

If you’re spending money on Google Ads but not tracking conversions, it’s kind of like ordering takeout and never checking if it arrived. You’re just throwing money into the digital void, hoping something sticks.
But don’t worry – setting up conversion tracking is way easier than it sounds. And once it’s live, you’ll know exactly what’s working and what’s just eating your budget.
Ready to track like a pro? Here’s the step-by-step guide to installing the Google Tag for conversion tracking, explained like you’re a normal human and not a robot coder from 1998.
✅ Step 1: Set Up a Conversion Action (AKA What You Actually Want People to Do)
Before we dive into tag installation, we need to tell Google Ads what we want to track. This is called a conversion action, and it could be anything like:
– Someone signing up for your newsletter 📰
– Buying a product 💳
– Calling your business 📞
– Downloading your app 📲
Here’s how to set that up:
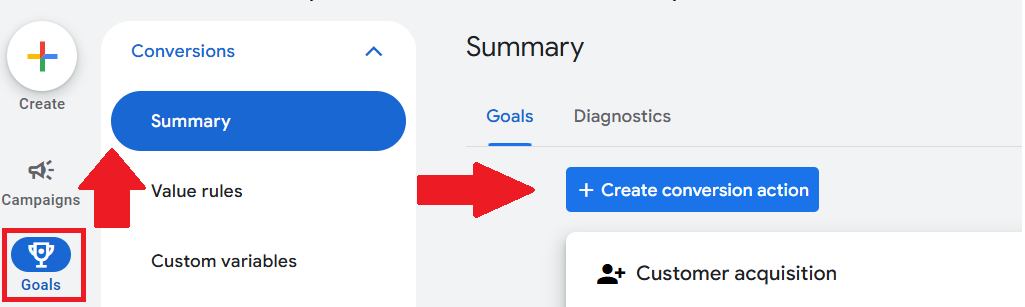
1. Go to your Google Ads dashboard
2. Click: Goals > Conversions > Summary
3. Then hit: + New Conversion Action
Now, choose your flavor of conversion:
– Website
– App
– Phone calls
– Offline (like stuff tracked via CRM or imported)
You’ll also pick a category for what kind of action it is – like purchase, sign-up, lead form submission, booking, etc. This helps keep your data organized and makes reporting way easier.
> Pro Tip: If you’re already using Google Analytics 4 and tracking events there, you can just import those conversion events into Google Ads. No extra code needed. Score.
🏗️ Step 2: Install the Google Tag
Alright, conversion action’s ready. Time to actually track it. This is where the Google Tag (formerly known as the Global Site Tag) comes in.
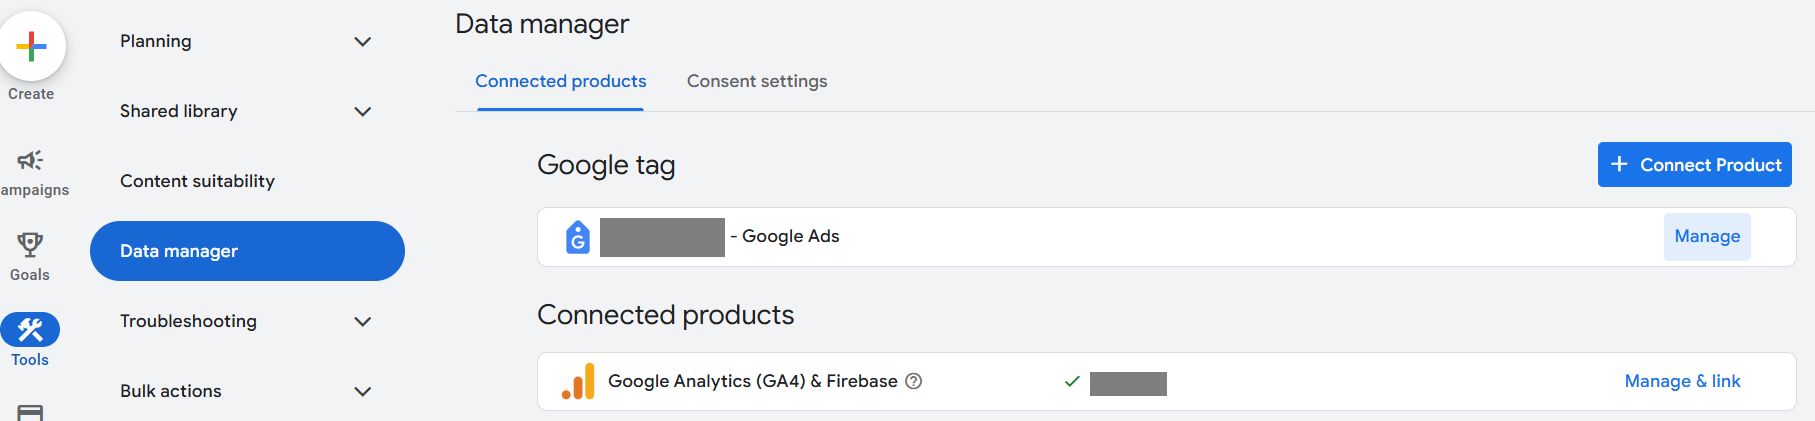
First, head to:
Tools & Settings > Data Manager > Google Tag
If it’s not set up yet, click + Connect Product to start fresh.
You’ve got two ways to install it:
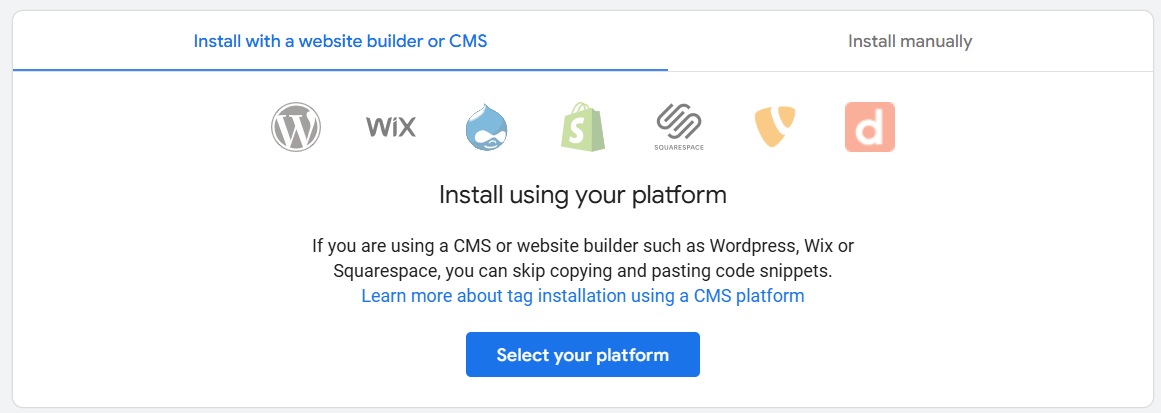
Option 1: Use a Website Builder (Easiest)
If your site runs on platforms like:
– Shopify
– Wix
– Squarespace
– WordPress
You can usually just paste your Google Tag ID in the integrations or settings area. No code diving required.
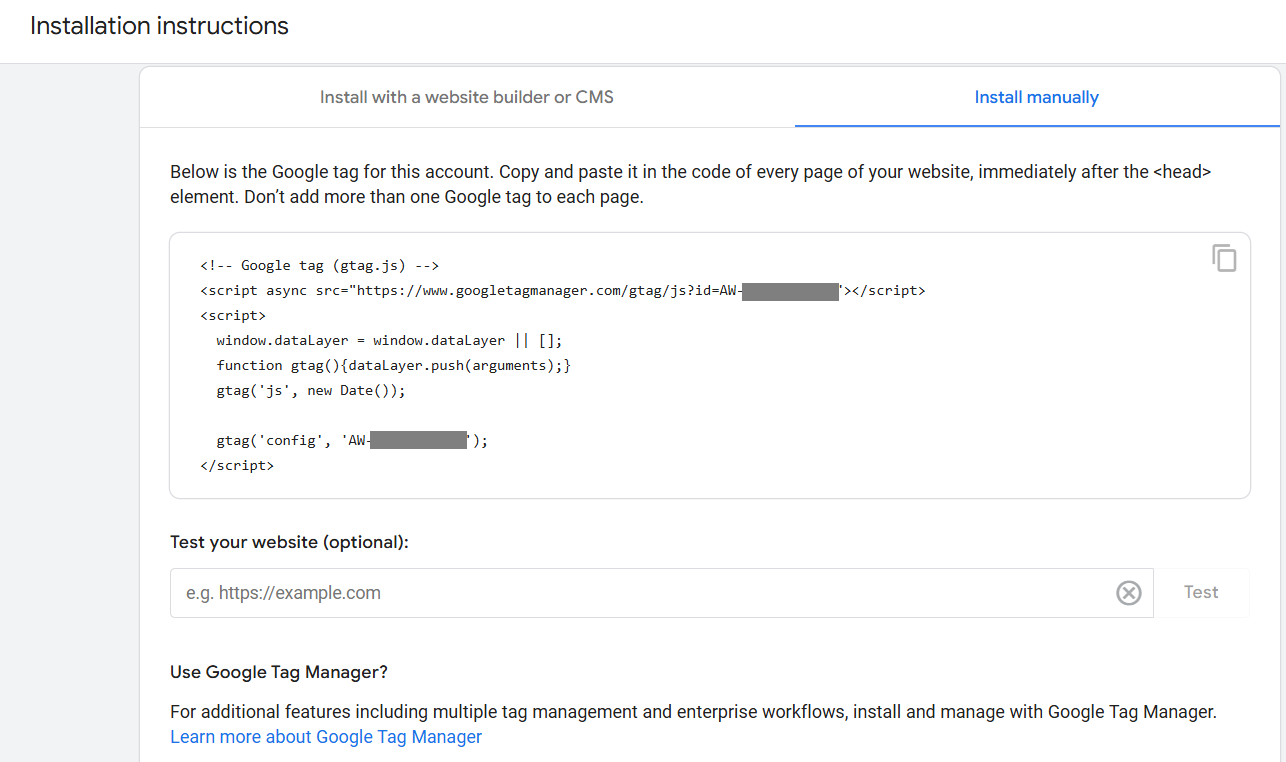
Option 2: Manual Install (Still Not That Scary)
If you’re old school or running a custom site:
1. Copy the tag code that Google gives you
2. Paste it into every page of your site
3. Place it right after the `` tag (yes, that’s important)
⚠️ Do not install multiple Google Tags on the same page – that’s a recipe for chaos.
—
🎯 Step 3: Add Conversion Event Snippets (Only if You Installed the Tag Manually)
If you installed your tag using a CMS or website builder, you can skip this part – congrats, you’re halfway to a celebratory coffee.
But if you went the manual route, you’ll need to add a conversion event snippet to the page where the action happens – like a “Thank You” page after someone signs up or checks out.
To do that:
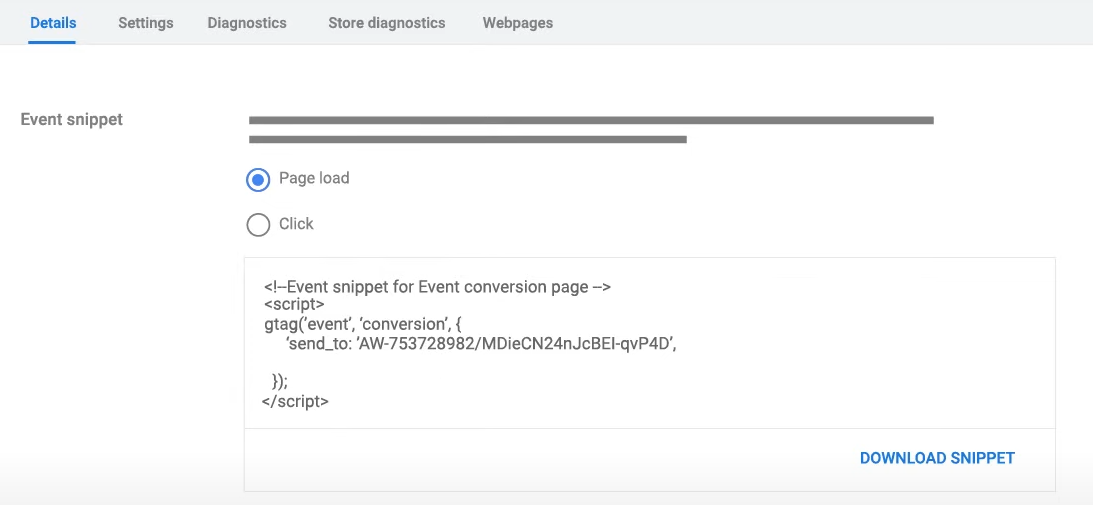
1. In Google Ads, go to your Conversion Action details
2. Find the Event Snippet code
3. Choose how it fires:
– On page load (perfect for sign-up or thank you pages)
– On click (like when someone presses a “Buy Now” button)
Paste the snippet into the `
` of the specific conversion page.—
🔍 Step 4: Test and Verify (Please, Please Don’t Skip This)
Before you high-five yourself and move on, you need to make sure the tag is actually working.
Here’s how:
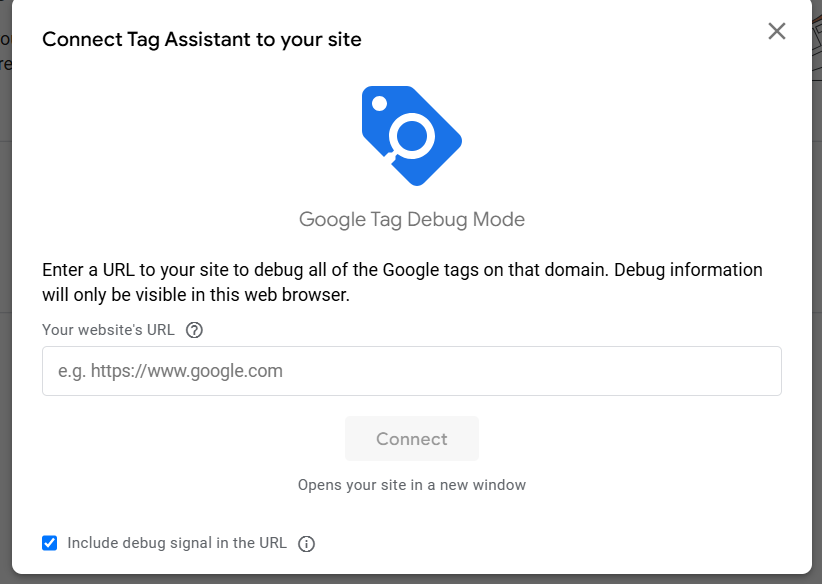
1. In Google Ads, head to the Google Tag section
2. Open Tag Assistant
3. Enter your website URL and click Connect
Google will open your site in a new tab and scan it for the tag. It’ll tell you if it’s installed correctly or if there’s a problem to fix (usually something small, don’t panic).
—
📈 Why This Matters (A Lot)
Once your tag is live and tracking conversions, you’re no longer guessing whether your ads are working – you’ve got the data to back it up.
– See what’s driving results ✅
– Stop wasting money on underperforming ads 💸
– Help Google’s AI optimize your campaigns like a pro 🤖
Just remember: if your site structure changes (like new URLs or different checkout steps), double-check your tag setup to make sure it’s still firing correctly.
—
TL;DR
Here’s the super quick version:
1. Set up a conversion action in Google Ads
2. Install the Google Tag using a CMS or manually
3. Add event snippets if needed
4. Verify it’s all working using Tag Assistant
And boom – now you’re tracking conversions like a boss. 🙌
How to Set Up the Google Tag for Conversion Tracking (Without Losing Your Mind)
How to Set Up the Google Tag for Conversion Tracking (Without Losing Your Mind)
How to Set Up the Google Tag for Conversion Tracking (Without Losing Your Mind)
How to Set Up the Google Tag for Conversion Tracking (Without Losing Your Mind)
How to Set Up the Google Tag for Conversion Tracking (Without Losing Your Mind)
How to Set Up the Google Tag for Conversion Tracking (Without Losing Your Mind)


