
Every business website invests a lot of time and money to carefully plan the perfect funnel to convert website visitors into customers.
It takes a lot of work to drive people from your website homepage to the pricing page. And that’s only the first step of the process. Now you have to convince those potential customers to hit the “Buy” button and actually purchase your product.
Social proof is a new technique many businesses are now leveraging to convince people to buy products.
What is social proof, exactly? How does it work? Can you add it to your own WordPress website? Let’s find out.
What Is Social Proof?
Have you seen those small notifications that pop up on some websites saying some people have bought their product? This is what website social proof is all about.
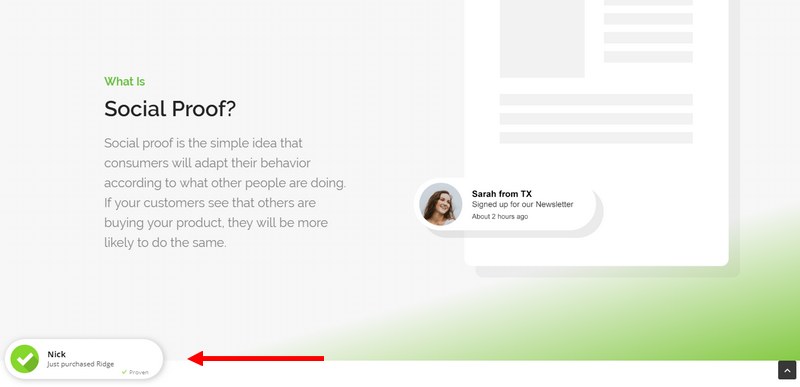
It may seem so simple but it works. People are often very cautious about buying products. But, knowing that other people have also bought the same product gives them the reassurance to take that leap and click on the Buy button.
Simply put, when you add social proof to your own website, you’ll be able to show notifications of the recent product sales to encourage others to buy your product.
How To Setup Social Proof In WordPress
Thanks to the power of plugins, you can easily add social proof to your WordPress website with just a few clicks. Proven is one of the most effective plugins you can use to get that job done.
Meet Proven
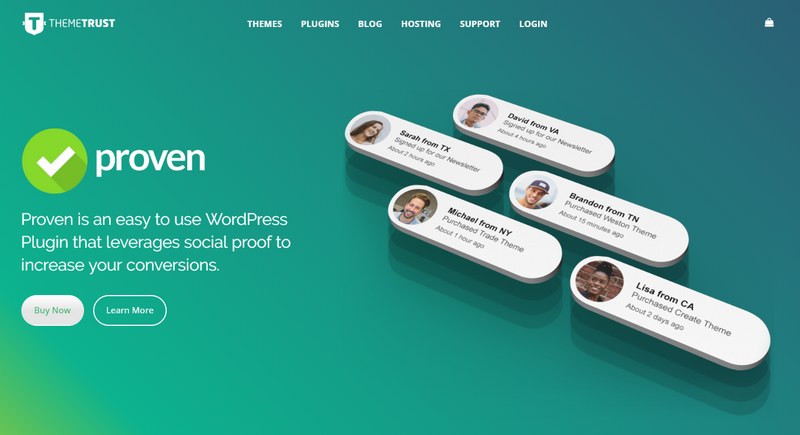
Developed by ThemeTrust, Proven is a powerful social proof WordPress plugin that lets you show notifications of either your most recent sales or recent email subscribers to your website visitors.
The plugin directly integrates with WooCommerce, Easy Digital Downloads, and MailChimp to allow you to show recent sales and subscriber notifications in real-time while also linking to your landing pages.
Here’s how you can set it up.
Step 1: Install and Configure the Plugin
The installation process is standard. Once you bought the plugin, simply upload the zipped folder via Plugins → Add New → Upload Plugin or via an FTP client.
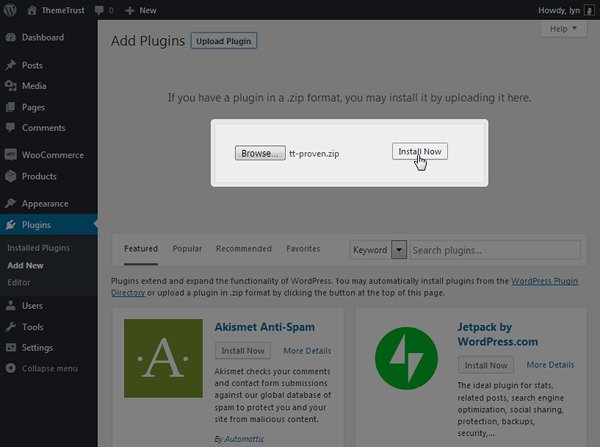
You’ll need to activate your license key after that by navigating to Proven → Settings, pasting your key into the License Key box, and clicking Activate License.
Step 2: Create a Notification
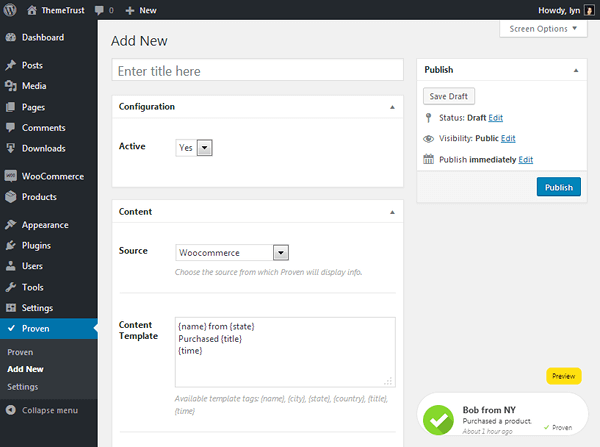
Setting up notifications is also quite easy. You can get started by going over to Proven → Add New. From here, you can create notifications based on sales from WooCommerce, EDD, or MailChimp.
Once you’ve made the customizations, make sure the Active setting is set to Yes and hit Publish.
Step 3: Configure Your Notification’s Content
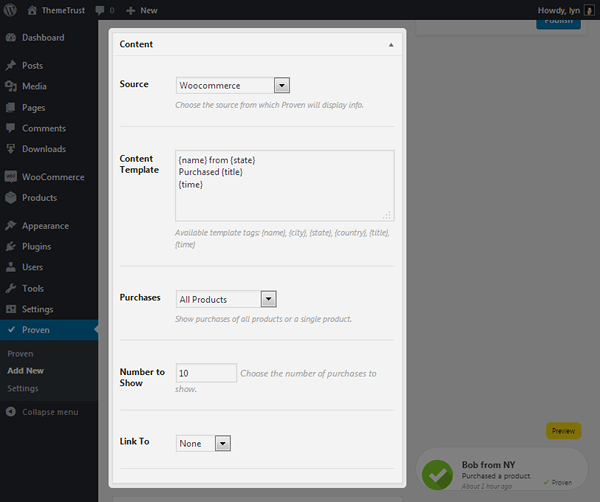
From the Settings page for Proven, you can choose which source you’d want to pull the notification data from. For example, you can choose to pull sales data from WooCommerce or MailChimp and even customize what type of purchases to show as notifications.
You can also add a custom link to your notifications to let people click on the notification to visit your pricing page or a landing page.
Adding Manual Entries
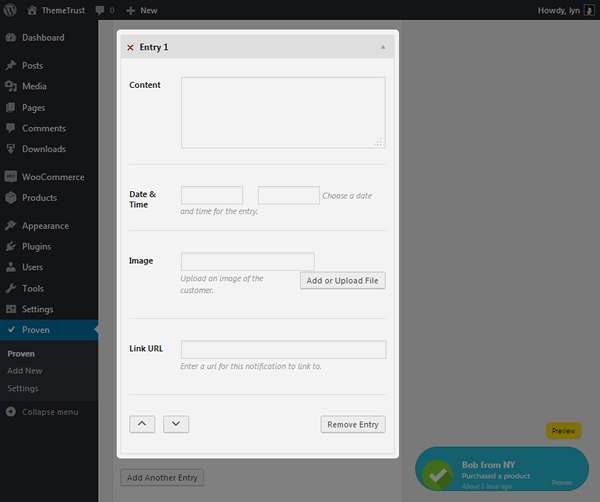
One of the (shady) features of Proven is the ability to create your own sales notifications. Which means, if you don’t have any sales to show, you can create fake notifications until you get sales.
You can create manual entries by simply choosing “Manual” as your source. Then you can make as many entries as you need or want. Template tags are not available for manual entries, so you’ll need to type the messages manually. (eg: “Bob from NY” instead of “Bob from {state}”.
Step 4: Configure Your Notification’s Behavior
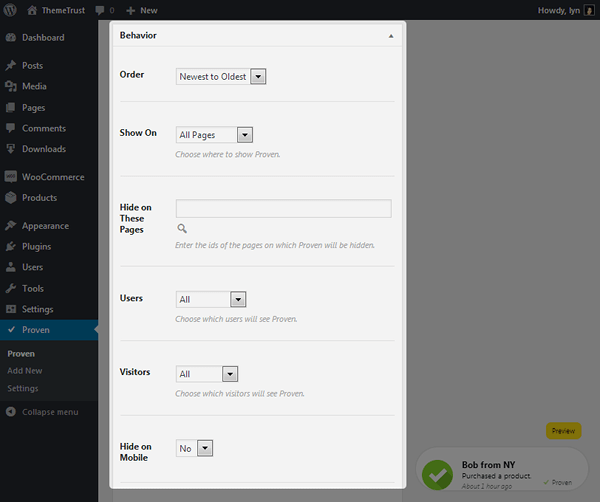
In the Behavior section, you can customize how notifications are shown on your website. For example, you can choose to only show the notifications on specific pages of your website. You can also disable the notifications from appearing on mobile devices as well.
Step 5: Configure Your Notification’s Design
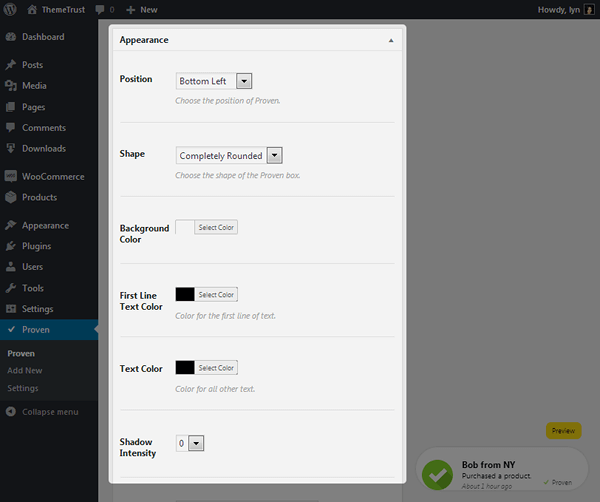
In the appearance section, you can customize the look and feel of the notifications and also choose which side of the page you want the notification to appear on. You can also adjust settings that’ll change the way the button appears, including changing border shape/radius, color settings and shadow intensity.
Should You Buy Proven?
There are a few things you should consider before buying Proven or even setting up social proof on your website.
- Is Your Website New?
If you’ve just setup your eCommerce website or it’s still barely making sales, you should consider setting up social proof at a later time. - Which eCommerce Plugin Do You Use?
While Proven is compatible with WooCommerce and Easy Digital Downloads, at the time of this writing, it’s not compatible with other platforms like BigCommerce and Cart66. - Which Email Service Do You Use?
At the moment, Proven is only compatible with MailChimp. Which may be an issue for most users who use other platforms like Aweber and GetResponse if you want to use the plugin to grow subscribers. - Fake It Till You Make It?
One of the main features of Proven is the ability to create manual entries. Which lets you make fake sales notifications. This can actually be a bad thing and might hurt your brand credibility.
Given these downsides, Proven may not be the most useful plugin to everyone. However, at only $39 per year, it’s worth giving this plugin a try as it could greatly help increase your conversion rates with less effort.


