
Being locked out of WordPress is frustrating, so I’m not going to make you wait around with a long introduction.

Instead, I’ll jump right into the meat of this post.
I’m going to show you how to recover your WordPress password and get back into your wp-admin dashboard even if your password reset functionality isn’t working or you don’t have access to your email address.
Then, I’ll also cover solutions for some of the other reasons why you might be locked out of WordPress, like an overzealous security plugin or common WordPress errors.
How To Recover WordPress Password When Locked Out
Let’s start with this scenario first. Your site is working fine but you can’t log in because you forgot your password, or your password otherwise isn’t being accepted.
First, while I’m guessing you’ve probably already tried it, it’s worth a quick reminder that WordPress does have a built-in password recovery feature on the login page:
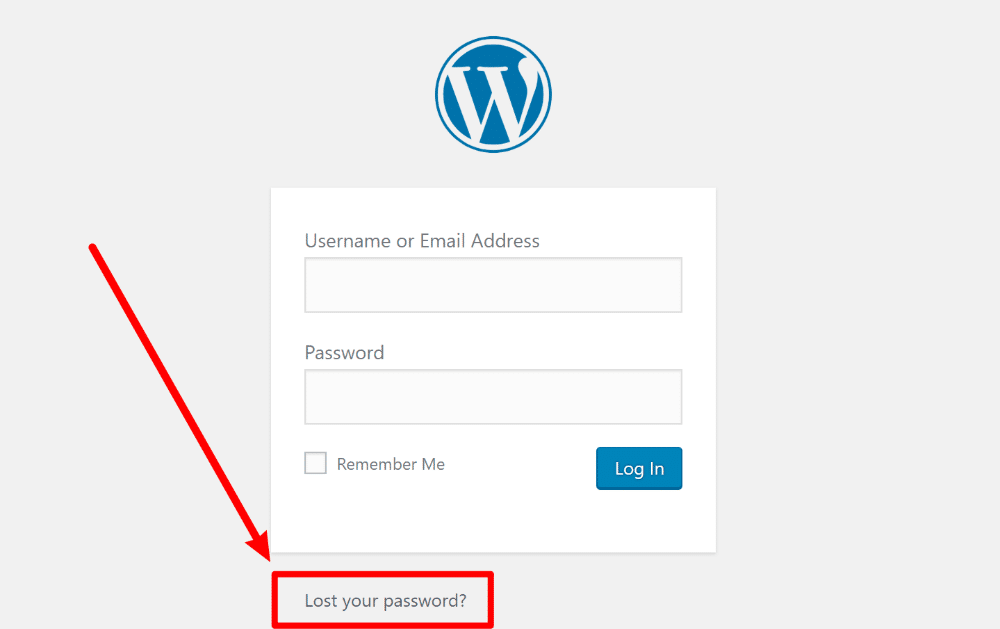
If that isn’t working for you for some reason, don’t worry! You can still manually reset your password by directly editing your site’s database as long as you still have access to your hosting account.
Here’s how to do it…
Step 1: Open phpMyAdmin
To get started, go to your host’s dashboard and log in.
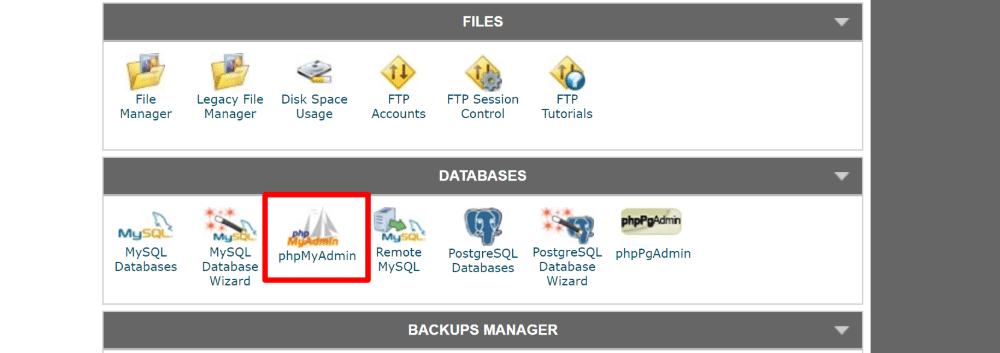
In your host’s dashboard, you’ll need to find and open a tool called phpMyAdmin. Most hosts use cPanel, which has an option for phpMyAdmin in the cPanel dashboard:
Step 2: Edit wp_users Table In Your Site’s Database
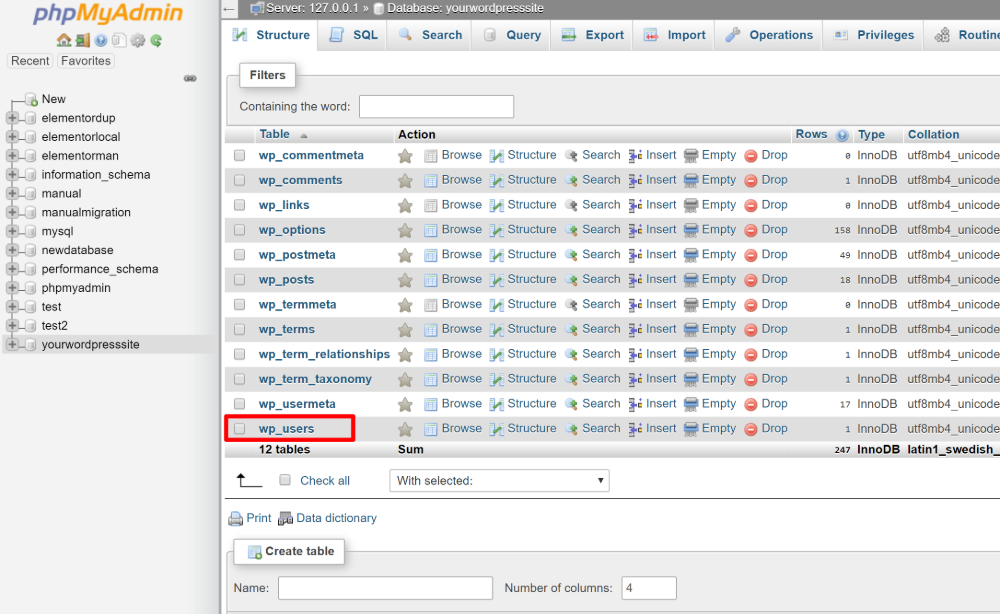
Ok, now you’re looking at your WordPress site’s database, which might look strange and overwhelming. Don’t worry, though – you’ll only need to work with one tiny part.
In the list that you see, click on the wp_users table (it might have a different prefix. For example – wp176_users. That’s totally fine. You basically want “_users”):
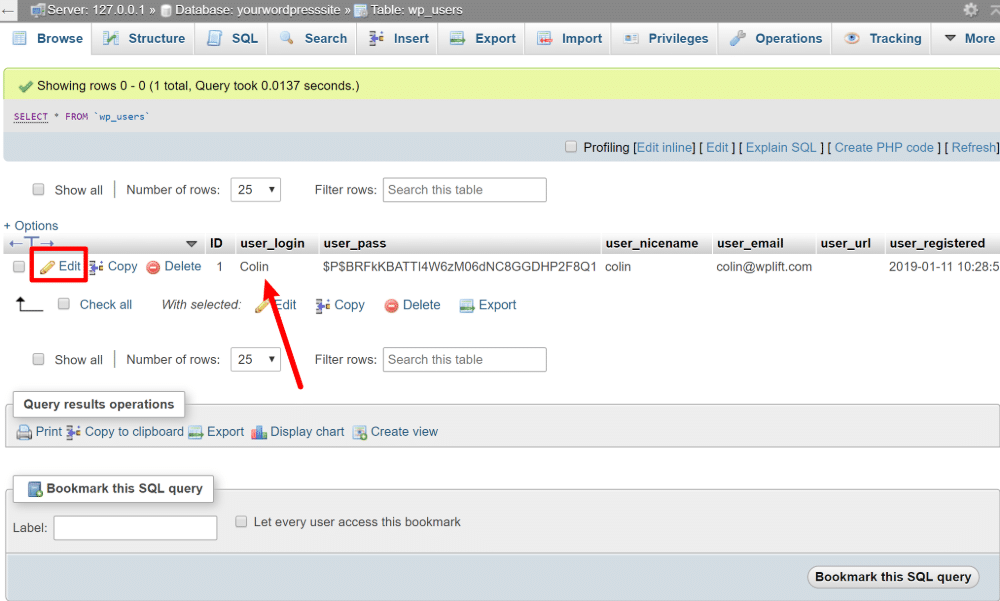
Then, you should see a list of all the user accounts at your site.
If you’re the only user, it will be a very short list, as it is in my example screenshots.
Use the user_login column to find your WordPress account by looking for your username. Then, click on the Edit link next to the pencil icon:
Step 3: Update And Encode Password
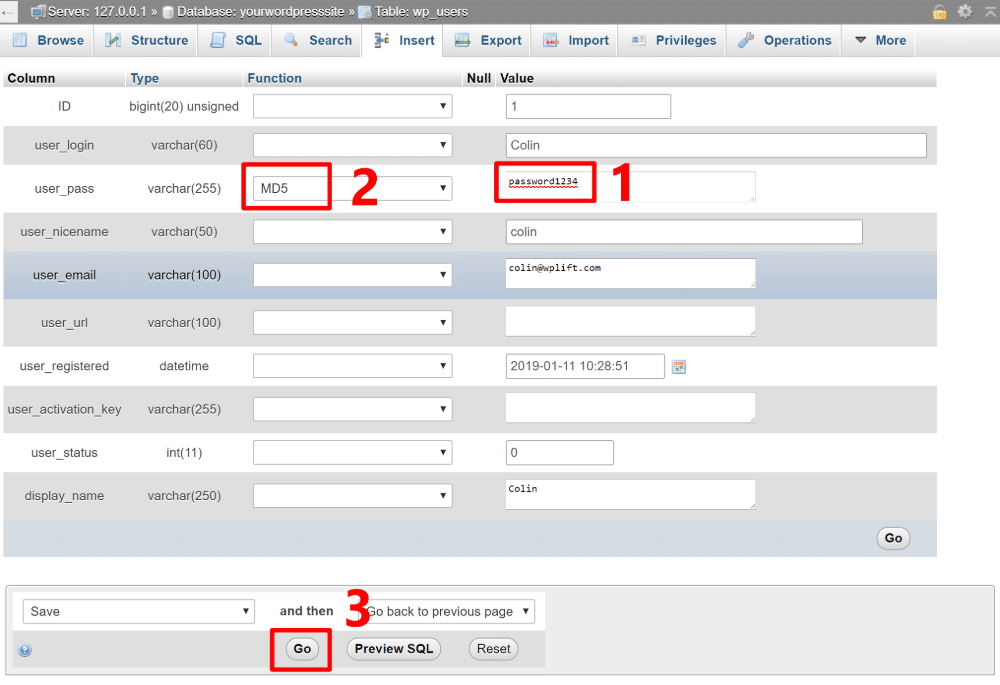
Now, you’ll see a list of information about your account, including a row called user_pass.
This is where you’re able to enter a new password.
Type your desired password in the Value field. Then, use the Function drop-down and select MD5 (this ensures that your password is securely stored – after you save it, your password will just look like a random string of characters).
Once you’ve done both of those things, click Go at the bottom:
And that’s it! You can now log in like normal using your existing username and the new password that you just created.
Locked Out Of WordPress Because Of Security Plugins
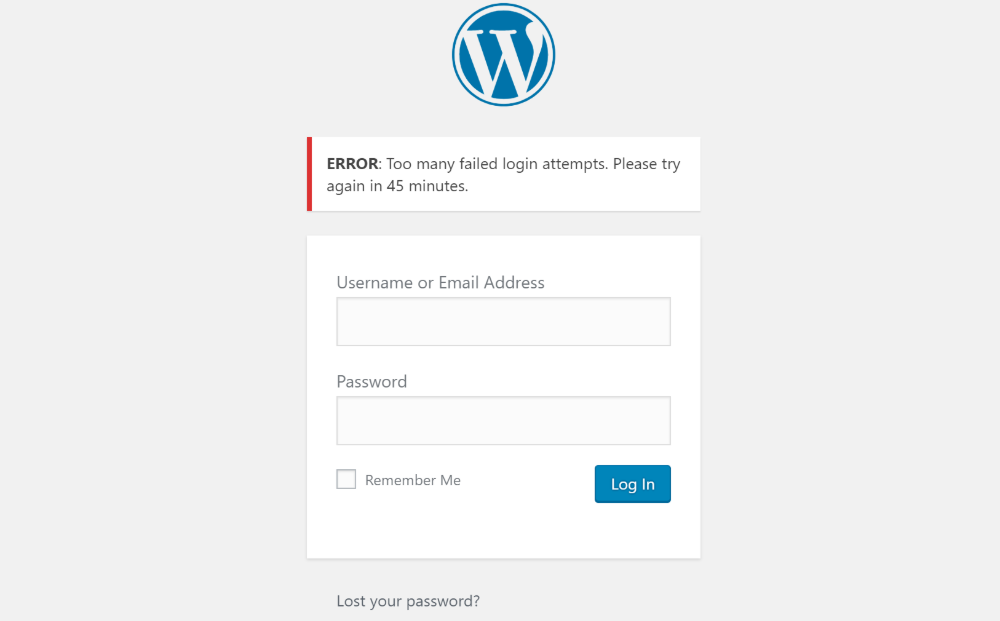
One common WordPress security tip is to limit the number of login attempts that someone can attempt before they get locked out. That’s good for security, but it might leave you locked out if you accidentally have too many failed attempts.
For example, here’s how that looks when you fail with the popular Limit Login Attempts Reloaded plugin:
Another common suggestion is to use a plugin to change your login page URL. Again, fine for security, but a big problem if you forget the new URL.
Don’t worry – there’s a pretty easy workaround for fixing issues with any security plugin as long as you still have FTP access to your site.
Basically, you’ll deactivate the offending plugin via FTP. Then, you can log in and reactivate the plugin once you’re safely inside.
Here’s how to do it…
Step 1: Connect To Your WordPress Site Via FTP
To get started, connect to your WordPress site using your FTP program of choice. If you’re not sure how to do that, check out our WordPress FTP access guide.
Step 2: Rename Plugin Folder
Once you’re connected via FTP, navigate to the plugins folder (…wp-content/plugins).
Then, find the folder for your security plugin, which should just be the plugin’s name.
Right-click on that folder and rename it to something else. For example, plugin-name-deactivated:
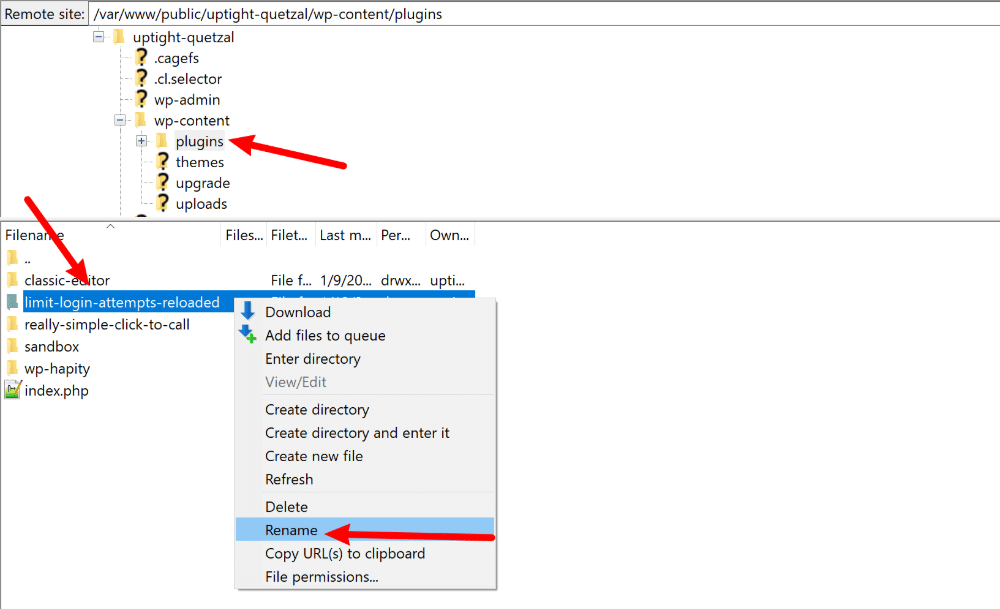
By renaming the folder, you’ve deactivated the plugin.
Step 3: Log In To WordPress
Now, you’ll no longer be locked out by the plugin and you can log in to your site like normal, assuming you have your password (see the method above if you don’t have your password).
Step 4: Reactivate Plugin
To keep your site secure, you’ll likely want to reactivate your security plugin once you’re back inside your WordPress dashboard.
To do that, go back to your FTP program and rename the plugin’s folder back to its original name. For example, if you added “-deactivated” to the end of the folder name, remove that portion:
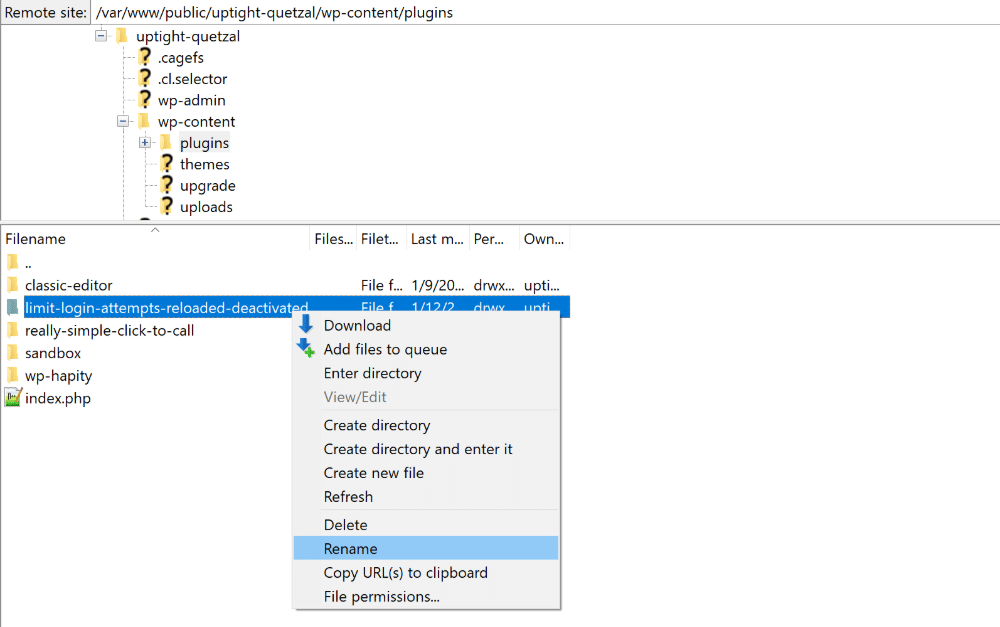
Once you’ve changed the plugin folder back to its original name, you can go to the Plugins tab in your WordPress dashboard to reactivate it (it also might have already reactivated itself).
Locked Out Of WordPress Because Of Lost Administrator Privileges
Another reason that you might find yourself locked out of WordPress is that your account lost its administrator privileges. Without the capabilities of the Administrator user role, you won’t be able to perform import actions, like managing plugins or customizing your theme.
Don’t fear! Just as with a lost password, you can manually grant yourself administrator privileges again as long as you have access to your hosting account credentials and phpMyAdmin.
Basically, you’ll create a brand new WordPress account and then grant that account administrator privileges.
Here’s how to do it…
Step 1: Open phpMyAdmin
To begin, log in to your hosting account and find the option for phpMyAdmin. Most hosts use cPanel, which has an option for phpMyAdmin in the cPanel dashboard:
Step 2: Edit wp_users Table In Your Site’s Database
Next look for the wp_users table in the database (again, it might have a different prefix, like wp173_users – that’s totally fine):
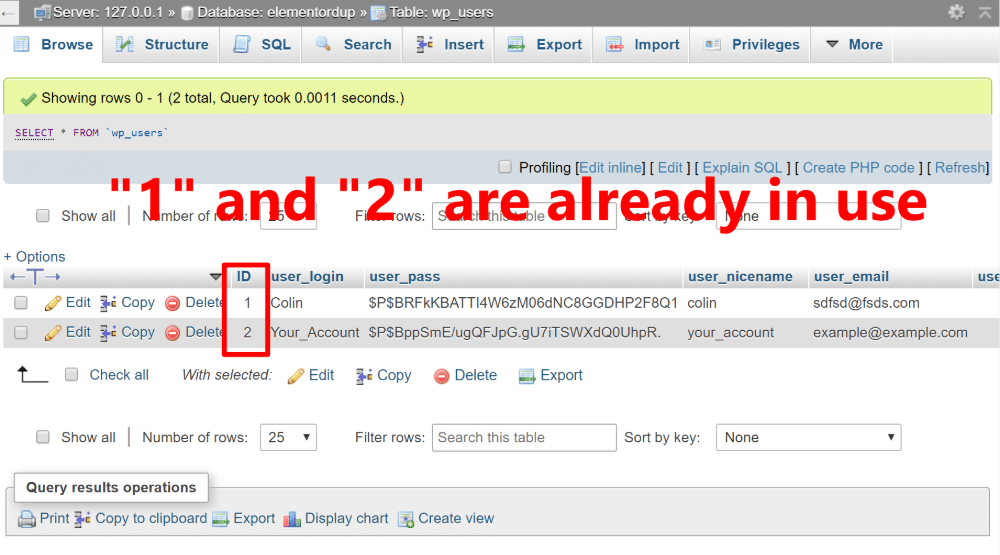
Before you move on, you need to pick a unique ID number. To do that, look at the ID column for the existing users. Then, you can just pick the next highest digit.
For example, in the screenshot below, you can see that “1” and “2” are already taken. So, you could choose “3”. Remember this, because you’ll need it in the next step:
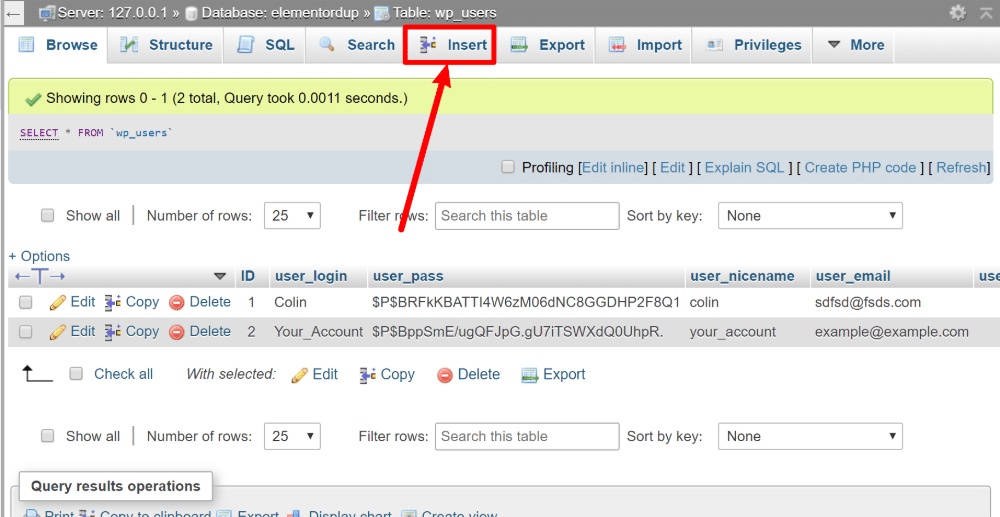
Once you’ve picked your unique ID number, click on the Insert tab:
Step 3: Enter User Information
In the Insert tab, you’ll see a list of fields, all of which connect to user account information.
Here’s what to put in those fields:
- ID – the unique number that you chose in the previous step. E.g. “3” for this example.
- user_login – your desired username.
- user_pass – your desired password. You also need to select MD5 from the drop-down.
- user_nicename – the username that will display in the back-end.
- user_email – your email address.
- user_registered – today’s date.
- user_status – leave it as 0.
- display_name – the human name of the user.
Here’s an example of how it might look:

Once you’re done, click the Go button.
Step 4: Give Admin Privileges
Ok, you’ve just created a new user. But it doesn’t have administrator privileges yet, so your work isn’t quite done.
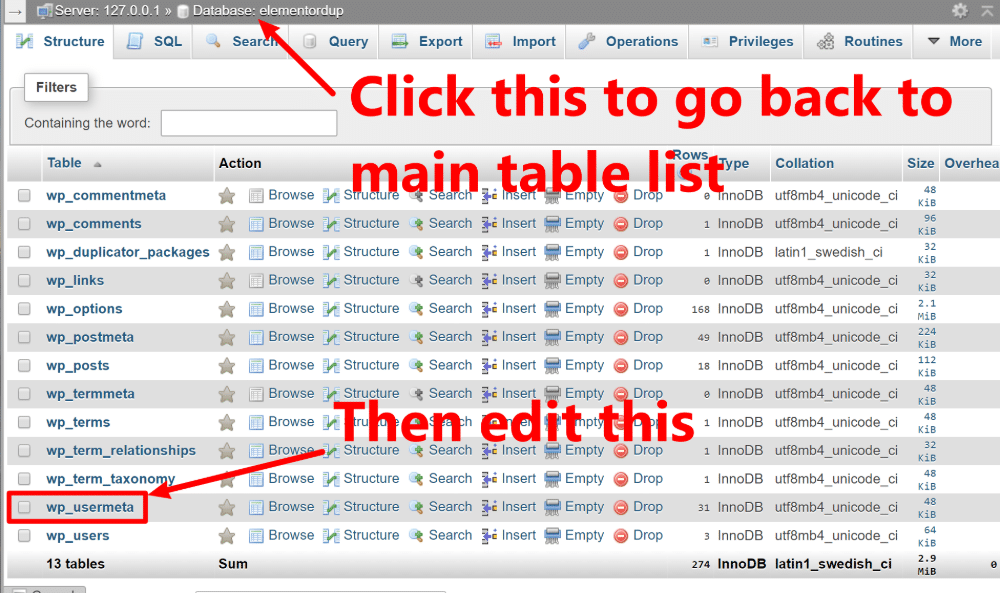
To give it admin privileges, you need to go back to the main table list and select the wp_usermeta table this time:
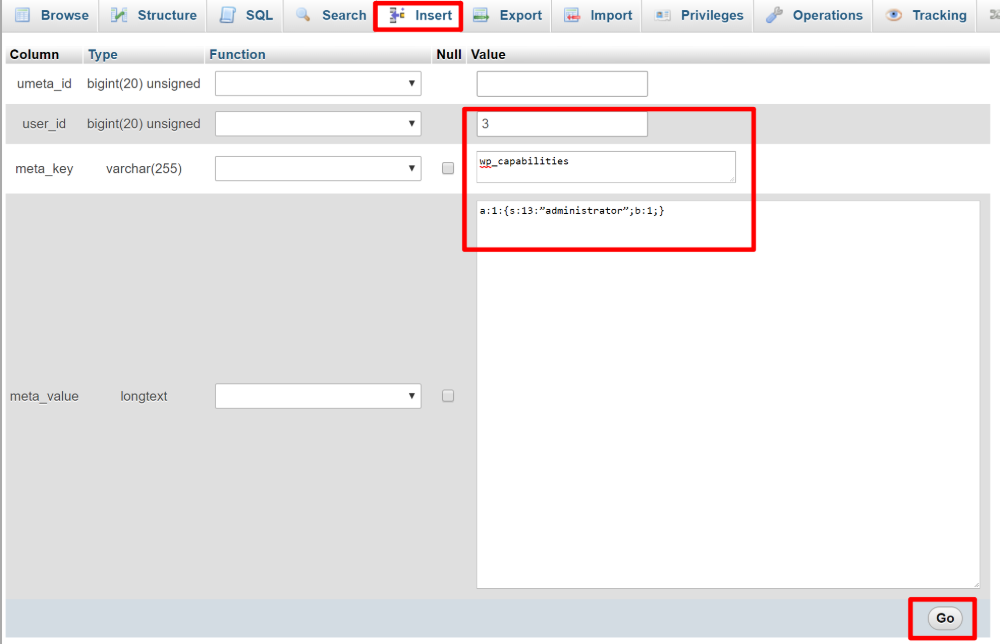
Once you’re in the wp_usermeta table, click on the Insert tab and enter the fields like this:
- umeta_id – blank.
- user_id – the user ID that you used in the previous step. For this example, it’s “3”.
- meta _key – enter
wp_capabilities - meta_value – enter
a:1:{s:13:"administrator";b:1;}(if you copy and paste this, make sure your text editor doesn’t add styled quotation marks, as that will stop it from working)
Then, click Go:
And voila! Your new user is now an administrator. Go ahead and log in using the username and password that you created in Step 3.
Locked Out Of WordPress Dashboard Because Of Site Error
Finally, you might be locked out of WordPress because of an error on your site. Common culprits are:
- Error Establishing A Database Connection
- White Screen Of Death
- Etc.
If this is happening to you, check out our post on fixing common WordPress errors. We also have a dedicated post on how to fix the Error Establishing A Database Connection message.
Still Locked Out Of WordPress?
If you’re still locked out of your WordPress dashboard after all of the tips above, leave a comment and we’ll try to help. If your issue is common enough, maybe we’ll even add it to the post!
You can also get professional help from services like Codeable or WP Kraken if the issue is urgent.


