Are you having a tough time generating leads and getting recurring customers on your WooCommerce store? Are you having difficulty increasing customer engagement? I have the perfect solution for you.
But before we jump into the process and the solution, let’s first see why you should be upselling and re-engaging your existing customers to boost sales.
Why Increasing Customer Engagement Works?
Statistics have it that it is ten times difficult and expensive to find a new client compared to retaining your existing clients.
Even I am sure if you have ever tried signing a new customer, you must have faced more difficulty than retaining an old customer.
When you have a decent amount of users, it is much better to start doing upsells rather than launching campaigns for a new and broader audience.
Your existing customers are already aware of your products. Since they have already bought from you earlier, it is relatively easier for you to ask them to buy it again.
This re-engaging can be done via, emails, social media promotions, ad campaigns, etc. but since these are your existing customers, you might want to go with a channel which has a more personal touch to it. For this, emails have proved to be one of the best ways to communicate with your eCommerce store customers.
But should you be going through every email and writing out upsells for your customers? Of Course not!
You can use segmenting, analytics, and engagement tools like Metorik, to convert your existing customers into recurring customers.
How to Engage with your WooCommerce Customers?
In this tutorial, we will look at how you can segment your WooCommerce store customers and start sending them automation emails for boosting sales.
If you don’t know what Metorik is, here is a quick explanation (or check out our review on Metorik).
In a nutshell, Metorik is a really useful analytics tool for your WooCommerce store. You can use Metorik to segment your customers and see insights of everything happening on your WooCommerce store. You can segment your data, orders, products, customers, etc. and then use that data for upsells and planning out future marketing strategies.
Regarding getting started, you can easily set up Metorik with your WooCommerce store in minutes and start using that data for your future WooCommerce strategies.
Once you have your WooCommerce shop set up and working, you can start sending targeted, customized emails to your existing users with the help of advanced segmenting.
Understanding your Customers
Now, the first thing you need to do is understand the behavior of the eCommerce store customers.
You need to analyze the buying habits and behavior of the customers on your eStore. You can analyze the frequency of purchases, average purchase power, interest in products, well-performing products, etc.
Once you see what your average customer looks like, you will be able to plan out what product to pitch for upsells, which users should be provided with the discount coupon codes, or which segment of customers hasn’t made any purchase in the last six months, etc.
You can easily see the division of the customers of your store with the segmenting features of Metorik dashboard. You can create custom segments as well, where you can put parameters so that you can target a specific group of customers.
If you want, you can learn all about customer segmentation.
Leveraging the Power of Metorik to Increase Customer Engagement
You can use the Engage feature of Metorik to start sending out emails to a segment of customers which you want to target.
You get an option to choose the template for the email as well. If you want, you can choose a template and can further customize it to suit your needs.
Let’s see how to use the engage feature.
Step 1: Starting with Metorik Dashboard
Since we are learning here with an example of how you can create a custom WooCommerce automation to increase the engagement of the users, we will start from the basics, i.e., creating a new automation.
For this, log in to your Metorik Dashboard. You will see the dashboard of your WooCommerce store. Here, you can see the analytics and other statistical data of your store. Moreover, you can customize your WooCommerce dashboard and even create a whole new custom dashboard.
Step 2: Creating a New Automation
Once you are in the dashboard, click on the engage option on the left. This is where we will be setting up our custom email automation.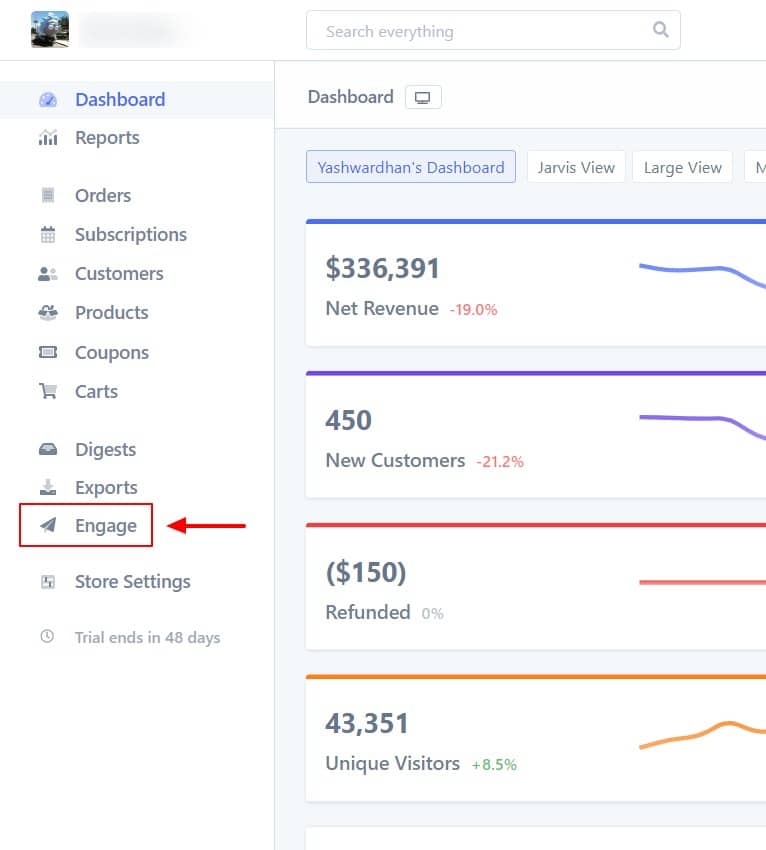

Once you do it, you might see automation(s) already in place for your customers.
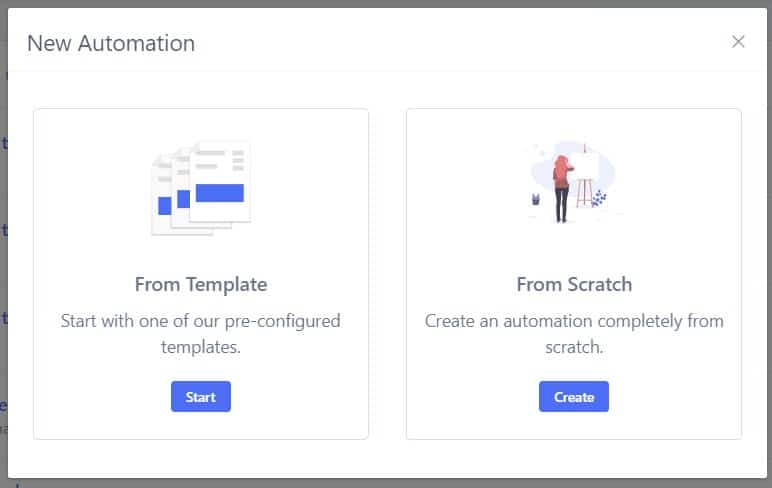
Since we will be setting up new automation for our customers, we will click on the “New Automation” button. 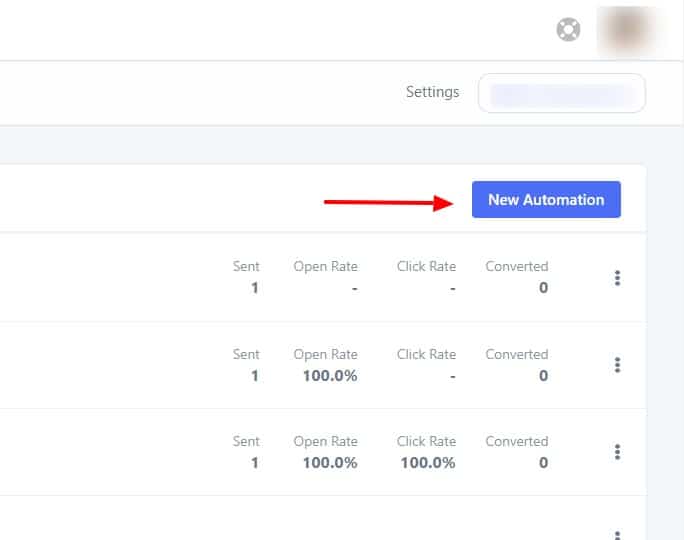

Once you click on the New Automation button, you will see a dialogue box with an option to create your automation using a template or from scratch. You can go with either option depending on your requirements.
For this tutorial, we will be creating our automation from scratch. Click on the create button.

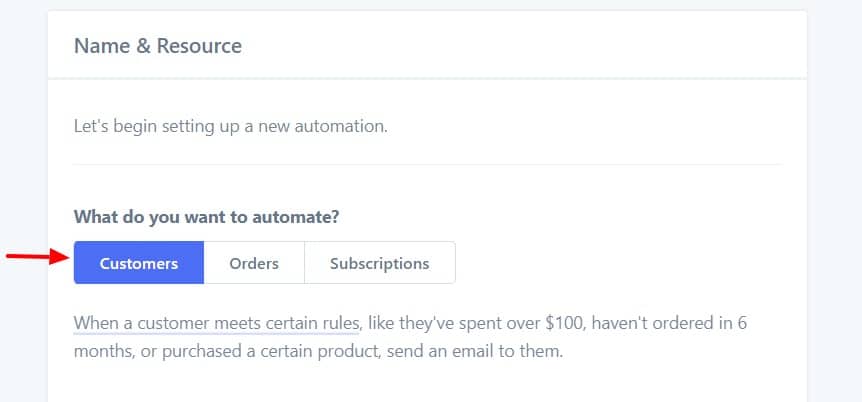
Now, firstly, you need to decide what type of automation you want to set up. Define what the condition, rule, parameter a user must meet for them to receive a certain email.
Plan out what you want and then start with the automation wizard of Metorik.
For this tutorial, we will be sending out emails to the users who have not ordered anything in the last six months. Also, customers who have spent more than $200 on total lifetime purchases and have ordered at least three times from our WooCommerce store earlier.
For this, we will be selecting the automation parameter from customer, orders, and subscriptions. Since we will be automating the customers based on their purchase history, we will select the automation as “Customers.”

Now give your automation a proper name by entering it in the next field. You can also add automation to a campaign if it belongs to one by simply entering and selecting the campaign from the next field. Further, you can also give a brief description of your automation as well. This will only be visible to you, and your customers will not see this information.
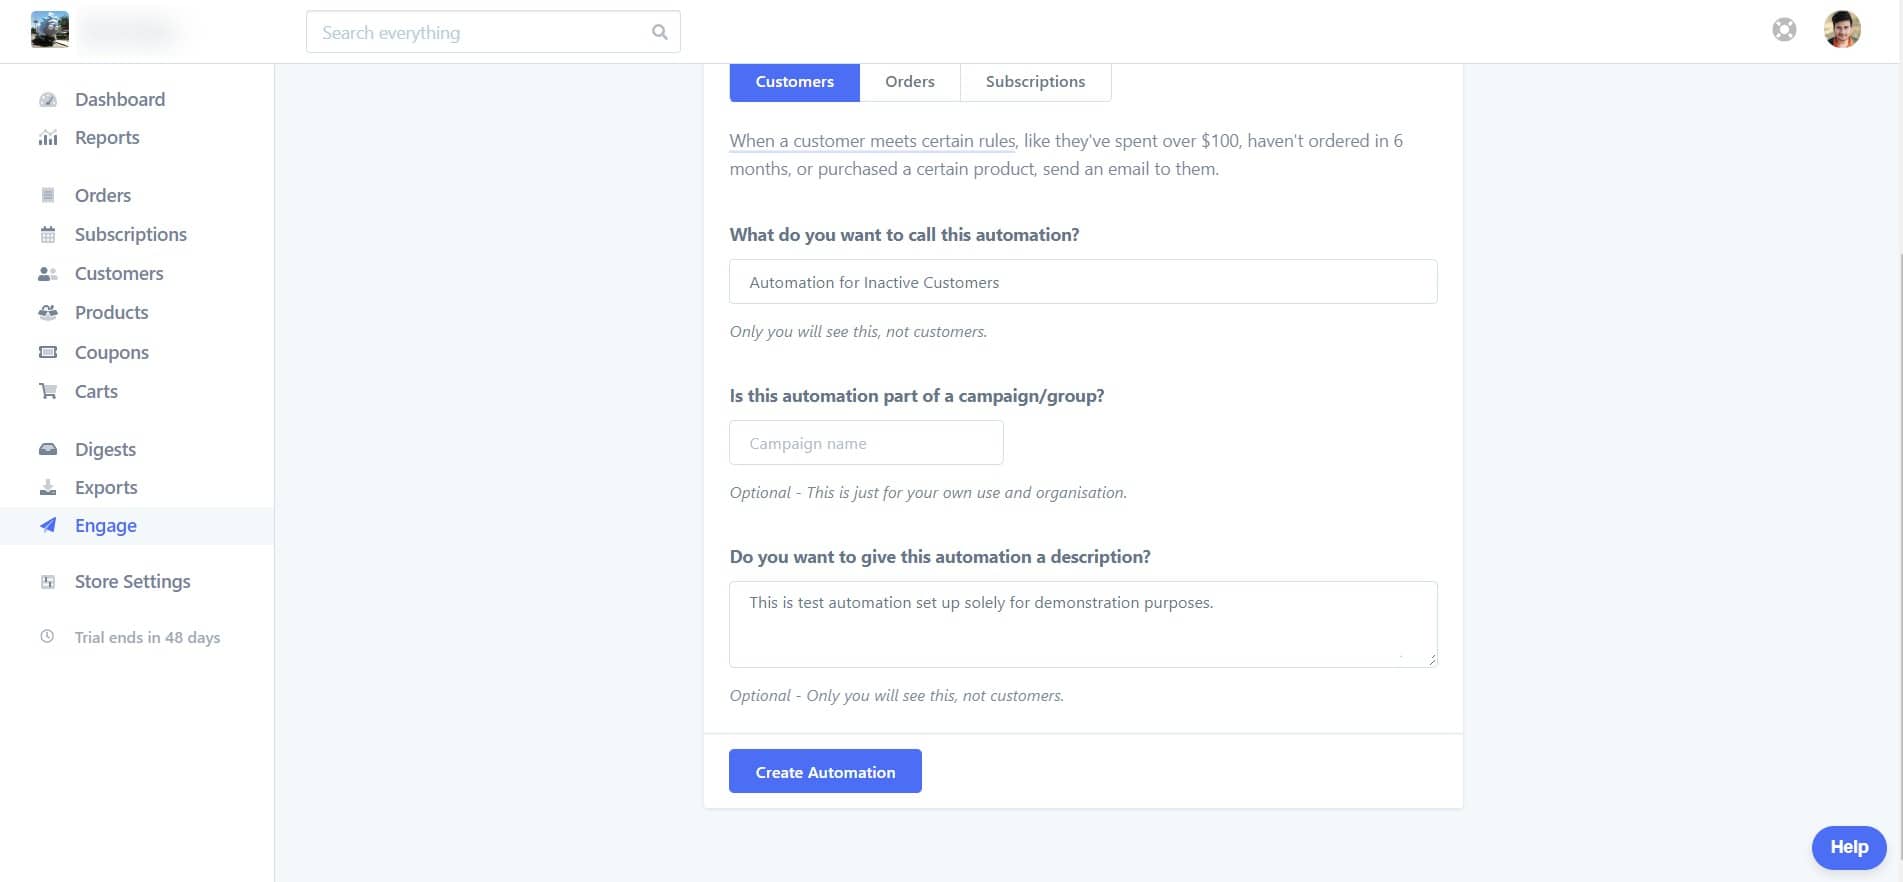

Once you are done making changes, click on the Create Automation button.
Step 3: Defining the Target Audience
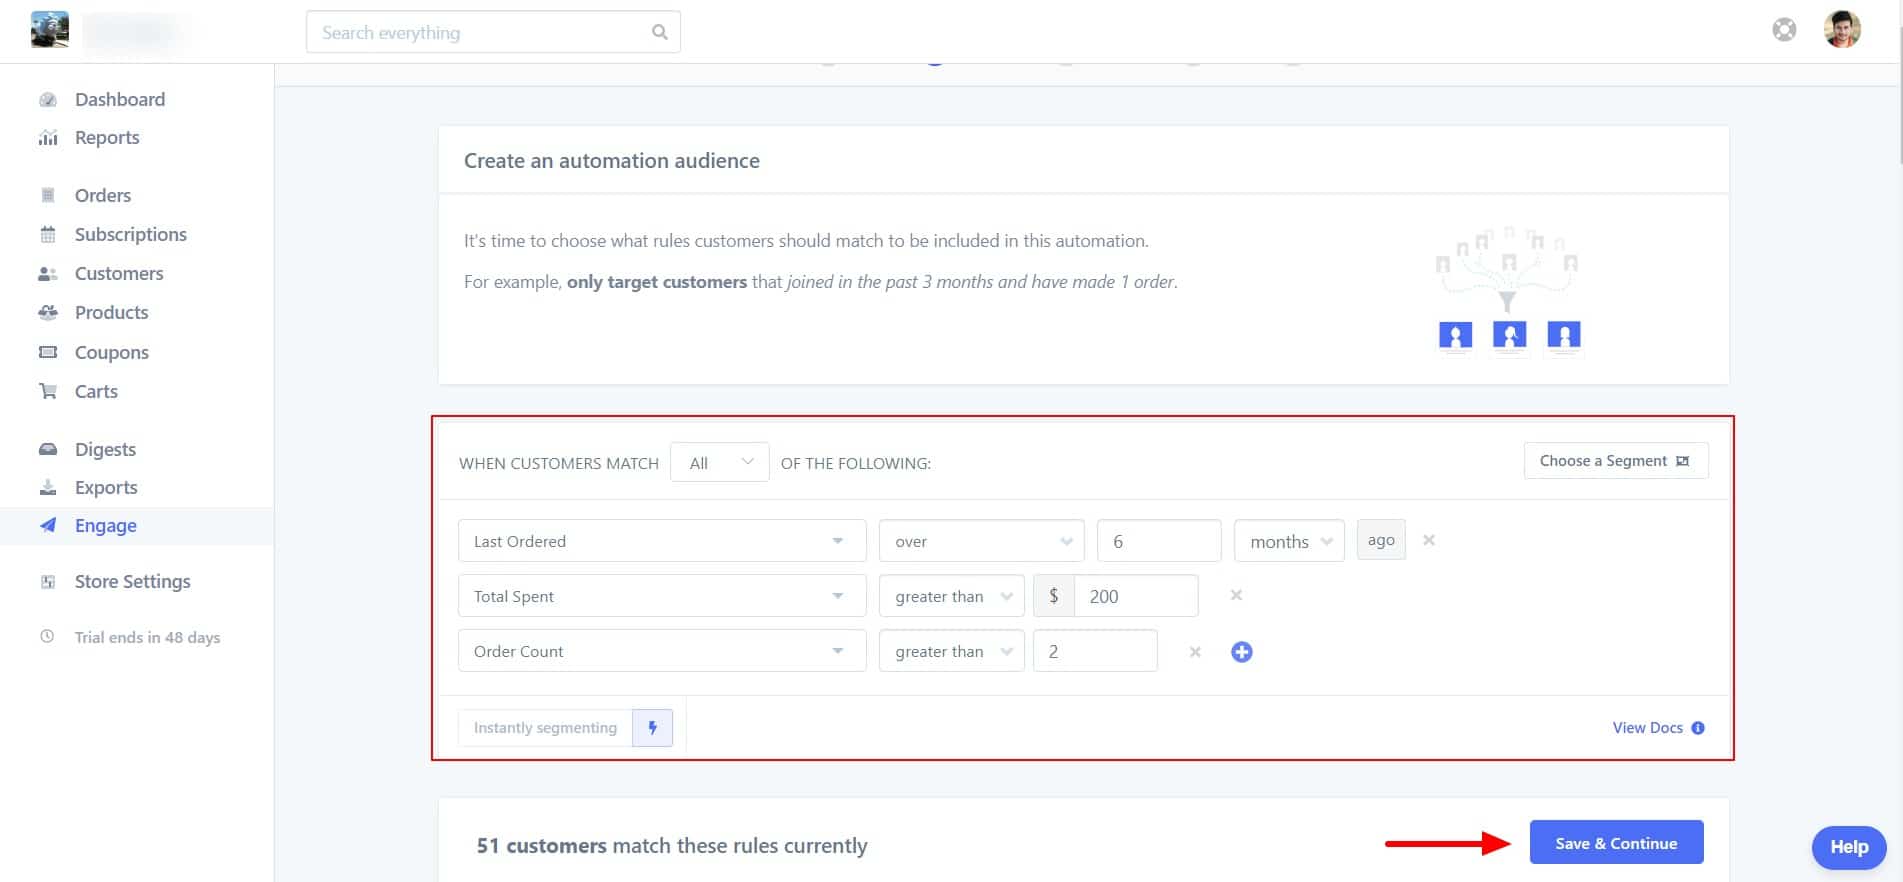
Now comes the part where you define your targeted audience. And which segment of your customers will be getting the emails. We already know our parameters (as we discussed earlier) and in a nutshell, we want to target the customers who:
- Haven’t ordered anything in the previous six months.
- Have spent more than $200 in their lifetime value.
- Have made at least three orders.
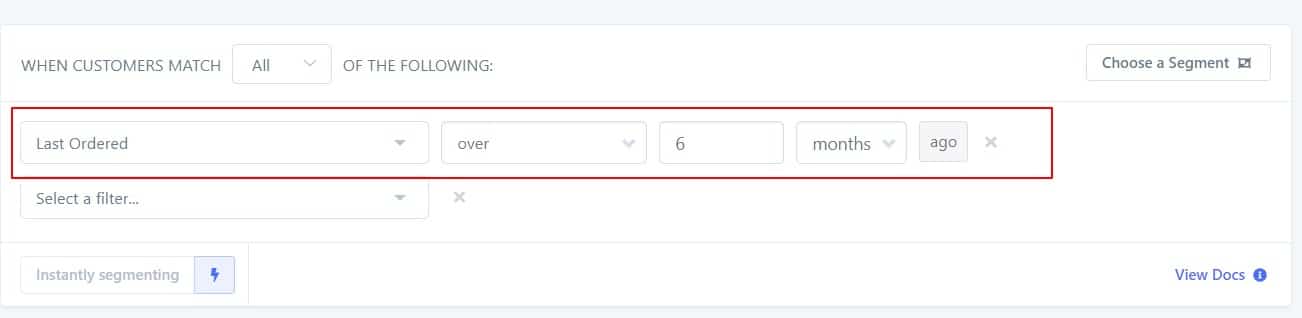
For this, just select the parameters for the same. Starting with the first parameter, select “Last Ordered” from the list. Then select the filter “over” and enter ‘6’ in the field given and select duration as “months” from the drop-down list. This will filter out the orders older than six months.
This is what the first parameter should look like.

Once you are done with the first condition, you can go ahead and add other conditions as well by clicking on the “+” button at the end of the condition. This is what it must look like when all the conditions are listed.
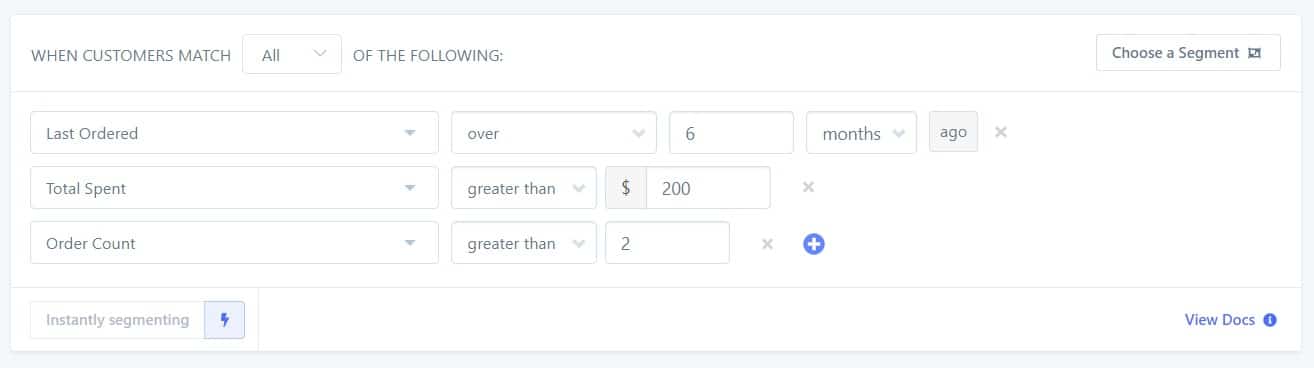

Since we want to filter out customers who have made at least three orders, we have set the parameter as “greater than two orders.”Once you select these parameters, you will see the details of customers listing down below. You can go ahead and click on the “Save and Continue” button.

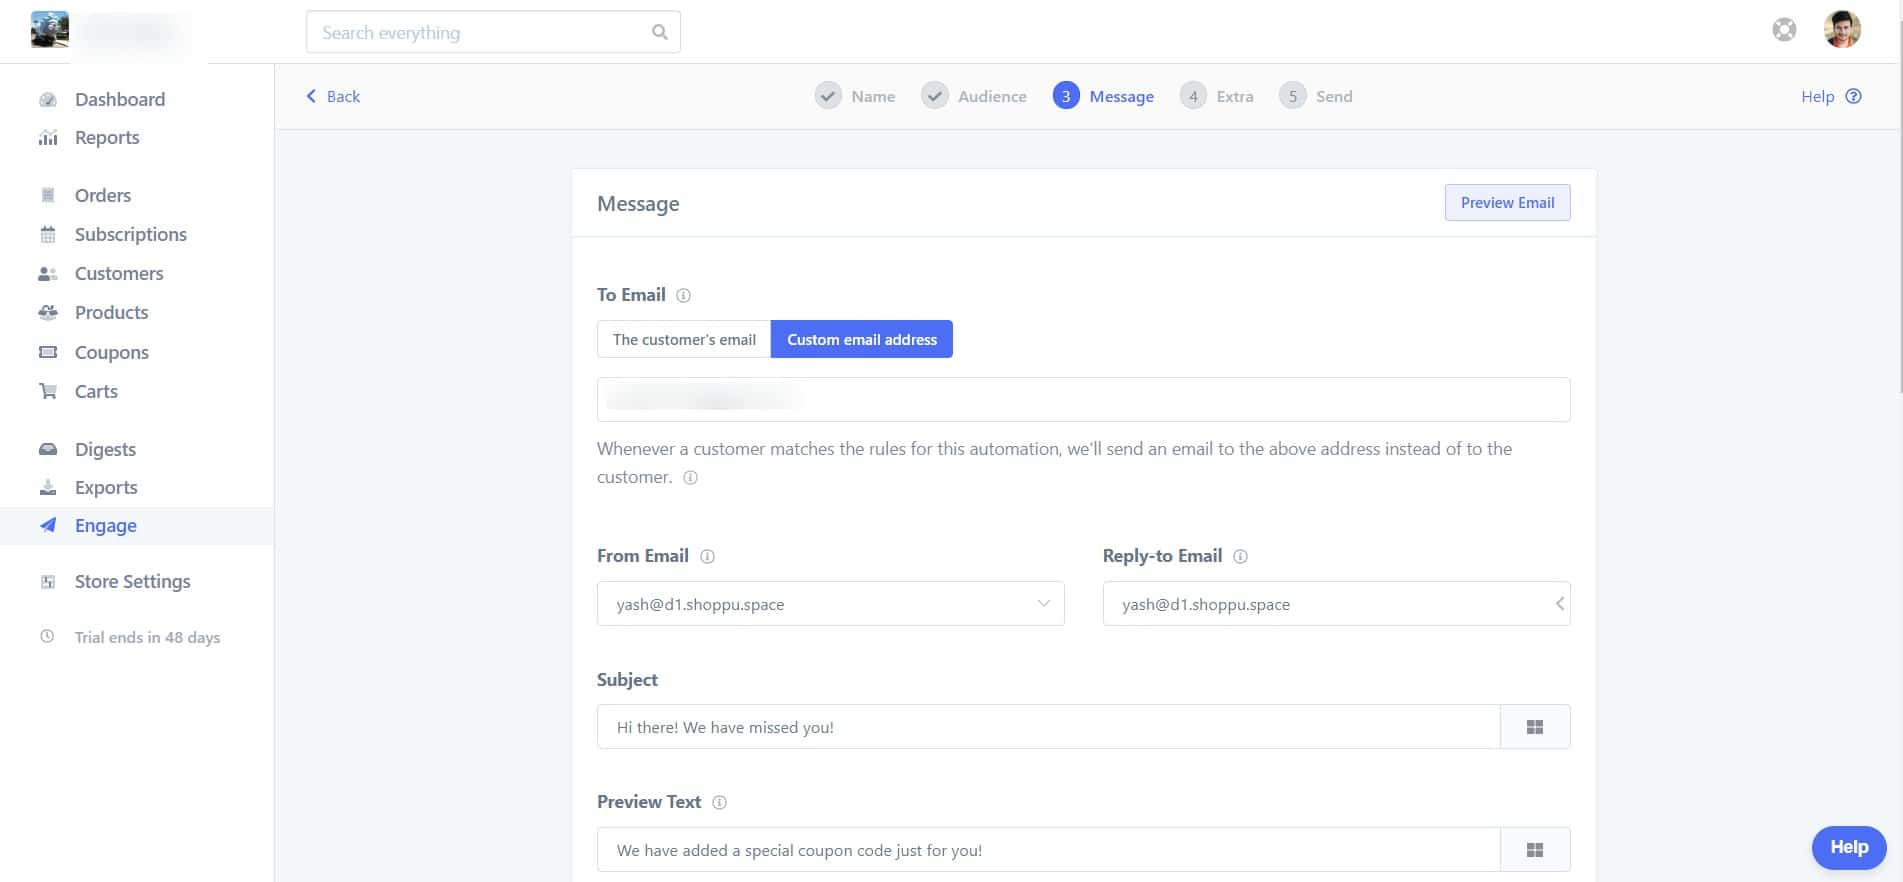
Step 4: Customizing the Email
Now comes the part where we write the email for our recipients. For this automation, we have set the email to go to a custom email account. Once everything is set up, we will automate it to send to all segmented customers.
The Engage feature of Metorik is useful for internal emails as well. For instance, if you want your vendor or the shipping team to receive an email whenever an order is placed, you can easily do it by entering the shipping team’s email account in the custom email field, and they will receive an email whenever there is a new order with the order details.
Next, select the email which will be the sender for the email and the ‘reply-to’ email for the users.
Now you need to enter the subject, preview text for the email. This will be displayed as the preview for the email before the users open them.
Now for the email body, you can choose one of the three options: Standard, Clean, Code Your Own.

The standard one will be displayed with the logo of your brand and good, responsive design. The clean layout will look exactly like what you type there. Or, if you wish to add custom designs and look to the email, you can do it with the last option, i.e., code your own.
For this tutorial, we will go with the standard layout.
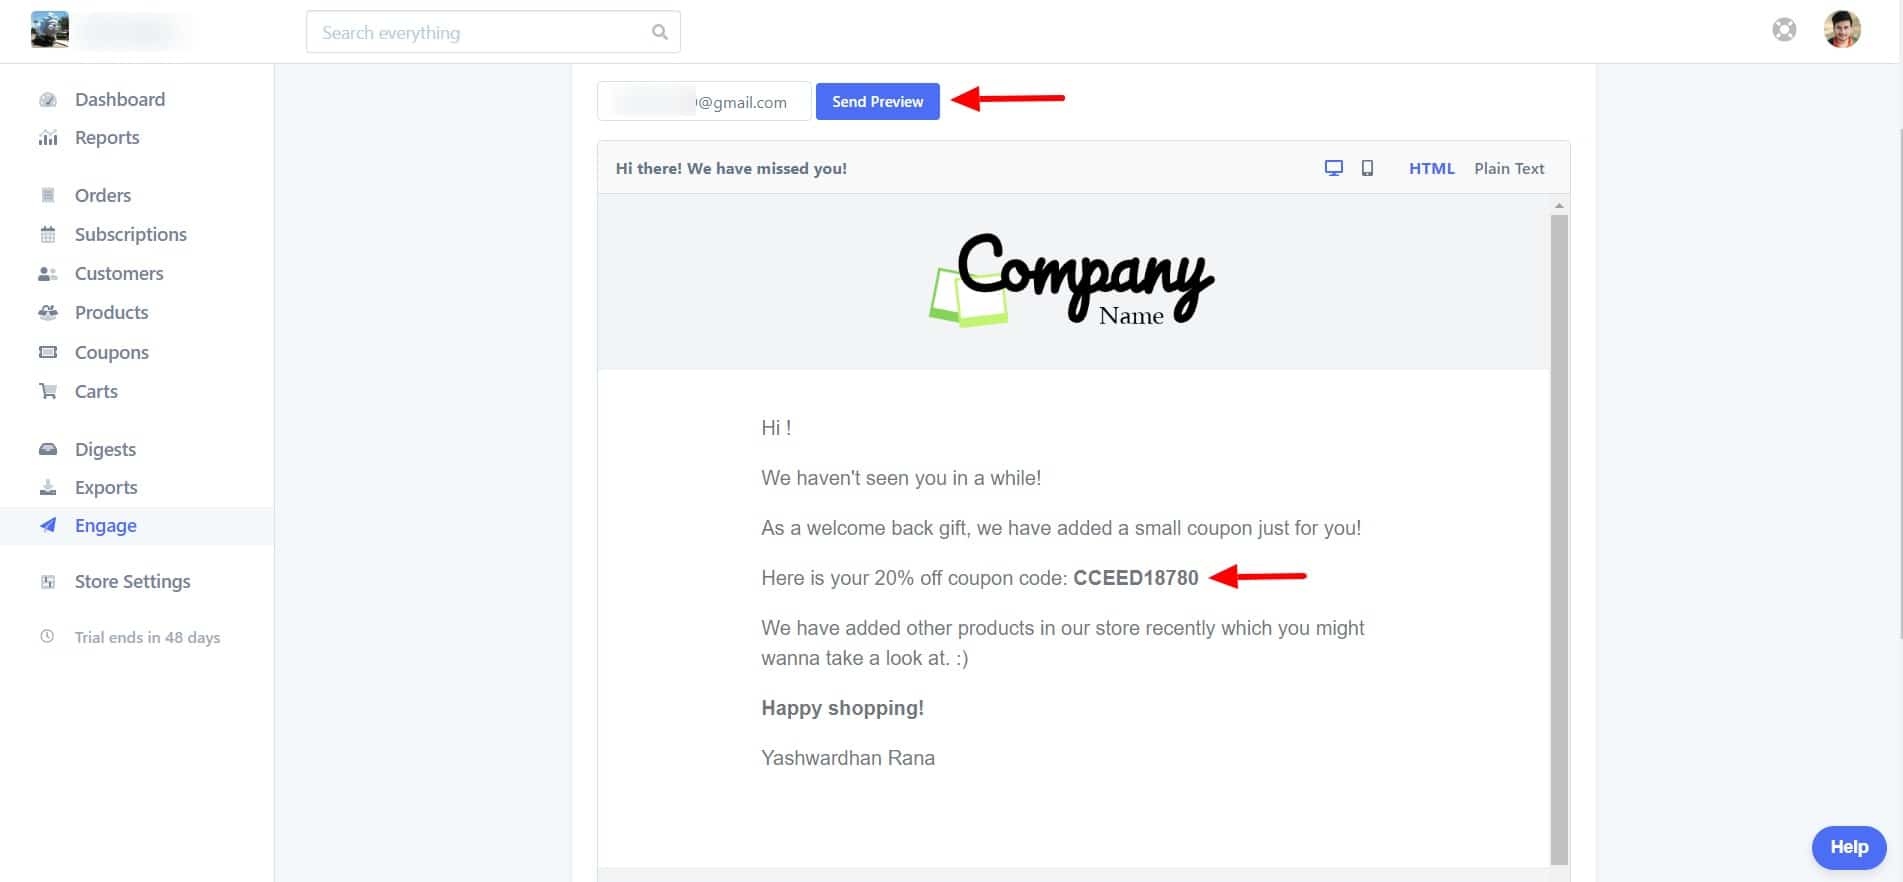
Enter the email in the space provided and make sure it looks attractive enough to grab the attention of your recipients.
Now since this is a lead generation/conversion-oriented email, we will add a discount code for our customers to boost more purchases.
Adding Discount Details
Metorik comes with a great feature which allows our users to custom add coupon code. You can add parameters, restrictions options, and other settings to your coupons as well. Click on the “Add Discount” button at the bottom, and a dialog box will open up.
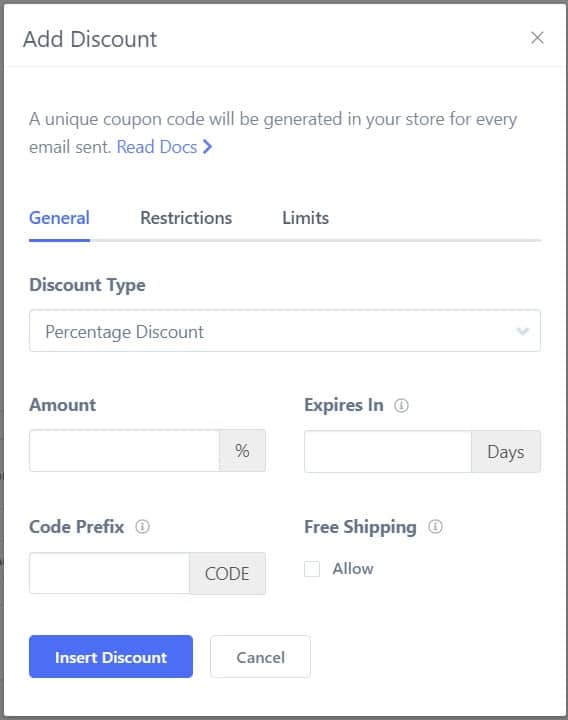

You will get various options and discount types in the drop-down options. I am setting up a fixed percentage discount at 20%. You can also set the expiry by simply entering the number in the respective field.
If you want, you can define a custom code prefix as well by entering the prefix in the settings.
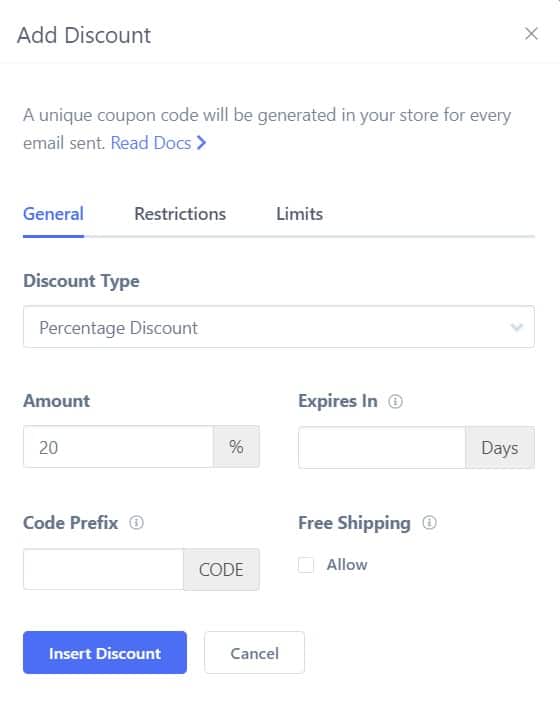

You can take more control over the minimum purchase requirement, included/excluded products, included categories, etc. for that specific coupon.
You can even set if the coupon works on top of other coupons or not. Further, you can even limit the usage of the coupons from the limits tab.
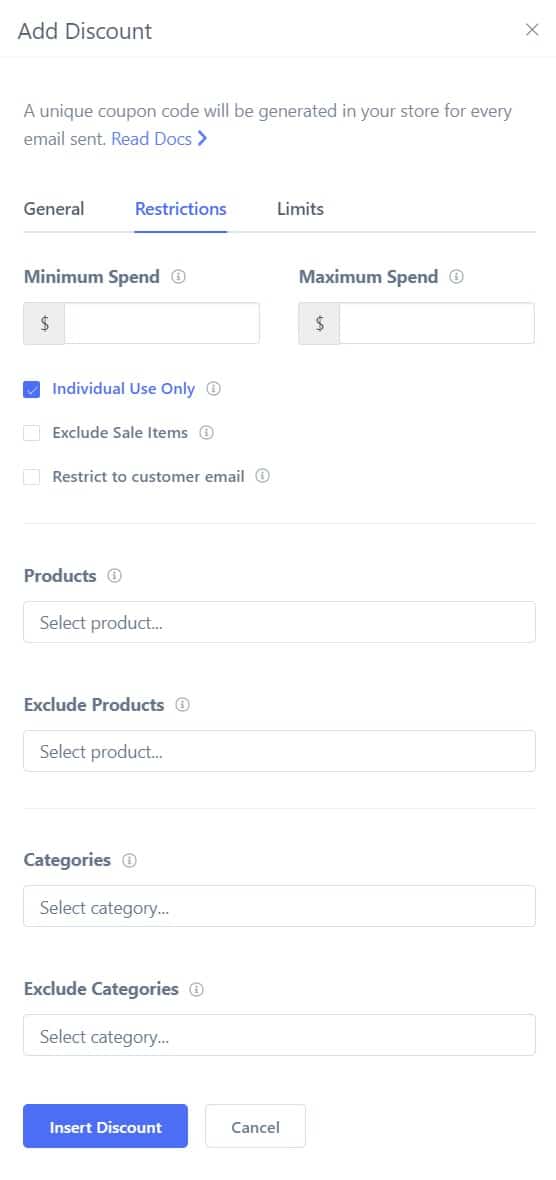

These coupon options give you complete freedom to limit and customize the coupons. And you can keep a track on how many people are clicking and buying using the coupon code.
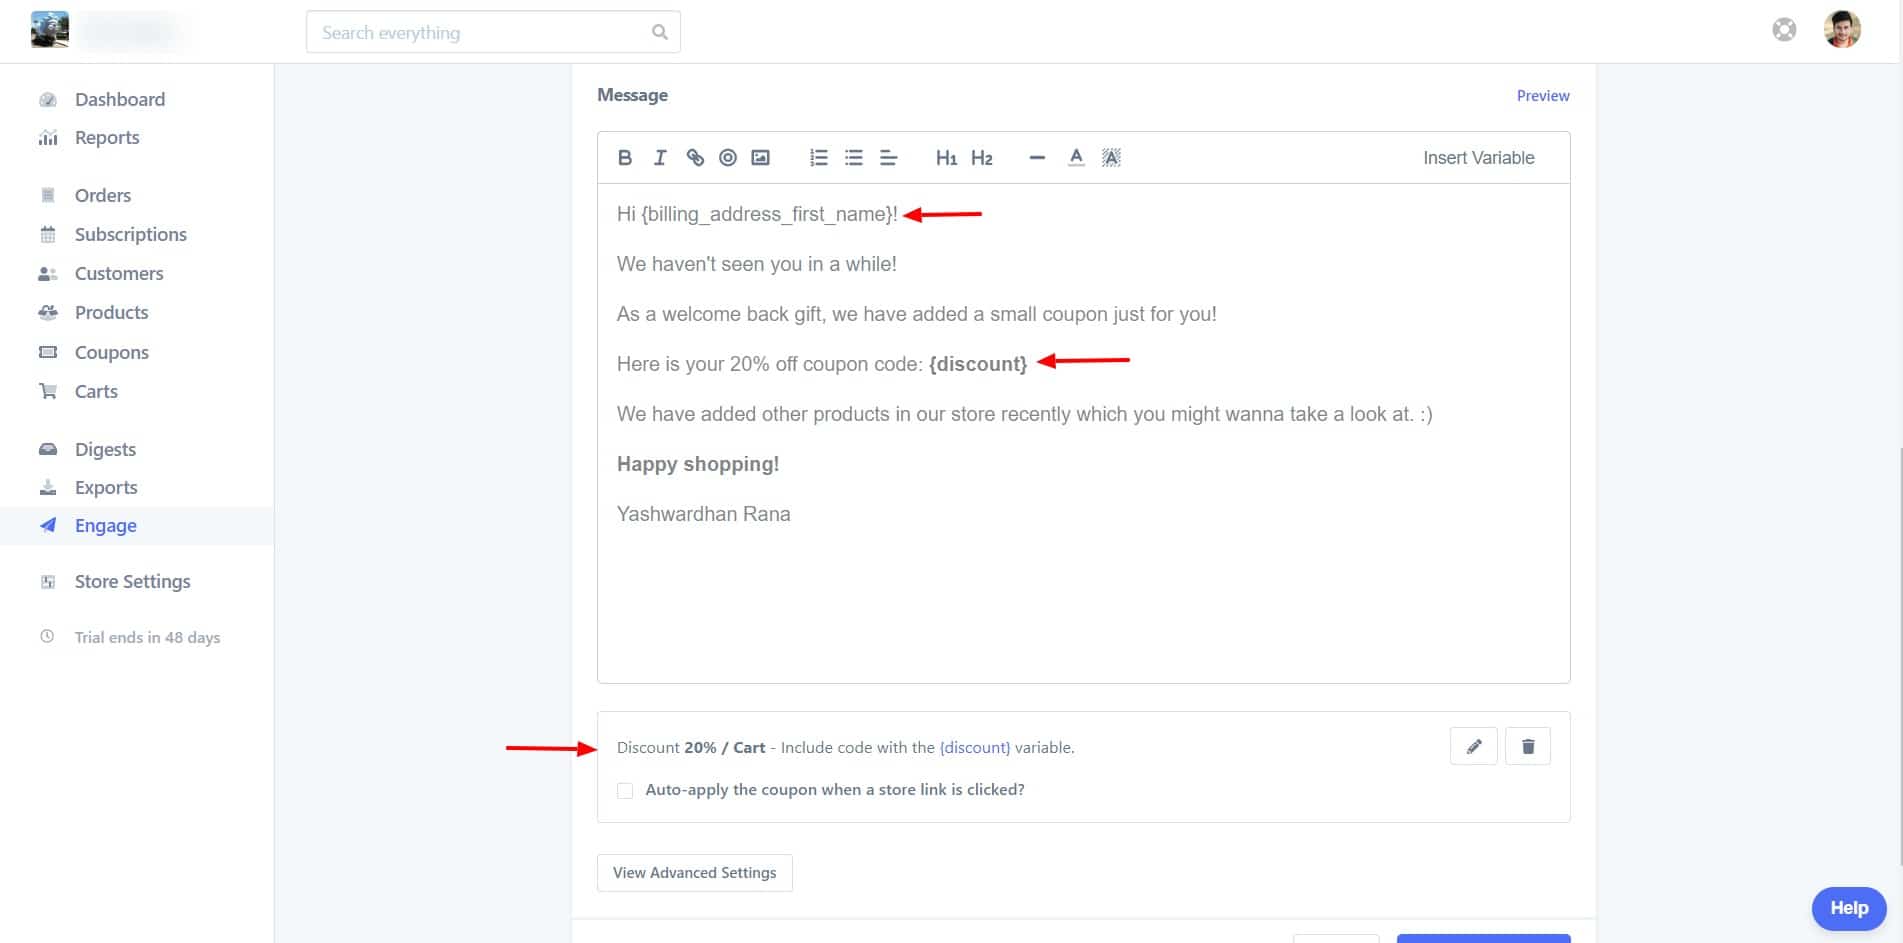

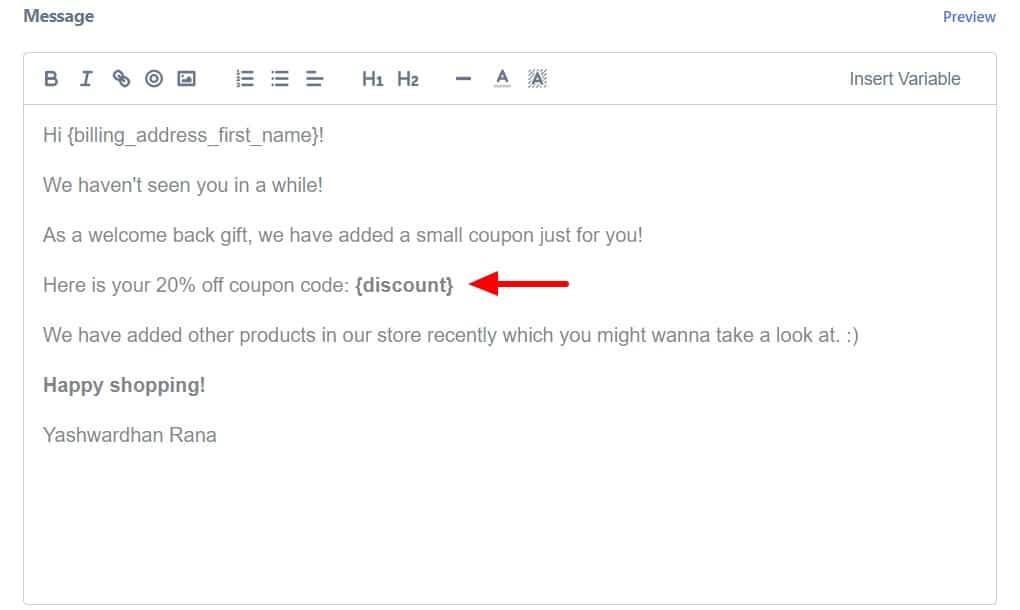
Once the coupon is ready and you have entered your email, you will need to add the code for displaying the coupon to the users on your email. For this, simply enter the code “{discount}” in your email wherever it fits the context and the result mail will automatically be converted to the unique coupon code.
Here is an example of the same:

If you want to take a look at how the email looks, you can do the same from the Preview button. You can find it at the top right corner of the email body. You can even send a test email to see how the email looks from the user’s end.

Once you are done, click on the Save and Continue button. Now you need to choose whether you want this automation mail to send out single time or multiple times. For example, taking the current automation into consideration, it is possible that a user might not order again for the next six months after ordering. If this happens, the user will again be counted as part of the list.
Do you want them to receive the email again whenever they are back in the list? If yes, select the checkbox. If no, just leave it as it is.
This option does come in handy when the automation is set to send out emails frequently, for example, weekly. You do not want to send out emails to your customers that often as that will only drive them off and will only lead to increasing unsubscribers.
Since this automation has six months gap, it will only send out at max once every six months so I will be selecting the checkbox for this specific automation.
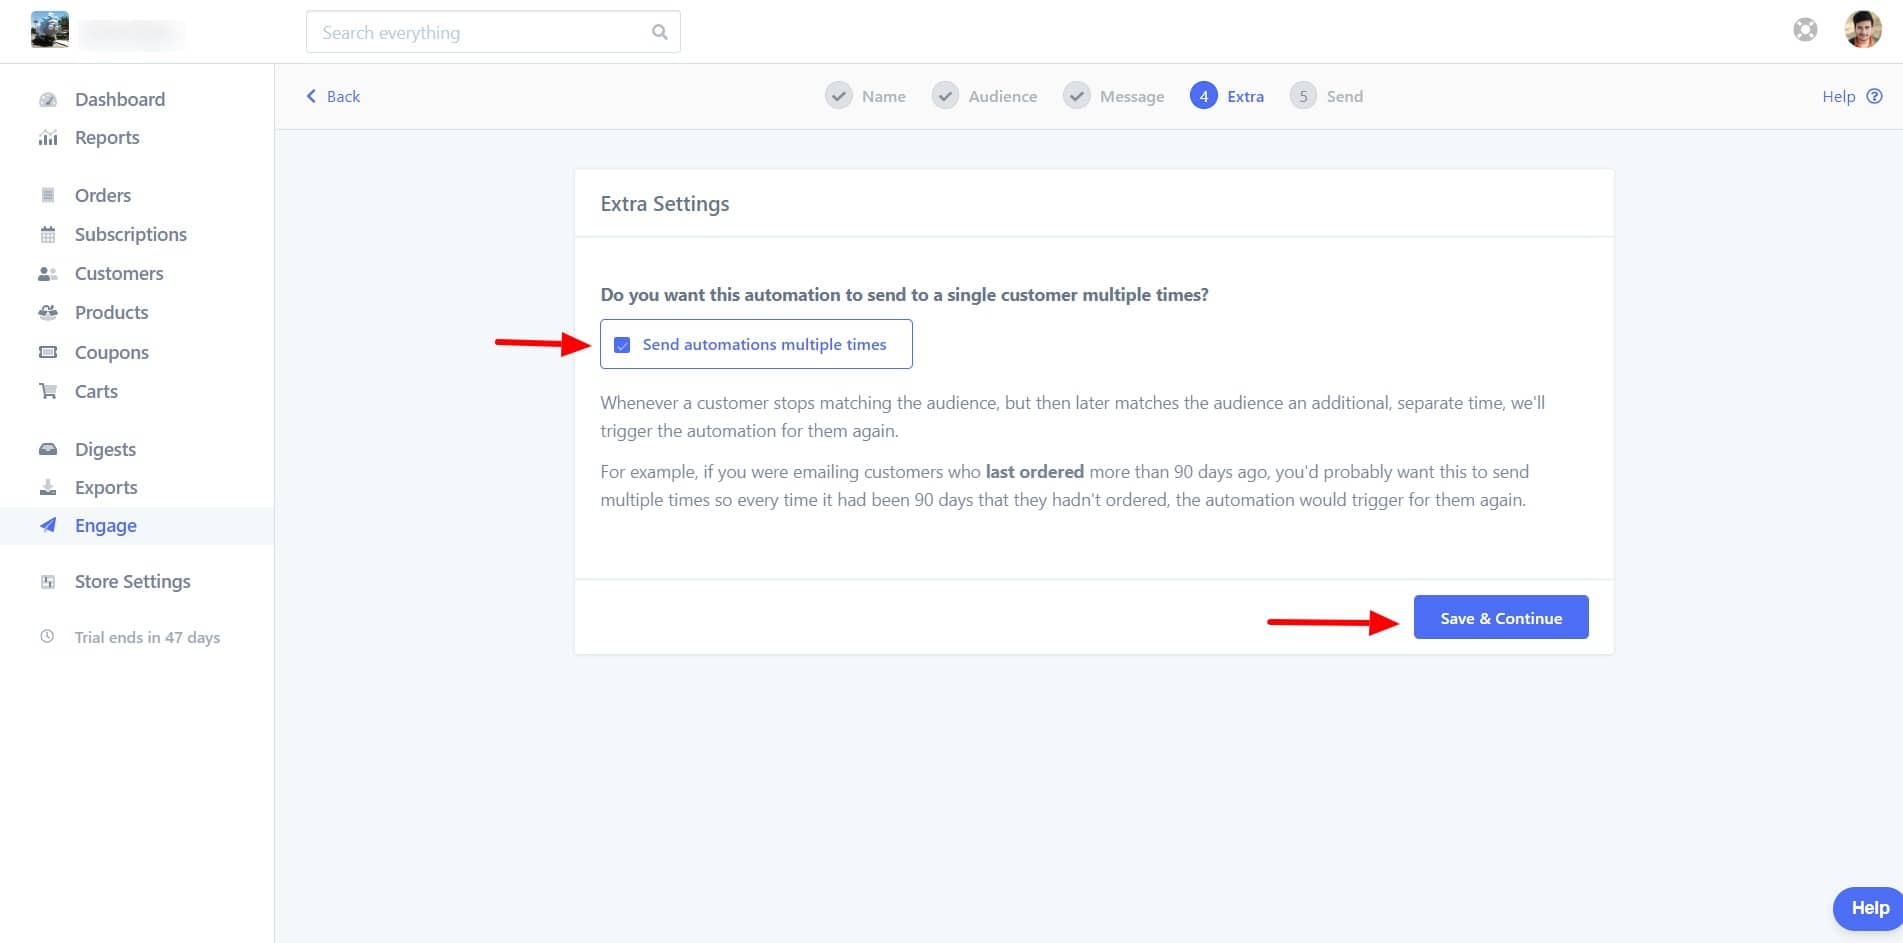

Now, you can see the number of customers matching the criterion and whether to send out emails right away or not. If you are all set, you can hit the send button or else you can save this automation as a draft.
Re-engaging Potential Customers with Abandoned Cart Emails
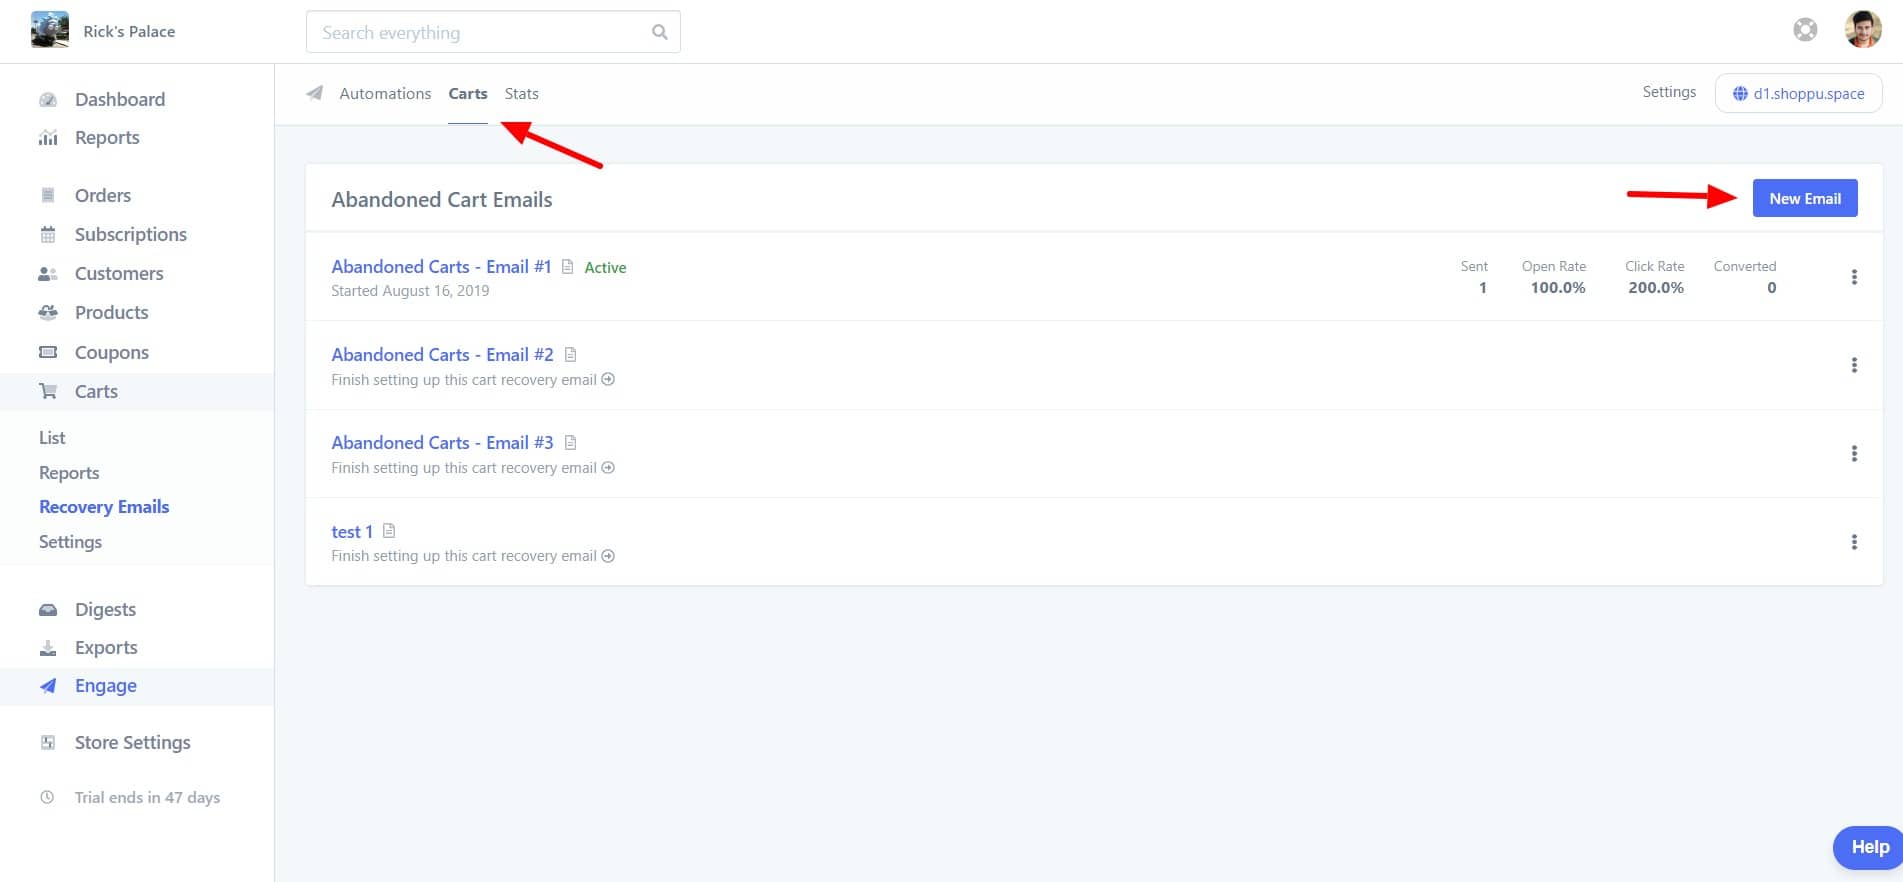
Another great feature that Metorik comes with is the abandoned cart emails. This feature allows you to send out emails to your users whenever they abandon a cart before checkout.
For this, you just need to select Carts tab from the header, instead of automation in the first step.

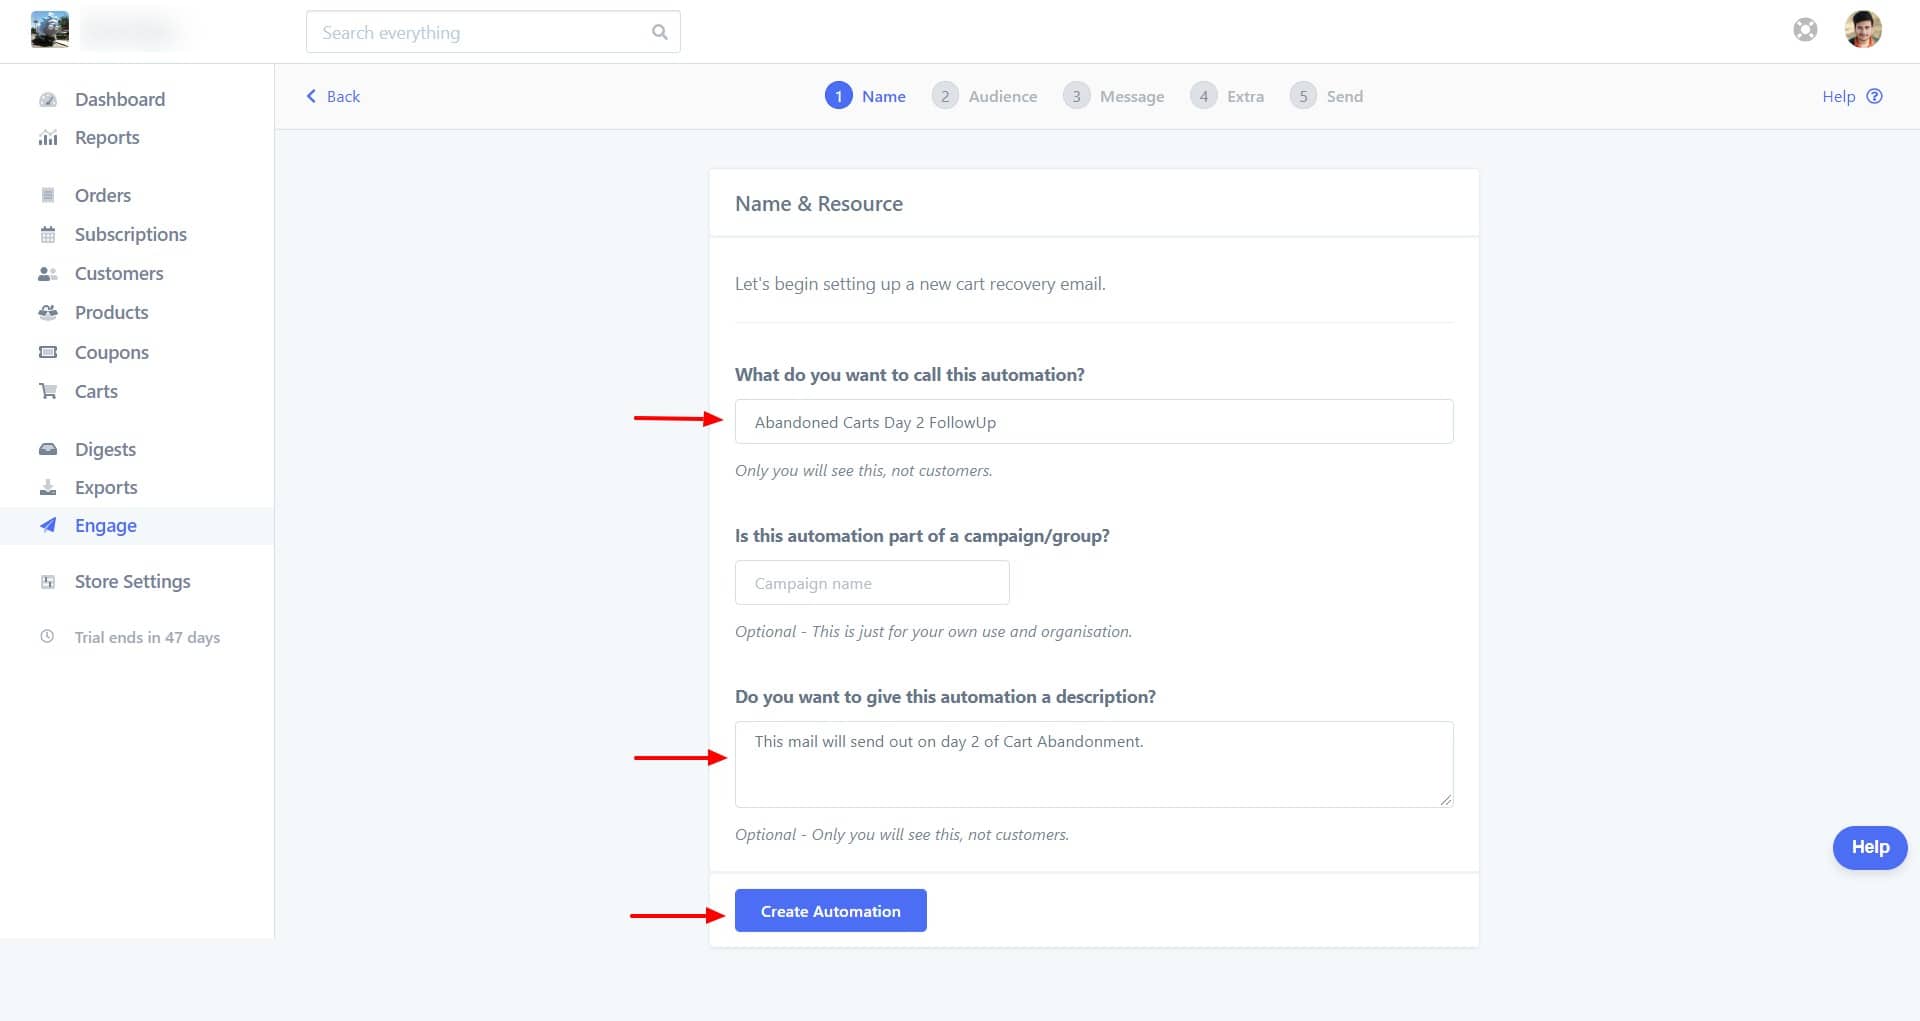
Now, just like we did before, name the automation and add a proper description. Then click on the Create Automation button.

Now for the audience, select the time for Cart Abandonment to over two days or any other duration that fits your requirements. You can even start advanced filtering to filtering the recipients based on parameters like cart value, products, items count, and even on the basis that the customer has a successful order or not. I have selected the “item count” filter as “more than one” in case there are carts which were recently emptied. Sending them the email will not serve the purpose.
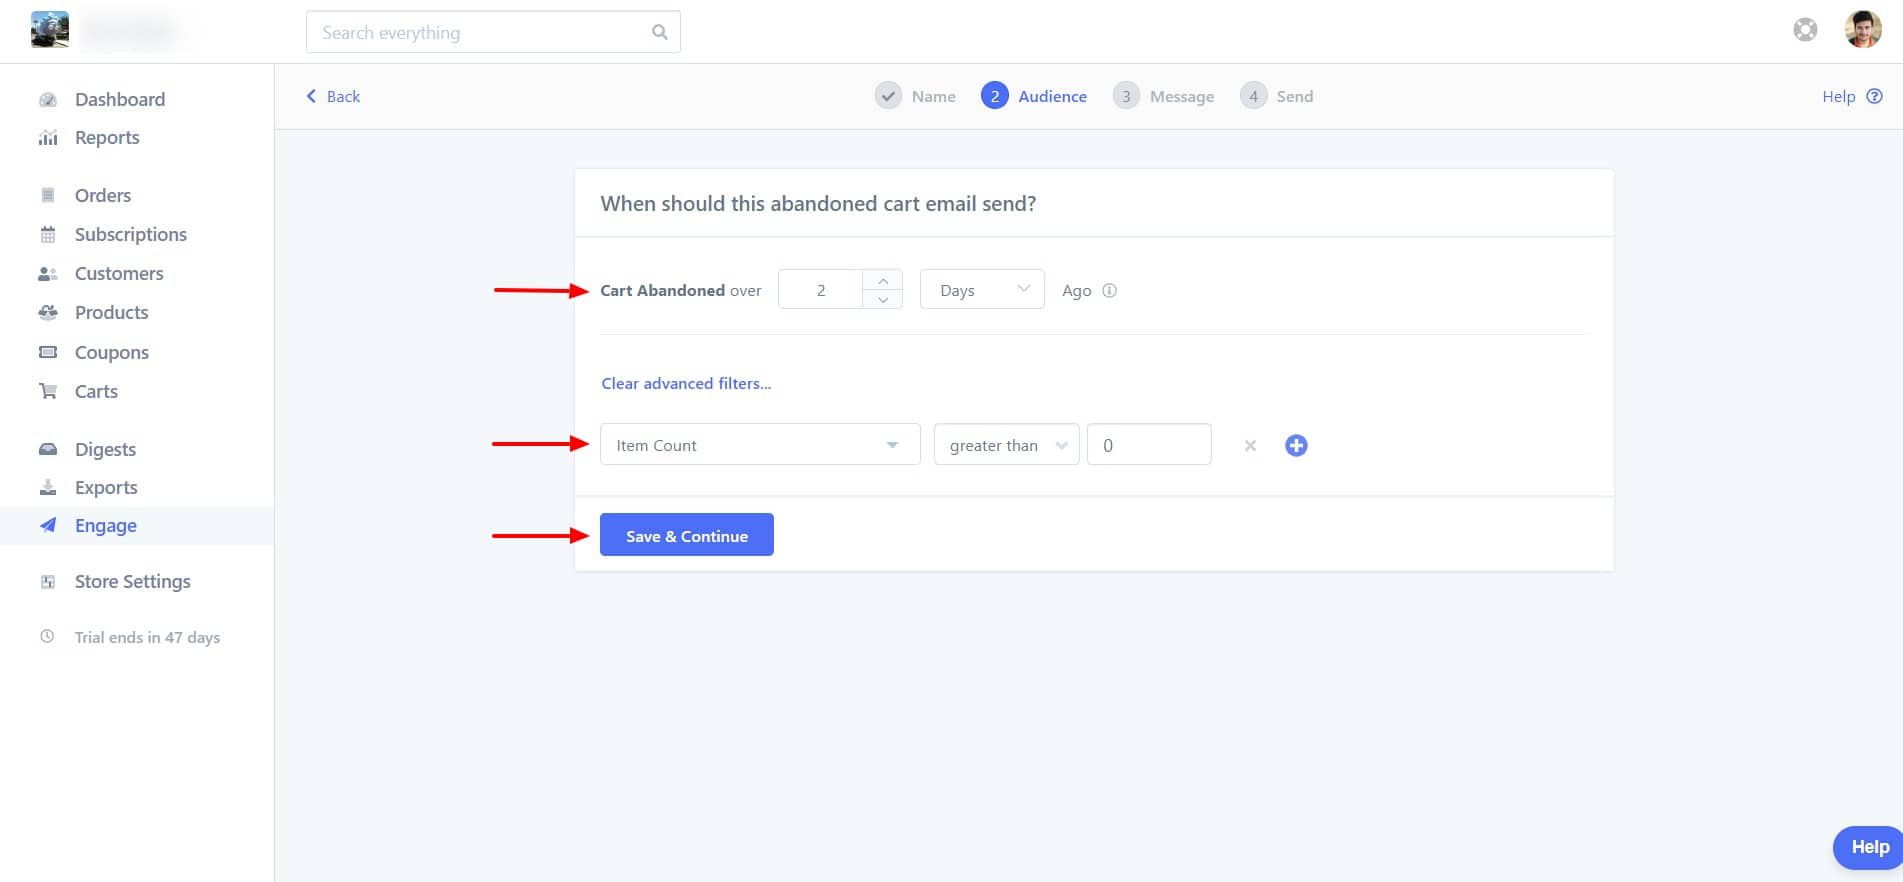

You can customize the email after settings the filters. This is the same as what we did earlier by entering the sender’s email, select a layout, adding discounts if required, and typing the emails.
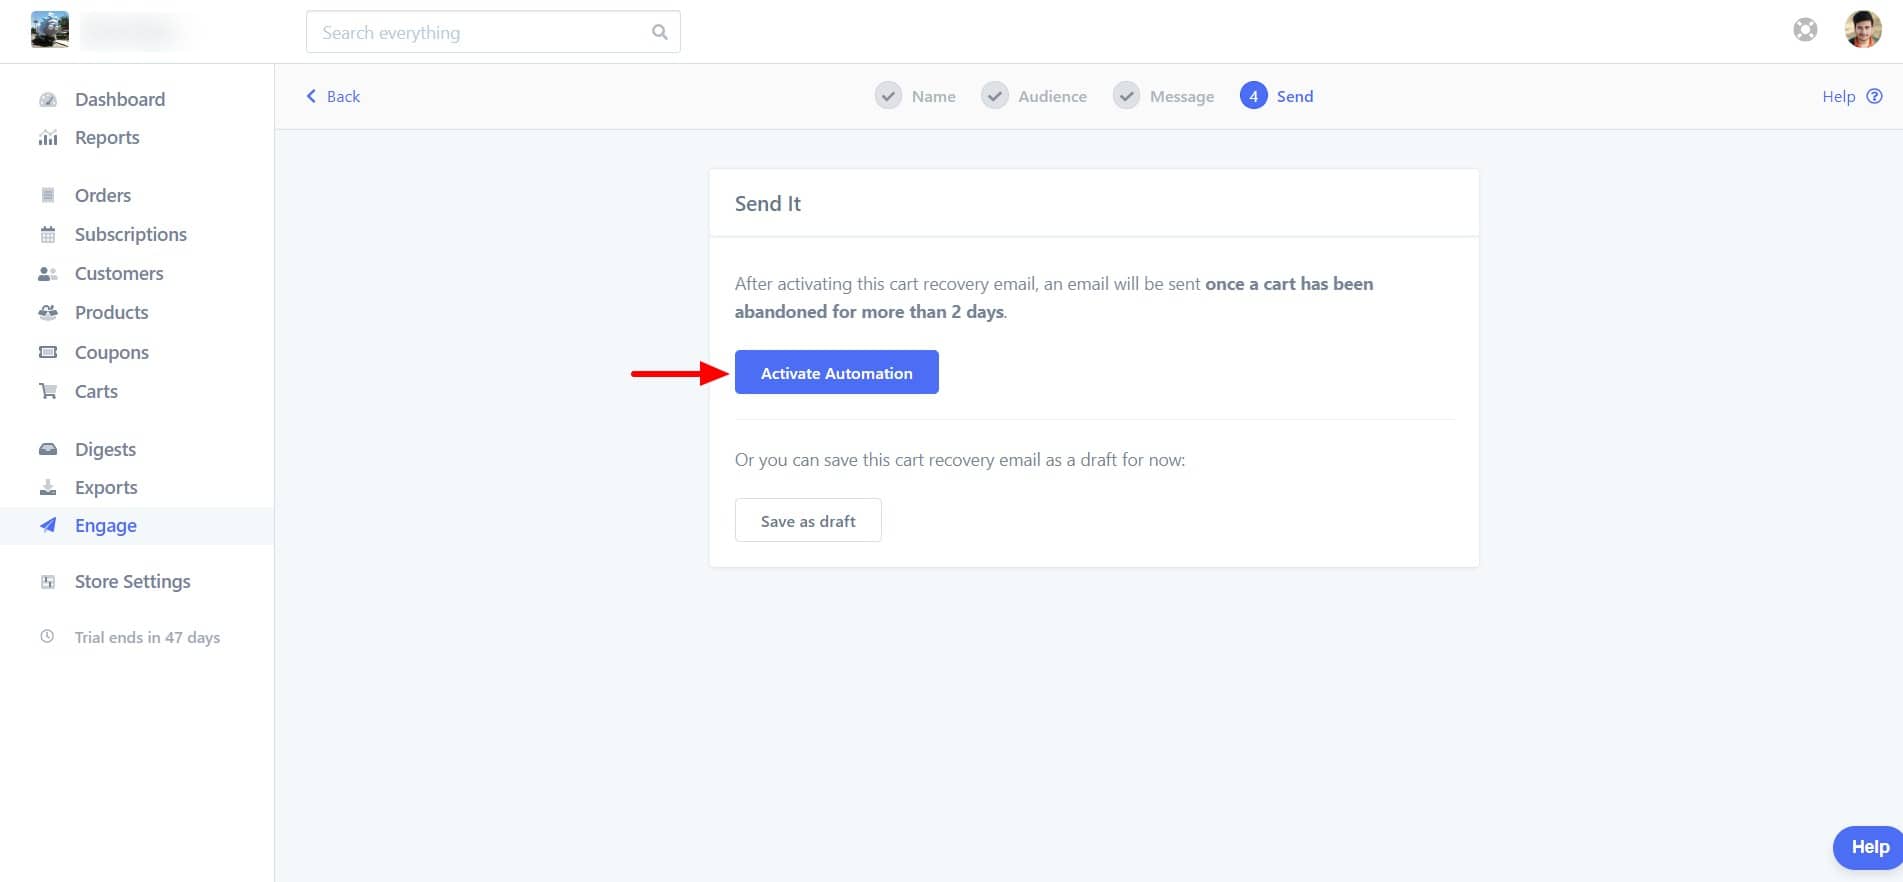
Once you are done, you can activate the cart recovery emails, and an email will be sent out whenever a potential buyer abandons a cart.

Diving Into Stats
There is no other way of knowing if any of your emails and marketing campaigns are working other than having access to statistics and analytics of how well your campaigns are doing.
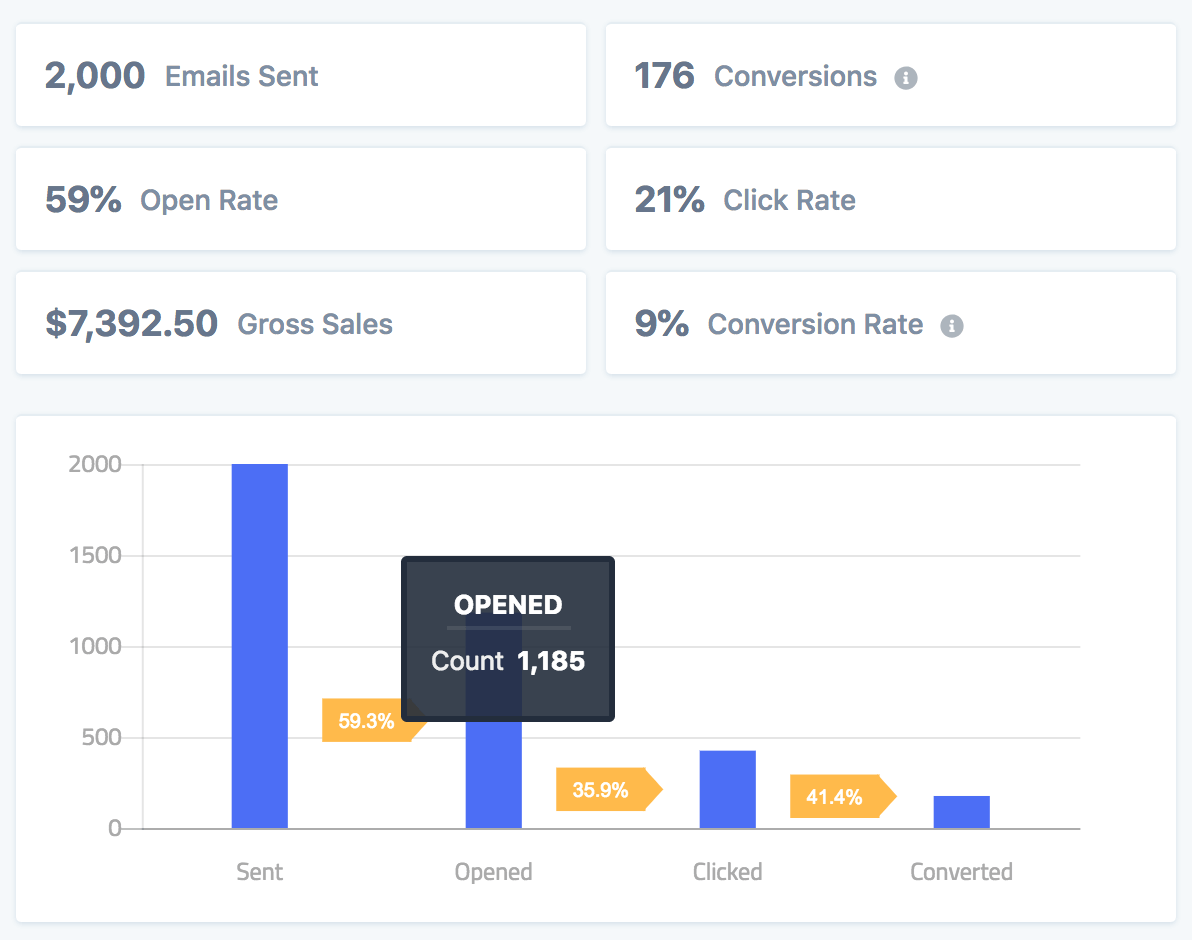
With Metorik, you can see how well your campaigns are doing with the help of the Stats tab Under Engage. You can also see the summary of statistics in front of each automation.
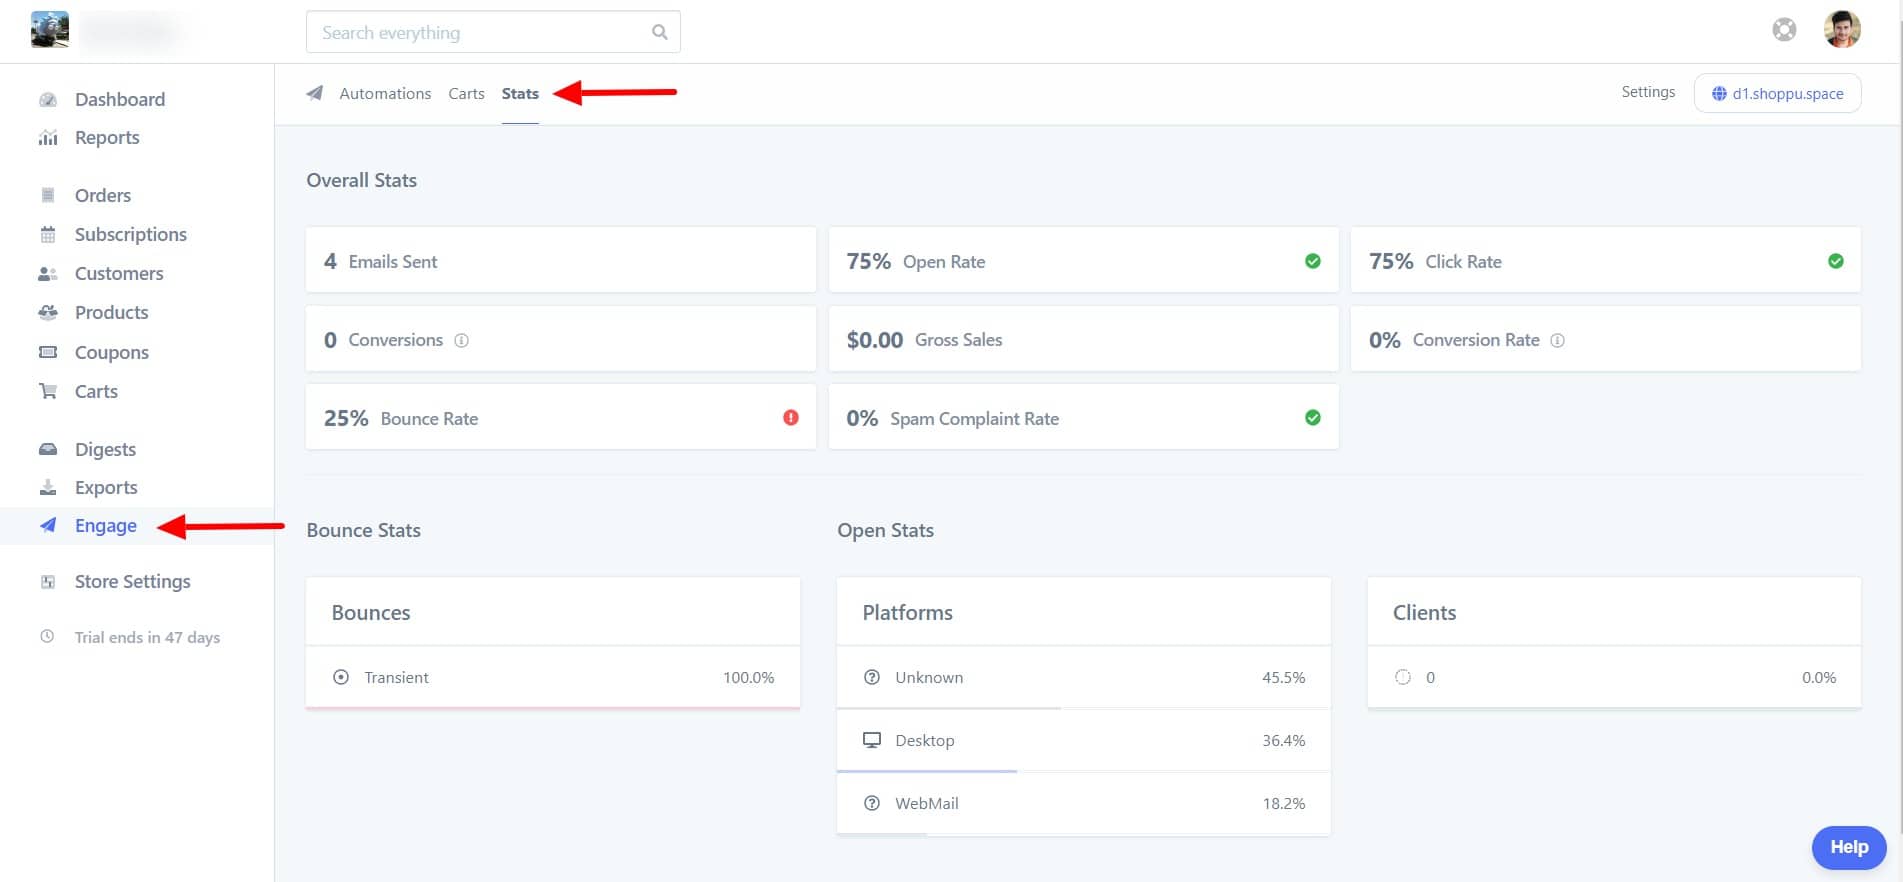

Moreover, you can see reports for each automation in the Stats tab like how many emails were sent, conversions, emails opened, and even how much sales did it generate with the emails.

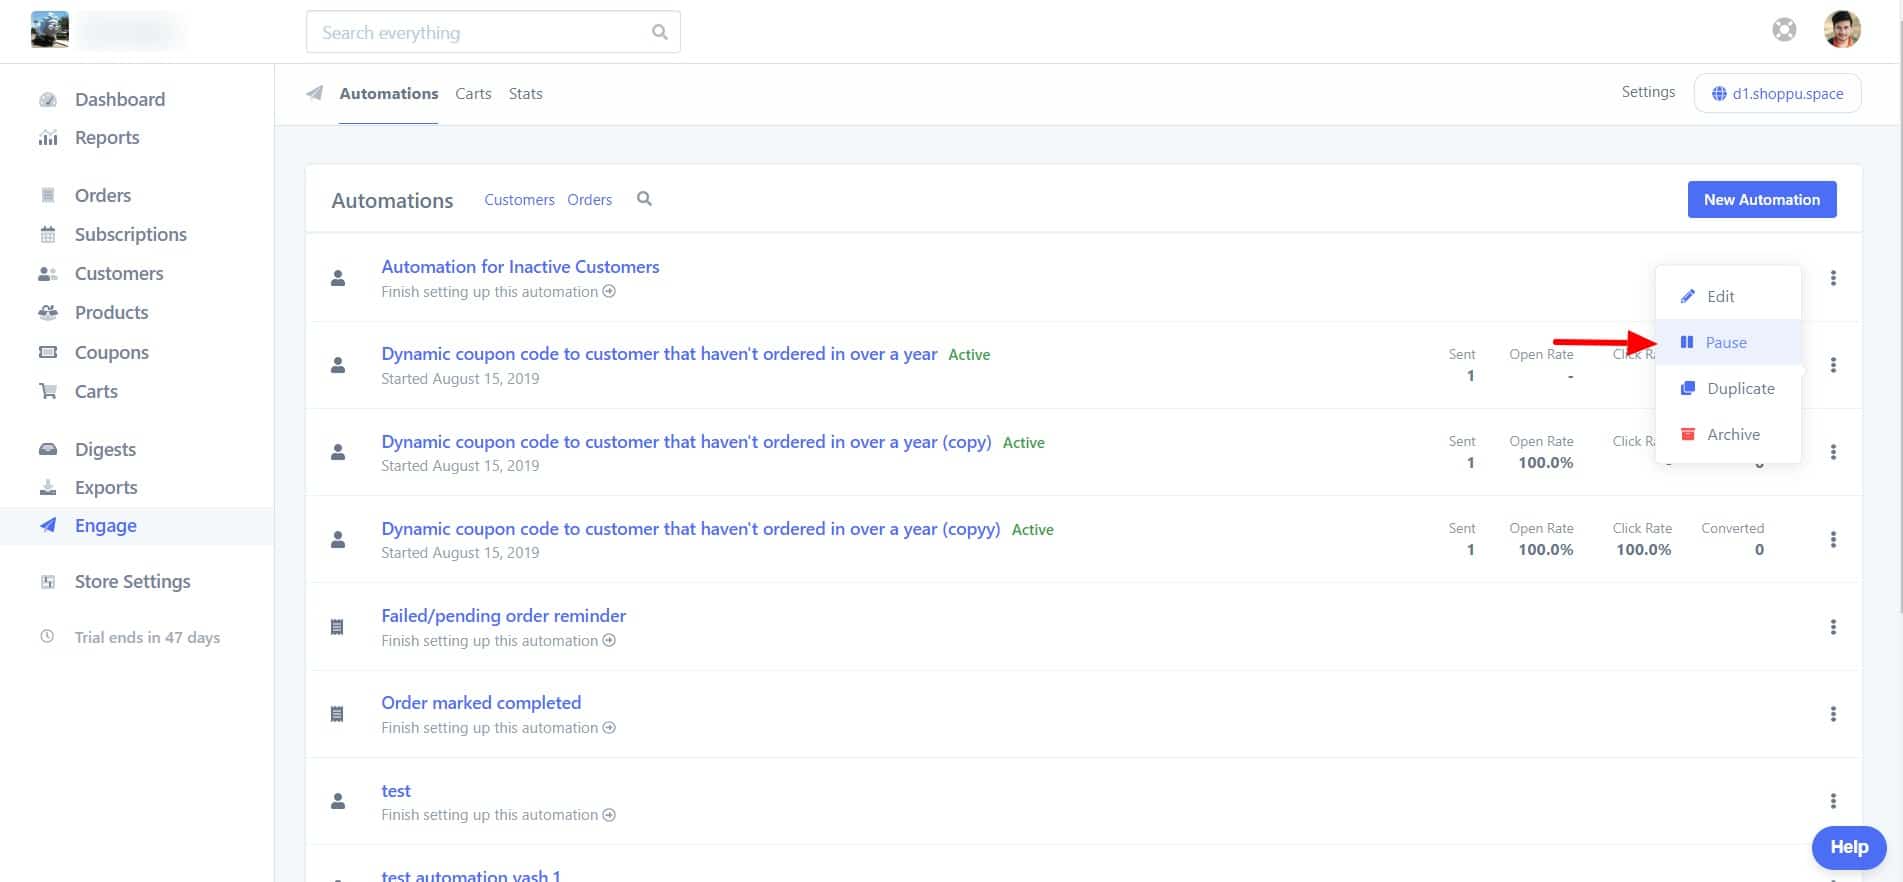
You can even pause and restart any email automation from the settings available for each automation.

Winding It Up!
Now you know how you can re-engage you WooCommerce users with Metorik and increase your eCommerce store conversions. There is a lot more that you can do with Metorik. If you want to know more about this tool, check it out.
Let me know your thoughts on this article. Also, how you will be leveraging the power of re-engagement to bring in more conversions.
What segment of users you think will yield maximum results with the help of email automation? Comment your thoughts below!
If you found this piece useful, do share the love!