If your WordPress site has a lot of content, you need to make it easy for visitors to search your site to find what they’re looking for. That can be a problem because, by default, site search is definitely not WordPress’s strongpoint.
As with most parts of WordPress, you can fix this and improve WordPress search – you’re just going to need the help of a search plugin.
In this post, we’re going to show you how to improve WordPress search using one specific plugin called Relevanssi. Relevanssi is not the only WordPress search plugin. However, it’s free, easy to use, and popular, which makes it a great option for easily upgrading your site’s search function.
How Does Relevanssi Improve WordPress Search?
Relevanssi is a freemium plugin that’s available at WordPress.org as well as in a premium version with more features.
It helps you improve your site’s search in a few different ways. Let’s go through them – then, I’ll show you how to set the plugin up in the next section.
1. Adjust What Content to Include in the Search Index
Your search index is basically the pool of all available content that visitors can search for. When someone enters a search term, your site will compare that term against all of the indexed content to return results.
Relevanssi gives you a few ways to control the index.
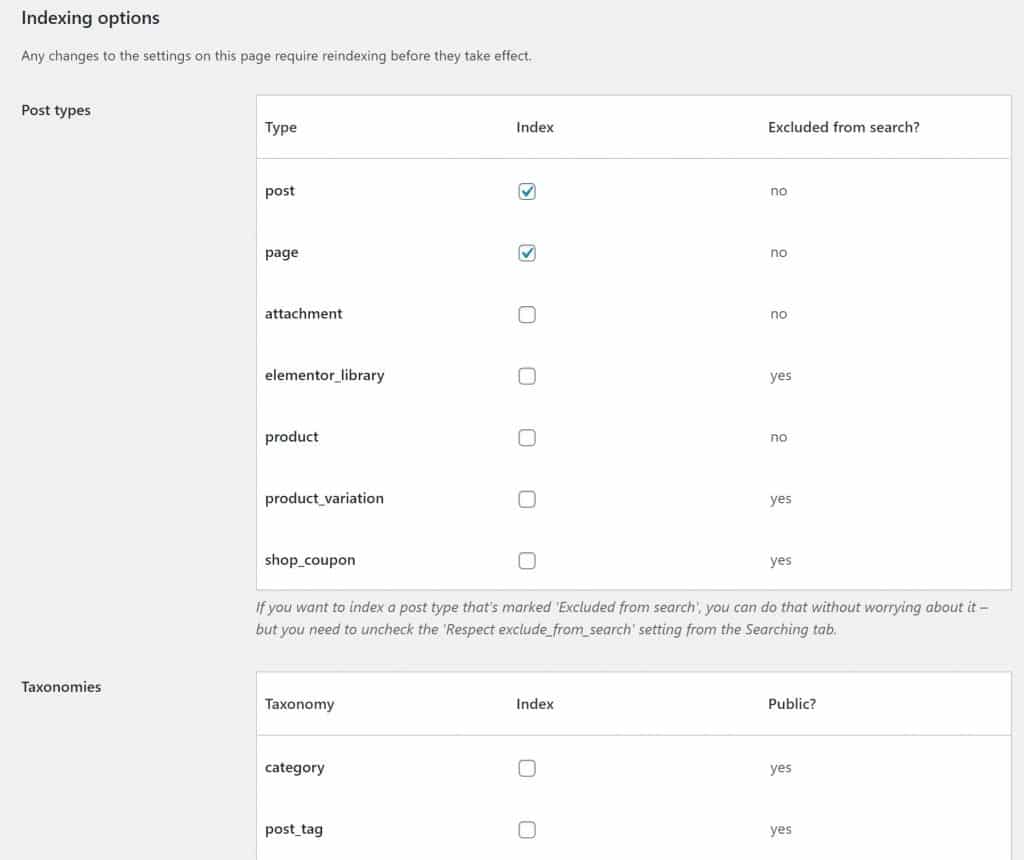
First, you can choose which post types to include. For example, you could include blog posts in your search results, but not static pages. This is especially useful if you’re using custom post types because you can include/exclude certain custom post types as needed.
You can also choose whether or not to index categories, tags, or other custom taxonomies. If you enable category indexing, your site will return all of the posts in that category if someone searches for the name of the category. Or, you can restrict results to a certain category.
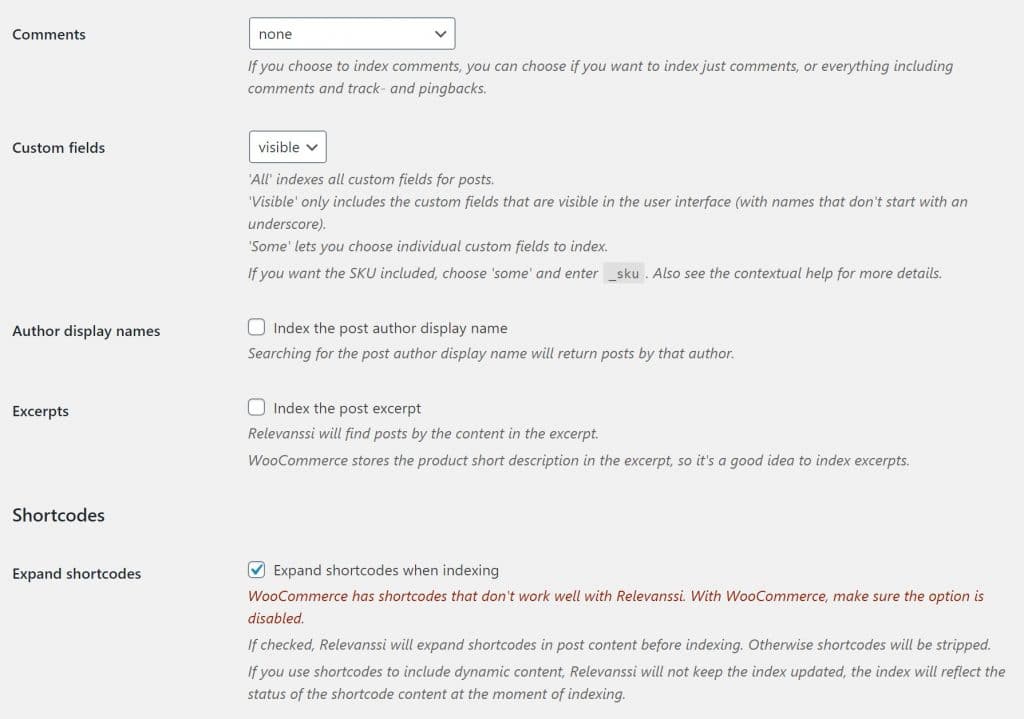
You’ll also be able to include whether to index comments and some/all of your custom fields. The latter feature is especially useful if your site relies on a lot of custom fields.
Finally, you’ll also be able to include shortcode content in your search index. For example, if you have a shortcode that turns into a rich review box summary on the front-end, Relevanssi will be able to index the content in the review box.
With the premium version, you can also index certain attachments including:
- PDF files
- Word documents
- Open Office documents
- …more
2. Adjust the Search Algorithm
Beyond choosing what content to include in the index, Relevanssi also lets you adjust the weight to give to different types of content, which gives you some control over the search algorithm.
For example, you can put more weight on keywords in the post title than content (and change the ratio). You can also give a boost to exact matches vs partial matches.
With the premium version, you can use different algorithms for different post types.
3. Add Synonyms, Stopwords, and Redirects
Synonyms are useful if people are regularly misspelling things, or if you just otherwise want to match two words to be the same.
For example, if your product is “Relevanssi” but people keep searching for “relevancy”, you could make the two synonyms so that your search treats “relevancy” just like “Relevanssi”.
Stopwords let you go the other way and exclude certain words from the index. Typically, you’ll use this for unnecessary words such as “that,” “their”, etc. Relevanssi will add a bunch of stopwords by default, but you can also add your own.
4. Add User-Friendly Front-end Features
Finally, Relevanssi just generally creates a better search experience for your visitors. For example, you can highlight search terms in search results and control the excerpt.
How to Set Up Relevanssi to Improve WordPress Search
Now, let’s get into how to set up Relevanssi to improve your site’s search.
A quick note – Relevanssi works with the default WordPress search feature, so you can keep using the default search widget or your theme’s search form. That is, you don’t need to add a separate search box just to connect to Relevanssi – all you need to do is configure the behind-the-scenes settings.
To get started, install and activate the free Relevanssi plugin from WordPress.org. Then, here’s how to configure it…
1. Configure Your Search Index
Again, your search index basically controls the pool of searchable content on your site.
With Relevanssi, you can control exactly what goes into this pool. To configure it, go to Settings → Relevanssi. Then, select the Indexing tab.
First, choose which Post types and Taxonomies to include:
Then, scroll down to find additional options:
- Comments
- Custom fields – if you use custom fields but aren’t sure what to put, you can start with Visible.
- Author display names
- Excerpts
- Expand shortcodes – check this box if you rely on shortcodes to generate front-end content
2. Build Your Search Index
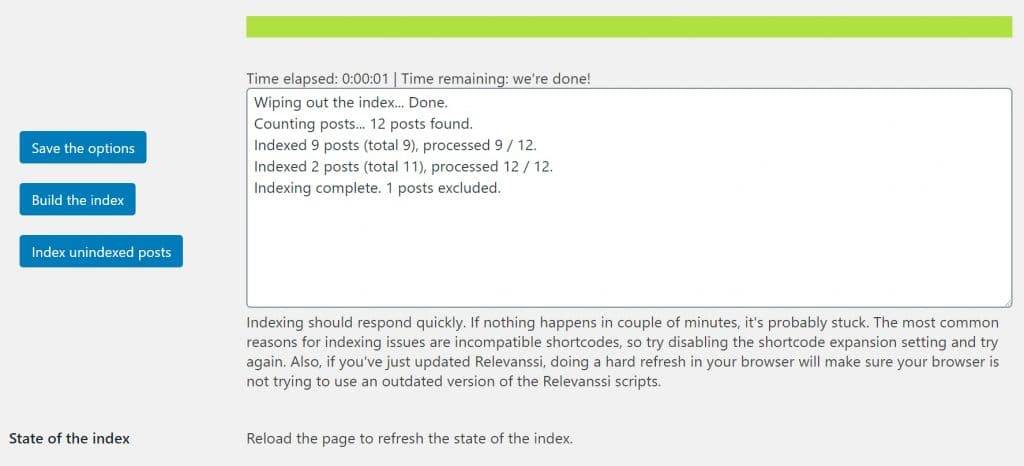
Once you’ve configured your choices, save your changes. Then, scroll back to the top and click the Build the index button:
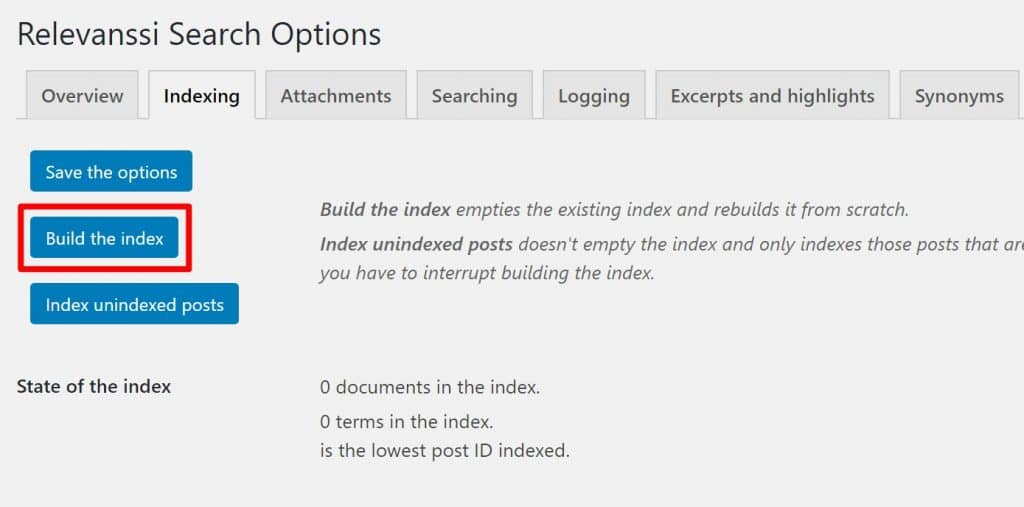
This will “put together” your pool of searchable content so that Relevanssi doesn’t have to do this for each search query.
If you have a large site, this might take some time:
3. Configure the Search Algorithm
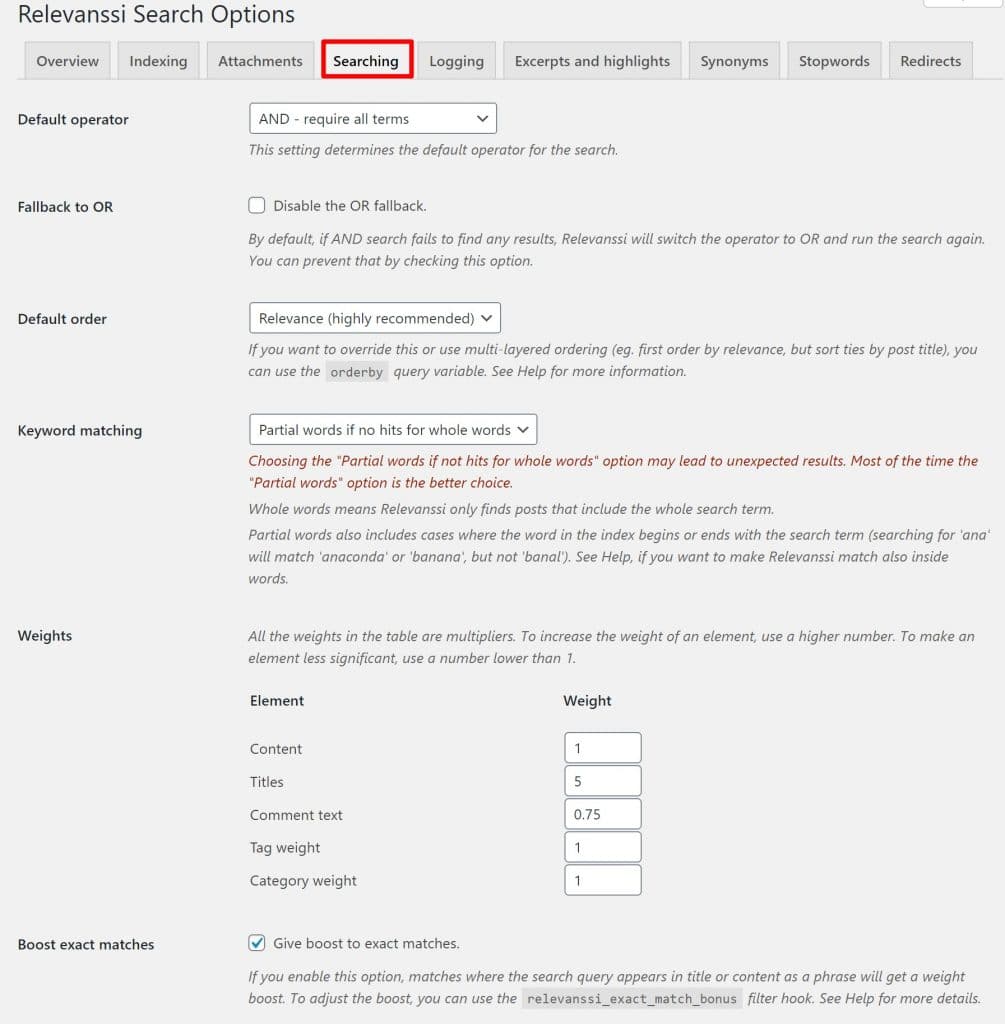
To adjust how the search algorithm works, go to the Searching tab. When in doubt, you can leave these as the defaults. But if you want to adjust your search, some of the biggest choices are:
- Default operator – if you switch this to AND, you’ll get more accurate results, but your search will be much more limited and you might fail to return results. If you choose AND, I would recommend leaving the OR fallback enabled (it will switch to OR if AND didn’t return any results)
- Keyword matching – again, you can balance relevant results with failing to find results.
- Weights – you can adjust the weighting that Relevanssi applies to different types of content.
4. Configure Other Features (Optional)
At this point, you can probably call it a day. However, depending on your preferences, you might want to configure some additional settings.
Here are what the other tabs do:
- Logging – log search queries – I think a better approach would be to use Google Analytics to track queries.
- Excerpts and Highlights – configure the excerpts and highlights that appear on the search results page.
- Synonyms – set up synonyms.
- Stopwords – set up stopwords.
5. Enjoy Better WordPress Search
And that’s it! Your WordPress search should now be much more useful and accurate, all thanks to the free Relevanssi plugin.
If you want even more features, you can consider upgrading to Relevanssi Premium for the following features:
- Automatically redirect certain search terms to a different page
- Index PDF documents, Word documents, and more
- Search across an entire WordPress multisite network
- Index usernames and profiles
- Return taxonomy term archives in search results
- Show “did you mean?” search suggestions
- More control over weighting, including applying different weights to different post types
Relevanssi Premium costs $99 for use on unlimited sites and one year of support/updates (or $349 for a lifetime license) – buy it here.
Other Options to Improve WordPress Search
If you’re looking for some other tools that can help you offer a better WordPress search, we also have an entire collection of WordPress search plugins for you to consider.
One plugin that didn’t make the list is Jetpack Search (because it wasn’t available as a standalone service when we wrote that post).
Jetpack Search comes from Automattic, the same team behind WordPress.com and WooCommerce.
One of the main things that makes Jetpack Search unique is that it does all of the search indexing on Jetpack’s servers, which makes it very performance-friendly (especially for large sites with tons of content). It also offers:
- Real-time Ajax search with no page reloads
- Filtered and faceted searches
- Real-time search indexing
- Spelling corrections
- Highlighted search terms in comments and post content
However, Jetpack Search is not free, which is the main downside, especially when compared to Relevanssi. Plans start at $5 per month for up to 100 search records and go up to $200+ per month for up to 1+ million records.
A “record” is any piece of content that’s searchable, including posts, pages, custom post types, WooCommerce products, etc.
Improve WordPress Search Today
With Relevanssi, you can easily improve your WordPress site’s search function at no cost.
Do you still have any questions about how to improve your site’s search or using Relevanssi? Ask us in the comments and we’ll try to help!


