
Trying to figure out how to install WordPress on Microsoft Azure?

If you’re not familiar, Azure is Microsoft’s cloud computing offering. You can think of it in the same vein as other cloud computing solutions such as Amazon Web Services (AWS), Google Cloud, DigitalOcean, and more.
Microsoft Azure encompasses a ton of different services, but one of them lets you affordably host your own WordPress site.
While the idea of setting up WordPress on cloud hosting might seem intimidating, Microsoft Azure actually includes its pre-made apps that make it surprisingly easy to install WordPress and get up and running.
In this post, I’ll show you step-by-step how to install WordPress on Microsoft Azure.
Of course, you’ll still need some technical knowledge when it comes to the ongoing maintenance and management of your WordPress site after the initial installation. If you don’t have that technical knowledge, you might want to check out WordPress hosting control panel services such as SpinupWP or GridPane. More on those later.
How to Install WordPress on Microsoft Azure
To give you a basic idea of what the process looks like, here are the high-level instructions for how to install WordPress on Azure:
- Sign up for a free Microsoft Azure account
- Create a new “resource” in Azure using a pre-made WordPress setup
- Configure your “resource”
- Set up WordPress using the regular WordPress install wizard
- Point your domain name to your site
1. Sign Up for Your Free Azure Account
Creating an Azure account is free and Microsoft will also give you 12 months free for both Linux and Windows virtual machines. Over those 12 months, you can use up to 750 hours of compute for free, which equals about a month of hosting.
You’ll also get 5 GB each of free blob storage and file storage, as well as 250 GB of SQL databases and 15 GB of bandwidth.
Basically, you’ll be able to follow this tutorial for free…at least at the beginning. However, if you want to use a custom domain name with your WordPress site, you will need to upgrade.
To get started, head to Azure and register for your free account.
During the signup, you’ll need to verify your account with both a phone number and a credit card number. However, you won’t need to pay for anything. Also, there are no automatic charges, so you won’t get any surprise bills – Microsoft will only upgrade you to the paid plans if you opt-in after your free period.
Once you sign up, you’ll see a prompt to go to the portal.
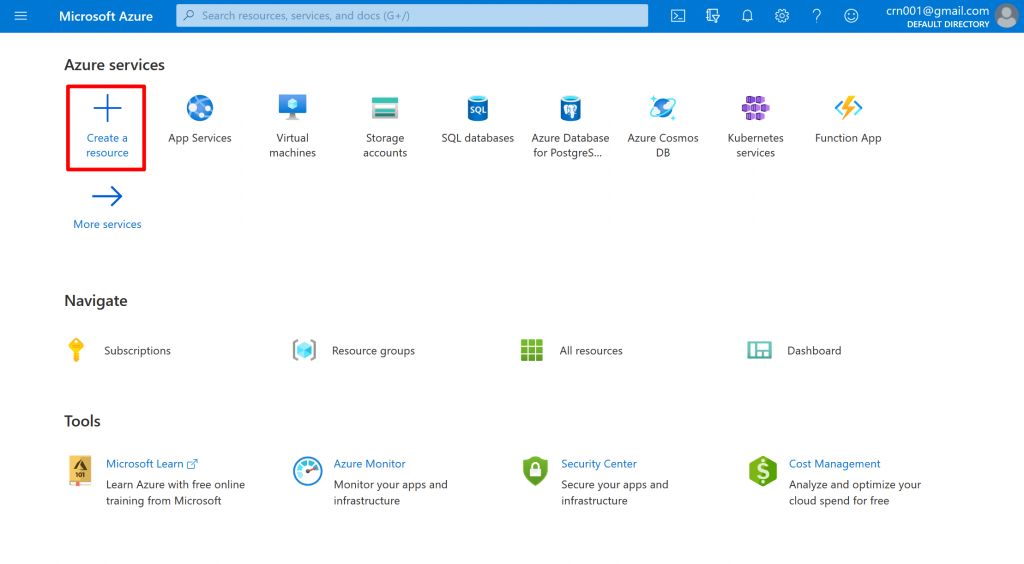
2. Create a New Resource
In the main dashboard, click on the + Create a resource button:
Then, search the marketplace for “WordPress”.
You’ll then see a bunch of different results. Each result is a different setup/server configuration for running WordPress.
For example, if you wanted to use Plesk for server management, you could choose one of the Plesk WordPress options. Or, if you want to use WordPress multisite, you could choose the WordPress multisite resource.
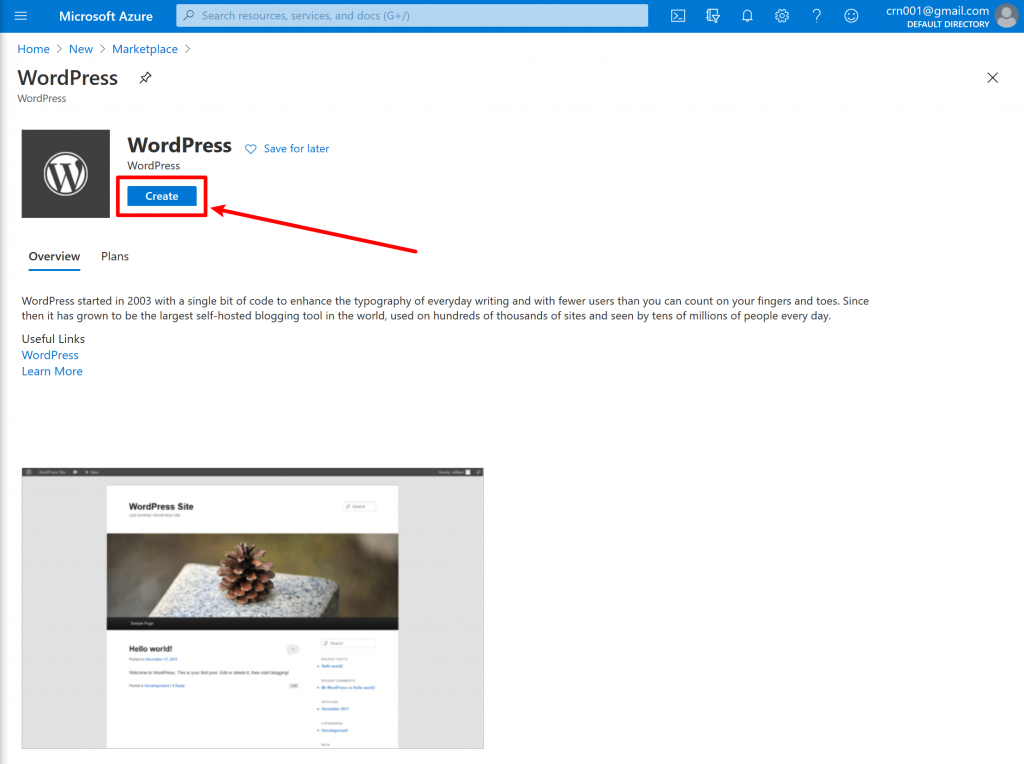
For this tutorial, I’m going to choose the basic WordPress resource that comes straight from WordPress – however, the same basic steps will apply even if you choose a different resource:

Once you select the resource, you’ll see more details about it. Click Create to proceed:
3. Configure Your Resource
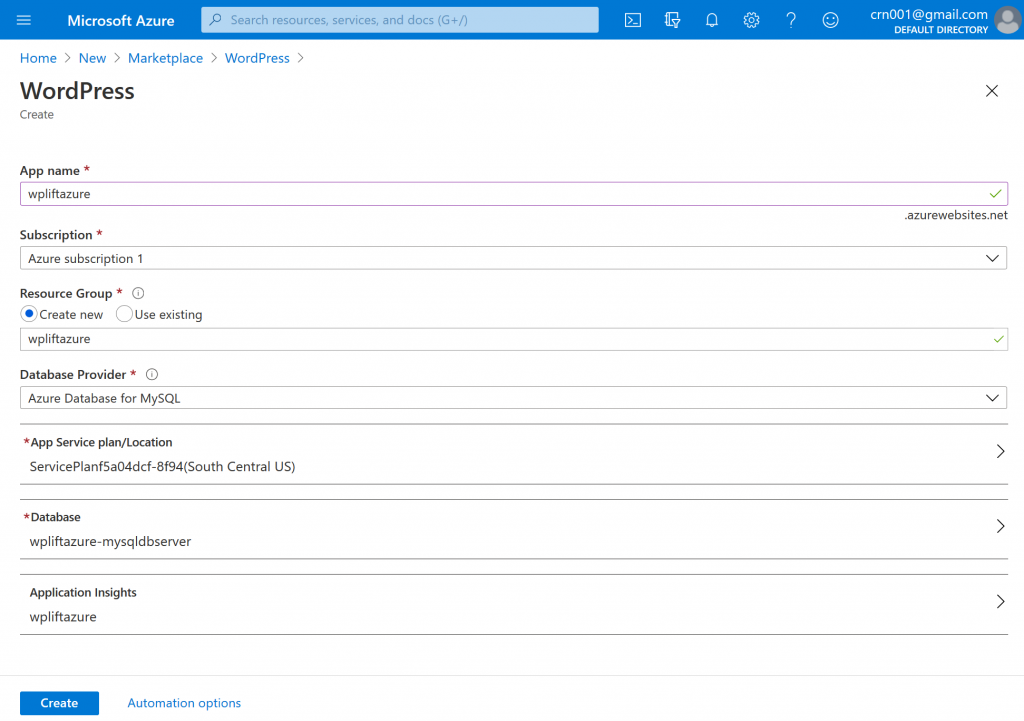
Now, you’ll see several options to configure your resource:
- App name – enter an internal name to help you remember this WordPress install.
- Subscription – leave this as the default.
- Resource Group – this will pre-fill based on your App name.
- Database Provider – leave this as the default – Azure Database for MySQL.
- App Service plan/Location – click to choose the data center that’s closest to your WordPress site’s target audience.
- Database – click to enter database credentials. Make sure that you remember these as you’ll need them if you ever want to access your database directly.
- Application Insights – leave this as the default.
Once you’ve filled everything out, click Create at the bottom:
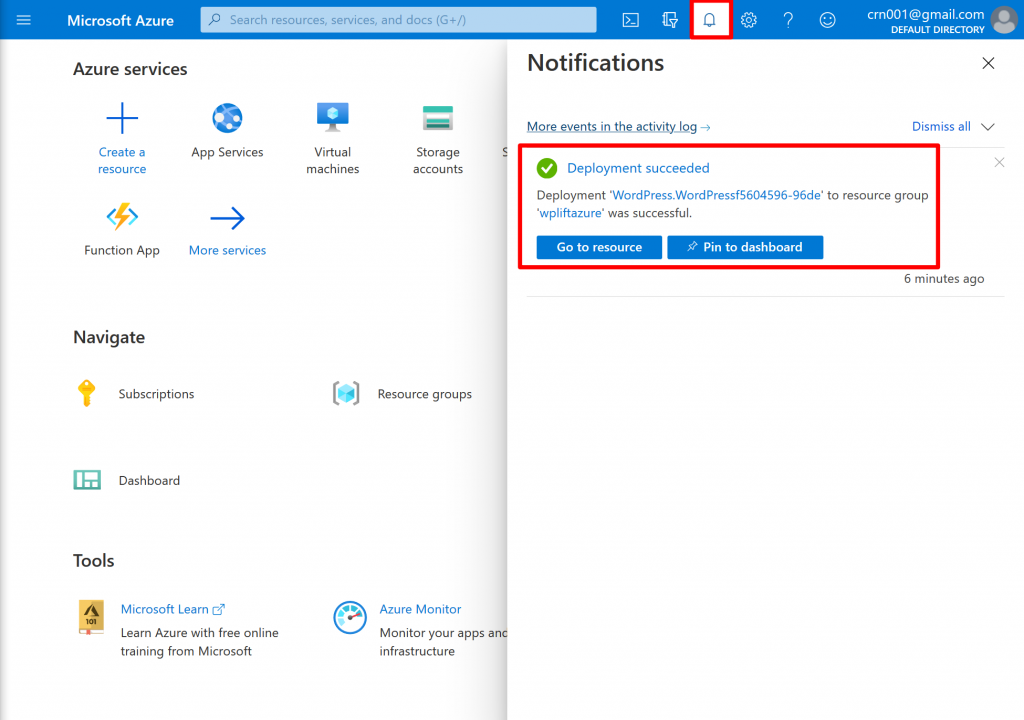
Now, Microsoft will start creating and deploying your resource. You might need to wait a few minutes while Microsoft works. Go grab a cup of coffee or something!
You can click on the notification bell icon to view the process. Once it’s finished, you should see Deployment succeeded.
Then, click the Go to resource button to access its settings:
Or, you can always search for your resource by name using the search box at the top of the Azure dashboard.
4. Run the WordPress Install Wizard
In the Azure dashboard for your resource, you’ll see the temporary URL for your WordPress site:
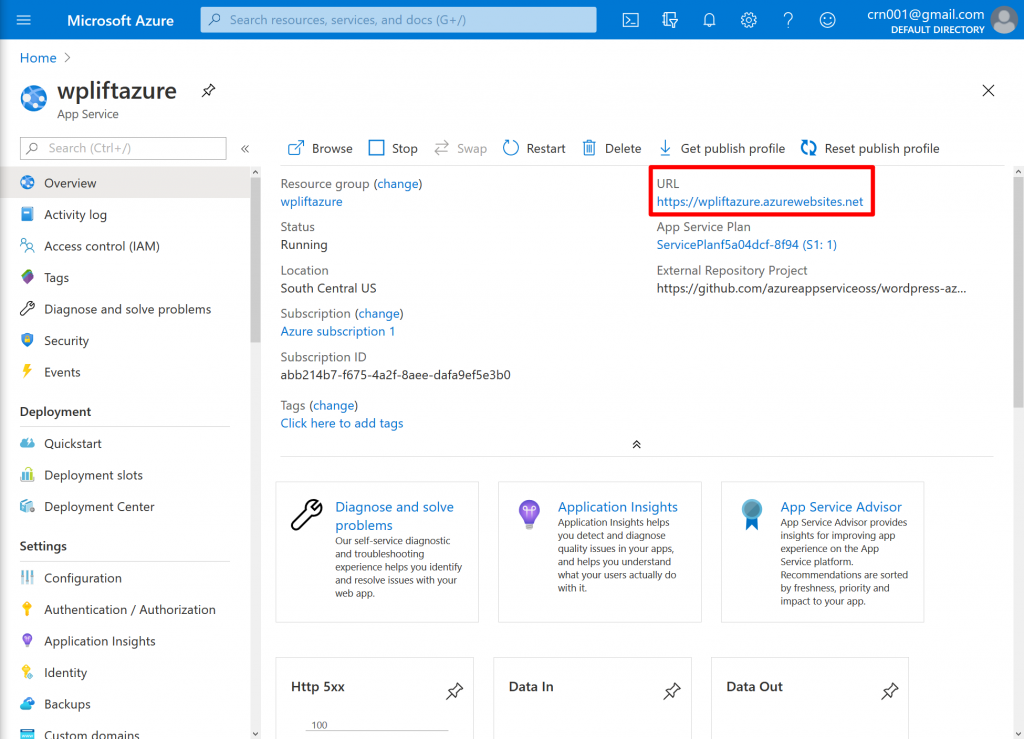
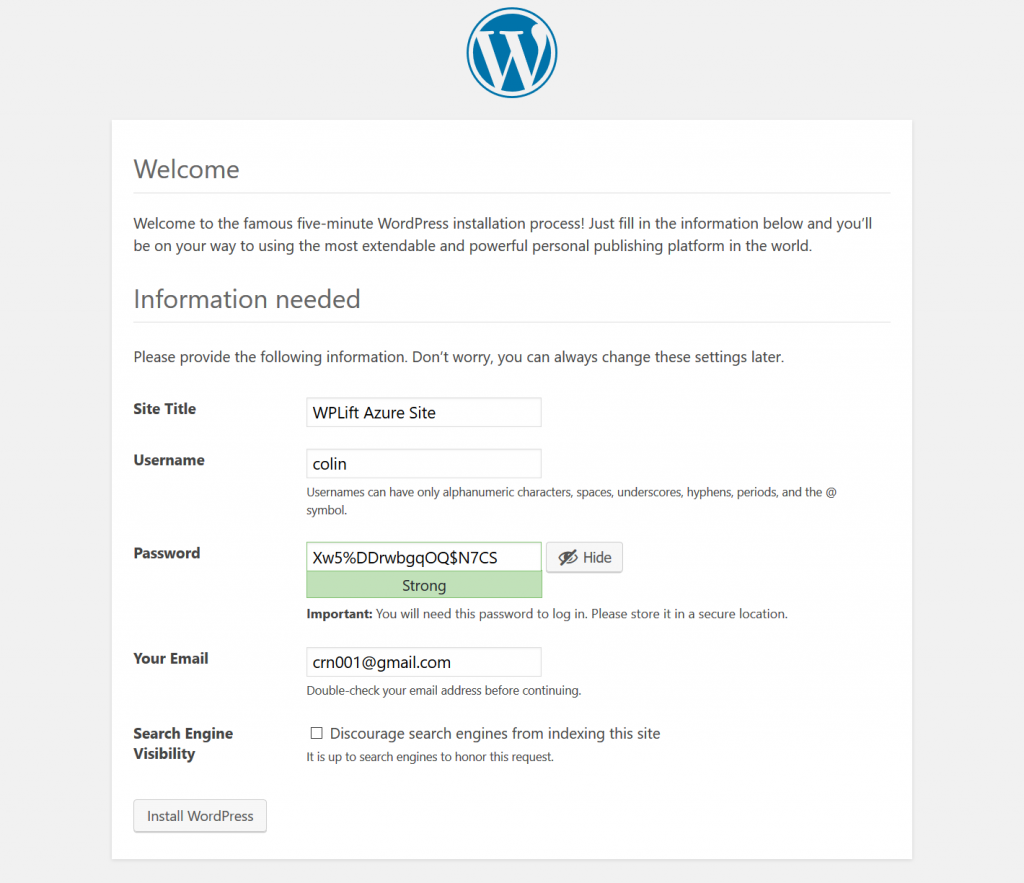
Click that URL link to open the regular WordPress install wizard.
You’ll need to enter your WordPress username and password, among other credentials:
From there, you can log in to your WordPress site just like you normally would:
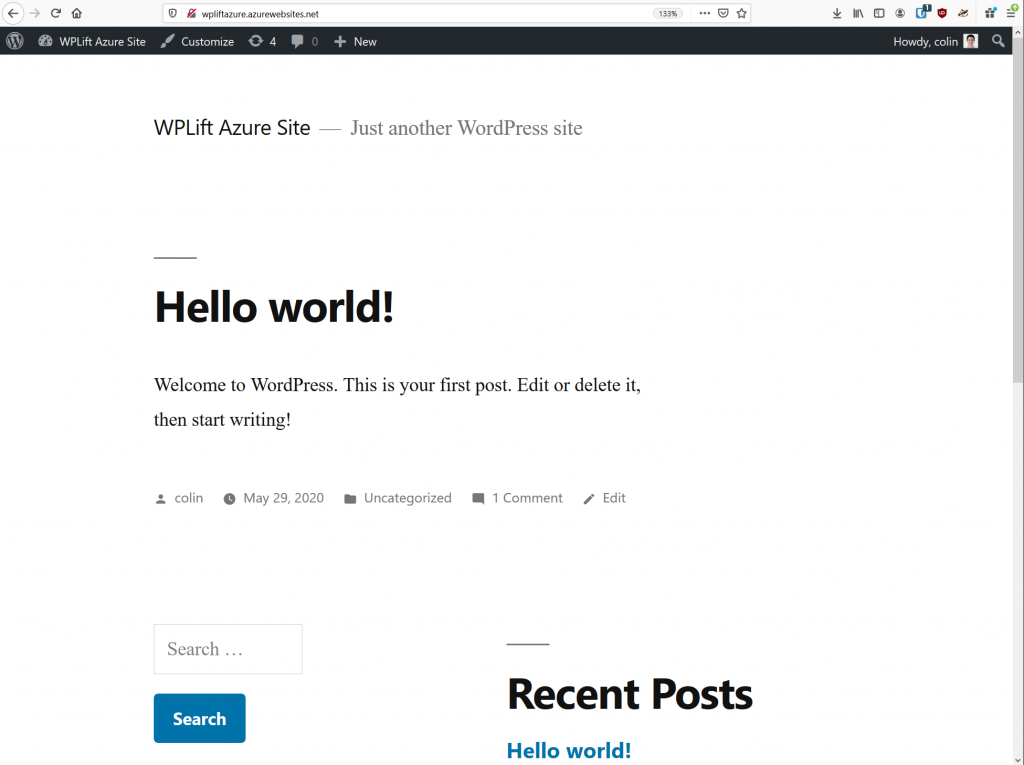
And that’s it – congratulations! You just successfully installed your own WordPress site on Microsoft Azure.
5. Point Your Domain Name to Your Site
For a real website, you probably don’t want to use the free Azure subdomain that your app has after the initial setup.
If you want to use your own custom domain name instead, you can do it from the Custom domains tab of your WordPress site’s dashboard in Azure:
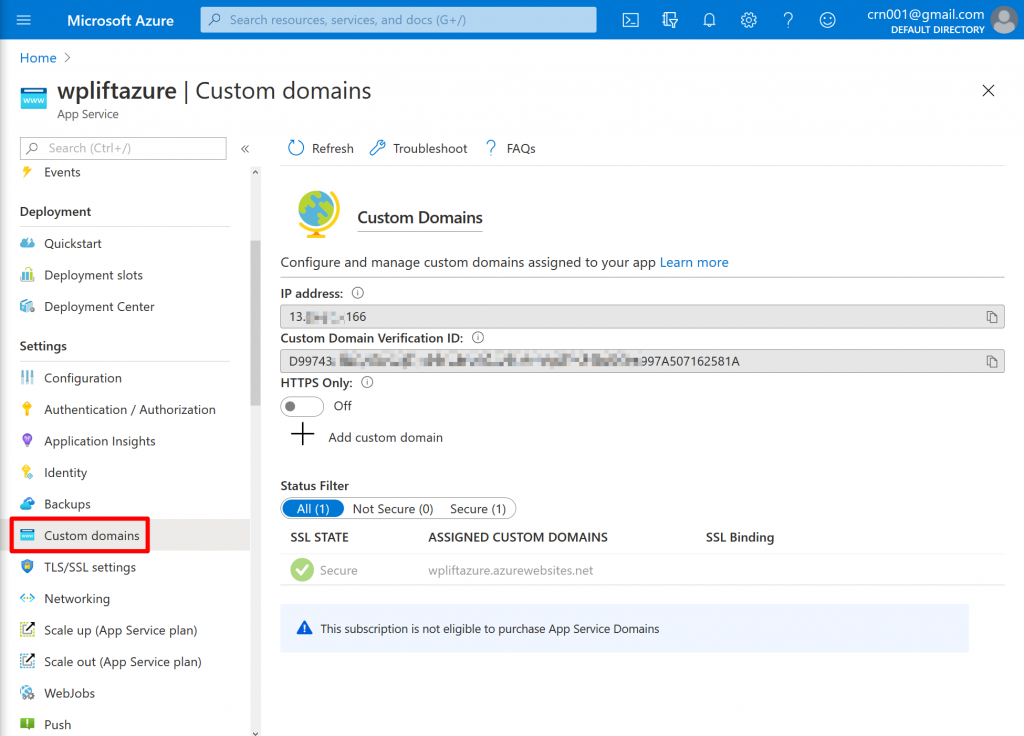
The process is kind of involved, though. You can follow this help article to learn everything that you need to do to map your custom domain name to your Microsoft Azure WordPress website.
I believe that you need to upgrade to a paying account to use a custom domain, however. So if you want to host your site for free, you’ll need to stick with the Azure subdomain.
Other Options for Hosting WordPress in the Cloud
As I mentioned earlier, Microsoft Azure is far from the only option for hosting WordPress sites in the cloud.
The easiest way that I’ve found to host WordPress in the cloud is by using a dedicated WordPress server control panel. These control panels not only handle setting everything up, but they’ll also handle routine server functions, which is important (especially if you’re not a developer).
We’ve written about two such panels with tutorials for SpinupWP (our tutorial) and GridPane (our tutorial). There are also plenty of other services such as RunCloud and ServerPilot.
I think these options are more accessible than trying to host WordPress directly with Microsoft Azure.
However, if you are set on Microsoft Azure, the initial setup process for WordPress is quite simple and smooth, as we’ve shown you in this article.
Do you still have any questions about how to install WordPress on Microsoft Azure? Ask away in the comments and we’ll do our best to help!


