While most site URLs are readable and easy to type, there’s no accounting for human error. Even the best of us sometimes mistype a URL, and end up at a location on the web we’re not expecting. A WordPress 404 page helps users understand that they’ve made a mistake. Though, it can also help keep lost users on your site and get them to the page they need.
We’ll explain more about what a 404 is and does in a later section. In short, it’s a page that displays an error code, but lots of sites realize that it is also a good way to present more information to users. As such, you’ll find that these pages can be unique and helpful in their own right.
Over the next few sections, we’re going to show you how to build a WordPress 404 page. It will include some examples from around the web, what it should contain, and much more.
What a 404 Page Is (And Does)
To start, let’s discuss what a WordPress 404 page is. For the unaware, 404 is one of many ‘HTTPS response status codes’. There are different groups of codes based on the information they tell you, and we’ve covered lots on the blog in the past. For example, the 500 range of numbers returns server errors:
The 400 range covers client error responses – times when the browser-side commits an error. For example, the 413 Request Entity Too Large error, the 429 Too Many Requests error, and (of course), the 404 error.
In layman’s terms, if you encounter a 404 error, a page doesn’t exist at the URL you’re navigating to. It’s a common error because of simple mistyping. In fact, lots of sites recognize this. While most errors don’t have dedicated pages, a 404 error will do. This lets you keep a user on site, and redirect them back to your site proper.
In the next section, we’ll take a look at how other sites show a 404 error to a user, for your own inspiration.
Examples of 404 Pages From Around the Web
We can start with the 404 page for WPKube. It offers a functional layout, with a quick message to say that the page doesn’t exist:
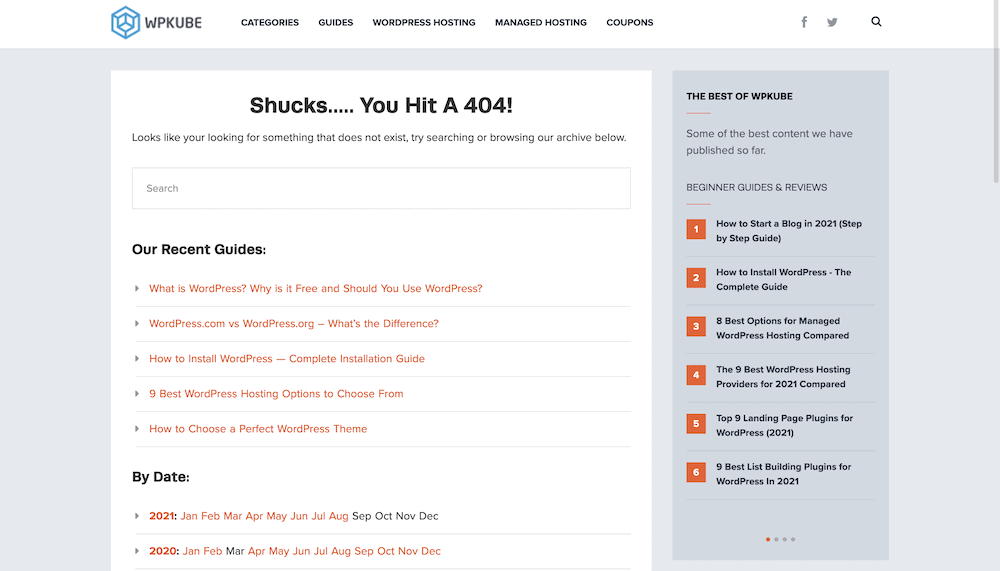
There’s a search box to help the user find the right post or page, and a collection of other articles arranged by date and category. This is essentially all you need to get users back to where they came from. Some sites go the extra mile through.
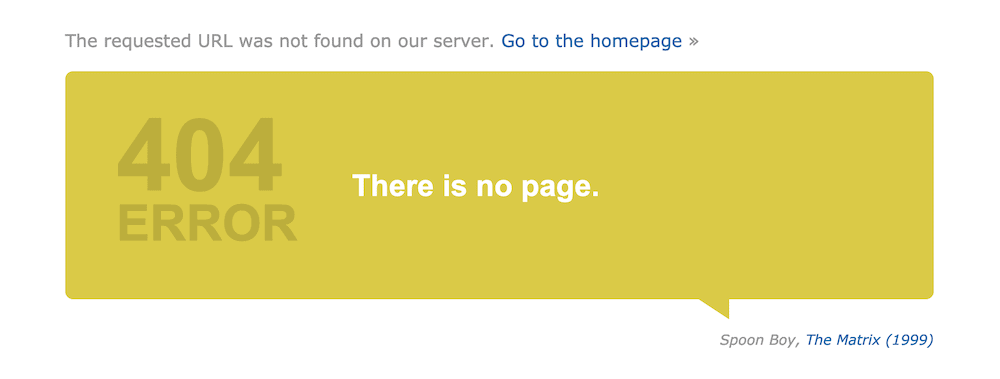
For example, the Internet Movie Database (IMDB) uses film quotes to help ascertain the problem, along with a link back to the home page:
This helps keep the page on-brand. The Elementor 404 page also offers some on-brand content. This time, in the form of a link to a relevant article:

We like this approach, because it gives you the guidance to build the page you’re looking at. This not only provides value. It also offers proof of what Elementor can do.
In our research, there were very few websites that carried out a full redirect to the home page when faced with a 404 error. There’s a good reason for this, and we’ll cover it next.
Why You’d Want to Build a Custom WordPress 404 Page
By now, you’ll understand that a WordPress 404 page can be a valuable asset. To give you some specifics, here’s why you’d want to put one together:
- It’s a great, user-focused way to help those who navigate to an unfamiliar page.
- You can keep your bounce rate low, which will help your Search Engine Optimization (SEO).
- Speaking of which, if you design the 404 page in the right way, you can also improve SEO to a certain extent.
- You can continue your branding efforts even when a user is somewhere they don’t expect on your site.
On the whole, a WordPress 404 page lets you offer a ‘human’ element to your website, in a situation where you might expect to lose a user. As such, don’t underestimate the psychological value of this. It’s could be a difference between a bounced user, and developing a potential customer.
How to Build a WordPress 404 Page
In the next few sections, we’re going to show you how to build a WordPress 404 page. In our opinion, there are three steps you need to take:
- Figure out how you’ll build the page, whether that’s using code, the existing WordPress template, a plugin, or a page builder.
- Add in the elements you’d like on your page, and tweak the branding and design until you’re happy with the results.
- Check out whether your site carries out redirections to your WordPress 404 page.
Your first task, though, is to make a decision. Let’s look at this in more detail now.
1. Decide How You’ll Build the 404 Page
As you’d expect, there are different ways to create your WordPress 404 page. Your approach will be based on your goals and the skills you have. Here’s a quick summary of the different methods you could use:
- You can take a blank PHP file and code up a WordPress 404 page from scratch.
- Each WordPress installation has a functional 404 page template. You could take this and develop your own page on top of the existing code.
- Most page builders have templates to help you create a 404 page for your site. If you use a page builder such as GeneratePress, Elementor, Beaver Builder, or others, this approach makes a lot of sense.
- There are also plugins available to help you build 404 pages fast.
For this article, we’re going to focus on the page builder and plugin approaches. This is because they will be the most accessible methods for the majority of users. Also, if you’re at a stage where you want to code up a 404 page, you’ll already have lots of the knowledge you need.
Using a Plugin to Create a WordPress 404 Page
Before we get onto the page builder approach – the primary focus for this article – it’s worth noting that plugin options exist too. Though, there’s really only one solution to consider here: 404page:

In fact, this plugin doesn’t give you the tools to create the page layout, more that it lets you set the page you develop as your 404 page. Lots of other plugins will redirect 404 errors to another page. This is not optimal for SEO. The plugin also doesn’t create any additional server requests, which is fantastic if site performance is important to you.
The process with the plugin is to create your 404 using the standard WordPress Block Editor. This will give you all of the tools you’ll need to create your page, while keeping the layout ‘homogenized’ with the rest of your site. We’ll have more details about what to include in a later section.
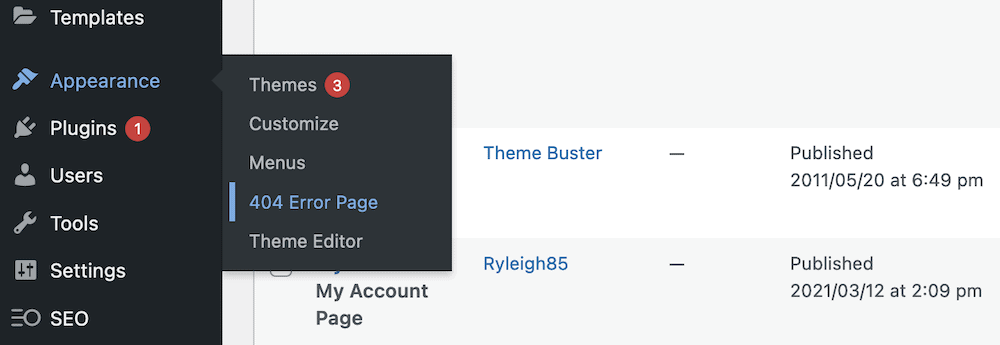
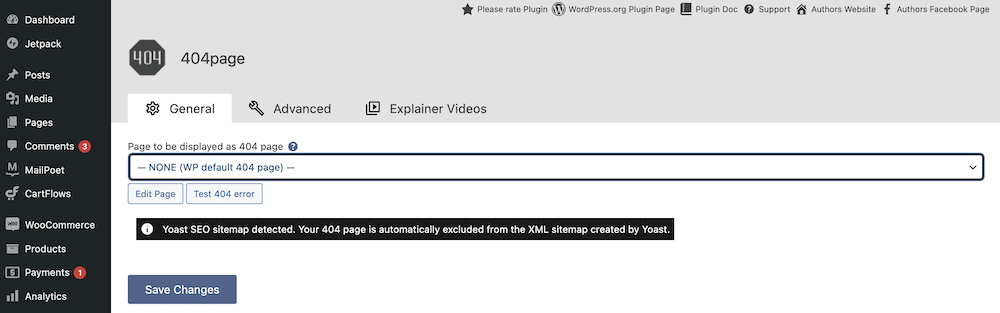
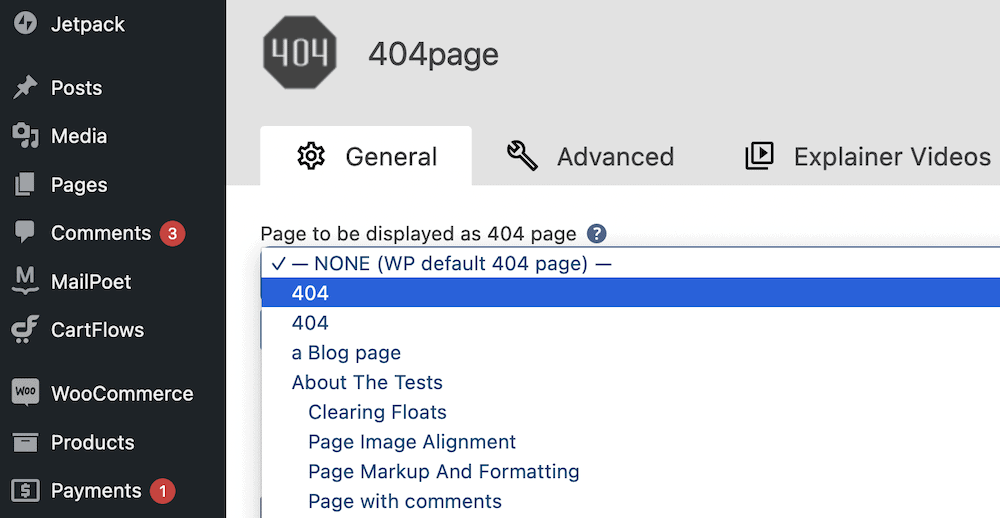
Once you’ve finished with your design, you’ll head to the Appearance > 404 Error Page screen:
This will let you choose the right 404 page from the drop-down menu, but also includes some other options too:
For example, there’s a dedicated Advanced tab that includes some helpful (and powerful) options for your 404 page:

You can choose from various options to make sure your 404 error works in the right way. Search engines use the feedback from the server to decide how to index pages. You may want to use the 410 Gone error code in some cases, and with 404page, you get this option.
Using a Page Builder to Create a WordPress 404 Page
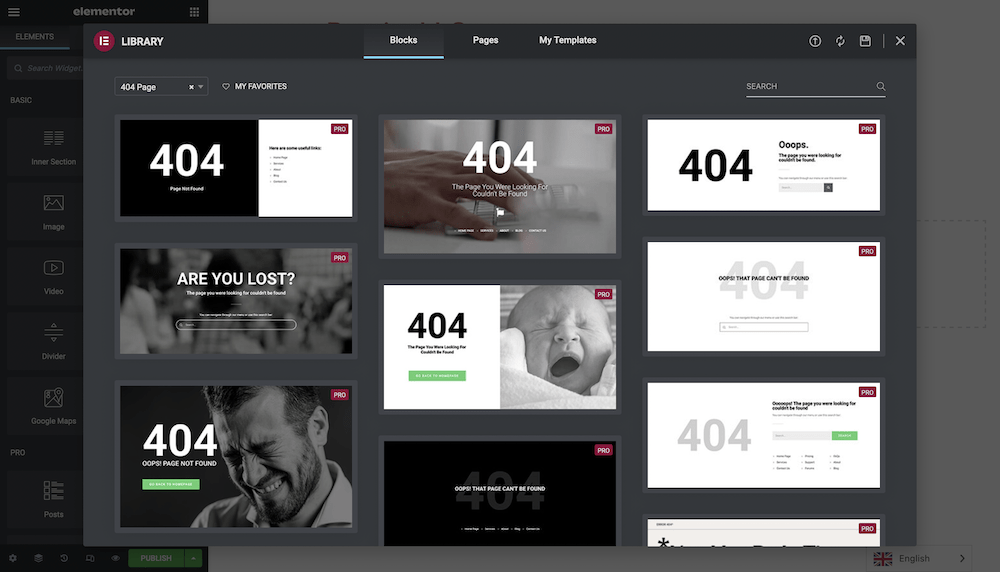
Most site owners will use a page builder or a framework of some description, and as such, the majority of major solutions on the market include templates or Block collections for your 404 page:
Adding these should be straightforward, at least as simple as it is to add any other elements to your WordPress 404 page. In fact, there’s little we can say that’s new in this regard. The process for each solution will be as much a part of the overall experience.
There’s much more to say on the elements your page includes, and we’ll look at that next.
2. Add the Essential Elements for Your Page
If you take a look at any 404 page – and we encourage you to do this for research and inspiration – you’ll notice a few similarities across the board.
At its core, a WordPress 404 page includes the following elements:
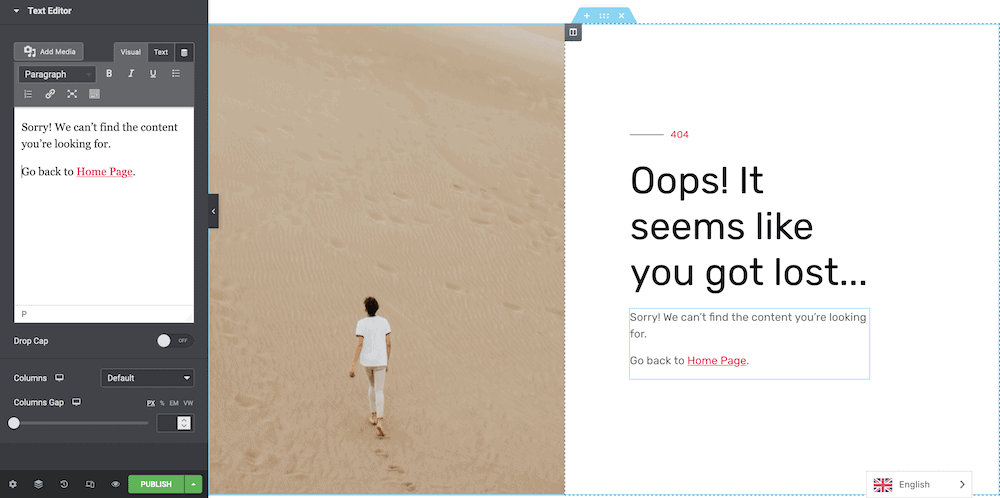
- A clear and direct message to the user that a 404 error has occurred.
- A way to get back to a page on your site that exists, often the home page.
In our example, we have both of these elements, along with some initial branding courtesy of an Elementor Block pattern:
Though, if you look at other 404 page examples, they often include ways to find the correct page on site. A search box is the most common, and we can add this using our page builder too:
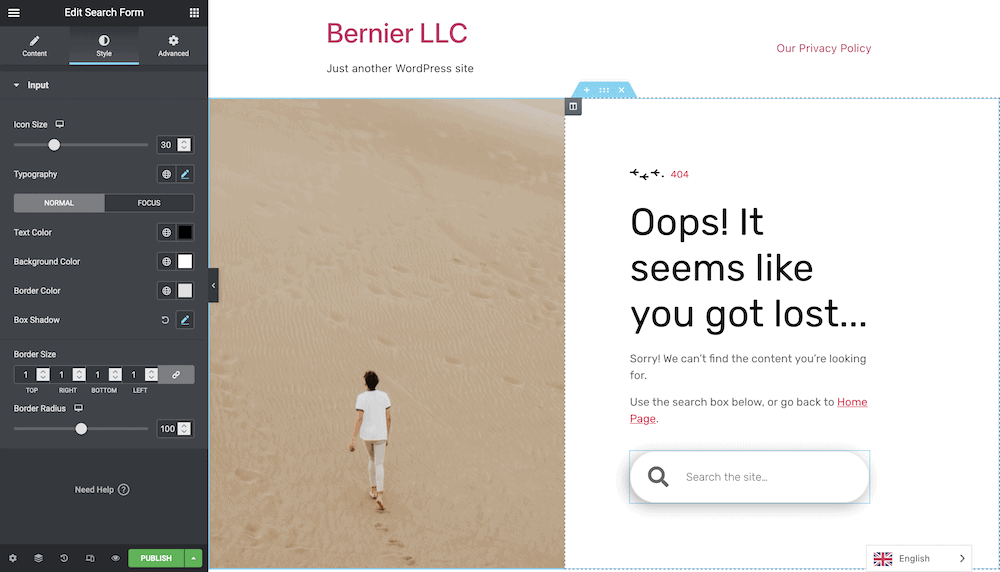
We’ve had to rework some of the text to mention the search box, and while we were here, we’ve added some styling. There’s a custom divider at the top to act as a ‘boundary’ for the rest of the text, and the search box offers a ’rounder’ and ‘3D’ look.
We’ve achieved this using Elementor’s styling options. Border Radius covers the shape of the search area, and Box Shadow helps to give the element some depth. We’ve done all of this without a single character of code, yet the functionality and value of the 404 page is clear to see.
From here, you can add almost any other element you think will be useful. Lots of sites use lists of posts, other will add a contact form, and the world is your oyster here. Our advice would be to keep users on site. Because of this, we’d forgo social media links, and stick to what your site contains. This will also serve as a pseudo-archive page, which will help your SEO.
3. Make Sure Your Site Redirects to Your 404 Page
The final step is to make sure your site uses your new page instead of the default template. If you’re using a plugin such as 404page, this is a snap. Navigate to Appearance > 404 Error Page, and locate the correct page from the drop-down:
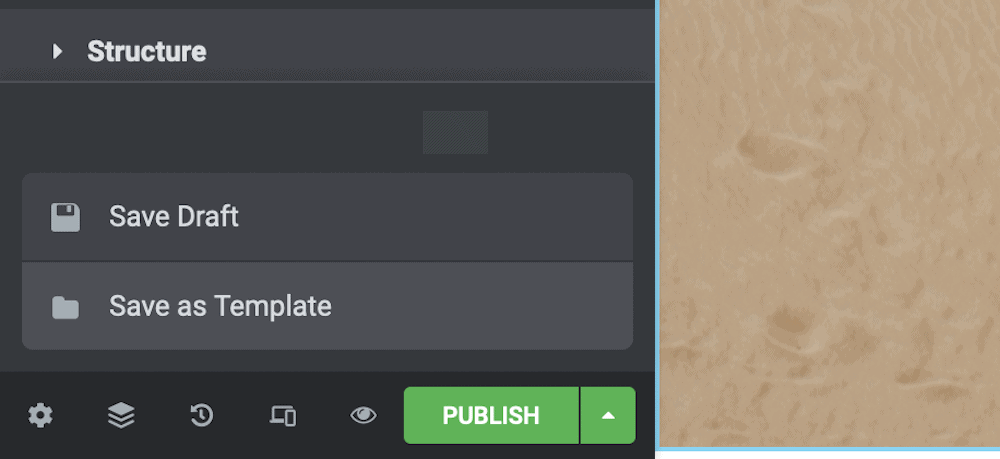
Once you save your changes, the job is complete. For Elementor, you’ll need to set your page as a template. If you haven’t done this, expand the green Publish button using the arrow, and select Save as Template:
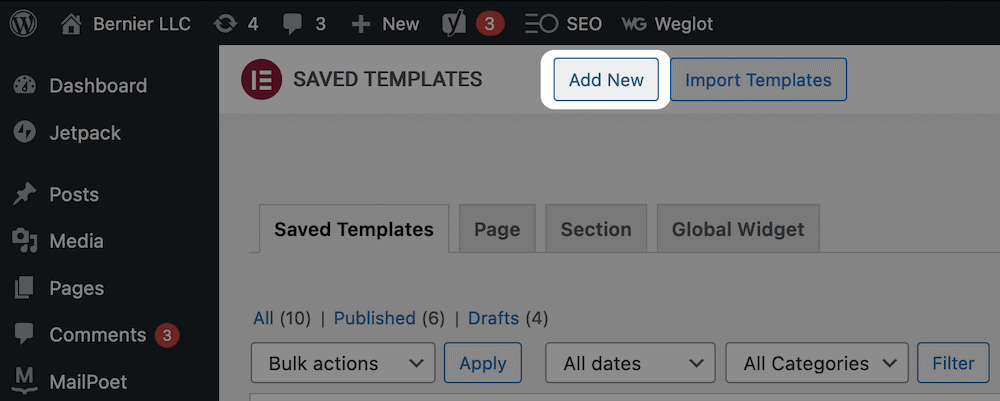
Once you give your template a name, you’re good to go. From here, head back to the WordPress dashboard and to the Templates > Saved Templates page:

The workaround here is a touch fiddly, but you should first create a new template using the Add New button:
On the next screen, give your template a name and choose the Error 404 type:

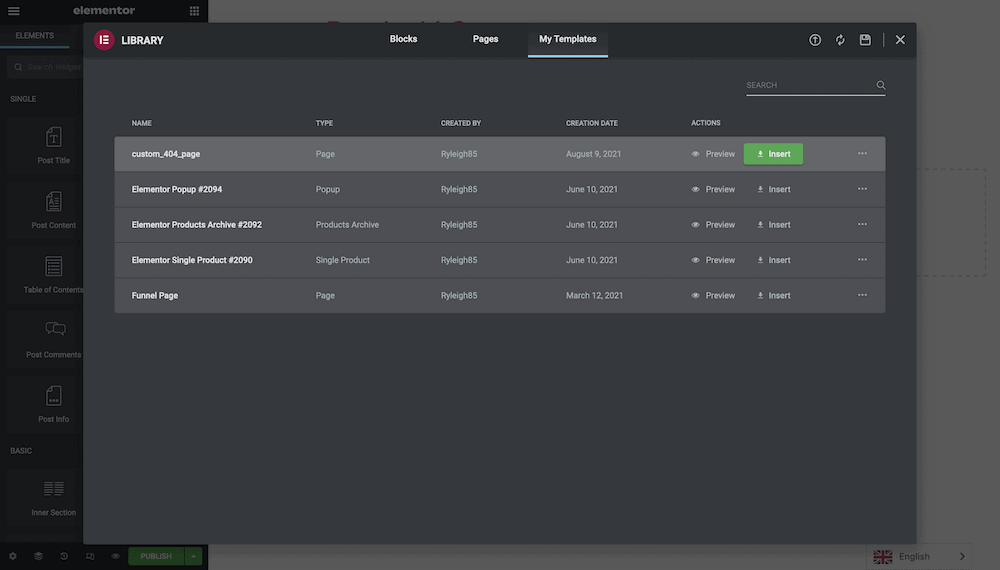
You’ll come to a pop-up, where you’ll insert your WordPress 404 page template:
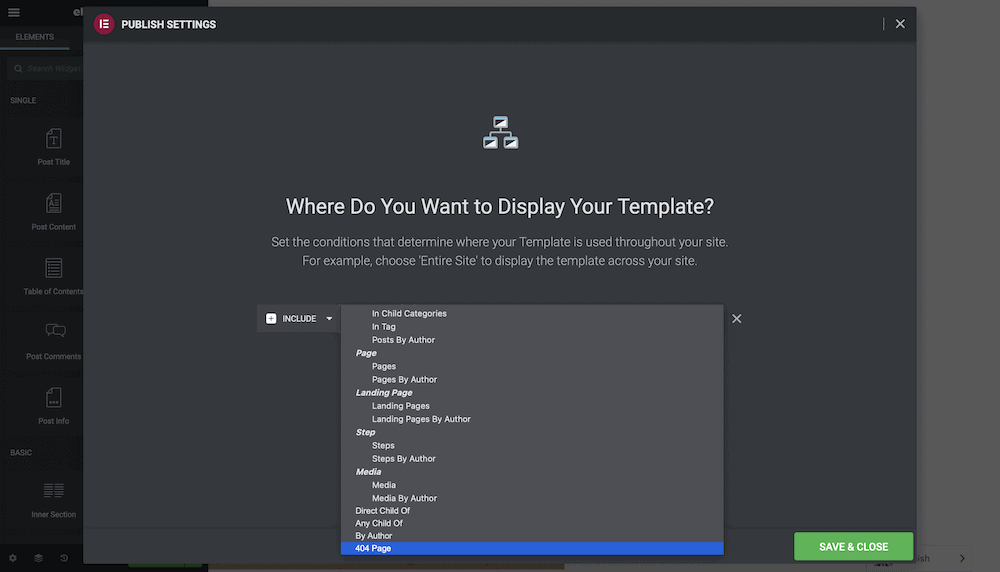
This will get you back to the Elementor edit screen, and when you click Publish, you’ll come to a dialog screen asking you to choose a ‘condition’:
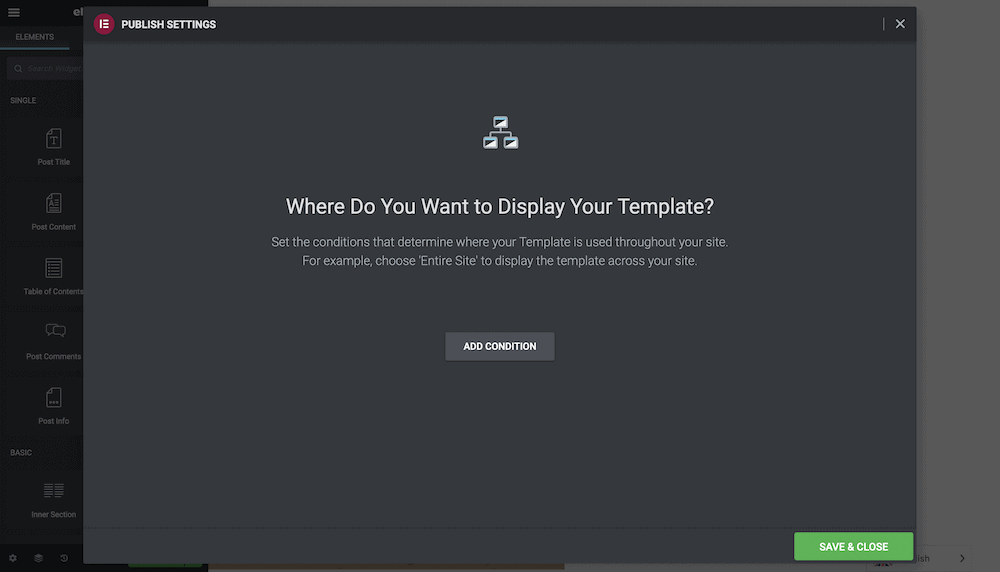
This gives you a way to specify when and where the 404 page will display. We can keep things simple and choose Include and 404 Page:
Once you save your changes, your site will show your custom WordPress 404 page.
In Summary
If you need directions in a large unfamiliar place, you’ll often seek out a map or a signpost for a clue as to where you are. A WordPress 404 page is a near-equivalent to a “You Are Here!” marker. It’s a way to tell a user that the URL they typed doesn’t exist. Lots of sites don’t stop at delivering an error though. These pages become a part of a site’s brand, and help users get back to a more familiar place on your site.
Throughout this post, we’ve looked at how to build a WordPress 404 page. It’s not too difficult regardless of your approach. Most themes will come with a functional 404 page template, although if you couple this with a dedicated page builder such as GeneratePress, Elementor, or Beaver Builder, you can craft fully-functional 404 pages that offer value to your website.
Do you want to build a WordPress 404 page, and will this article help you? Share your thoughts, questions, and ideas in the comments section below!