If you have a business with one or more physical locations, adding a WordPress store locator makes it easy for your site’s visitors to find all those locations and see details about each. A store locator WordPress plugin can help you create such a map with minimal fuss.

In this post, we’re going to show you exactly how to add a store locator to WordPress using our recommended solution – Mapify.
Then, we’ll also share some other store locator WordPress plugins that you can consider based on your needs.
Let’s dig in, starting with the tutorial…
How to Set Up a Store Locator WordPress Plugin
While you’ll find several different store locator WordPress plugins, our recommended solution is Mapify, which comes in both a free and a premium version.
The free version lets you add up to 10 locations to your map, complete with custom map markers, image and video galleries, tooltips, full store details, etc.
Mapify does not use Google Maps because of Google’s changes to the program (wherein it’s no longer free – at least not legally). Instead, it uses a free, open-source alternative to help you create your store locator for free (and without breaking Google’s terms of service).
We’ll use the free version for this tutorial to make this guide accessible to people of all budgets.
If you still need some extra functionality after following this tutorial, you can consider upgrading to the premium version, MapifyPro, which lets you add unlimited locations, as well as a bunch of additional features.
To get started, install and activate the free version at the WordPress site where you want to add your store locator.
It’s pretty easy to use, but let’s run through the steps to create your store locator…
1. Create a New Map
Before you can add your store locations, you need to have a map.
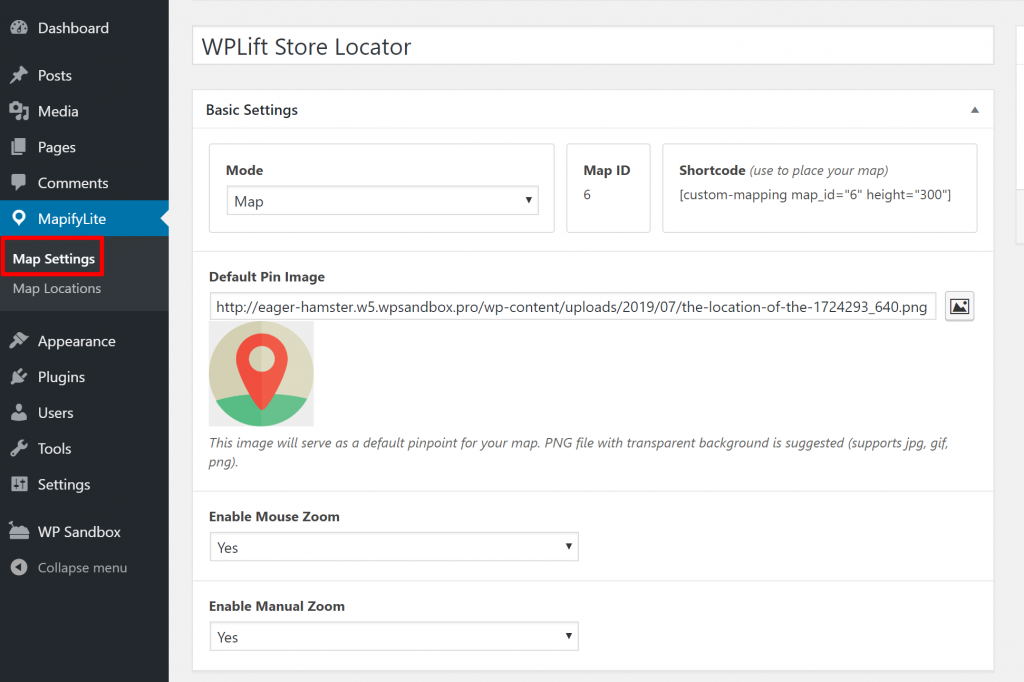
To create and manage your map, go to MapifyLite → Map Settings.
The free version only lets you have one map, so you can jump right into customizing it. The Pro version lets you create unlimited maps.
At the top, you can choose some important basics:
- Your canvas. You can either use a traditional map or upload your own image.
- The default pin image. This is what will represent each location (by default).
- Zoom options. You may or may not want your visitors to be able to change the map’s zoom level.
Below that, you can configure whether or not you want to add a subtle animation to your tooltips and pinpoints.
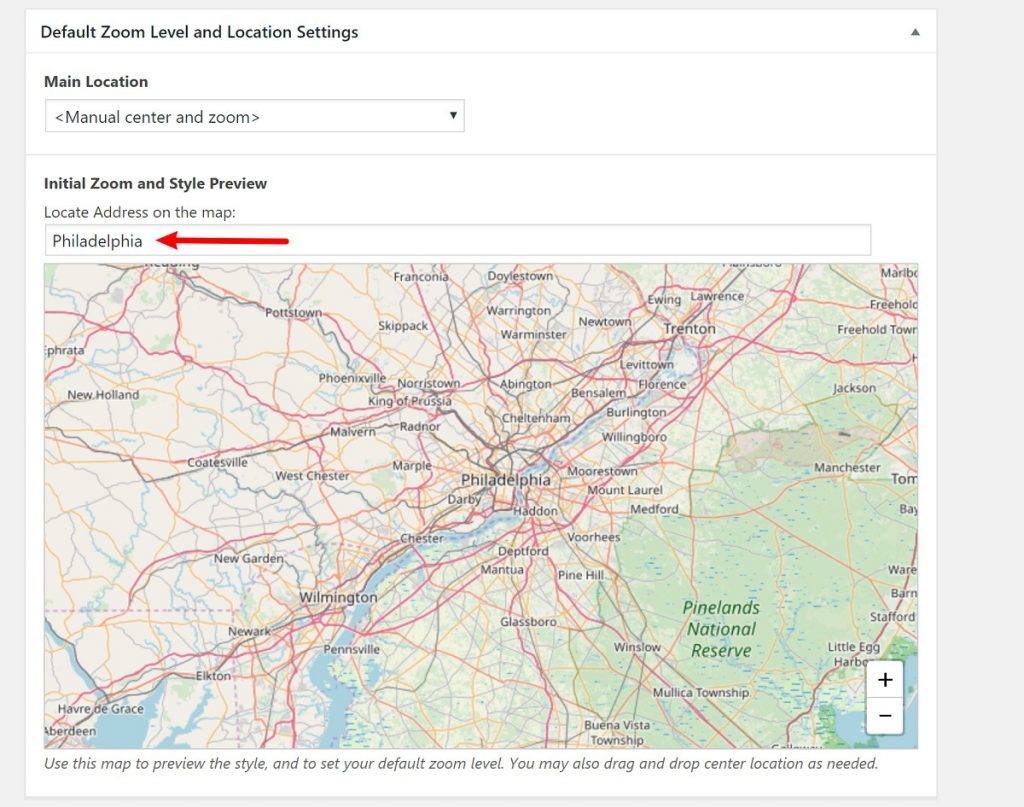
Then, at the bottom of the page, you can choose your default zoom level and location.
You’ll want to make this relevant to your stores’ locations. For example, if all of your stores are in a specific city, you’ll want to center your map on just that city to start.
However, if you have stores nationwide or around the globe, you’ll probably want to start your map zoomed out (and then let visitors zoom in as needed).
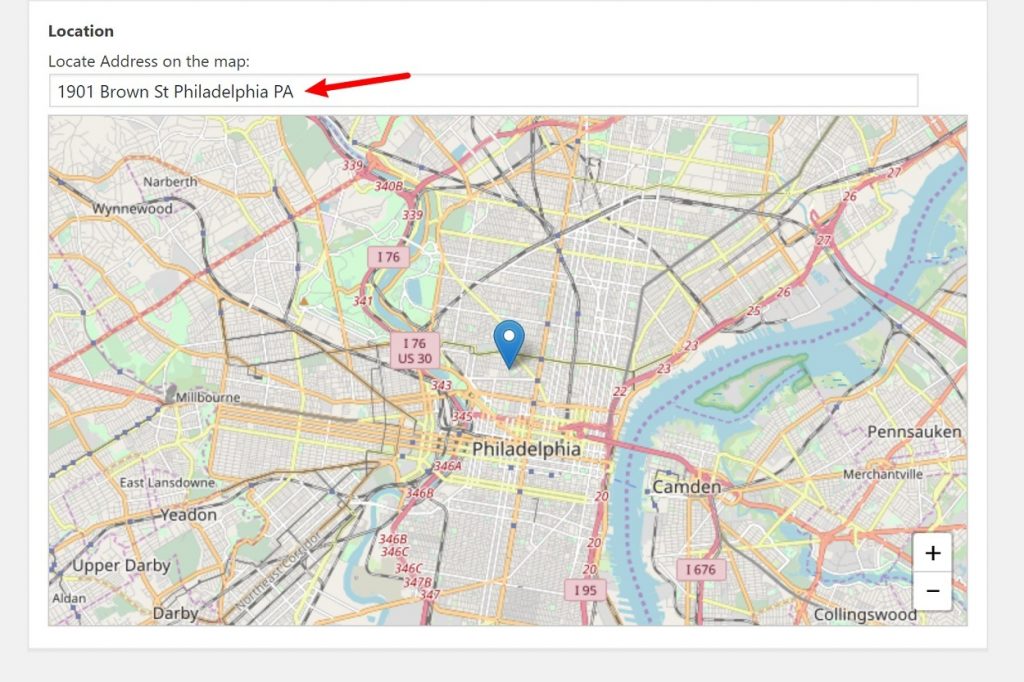
For this example, I’ll display my store’s physical locations in Philadelphia, PA, so I’ll start my zoom level there:
Once you’ve made your choices, make sure to save your changes.
2. Add Store Locations to Map
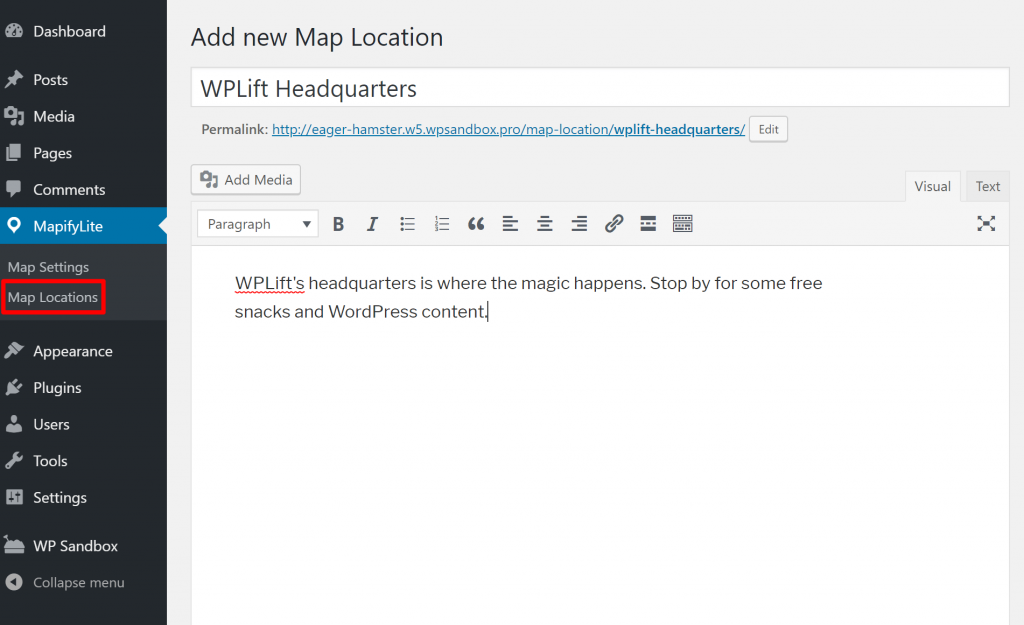
Once you’ve set up your map canvas, you can go to MapifyLite → Map Locations → Add New to add your first store location. Remember, the free version lets you add up to 10 different locations, and the Pro version lets you add unlimited locations.
At the top, enter the title and description for this location. This is the information that will appear in the popup when someone actually clicks on a map marker (I’ll show you how this works in a second):
Then, scroll down to the new MapifyLite meta box.
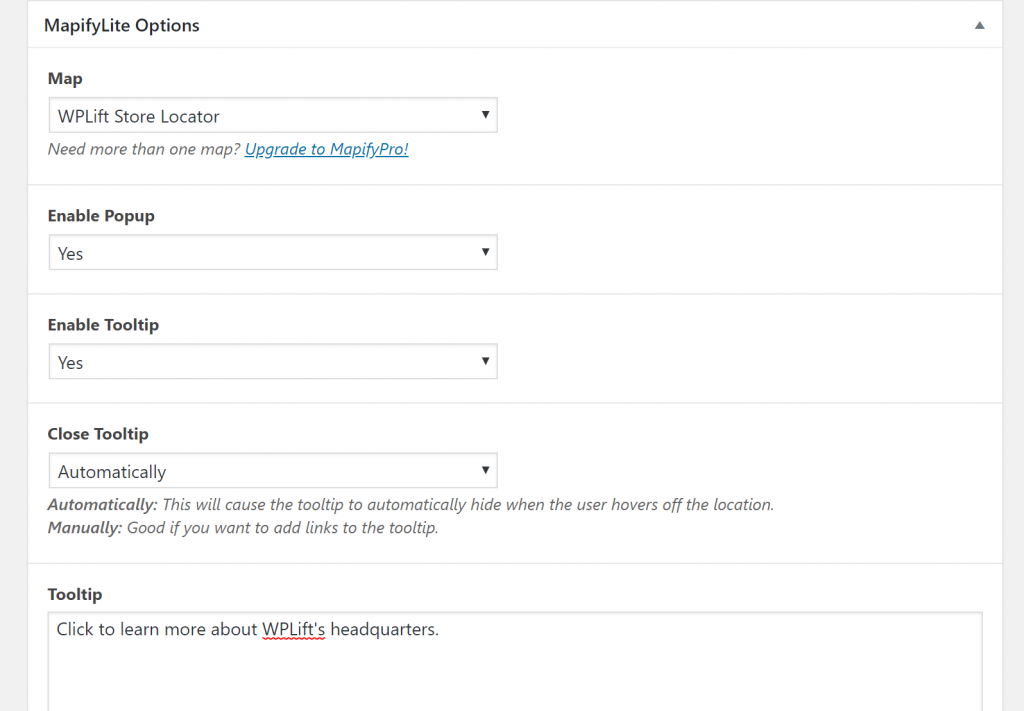
First, choose the Map that you just created. Then, you can enable two parts of your map:
- Popup – this is what appears when someone clicks on a location.
- Tooltip – this is what appears when someone hovers their mouse over a location.
You can also choose how to close the tooltip and, if you are using the tooltip, you can enter the content to display there (including basic HTML formatting if needed):
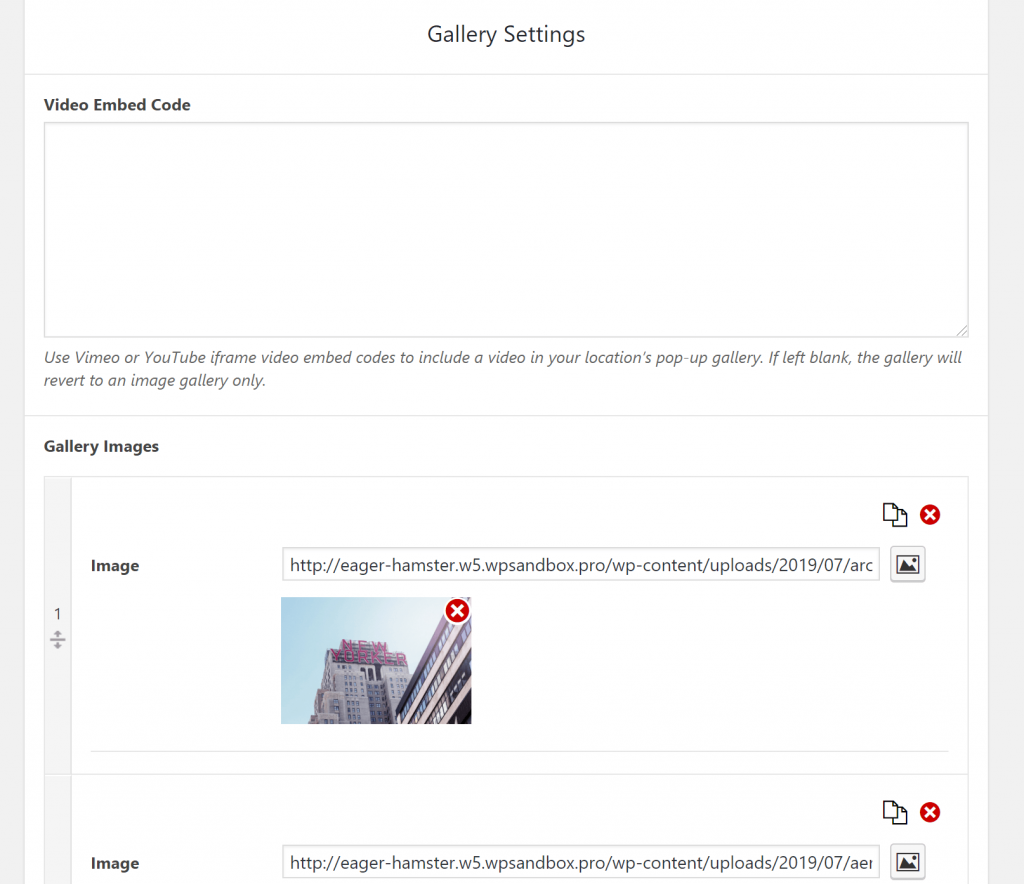
Then, scroll down a little further to the Gallery Settings. This lets you embed images and/or videos in a gallery that displays in the popup (AKA when someone clicks on a map location):
Finally, scroll down to the Location section and enter the exact address for this map marker:
Once you’ve entered all the details, Publish your location.
Then, repeat the same process for all the different locations that you want to display on your store locator map. Again, that’s up to 10 locations in the free version, or unlimited in the paid version.
3. Embed Map
Now, you’re ready to display your store locator map on the front-end of your site.
To do that, go back to the Map Settings area and copy the shortcode:

Then, add the shortcode to the page where you want your store locator to appear. You’ll probably want to adjust the map’s height to make it a little larger, too. You can do this by editing the height=”X” parameter.
Visitors will see all your locations on the map, along with tooltips if you opted to use them:

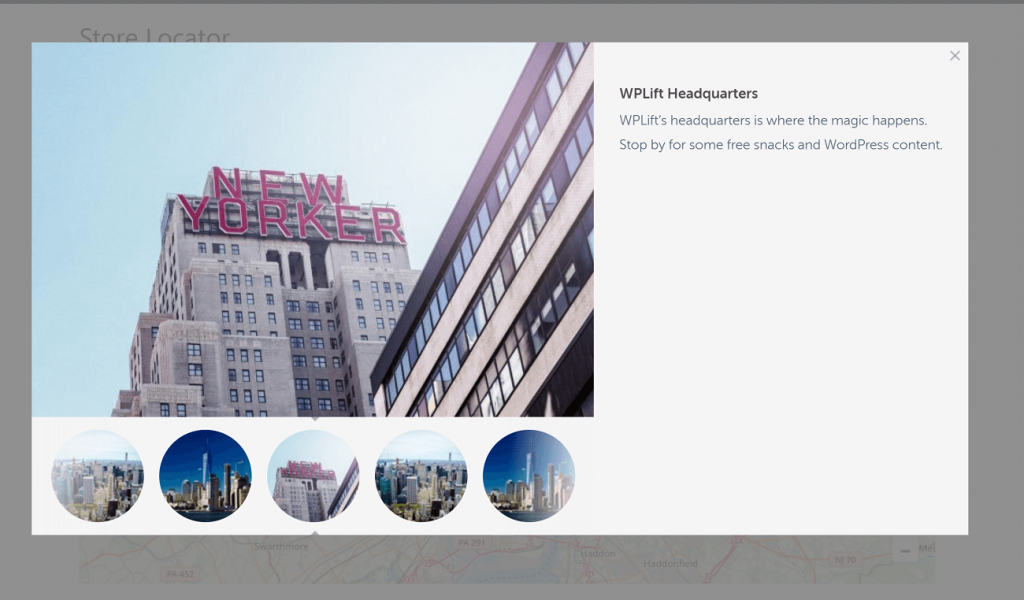
Then, if you enabled the popup feature, visitors will see a popup with more information for each location when they click on it.
You can see how this includes the title and text content, as well as the video/image gallery that Mapify lets you add:
And that’s it! That’s all you need to add a store locator to your WordPress site.
Other Good Store Locator WordPress Plugins
Mapify is our recommended store locator WordPress plugin, but you can also find some other good options at WordPress.org and/or CodeCanyon.
Here are some good alternatives to get you started if you’d prefer a different approach:
- WP Store Locator – a free core plugin with various premium add-ons.
- MapSVG – a premium WordPress mapping plugin at CodeCanyon – $46.
- Store Locator WordPress – a free core version, as well as a $25 premium version at CodeCanyon.
Create Your WordPress Store Locator Today
If you want to add a store locator to your WordPress site, a dedicated store locator WordPress plugin will be the simplest, easiest option.
To get started for free, we recommend the MapifyLite plugin, which we detailed in the tutorial above. Then, if you need more functionality, we’d recommend looking at the premium version of this plugin – MapifyPro.
Do you have any questions about how to add a store locator to your WordPress site? Ask away in the comments and we’ll do our best to help out.