If you want to improve your WordPress site’s SEO and user experience, including relevant internal links in your content is a great way to benefit your website when it comes to both human visitors and search engines.

However, finding internal links to add to your content can be difficult, which is why you’ll want to read our Internal Link Juicer review to learn how this tool can help you out.
In a nutshell, Internal Link Juicer helps you automatically insert internal links to your content in a smart way, like varying the anchor text and limiting how many internal links you use.
Overall, I think that Internal Link Juicer is a useful tool and it includes some smart features to avoid the problems that some other automatic internal link plugins have.
Keep reading for a hands-on look at how this plugin works…
Why Use Internal Links?
Using internal links helps benefit your website in a few different ways:
- SEO – most people know that getting links from other websites is beneficial, but including your own links to your most important content also helps Google rank your content.
- Engagement – internal links can draw people deeper into your website which helps with engagement metrics like bounce rate and time on site.
- User experience – internal links make it easier for human visitors to find content that they’re interested in and that is relevant to the post that they’re currently reading, which improves their experiences on your website.
Basically, internal links are a great thing to use on your site, which is why you’ll notice that most of our blog posts here at WPLift include internal links (like that link to our SEO tips post above).
But, as I mentioned above, internal links can be time-consuming to add to your content, which is where Internal Link Juicer comes into play.
Internal Link Juicer Review: The Feature List
You know the high-level details already – Internal Link Juicer helps you automatically insert internal links in your content.
Now, let’s get into how it actually does that, because that’s the most interesting thing here.
See, some of the other automatic internal link solutions out there are kind of dumb – they just use the same anchor text over and over (or same set of anchor texts, if you’re lucky), which makes it look like you’re trying to trick Google.
With Internal Link Juicer, you also get tools to avoid that pitfall while still keeping things automated.
You can:
- Set up a minimum or maximum gap in your key phrases to ensure variable anchor text (you’ll see this in action). You can even force this so that you can guarantee anchor text variety.
- Limit your internal links to specific types of content.
- Set up custom templates for your internal links.
- Set caps on the number of overall internal links or internal links to specific posts.
There are also lots of smaller features that come into play, which you’ll see as I take you through how the plugin works.
Hands-On With Internal Link Juicer
Now that you know what Internal Link Juicer does, let’s go hands-on and I’ll show you how it works.
For reference, Internal Link Juicer comes in both a free version and a premium version. I’m using the free version at WordPress.org the review, but you’ll be able to see some of the premium features in the interface.
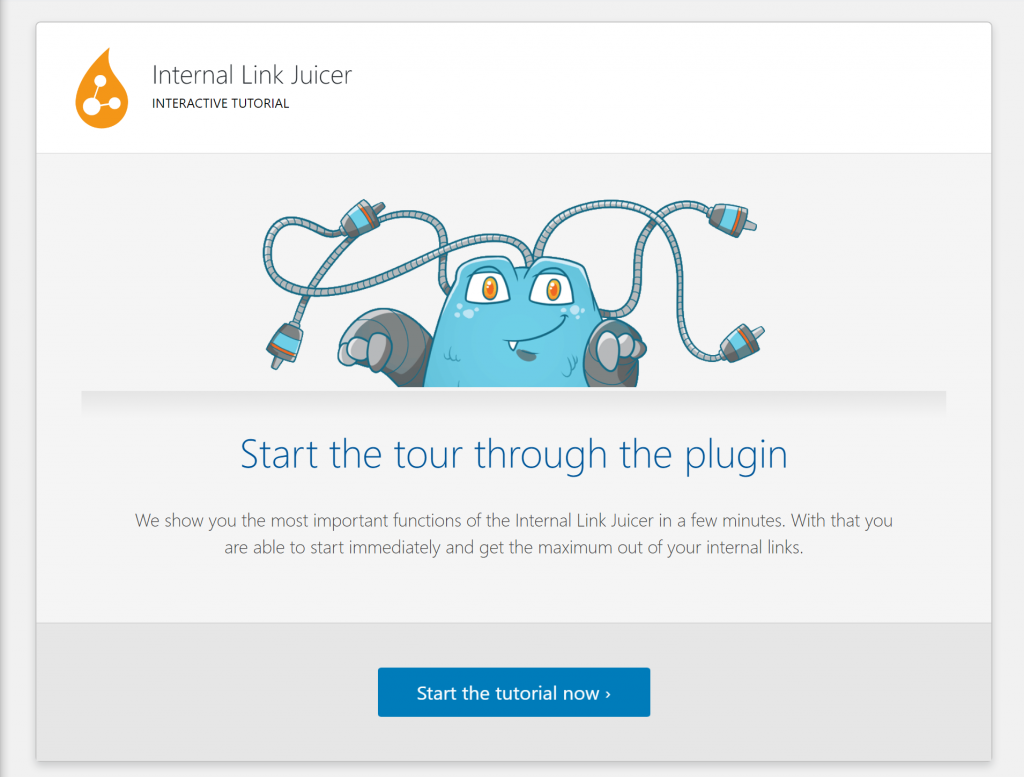
When you first launch Internal Link Juicer, it gives you an interactive tutorial to help you figure everything out, which is a nice bit of onboarding:
Associating Keywords With Posts
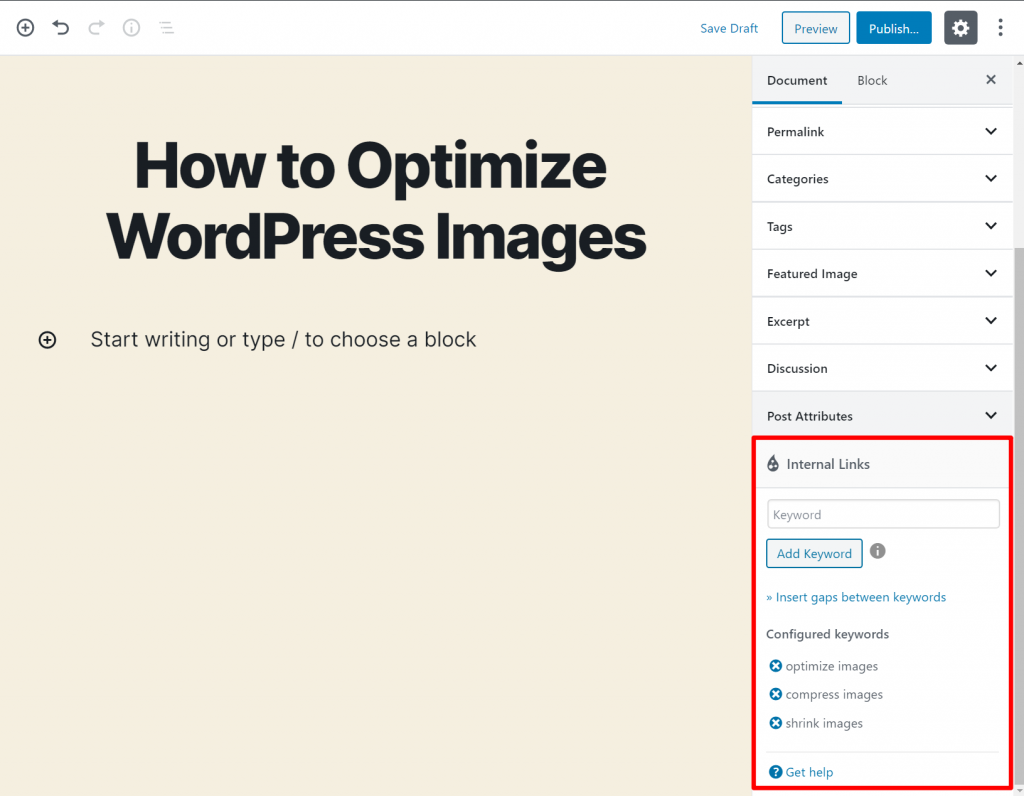
To get started, you’ll first want to associate keywords with your posts. These are the keywords that Internal Link Juicer will use to link to this post when you’re writing other posts.
For example, let’s say that you have a post on how to optimize WordPress images.
You’d then use the Internal Links section in the editor sidebar to add keywords like:
- Optimize images
- Compress images
- Shrink images
- Etc.
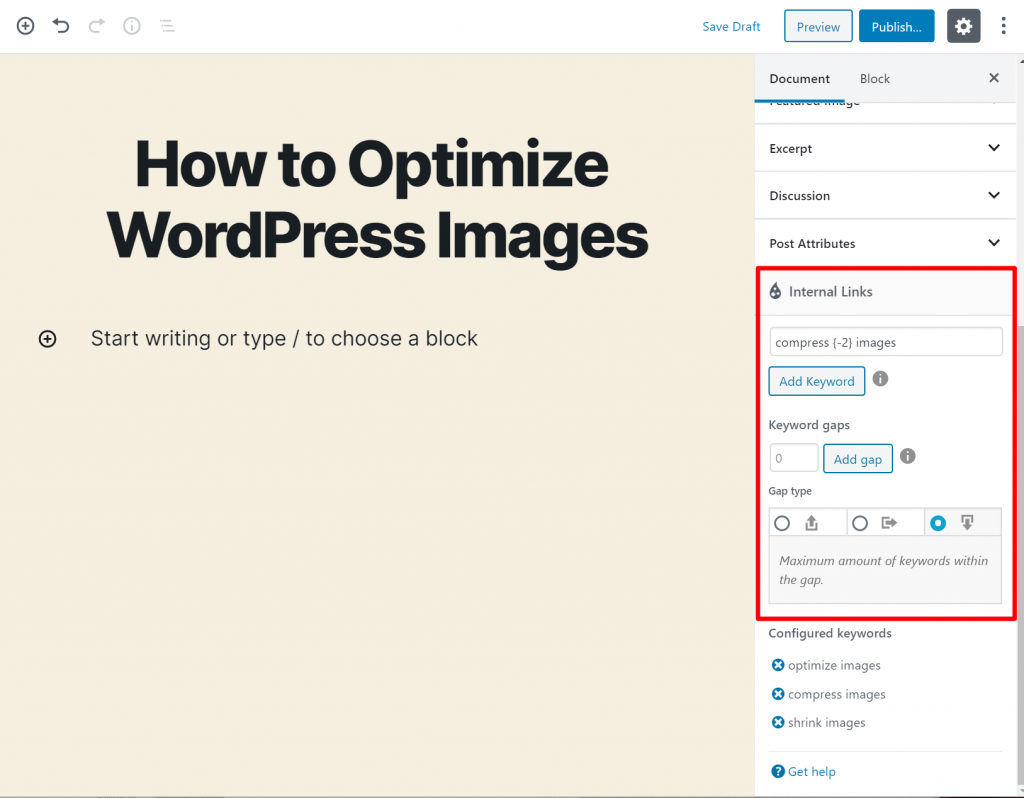
The most powerful feature here is the ability to insert gaps between keywords. This is what lets you vary your keyword anchors.
This feature lets you specify a minimum, exact, or maximum gap between keywords. For example, if you set the gap between keywords equal to a maximum of “2”, then “compress images” would still trigger for a written phrase like:
- “Compress your WordPress images” (2 word gap)
- “Compress your images” (1 word gap)
- Etc.
This way, you can still keep your anchor links relevant while also ensuring diversity, which is important to keep Google happy.
If you set a minimum keyword gap, you can even guarantee variety because the link will not insert for the exact match keyword.
You’ll want to add keywords like this for every post that you write – make it part of your normal publication process.
Configuring General Plugin Settings
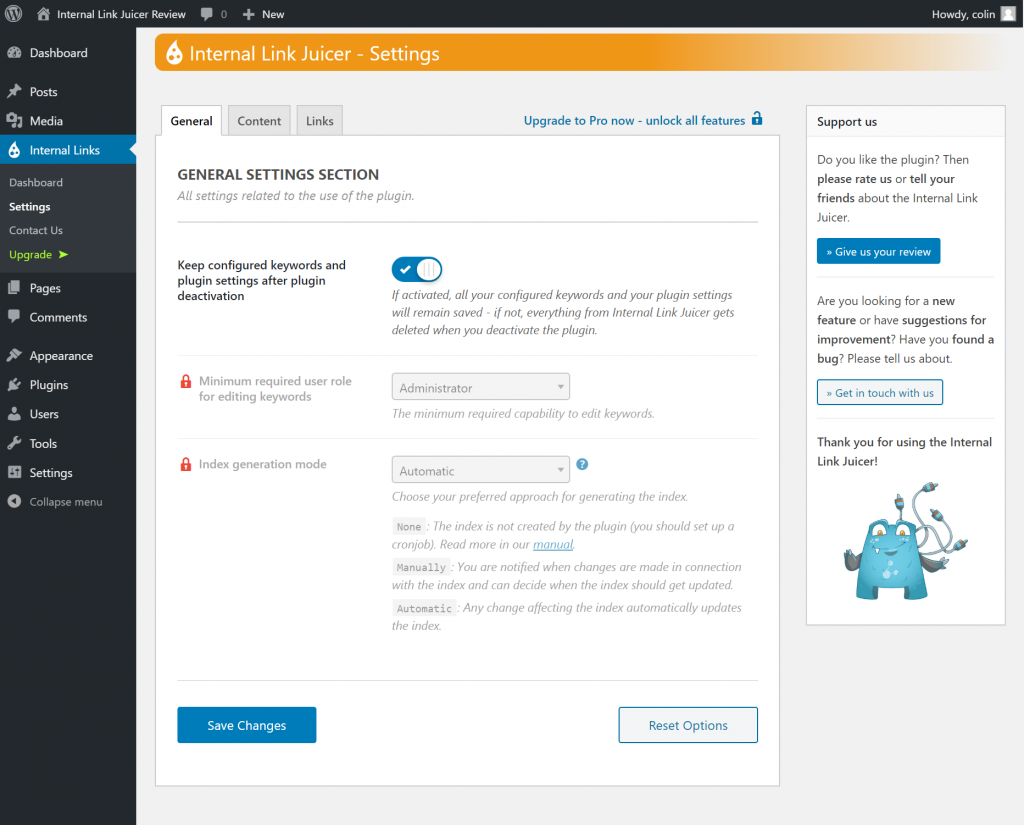
Once you’ve set up your keywords, you can go to Internal Links → Settings to set up some plugin-wide settings.
The settings are divided into three tabs.
With the premium version, the General tab lets you control access to which user roles can manage keywords (like those I showed you in the previous section):
In the Content tab, you can choose what content is eligible to have automatic links inserted. You can also set up limits for how often to include internal links and where to include them in content.
At the top, you can:
- Choose which post types to include internal links in
- Add a whitelist so that certain taxonomies can link directly to another post (paid)
- Blacklist pieces of content that should never include automatic internal links
- Blacklist terms that should not be used for internal linking (paid)
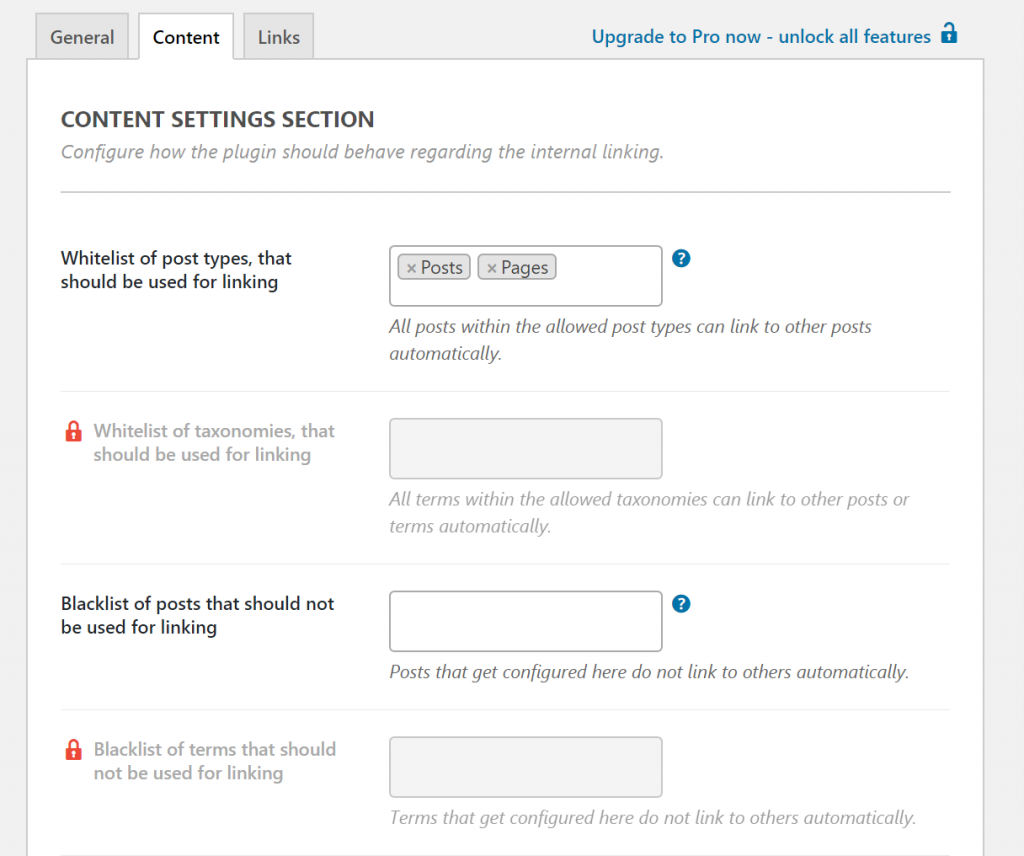
With the premium version, you also get shortcodes to exclude specific portions of your content from having internal links.
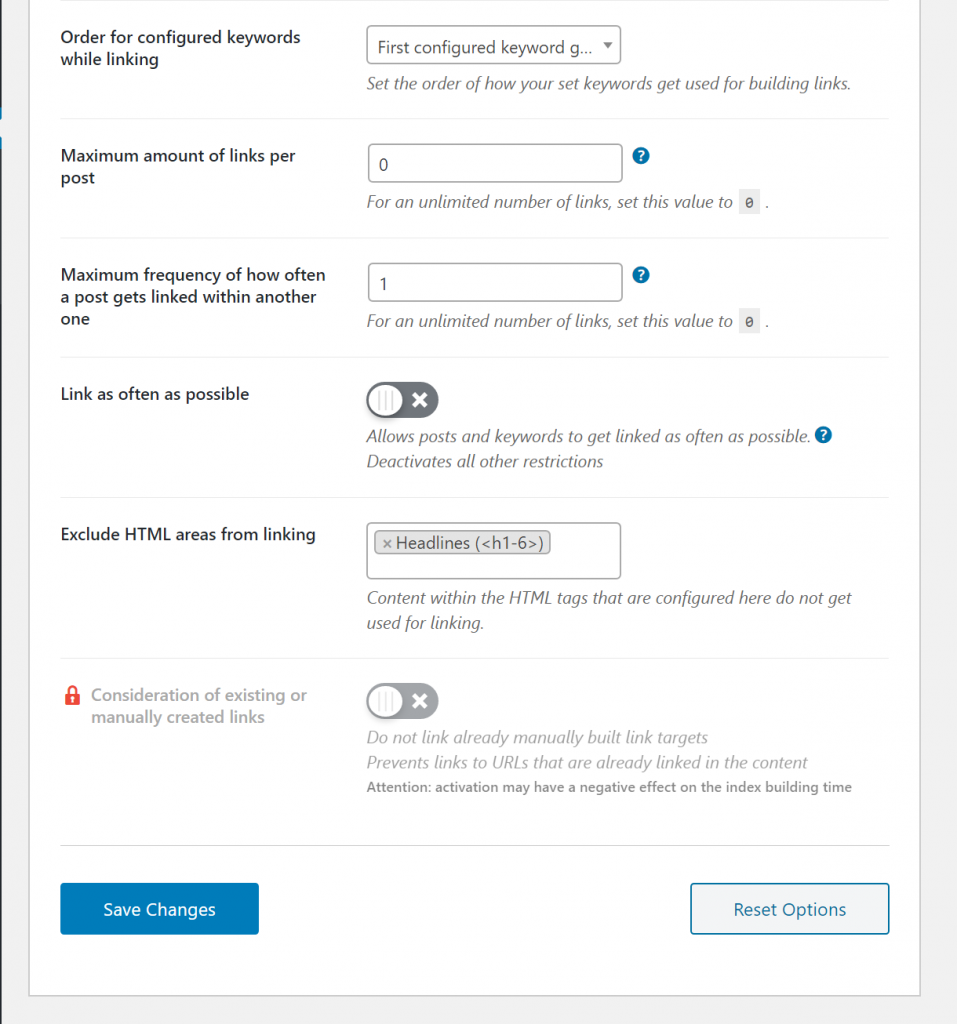
Further down, you can configure how links function like:
- Which keywords get preference for internal links. For example, you can prioritize longer keyword combinations to ensure a more varied anchor text distribution.
- Set a maximum number of total internal links per post. E.g. only three internal links max.
- Set a maximum number of links per linked-to post. E.g. Post A can have one link, Post B can have one link, etc.
- Exclude internal links from certain areas, like your headings or other areas (bolded text, tables, image captions, etc.). Some restrictions require the paid version.
- Factor in internal links that you’ve manually included (paid).
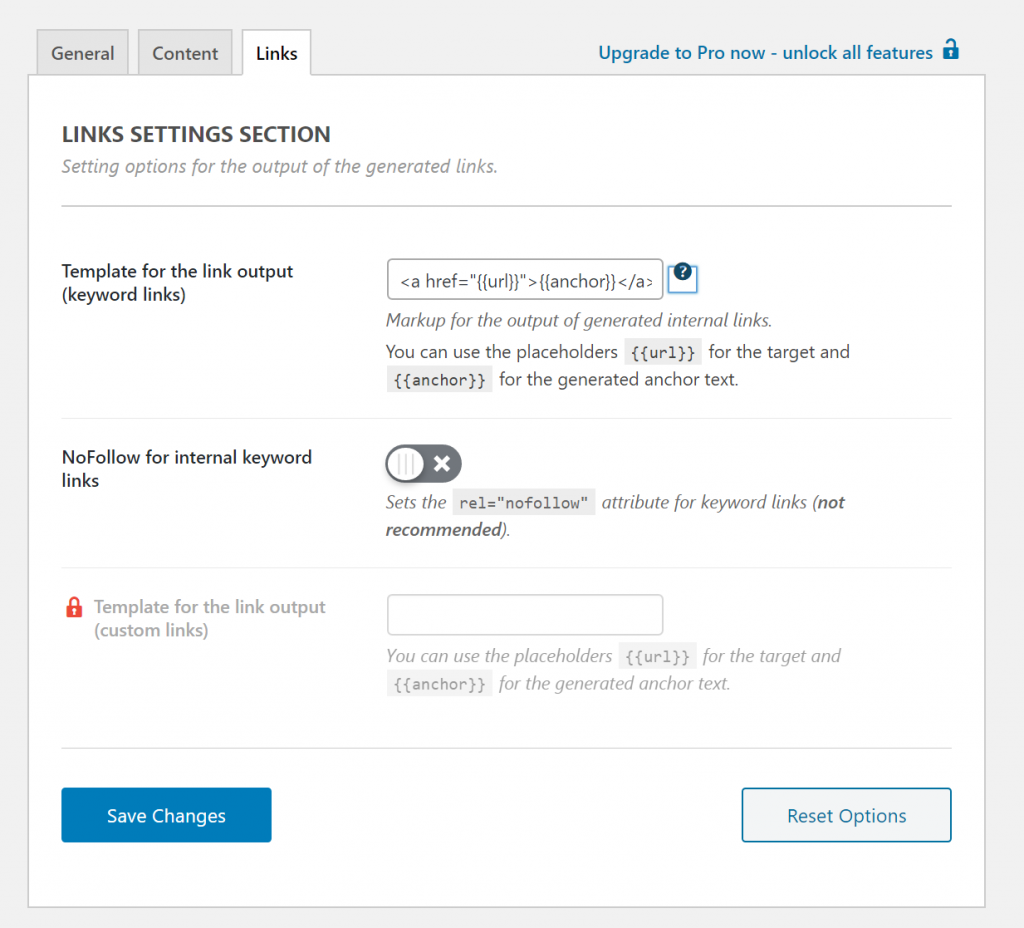
Finally, the Links tab lets you set up the template for internal links. For example, you could use this feature to automatically add UTM tracking parameters or open links in a new tab:
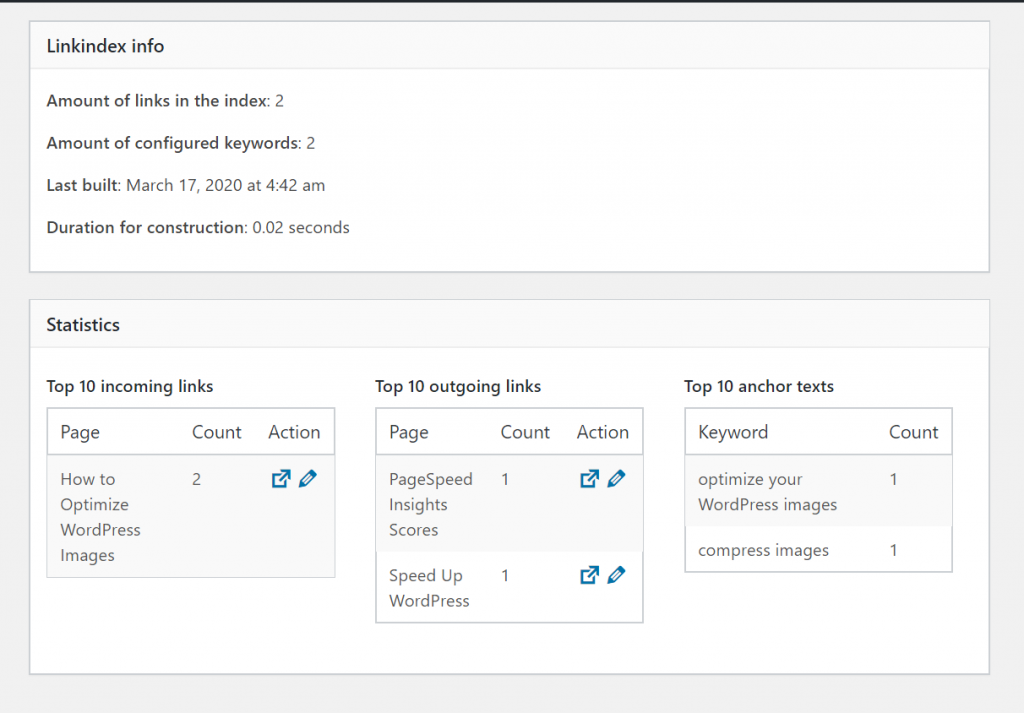
Viewing Internal Link Statistics
Once you’ve set everything up, Internal Link Juicer will start automatically inserting internal links according to your preferences.
To keep track of everything, you can go to Internal Links → Dashboard to see:
- Which posts have received the most internal links
- Which posts have the most internal links to other posts
- The most used anchor text for links, as well as the frequency
Internal Link Juicer Pricing
The core Internal Link Juicer plugin that I used for this review is available for free at WordPress.org.
If you want access to the premium features, the developer offers monthly, one-year, and lifetime licenses for different numbers of sites:
- Single site – 8.35 per month / $69.99 per year / $249.99 for a lifetime license
- Five sites – 34.60 per month / $289.99 per year / $969.99 for a lifetime license
- Unlimited sites – 107.99 per month / $899.99 per year / $3,299.99 for a lifetime license
I find the prices for multiple site licenses to be quite high for the WordPress space. However, most sites will be fine with the free version at WordPress.org, so I don’t think that’s a big drawback.
Final Thoughts
If you want a solution to help you automatically include internal links in your content, I think that Internal Link Juicer is a great option.
My favorite thing about this plugin is that it lets you set up those keyword gaps to vary anchor text and also prioritize those types of anchor text when inserting internal links. I think that’s one of the key things that differentiates this plugin from other solutions.
If you set a minimum keyword gap requirement, you can pretty much guarantee that you’ll have a varied anchor text distribution, which will make your internal link strategy look much more natural.
The premium version is a bit pricey if you need to use it on multiple sites, but I think most webmasters will be fine with the free version,