Do you want to create a Dropbox upload form in WordPress?
A contact form with a file upload option could be hard to manage if you are getting too many attachments. You can connect your form to Dropbox and upload those files directly to the cloud.
In this article, we’ll show you how to easily create a Dropbox upload form in WordPress.

Why Use Dropbox to Upload Form Attachments
Some times you may need users to upload a file attachment using a form on your website.
For example, a job board website may need a file upload option to upload CV or work samples.
A customer feedback form may need a file upload option so users can send screenshots. A photo contest website may need it for users to upload their entries.
As you receive files, you can store those files on your WordPress website. They will be added to your website’s wp-content folder.
However, if you are expecting to get a ton of entries, and they are not related to your actual website files, then it is a good idea to save them separately.
Uploading form attachments to Dropbox has the following advantages:
- Keeps form upload entries separate from your WordPress files
- Dropbox makes it easier to share those files with anyone and you’ll not need to give them access to your website.
- You can easily browse and manage form attachments from your Dropbox dashboard
- If you no longer need those files, then you can download, archive, and delete them.
That being said, let’s take a look at how to make a WordPress form with an option to upload files to Dropbox.
Creating a Dropbox Upload Form in WordPress
First you need to install and activate the WPForms plugin. For more details, you should check out our article on how to install a WordPress plugin.
Note: WPForms is a paid plugin built by the same team as WPBeginner, and you’ll need at least their ‘Pro’ plan to access the Zapier addon which we’ll be using in this tutorial.
Upon activation, you need to visit WPForms » Add New page in your WordPress admin area.
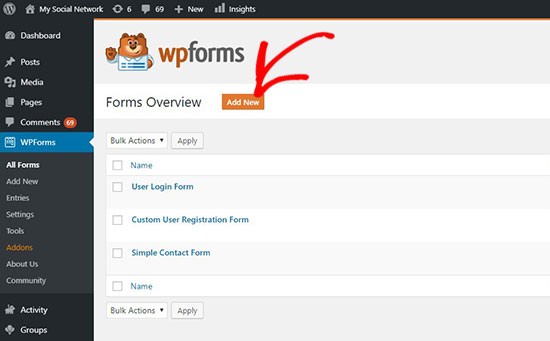
It’ll take you to the WPForms form builder page. Simply provide a name for your form and then select simple contact form template as a starting point.
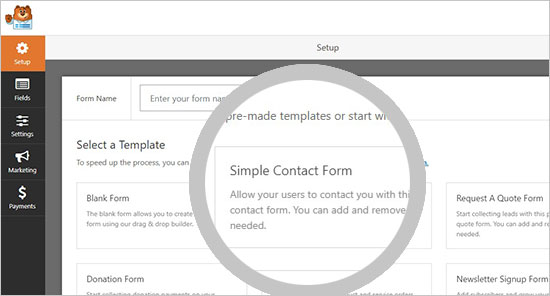
WPForms will load the form template with commonly used form fields. You can click on any fields to edit it, and you can also drag the fields to rearrange them or add new fields to the form.
Next, you need to click on the ‘File Upload’ field located under the ‘Fancy fields’ section in the left column.
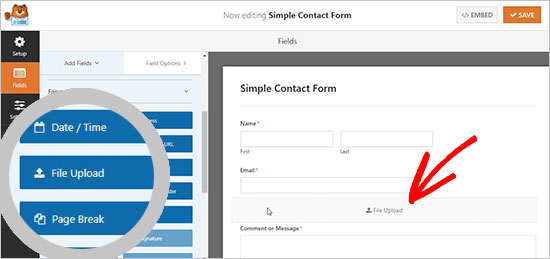
This will add the file upload field to your form.
Click on the ‘Save’ button to save your form, and your file upload form is ready.
Integrating Zapier with WPForms
Next, you need to connect your form to your Dropbox account.
We’ll be using a service called Zapier to do that. Zapier allows you to connect different apps to your website without writing any code. In this case, we’ll use it to build a connection between WPForms and Dropbox.
WPForms comes with a ‘Zapier Addon’ that you can use to integrate with over 1500 popular apps, including Dropbox.
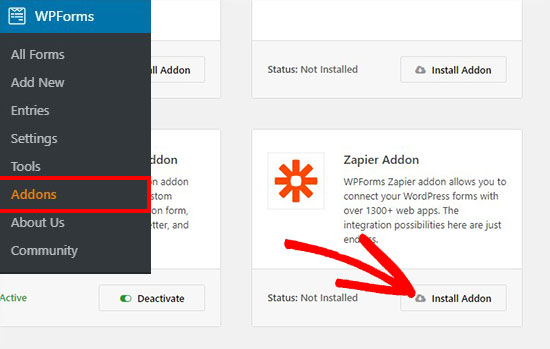
To access this addon, you need to go to WPForms » Addons page. From there, you need to look for the Zapier addon and click on the ‘Install Addon’ button. It will activate the addon automatically.
Next, you need to go to WPForms » Settings » Integrations page in your WordPress admin area. From there, you need to copy the ‘Zapier API key’ that you will need to connect your WordPress website with Zapier.
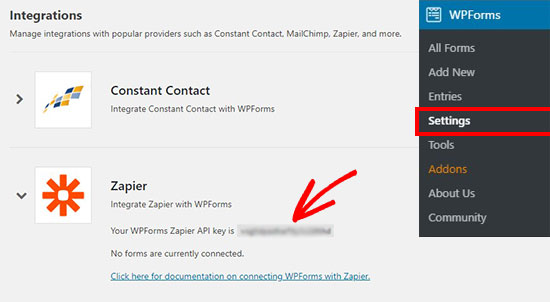
Once copied, you should go to the Zapier website and login to your Zapier account. Then, click on the ‘Make a Zap’ button to continue.

There will be many apps available. Search for ‘WPForms’ and select it as a trigger app.

After that, you need to select ‘New Form Entry’ as a trigger event for the WPForms app. It will create a trigger on every form submission.
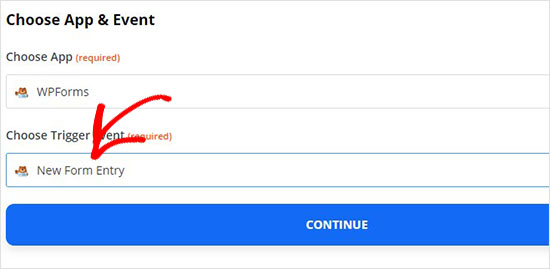
Now, you can go ahead and click on the ‘Sign in to WPForms’ button to connect your Zapier account with WPForms plugin on your site.
To connect Zapier with your website, you need to add your website URL and Zapier API key that you copied earlier.
It will display the WPForms account. Click on the ‘Continue’ button.
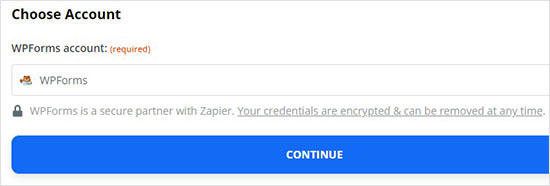
In the ‘Form’ dropdown, you need to select the file upload form that you created previously.
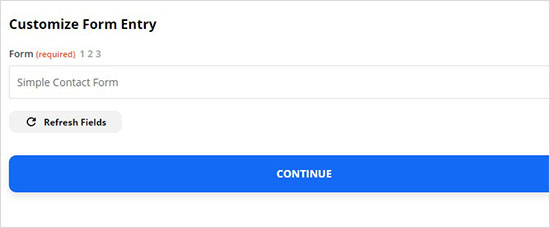
After that, click on the ‘Continue’ button.
Before going to the next step, Zapier will ask you to test the new file upload form to see if all the settings are working properly.
You can visit WPForms » All Forms page in the WordPress admin area and click on the ‘Preview’ link below the file upload form.
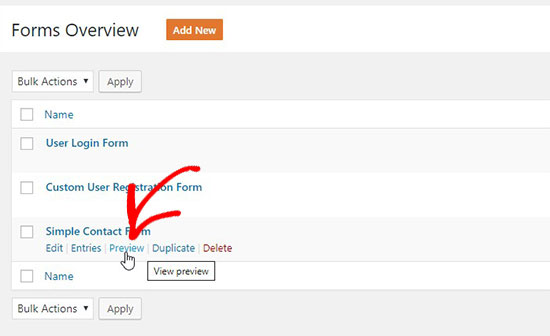
To make this test smooth, you should upload a file and also add dummy text in the message section. Submit the test entry and go to your Zapier account. Click on the ‘Test & Continue’ button.

Note: You can check the test entry in the ‘Find Data’ section.
If the test is successful, it will jump to the next step where you can integrate your form with Dropbox.
Connecting WPForms with Dropbox
First you need to visit your Dropbox account and create a new Dropbox upload folder. You can rename this folder as ‘WPForms Uploads’ or give it any name. All your file attachments will upload in this folder automatically.
Next, you need to go back to your Zapier account. In the ‘Do this’ section, you need to choose ‘Dropbox’.

It will ask you to create an action for Dropbox. Select the ‘Upload File’ option and click on the ‘Continue’ button.
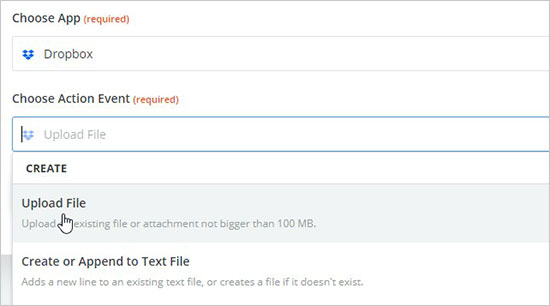
After that, you need to click on the ‘Sign in to Dropbox’ button to select your Dropbox account and connect it with Zapier.

Upon connecting the account, click on the ‘Continue’ button.
Now, you need to configure the Dropbox file settings. It will ask you for 2 options:
- The Dropbox folder where you want to save the file attachments
- The WPForms file upload field
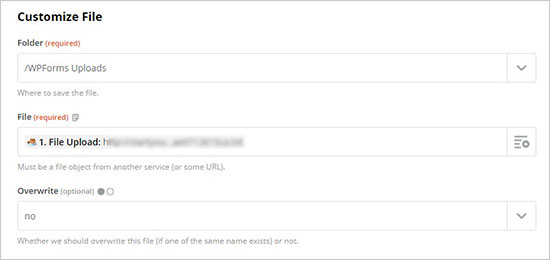
After setting up, you can go ahead and test your configurations. Click on the ‘Test & Continue’ button to continue.
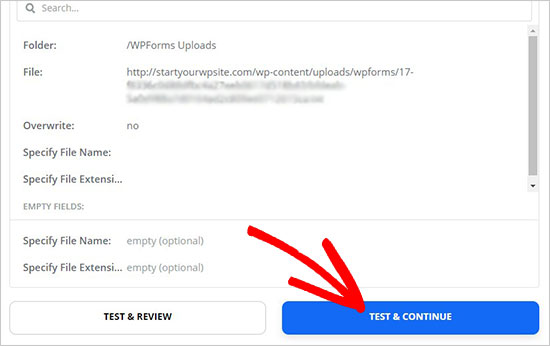
Lastly, click on the ‘Turn Zap On’ button to store these settings. It will take a few seconds, and you will see the Zap status on the top rights corner of the screen.
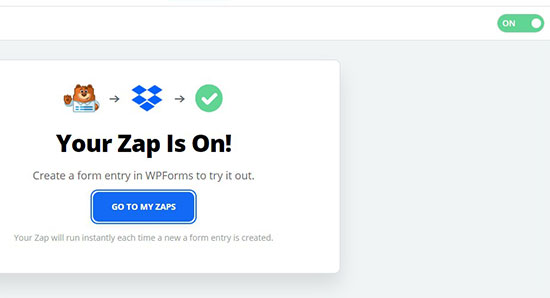
Your online form with file upload option is ready to be added on your website.
Adding the Dropbox Upload Form in WordPress
To add the Dropbox upload form in WordPress, you can edit any page or post where you want to display it.
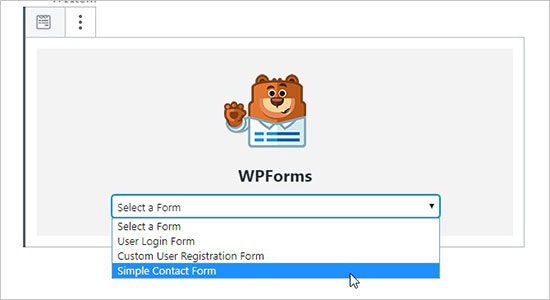
Simply add the WPForms block to the content editor and select the form you created earlier.
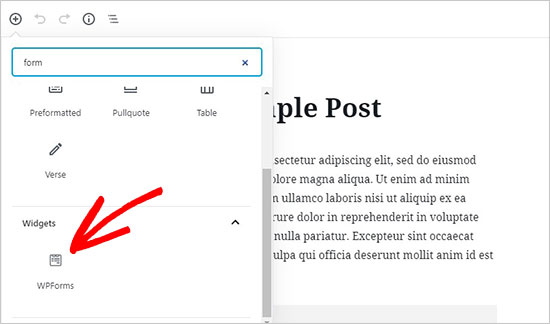
WPForms will load the live preview of your form inside the content editor.
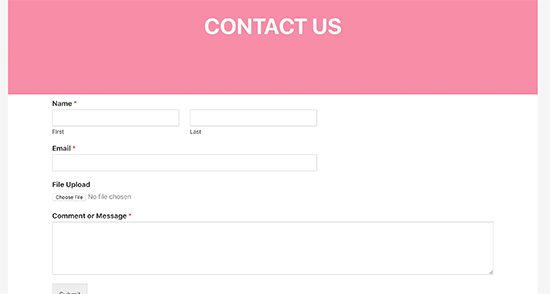
You can now visit your website to the form in action. You can also test out the form by uploading a file and filling out the form.
That’s all.
We hope this article helped you learn how to create a Dropbox upload form in WordPress. You may also want to see our guide on how to run a giveaway contest in WordPress to boost user engagement.
If you liked this article, then please subscribe to our YouTube Channel for WordPress video tutorials. You can also find us on Twitter and Facebook.
The post How to Create a Dropbox Upload Form in WordPress appeared first on WPBeginner.


