At this point, the new WordPress Gutenberg block editor has been out for quite some time, and you’ve probably become familiar with the opportunities it affords you with its default blocks.
What’s more, intrepid developers have created tons of plugins that add new blocks to the editor, which greatly expand what you can build with Gutenberg.
However, what if that’s still not enough? What if you want to create your own custom Gutenberg blocks?
Sounds like something you need to be a full-on coder to do, right?
Well, you’d be surprised…
You can actually create your own Gutenberg blocks without the need for any special knowledge*, and I’m going to show you exactly how to do it in this post.
*Having some very basic HTML/CSS helps with the layout, but you definitely won’t need any JavaScript or PHP.
What You’ll Need to Create a Custom Gutenberg Block
To create your own custom Gutenberg block, you’ll need a helper plugin. Essentially, this plugin will let you “build” your custom block by adding as many custom fields as required and controlling how those custom fields are arranged.
For this tutorial, I’m going to use the free Lazy Blocks plugin. The reasons why I think this plugin is the best for non-developers are:
- It’s free
- It lets you control the block output from inside your WordPress dashboard
- It offers a good number of field types that you can use in your custom blocks
Another good option is the Block Lab plugin, but I found Lazy Blocks to be a little more beginner friendly.
Beyond the plugin, it also definitely helps to know some basic HTML and CSS for simple layout and styling control.
However, when I said “no code required”, I meant it. And even if you don’t know any HTML, you’ll still be able to build a basic custom block.
With that being said, I’ll use some simple HTML/CSS to help with the layout – but it’s really not that hard, I promise ?
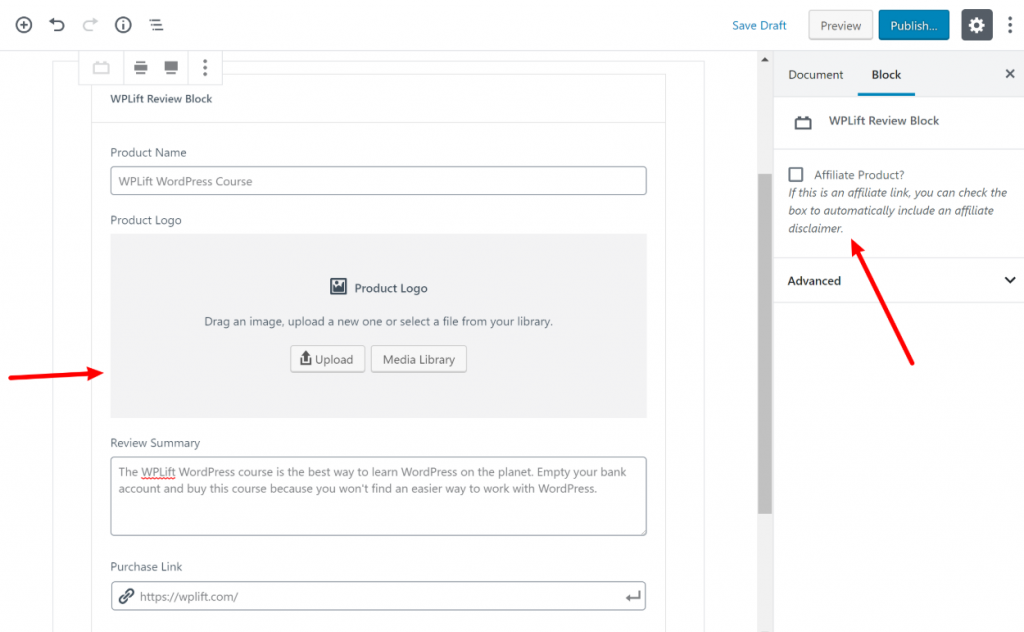
In the end, you’ll be able to create your own block like this in the editor:

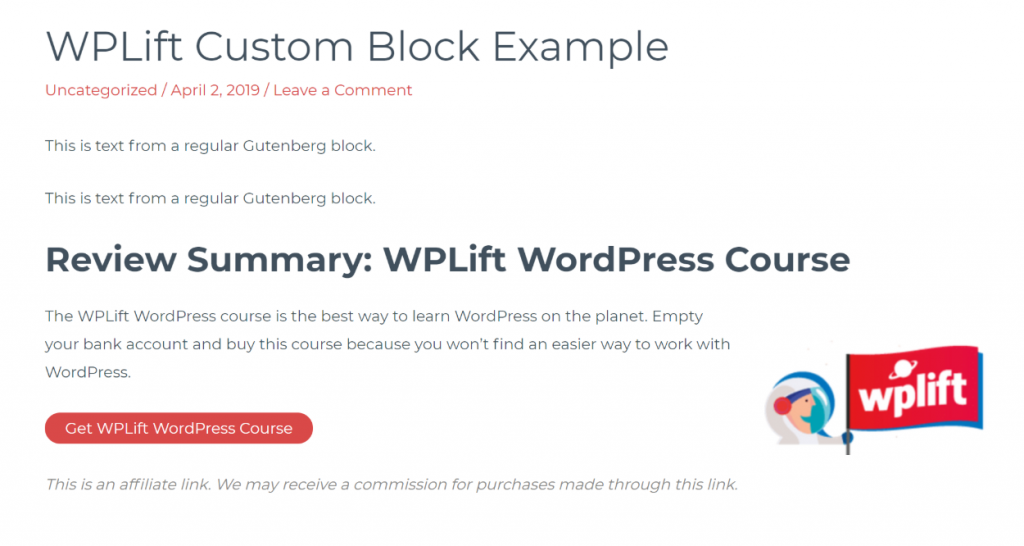
And it will show up like this on the front-end:
To get started, install and activate the free Lazy Blocks plugin from WordPress.org. Then, here’s how to use it.
How to Create a Custom Gutenberg Block With the Lazy Blocks Plugin
For this tutorial, let’s say you want to create a custom review block that you use at the end of review posts. It will include:
- The product name and logo
- A text summary
- A CTA to buy the product
- An optional affiliate link disclaimer. If you check a box, the block will automatically include an affiliate disclaimer. If the box is unchecked, there will be no affiliate disclaimer, though.
Step 1: Create a New Block
To get started, go to Lazy Blocks → Add New and give your block a name. This name is what will show up when you go to insert the block while working in the editor:
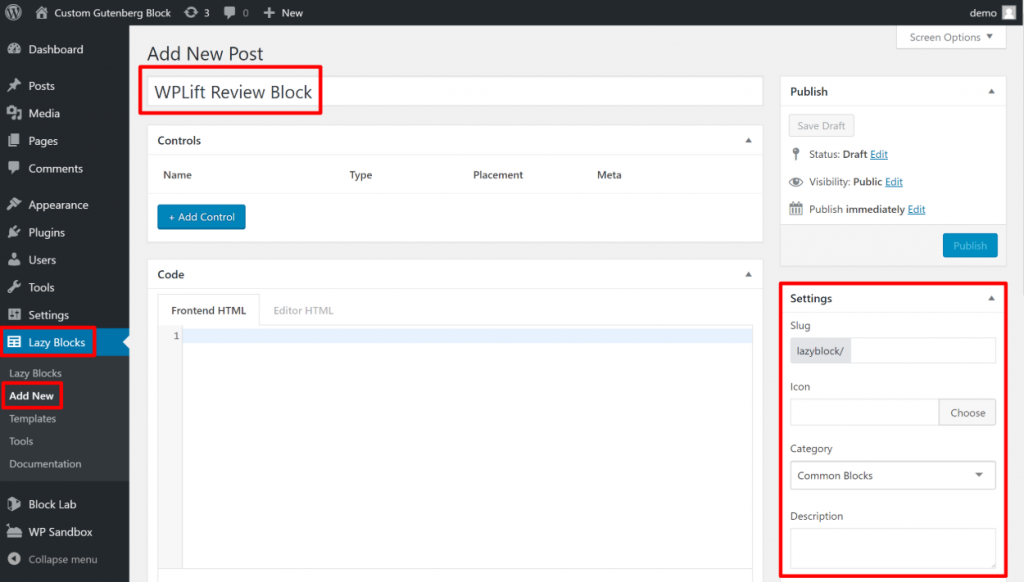
You can also use the Settings sidebar to control which “section” the block appears in while working in the editor, as well as the block’s icon and description.
Step 2: Add Controls (AKA Custom Fields, AKA the Information You Want to Collect)
Next, you need to add “Controls” for all the information you want to collect. If you’re familiar with custom fields in WordPress, it’s the same idea.
For this example, we need to collect this information:
- Product name
- Product logo
- Review text summary
- URL to purchase the product (for the CTA)
- Checkbox to indicate whether the product link is an affiliate link
To get started, click the + Add Control button and fill in the details.
For example, for the product name, you just need a simple text field:
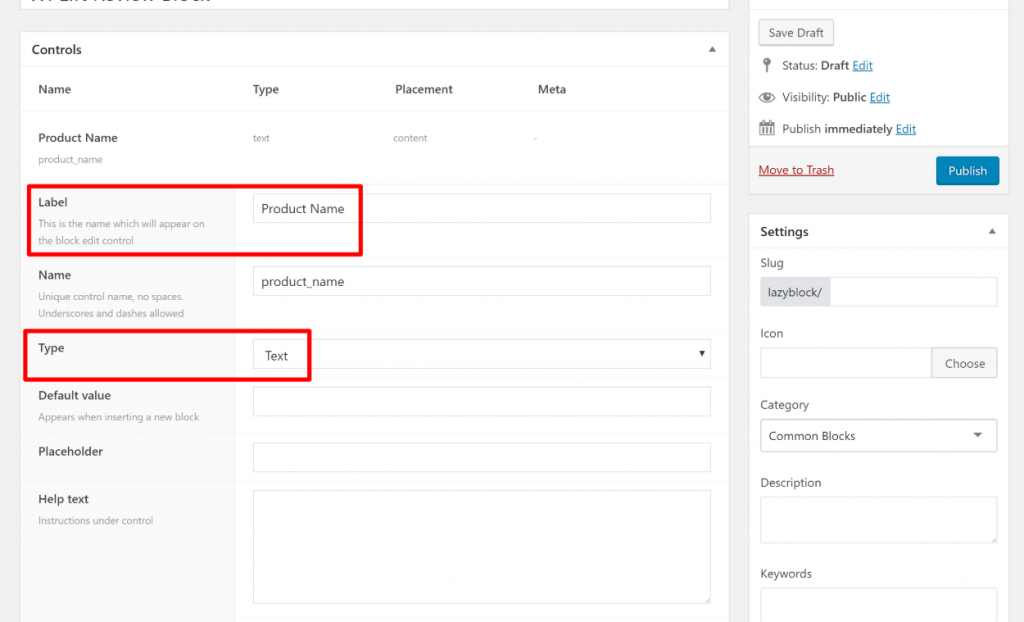
Once you fill in the Label, Lazy Blocks will automatically add the Name.
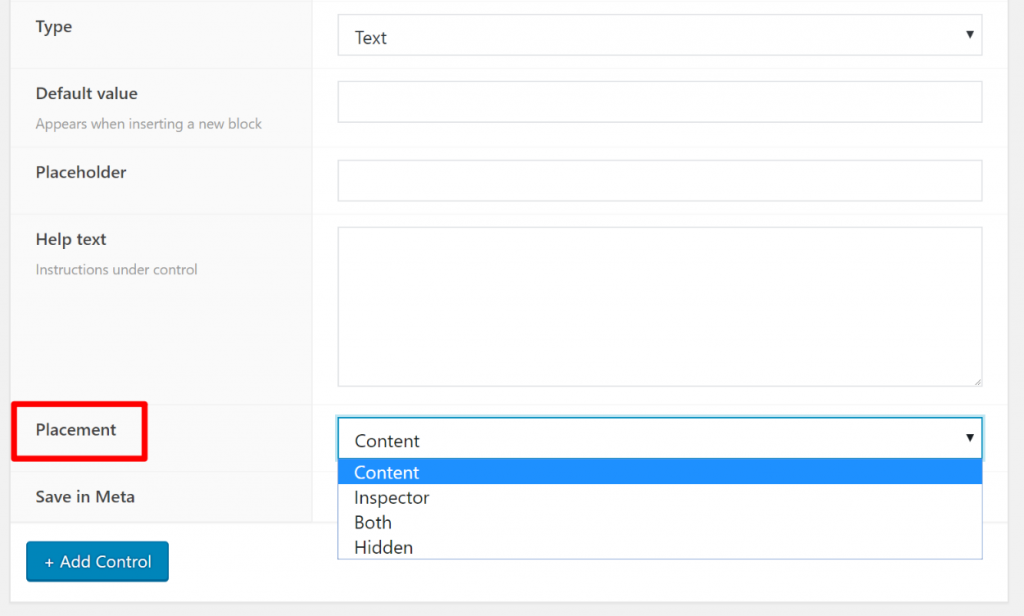
Beyond the label and type, the Placement drop-down is also important. This affects where you’ll enter the information in the actual WordPress block editor. You get four options:
- Content
- Inspector
- Both
- Hidden (you probably don’t want to use this one)
Here’s the difference between Content and Inspector:
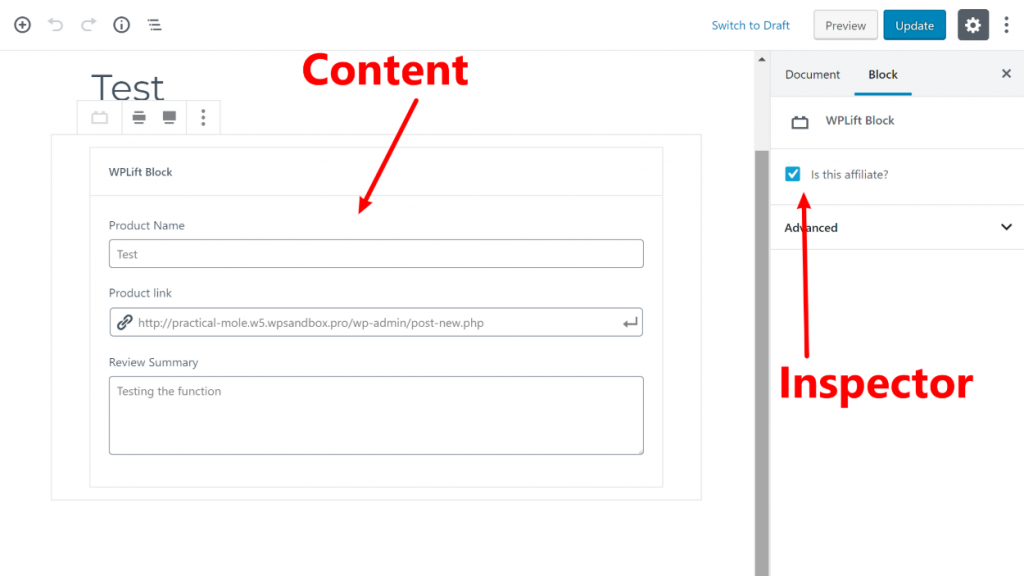
Repeat the process for the other information you want to collect. Make sure to pay attention to the Type for each piece of information.
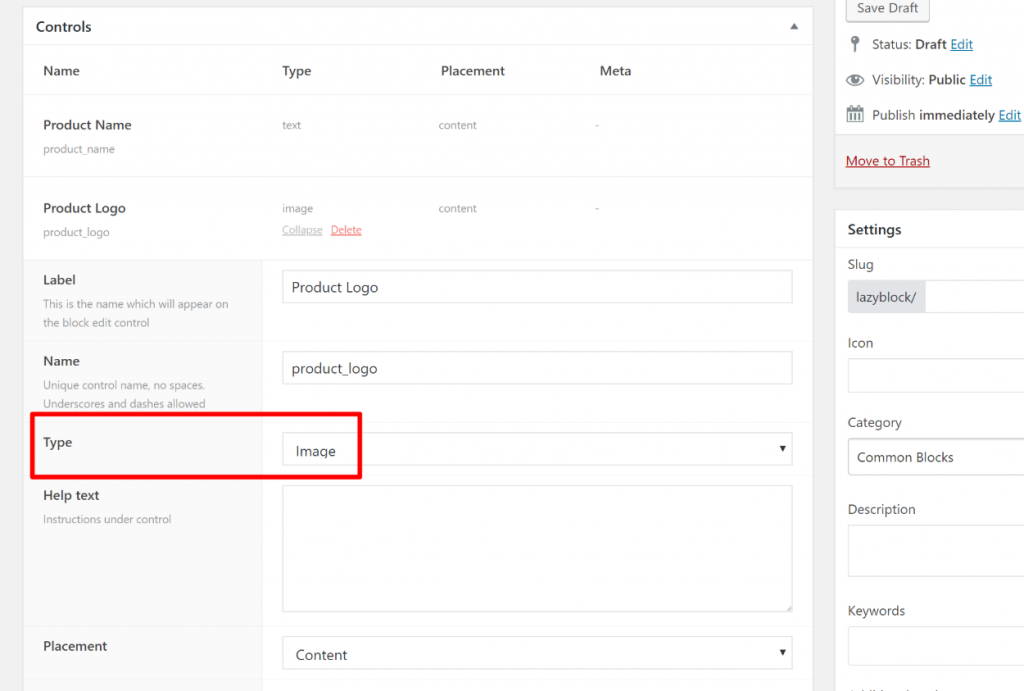
For example, for the product logo, you’d want an Image field:
And for the affiliate disclaimer option, you’d want a Checkbox field (I’ll put this one in the Inspector sidebar instead of the block content):

Here’s how it looks once I’ve added all the Controls. Note how I used a Text Area for the review summary to give a little extra room:
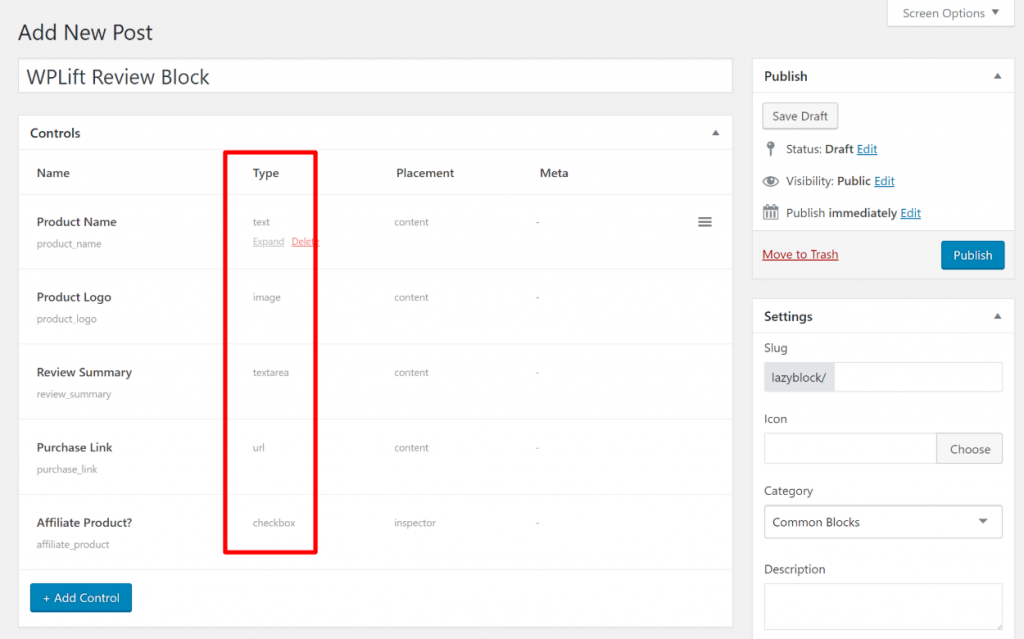
If you want, you can use drag-and-drop to change the order of how the fields appear in the block editor (this has no effect on the front-end display, though).
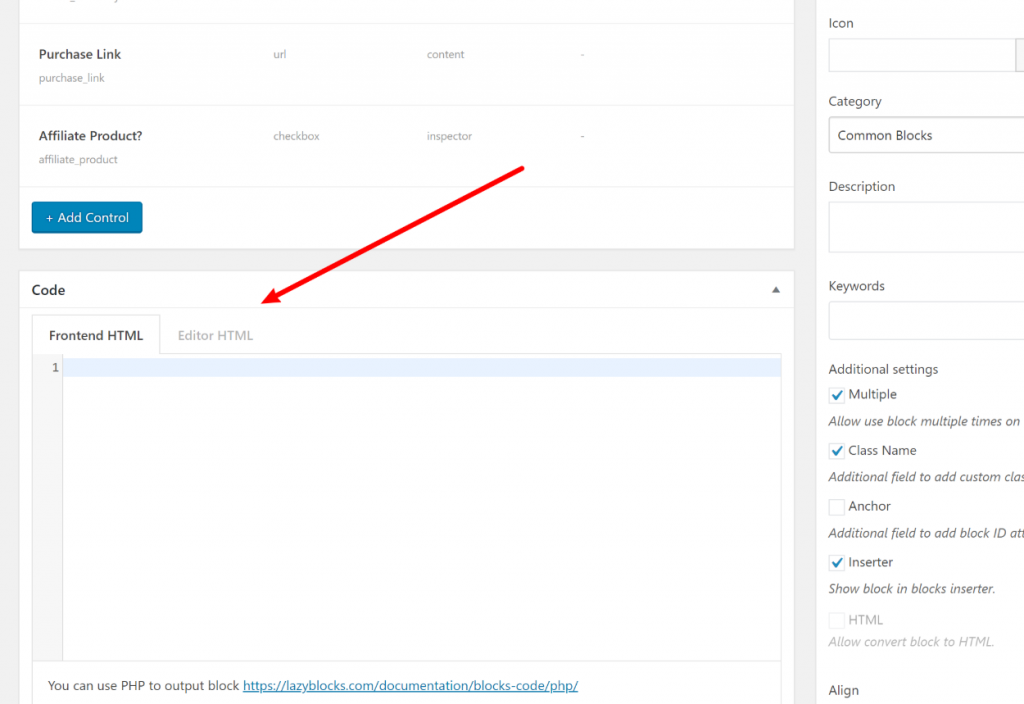
Step 3: Control Front-End Display of Block Content
At this point, you have a working block that would appear in the backend WordPress editor. However, you haven’t told WordPress how to display that block’s content on the front-end.
To control how your block’s content looks on the front-end, you’ll scroll down and use the Code editor:
“Code editor??? I thought you said no code?”
Don’t worry! While you can use PHP in the code editor, Lazy Blocks also lets you work with the much simpler handlebars syntax.
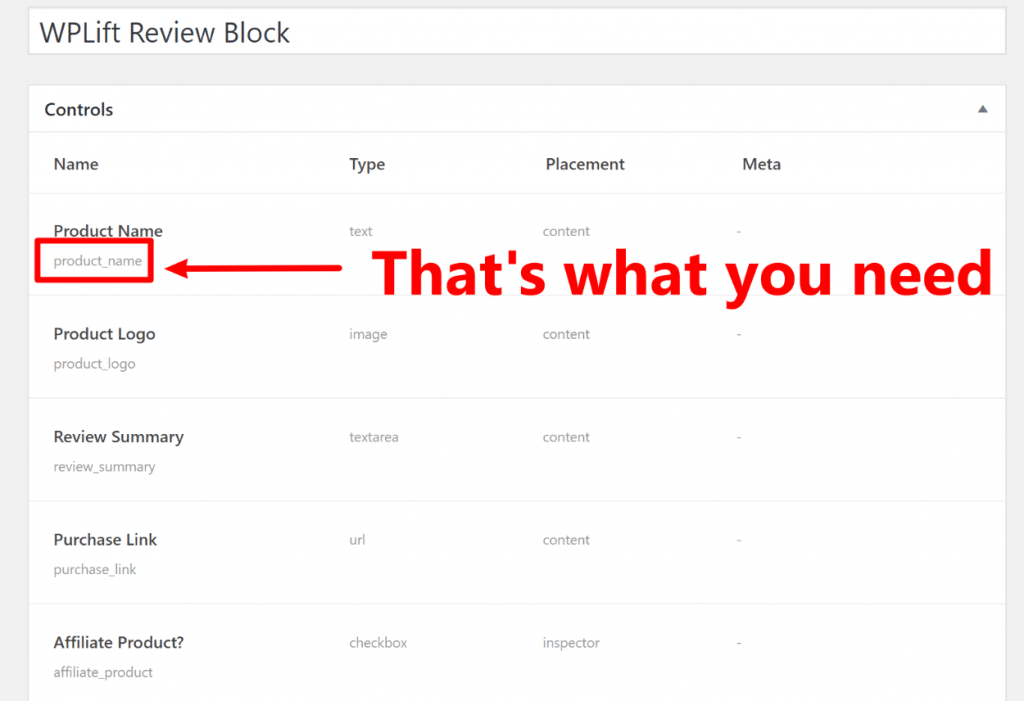
To display the content from one of your controls, all you do is wrap the control’s name in {{handlebars}}.
Here’s an example – let’s say you want to display the product’s name. First, you go to your Controls list and look for the name:
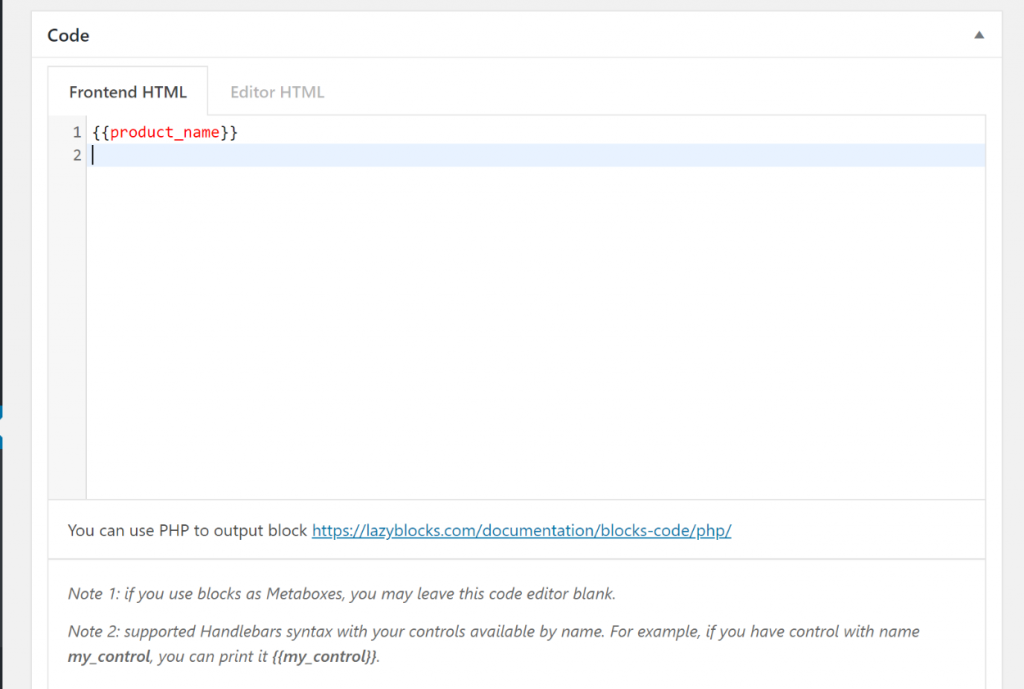
Then, you add it to the editor and wrap it in handlebars. For example, {{product_name}}:
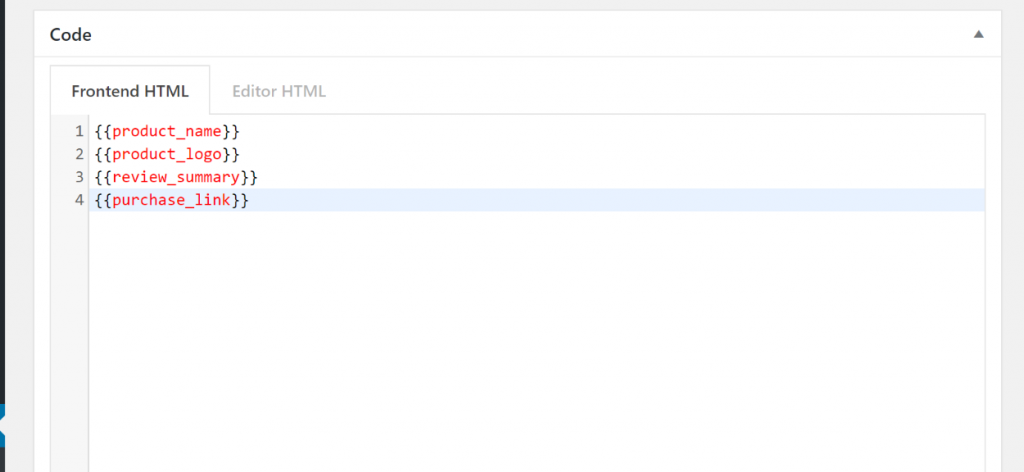
After repeating the same thing for the logo, summary, and link, you get something like this:
If you’re using an image, you’ll need to add some additional handlers to target the URL itself.
Adding Some HTML to Organize Things
In addition to adding the fields themselves with handlebars, you can also add regular text and HTML to the editor.
Here’s an example of what it might look like after you add some HTML:
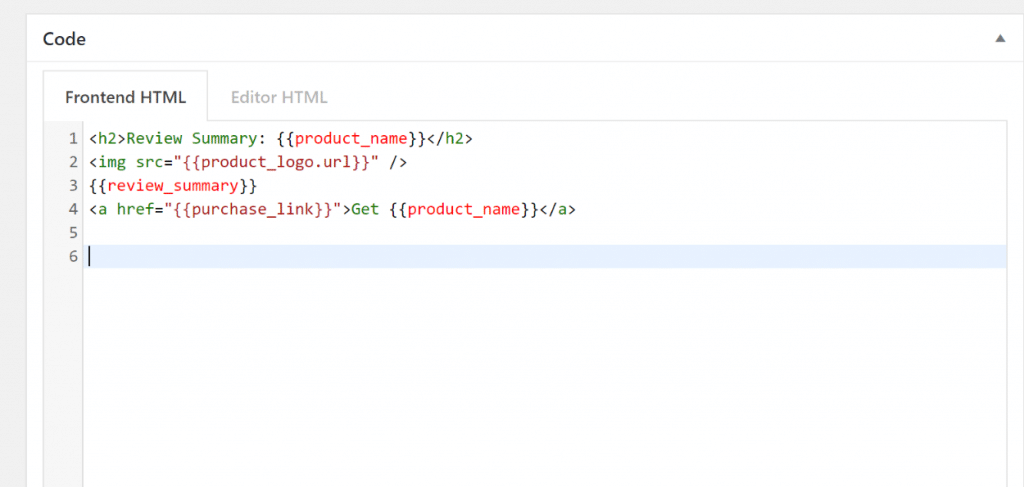
You can see how I inserted the {{purchase_link}} control inside the regular HTML for a link.
Also, note how I’ve added .url to get the image’s URL in the img HTML.
Using If/Then for the Affiliate Disclaimer
Now for a neat trick for the affiliate disclaimer! There’s a reason we added the affiliate disclaimer as a checkbox, rather than a text field.
That’s because we want it to:
- Display the affiliate disclaimer when checked
- Not show anything when unchecked
To do this, you can implement a simple IF/THEN statement, also using handlebars.
Essentially, you’re saying…
IF the box is checked, do this. If it’s not checked, do this.
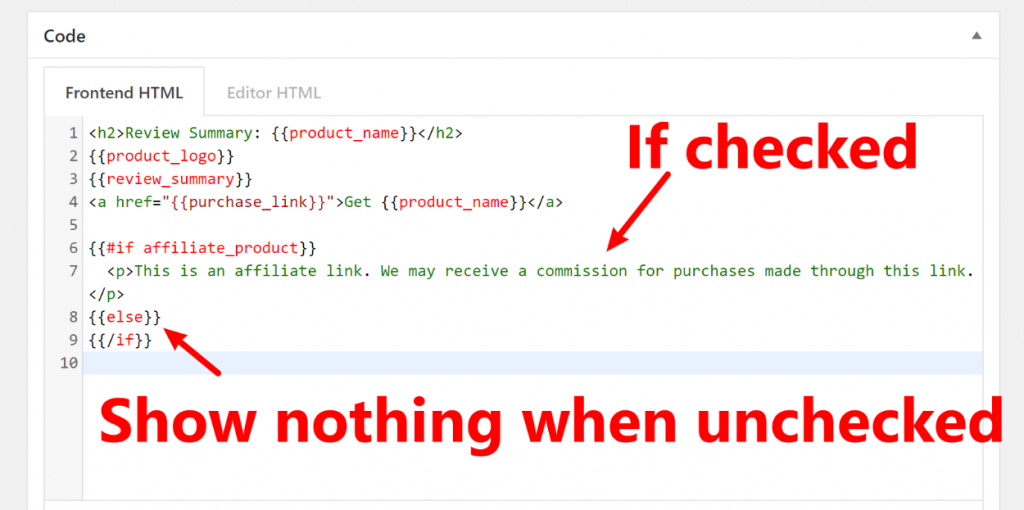
Here’s the syntax:
{{#if FIELD_NAME}}
DO THIS IF THE BOX IS CHECKED
{{else}}
DO THIS IF THE BOX IS NOT CHECKED
{{/if}}
And here’s an example for the affiliate disclaimer:
Now, go ahead and Publish your block and let’s use it!
How to Use Your New Custom Gutenberg Block
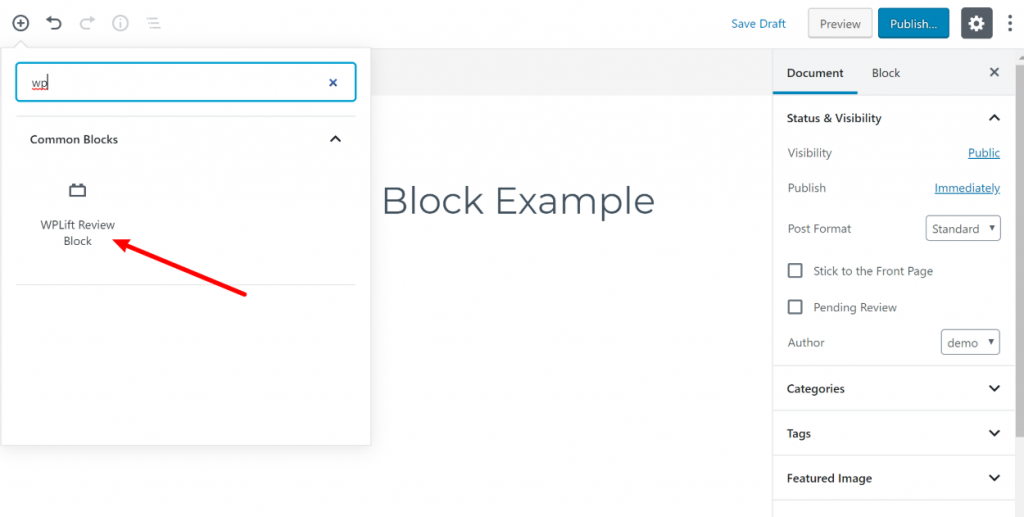
Once you publish your custom Gutenberg block, you’ll be able to insert it in the block editor just like you would any other block:
After you insert it, you can fill out the information in the content box and use the sidebar to indicate whether or not it’s an affiliate link:
And voila! There’s your custom block on the front-end:
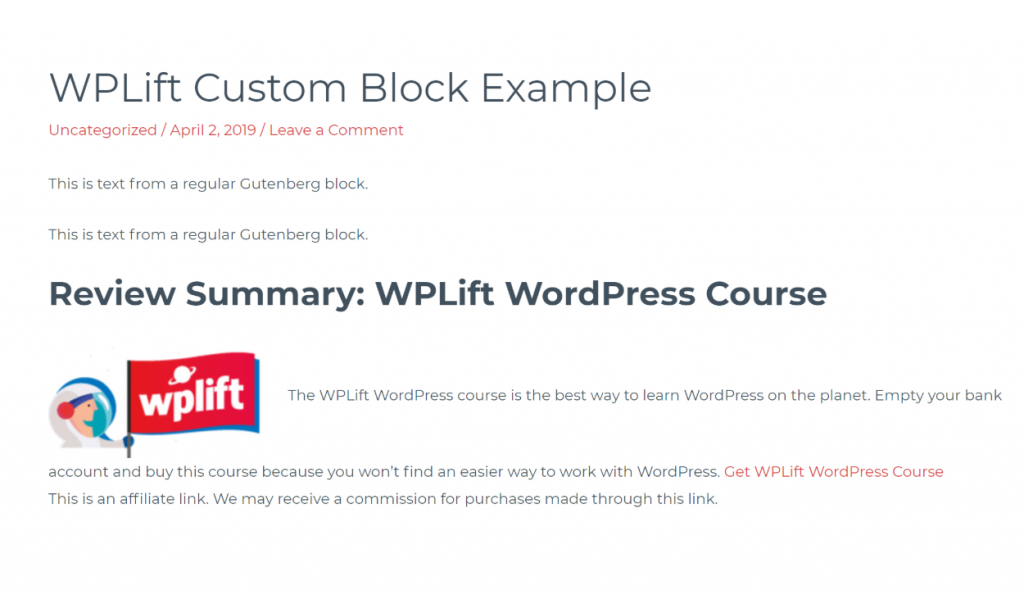
But there’s a problem! The layout sucks, right?
This is where having a little basic CSS or HTML knowledge can help.
For example, you’ll probably want to:
- Add some line breaks
- Make the CTA a button instead of a link
- Maybe use a column layout or float the image
You can add this right to the code editor (I’ll use inline CSS styles for simplicity’s sake):
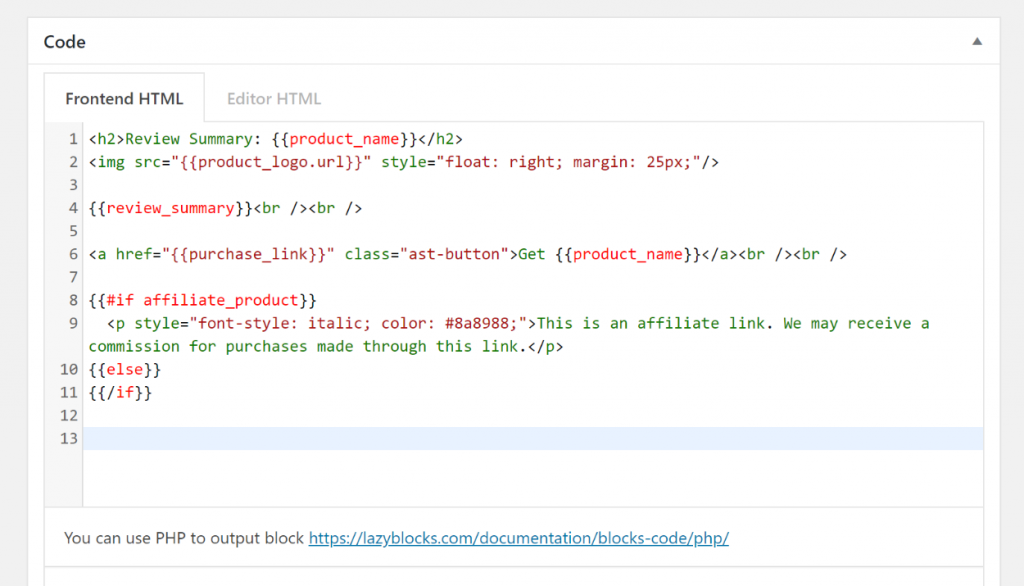
This code basically:
- Adds some line breaks
- “Floats” the image to the right
- Turns the link into a button (using my theme’s existing button style)
- Makes the affiliate disclaimer text italic and light grey
And with that little cleanup, you get something more like this:
And if you’re wondering, here’s how it looks when you uncheck the affiliate disclaimer box:
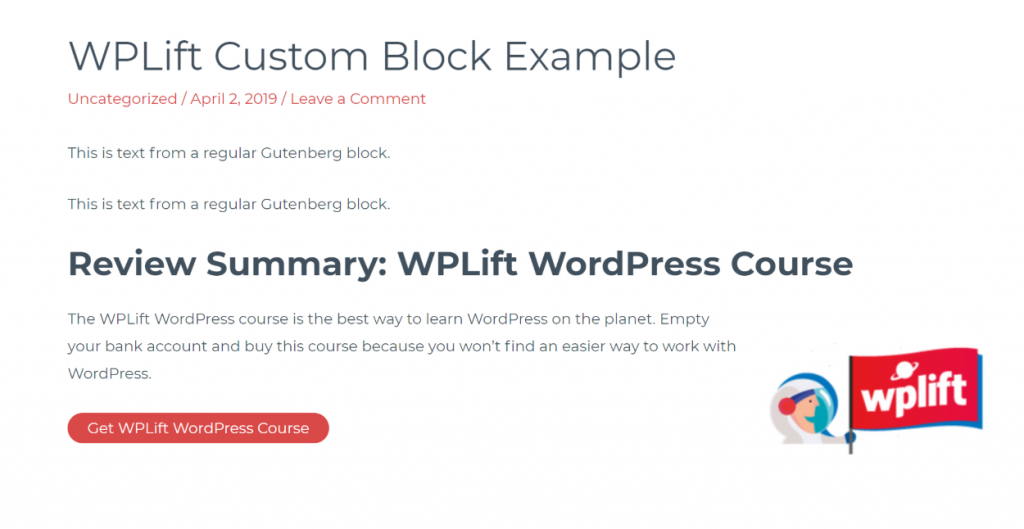
Pretty cool, right?
Final Thoughts
With Lazy Blocks, creating a custom Gutenberg block is achievable for anyone, no matter what your knowledge is (though I concede having some basic HTML/CSS does make things easier).
With this approach, you can create your own Gutenberg blocks that are 100% customized to your needs, and that’s pretty dang awesome!
Have any questions about how to create custom Gutenberg blocks for your WordPress site? Ask away in the comments and I’ll try to help!