Do you want to build an AJAX contact form in WordPress?
AJAX contact forms allow users to submit the form without reloading a page. This enables you to increase user engagement while offering a better form submission experience to your users.
This comes in handy when you run an eCommerce website and want to collect user feedback without diverting user attention.
You can also use the same AJAX functionality for other custom forms on your website. For example, a custom user login form will allow users to login without an additional page load.
In this article, we will show you how to easily build a WordPress AJAX contact form with step by step instructions.

What is Ajax and Why Use it For Your Forms?
Ajax, short for Asynchronous Javascript and XML, is a JavaScript programming technique which allows developers to transfer data without reloading a page.
It is most commonly used in web forms allowing users to submit form data without reloading a page. This makes form submission easy and fast, which improves the overall user experience.
Web applications like Gmail and Facebook extensively use this technique to keep users engaged while making everything work seamlessly in the background.
You can also use Ajax for your WordPress forms. It will save users from unnecessary page reload and keeps them engaged on the page they are currently viewing.
That being said, let’s take a look at how to easily make a WordPress Ajax contact form in 4 simple steps.
1. Install WPForms Plugin
First thing you need to do is install and activate the WPForms plugin. For more details, see our step by step guide on how to install a WordPress plugin.
WPForms is the best WordPress form builder plugin on the market. It allows you to easily create Ajax powered forms aswell.
Upon activation, you need to visit WPForms » Settings page to enter your license key.
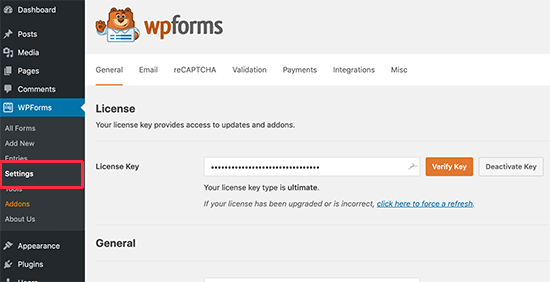
After entering the license key, you’ll be able to receive automatic updates and install add-ons.
You are now all set up to make beautiful ajax forms in WordPress.
2. Create Your First Form
Let’s go ahead and create your first form.
Simply visit WPForms » Add New page in WordPress admin area. You’ll be asked to provide a title for your form and select a template as a starting point.
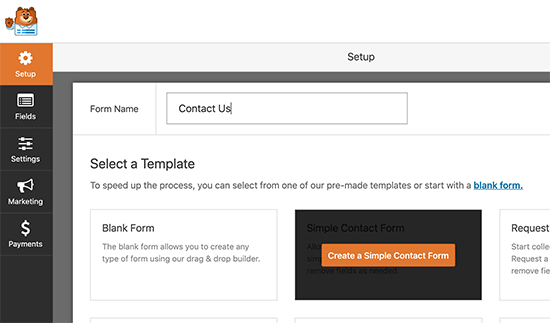
For the sake of this tutorial, we will be creating a contact form. However you can create any other type of form you need.
WPForms will now load your form with basic fields already added to it. You can simply point and click on any form field to edit it.
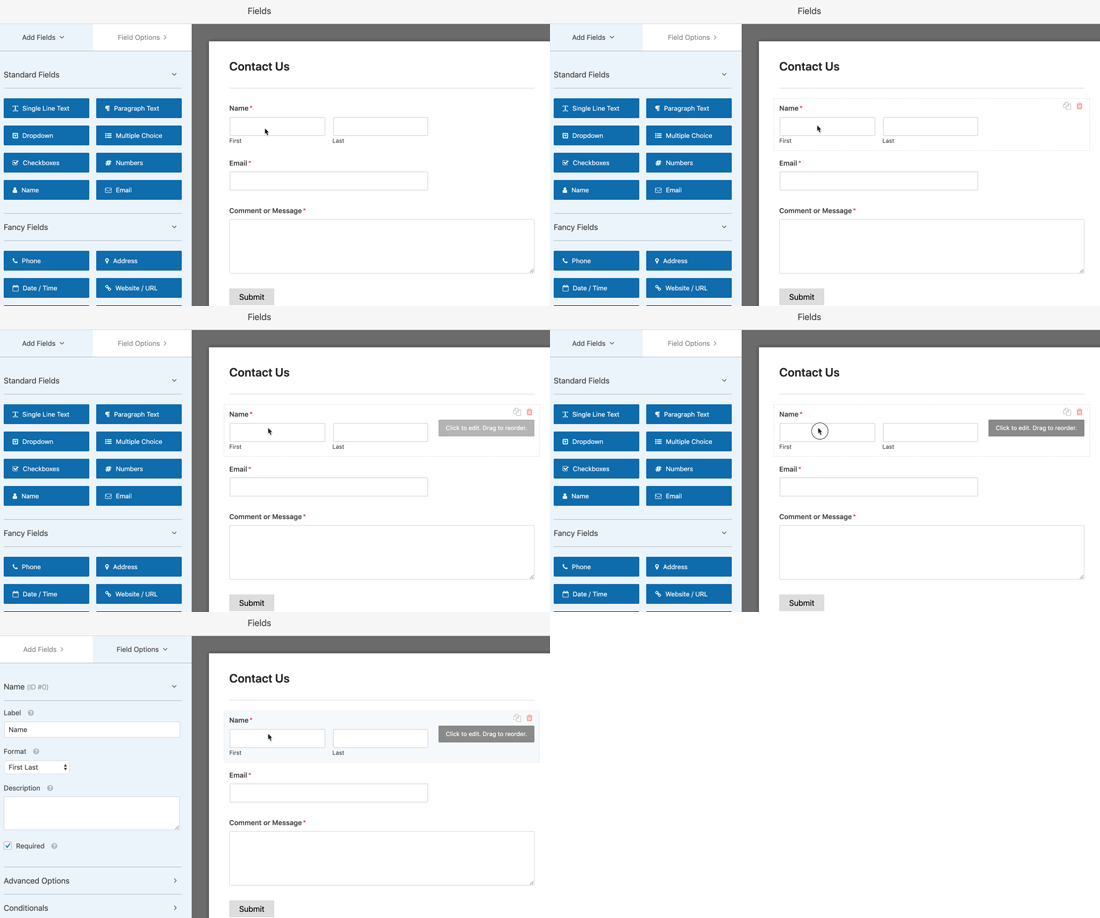
You can also add any new form field from the left column by simply clicking on it. The new field will appear at the bottom of your form just above the submit button.
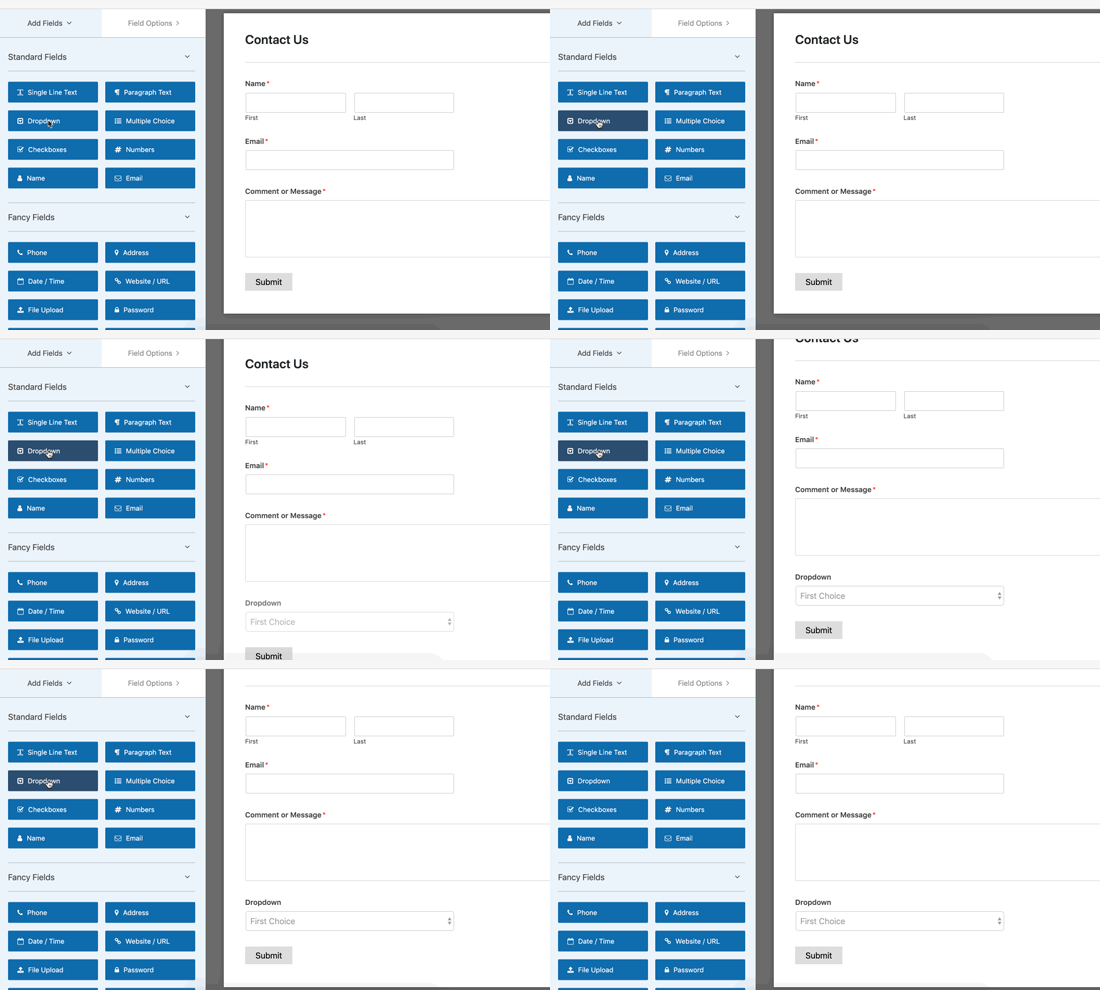
You can easily drag and drop form fields to move them up and down in the form.
Once you are finished editing the form, you can move on to the next step.
3. Turn On Ajax Form Submission Feature
WPForms does not enable Ajax form submission by default. You will need to manually enable it for your form.
Simply switch to the Settings tab in the form builder and check the box next to ‘Enable AJAX form submission’ option.
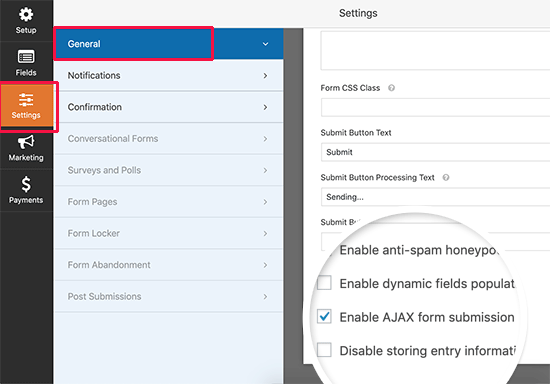
Checking the box will turn on the Ajax functionality for this form.
Now let’s set up what happens after the form submission.
First, switch to the ‘Confirmation’ tab under settings. This is where you inform your users that you have received their form submission.
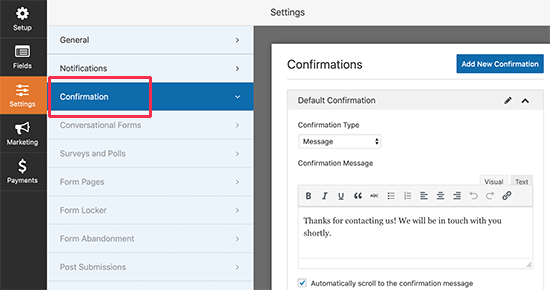
WPForms allows you to do that in different ways. For example, you can redirect users to a URL, show them a specific page, or simply display a message on screen.
Since we have enabled Ajax functionality for the form, redirecting users to another page will defeat the purpose of creating an Ajax form.
You need to select the message option and edit the confirmation message. Feel free to use the formatting toolbar on the editor or add a link or two to tell users where to go next.
After that, you can set up how you would like to be notified about a form submission.
Switch to the Notifications tab in the form settings and configure notification email settings.
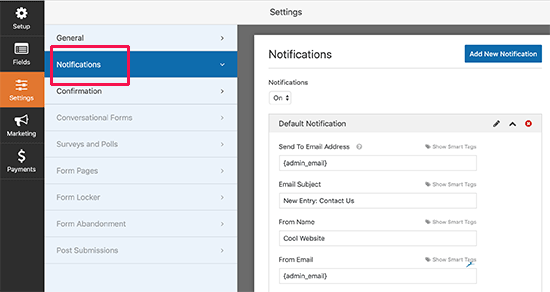
Once you are done, you can save your form and exit the form builder.
4. Add Your Ajax Enabled Form in WordPress
WPForms makes it super easy to add forms into your WordPress posts, pages, and sidebar widgets.
Simply edit the post or page where you want to add the form and insert the WPForms block to your content area.
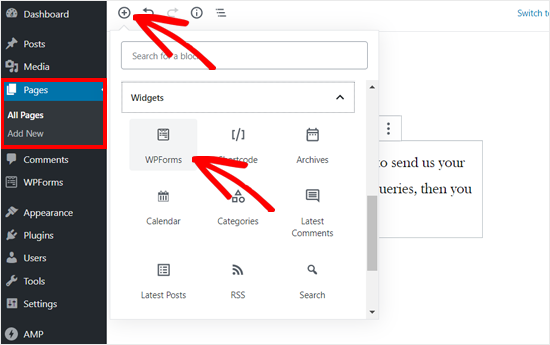
After that, you need to select the form you just created from the block’s settings. WPForms will immediately load a live preview of the form in the content editor.
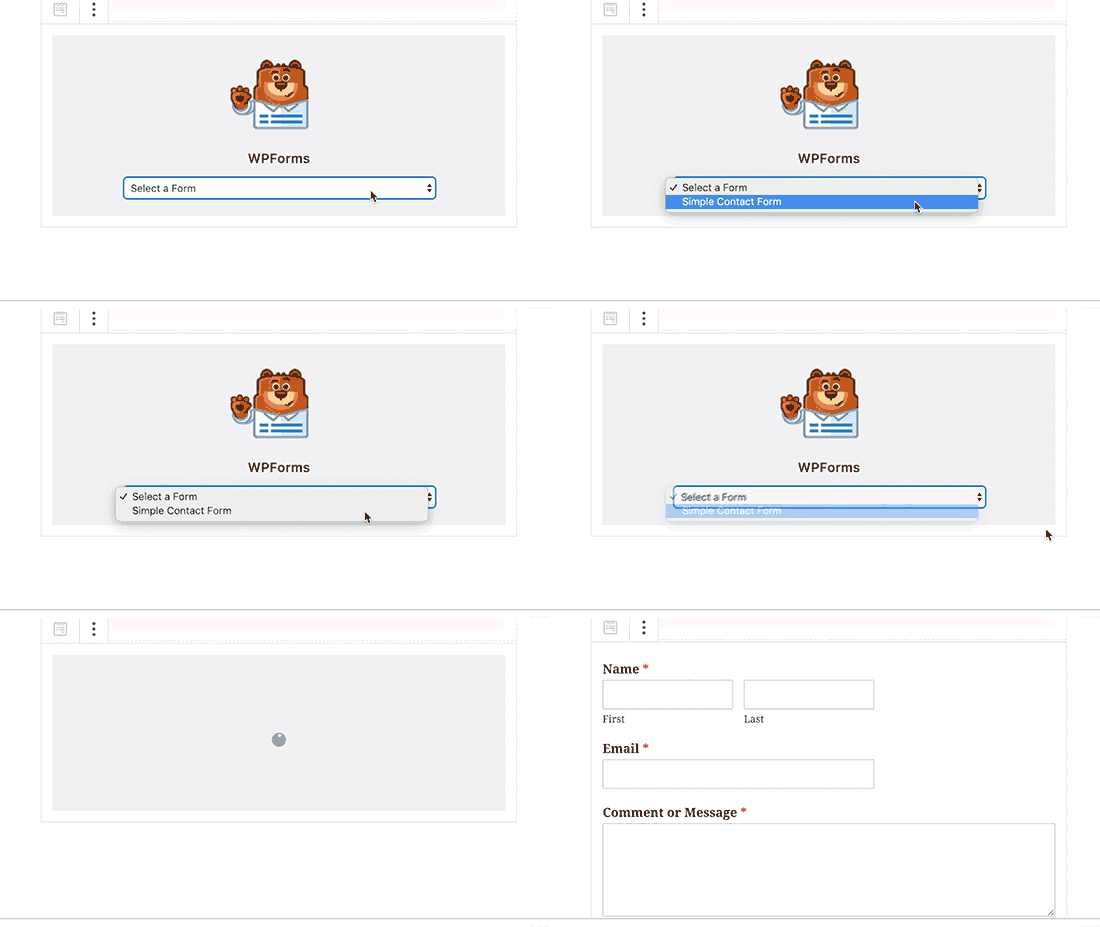
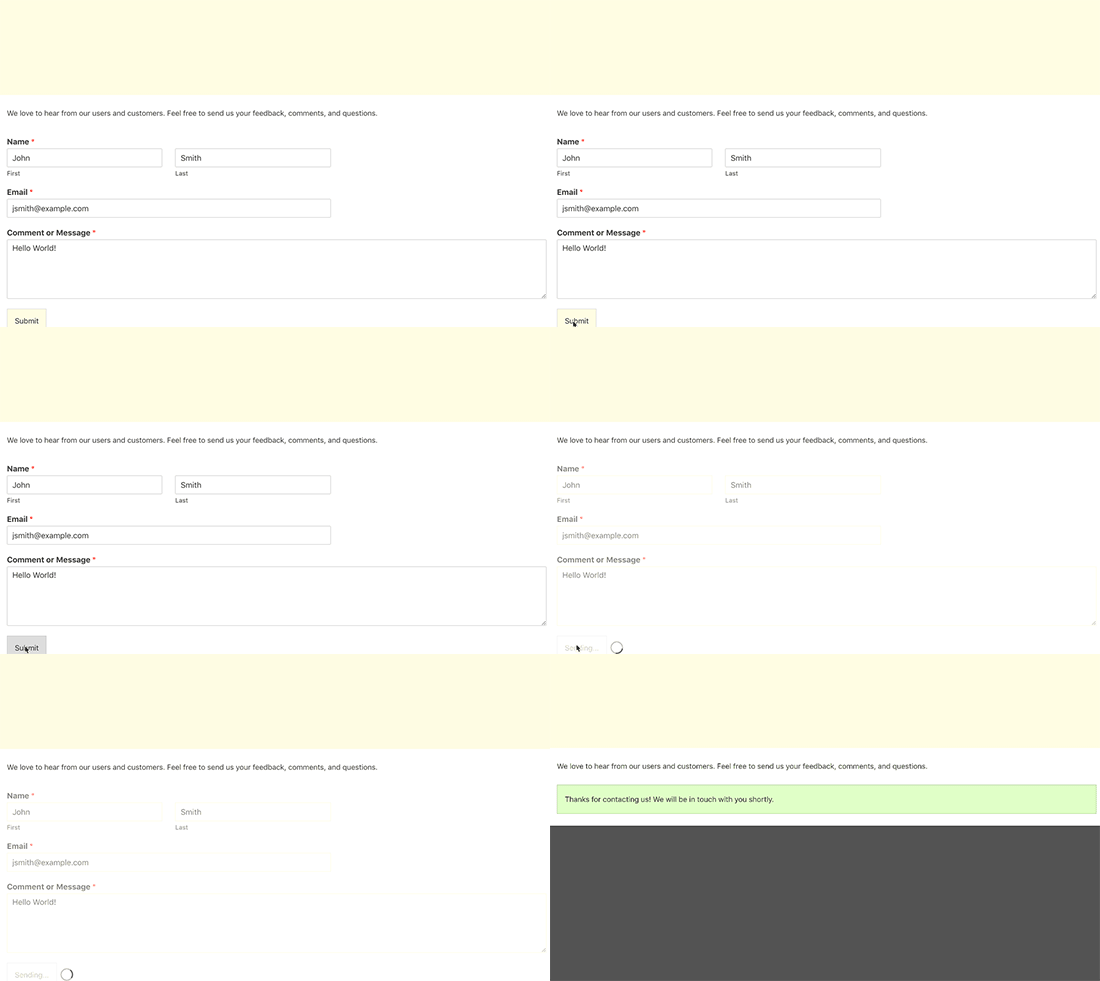
You can now save or publish your content and then visit your website to test the form’s ajax functionality.
You can also add your form to a sidebar widget in WordPress. To do that, go to Appearance » Widgets page and add the WPForms widget to a sidebar.
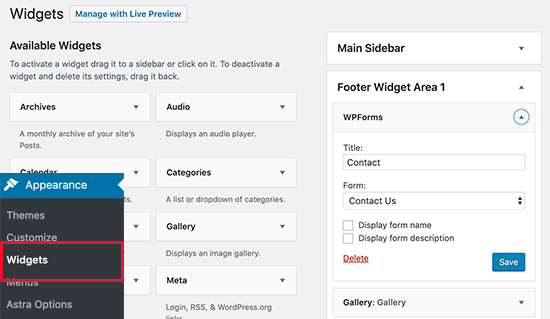
Select the form you created earlier and click on the Save button to store widget settings. You can now visit your website to see your Ajax powered form in action.
We hope this article helped you learn how to create a WordPress Ajax contact form for your website. You may also want to see our guide on how to create a contact form popup in WordPress.
If you liked this article, then please subscribe to our YouTube Channel for WordPress video tutorials. You can also find us on Twitter and Facebook.
The post How to Build a WordPress AJAX Form (in 4 Easy Steps) appeared first on WPBeginner.


