How to accept ACH payments on your website
Whether you want to add ACH to your ecommerce store or as a way for clients to pay you for services through your business website, there’s always a method for you.
? Follow the several tutorials below to accept ACH payments on your WooCommerce, Shopify, Wix, or other website.
Accept ACH payments on WooCommerce
Allowing ACH payments on WooCommerce requires the use of:
- The Payment Plugins for Stripe WooCommerce plugin
With that installed, you can create a WooCommerce product page—with an ACH payment option—for:
- Standard eCommerce products
- Recurring subscriptions
- Individual payment pages/invoices for products or services
To begin, install and activate Payment Plugins for Stripe WooCommerce.
In WordPress, go to WooCommerce > Stripe by Payments Plugins.
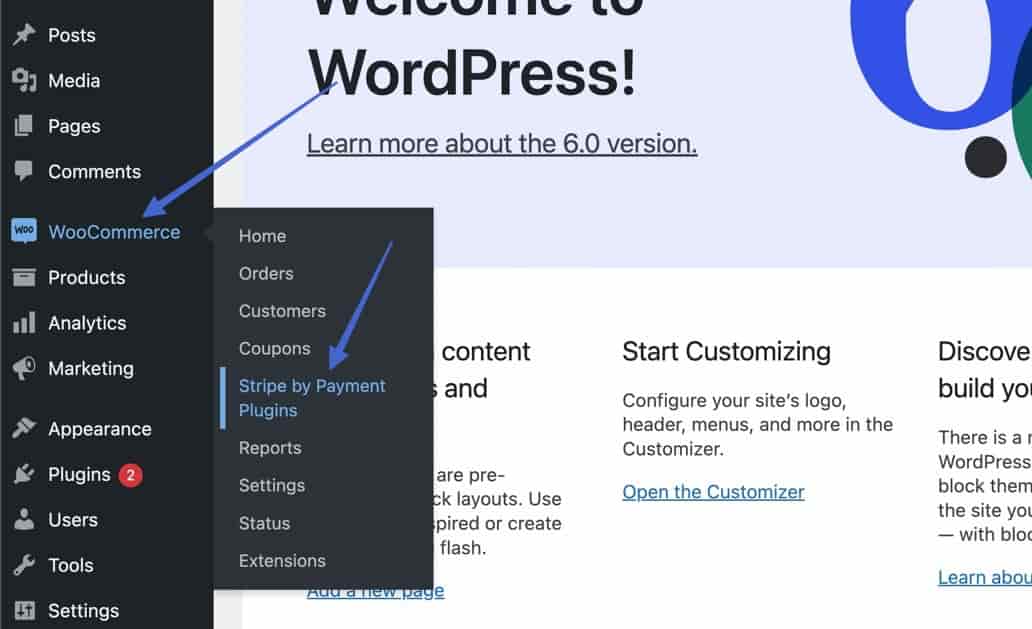
Click on the Settings option.

Click to Connect to your Stripe account. Either log into your current Stripe account or create one to link it to the plugin.
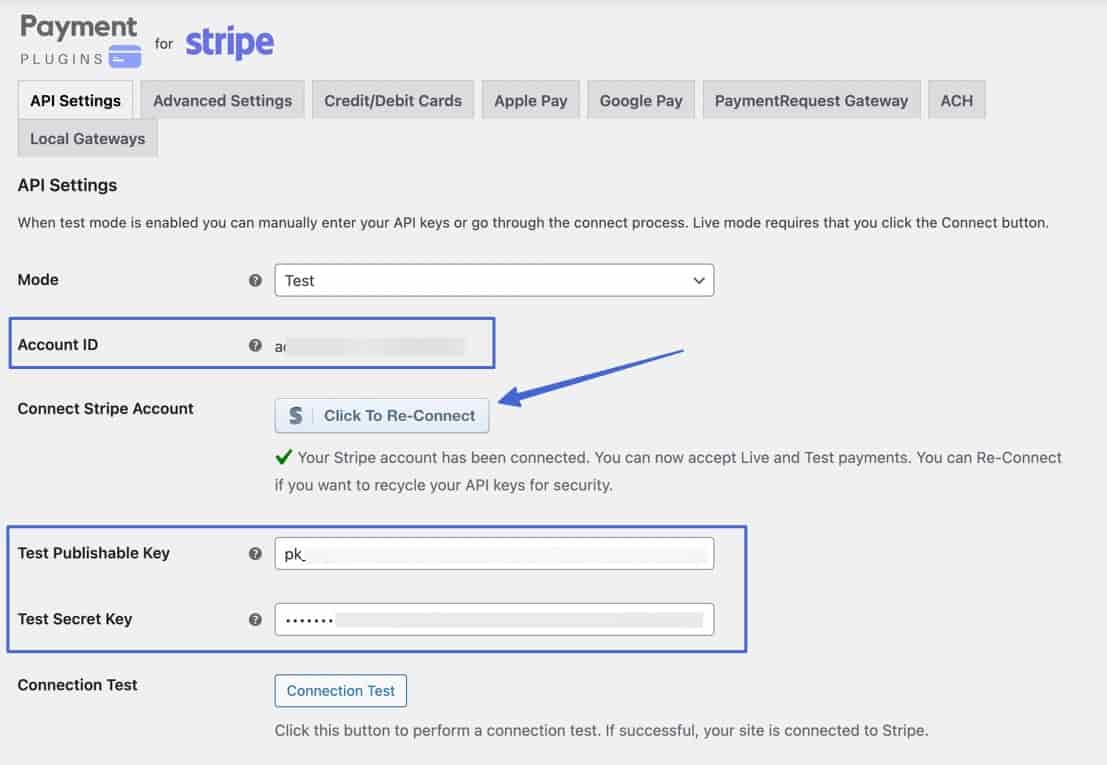
Once linked, the plugin shows that you’re connected, and it gives an option to test the connection.
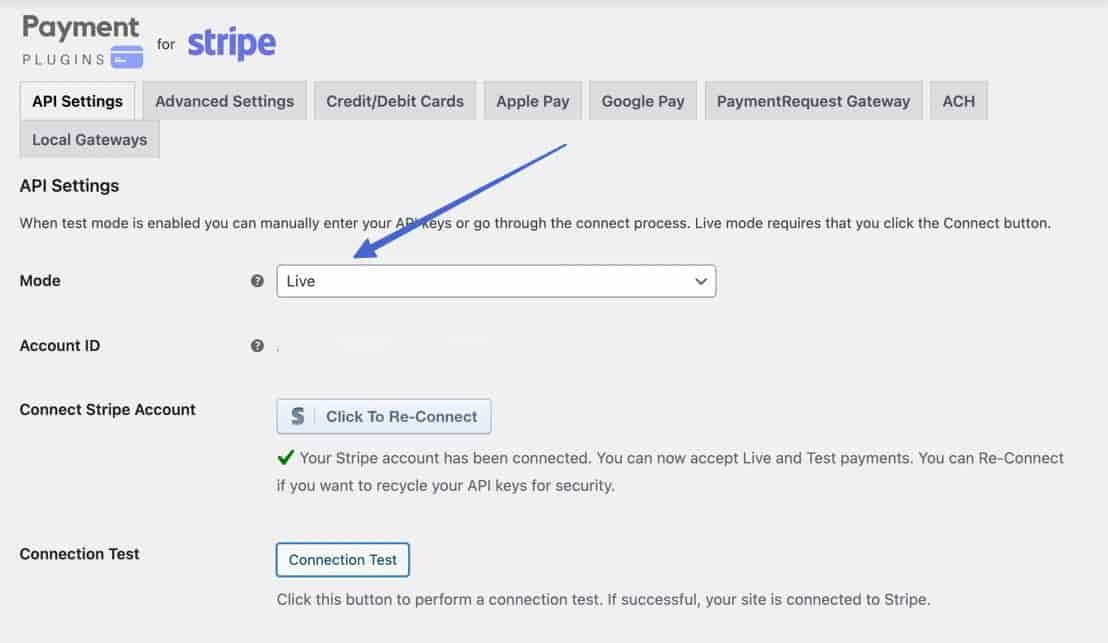
Choose Live or Test mode, depending on how you currently want to run the ACH checkout.
⚠ Note: Test mode is best for the Sandbox and Development options from Plaid.
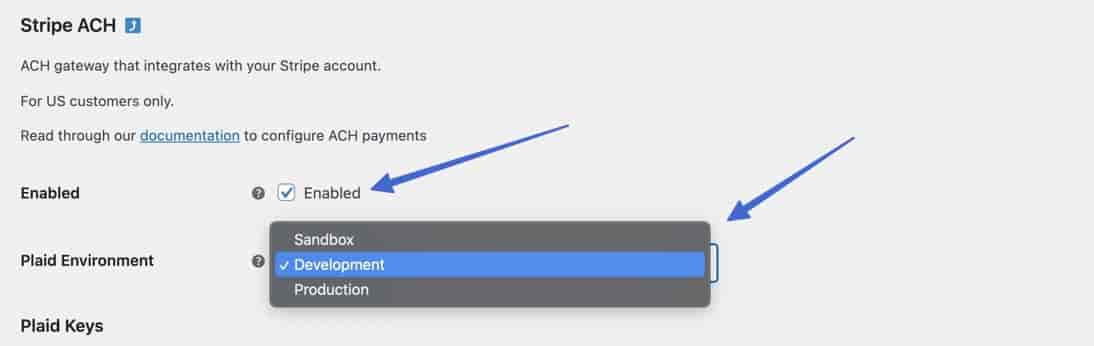
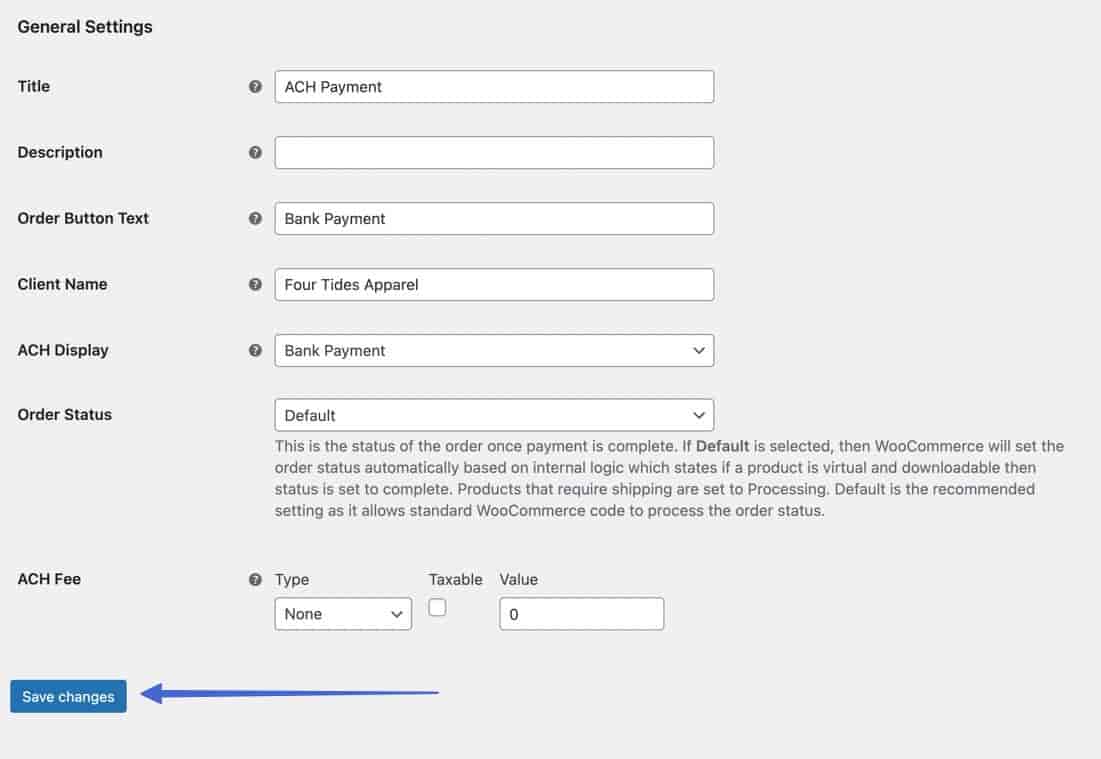
Go to the ACH tab and check the Enabled box. The plugin uses Plaid, a service for making ACH payments where users simply log into their bank accounts. Therefore, select Production or Development next to Plaid Environment.

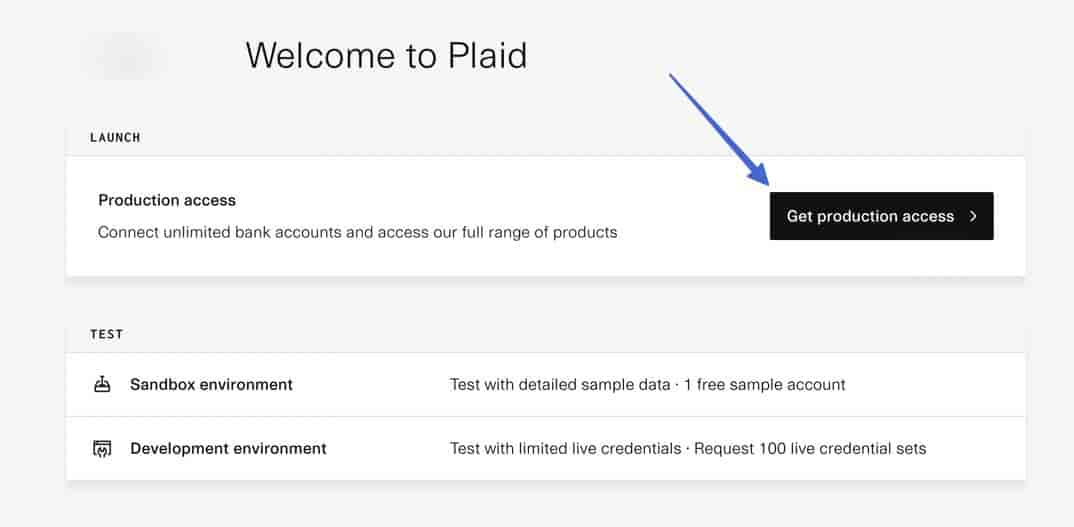
- Production: This is what you’ll eventually want for a live checkout, but it requires you to apply for a Production key inside Plaid.
- Development: Allows for 100 live credentials, so it works well for testing, and theoretically for small-batch processing.
- Sandbox: Another testing option that only gives one set of credentials. You can use it for testing, but we find that Development is more flexible.
ℹ️ Be sure to save the changes.
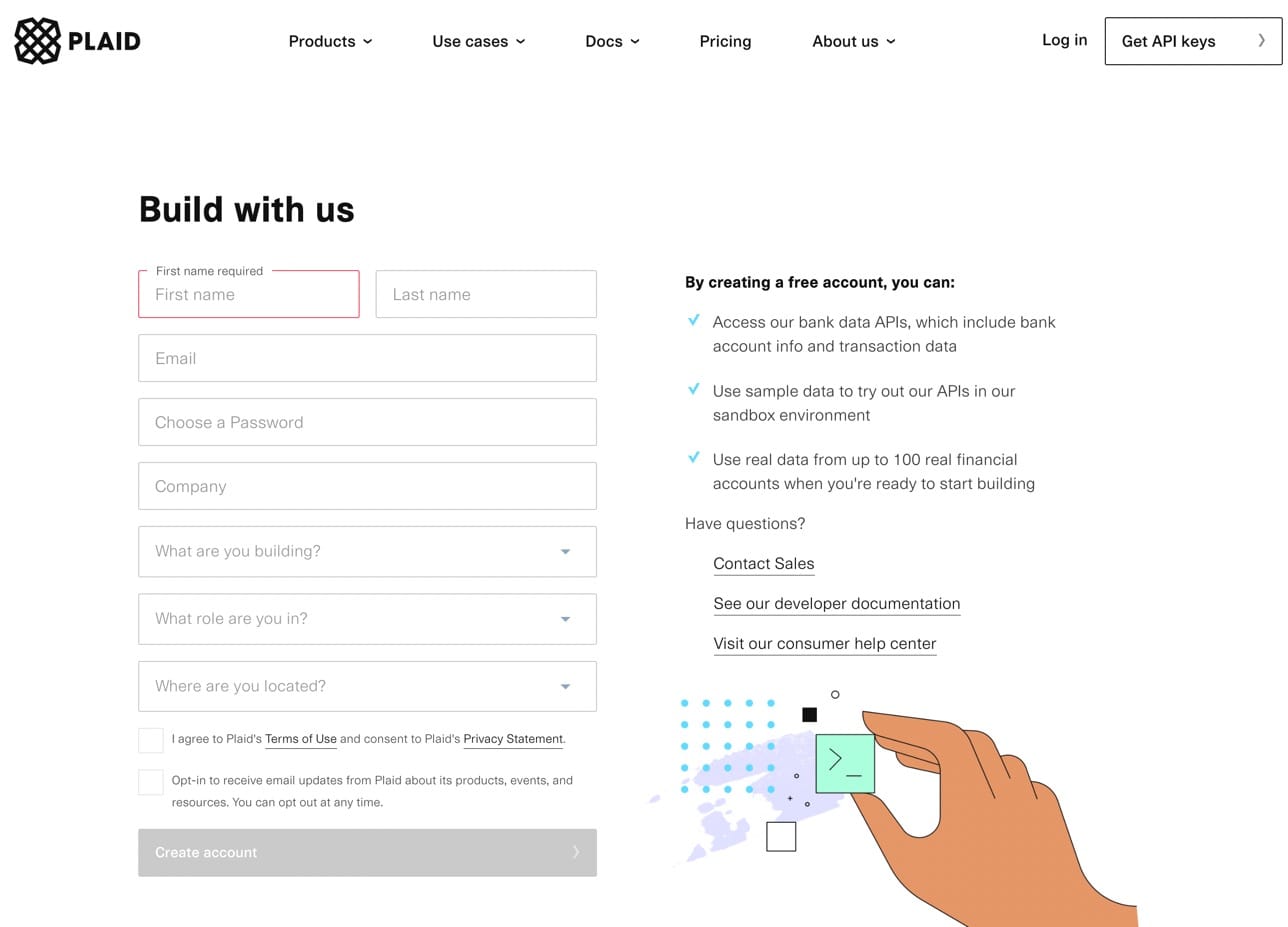
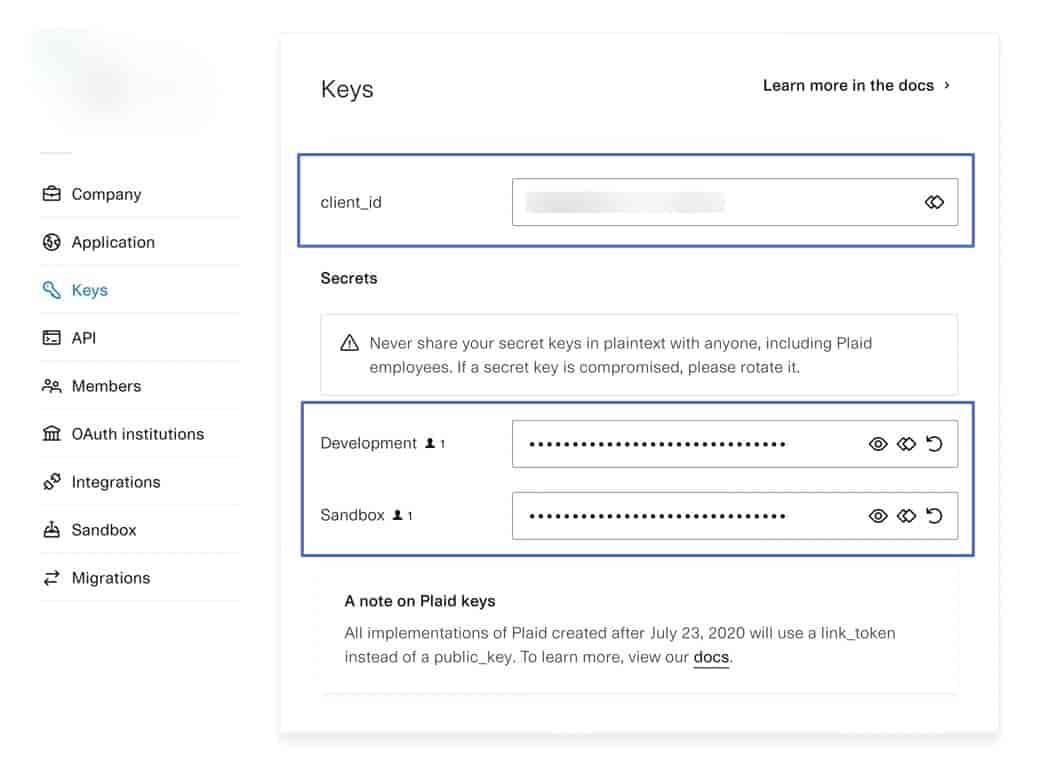
Create a Plaid account. This will link to both the plugin and your Stripe account. It’s also where you get your Client ID and API secrets.
In Plaid, go to Team Settings > Keys.

Copy the Client ID, Development Secret, and Sandbox Secret.
Paste all of those into their respective fields in the Payment Plugins for Stripe fields (under ACH).
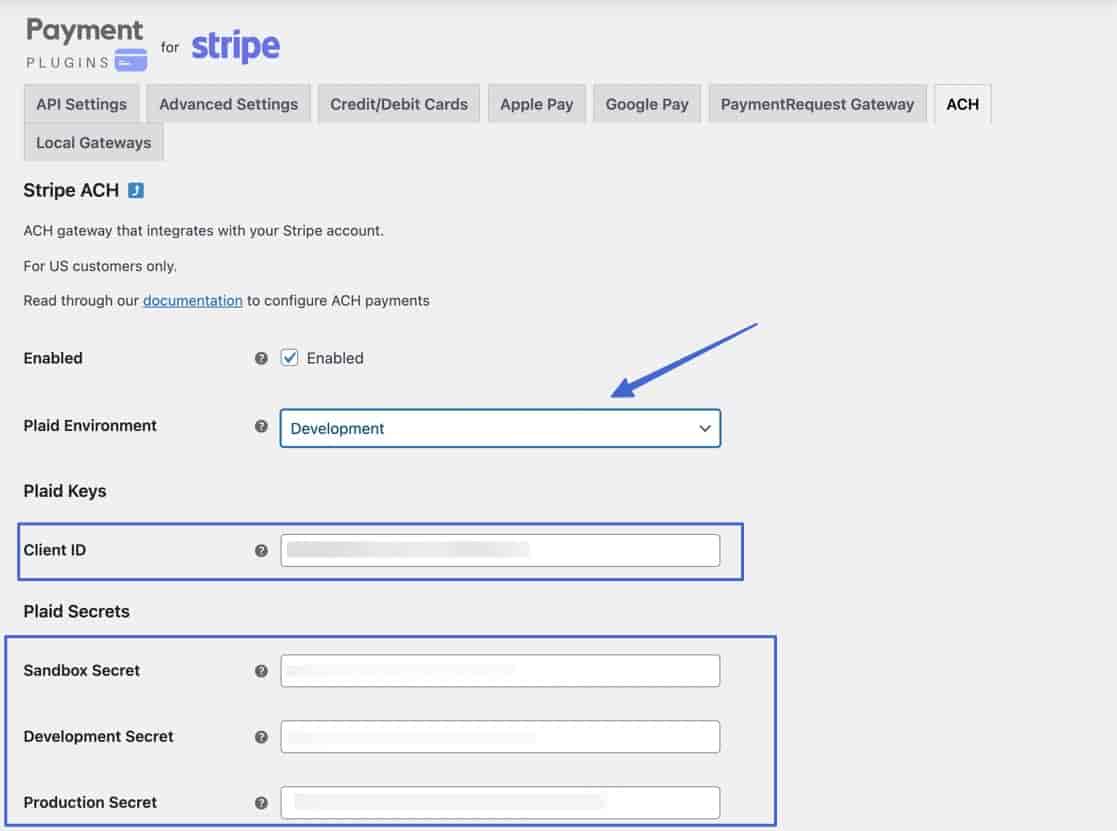
The Production Secret from Plaid is required for running a live checkout. You must apply to get production access, after which, you can find the key and paste it into WordPress.
The ACH tab in the plugin also has some settings for formatting your ACH checkout module. Customize those as you please, then click Save Changes.
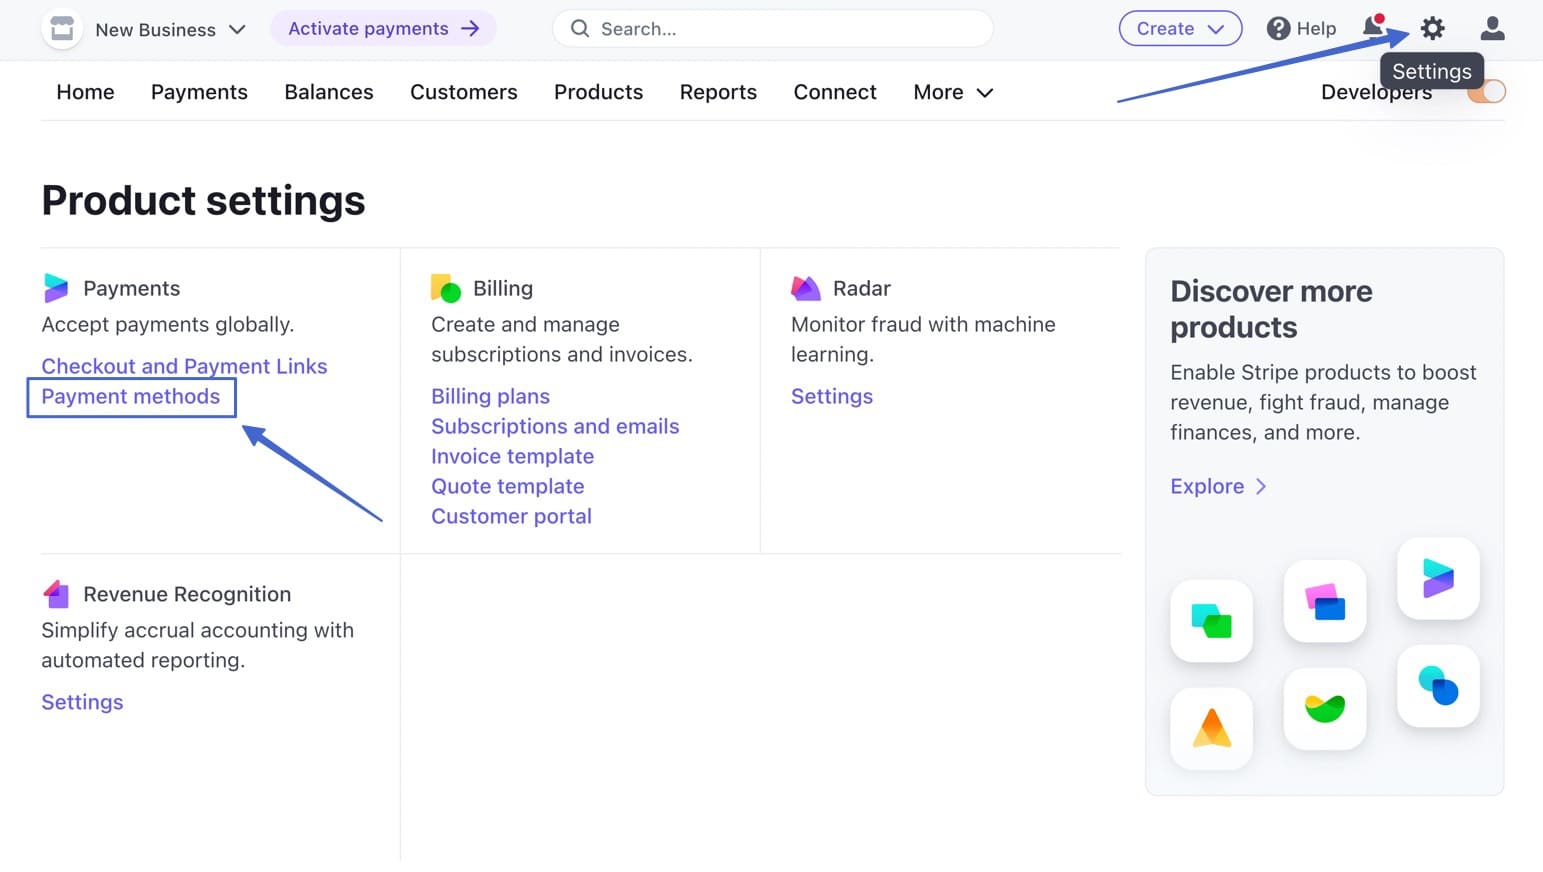
You must also activate ACH payments in Stripe. To do so, navigate to Settings > Payment Methods.
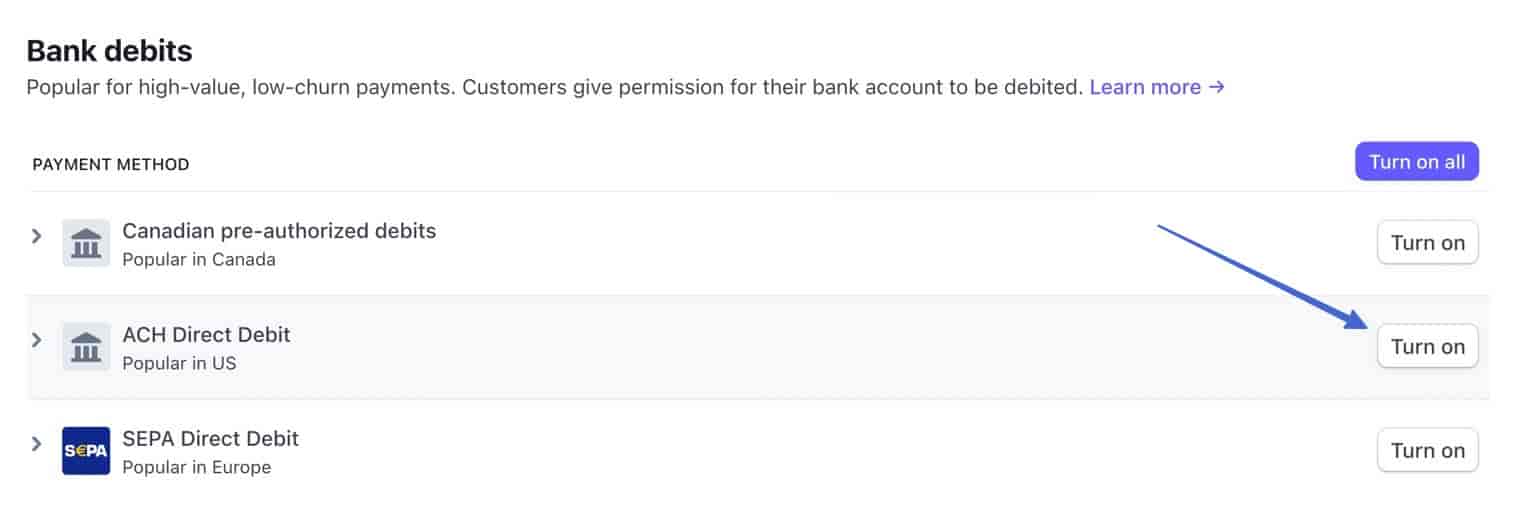
Scroll down to the Bank Debits section and Turn On the ACH Direct Debit option.
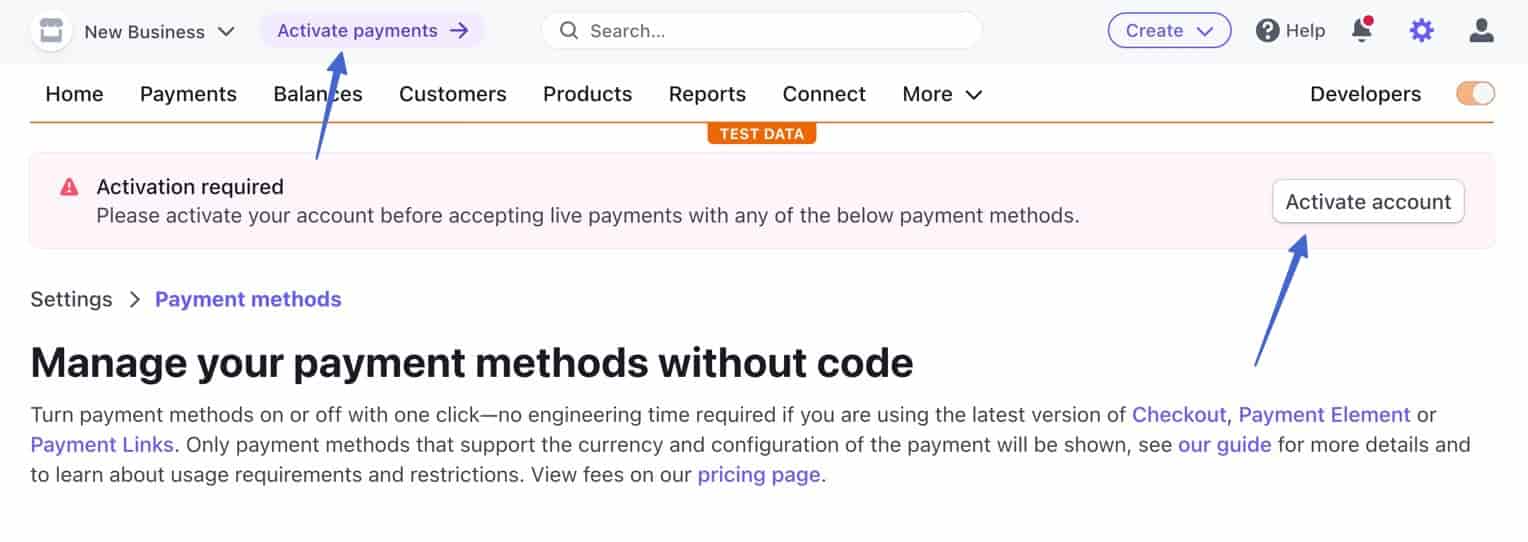
As a reminder, you also need to Activate Payments in Stripe if you haven’t already done so.
To check the functionality of your ACH payments, add items to your WooCommerce cart, then go to the Checkout module.
You should see an ACH Payment option in the payment method section. Users can then click the Bank Payment button (or whatever you named it) to proceed.
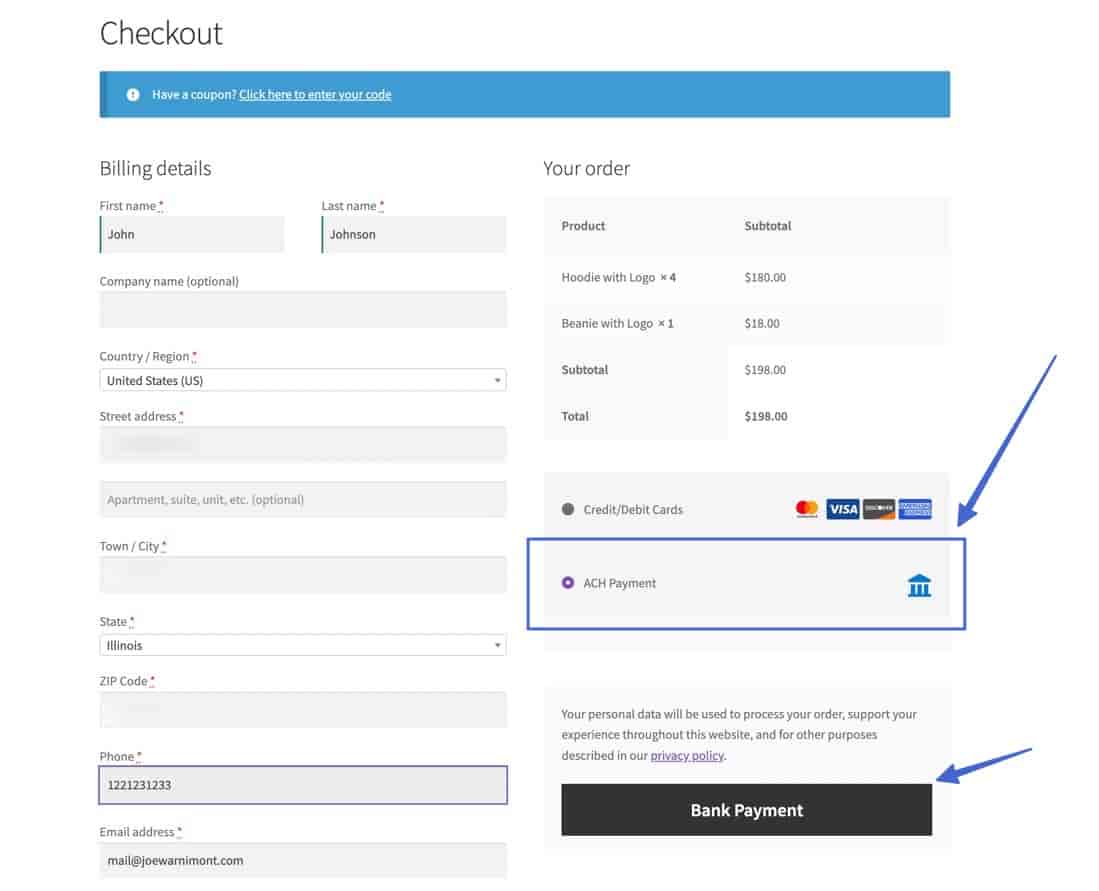
That reveals the Plaid module for ACH payments.
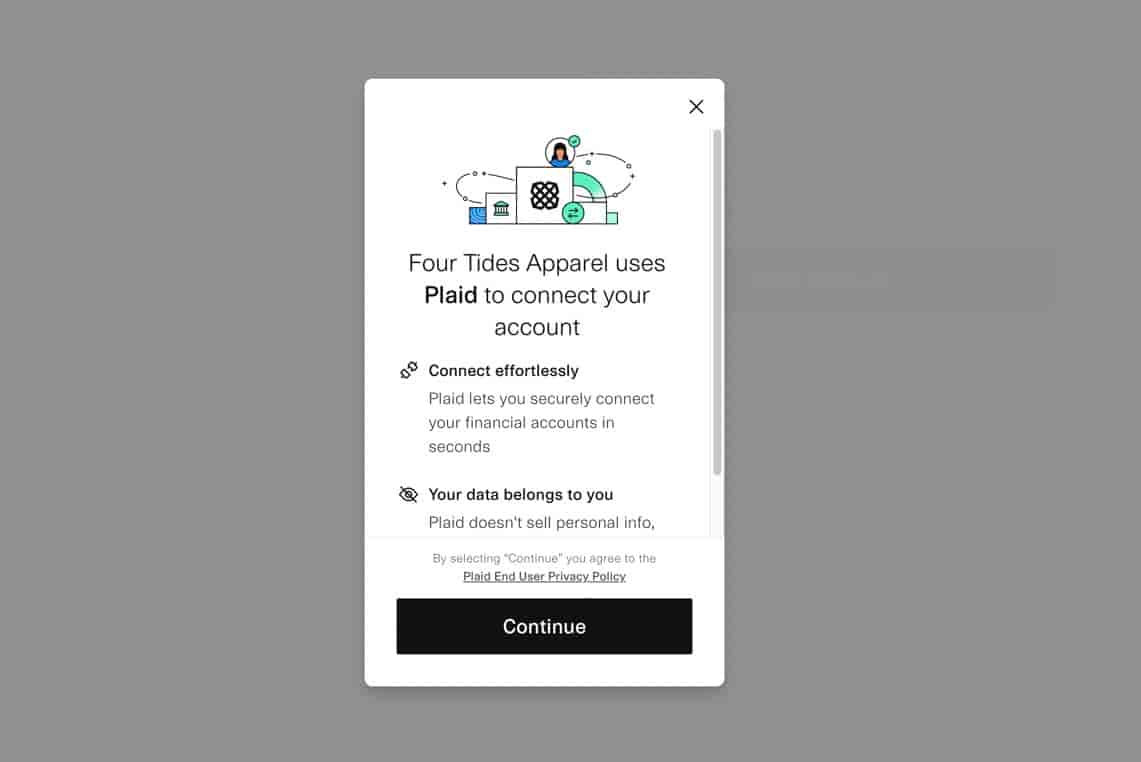
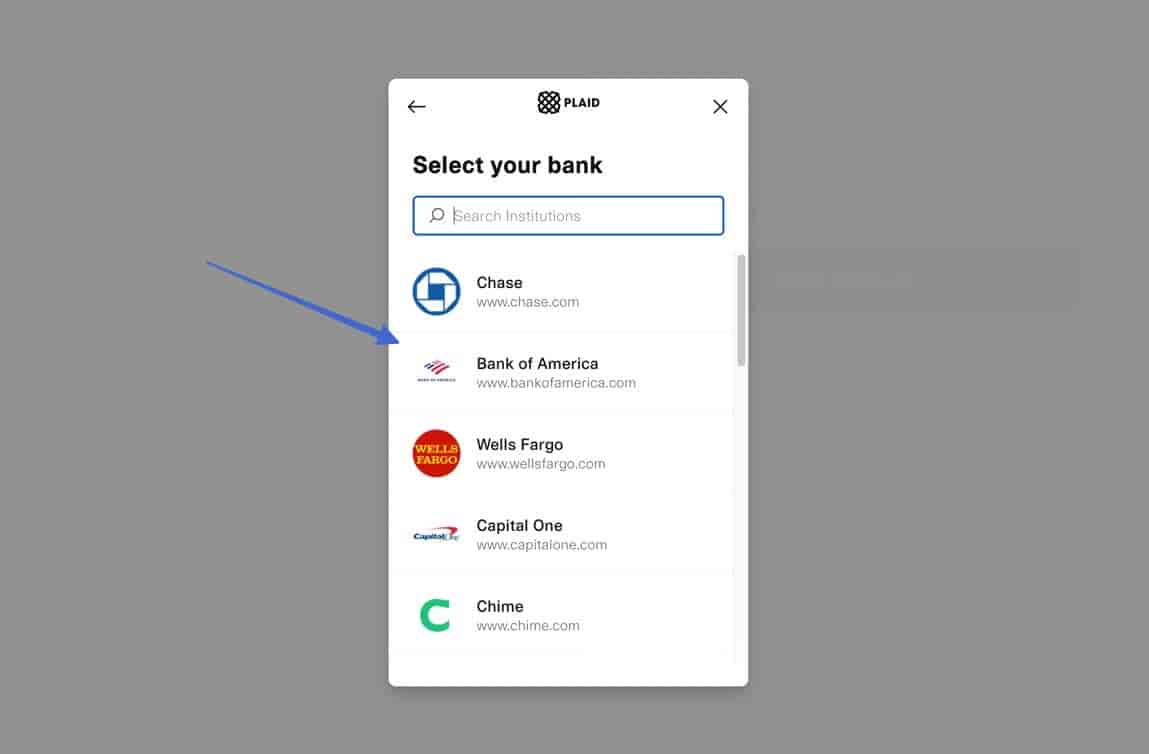
Users can choose their bank and login with those credentials, or they have the option to manually type in bank account numbers.
That’s it! ?
Alternative option for WordPress
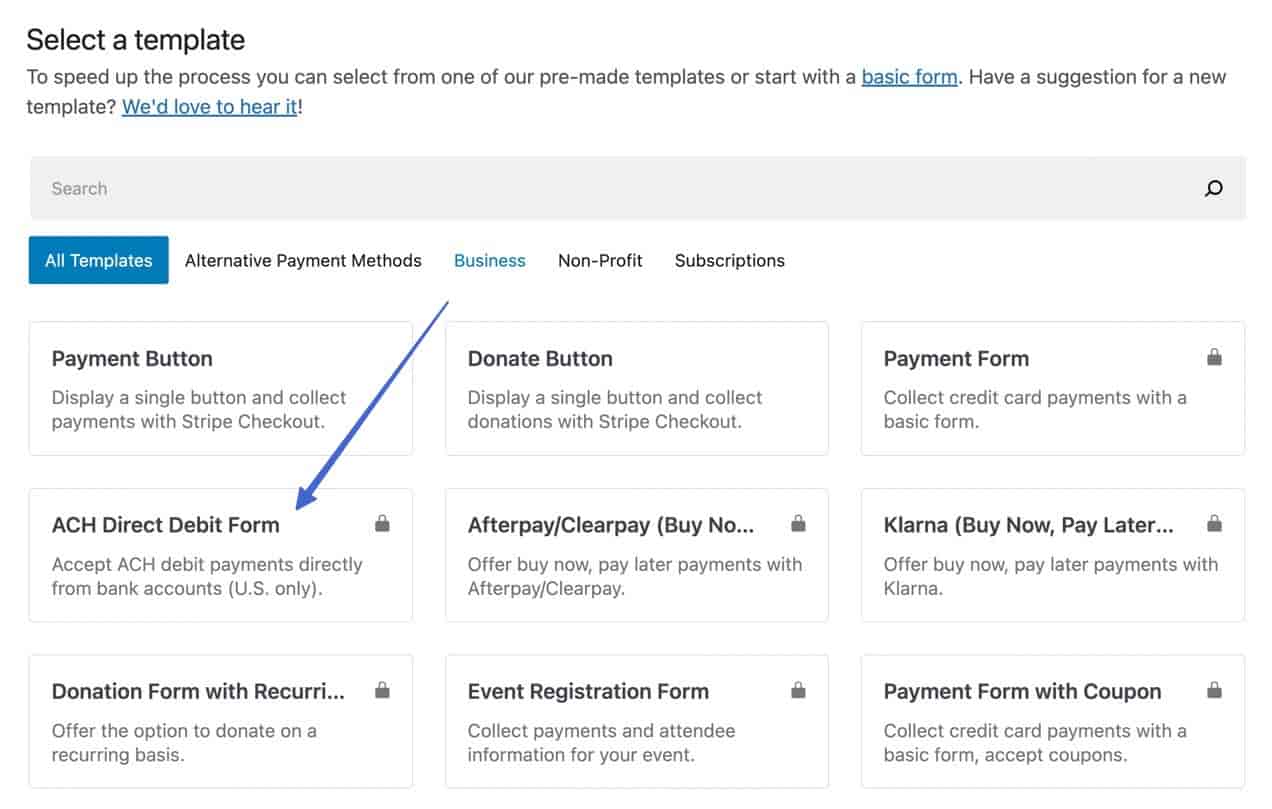
You may want to add an ACH payment method to your general WordPress site to accept money from clients, B2B customers, or for service-based work. In this case, the best option is to add the WP Simple Pay plugin called Stripe Payment Forms.
The ACH functionality requires a premium membership, but once active, you can turn on an ACH Direct Debit Form to send clients or customers to individual invoices and payment pages on your website.
Accept ACH on Shopify
Unfortunately, Shopify tries its hardest to prevent merchants from processing ACH payments, since they make so much of their money from credit card processing fees.
There’s only one way around this: a manual payment method that leads to a separate ACH payment link.
The good news is that it’s not that much of a hassle considering ACH is most often used in ecommerce for high-priced orders, where the customer or B2B client doesn’t mind the extra step (kind of like an invoice).
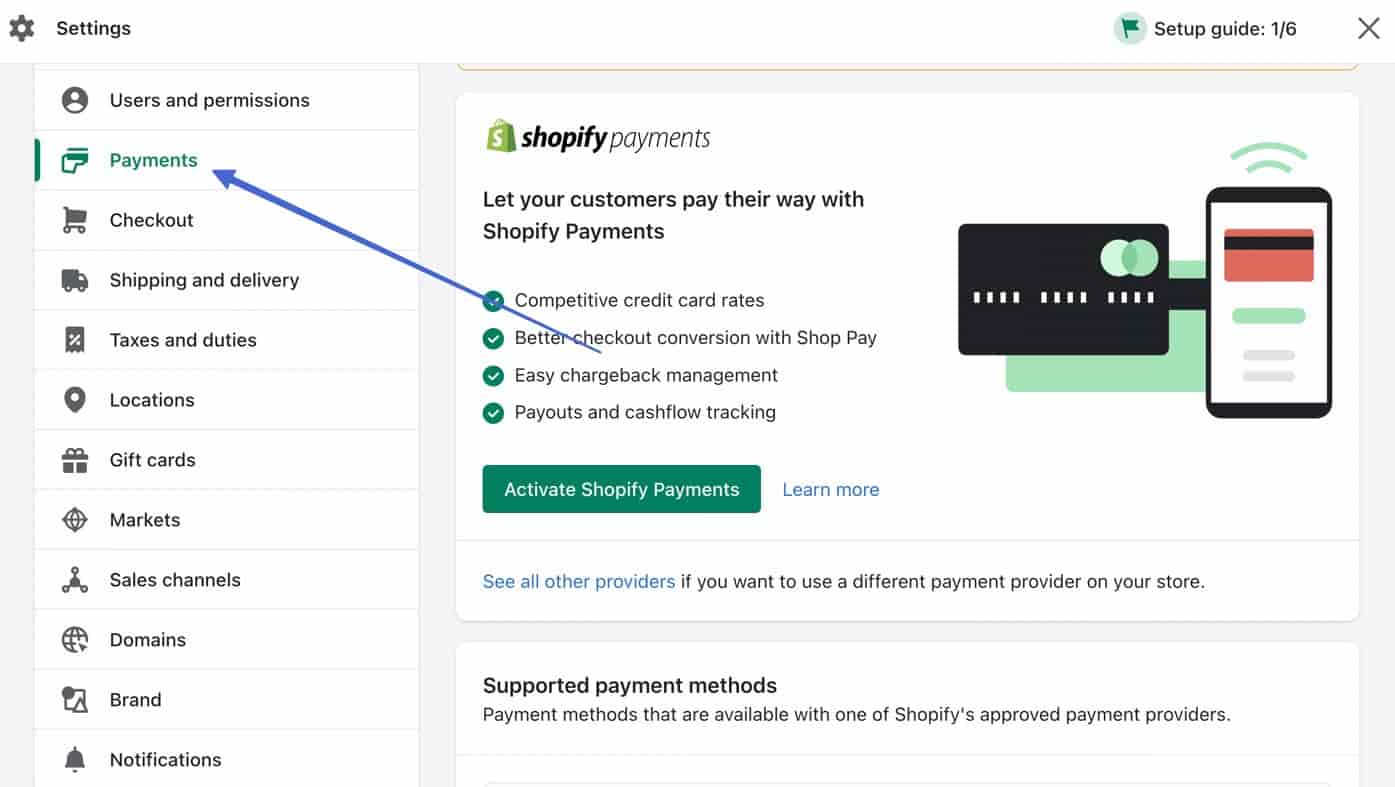
To start, go to Settings in Shopify.
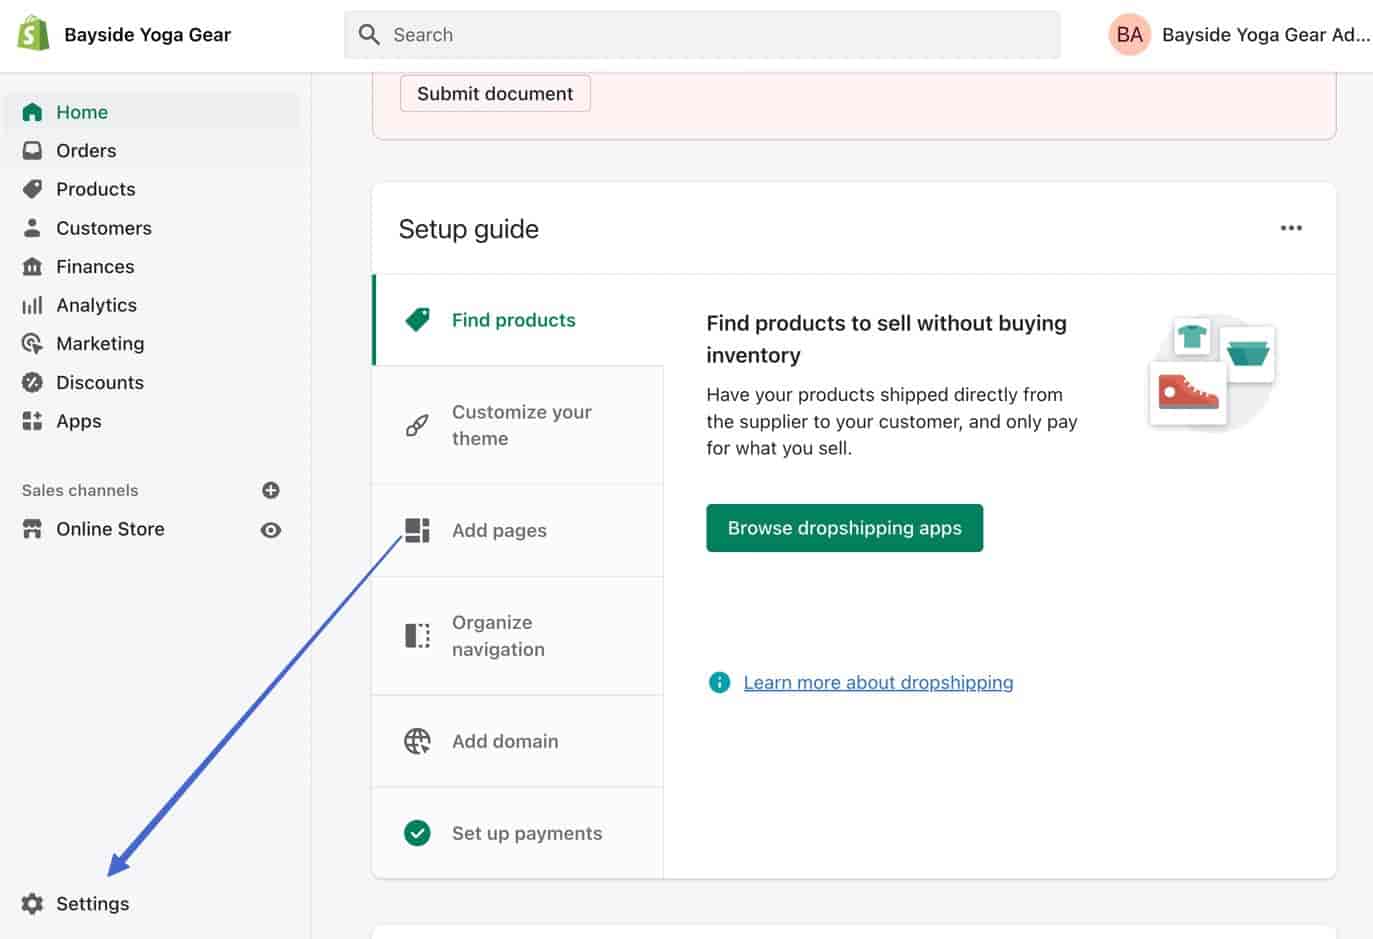
Click Payments.
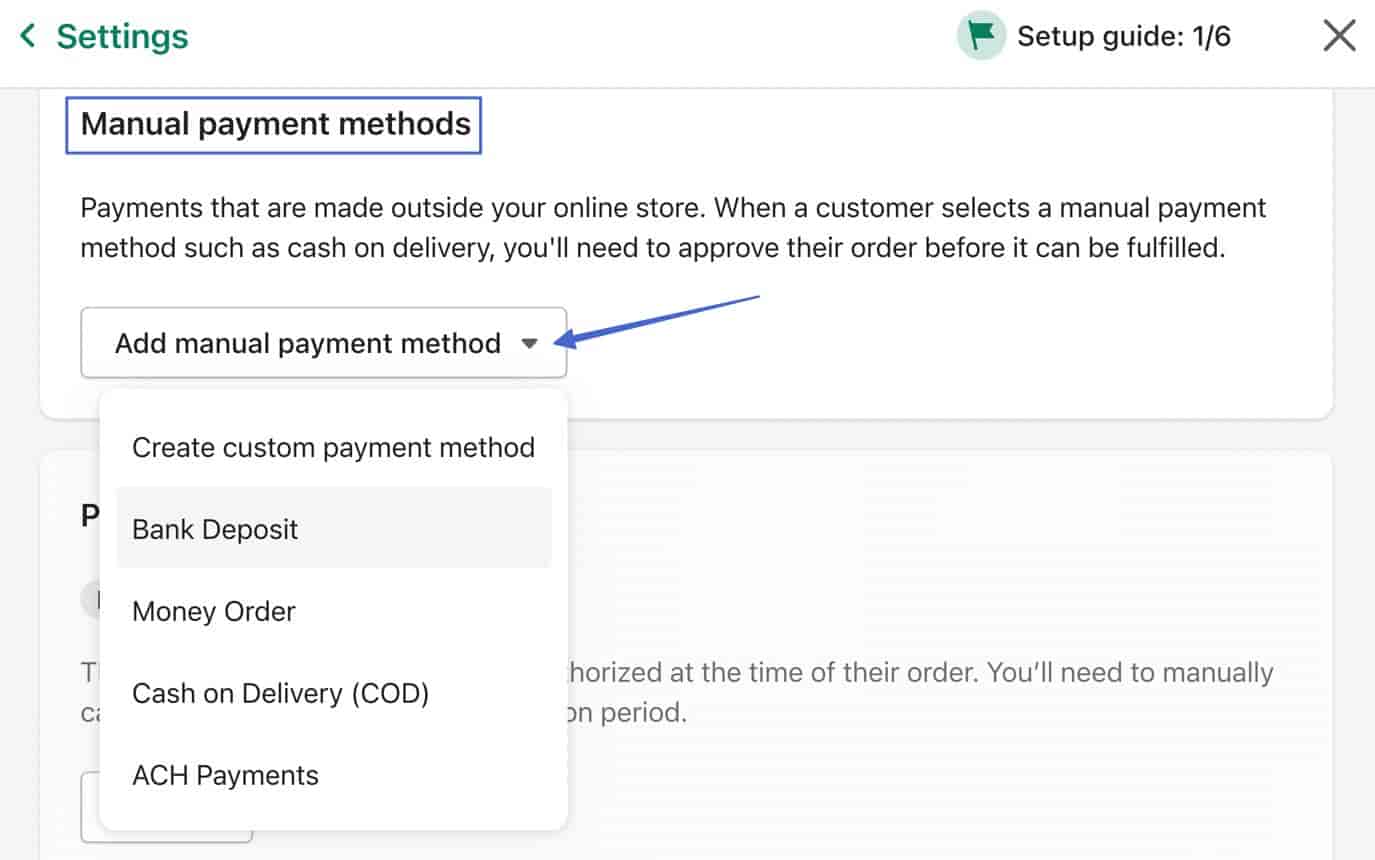
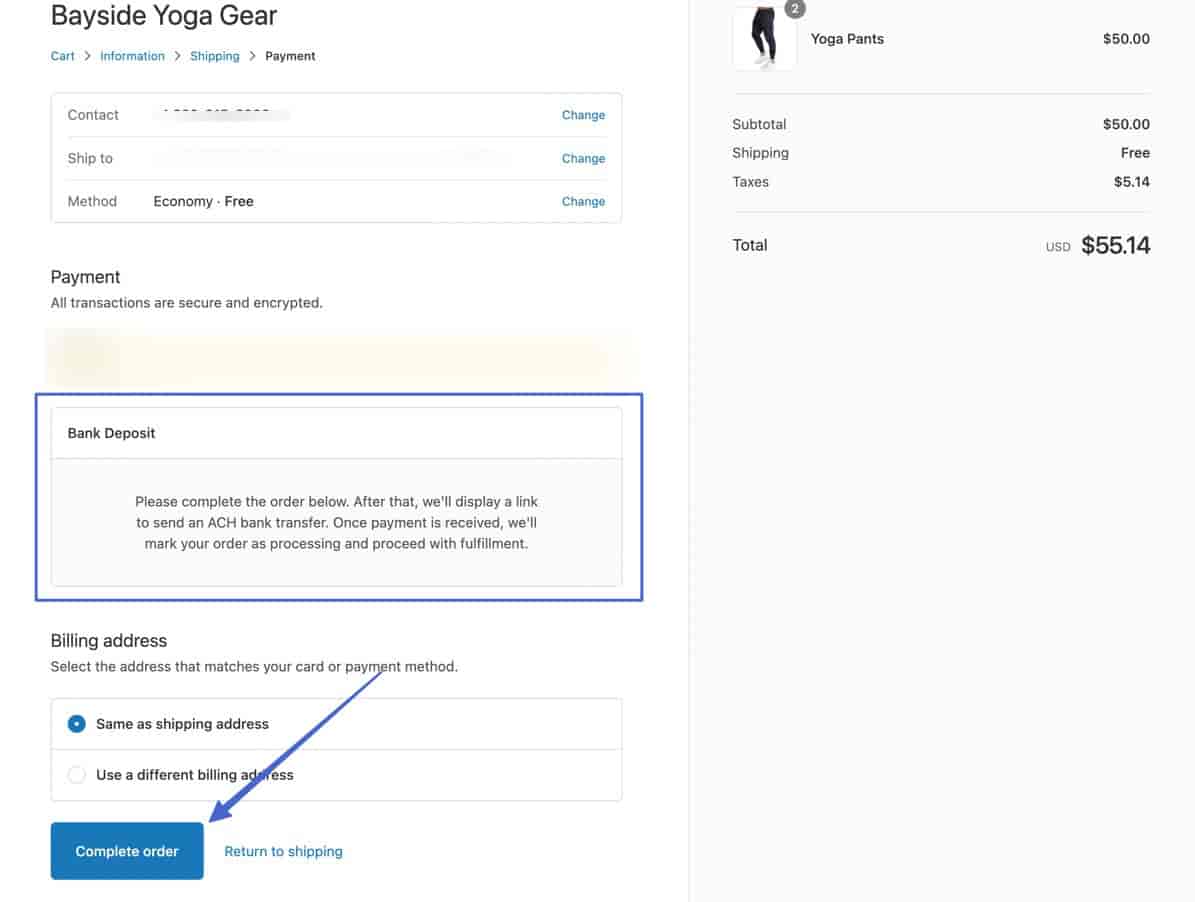
Scroll down to the Manual Payment Methods section. Click the Add Manual Payment Method dropdown, and either choose Bank Deposit or Create Custom Payment Method.
Both offer the same features, but you can give a custom name to the second “Custom” option.
This provides two fields for explaining to your customer where to make the payment.
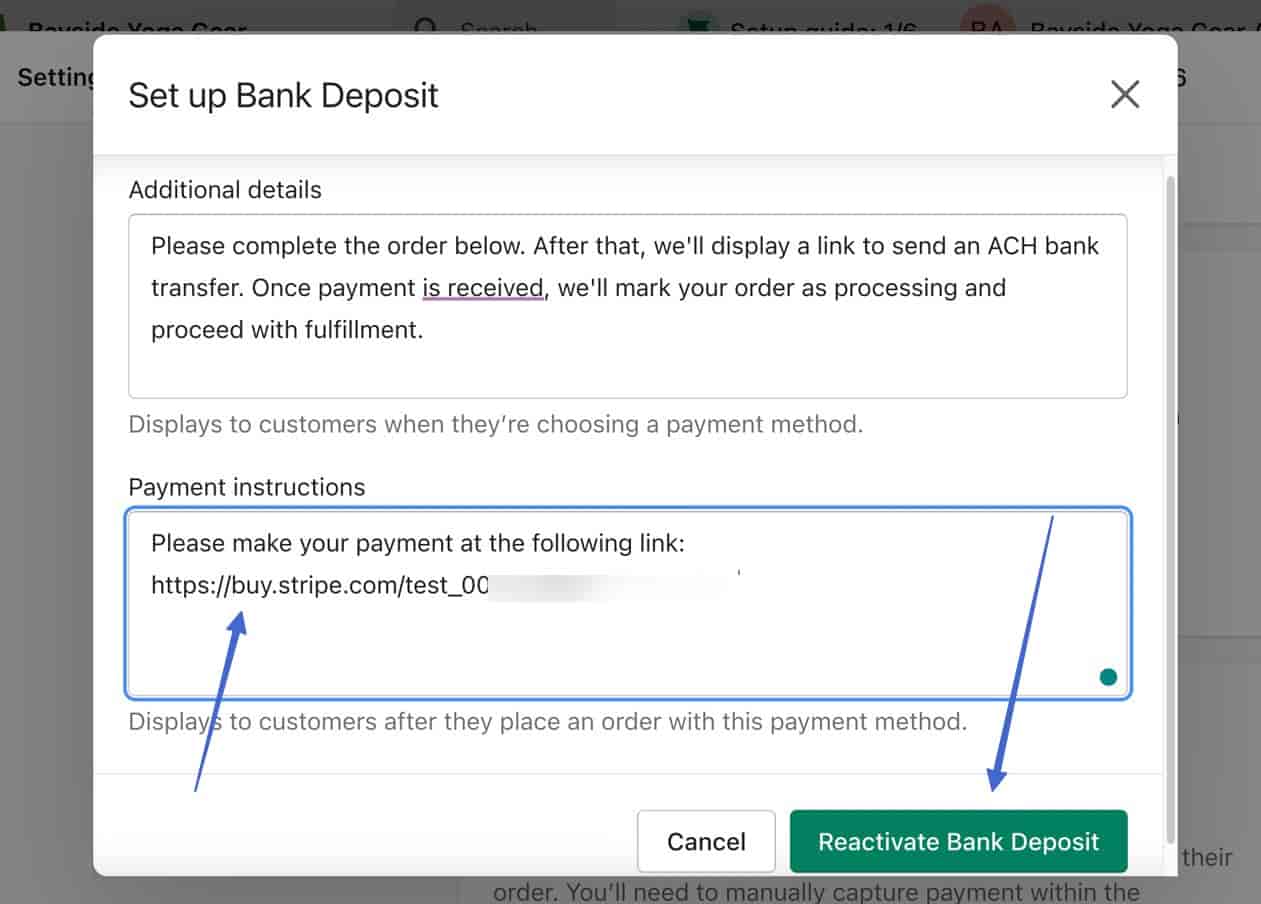
- Additional Details: This is where you tell the customer to complete the purchase on Shopify (without typing in any payment information). Then, inform them that they’ll get a link for payment, after which, you will process the order.
- Payment Instructions: Here’s where you provide a link to your external ACH payment link. This page shows up after they complete the order in Shopify.
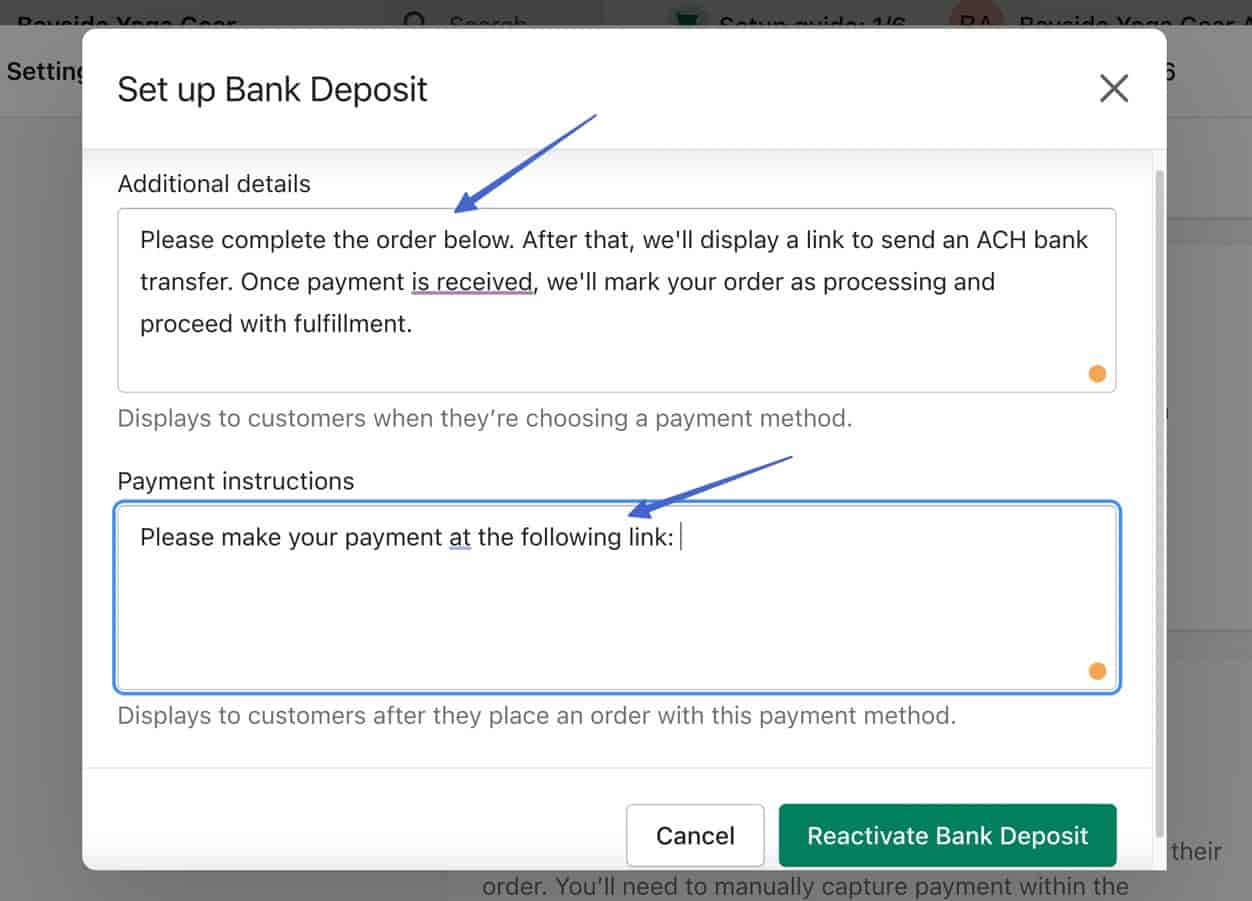
Before saving your Manual Payment Method, you must create an ACH payment link to put in that field.
? We recommend using Stripe.
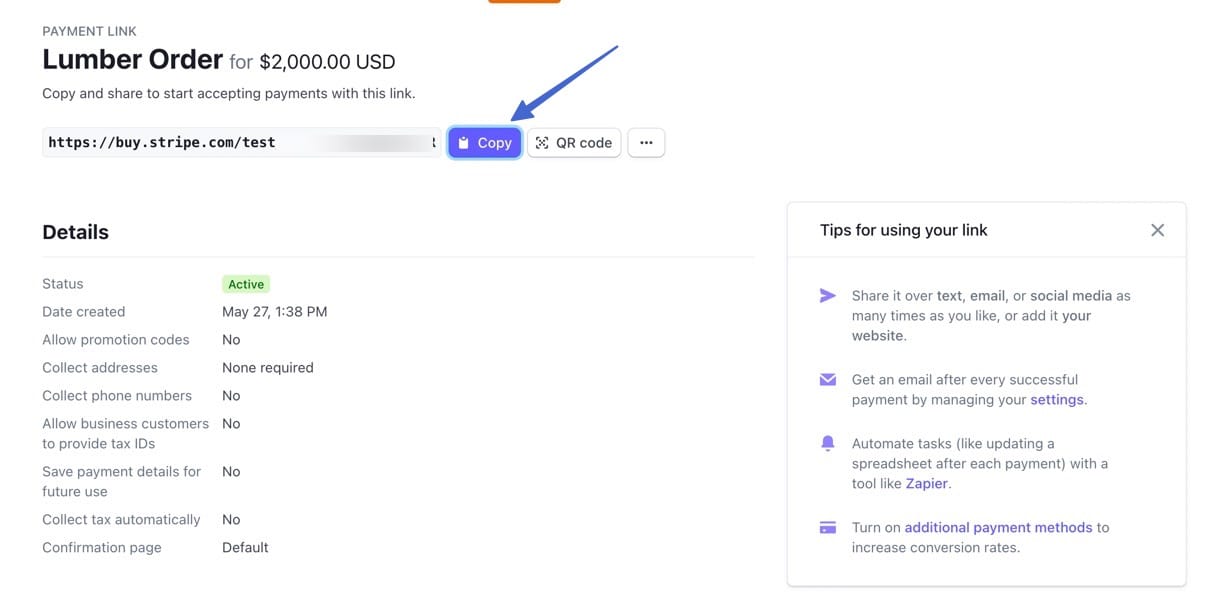
Create or log into your account, then go to Payments > Payment Links.
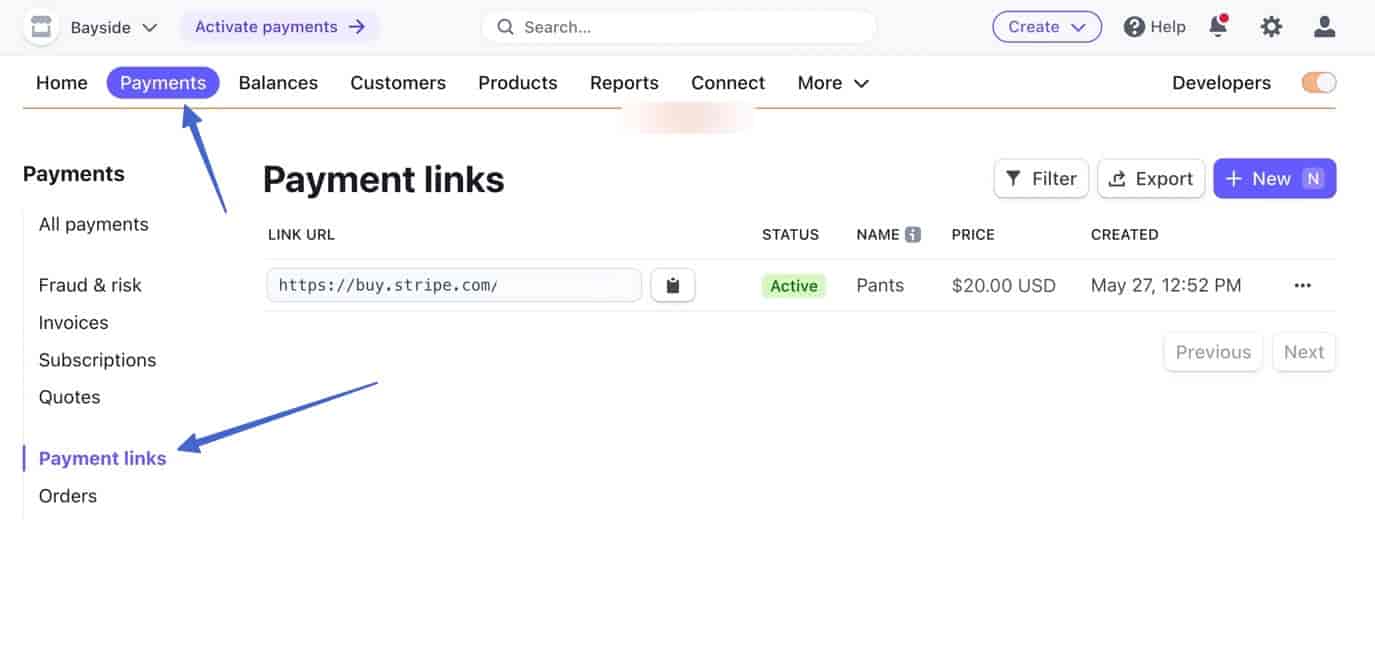
Select the Add New button.

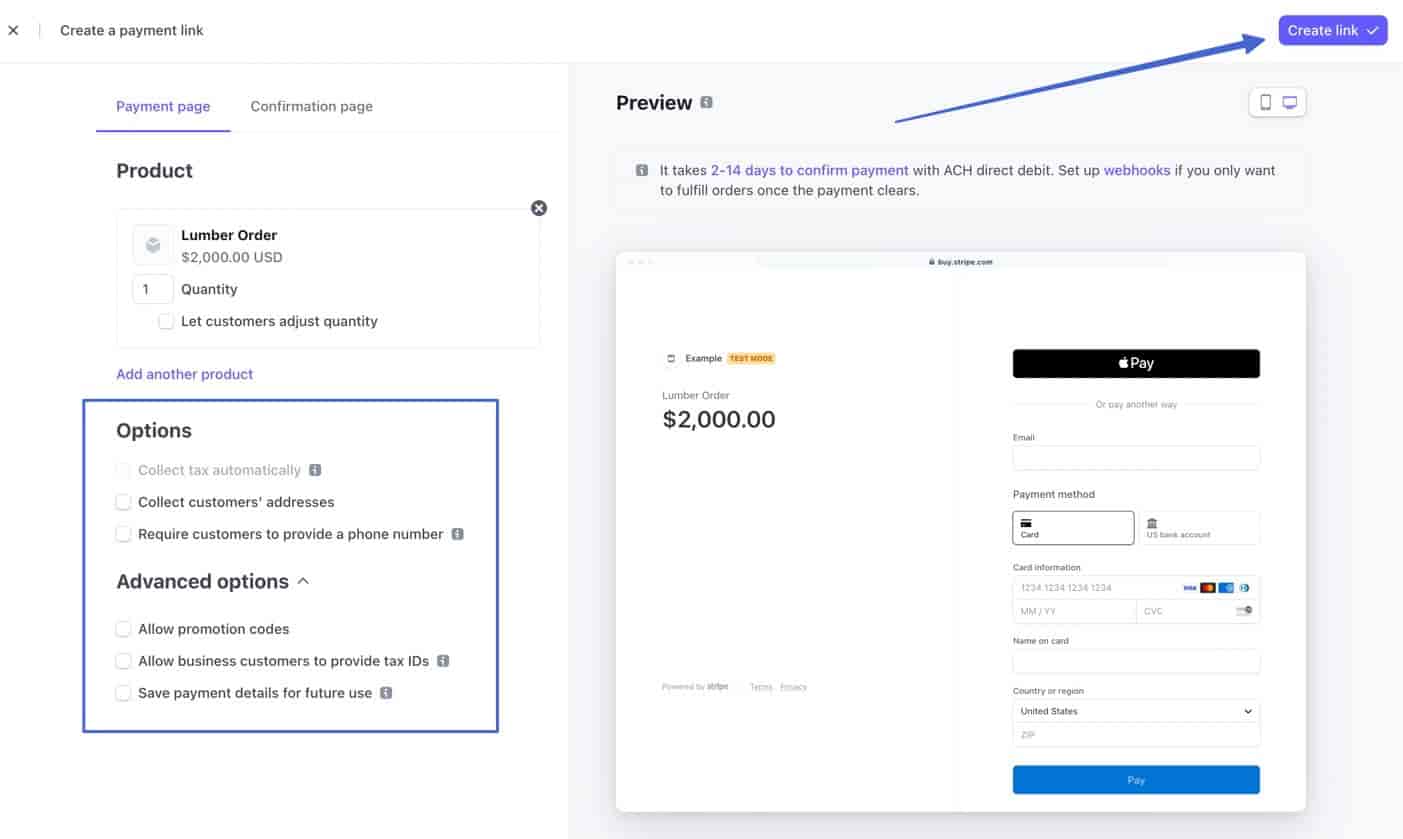
Add a product or a summary of the order for that customer. You can also make a product that multiple customers can pay for.

Fill in all the optional settings, then click on the Create Link button.
Click to Copy the link to your clipboard.

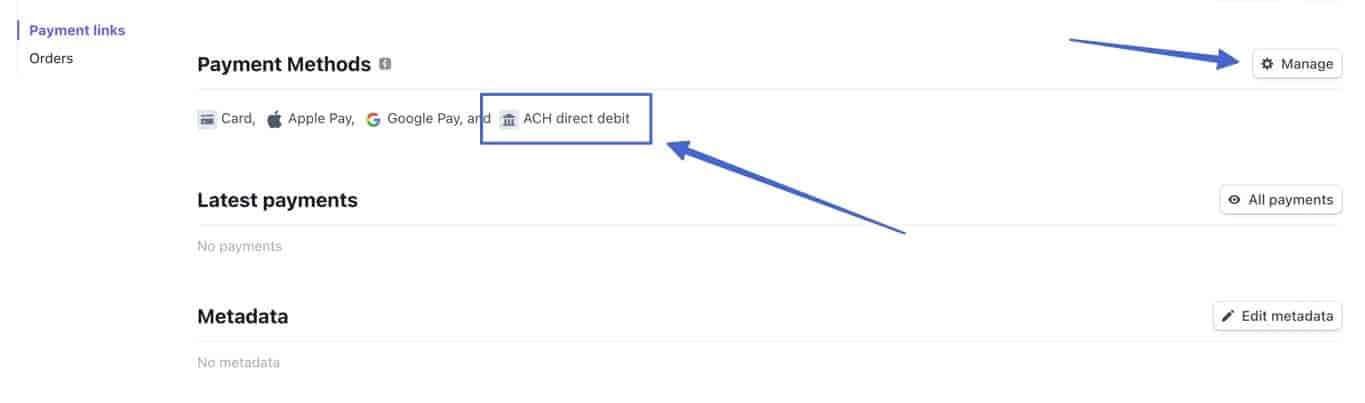
⚠ Note: On the same Payment Link page, make sure you scroll to the bottom to ensure that ACH Direct Debit is included under Payment Methods. If not, click Manage to add it.
Paste that link in the Payment Instructions field, then save the payment method.
Now, on the frontend, customers see the Bank Deposit (or whatever you called it) payment method and instructions. They should then click on Complete Order.
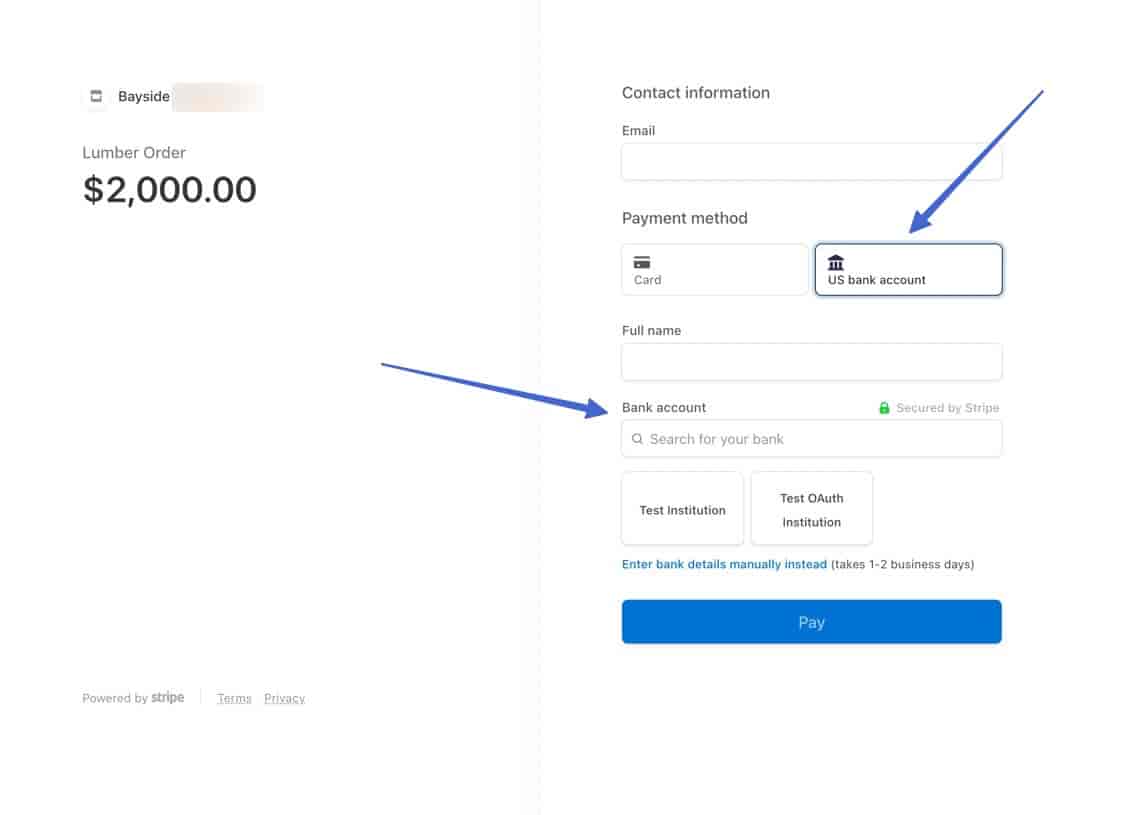
The next page delivers the message with your payment link. When they click on that, they’ll see the Stripe payment link with the ACH payment option (US Bank Account tab). They search for a bank account or choose one that’s already saved. Then they pay you!
Once you receive payment, it’s required for you to go back in Shopify and manually fulfill the order.
Accept ACH payments on Wix
Wix has a similar configuration as Shopify, where they won’t allow ACH payments due to it cutting into their profits.
There is a manual workaround, however.
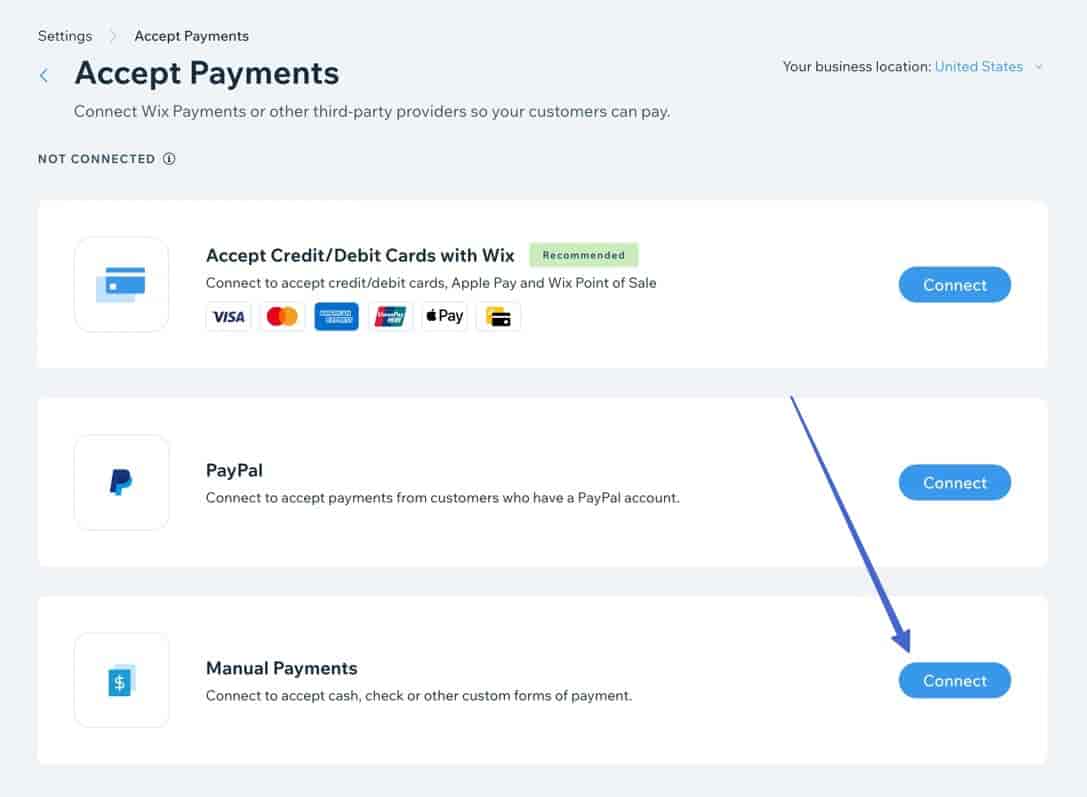
In Wix, go to Manage > Store.
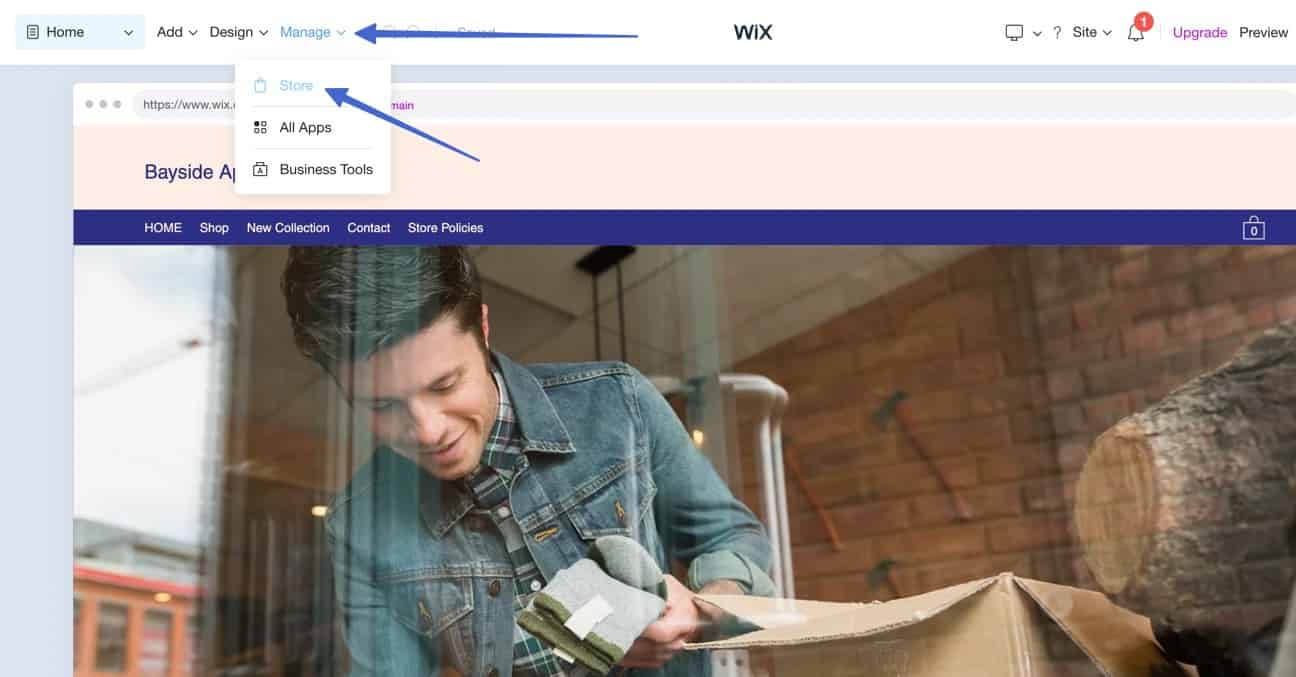
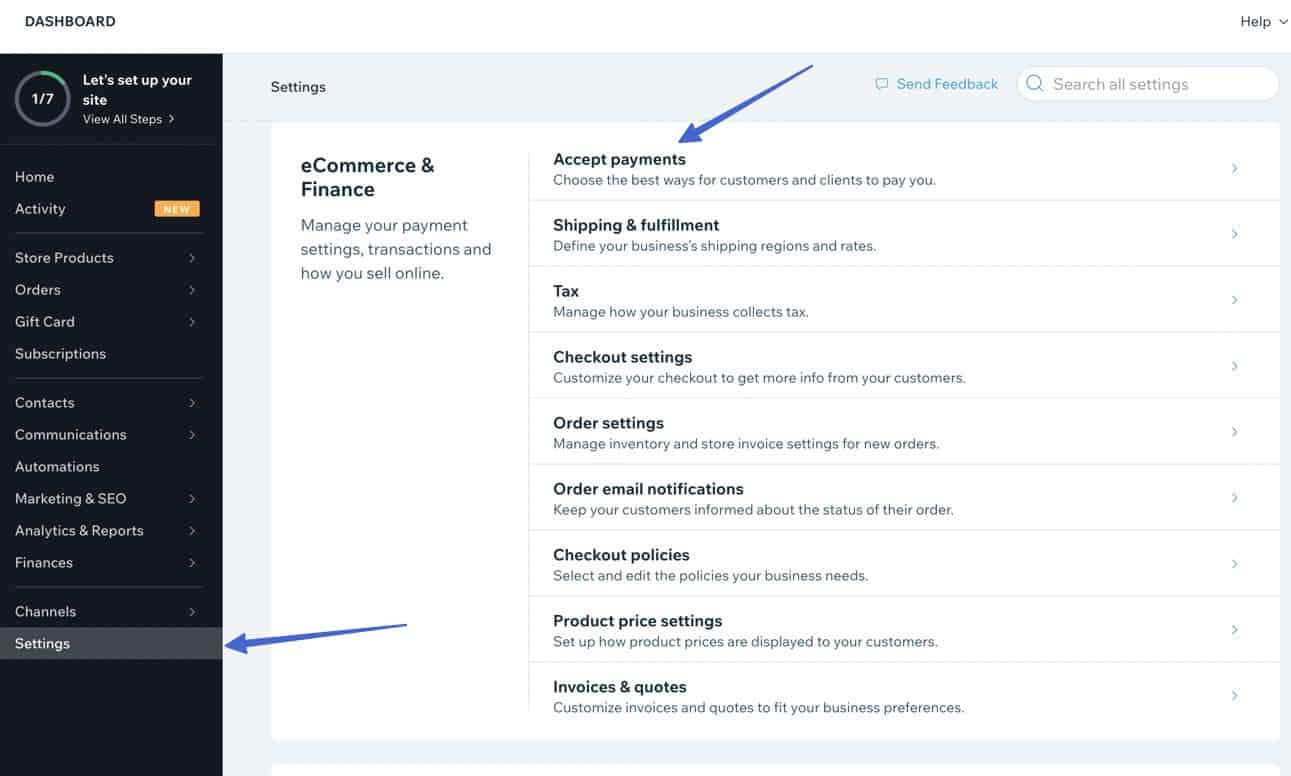
Choose Settings > Accept Payments.
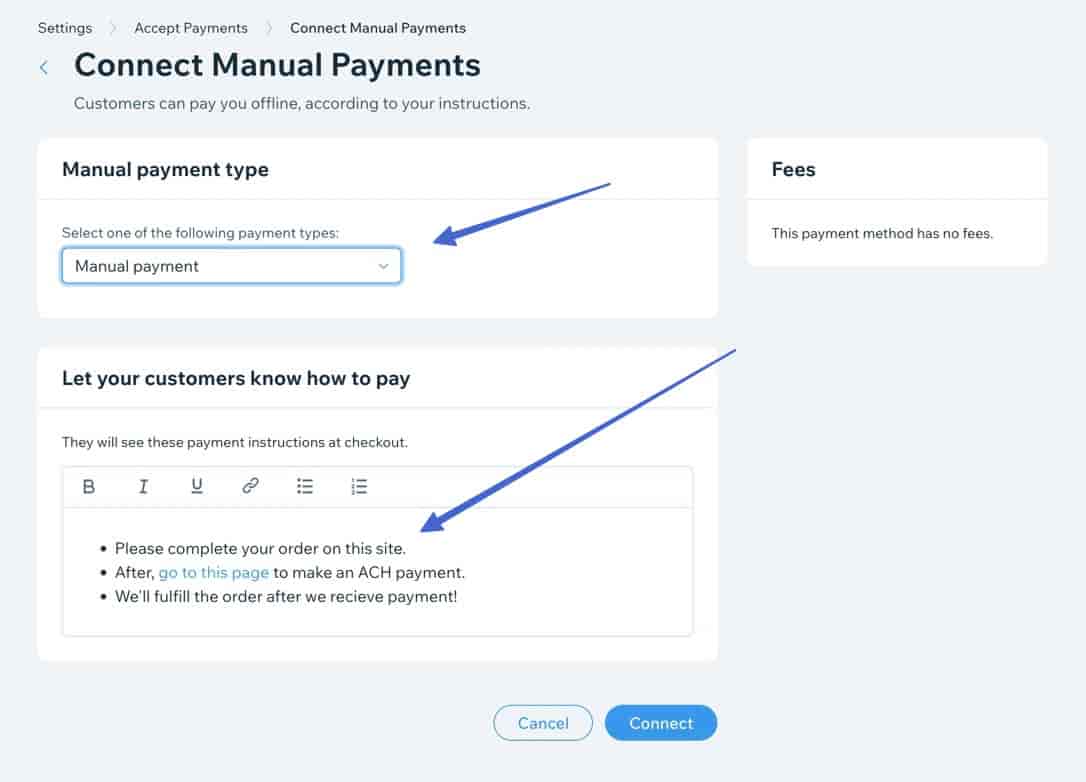
Click to Connect the Manual Payments option.
There’s a section called “Let customers know how to pay.” This is where you fill in the instructions for the ACH payment. It’s a little better than Shopify since they allow hyperlinking.
? We recommend explaining that customers should complete the order, then click through the link to make the ACH payment.
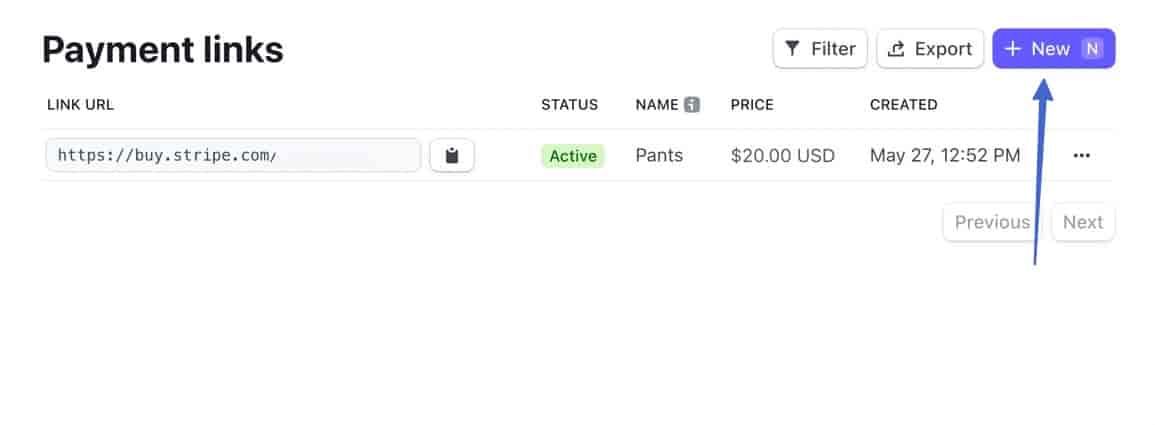
To create an ACH link, use Stripe. Go to Payments > Payment links.

Click New.
Add items that reflect what you’re selling.
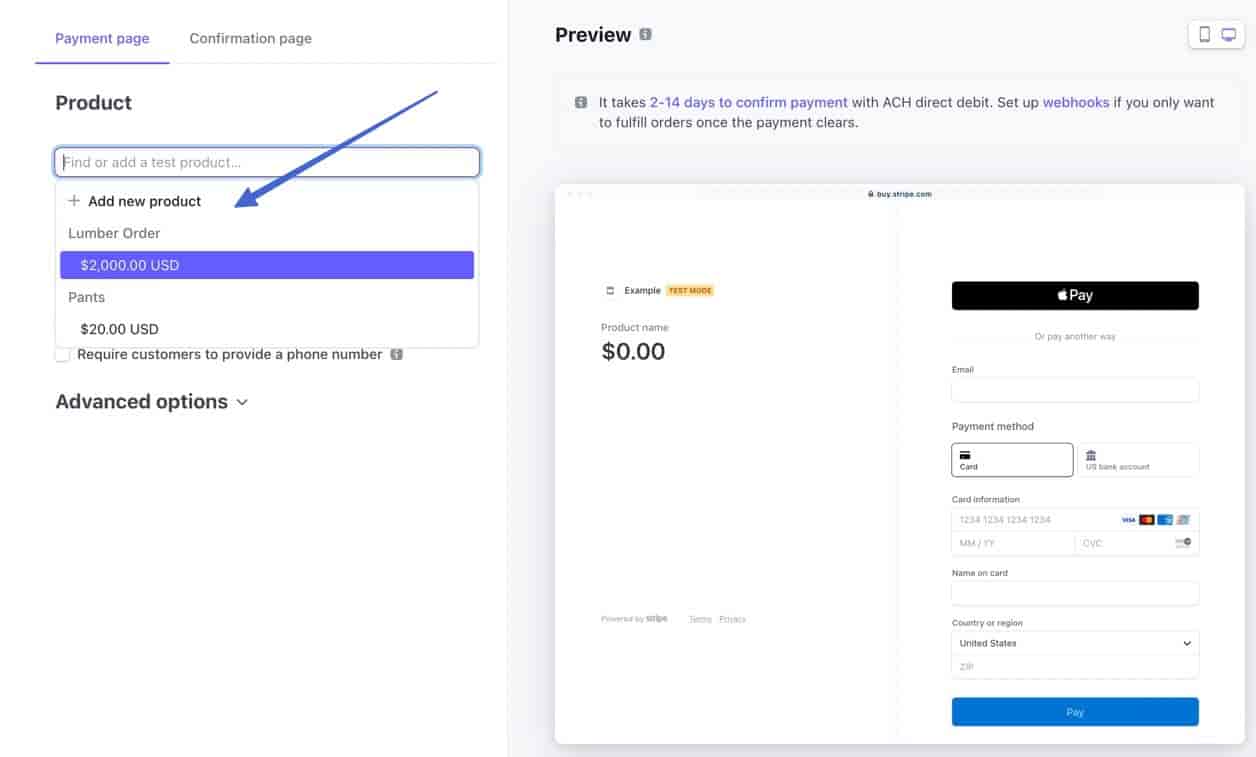
Finish the settings, then click Create Link.

Click Copy.
⚠ Note: Scroll down on the same page and ensure you have ACH Direct Deposit active under Payment Methods.

Go back to the Wix Manual Payment setup and hyperlink a bit of text with that link.
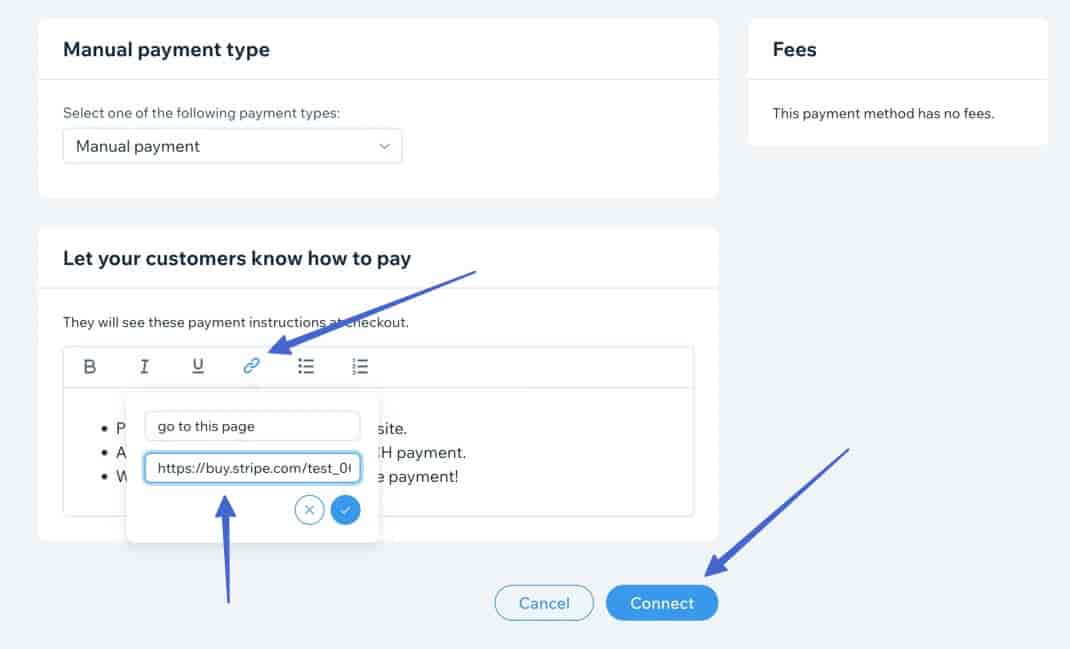
Now, when a customer picks that payment method, they can click through to complete an ACH payment through Stripe.

Accept ACH payments on any website
Finally, there’s a free and simple way to embed a form with an ACH payment option to any type of website, particularly those that don’t have ecommerce functionality.
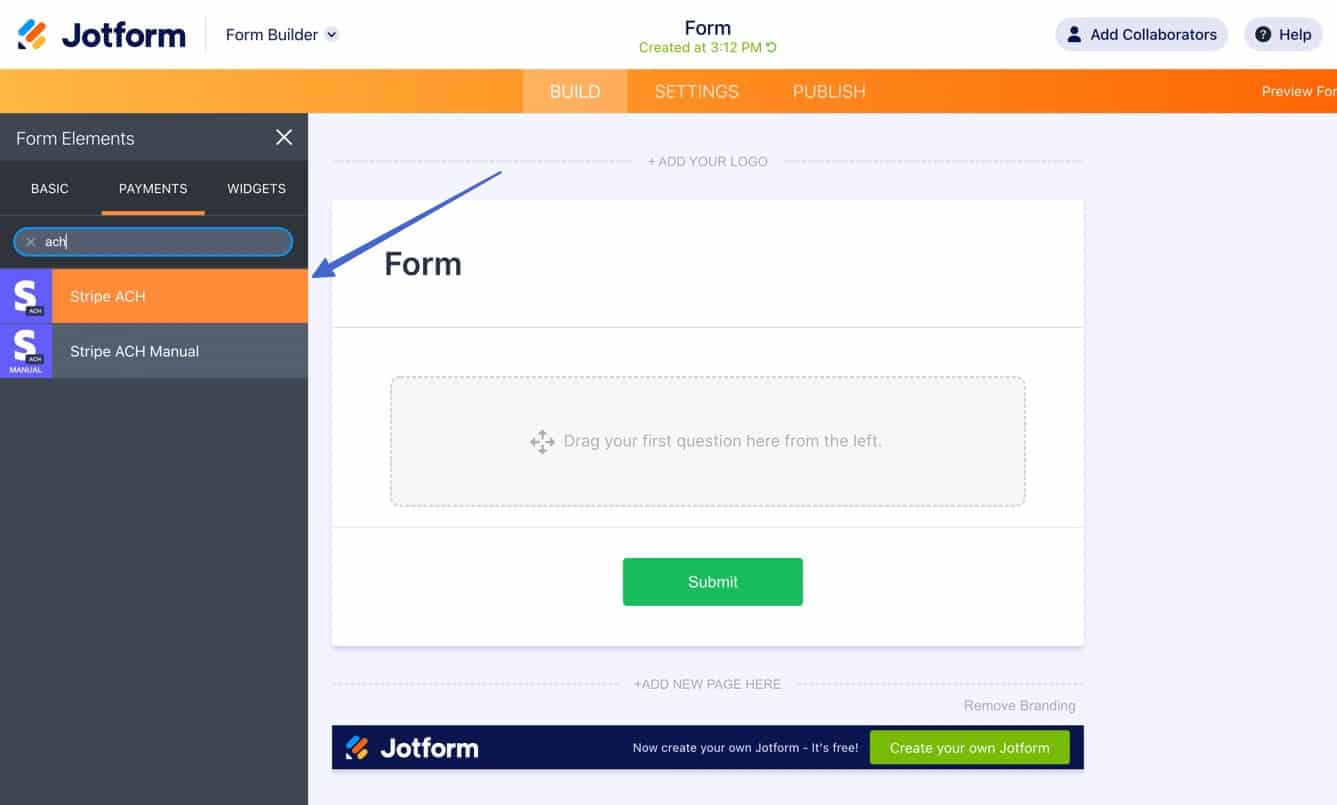
You can achieve this by signing up for a product called Jotform.
Once you have a free account: add a new form, then search for the Stripe ACH element. Add it to the form.
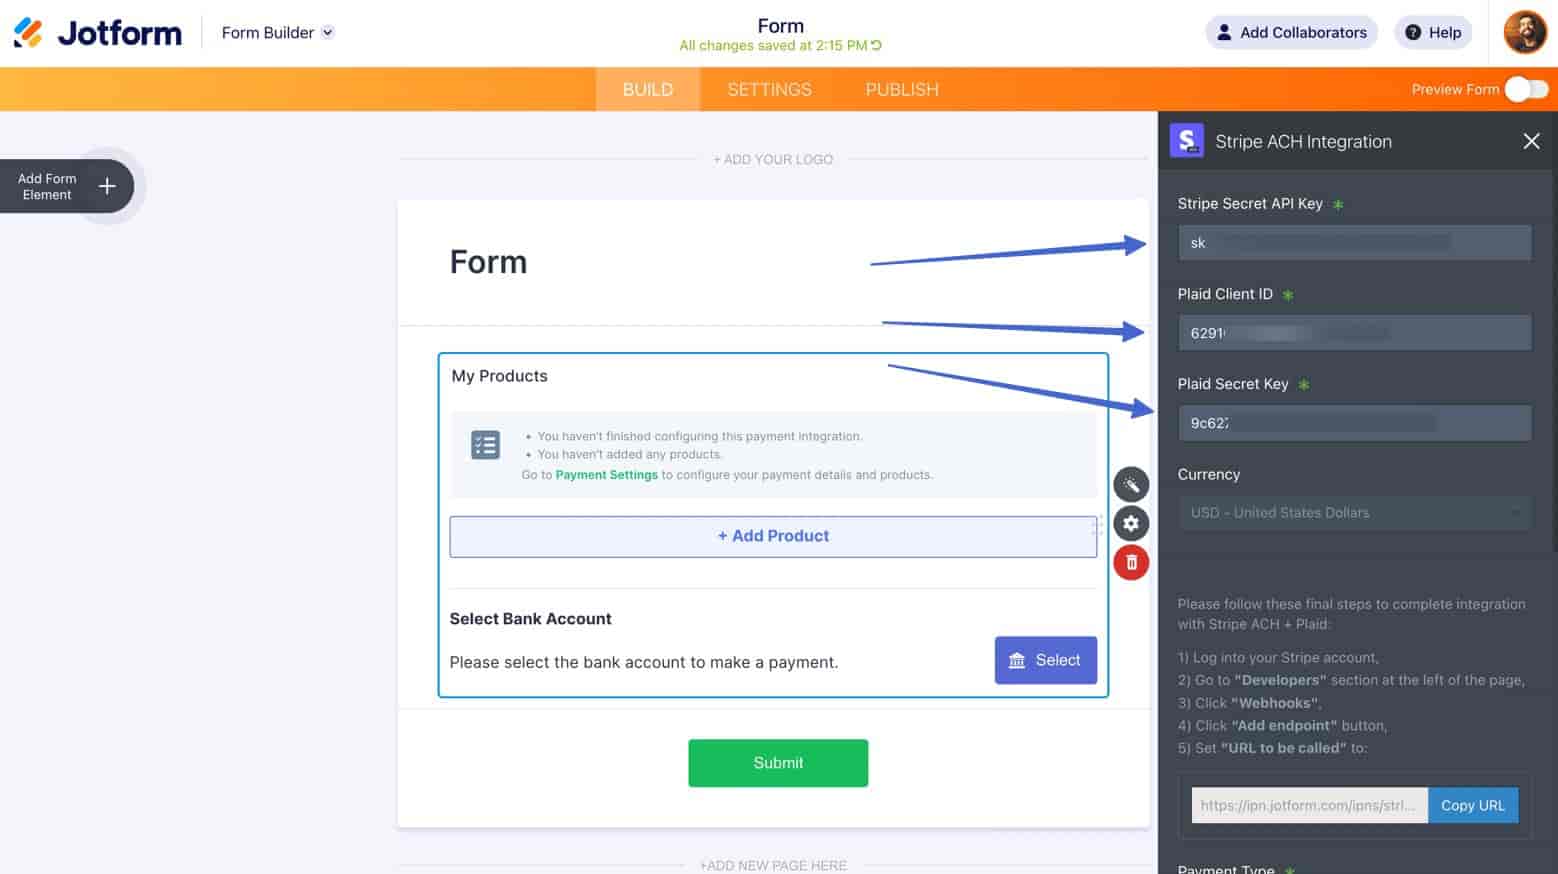
You’ll see multiple fields that need filling:
- Stripe Secret API Key: In your Stripe account, find this by going to the Developers button (upper-right corner), then API Keys > Reveal Key. You may need to create a key to get the secret.
- Plaid Client ID: Make or log into a Plaid account, then find the Client ID by going to Team Settings > Keys.
- Plaid Secret Key: The Secrets are also listed under Team Settings > Keys in Plaid. You can opt for Development, Sandbox, or Production secrets.
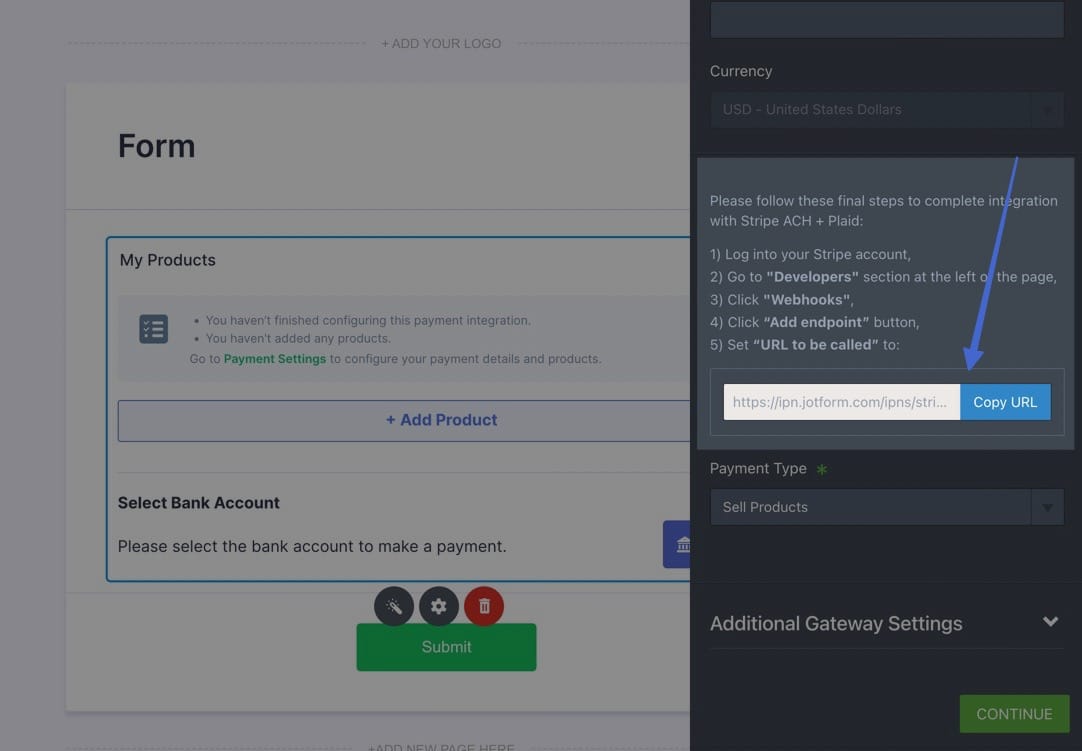
Finally, copy the IPN Jotform link and paste it into Stripe, using these steps in Stripe:
- Click Developers
- Choose Webhooks
- Click on the Add Endpoint button
- Paste the link in the Endpoint URL field, then click Add Endpoint after selecting events
Back in Jotform, click Continue.
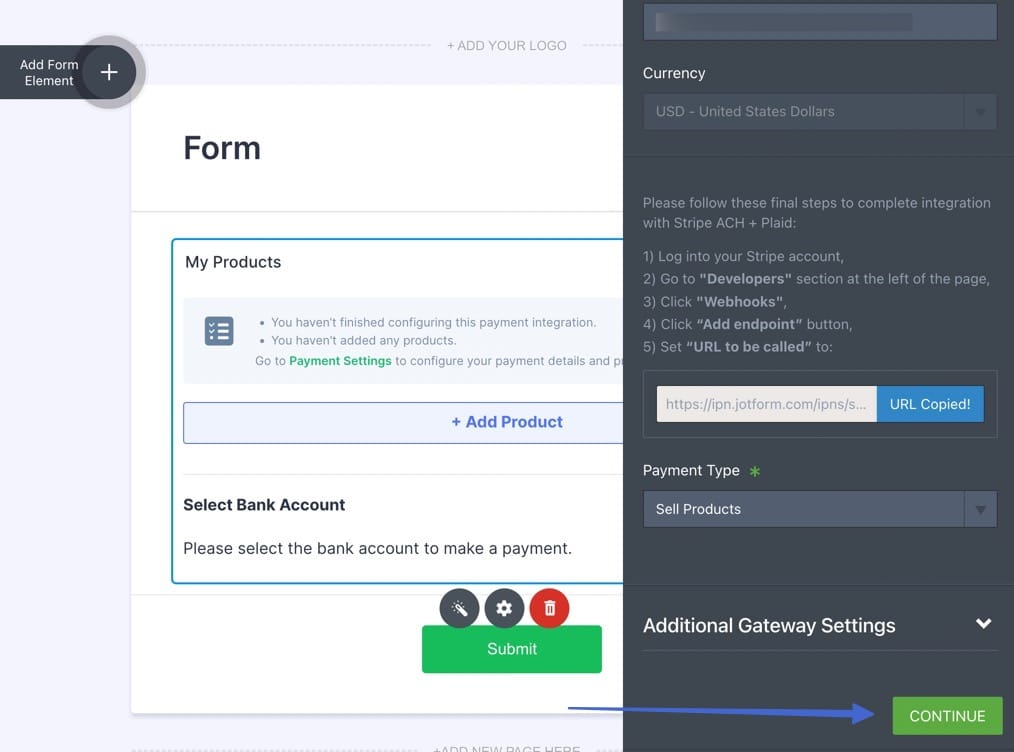
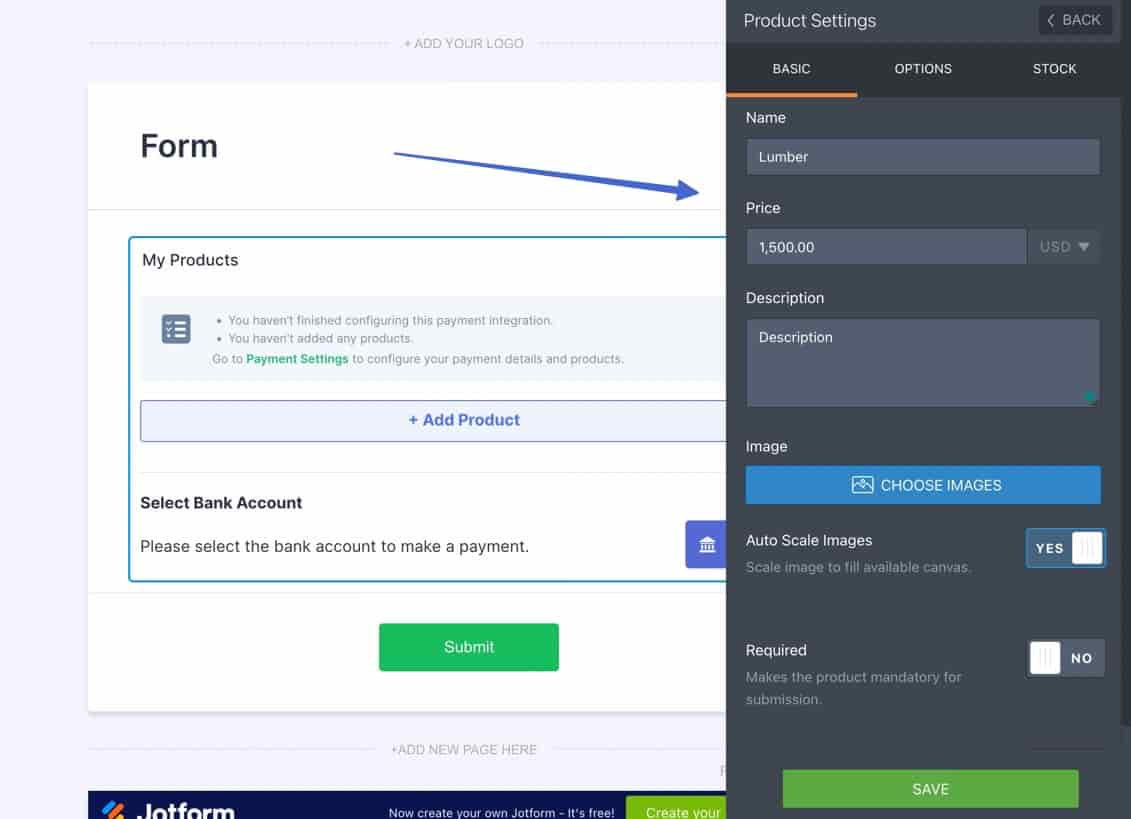
Make a product for the form.
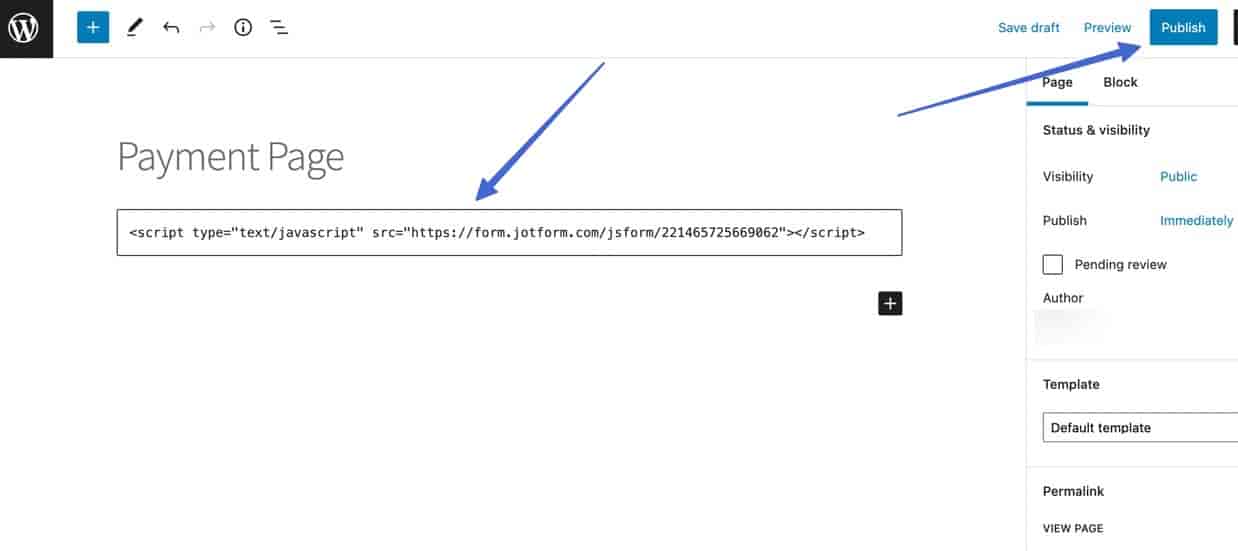
Then, go to the Publish page on Jotform, and select Embed. Copy the Embed or iFrame code to your clipboard.

This allows you to open an HTML or embed module in any website builder or content management system and add a form with ACH payment functionality.
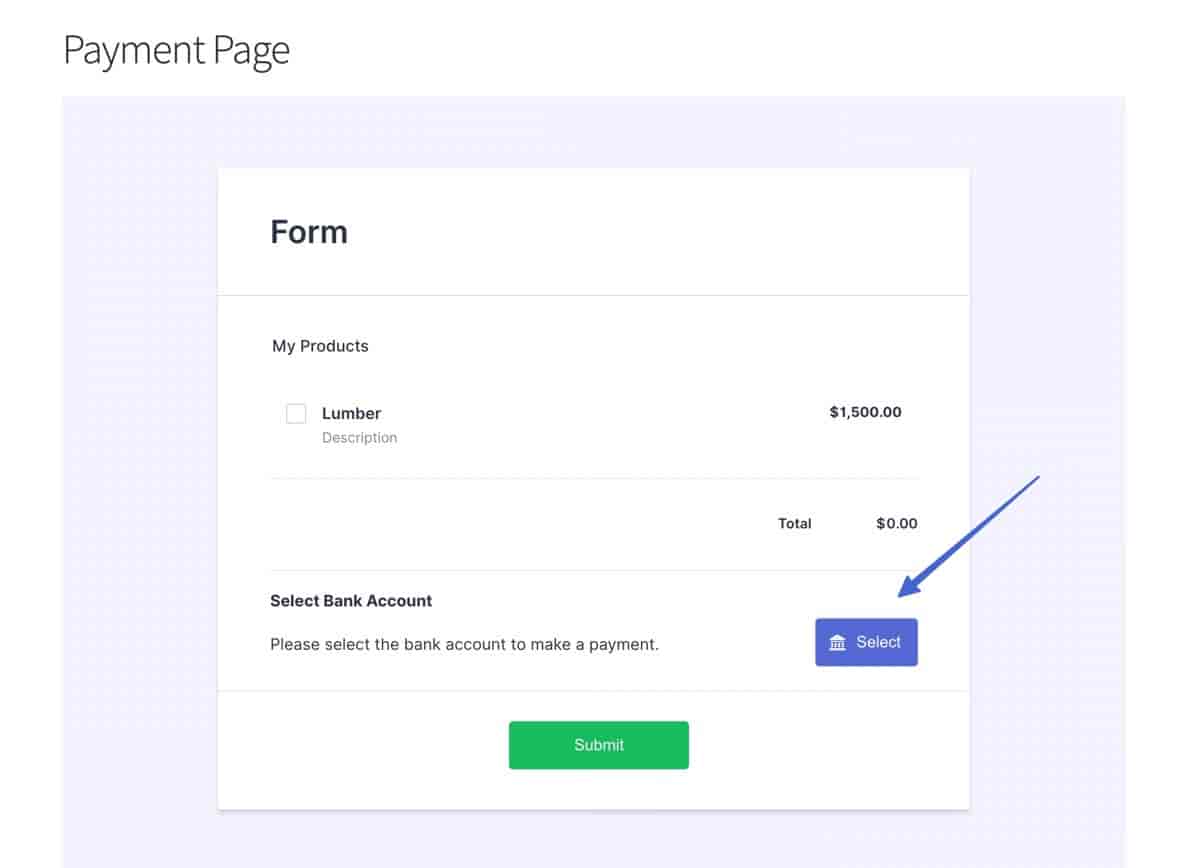
On the frontend, the customer sees the form, product, and a button to Select their bank account. After that, they can submit payment via ACH.
Get started with ACH payments today ?
In this tutorial, you learned ?? how to accept ACH payments on:
- WooCommerce
- Shopify
- Wix
- And any website
We also explained the benefits of accepting ACH, along with the situations in which it may come in handy, like for freelancing, pricey orders, and general invoicing.
? To learn about some other options for accepting payments on your website, you can check out our guides to the best PayPal alternatives and our comparison of PayPal vs Stripe vs Authorize.net vs Amazon Payments.
Do you accept ACH payments on your website? If so, let us know in the comments how you set it up.