In this post, we’ll discuss some benefits of WordPress content syndication. Then, we’ll show you how to syndicate content in WordPress in three easy steps. Finally, we’ll share a few best practices to consider. Let’s dive right in!
A brief overview of WordPress content syndication
In the world of WordPress blogs, content syndication refers to republishing articles on other websites. This differs from simply copying and pasting content. When you syndicate posts, they are effectively imported into a website.
For example, if you have two blogs, you might occasionally republish a post on your second website. Alternatively, you might publish posts from third-party sites.
Content syndication can have several benefits for your business. Here are a few of them:
- It helps you fill gaps in your content calendar: If you’re unable to produce your own posts, you can syndicate high-quality articles from other websites.
- You can build authority in your niche: By syndicating your content on third-party sites, you can establish credibility and authority in your industry and boost your online presence.
- It’s an effective way to get more backlinks: By allowing other websites to syndicate your content, you can get contextual links to your site. It can help you improve your rankings in the search results.
As you can probably tell, WordPress content syndication can be more beneficial to the owner of the posts, rather than the person republishing them. Therefore, if you want to get your content in front of a larger audience, it may be a good idea to partner with other publishers.
For example, let’s say you run a travel website and your main area of expertise is South America. Another travel blogger may be looking for high-quality content on that destination to publish on their site. In this case, you could syndicate your South American content to their blog, and in return, you might share some of their posts.
How to syndicate content in WordPress (in 3 steps)
Now, let’s look at how to syndicate content to your website. For this tutorial, we’ll be using Feedzy RSS Feeds, which has both a free version and a premium version.
Feedzy is an RSS aggregator which enables you to display unlimited feeds on your site. You can import content from other WordPress sites, filter syndicated posts by keywords, create feed categories, add affiliate links and referral parameters, and much more.
So, here’s how you can implement WordPress content syndication on your site using Feedzy:
Step 1: Import posts
Once you’ve installed and activated Feedzy on your site, you can start importing posts from other websites.
In your WordPress dashboard, simply navigate to Feedzy > Import Posts and click on New Import:
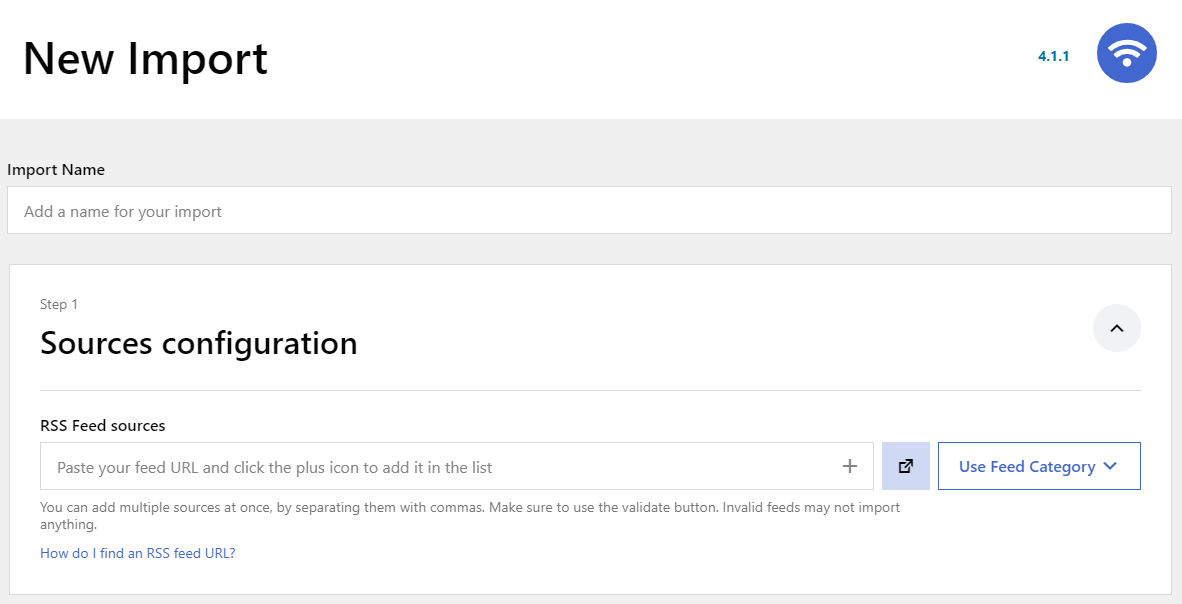
Start by entering a name for the import. Then, paste the RSS feed URL of your source, and click the “+” button.
When importing content from another WordPress site, you can get the feed URL by adding the suffix /feed to an address (e.g., themeisle.com/blog/feed). If that doesn’t work, you could try one of the following suffixes:
- http://example.com/feed/rss/
- http://example.com/feed/rss2/
- http://example.com/feed/rdf/
- http://example.com/feed/atom/
If the permalink of the WordPress site is set to default (which you can check with the owner), you’ll need to use one of the following suffixes:
- http://example.com/?feed=rss
- http://example.com/?feed=rss2
- http://example.com/?feed=rdf
- http://example.com/?feed=atom
Note that not all websites offer RSS feeds, or have them readily available. However, since you would have sought permission from the site owner before syndicating their content, you shouldn’t have trouble accessing the feed URL.
Step 2: Configure your post settings
Next, you may want to configure some settings for the imported posts. To do this, click on the Map content tab:

Here, you can select a post type for the imported articles and assign them to a category. You’ll also need to select a post status. For example, if you don’t want to publish the syndicated content right away, you can set this option to Draft.
Then, if you scroll down, you’ll see fields for the post title, date, and content. To fill them in, click on the Insert Tag button and select an option from the list:
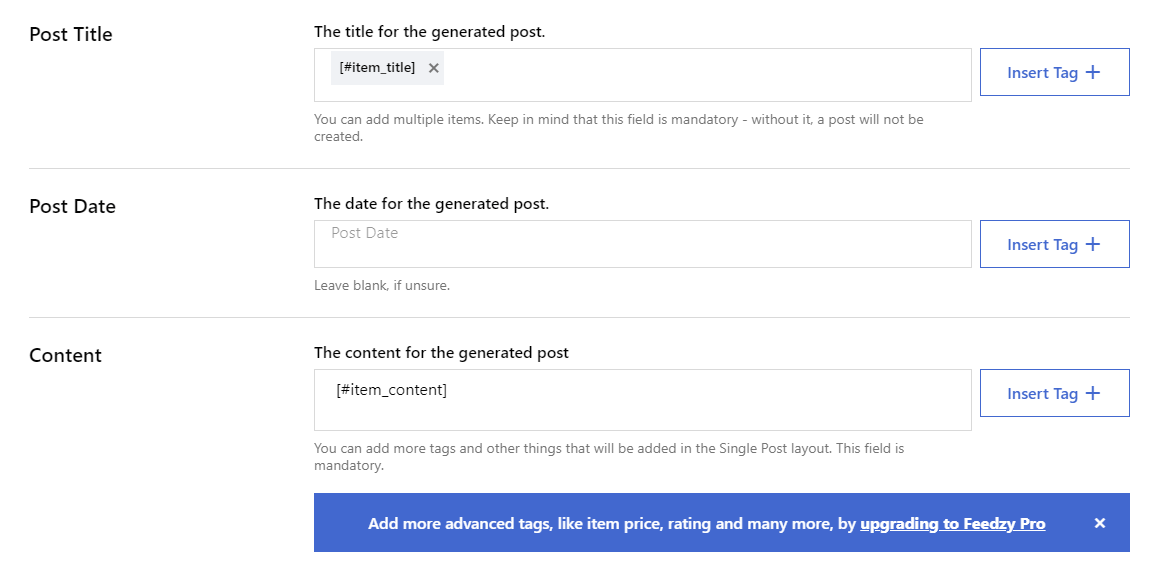
The Post Title and Content fields are mandatory. If you upgrade to Feedzy Pro, you’ll be able to import more elements, including the item price and rating. This can be very useful if you’re syndicating products. Also, you’ll need to use the premium plugin to display the entire content of an imported post.
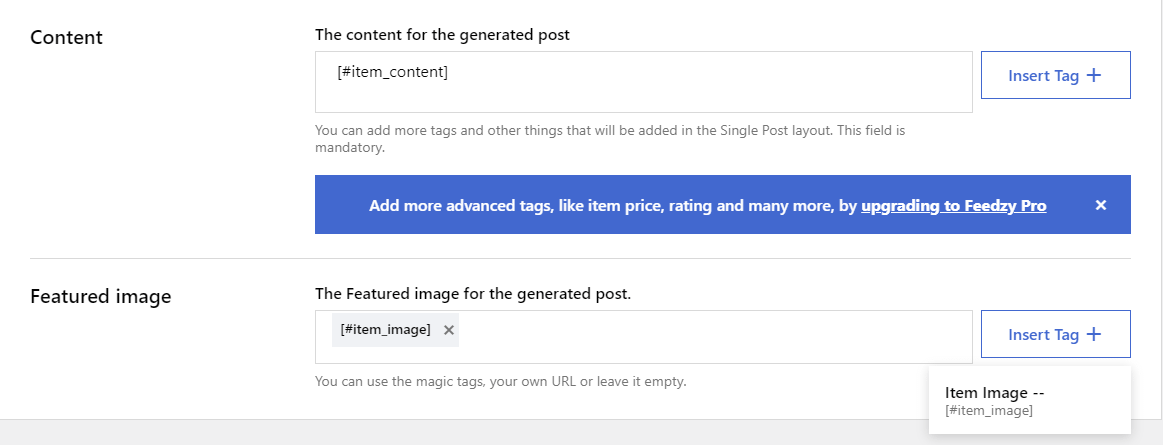
You also have the option to add a featured image to the imported content, using a magic tag or a URL:
When you’re finished configuring this section, you can move on to General feed settings:
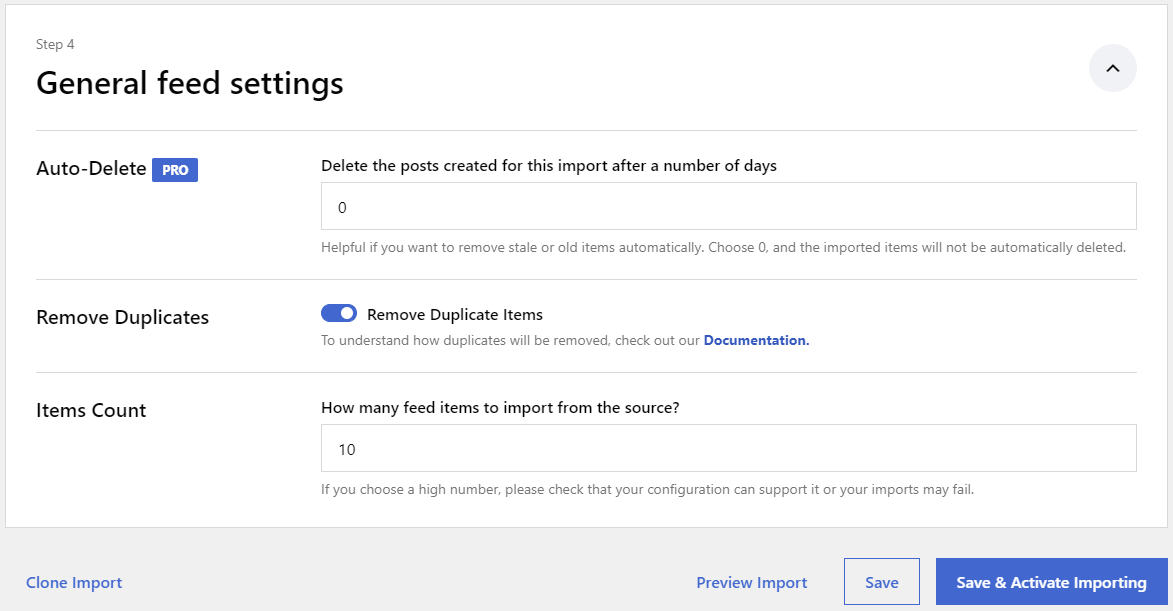
Here, you can configure the tool to auto-delete imported posts after a specified number of days (only if you have Feedzy Pro) and remove duplicate items. Additionally, you can choose the number of items to import.
When you’re ready, click on Save & Activate Importing. Note that if you upgrade to Feedzy Pro, you can also filter your imported items:
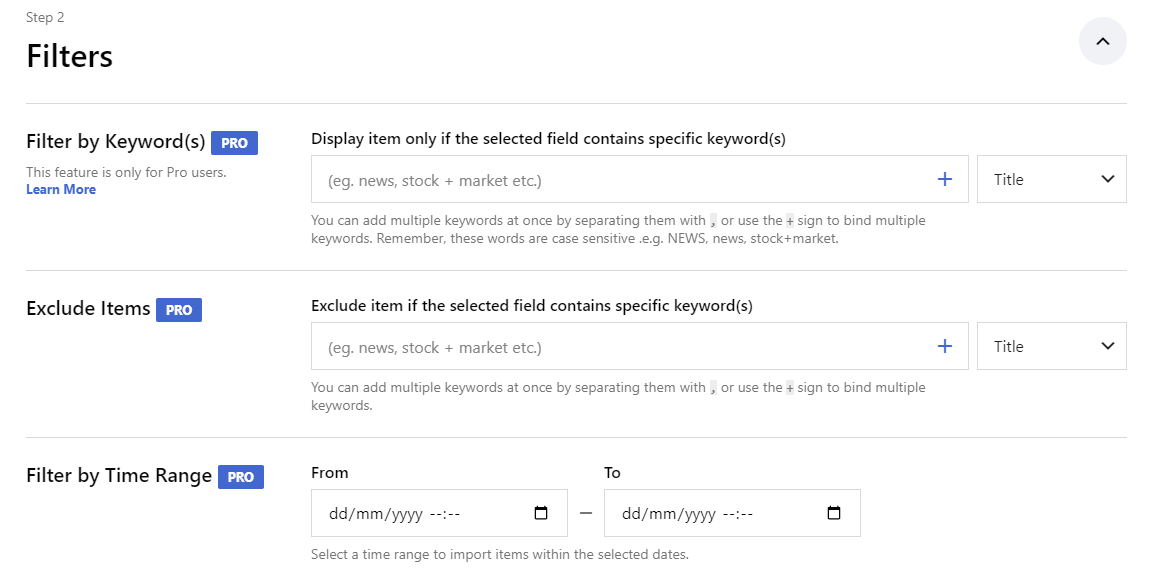
Using this setting, you’ll be able to display or exclude items that contain specific keywords and filter the posts by time range.
Step 3: Run your import and view your posts
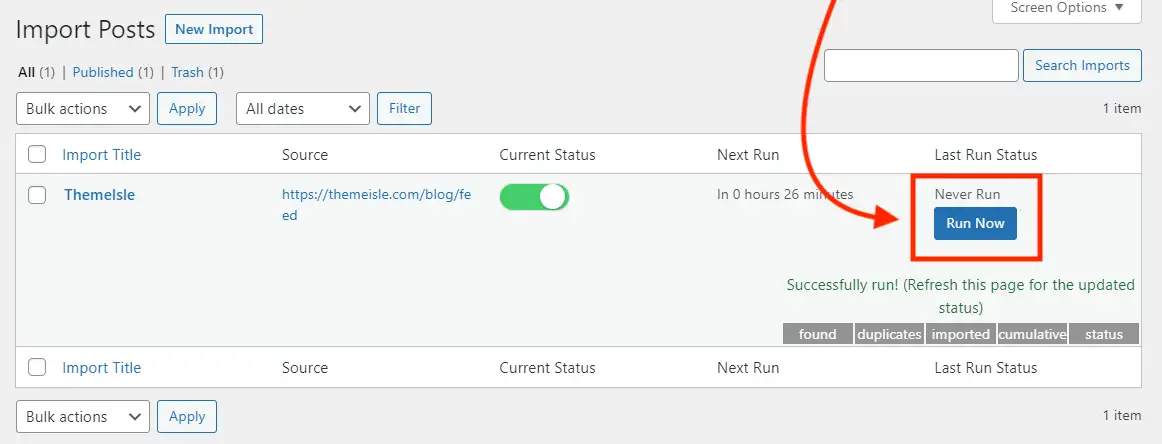
Now, it’s time to run your import. If you go to Feedzy > Import Posts, you’ll see the import you’ve just created:
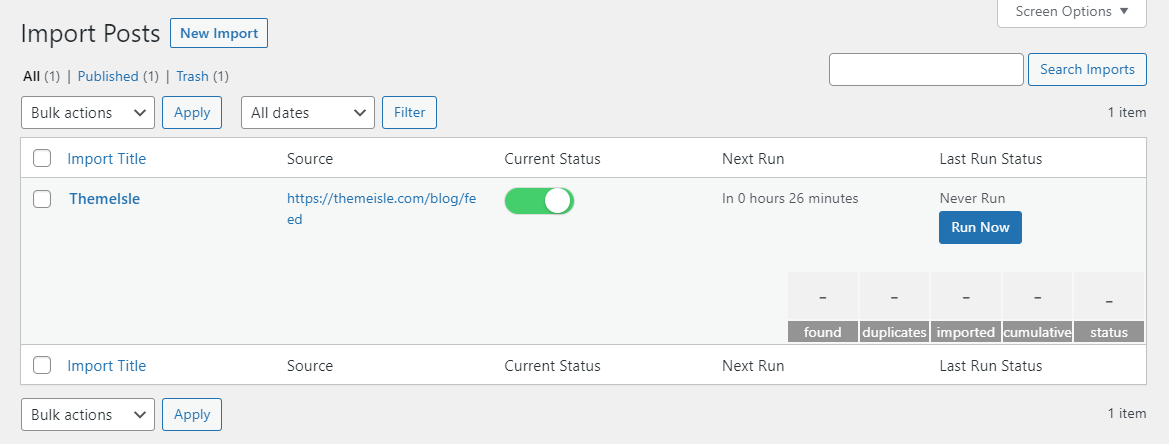
Next, click on Run Now. When it’s ready, you’ll see a success message. It will also ask you to refresh the page to view the results:
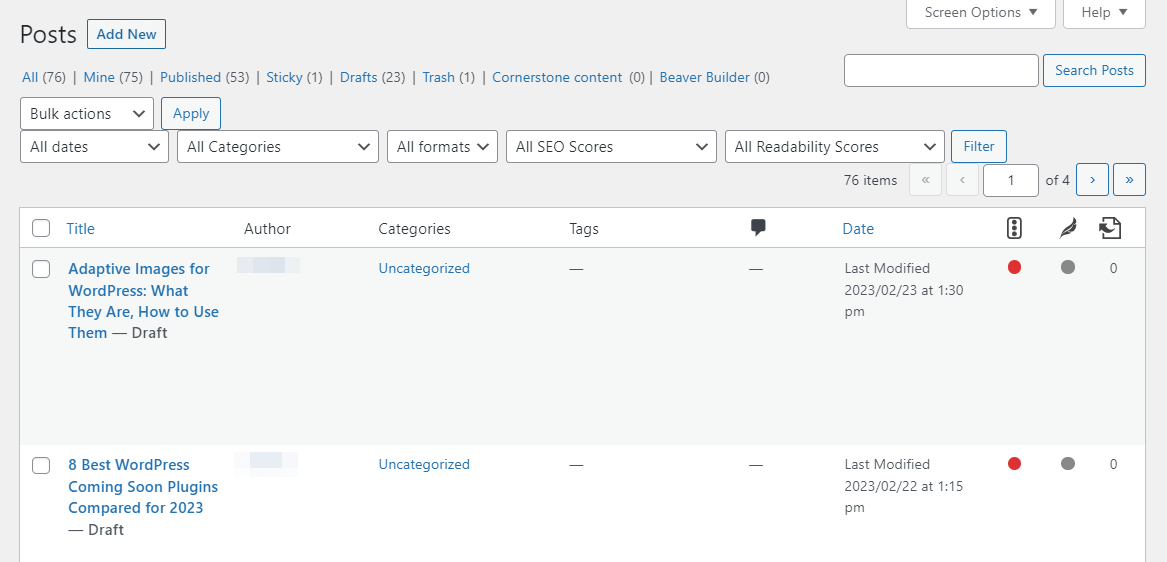
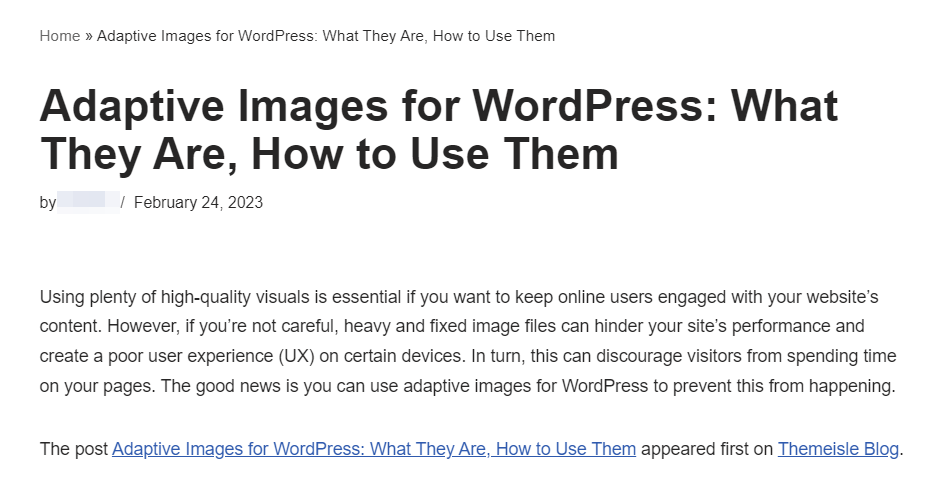
You should now see the number of posts that have been imported, based on the amount you specified in the previous step. To view this content, just go to Posts > All Posts and open any imported article in the Block Editor:
Then, select Preview to check that everything looks okay on the front end:
As mentioned earlier, you’ll need to upgrade to Feedzy Pro to display the entire content of a post.
Of course, remember to always add a disclaimer crediting the source of the original article (if it’s not from one of your other sites). Finally, when you’re happy with the imported content, you can go ahead and publish it!
A few best practices for WordPress content syndication
As you can see, syndicating content is quite a simple process. However, there are a few important things to keep in mind. Let’s look at a few best practices for WordPress content syndication:
Always ask for permission to syndicate content
First of all (and perhaps most importantly), you always need to seek permission from the website owner before syndicating their content. This is crucial because if you syndicate content without permission, you might run into legal issues.
You may have your heart set on syndicating content from one of your favorite websites, but some publishers might not want their posts to appear on other blogs. This may seem limiting, but due to the previously mentioned benefits, you’ll likely be able to find plenty of bloggers who are willing to collaborate. Alternatively, WordPress content syndication is also an excellent option if you own all the websites you plan to syndicate content from.
Include a legal disclaimer
It’s also a good idea to include a disclaimer in syndicated posts. This could be a simple sentence such as the following:
“This post originally appeared in [publication + link] and has been published here with permission.”
Here’s an example of a syndicated post on Medium:
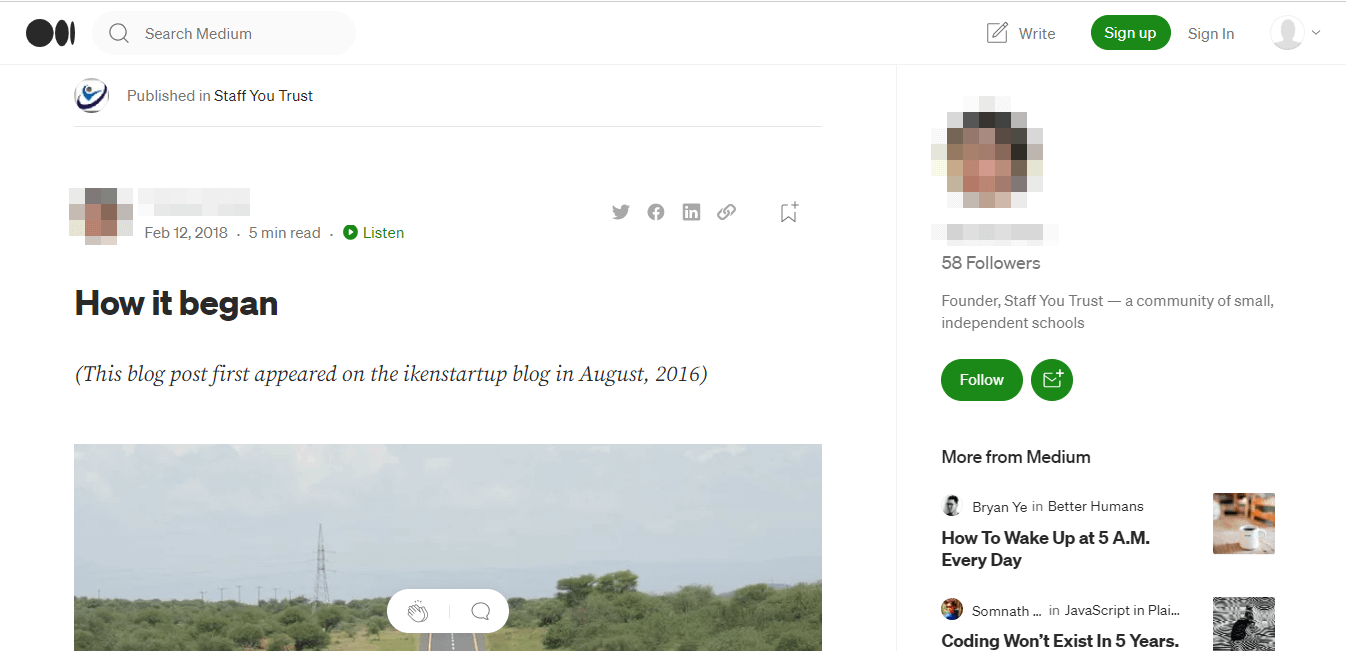
As you can see, Medium covers its bases by including a disclaimer. While it doesn’t link directly to the post in the disclaimer, it does provide the source and a specific publish date, which would make it easier for a reader to find.
Consider search engine optimization (SEO)
You might also be wondering if content syndication has any effect on Search Engine Optimization (SEO). As you may be aware, Google doesn’t like duplicate content and such posts are usually removed from search results.
If you syndicate a post to another website, the original article that was published on your own blog may disappear from search results (and vice versa). This could have a negative impact on your organic traffic.
The good news is that Google is okay with syndicated content, and there are ways to show search engines that the post is “syndicated” rather than copied or plagiarized. For example, you can add a canonical link to the article.
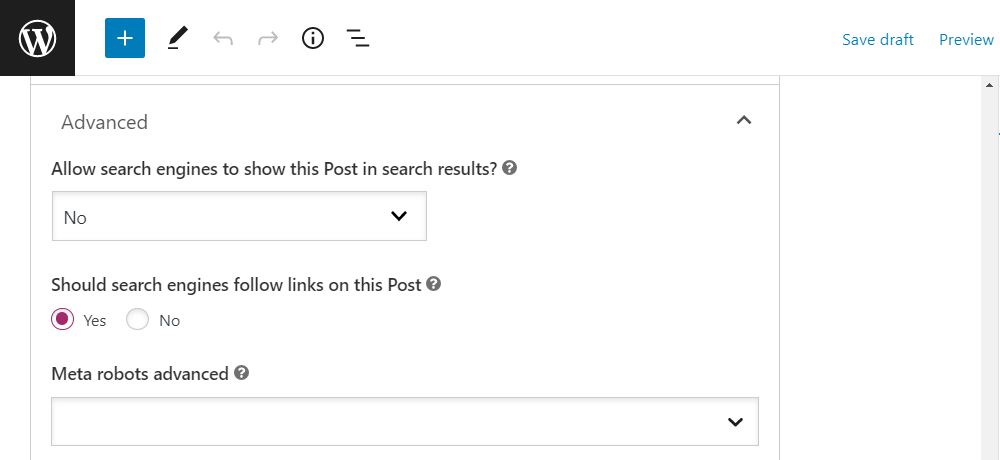
Alternatively, you could use a noindex tag so that search engines won’t index the syndicated post. If you already use Yoast SEO, doing this is super straightforward.
Simply navigate to the Advanced tab in the Yoast SEO meta box within your post and change the setting for Allow search engines to show this Post in search results? to No:
Other SEO plugins will have similar settings. Also, if your content is syndicated to another website, keep in mind that you’ll need to ask the owner of that site to add the canonical link or NoIndex tag to your post.
Conclusion ?
Syndicating your posts to high-quality websites can help you build authority in your niche and boost your online presence. Meanwhile, by republishing third-party articles on your own blog, you can avoid gaps in your content schedule and continue providing valuable content to your audience.
To recap, here’s how to syndicate content with Feedzy RSS Feeds:
- Import posts with the RSS feed URL. ?
- Configure the settings of the imported content. ⚒️
- Run your import and view the syndicated posts. ?️
Do you have any questions about WordPress content syndication? Let us know in the comments section below!