The cost of WordPress vs Wix
The pricing of Wix is this:

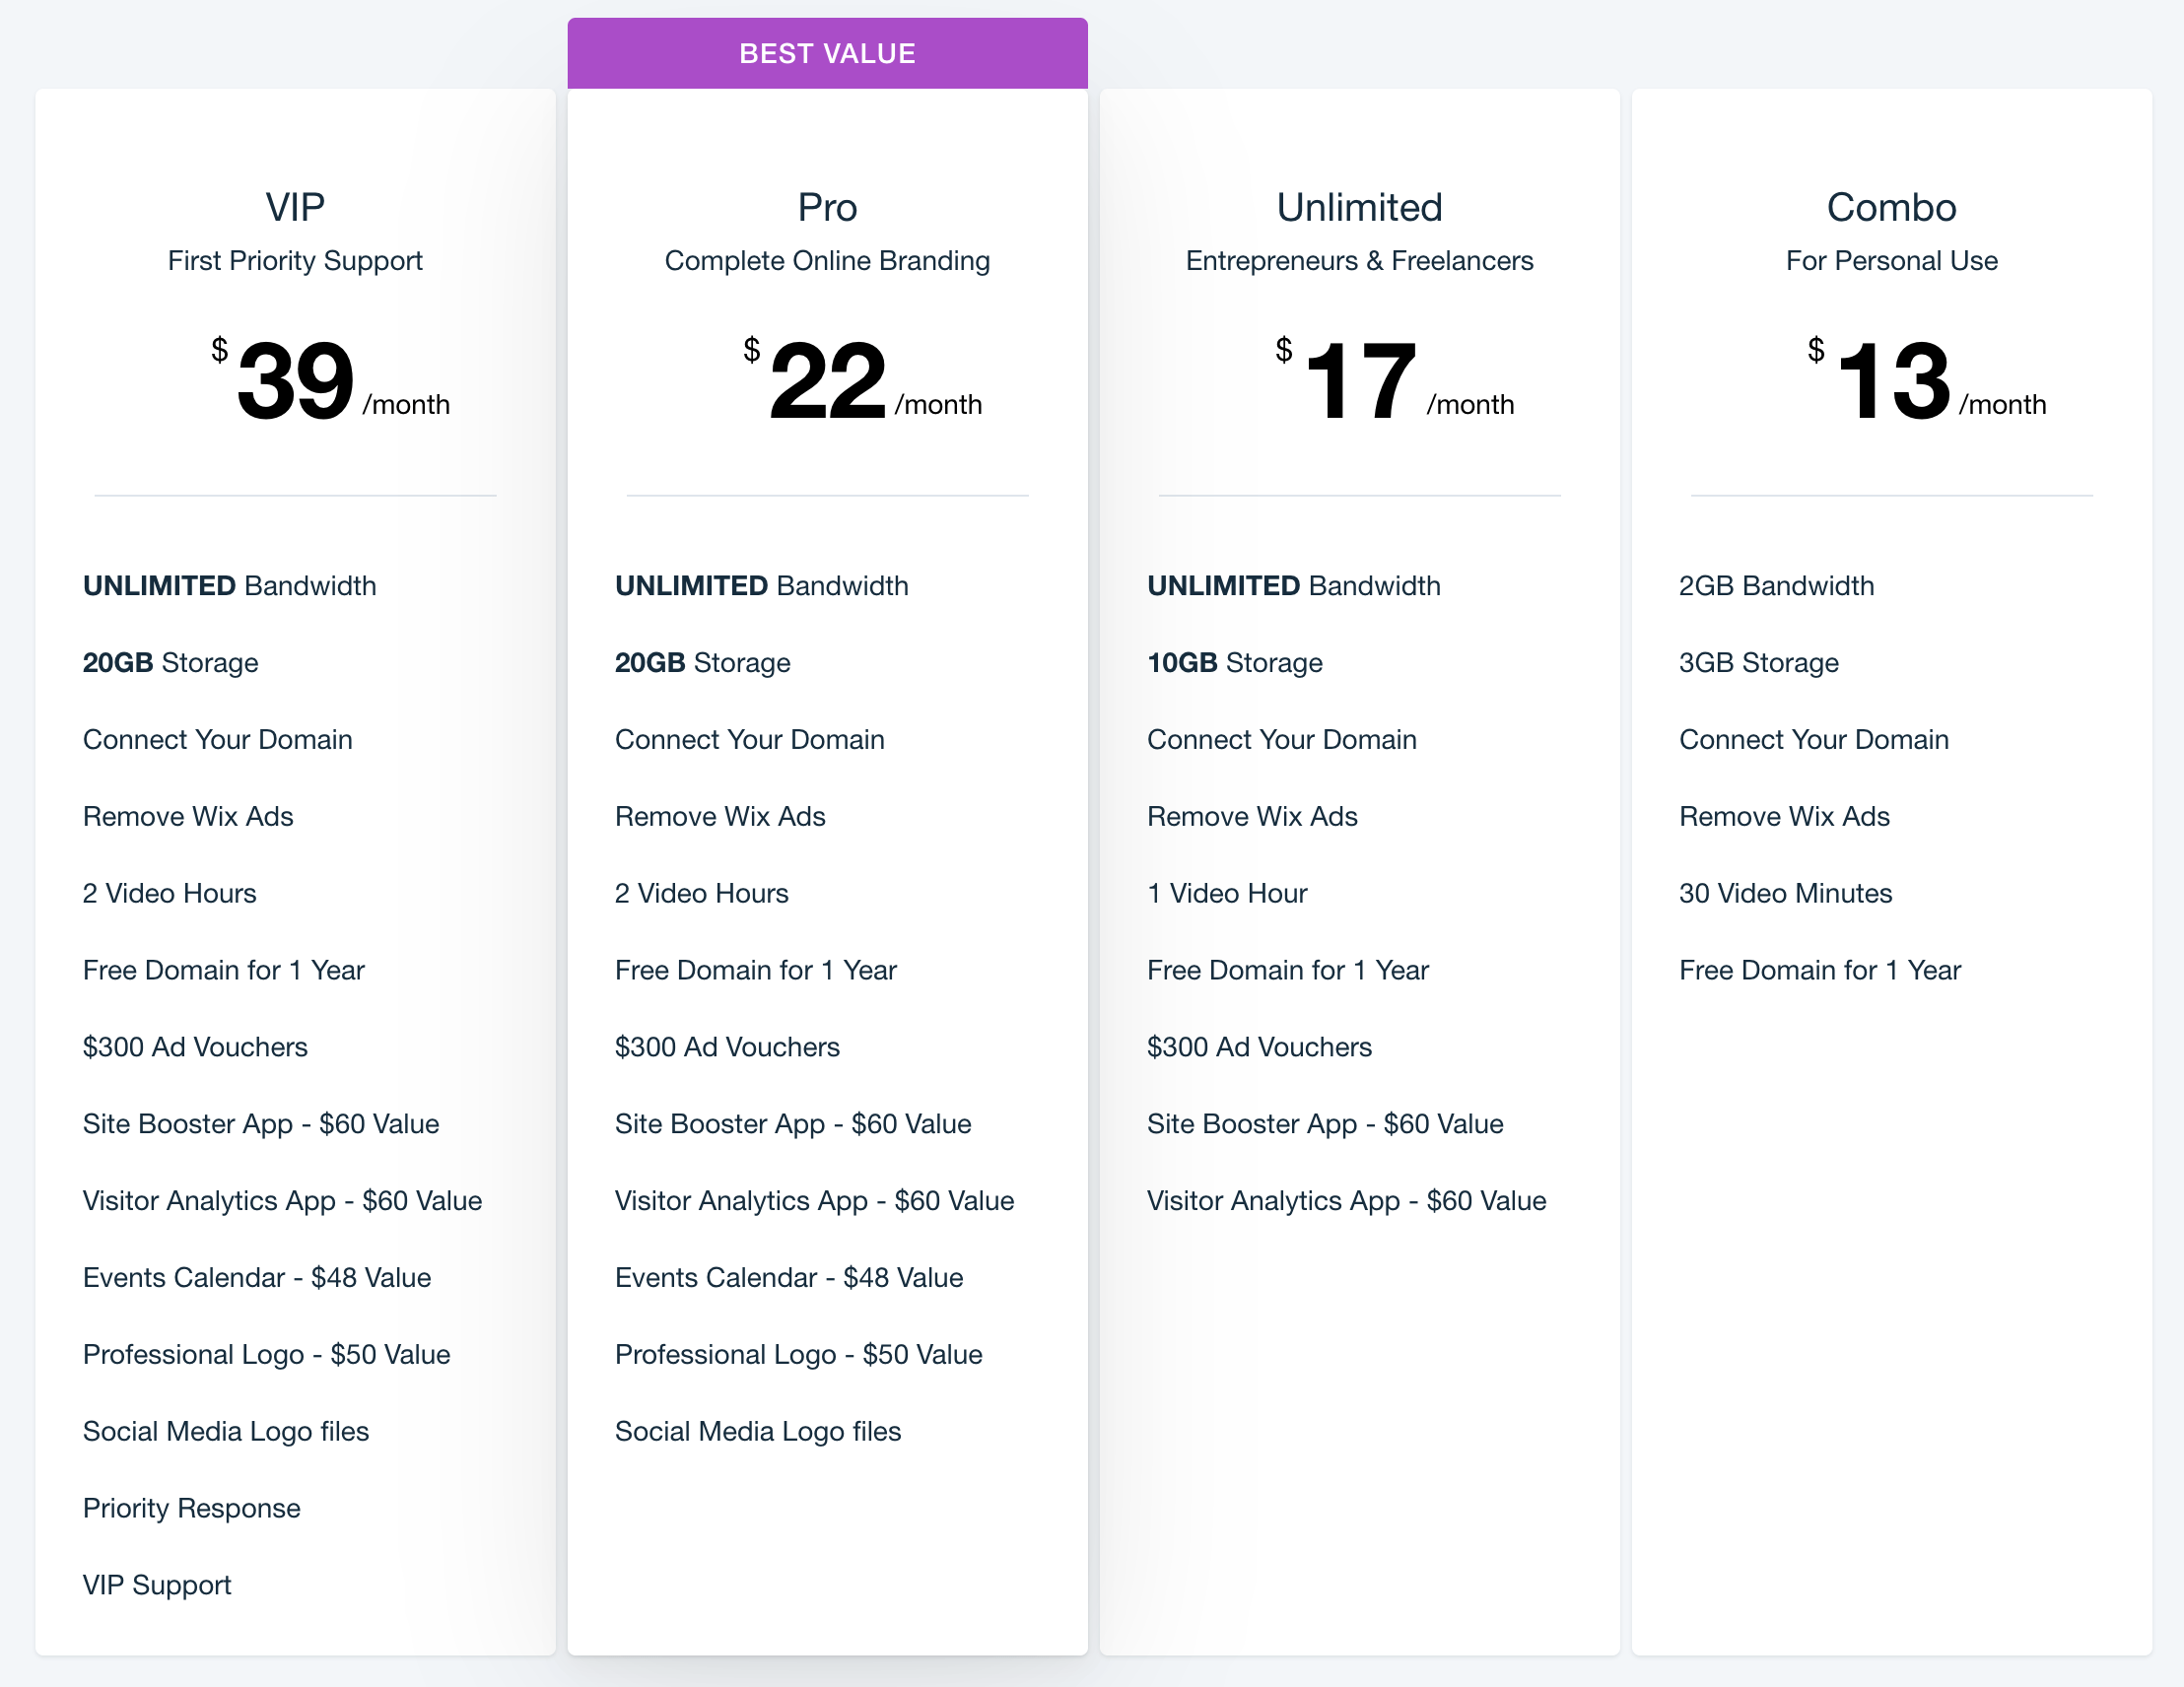
Apart from those options, there’s a free plan available as well. The limitations on that are:
- You can only launch your site under a subdomain; like
USERNAME.wixsite.com/SITENAME - Wix ads will appear on every page within your site
- You’re limited to 500MB of disk storage and 500MB of bandwidth
In total, if you want to build a site for personal use, on a custom domain name, and get rid of Wix’s ads, then it’s going to cost you $13 per month = $156 annually.
With WordPress, things are a bit more complicated. The WordPress software itself is free. What you do have to pay for, though, is hosting and a domain name.
To keep things budget-friendly, you can get the hosting and domain from Bluehost. The plans start from $2.95 a month, and you get a free domain name bundled in for the first year. Here’s the full pricing:

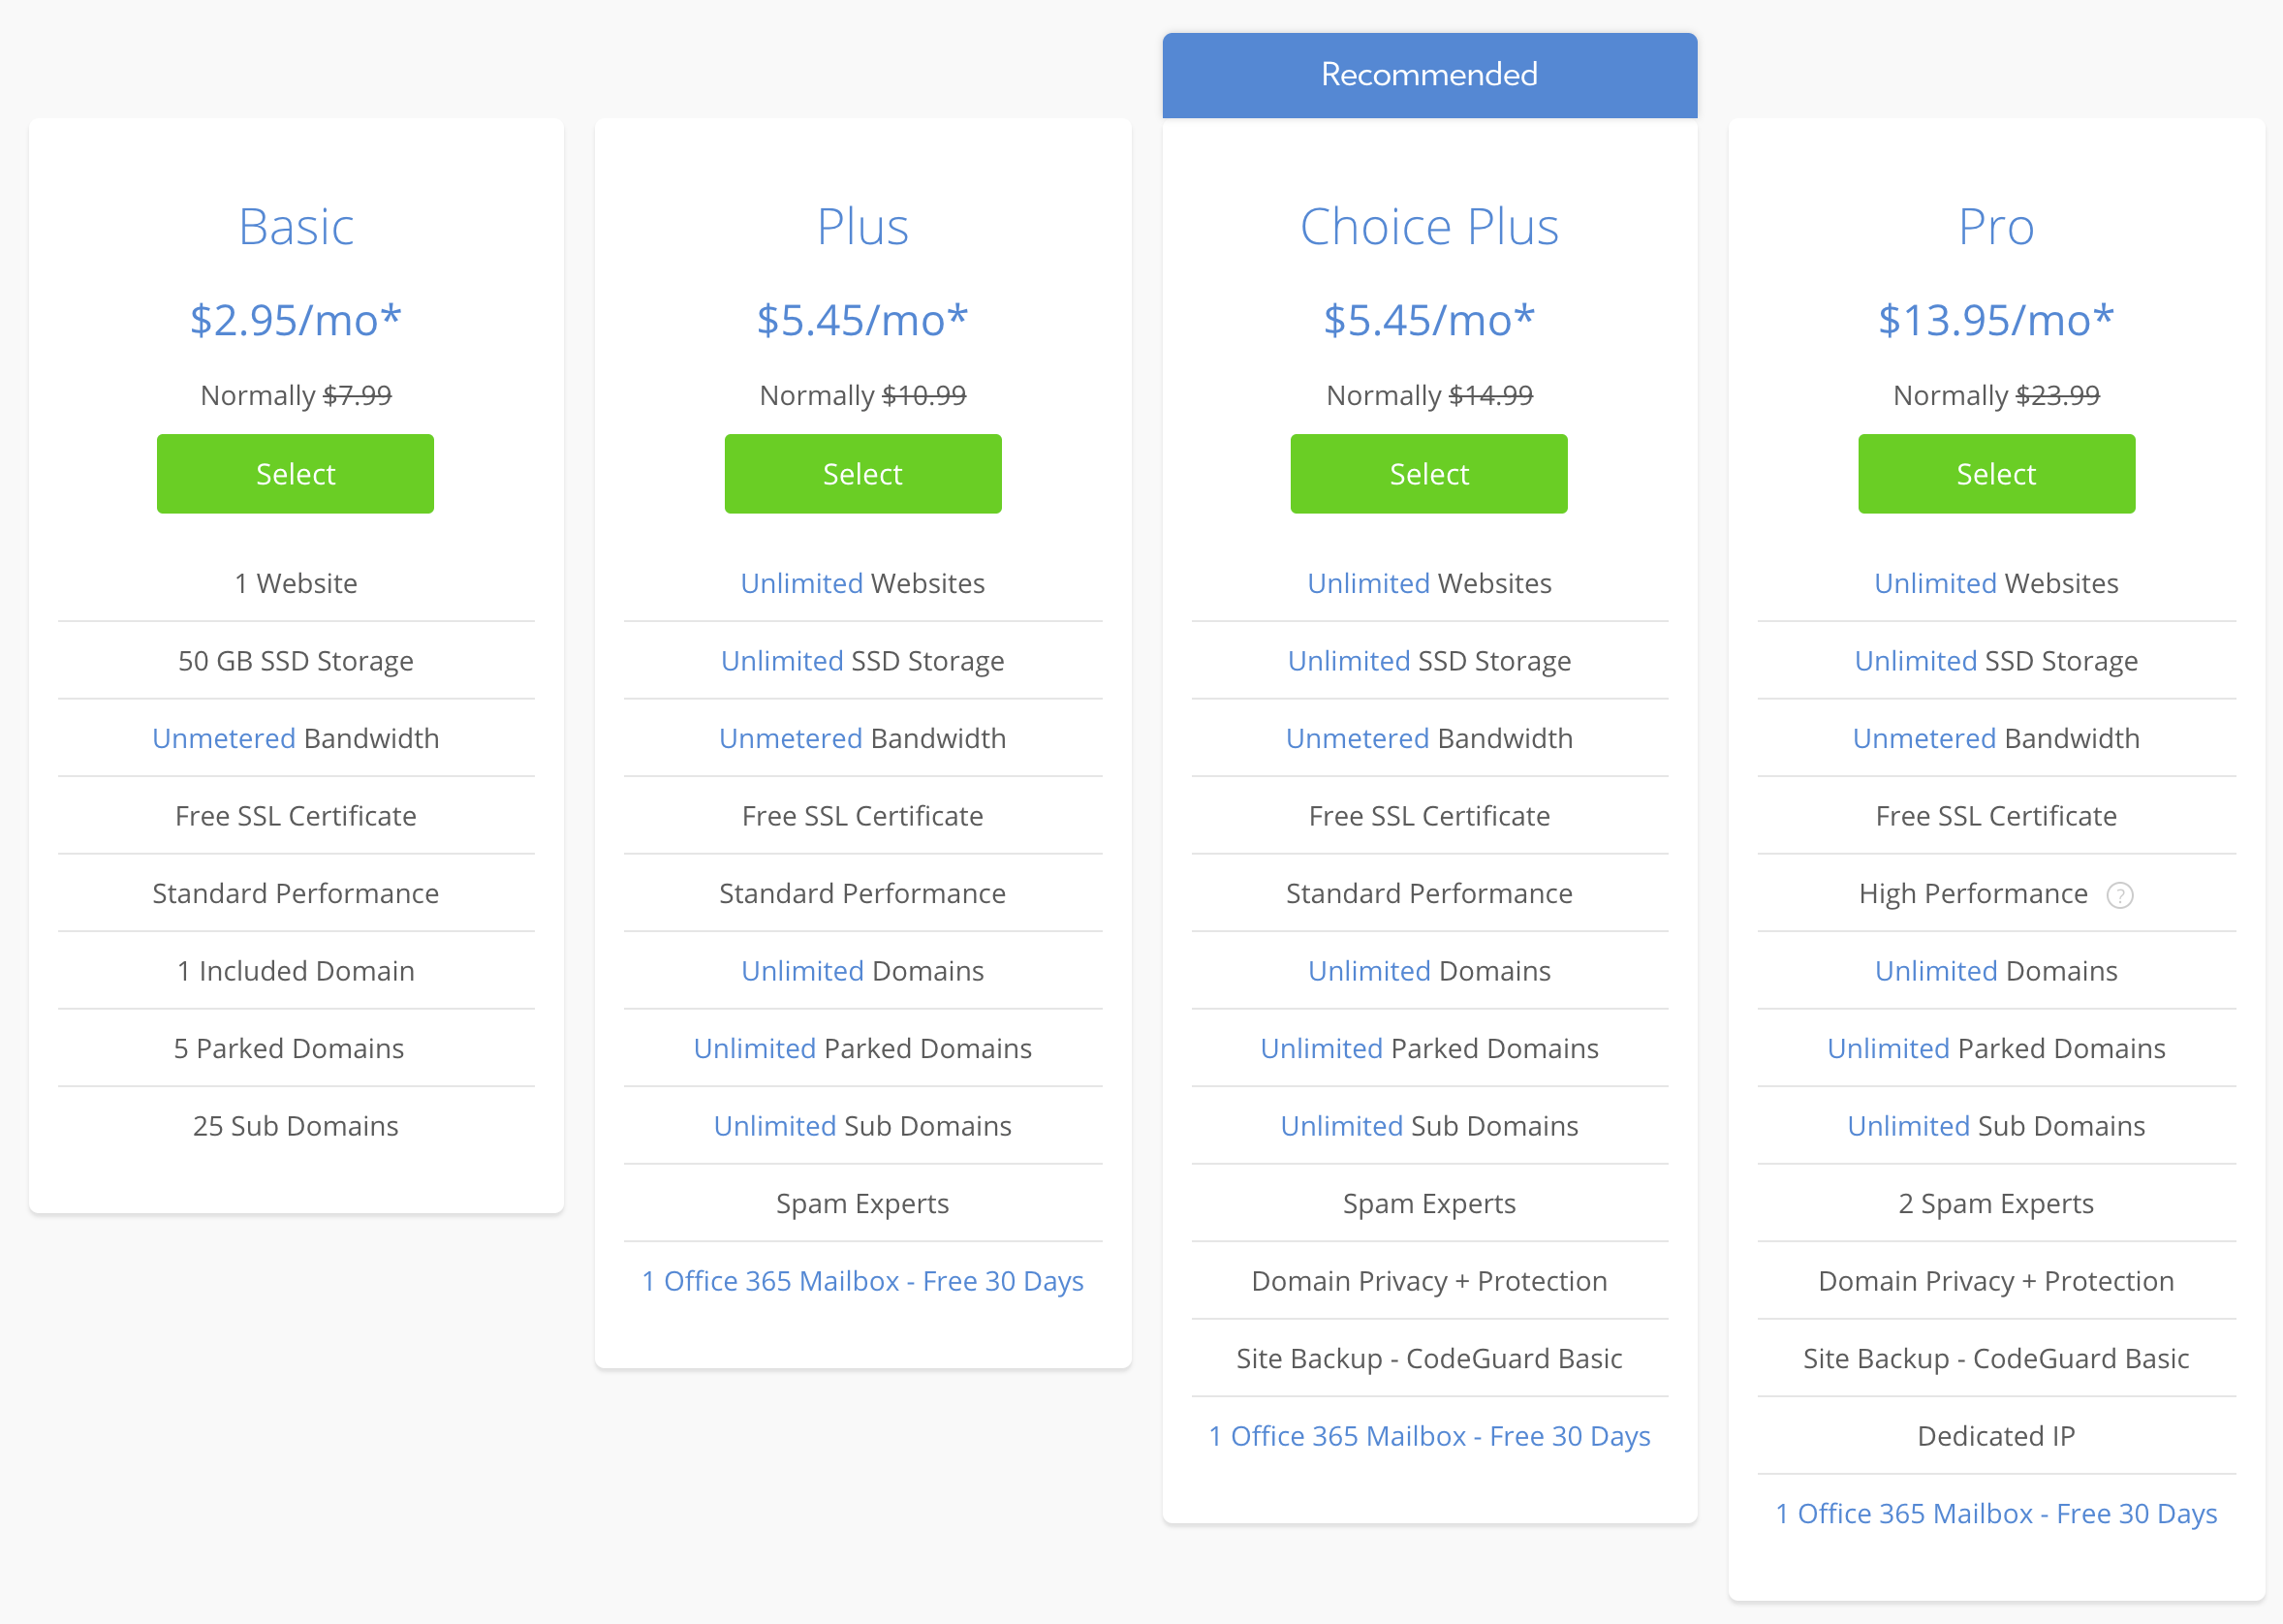
What’s also worth pointing out is that Bluehost will install WordPress on your hosting setup for you, so no need to get your hands dirty.
Overall, this lets you build a site for $35.40 in your first year, and then pay an additional ~$15 each consecutive year for the domain name (the domain name is only free for the first year). Also, keep in mind that to get this low price ($2.95 a month), you’ll have to pay for three years upfront (so it’s $106.20 in total).
Another thing to keep in mind is that what we’re talking about here is launching just a basic site with WordPress. If you will need things like online payments, additional plugins, premium themes, then your costs will rise.
Here’s how to decide between WordPress and Wix
Deciding between Wix and WordPress is not as easy. You should take into consideration at least a couple of factors. Here’s how things play out in general terms:
| WordPress | Wix | |
|---|---|---|
| Features | ⭐⭐⭐ | ⭐⭐ |
| Designs | ⭐⭐⭐ | ⭐⭐ |
| Ease of use | ⭐ | ⭐⭐⭐ |
| Control over site | ⭐⭐⭐ | ⭐⭐ |
| Price | ⭐⭐⭐ | ⭐⭐ |
Have your favorite? Great! Here’s how to build your own website with either platform:


How to build your own website on Wix
The great thing about Wix is that you can build your own website all in one go, without ever leaving Wix.com. The interface takes you by the hand all the way to a working site. Here’s how to get everything done:
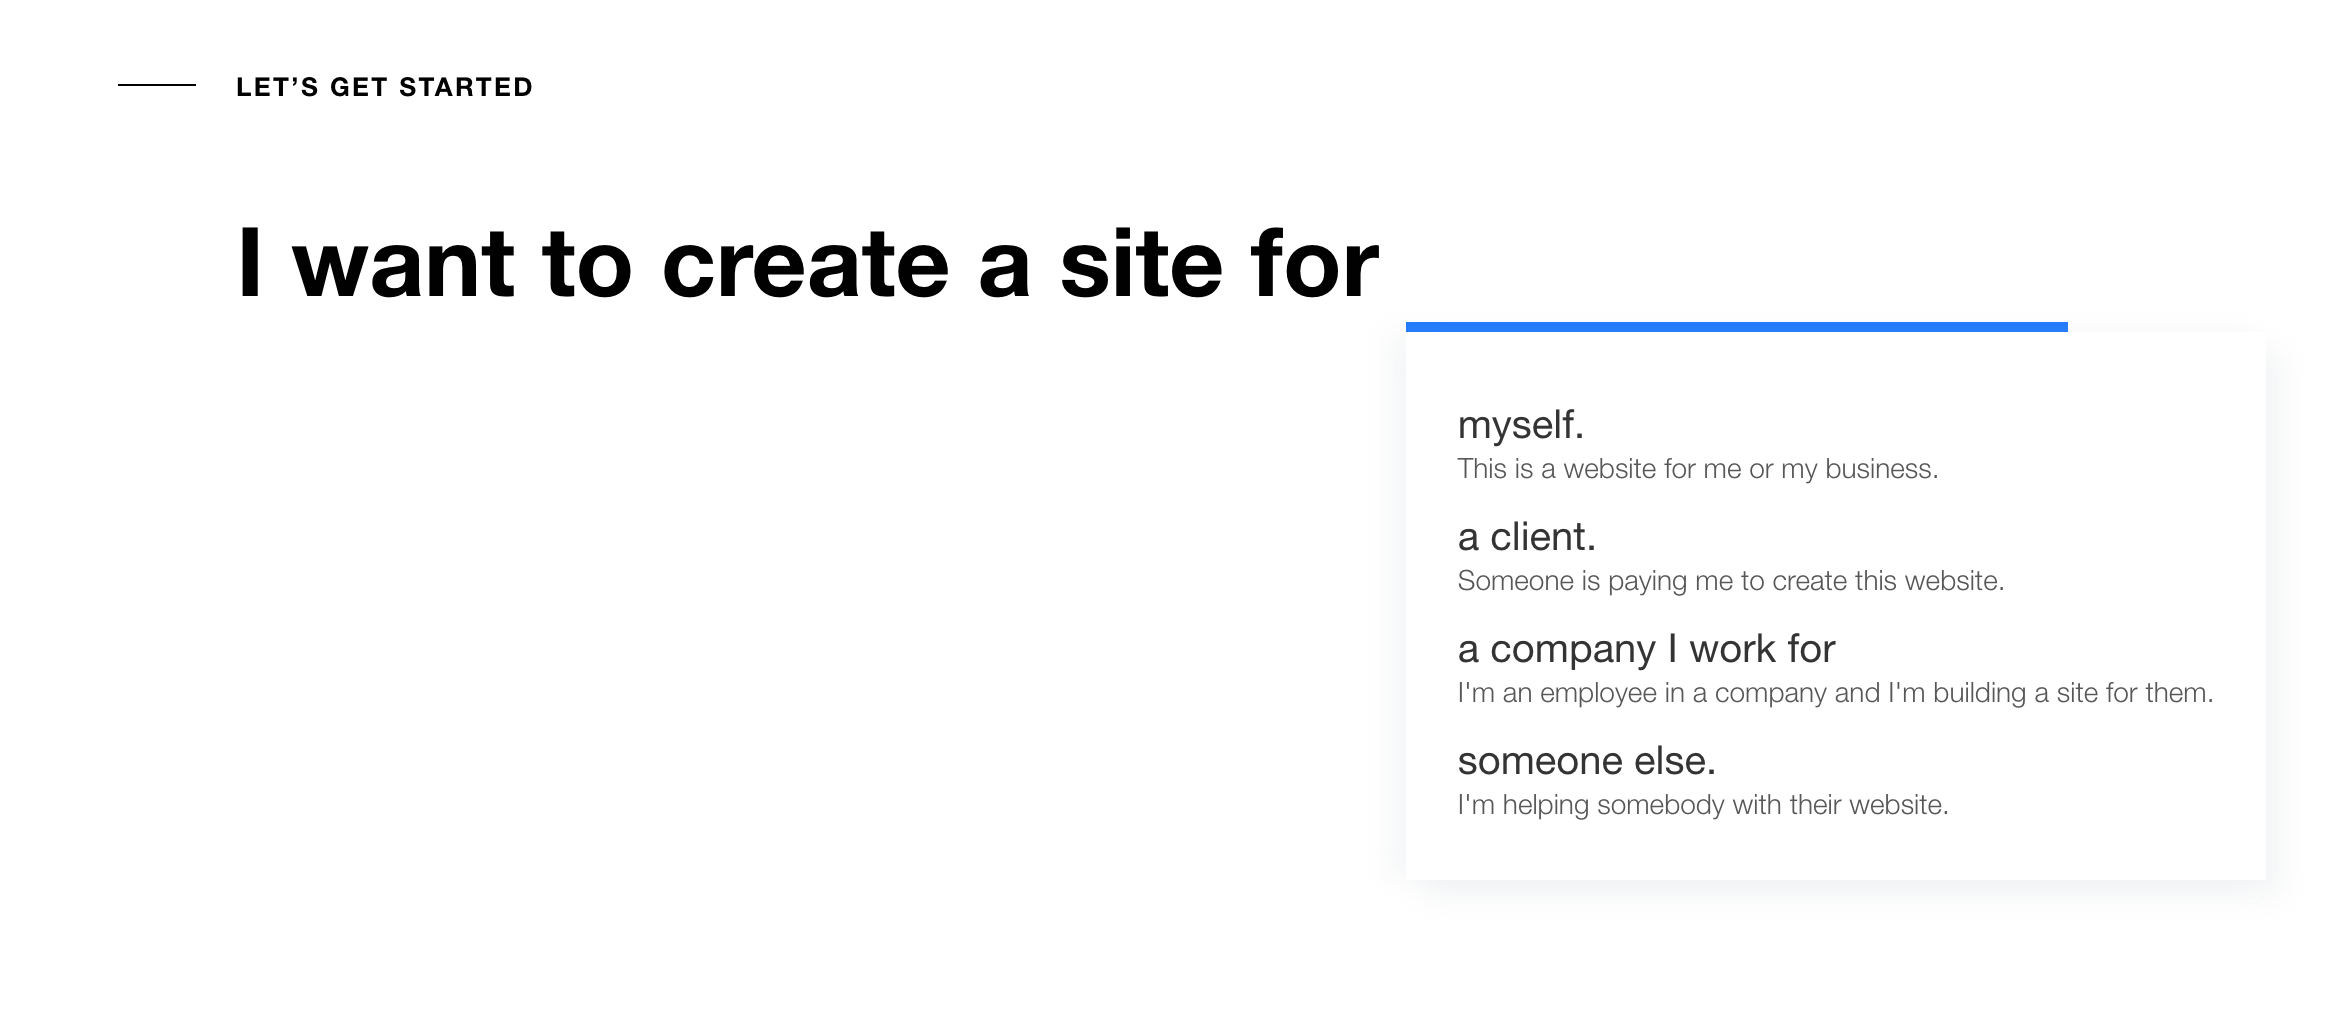
1. Create a Wix account
Go to the Wix homepage and click on Get Started. Enter your email address to create an account.

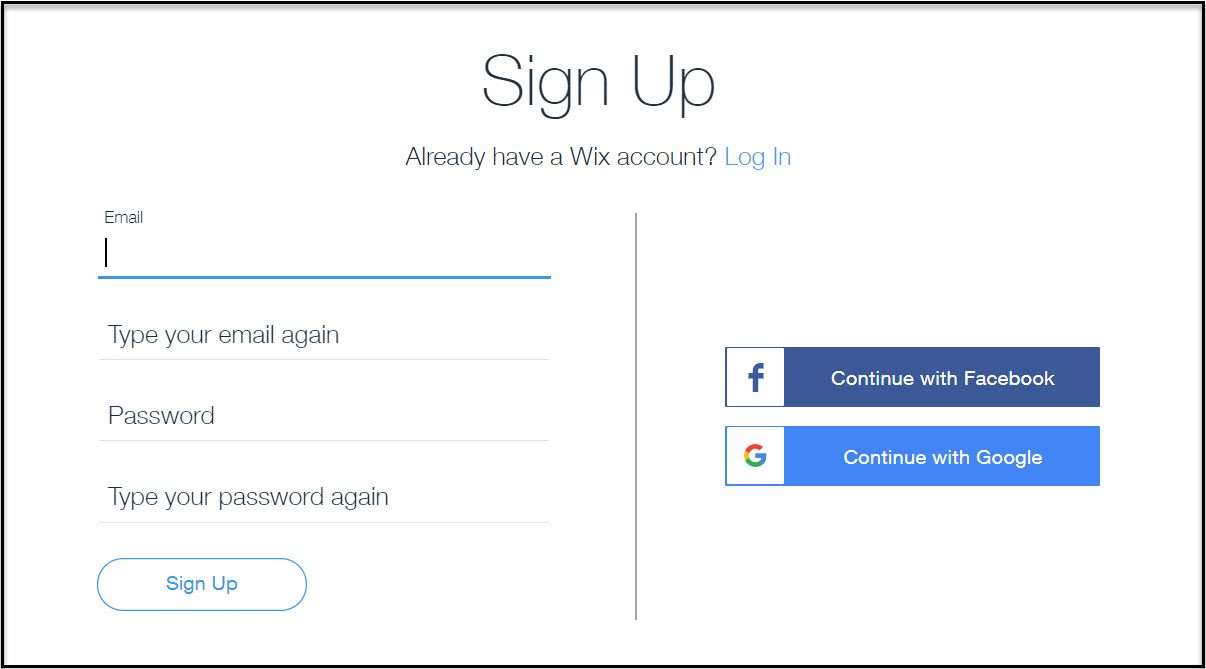
Wix will ask you a series of questions about your new website.

2. Let Wix ADI do its magic
In this next step, Wix uses your answers in its cool Wix ADI tool (Wix’s artificial intelligence module) to prepare a tailor-made website for you.

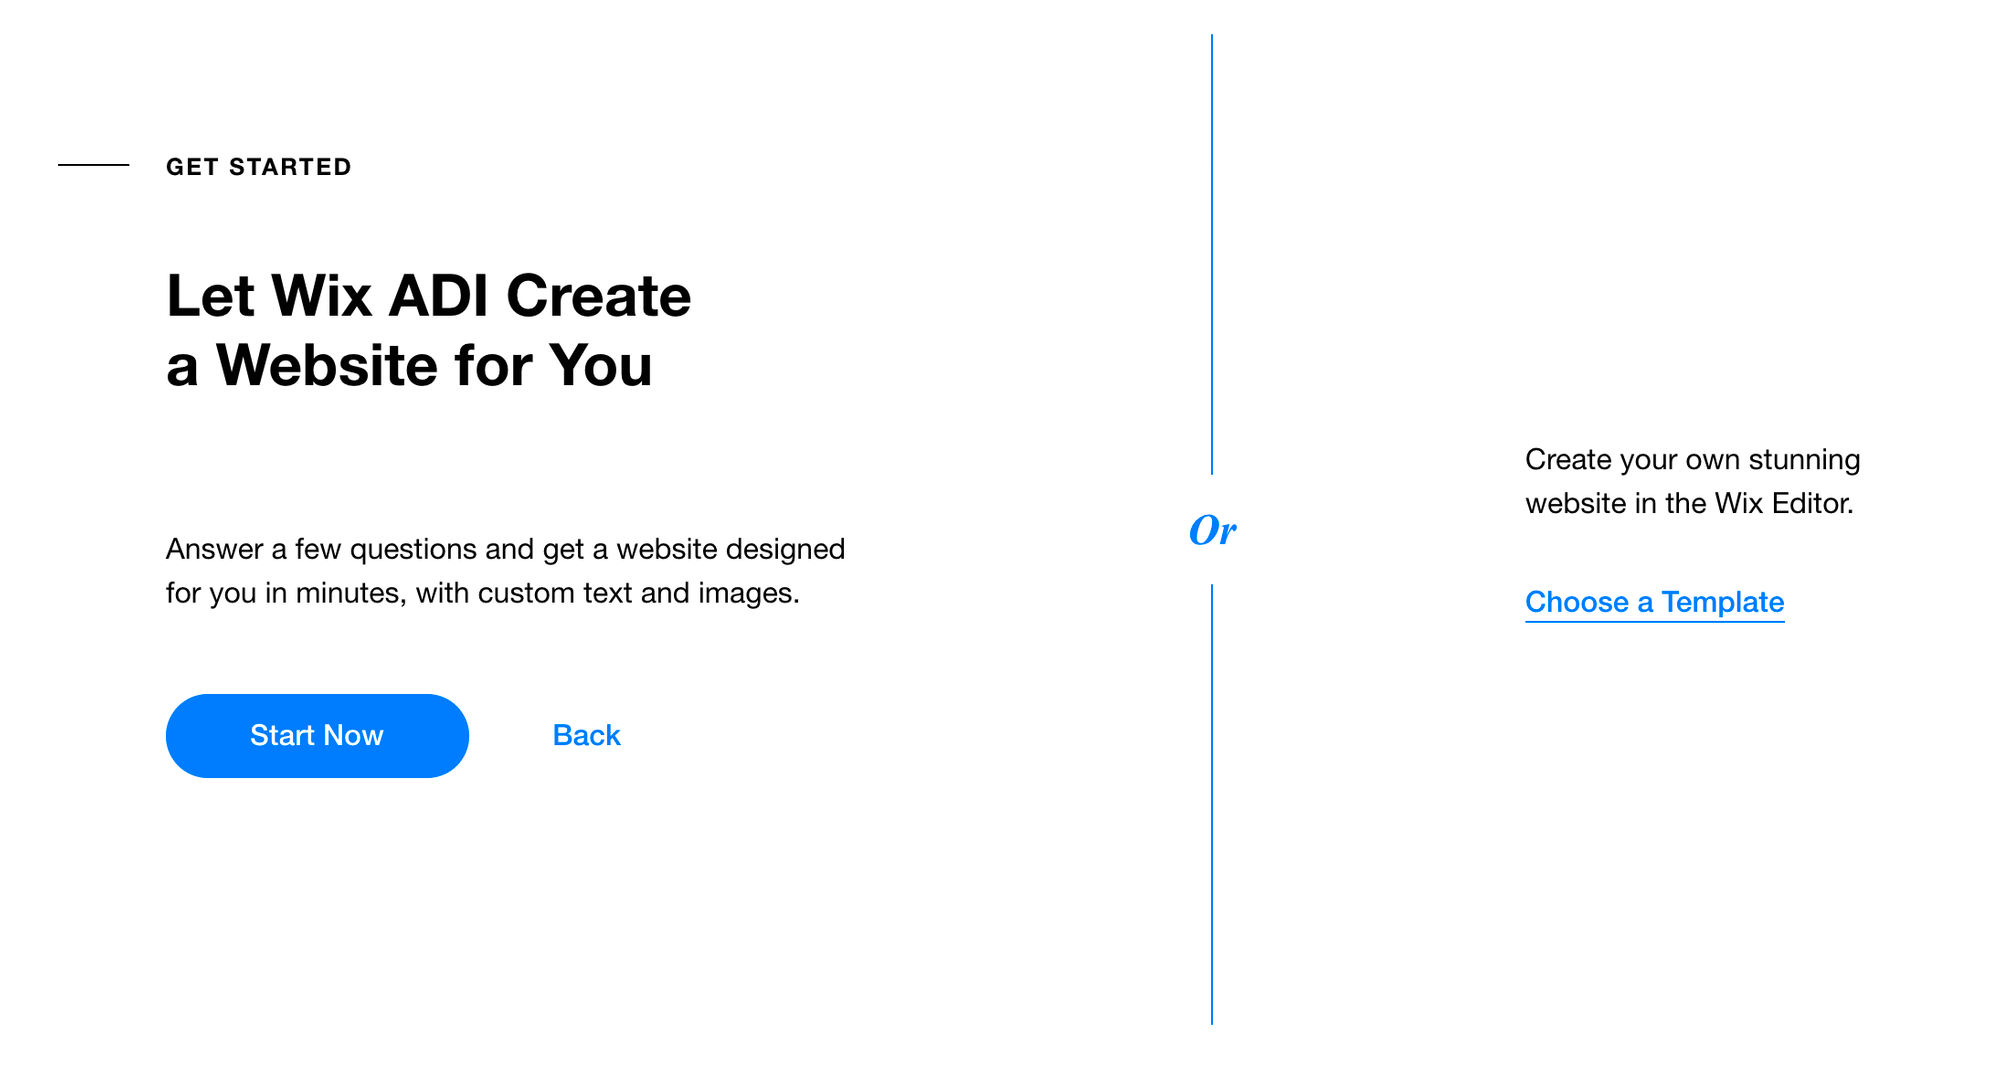
What’s great about it is that Wix will take you by the hand through the entire process, without requiring you to understand what’s going on under the hood.
3. Pick a design
Based on your answers, Wix ADI will suggest some design options that you might enjoy:

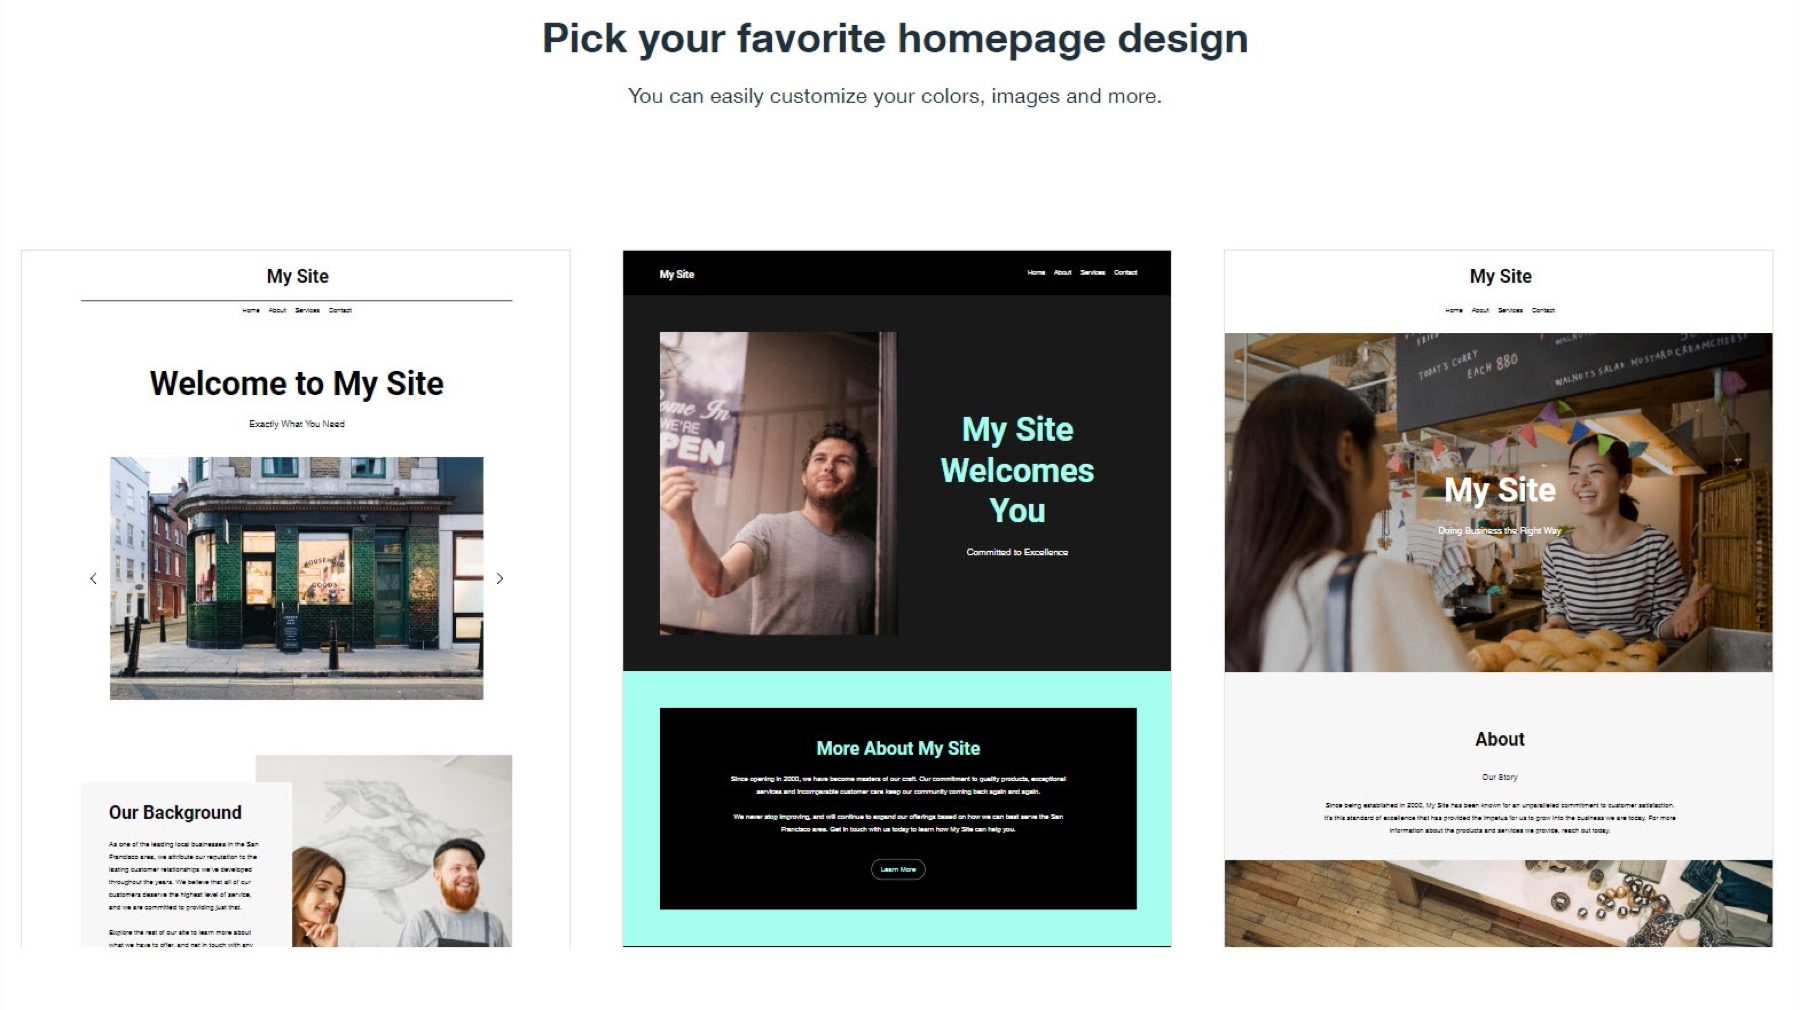
You’ll be able to customize that design later on, but you won’t be able to change it to something else entirely.
3. Customize the site
When the ADI finishes its job, you’ll be able to customize your design and make it truly fit your needs.
The website builder interface is very clear and highlights all the key areas where you should focus your attention first.

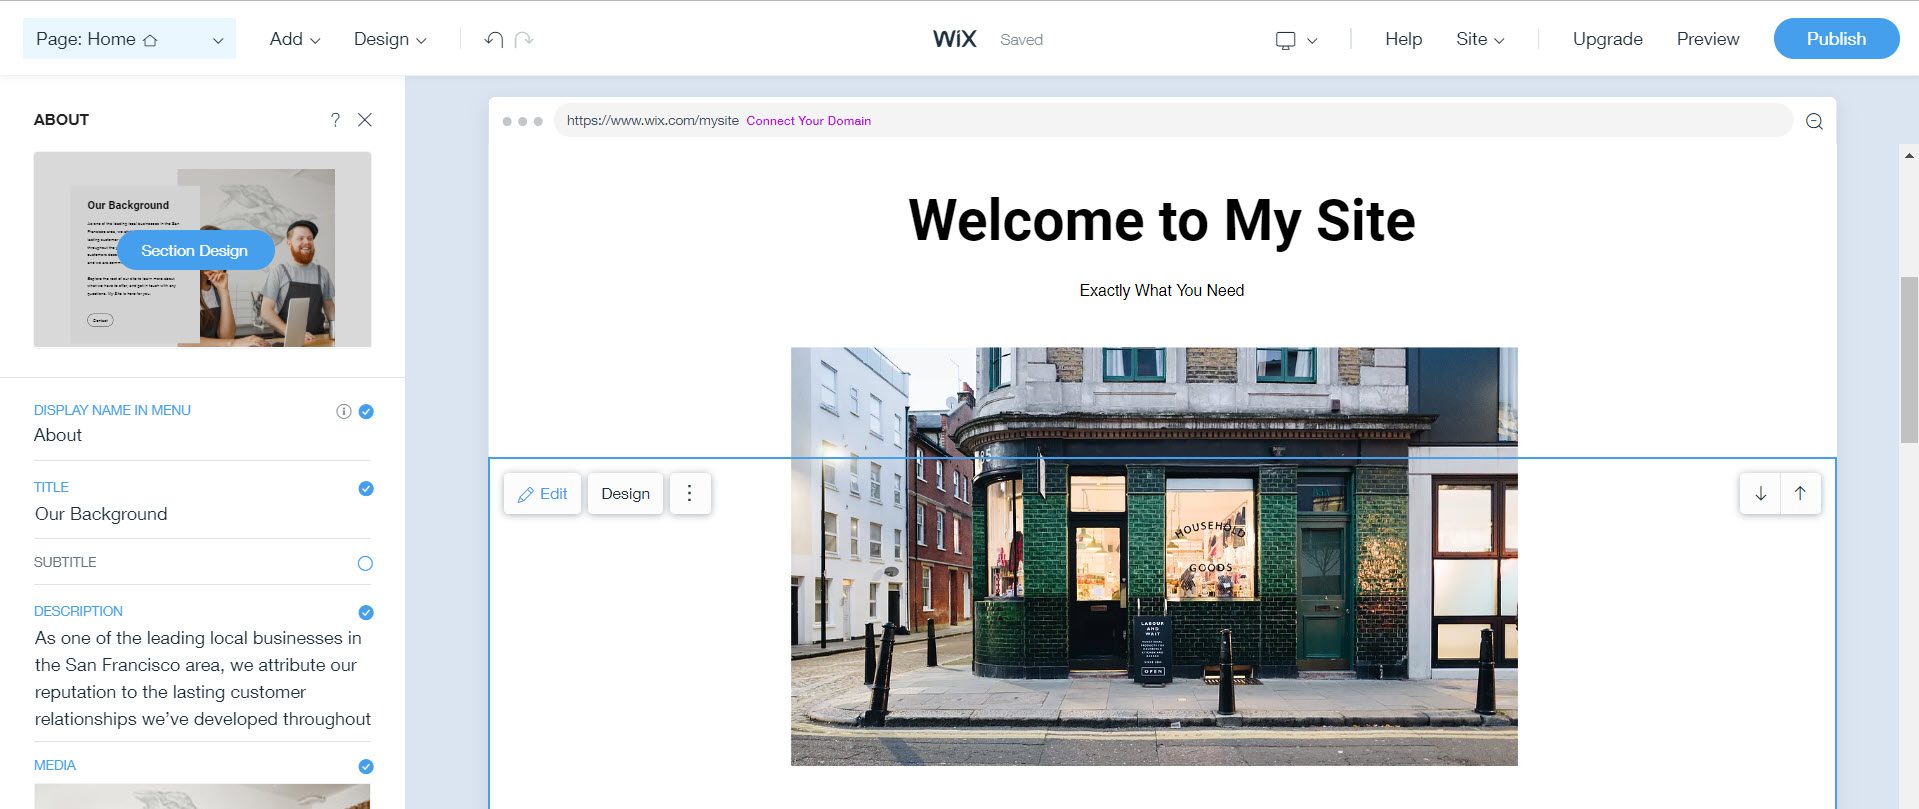
In it, you can:
- Edit the elements on the page. Click on any element on the page to customize it. You’ll see the element’s settings in the sidebar on the left. The options allow you to change the texts, images, colors, and other details about the element.
- Click on the arrows in the upper-right corners to realign the elements.
- Click on the design buttons in the upper-left corners to change the element’s design style.
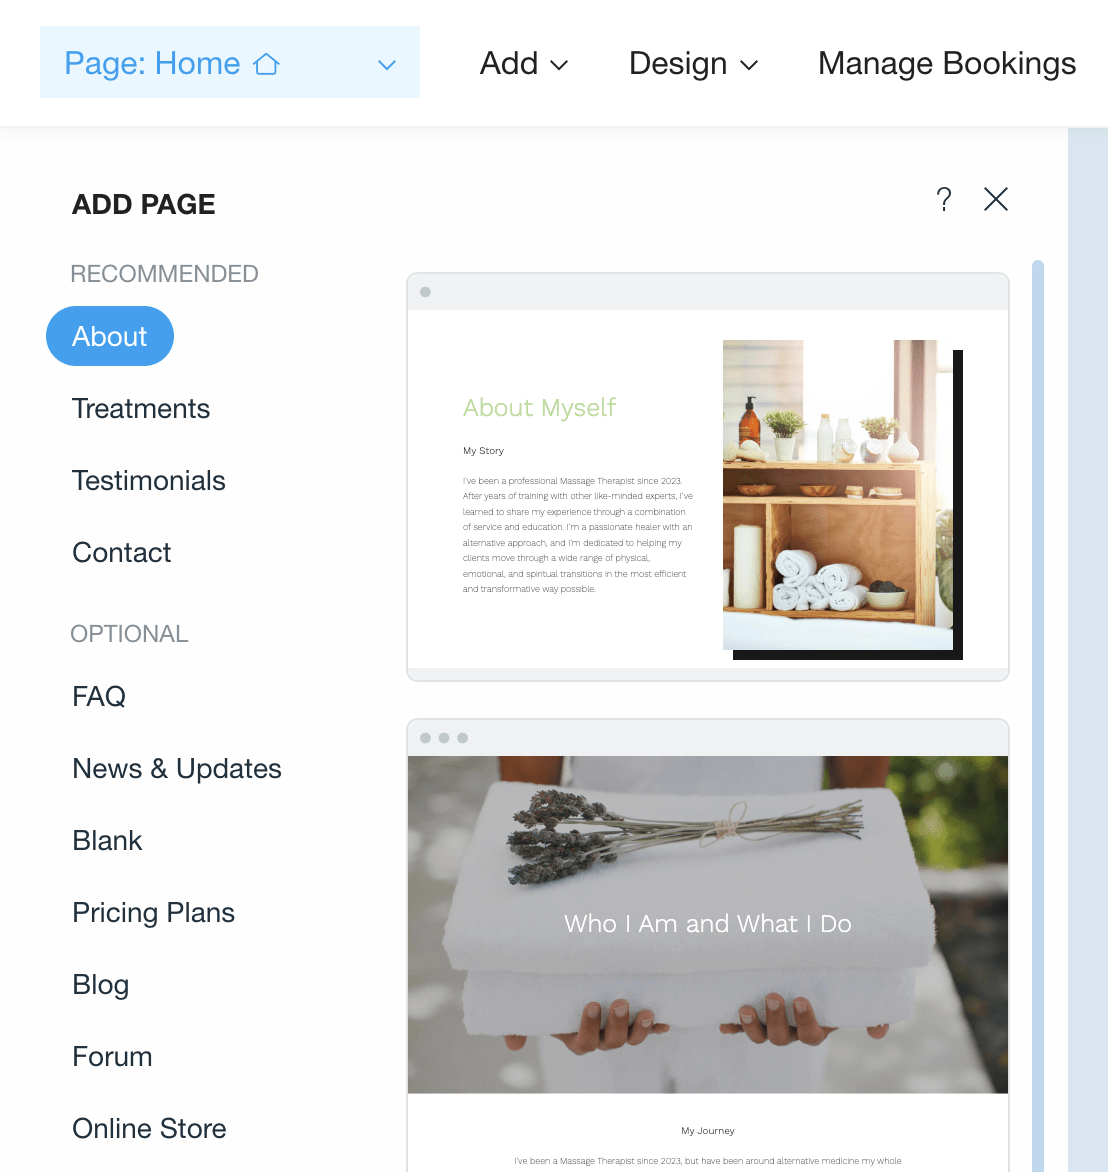
- Add new elements and sections to the page by clicking on the Add link in the top bar.
- Add new pages by clicking on the Page → + Add Page button in the top bar.
Let’s talk about adding new pages for a second. Ultimately, when you want to add a new page, you’ll see the exact design interface as when customizing the homepage. The usage is the same, and the range of available content elements is the same as well.
Wix also offers you a set of pre-made page templates for things like about pages, contact pages, sales pages, and more.

4. Add functionality via Wix apps
Wix comes with a lot of built-in features, but if you want more, you can add those via the Wix App Market. You’ll find apps for email tool integrations, analytics, and more.

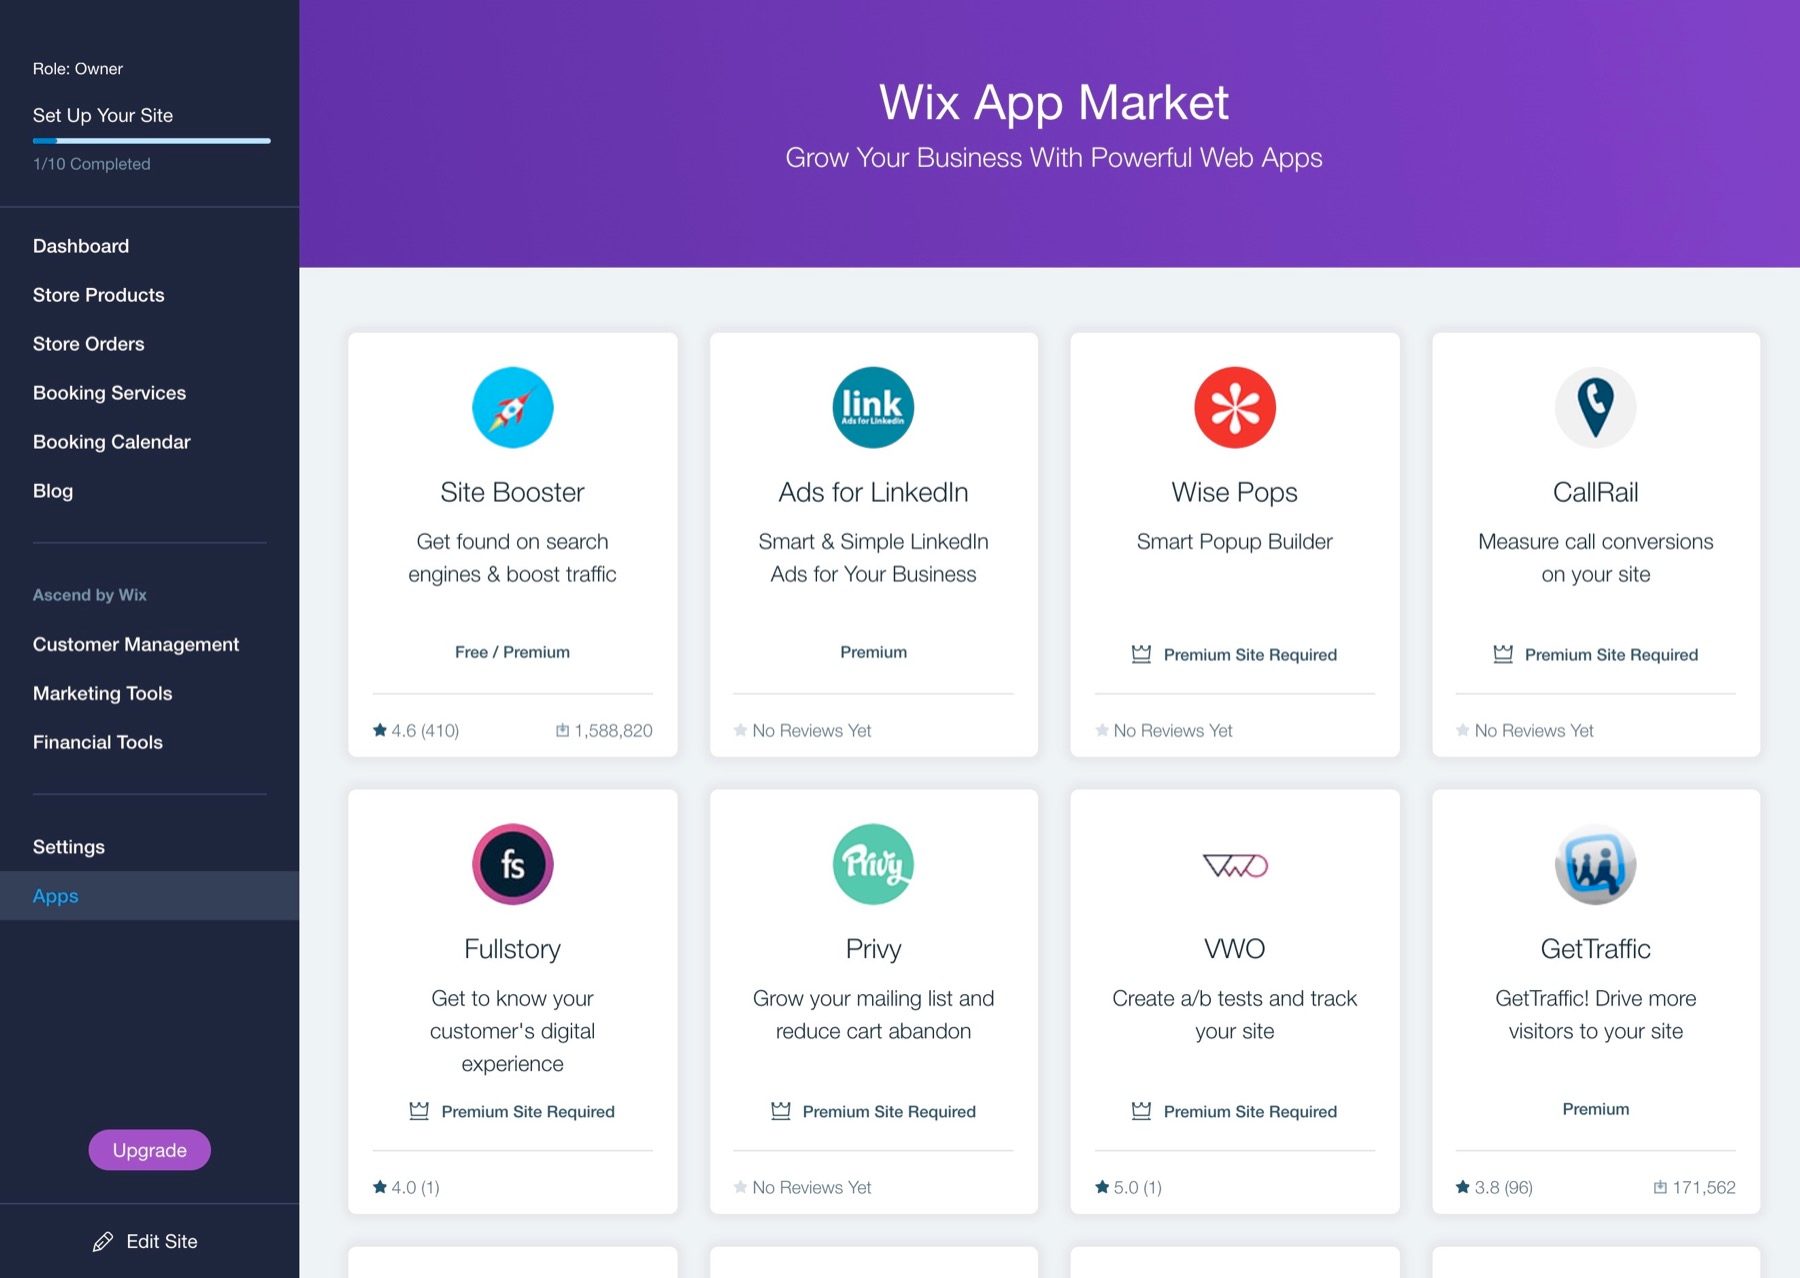
Just install any app with a couple of clicks and then configure it via the app’s settings accordingly.
5. Set a name, domain, pick a plan
When you’re happy with the look of your site, you can finally publish it for the world to see.
To do that, click on the Publish button in the top right corner of the Wix UI.


Next, choose whether you want to register a new domain name or stay with the free Wix subdomain.

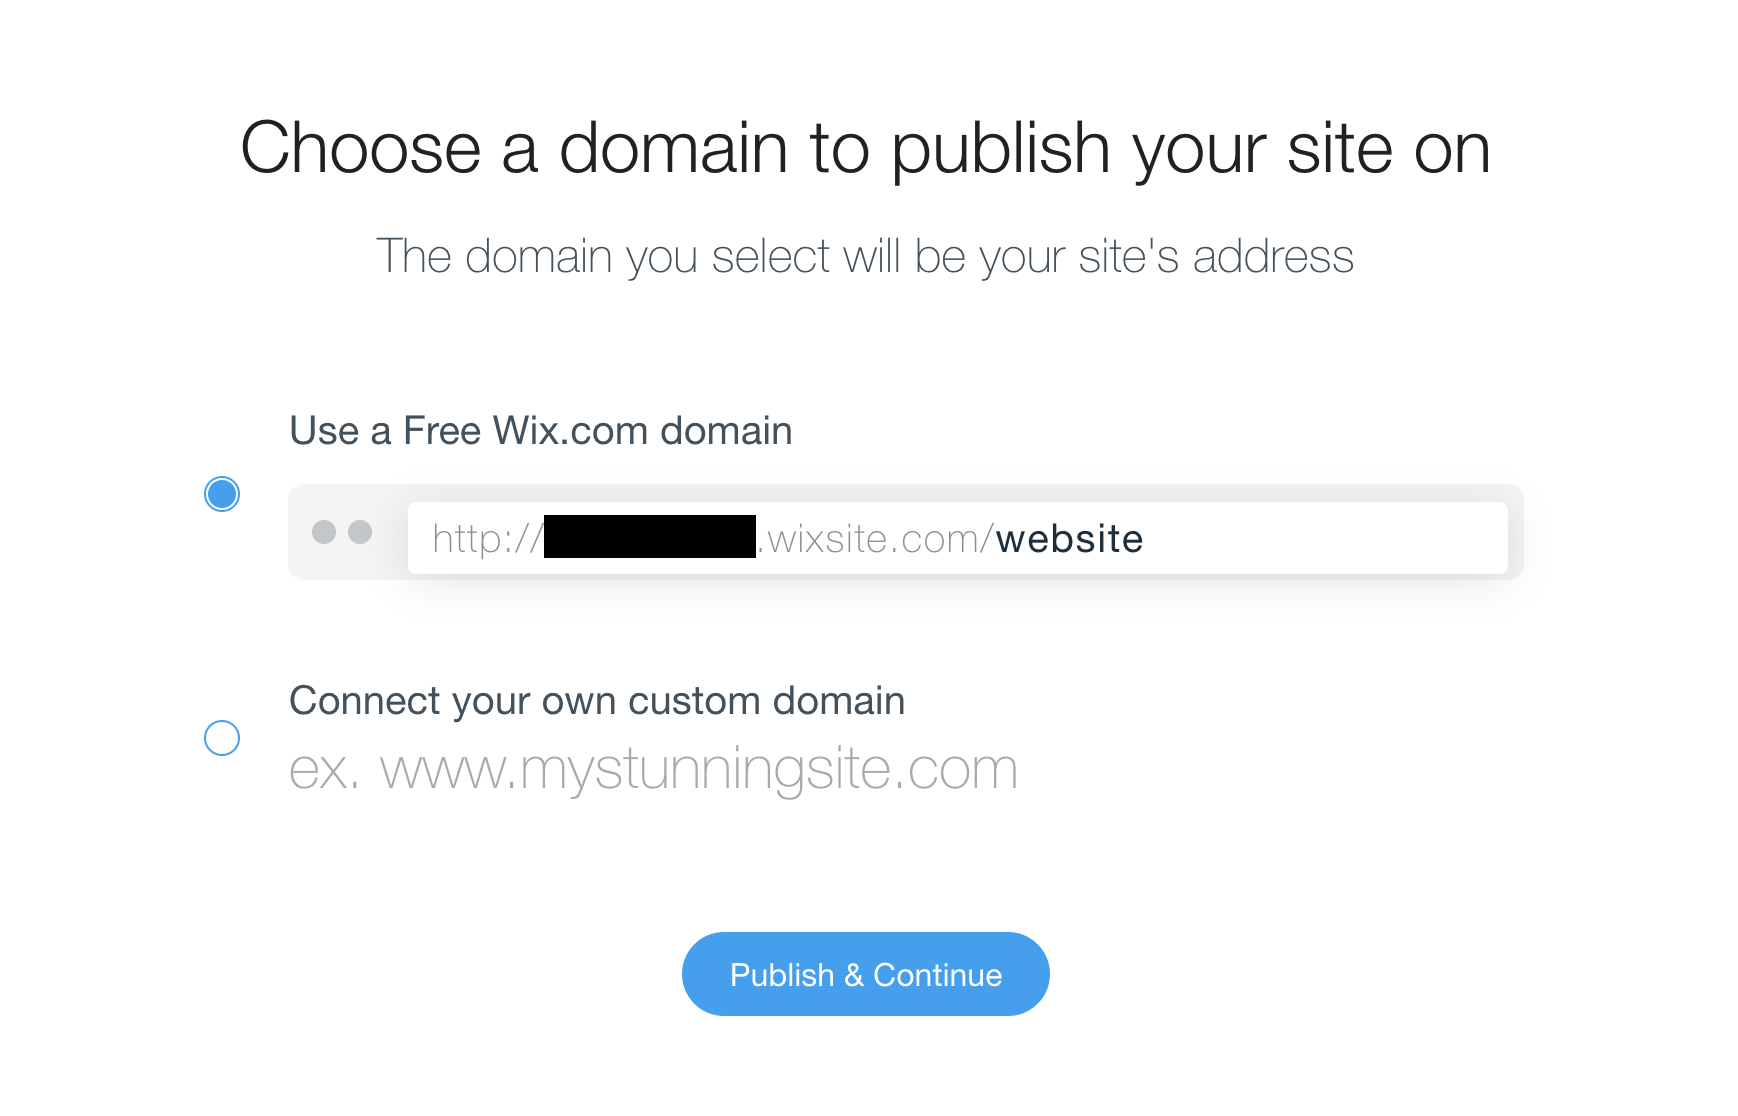
Note; if you choose a custom domain name, you’ll also have to upgrade to one of Wix’s paid plans that we talked about earlier.
Once you finalize these steps, your site is going to be online and publicly visible! ?


How to build your own website on WordPress
Building your own website on WordPress is a bit different from doing so on Wix.
First, you don’t go to the main WordPress website to get started. Instead, the best place to start is with a hosting firm.
We’ve talked a lot about different types of hosting before, so if you want the full comparison of what’s available in the market, read this. If you can’t be bothered to do that now, here’s a quick summary – our recommendations when it comes to WordPress hosting:
- Bluehost: This host is officially recommended by WordPress, and it’s among the most affordable options out there. As I mentioned earlier in this post, you can get started from $2.95 a month, and you get a domain name for free for the first year.
- SiteGround: This is another WordPress-approved host. It has some great reviews from customers, offers excellent performance and top-of-the-line support. A tad bit more expensive, starting at $3.95 a month.
? Here’s a more in-depth comparison between SiteGround vs Bluehost.
We’re going to use Bluehost for the purpose of this guide:
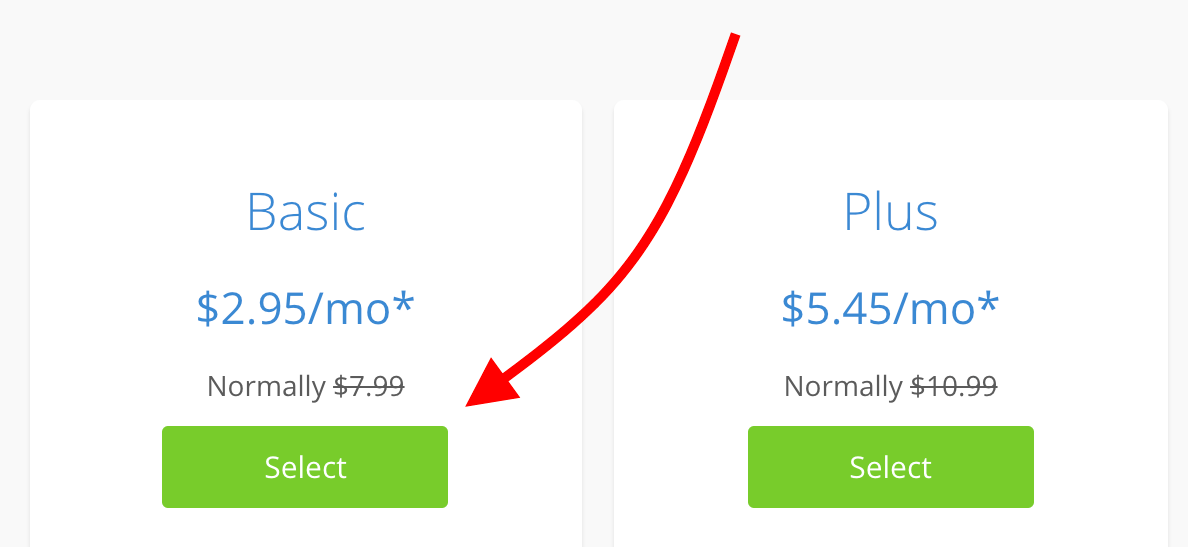
1. Go to Bluehost and sign up
Go to the Bluehost website and click on the Get Started button. Pick one of the plans – probably the one labeled Basic at $2.95 a month (enough if you’re just starting out with a small site).

In the next step, pick a domain name for your site. Remember that you’re getting this domain name for free for the first year.
Make it something original that’s in tune with your brand, niche, and the thing that you want your site to represent. Here’s some advice on how to choose a good domain name.
Complete the signup process and go through with the purchase. As mentioned earlier, you’ll need to pay for three years upfront to get this low price of $2.95 a month.
2. Install WordPress
Bluehost makes this part very easy to do, and it doesn’t require any server management skills from you.
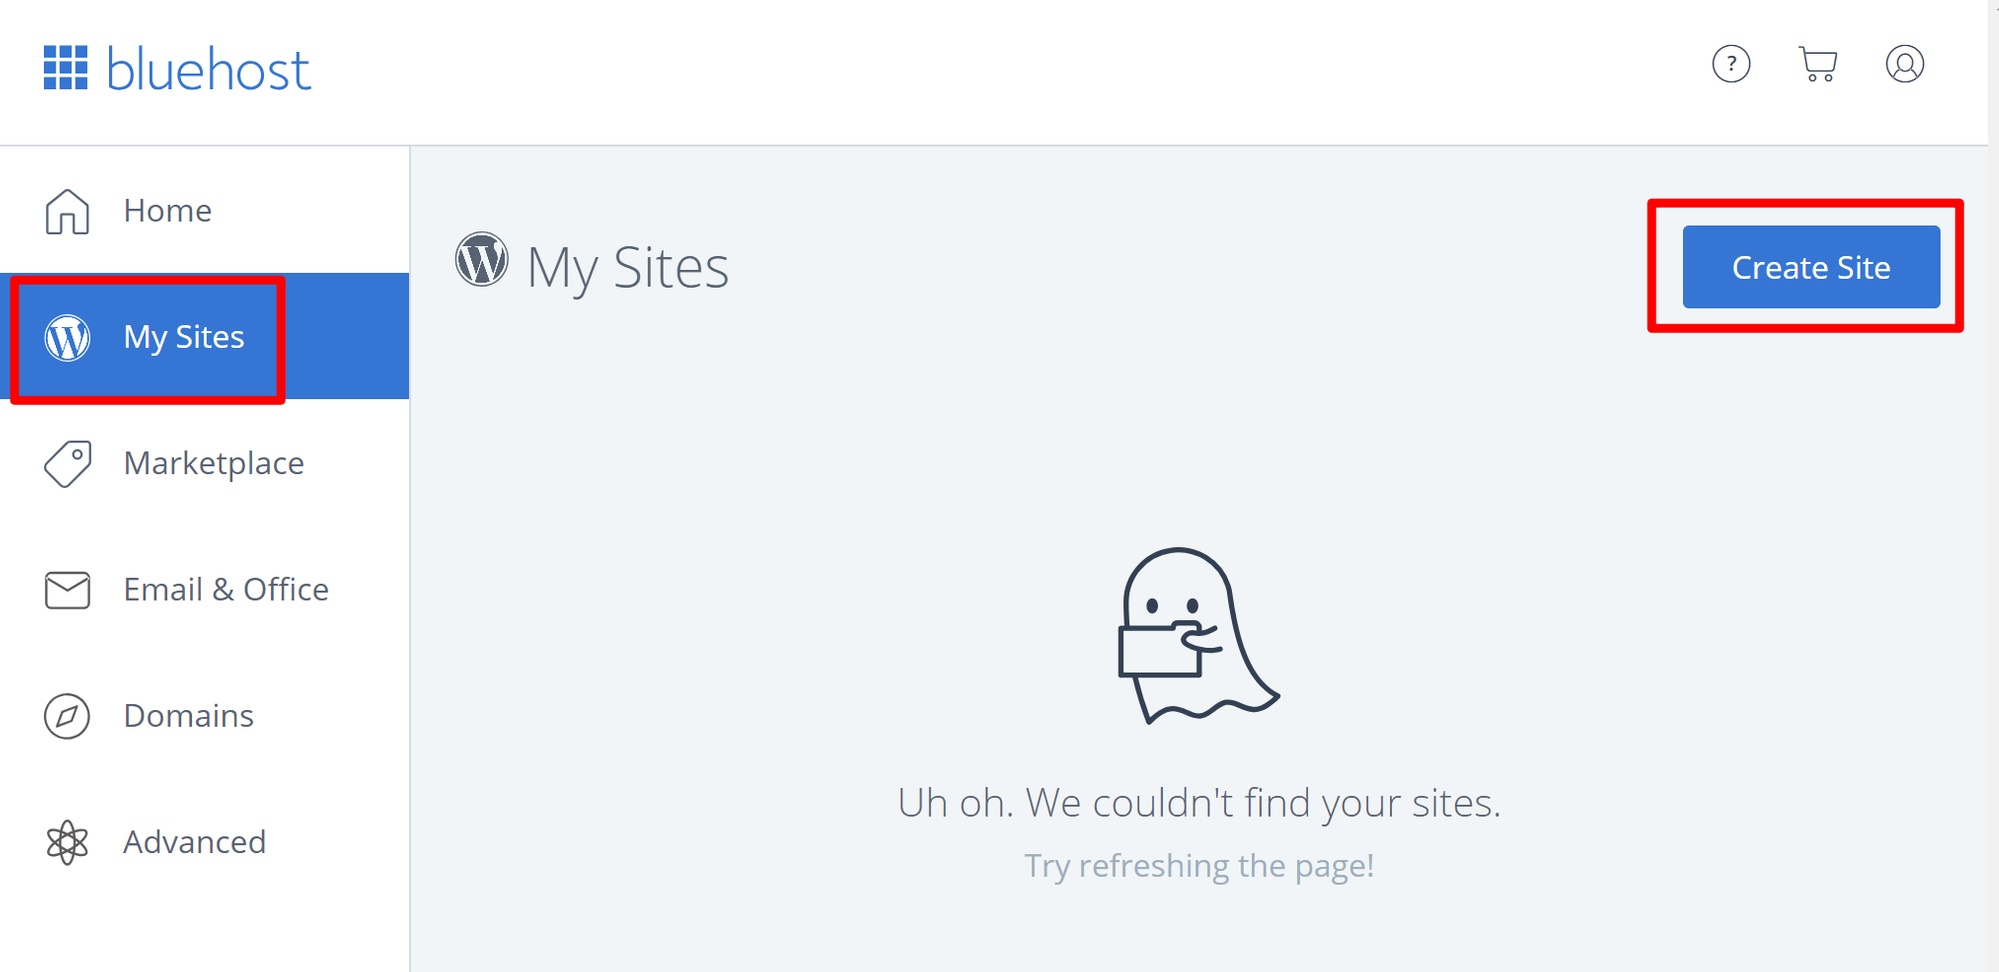
Just log in to your account, go to the My Sites tab, click on the Create Site button.

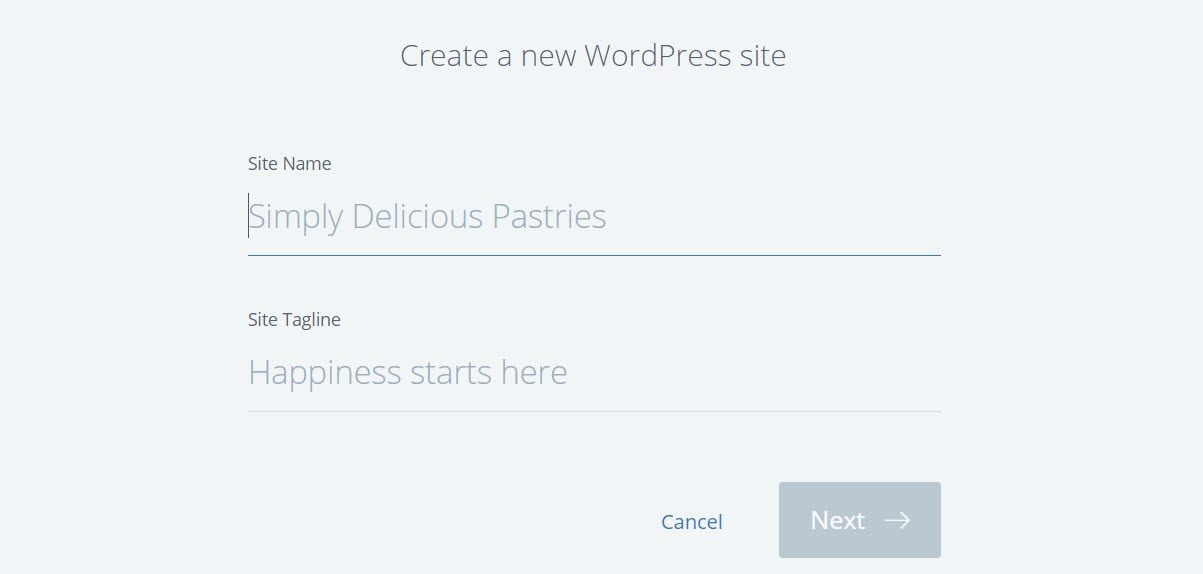
Bluehost will ask for some details like site name and tagline.

Next, you’ll be asked to pick which of your domain names you want to connect the site to. You likely have only one domain there, so select it from the list.
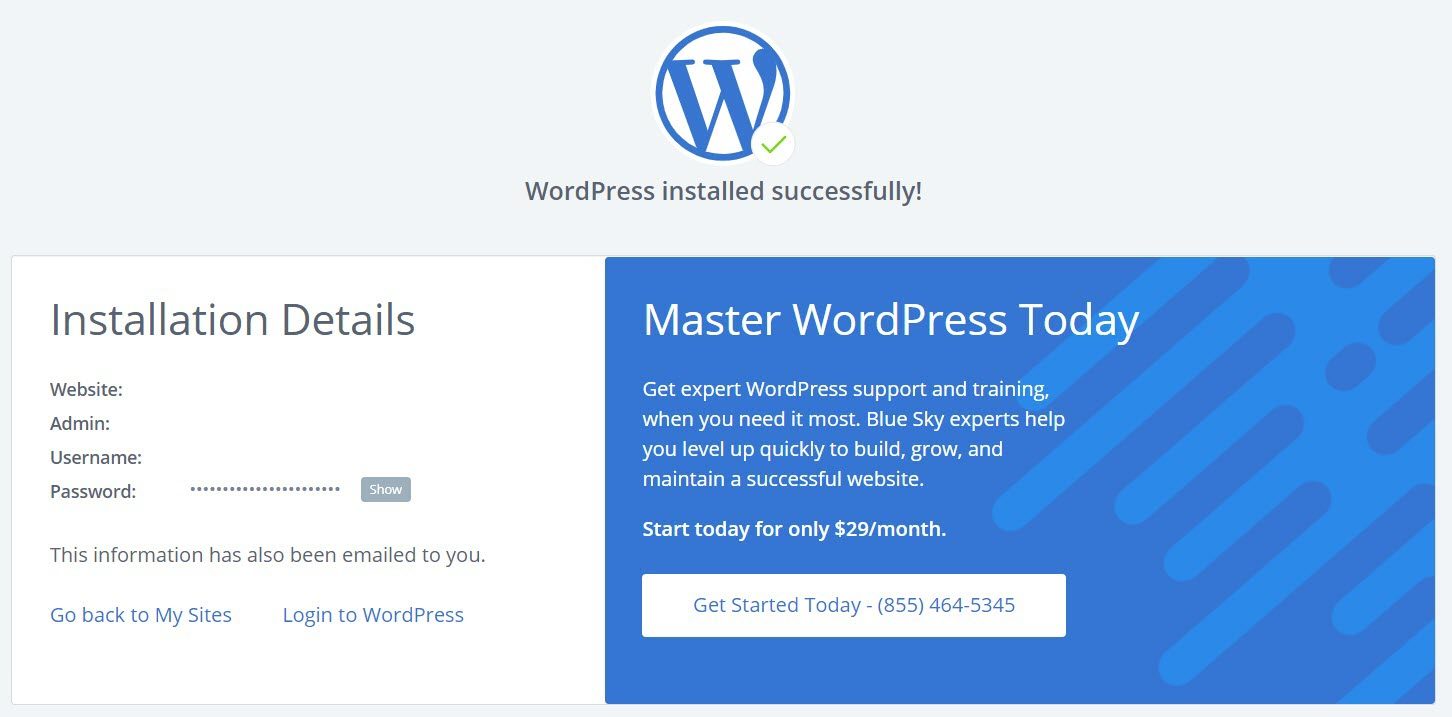
With that done, Bluehost will now install WordPress for you. When the process finishes, you’ll be able to log in to the WordPress admin panel.

3. Pick a design
WordPress allows you to pick from thousands of designs (called themes) and then install them in a couple of clicks!
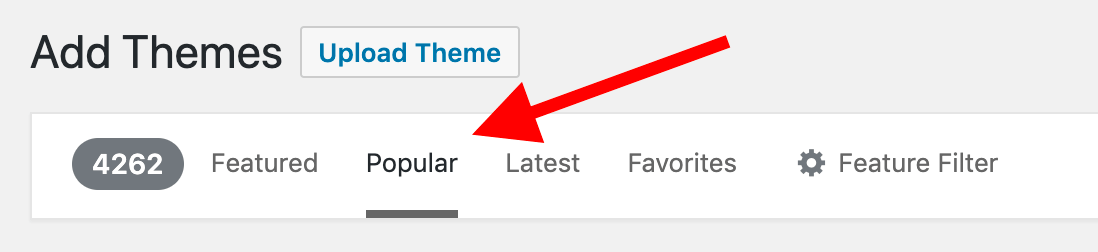
To begin, log in to your WordPress admin panel and go to Appearance → Themes. From there, click on Add New.

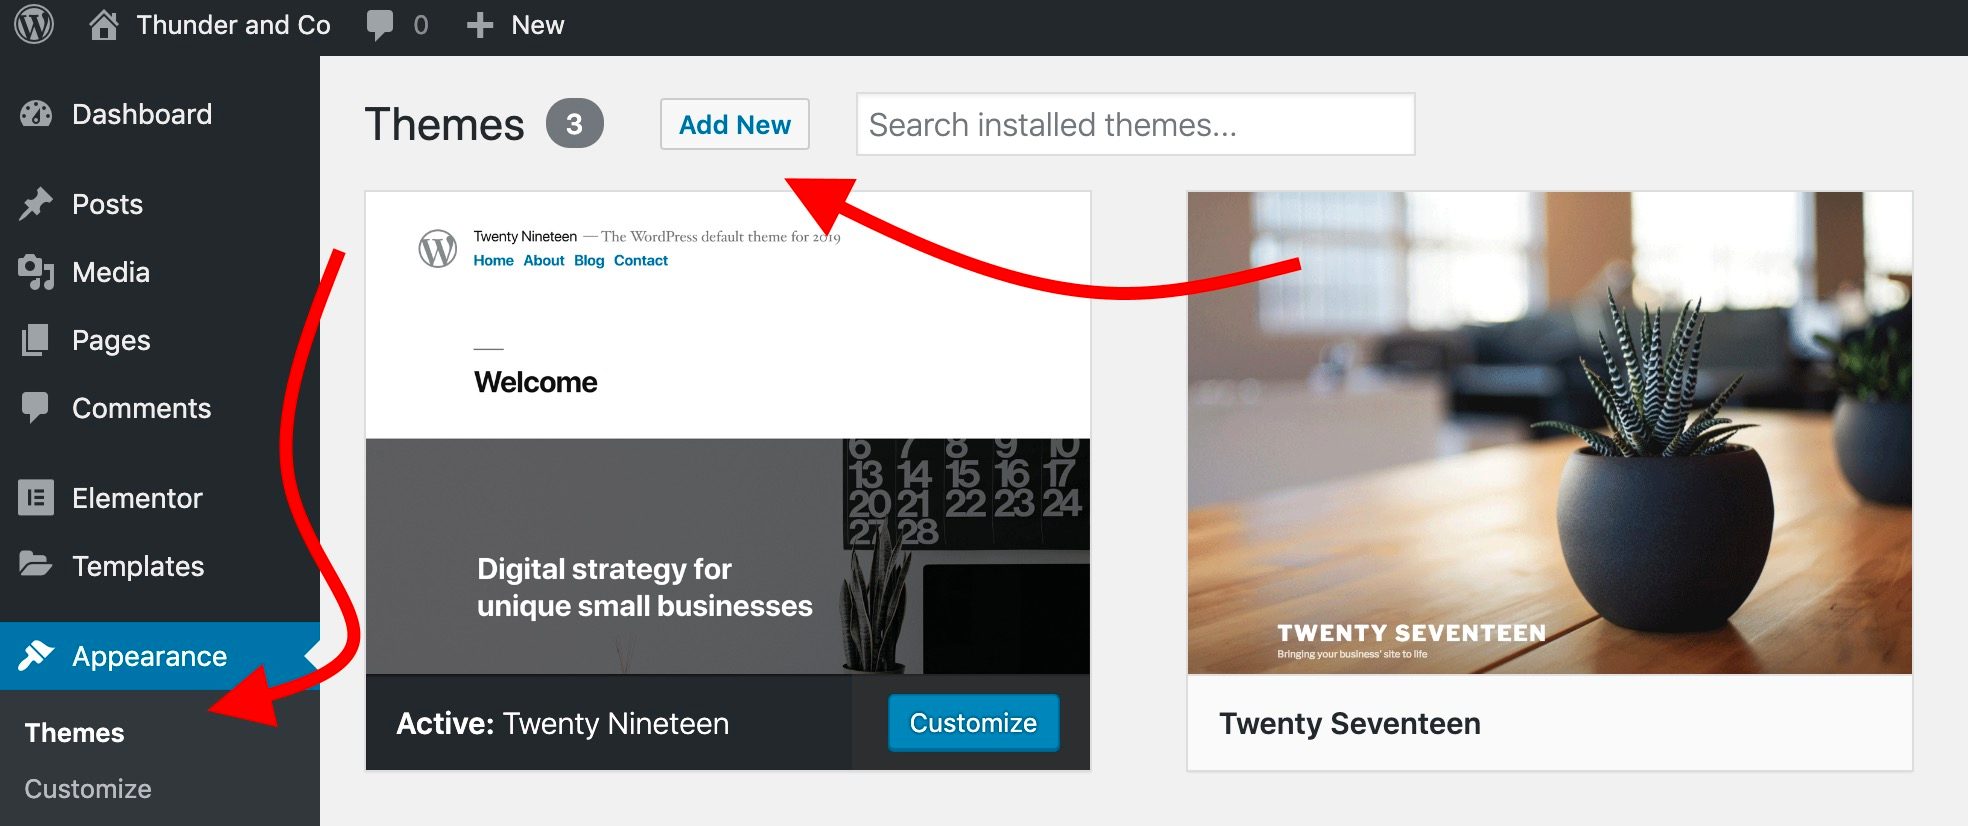
To make sure that you’re only browsing through the best themes there, switch to the Popular tab.

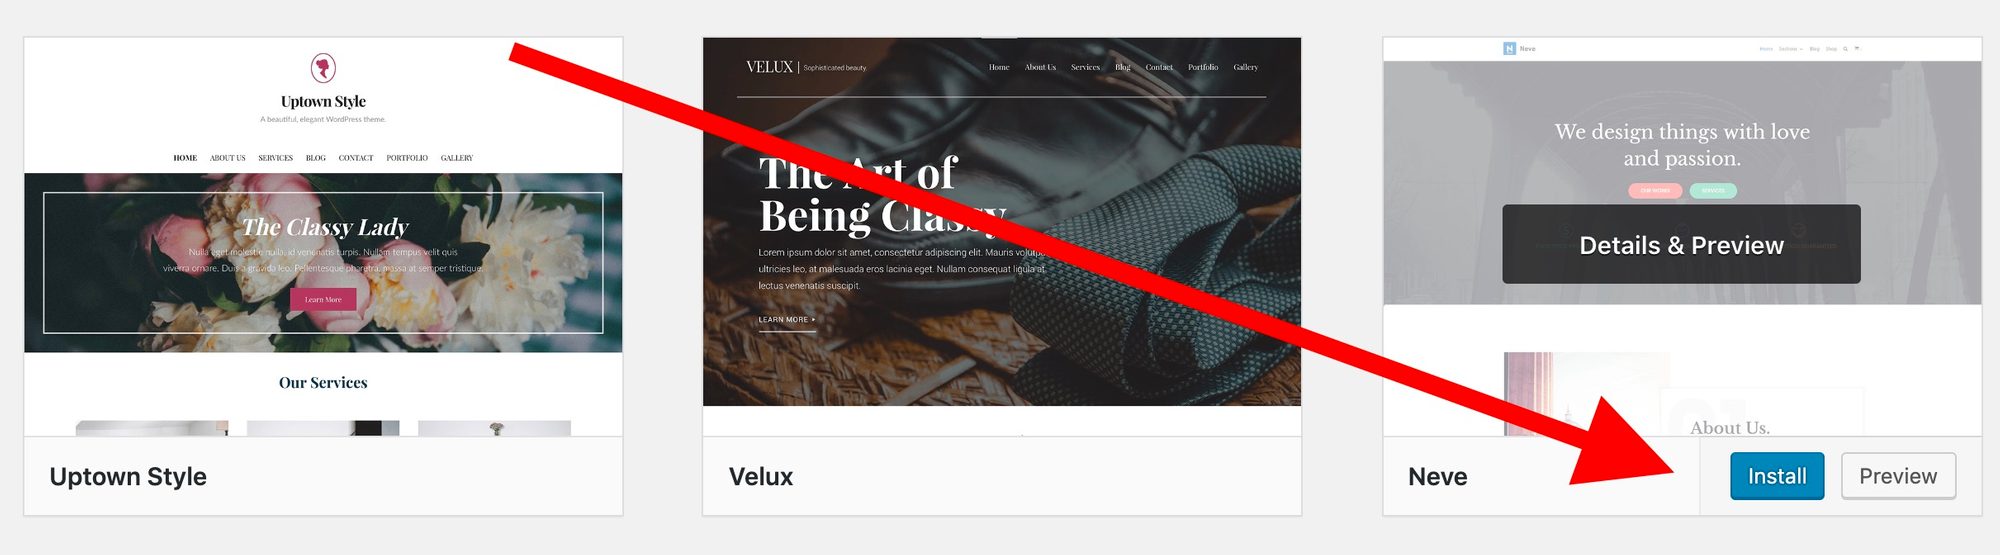
Pick a theme from the list that you like and install it. We’re going to go with Neve (you’ll find it somewhere around the second/third row).
This is actually a theme of our own, which the WordPress community seems to like a lot. The theme is active on more than 50,000 websites at the time of writing.

? Read also: 50+ best free WordPress themes for 2019
Just click on the Install button below the theme (see image above), and then click on Activate when the installation finishes.
Neve will then invite you to give a shot to one of its starter sites.

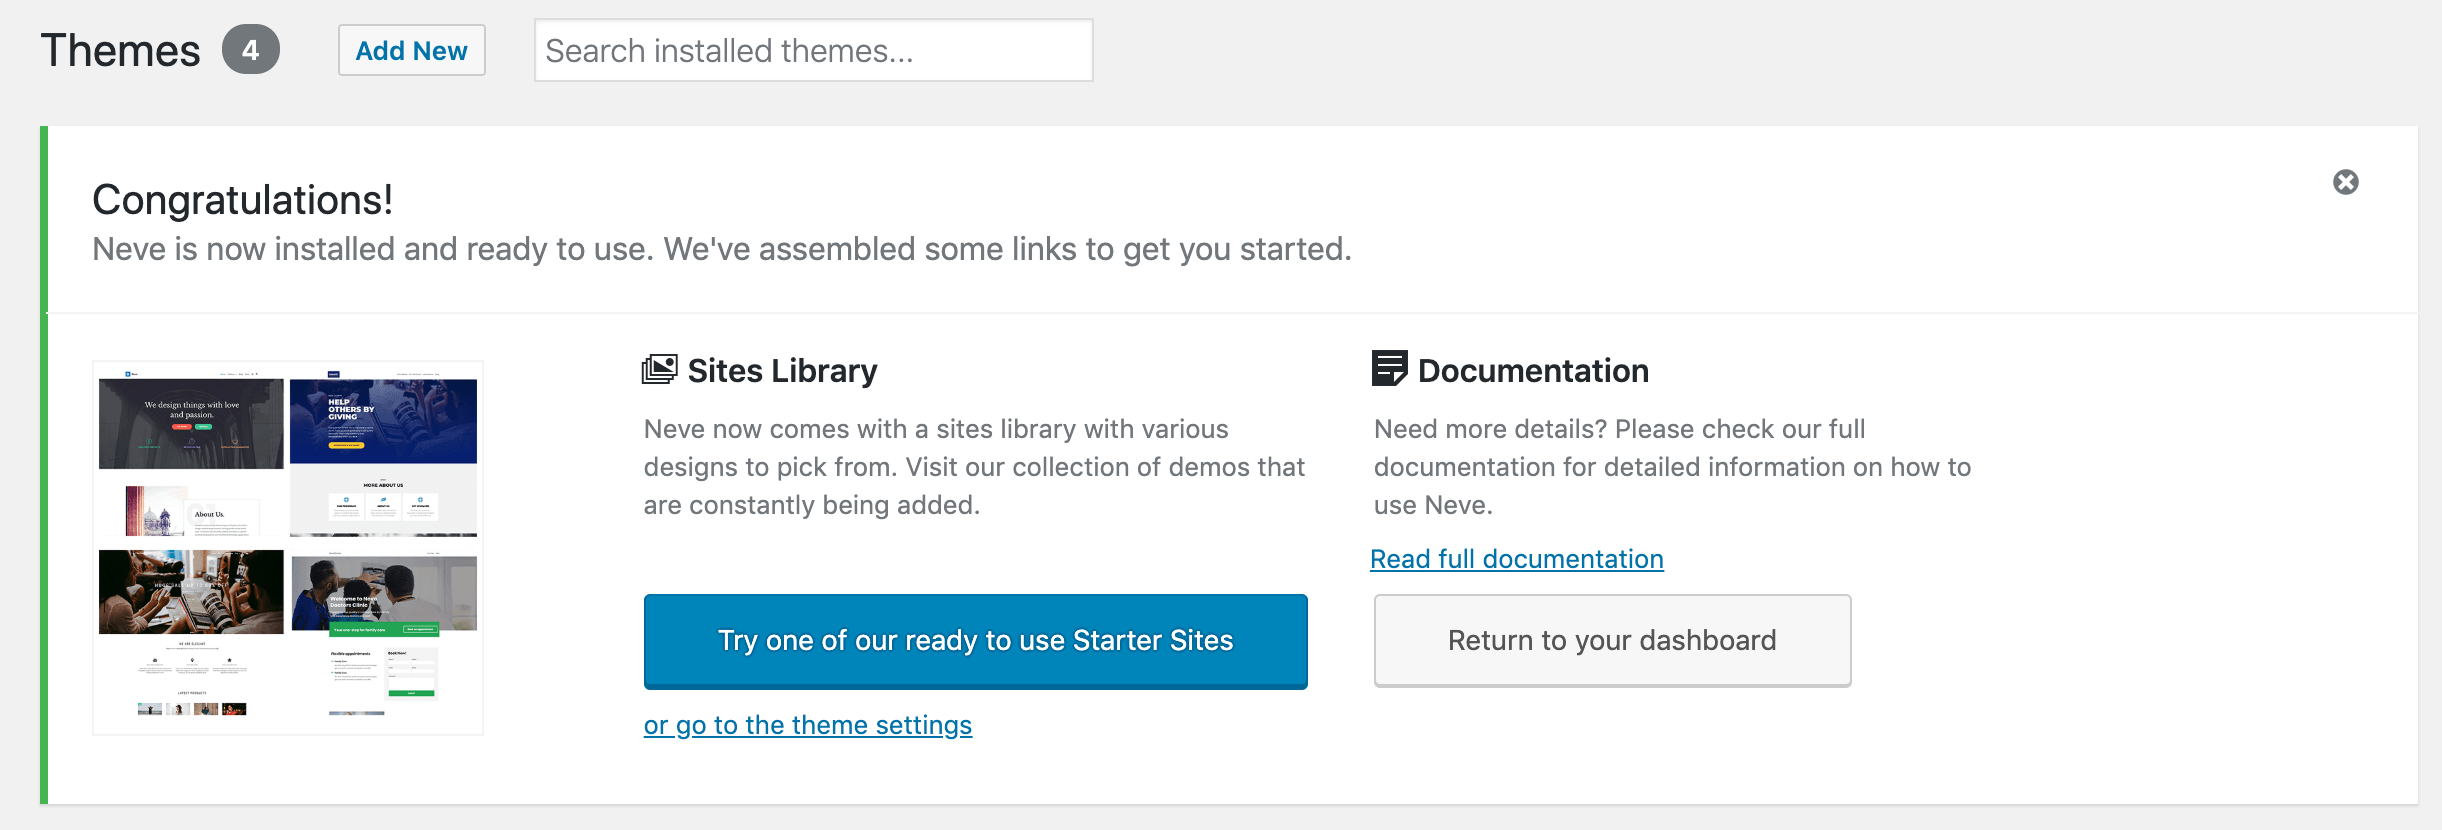
These website templates will help you kickstart your design so that you don’t have to do everything by hand. Highly recommended!
To begin, just click on the big blue button. You’ll see a list of the available templates. You can pick one based on the niche your site is in, or simply pick a look that you enjoy.

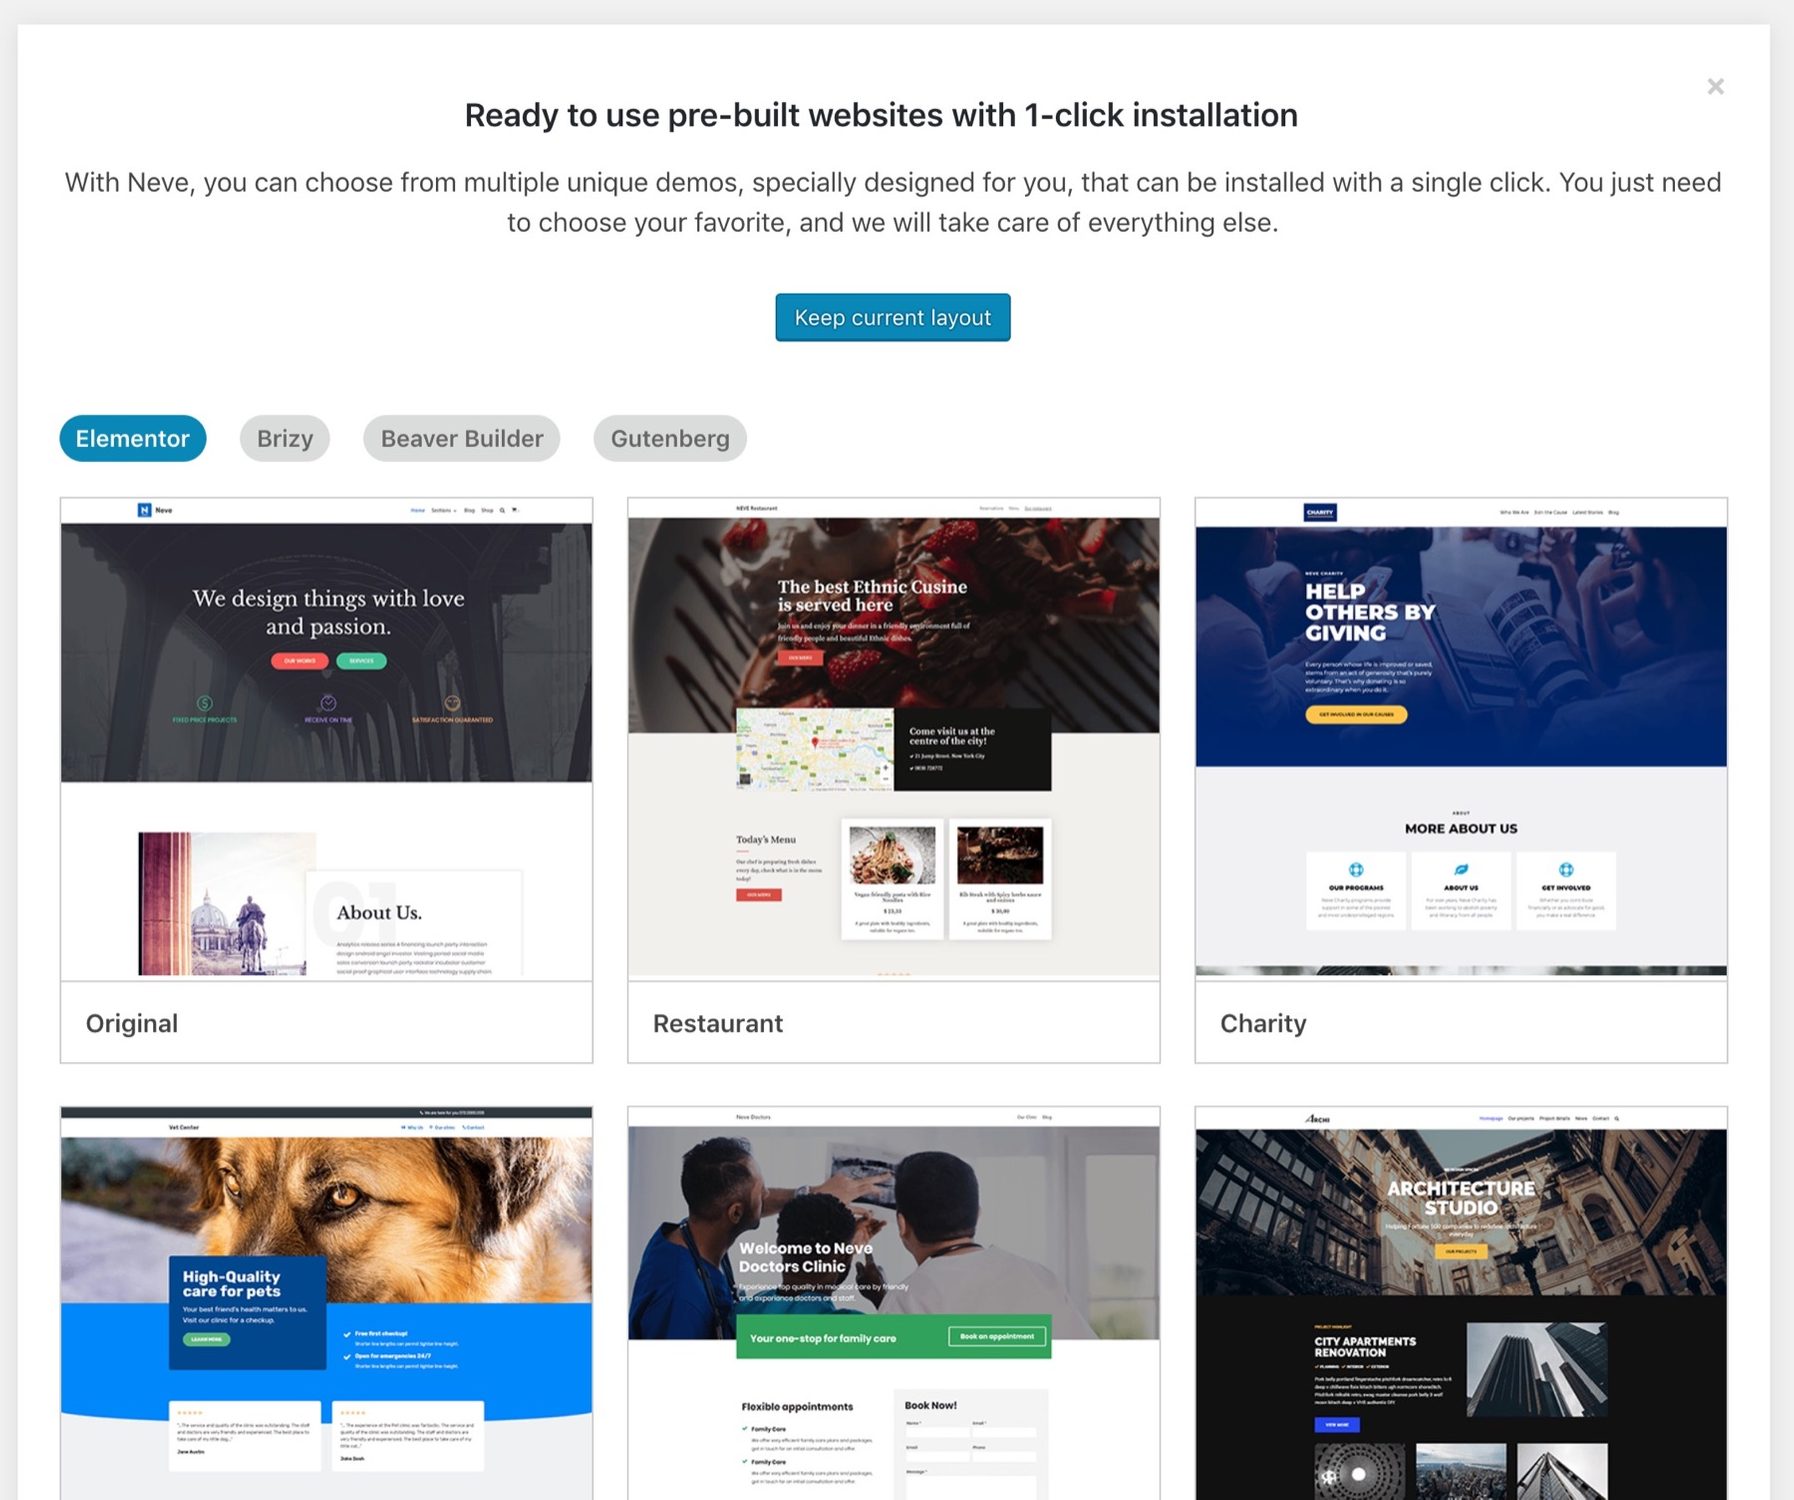
At the top, you also get to pick your page builder of choice. We like Elementor best, but you are free to go with any of them.
Just click on the Import button next to the template you like. Neve will give you a choice as to which specific elements you want to import. It’s best to leave them all selected so that you get a whole working website after the import is done. Neve will also install the page builder required to make the design work.

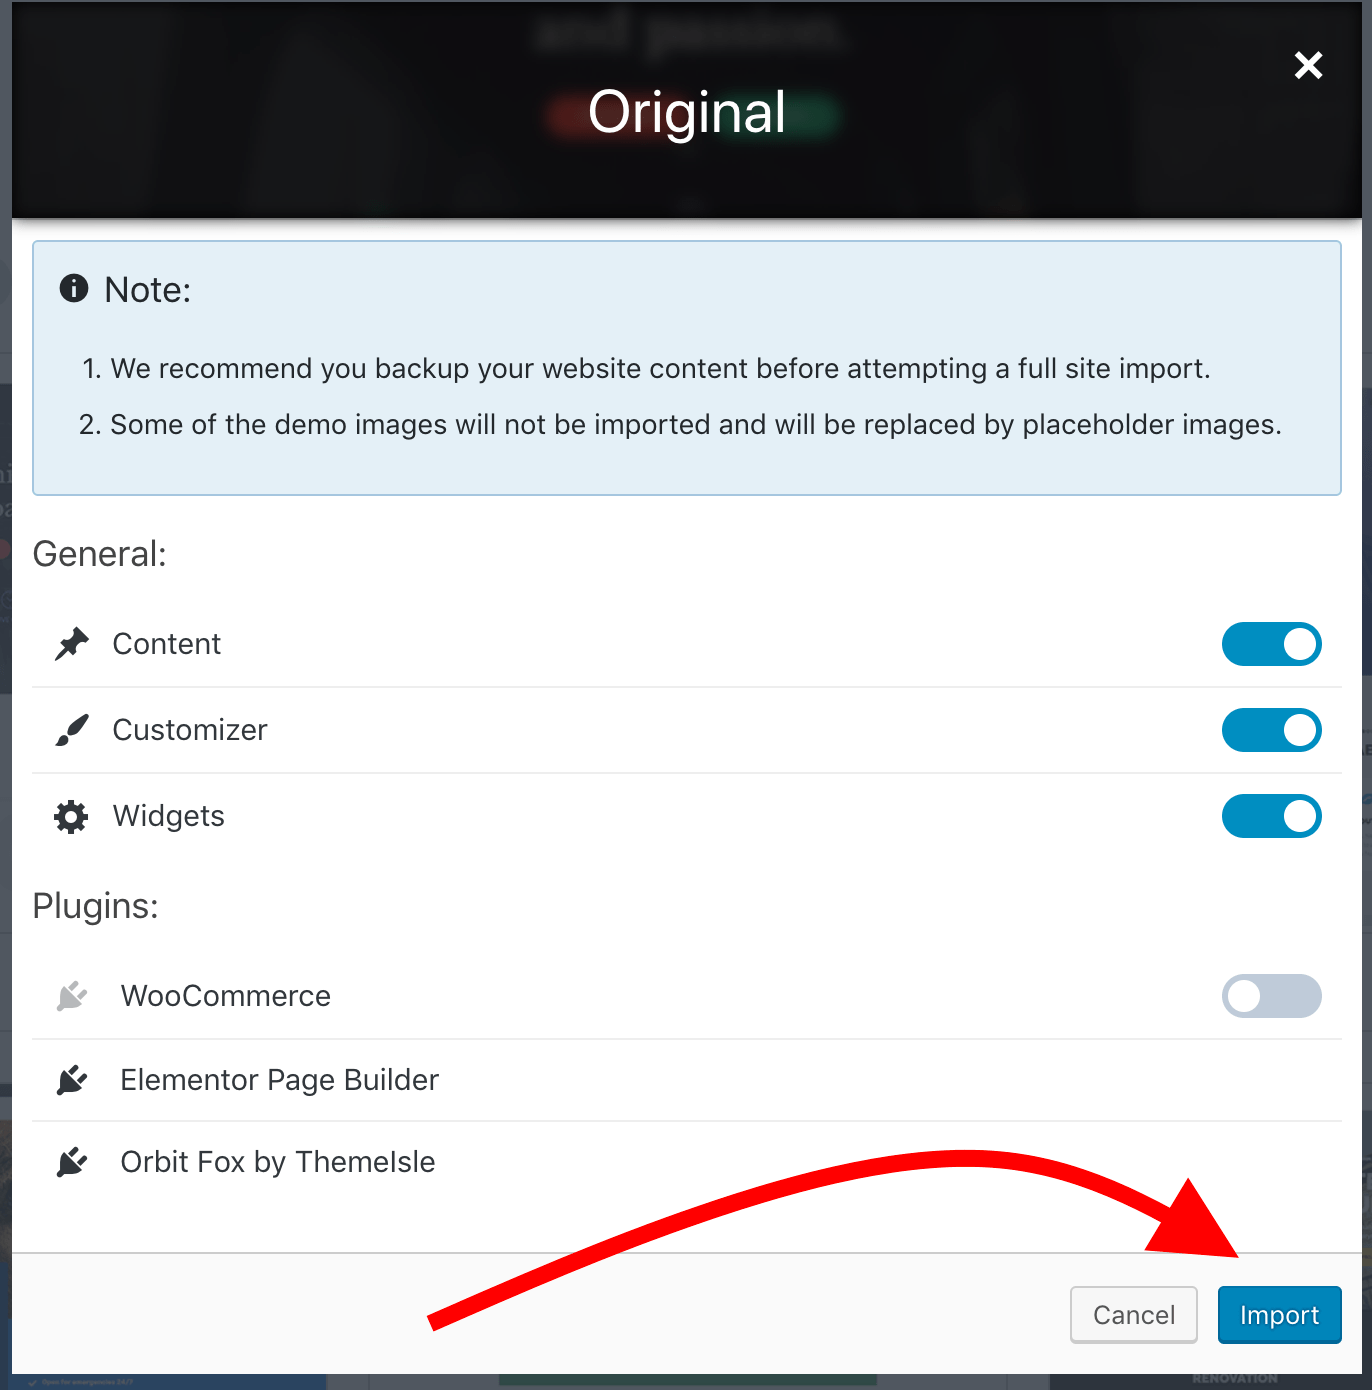
Click on Import to begin. This may take a minute or two.

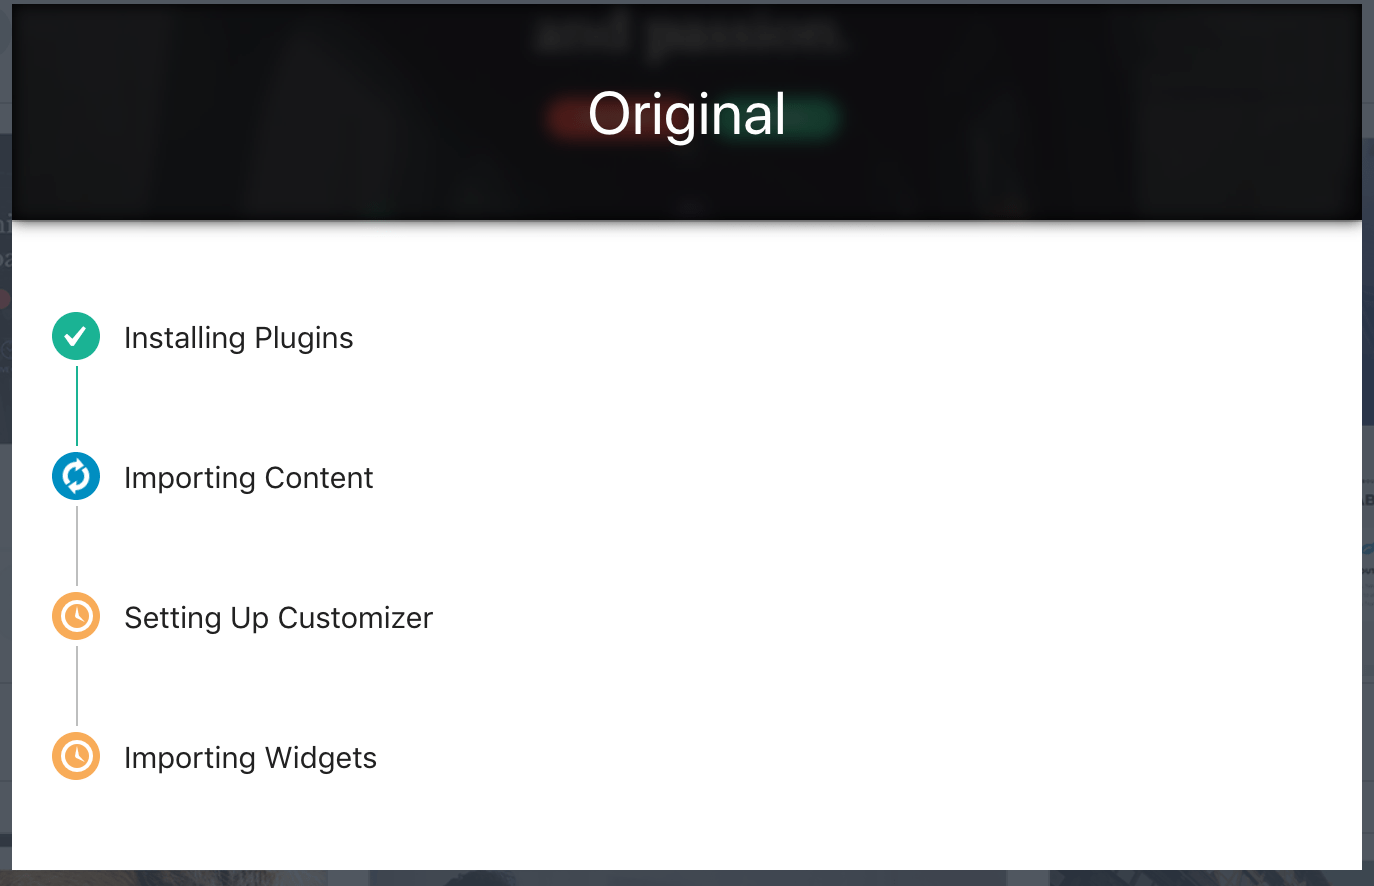
When the import finishes, you’ll be able to view your site.


4. Customize your site
At this stage, you can customize your website in a couple of ways.
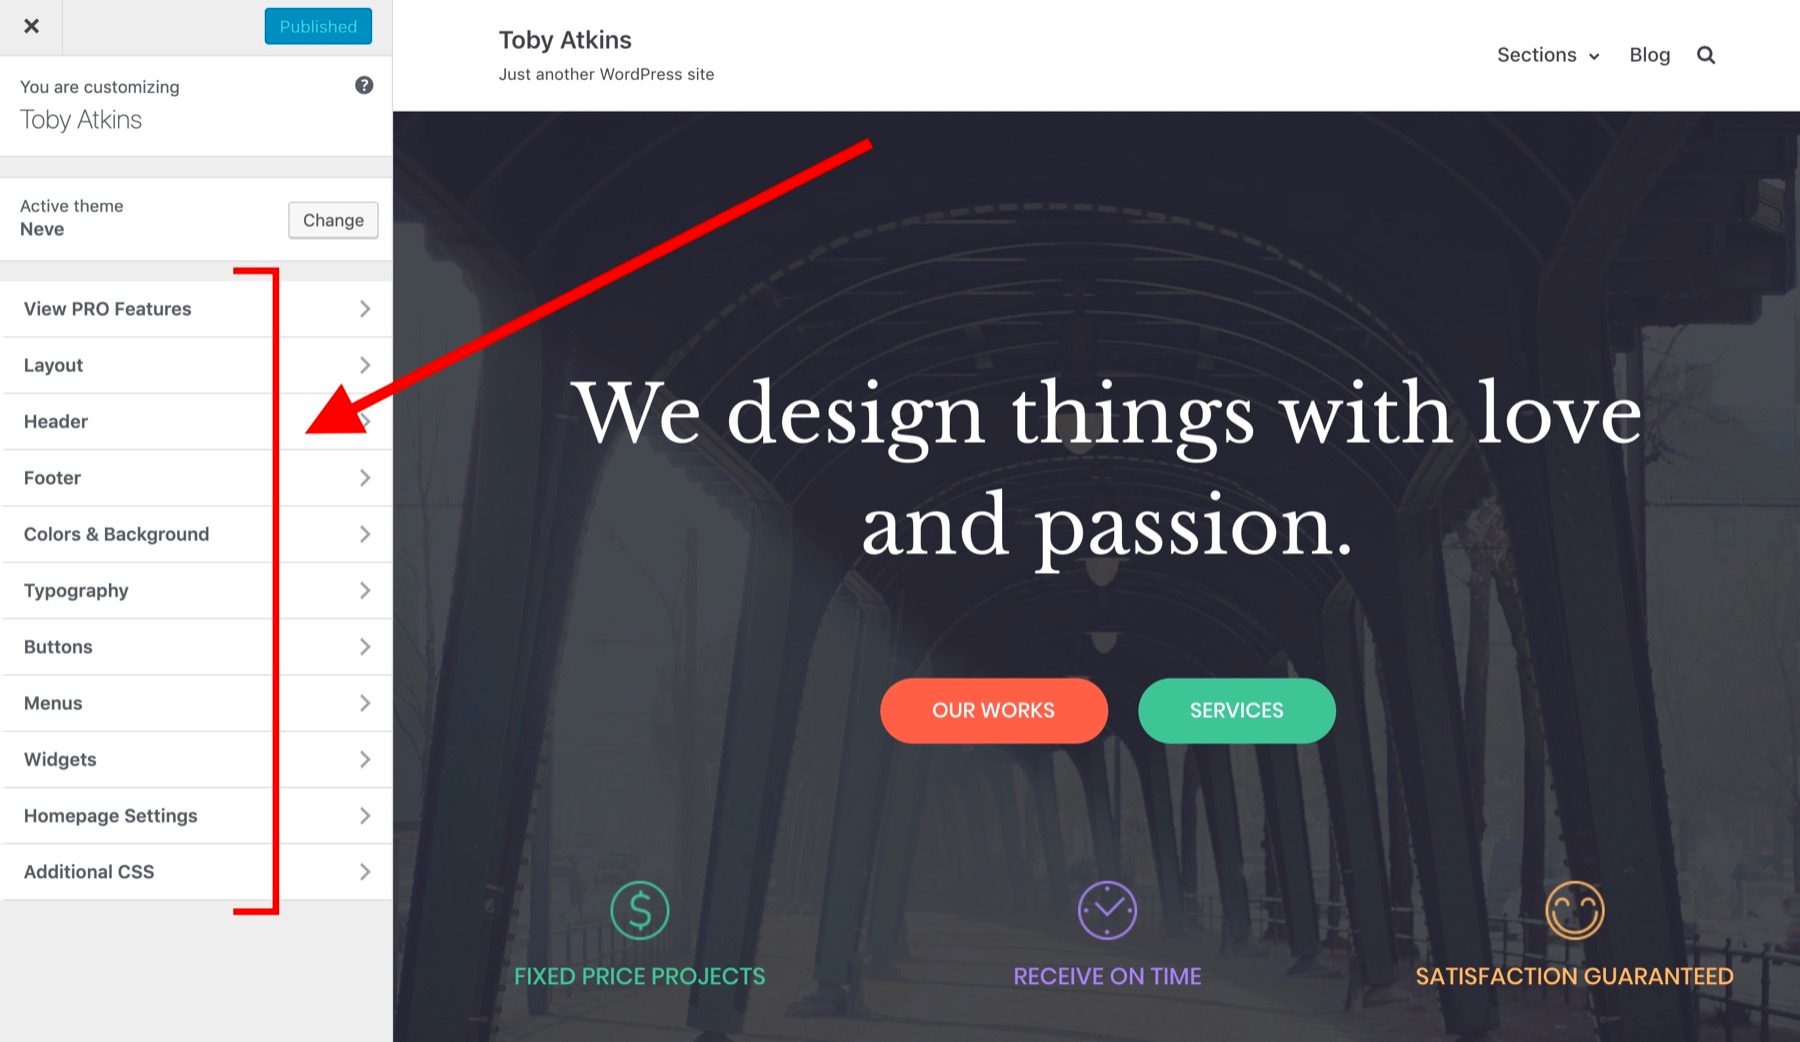
First, you can use the WordPress Customizer to take care of the basic settings.


The WordPress Customizer lets you adjust things like the main layout, headers and footers, colors and background, typography, buttons, menus, and more. All accessible via the sidebar menu:

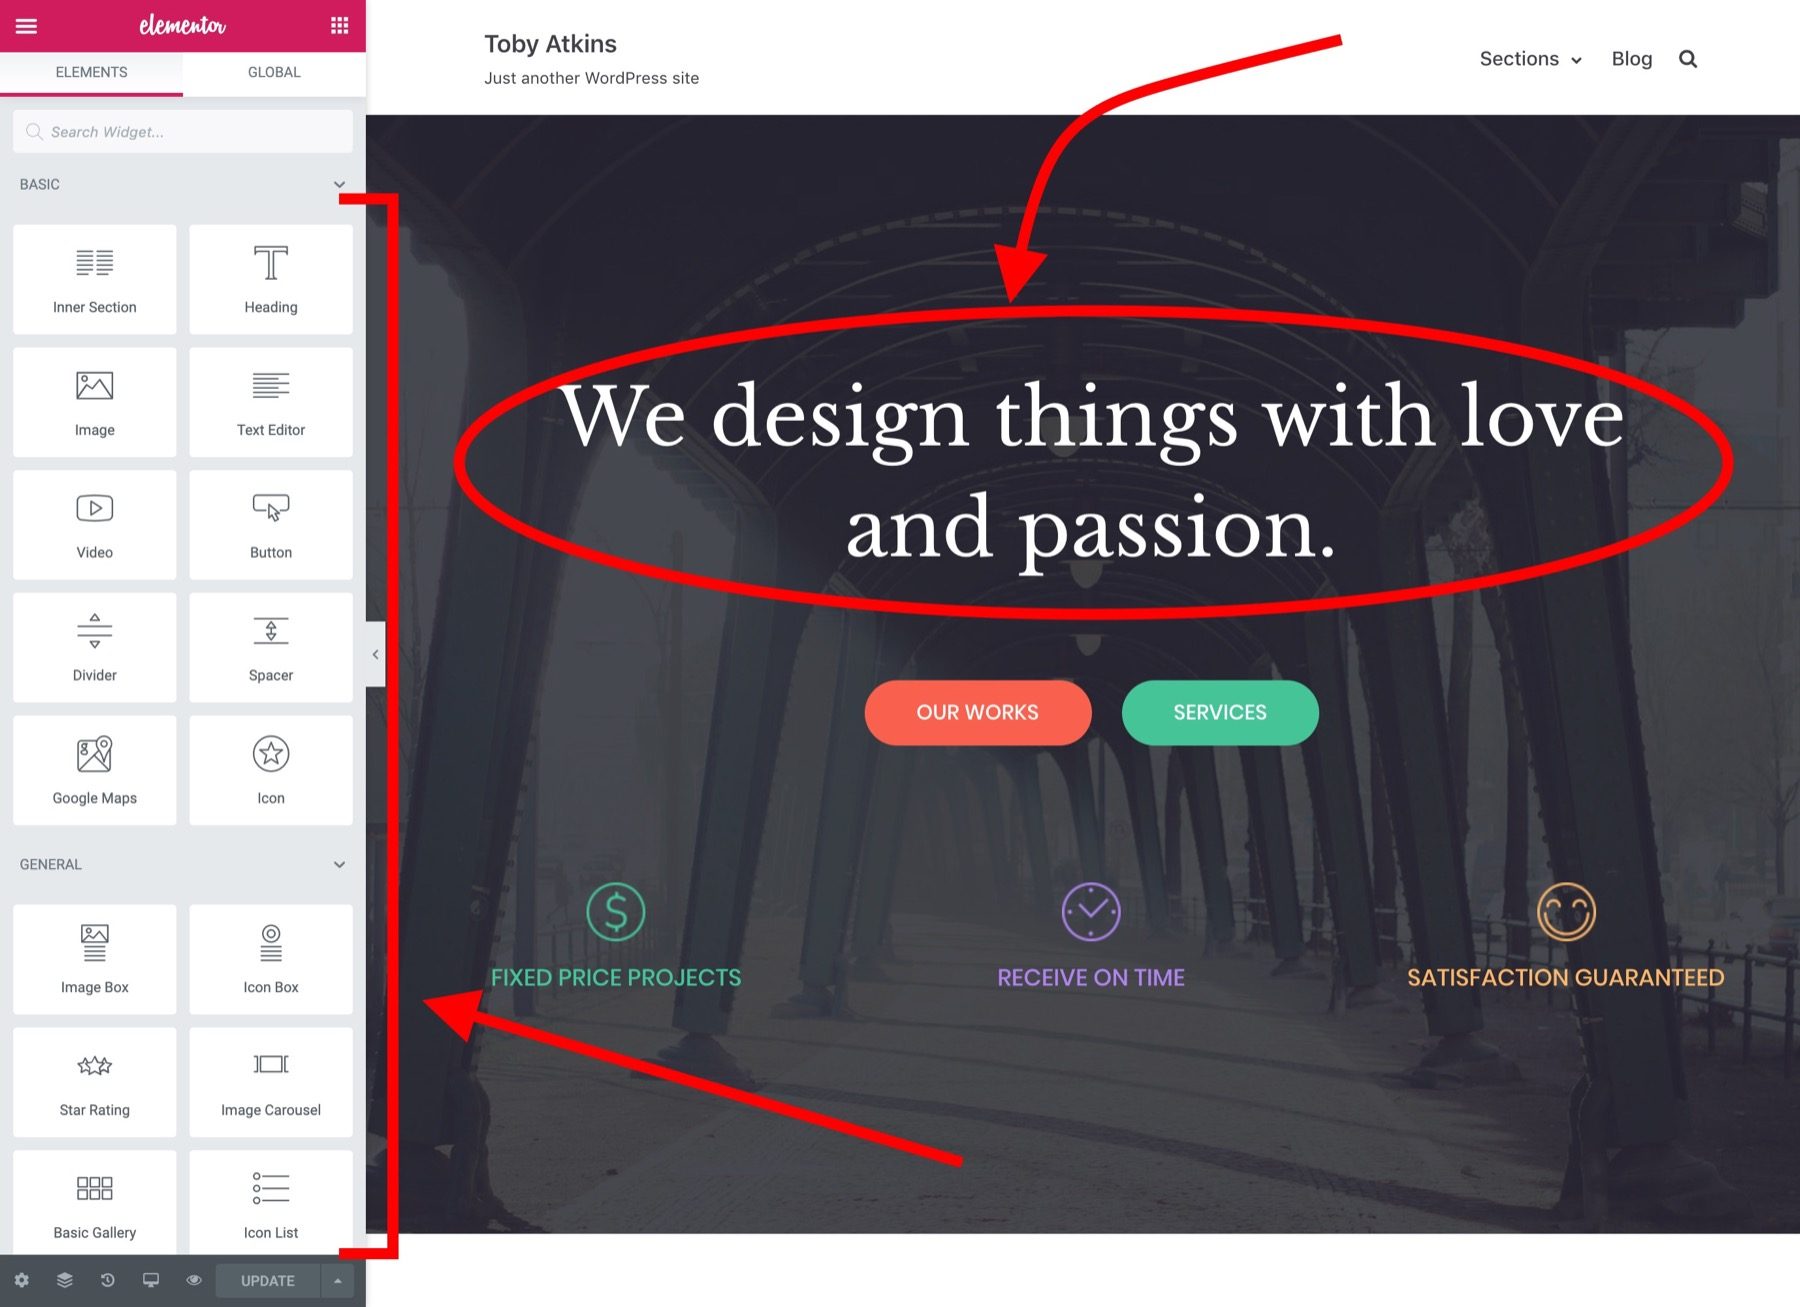
Apart from the Customizer, you can also edit your page through Elementor.


To say it simply, Elementor allows you to edit and customize pretty much anything you see on the page. To begin, just click on an element on the page or add a new element from the sidebar:

To learn more about Elementor, read this review or this comparison between Elementor vs Divi Builder vs Beaver Builder.
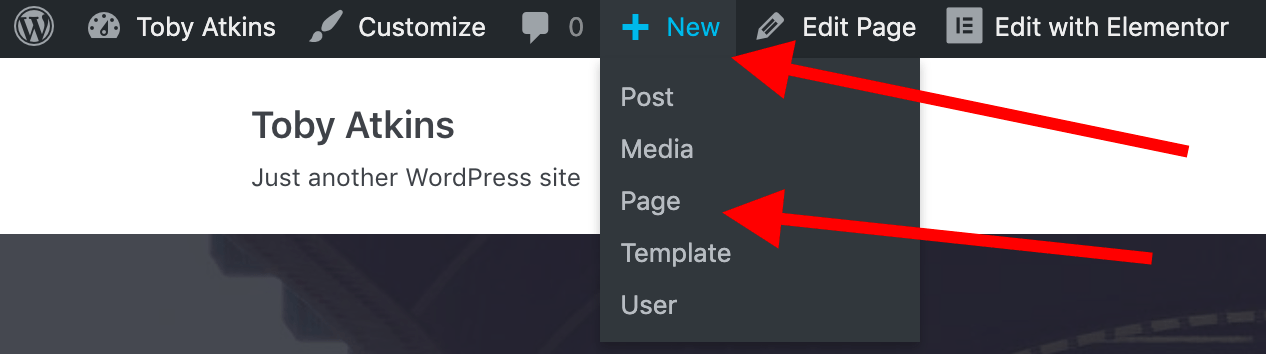
5. Create new pages
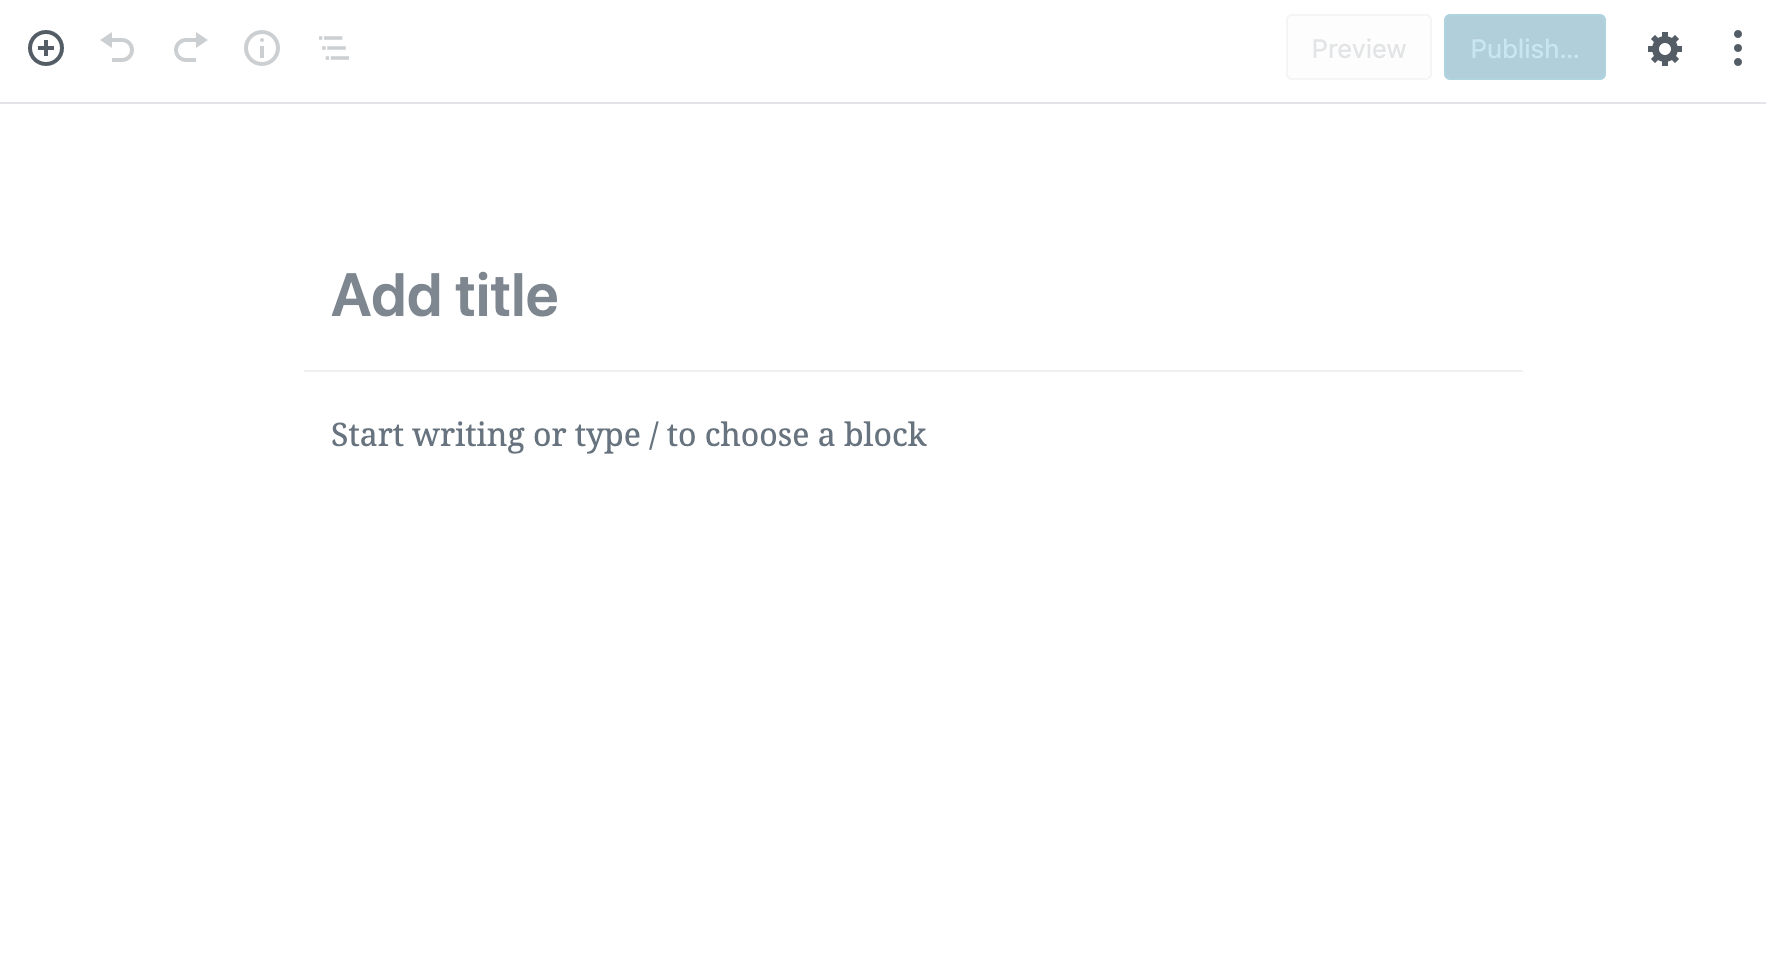
To create additional pages in WordPress, click on the + New button and then on Page:

You’ll see the main WordPress content editing interface. This one is quite easy to use … pretty much all you have to do is start typing away.

? If you want to learn more about how to edit content in WordPress, read this.