
Live streaming is big and only getting bigger. Where I live (in Vietnam), it’s commonplace for shops to sell products via live stream. But you can also live stream events, webinars, fundraisers, performances…you name it. If you can record it, you can probably find an audience for it. WpStream is a plugin that helps you stream and monetize video content on your WordPress site.
You can not only stream any type of content but also charge for access and monetize your content via a WooCommerce integration. It’s not just for live streaming, either. You can also create your video library and charge users to rent videos, just like the big guys.
In our hands-on WpStream review, I’ll share more about the plugin’s features and then I’ll show you exactly how it works.
WpStream Review: The Feature List
In a nutshell, WpStream helps you deliver and monetize video content on your WordPress site.
The main focus is on live streaming. You can live stream directly to your WordPress site and either let visitors watch for free or charge them for access to your stream.
However, WpStream is not just for live streaming, as I mentioned above. You can also use it to deliver existing video content either for free or for a fee.
Multiple Streaming Options
To help you create effective live streams, WpStream gives you plenty of choices.
First off, for the simplest option, you can stream directly from your web browser. This is 100% pain-free – there’s no setup required. However, it only gives you access to your computer webcam and microphone, which will only work for very basic streams. If you want more production quality, you’ll probably prefer a different solution.
To give you more options, WpStream also integrates with third-party desktop software and mobile apps.
For example, you can use the popular OBS software to stream directly to your WordPress site. OBS is super flexible, which opens up a lot of opportunities for more professional broadcasts.
WpStream also integrates with mobile broadcasting apps for iPhone and Android. You can even integrate with the DJI GO app to stream directly from a DJI drone to your WordPress site, which is pretty neat (though I’m not sure of the practical implementations here).
For existing videos, you can host them with WpStream or there’s also an option to embed them directly from external sites such as YouTube or Vimeo.
WooCommerce Integration for Payments
Again, WpStream supports both free and paid content. For the paid content, WpStream integrates with WooCommerce.
You can create regular WooCommerce products and then link them to either a live stream channel or an existing video.
Because it’s using WooCommerce, you also have lots of flexibility for pricing. For example, you can charge one-time or recurring fees, offer coupons, etc.
One thing to consider, though, is that you’ll need to purchase WooCommerce Subscriptions if you want to offer recurring payments, which will cost you $199 on top of whatever you pay to WpStream.
Free WpStream Theme
WpStream will work with any WordPress theme. But if you want to create a website that’s 100% focused on live streaming, WpStream also offers a free WordPress theme that comes with two demos.
If your site is 100% dedicated to video content, using the official theme gives you an easy way to get up and running.
The theme uses WPBakery Page Builder, though, which I’m not a huge fan of. I would rather see it built with the block editor or Elementor if a page builder is absolutely needed.
Hands-On With WpStream
Now, I’ll go hands-on with WpStream and show you how it works.
For this section, I’ve installed both the plugin and the theme, but I’m going to focus on the plugin as that’s where the features are (and you can use it with any theme).
Setting Up the Plugin
To get started, you can install and activate the free WpStream plugin from WordPress.org.
You’ll then need to register for a WpStream account (there’s a free trial) and enter your account credentials in the plugin’s settings to connect your WordPress site to WpStream.
Adding Video Content or Live Streams
I’ll start by showing you what it’s like to create a free video channel or live stream. Then, I’ll dedicate a section later on to showing you how to offer paid content with WooCommerce.
WpStream lets you add three types of free video content to your site:
- Free live channel – you can live stream content and your content is encrypted and protected from copying.
- Free video (protected) – an existing video that’s encrypted and protected from copying.
- Free video (unprotected) – an existing video with no download/watch protection. You can use this one to embed videos from external services such as Vimeo or YouTube.
To create a free channel or video, you go to Free Live Channels/Free Videos → Add New.
You’ll get the regular WordPress editor, along with some new meta boxes to control what type of video content to add:

If you add an existing video, you’ll be prompted to choose the specific video. Again:
- For protected videos, you need to upload your own video file.
- For unprotected videos, you can upload your own file or use an external URL to embed content from YouTube, Vimeo, or others.
To upload your own videos, you can go to WpStream → WpStream Video Management:

Streaming Live Content
If you want to stream live content, you can go to WpStream → WpStream Channels to stream to any one of your channels.
All you need to do is hit the Broadcast to Channel button. You can also choose whether or not to record your stream:

Once the stream is ready to go (it takes a minute or so), you’ll be able to choose between streaming right from your browser or using third-party software such as:
- OBS for desktop streaming on Windows or Mac
- Larix Broadcaster app for streaming on iOS or Android
WpStream also supports some other pieces of software, which the developer details here.
For this review, I’ll use the browser approach.

And here’s me streaming from the browser – go Sixers!

Users will be able to watch the live stream from the stream’s dedicated page on WordPress:

All in all, the process of streaming from the browser is super simple. And if you need more than just your webcam and microphone, having the ability to connect to those third-party services is useful.
Creating Paid Video Content
If you want to create paid video content, WpStream comes with WooCommerce integration.
You can either sell existing videos on demand. Or, you can charge for access to a live stream channel.
For example, let’s say you run a basketball league and want to charge for access. You could:
- Create a catalog of historical games and charge people to watch a pre-recorded game.
- Live broadcast current games and charge people to stream the event live.
To set up paid video content, you can use the regular WooCommerce products interface.
Only now, you’ll get two new product types:
- Live Channel – charge for access to live streams.
- Video on Demand – charge for access to watch existing videos.
Everything else works pretty much like the free channel setup that I showed you above.
To make the purchases, visitors will use the regular WooCommerce checkout process, and you’ll also be able to use other WooCommerce plugins to enhance everything.
For example, if you want to offer recurring paid subscriptions, you can use the WooCommerce Subscriptions plugin. This would let you say, create your own NBA League Pass, where people can pay a monthly fee to watch all of their team’s live games.
Where WpStream Could Get Better
One area where I think WpStream could improve is in the interface. I use a lot of WordPress plugins so I found it easy to pick up, but I think a casual user might find some things unnecessarily complicated.
For example, if you want to create/manage your paid channels, you need to use the WooCommerce products, which is completely different from how you manage free channels.
I think a more logical implementation, and what I’ve seen most other plugins do, would be to let you manage all of your free/paid channels from the same interface and then select an existing video channel when linking to the WooCommerce product for paid channels.
I’d also like to see an integration with the block editor. Right now, when you edit a channel description, it uses the Classic TinyMCE editor. This limits what you can do and also feels a bit dated now that WordPress has moved on to the block editor.
I’d also like to see blocks implemented more in general. For example, right now the individual page shows the video at the top and then content from the TinyMCE editor below that. I think it would be a lot more user-friendly to be able to construct the entire front-end video channel layout with blocks, including letting users control the placement of the video with a dedicated video embed block.
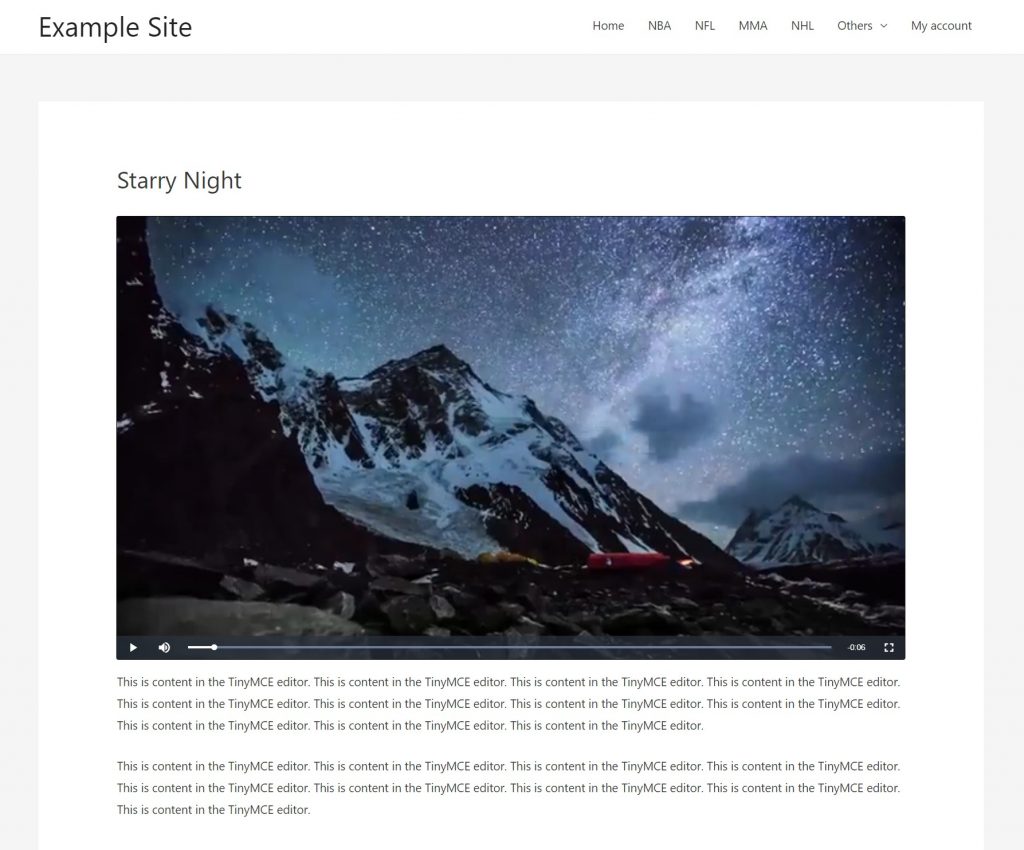
I think this is especially important if you’re not planning to use the bundled theme, as the default layout is pretty barebones on third-party themes. For example, here’s what it looks like out-of-the-box on the Astra theme:
If everything were blocks, it would be much easier for non-developers to control the layout and style of their video pages. They could also add content to go along with the video, which I think would be especially useful for streams. For example, CTAs, opt-ins, etc.
WpStream Pricing
First off, WpStream offers a free trial that lets you test the plugin out with a few videos. So you can try it without cracking open your wallet.
However, if you want to use it on a real website, you’ll likely need to go with one of the paid plans to increase the limits.
Currently, WpStream offers four paid plans. Each plan uses monthly billing and comes with full features. The only differences in the plans are the resources that you get.
Paid plans start at $19 per month for:
- 100 GB streaming bandwidth
- 300 HQ or 150 HD viewer hours
- 2 GB storage, or about 6 HQ hours of video
You can view details for all of the plans below:

Final Thoughts With WpStream
Overall, I was impressed with how easy WpStream made it to start streaming. You can go from zero to live streaming from your browser in just a few minutes.
For higher production streams, you’ll need to add something like OBS as an intermediary, but it’s still pretty easy to get up and running.
Additionally, I like how it uses WooCommerce for the payments, as this allows you to tap into the huge ecosystem of WooCommerce extensions to enhance your paid content.
I think it could be improved a bit in terms of the user-friendliness of the interface, as I mentioned above. While I think the interface is easy enough once you figure things out, having more control over the content on the front-end stream/video embed page would be useful for a lot of scenarios.
All in all, if you’re looking to start live streaming on WordPress, either for free or for money, give this one a look.


