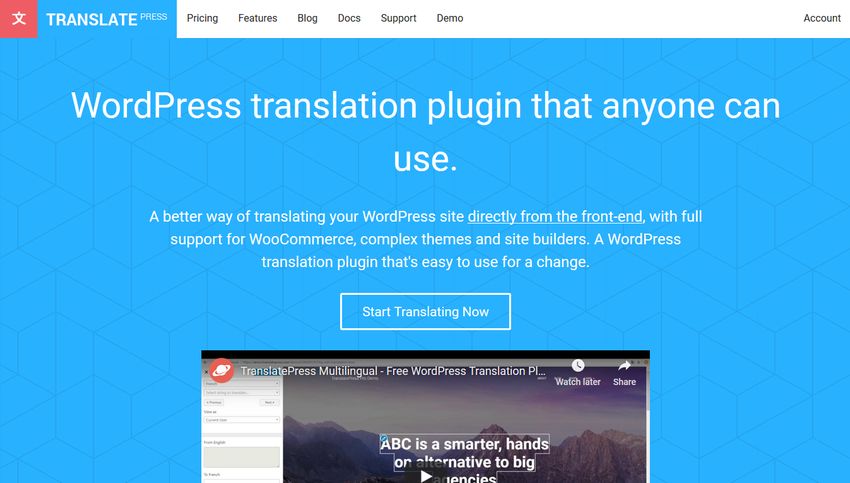
If you want to create a bilingual or multilingual WordPress site you will need an easy-to-use translation plugin. TranslatePress allows you to translate your site into any language, right from a front-end editor that works similar to the Customizer. You can use TranslatePress without any programming knowledge.
In this article, we’ll have a look into the free version of TranslatePress you can find in the official WordPress repo. You can read more about the premium version on TranslatePress’ website.
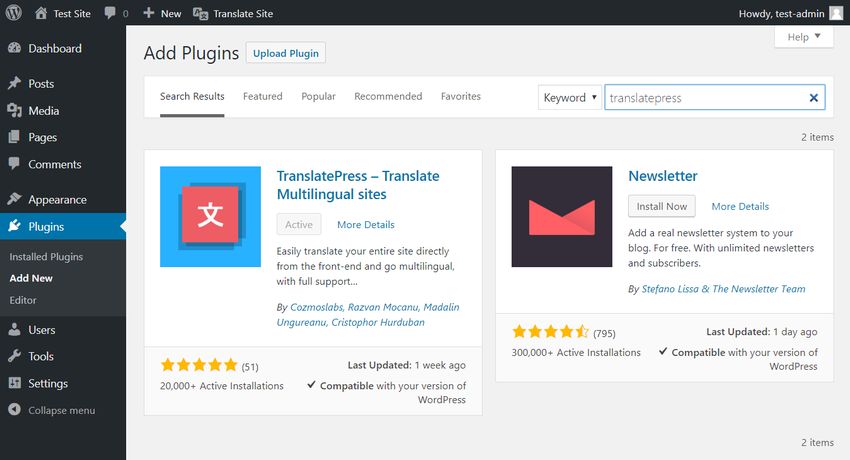
Install TranslatePress
You can install TranslatePress the same way as any other WordPress plugins. Go to the Add Plugins page on your dashboard (Plugins > Add New), then install and activate the plugin.
After activating the plugin, you will find two new menus in your WordPress admin:
- a “Translate Site” menu in the top bar
- a “TranslatePress” item in the Settings sidebar menu
The top menu is also available on the front-end, so you can start to translate any page whenever you want.
Configure Your Settings
You can configure the plugin settings on the Settings > TranslatePress admin page. It has three tabs:
- General
- Translate Site
- Addons
The “Translate Site” tab simply brings you to the front-end editor, while the “Addons” tab (obviously) contains the add-ons. All add-ons belong to the pro plans, except for one that allows you to use GET parameters to encode language in the URL. However, this is an advanced feature, so you won’t need it if you just want to translate your site without implementing a custom URL structure. If you’re interested more in this free add-on you can read the related docs here.
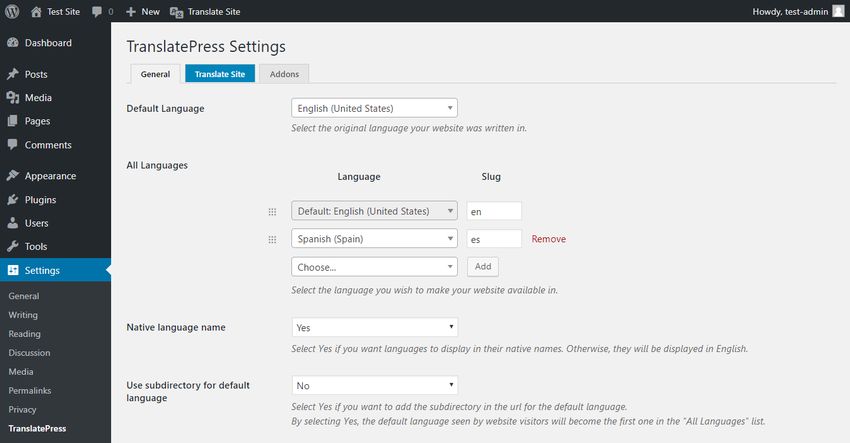
On the “General” tab, you can set up the languages you want to translate your site into.
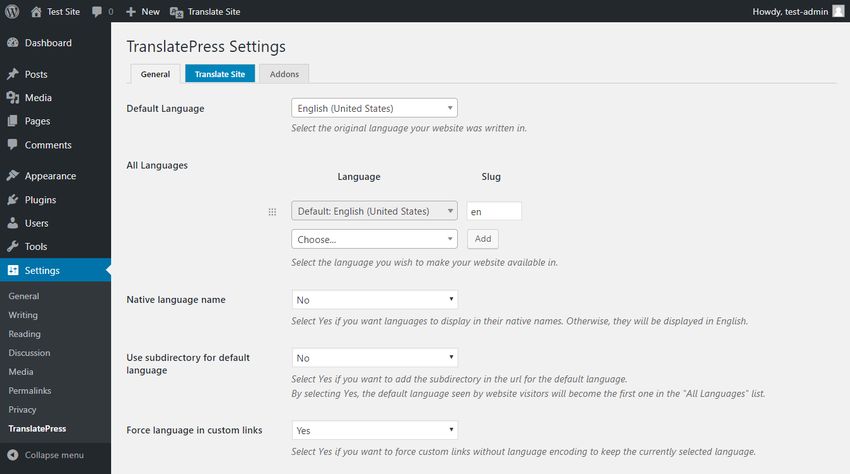
The Default Language is the language of your WordPress admin interface, in which you installed your site. If you want to use a different default language, you can change it here. Below the default language, you can define the languages you want to translate your site into.
With the free version, you can add a maximum of two languages: one default language and one extra language. If you want to make your website available in more languages you need to purchase one of the pro plans. For instance, I will add Spanish, so my site will be available in two languages, English and Spanish.
You can also choose to display languages in their native names. For my site, I choose this option, so users will find the “español” label instead of “Spanish” in the language switcher.
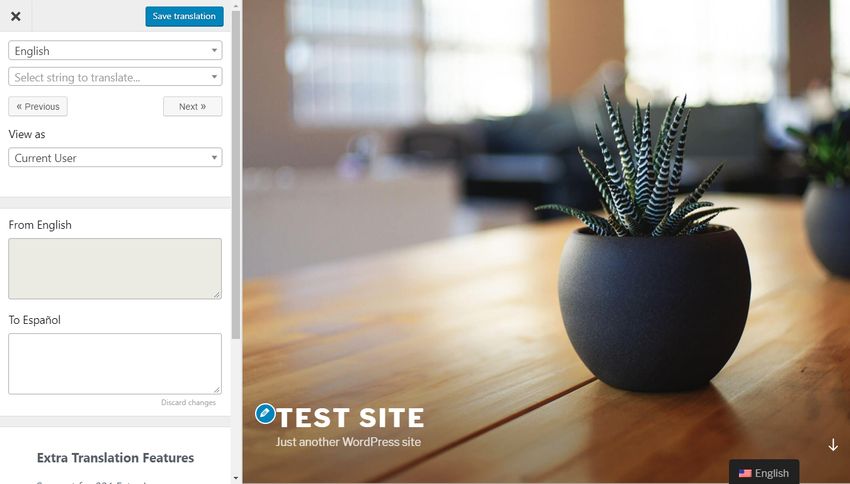
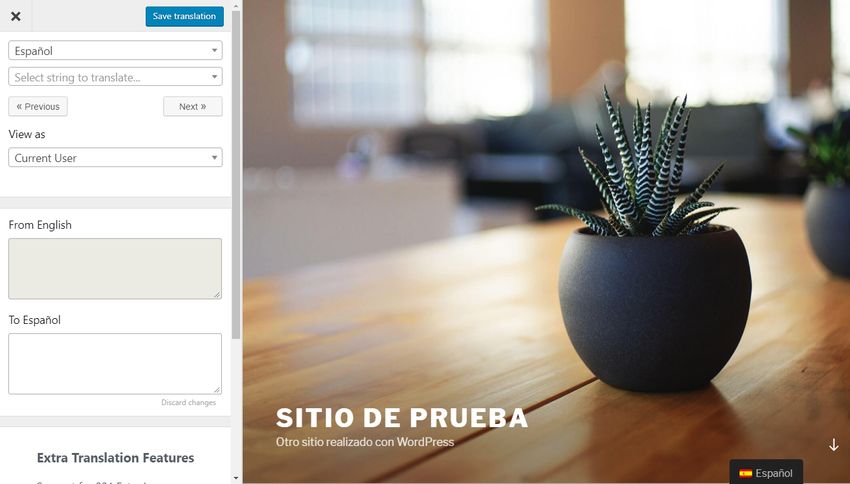
Open the Front-end Editor
You can open the front-end translation editor by either clicking the “Translate Site” tab on the settings page or using the top bar menu. The front-end editor looks and works similar to the Customizer, so it’s learning curve is pretty flat. Whenever you make a change, the results appear on the page real-time.
When you open the front-end editor, you will also notice that the language switcher appeared at the bottom of the page. From here, your users can quickly switch between the two (or more) versions of your site. Although this is the default place of the language switcher, TranslatePress provides you with the [language-switcher] shortcode as well. It allows you to display a language switcher anywhere on your site, for instance, inside your header menu or sidebar.
Translate a Page
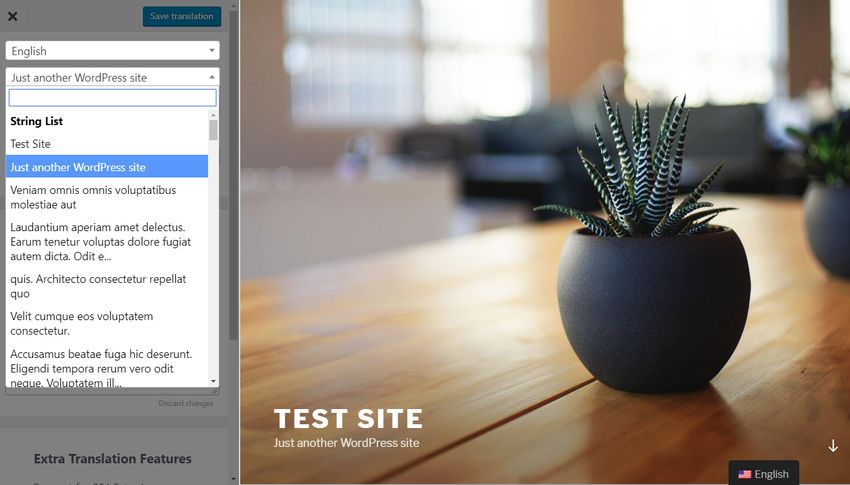
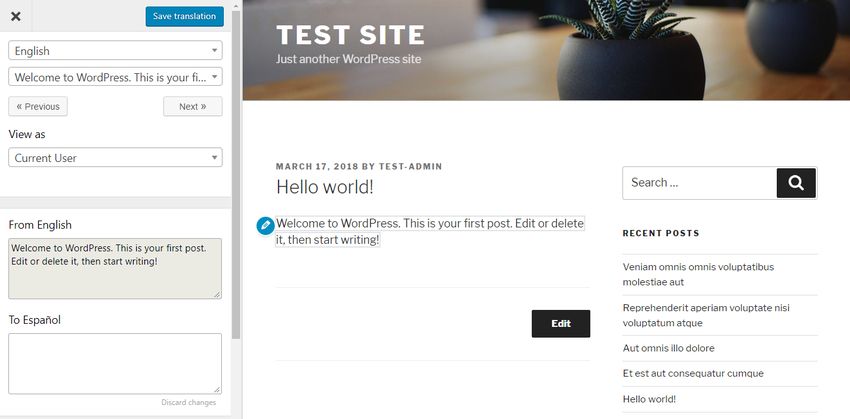
TranslatePress’ front-end translation editor is quite awesome. You can find all strings that appear on the page inside a handy dropdown list. You only have to select the string you want to translate and it appears in the translation box below the String List.
For example, I chose the “Just another WordPress site” string. This text doesn’t belong to a post or a page but to the WordPress admin settings. With TranslatePress, you can translate any string on your site, not just the ones that belong to a specific post or page.
After you select a string, TranslatePress automatically displays it in the upper translation box below the String List. Here, you can translate it into your chosen language by typing the translation into the lower translation box.
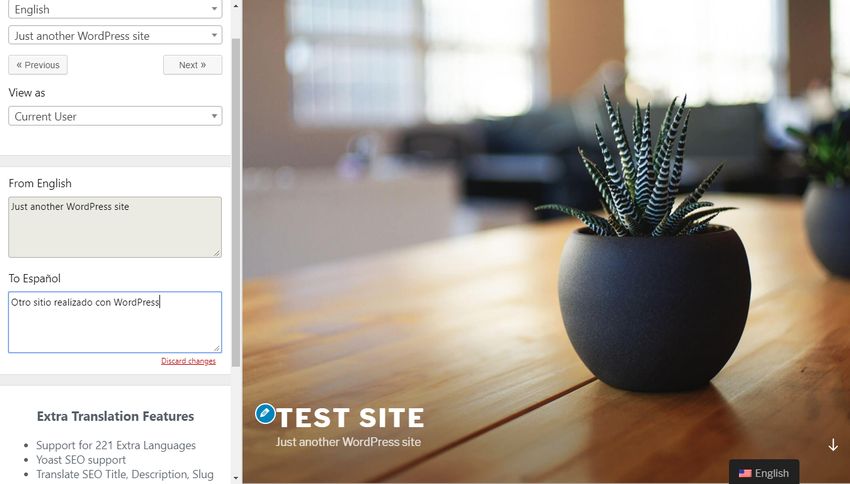
When the translation is ready, you need to hit the “Save translation” button on top of the translation sidebar and TranslatePress saves the translated string into the database.
Now, when I switch to the Spanish version of my page, the translated strings appear right away on the site. Untranslated strings are still displayed in English until they get translated as well.
Besides the translation sidebar, you can also translate strings right from the front-end of your site. You need to hover your mouse over the string you want to translate, click the little pencil icon, and the selected text straight away appears inside the translation box in the sidebar panel. From here on, you can go on with the translation as in the previous case.
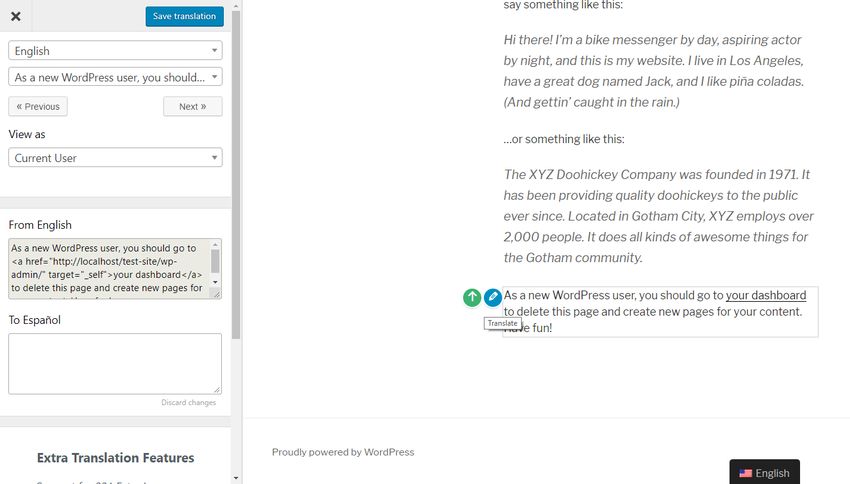
Use the Translation Block Feature
The pencil icon lets you translate your page block by block. For instance, each paragraph or list item can be translated as one string. But what happens when a block element consists of multiple elements, for instance, one or more links? Do you have to translate every tiny string one by one? Well, you don’t. TranslatePress has a solution to this problem, called the “Translation Block” feature.
When a block contains multiple HTML elements such as links or highlights, a green up arrow icon appears next to the pencil icon. When you click it, TranslatePress merges all HTML tags it finds inside the block and you can translate them as one string. However, block translation is only an optional feature and you can still go through each element one by one if you want.
Translate Dynamic Strings
Another great thing about TranslatePress is that it also allows you to translate dynamic strings. WordPress uses gettext to translate strings that include one or more variables. The WordPress core team and plugin&theme authors can add dynamic strings to their content using gettext functions (also called internationalization functions). Dynamic content is pulled from the database when a user requests a page containing dynamic strings.
For instance, “Proudly powered by %s” is a dynamic string, as the value of the %s variable is calculated on the fly, based on an entry in the database (or on a dynamic calculation in other cases). TranslatePress also displays gettext strings that appear on a page inside the same dropdown list as static strings. You only need to scroll down the String List and you will find the Gettext Strings right below it.
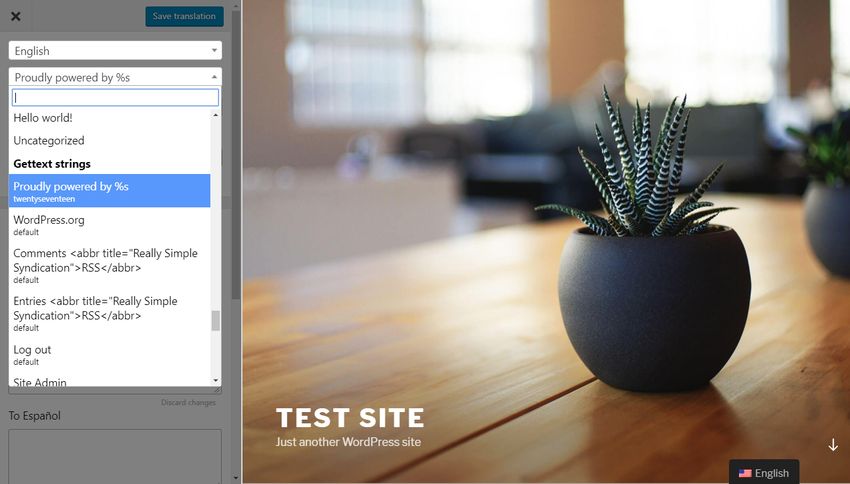
Gettext strings are saved into a different database table than static strings. So, when you translate a gettext string, the translated version will appear on all other pages containing the same string and you don’t have to translate it again.
Use Google Translate
If you have a paid Google account you can use Google Translate to automate your translations. You need to generate a Google Translate API key, insert it into the TranslatePress Settings page, and enable the feature.
Google Translate only translates strings you haven’t translated before. TranslatePress also allows you to later edit automatic translations, which is something you should do anyway, as Google Translate is prone to inaccurate (or ridiculous) results.

TranslatePress’ docs have detailed instructions about how to generate a Google API key and guides you through the process of properly setting up automated translations.
As I mentioned before, you will need a paid Google Cloud account to use this feature. You can try Google’s Cloud Translation for free, but in the long term, it will cost some money (text translation is currently $20 per million characters).
TranslatePress Behind the Scenes
Translations created with TranslatePress are stored in the database. TranslatePress creates one database table for each language pair (e.g. English-Spanish) plus one gettext table for each language (one for English, one for Spanish, etc.). However, you won’t find your translations inside your WordPress admin. You can’t export your translations as proper PO and MO files, either.
Until TranslatePress is up and running, you can access your translations from the front-end editor, but it’s not that easy to move your data. According to TranslatePress’ roadmap, they are planning to create an add-on for proper data export in the near future. However, until this happens, your translation data is hard to move and you are somewhat tied to the plugin as well.
Wrapping Up
TranslatePress is a great translation plugin that makes it possible to translate your WordPress site without any programming knowledge. You can’t only translate posts and pages but also dynamic text, plugins, themes, and any string stored as a WordPress setting. Besides, TranslatePress seamlessly integrates with WooCommmerce, so you can use it to translate your online store as well.
The real-time front-end editing feature is pretty awesome and easy-to-use. As it works similar to the Customizer, it provides users with a sense of familiarity, which is a huge win for usability, too. However, there is some room for improvement in terms of data mobility (export&import), which is something you need to think about if you want to use the plugin on a production site.
If you are interested in other options of translating your WordPress site also have a look at our collection about the six best WordPress translation plugins. Besides, we have an in-depth review of Weglot which is another great solution to create a multilingual WordPress site.