With WordPress 5.0, WordPress is about to undergo one of the largest changes in a long, long time.
The new feature? A brand new default content editor, dubbed Gutenberg.t
The Gutenberg block editor will completely replace the formerly default TinyMCE editor that you’ve been using for years. As such, the way that you create content on your WordPress site is going to completely change.
To help make that transition as painless as possible, we’ve created this WordPress Gutenberg tutorial so that you can be up and running as soon as you update your site to WordPress 5.0.
What’s Different About The WordPress Gutenberg Block Editor?
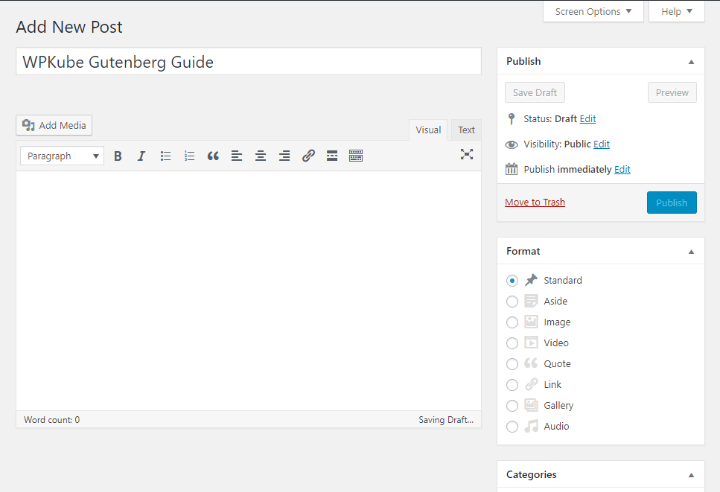
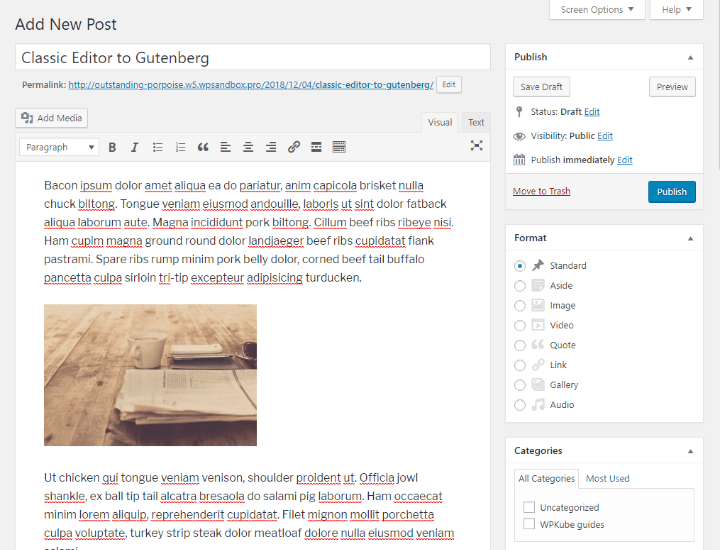
Ok, in case you’ve been a little confused about what I’m talking about, here’s what the TinyMCE editor looks like (it should be pretty familiar to you!):
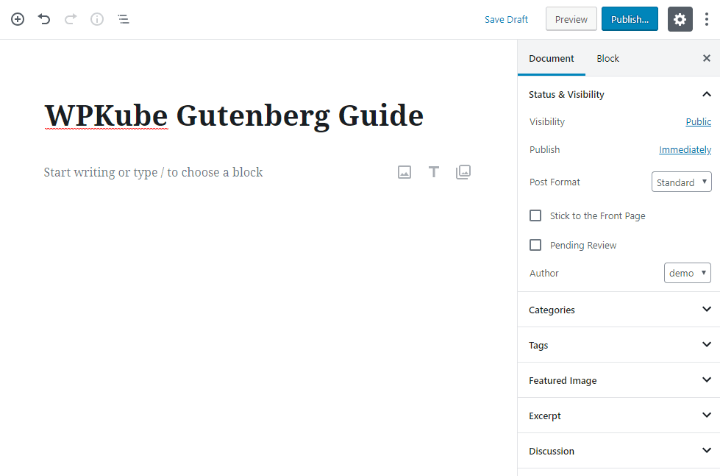
And here’s what the new Gutenberg block editor looks like:
So…what’s the difference?
Well, the big one is that word – “block”.
Rather than using a single field for all of your content like the TinyMCE editor, each “thing” in Gutenberg is a separate block.
So:
- Each paragraph is a separate block
- An image is a separate block
- A quote is a separate block
- An embedded video is a separate block
- …you get the idea! Everything that you might possibly use is its own block
Next question – why are blocks beneficial? Why change how things were?
Well, the Gutenberg block editor makes it a lot easier to create more complicated layouts and use more interesting content types. Beyond that, it’s also a lot more visual because you can see exactly how each block will look.
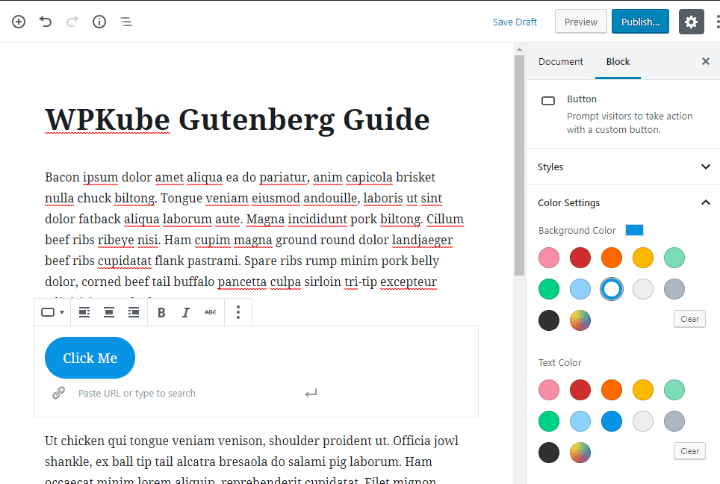
For example, let’s say that you want to add a button to your post.
With the TinyMCE editor, you’d need to use the Text tab to add a CSS class or use a shortcode from a button plugin. With Gutenberg, you just add the Button block and you can see the button right there in the editor:
The other big benefit of Gutenberg and blocks deals with the shortcodes that I mentioned above.
Shortcodes are not a very intuitive or visual way to add content. With Gutenberg, plugin developers can create their own blocks instead of relying on shortcodes, which makes it much simpler to add plugin content.
WordPress Gutenberg Tutorial: Using The New Editor
Now that you have some basic background on the new editor, let’s get into the actual “how-to” part of this guide.
I’ll break this Gutenberg editor tutorial into two parts.
First, I’ll show how to use Gutenberg to do the same kinds of things that you’re already able to do with the TinyMCE editor. The goal with this first section is so that you can keep creating the same type of content that you’re already making with no interruption.
After that, I’ll go a little deeper and show you advanced productivity tips, as well as some of the new things that Gutenberg will let you do.
How To Create A Basic Blog Post Or Page With Gutenberg
Adding regular text to Gutenberg is simple. Just like before, you click and type. The only difference is that each time you hit enter, Gutenberg will now create a new paragraph block.
To format your text (bold, alignment, etc.), you’ll see a floating toolbar that appears once you stop typing:
Many people don’t like this “floating toolbar” approach. So if you prefer the fixed toolbar approach of the TinyMCE editor, you can use the drop-down in the top-right corner to “fix” the toolbar to the top of the editor. Just select the option for Top Toolbar:

How To Insert A New Block
When you’re just writing, you can create new blocks automatically by typing.
For everything else – images, videos, headings, etc. – you’ll need to add a new block.
There are a couple of ways to add new blocks:
- To add a new block at the bottom of the editor, you can click the plus icon in the top-left corner of the editor.
- To add a new block in between existing blocks, you can hover your mouse over the spot where you want to insert the block and click the plus icon there.
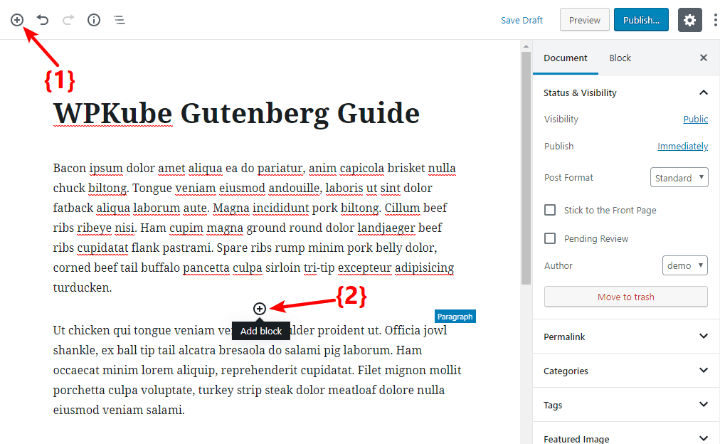
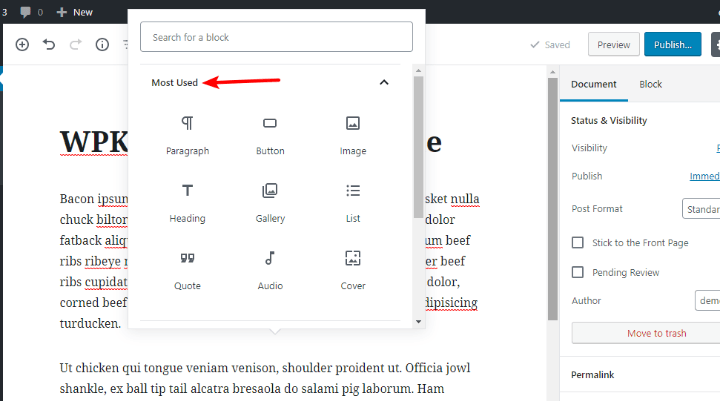
Once you click either of the plus icons, a popup will appear that lists all the available blocks.
At the top of the popup, you’ll get a list of the blocks that you use the most often:
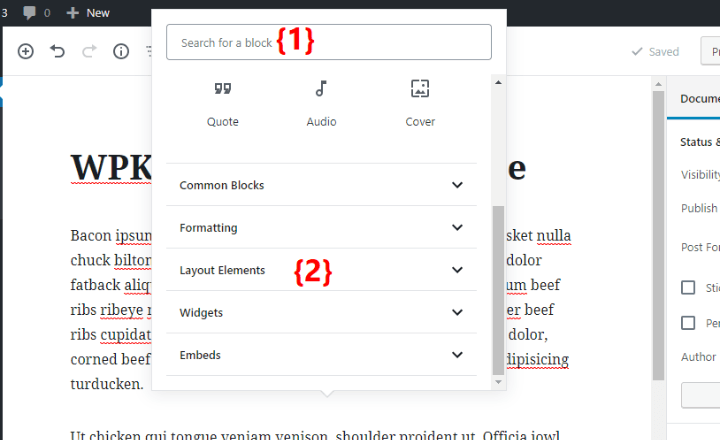
But you can also:
- Use the search box to search for a block by name
- Scroll down to see accordion tabs for all the categories of available blocks
Let’s run through a few examples…
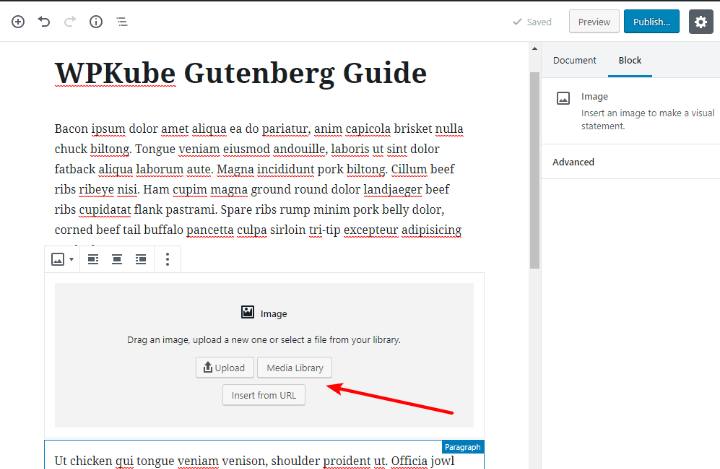
If you want to insert an image…
You would add the Image block. Then, you can use the options to choose where to get the image from:
If you want to embed a YouTube video…
You would add the YouTube block. Then, you just paste in the URL to the video and you’ll see a live preview:

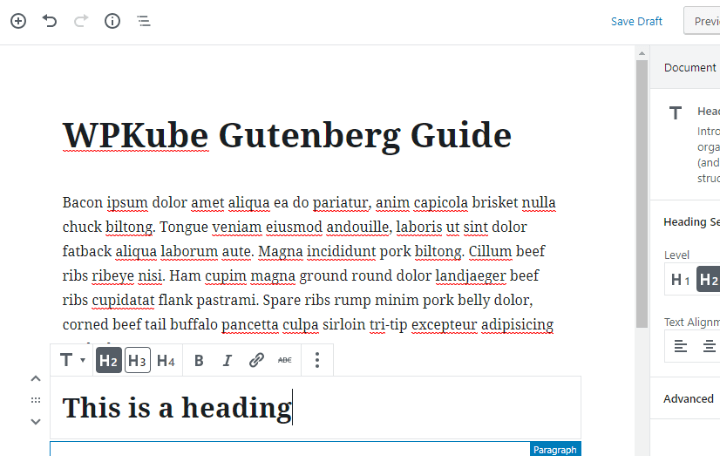
If you want to insert a heading (h2, h3, etc.)
You can add the Heading block and choose the heading level from the toolbar:
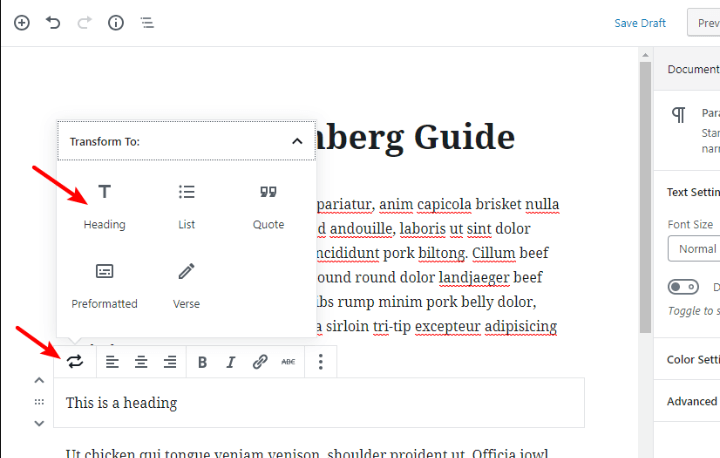
Or, you can also choose an existing paragraph block and use the toolbar to “convert” it to a heading block (or another type of block – like a quote):
How To Configure A Block
For basic things like bold, italics, alignment, etc. you’ll use the toolbar.
However, for other block settings, you’ll use the Block tab of the sidebar on the right.
For example, if you add a Button block, you can use the sidebar on the right to change its colors:

How To Rearrange Content
In the TinyMCE editor, you had to use cut and paste if you wanted to rearrange content.
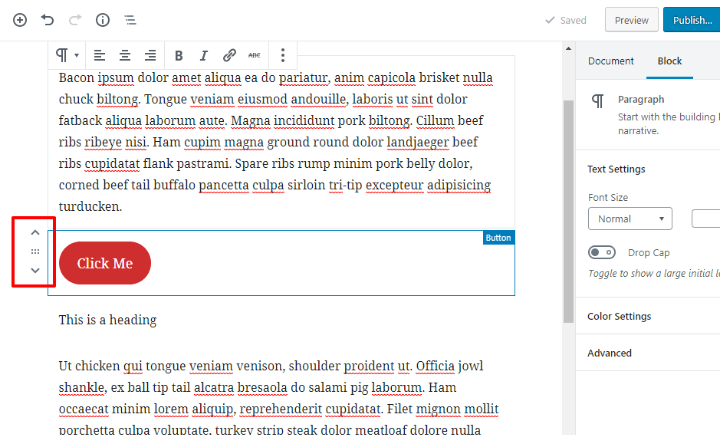
With Gutenberg, you get two options:
- Up/down arrows that move a block up or down one spot
- Drag-and-drop functionality that lets you drag a block anywhere
To enable these controls, hover over the block you want to move.
If you want to use the drag-and-drop functionality, you need to hover your mouse over the six dots in between the arrows. Then, you’ll be able to drag and drop like this:

How To Configure Basic Post Information (Categories, Slug, Etc.)
The steps above should give you everything that you need to create some basic posts and pages.
But what about the behind-the-scenes information like:
- URL slug
- Categories
- Tags
- Etc.
To configure all of this information, you can use the Document tab of the sidebar, which acts very similarly to the sidebar in the TinyMCE editor:

What About Plugins Like Yoast SEO?
You probably have other plugins that you’ll need to configure on a post-by-post basis. Common examples would be SEO plugins, social media plugins, etc.
So how do those work?
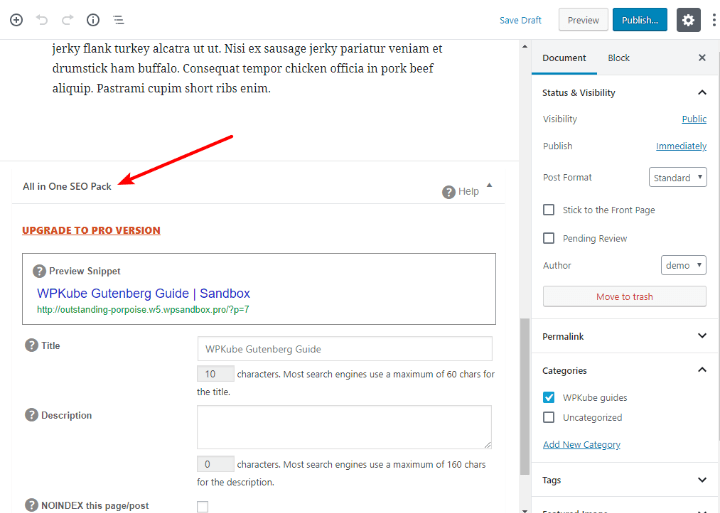
Well, some plugins – like Yoast SEO – have already built in Gutenberg support. To access the Yoast SEO settings, or other plugins with such support, you can click on the icon in the top-right corner. Then, you’ll be able to configure the plugin in the sidebar:

For other plugins, you’ll still be able to use “meta boxes” that appear beneath the text editor, just like before:
Five More Advanced Tips For Using The Gutenberg Block Editor
The Gutenberg editor tutorial above will help you keep creating the same type of content that you’ve already been building with the TinyMCE editor.
Now, let’s cover some more advanced tips for getting more from the Gutenberg editor.
1. Learn The Keyboard Shortcuts For Better Productivity
Because everything is a separate block in Gutenberg, there are a lot more “mouse clicks” to get things done. That means slower work, especially at the beginning.
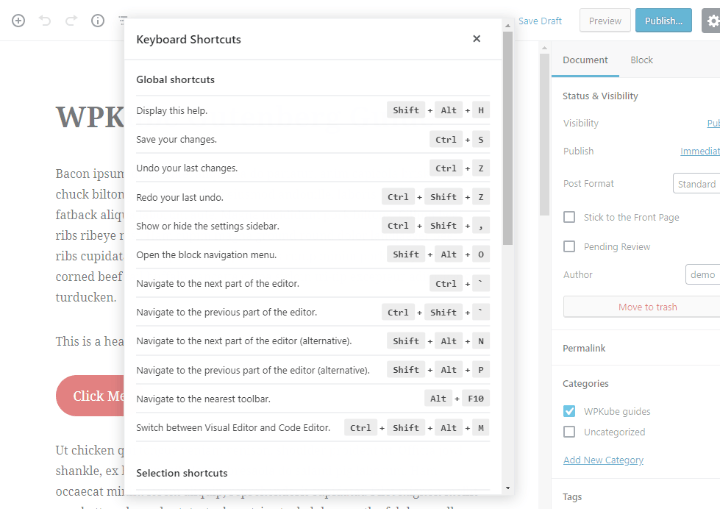
The best way to eliminate this issue is to learn the Gutenberg editor keyboard shortcuts. These will let you quickly add or delete blocks as needed.
To open the full list of shortcuts, use the Shift + Alt + H shortcut:
2. Quick Insert Blocks With Slash
Rather than using the insert block popup each time you want to add a block, a quicker method is to just type “/” in a blank block and search for the block by name.
Here’s an example:

3. Drag Images From Your Desktop Into Gutenberg
To speed up adding images, you can drag them straight from your desktop to a specific spot in the editor. Gutenberg will automatically upload them to your Media Library:
4. Use The Columns Block For More Complicated Layouts
If you want to create more complicated layouts, Gutenberg includes a Columns block. Once you add the column block, you can add other blocks inside of it:
For more flexibility with layouts, you can install the Kadence Blocks plugin. Speaking of…
5. Take Advantage Of Third-Party Blocks Plugins
One of the great things about Gutenberg is that you can use third-party plugins to add new blocks. A lot of developers are working to create new content and layout blocks, which can help extend Gutenberg’s functionality. Some good ones to start you off are:
The Gutenberg Cloud plugin is also an interesting project that lets you install specific blocks from a variety of developers.
Beyond that, some plugins that you already use will add blocks to replace shortcodes. For example, if you have a WooCommerce store, you’ll be able to insert WooCommerce products in your content using a new block.
What Happens To Your Old Content After Updating To WordPress 5.0?
If you already have a WordPress site, it’s natural to wonder what’s going to happen to all of the content that you’ve already created with the TinyMCE editor.
Don’t worry – the core team didn’t forget about your old content.
Here’s how it’s going to work.
Let’s say you have a post built using the TinyMCE editor that looks like this:
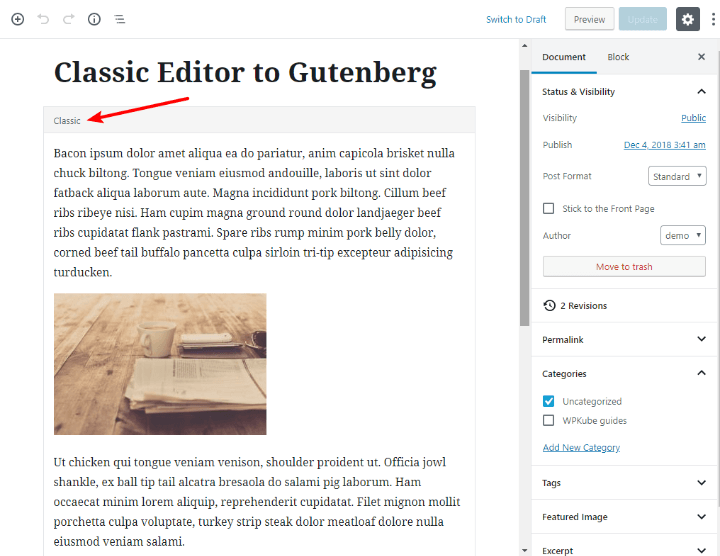
When you move to WordPress 5.0 and the Gutenberg block editor, WordPress will put all of the old content into a single Classic block. The Classic block is basically the TinyMCE editor…just inside the Gutenberg interface.
So rather than each element being a separate block, everything is just in that one Classic block. It looks like this:
If you need to edit the content, you can either edit it inside the Classic block just like you would the TinyMCE editor:
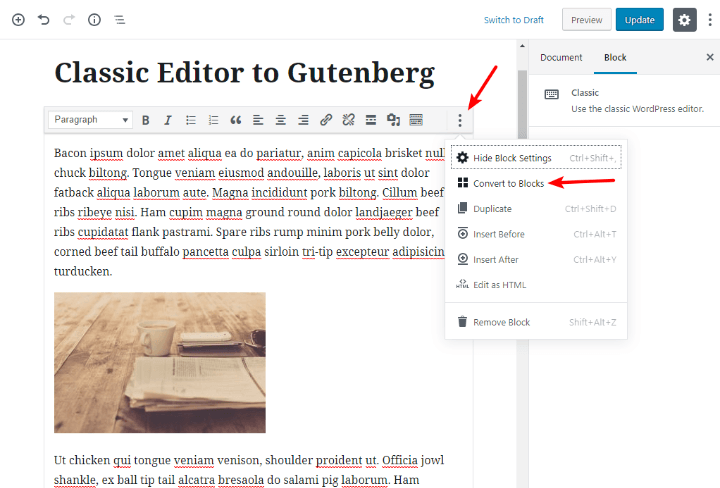
Or, you can also choose the option to Convert to Blocks. Once you choose that option, Gutenberg will break all your old content into separate blocks and you’ll be able to work with it just like you’d built the post from scratch with Gutenberg.
Do You Have To Use The Gutenberg Editor? Can You Keep Using The TinyMCE Editor?
You do not have to use the new Gutenberg block editor. While it will become the default editor in WordPress 5.0, there’s also an official Classic Editor plugin that will let you continue to use the original TinyMCE editor that you’re already familiar with. Additionally, the WordPress core team will continue to officially support the TinyMCE editor until at least the end of 2021.
All you need to do is install the plugin from WordPress.org. Once you activate it, it will deactivate the Gutenberg block editor and you’ll create content exactly the same as you did before WordPress 5.0.
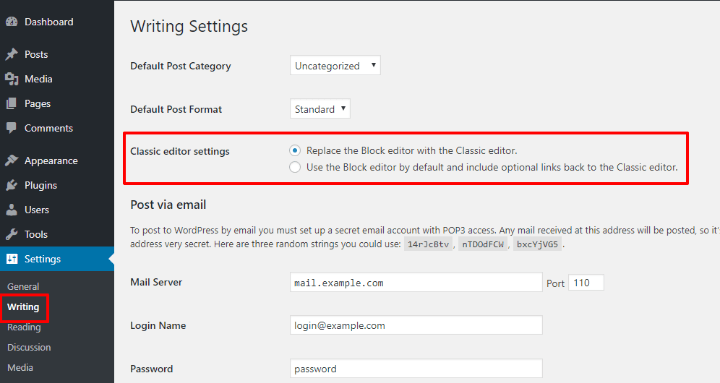
If desired, the plugin also has another option that lets you use both the TinyMCE editor and the Gutenberg block editor and switch between them on a content-by-content basis.
To activate this setting, go to Settings → Writing and choose the option for Use the Block editor by default and include optional links back to the Classic editor:
There’s Your WordPress Gutenberg Editor Tutorial!
There’s been a lot of debate in the WordPress community about the new Gutenberg block editor.
We’re not trying to weigh in on whether it’s a good thing or a bad thing. All we want to do is make sure that you’re still able to have a great WordPress experience once WordPress 5.0 ships, which we hope this Gutenberg editor tutorial will help with.
And if you’re looking for another type of editor that will help you create more complicated content, you might want to check out our post on the best drag-and-drop WordPress page builders.
Do you have any other questions about the new Gutenberg block editor? Leave a comment and we’ll try to help!