There is no doubt that WordPress is one of the most popular content management systems. One of the reasons why it’s so popular is the sheer amount of plugins that allow you to create almost any type of website imaginable.
From simple blogs to business portfolios, there is very little WordPress cannot do. If you’re a long time WordPress user, you probably know that WordPress can also be used to create a powerful social network with the help of a plugin called BuddyPress.
At first glance, you might be wondering how can a social network benefit you.
However, BuddyPress can be used to create more than just a social network. As a business owner, you can use it create a company intranet to give your employees or even clients a place where they can collaborate, exchange ideas, and even get support.
In this post, I’ll walk you through the process of installing and setting up BuddyPress, explaining the user roles, setting up the pages and adding them to your navigation menu, as well as show you a few themes that will take your BuddyPress website to the next level.
BuddyPress explained

BuddyPress claims to be a “social network in a box”. Essentially, you can use the plugin to create a community website with features similar to Facebook. Visitors can register for your site and have member profiles where they can enter their personal information. They can share status updates, create groups, and chat with other users.
There are also various BuddyPress add-ons that you can use to allow users to upload files, collaborate on documents and projects, like the posts, and a lot more. You can even integrate the plugin with bbPress and extend the forums as a natural extension of your community to provide support or simply allow members to have longer discussion on topics of interest.
The best thing about BuddyPress is that it works great with any theme out of the box and it integrates directly with your existing website. However, there are also numerous BuddyPress themes which allow you to style your network without having to dig into code.
Installing and setting up BuddyPress
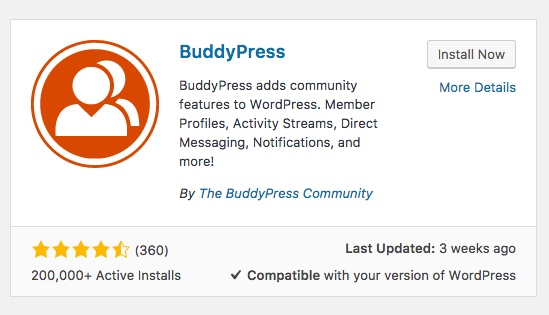
BuddyPress follows the same installation procedure as all the other WordPress plugins. Begin by logging into your WordPress dashboard and navigate to Plugins > Add New. Search for BuddyPress and click Install. Once the plugin is installed, click Activate.
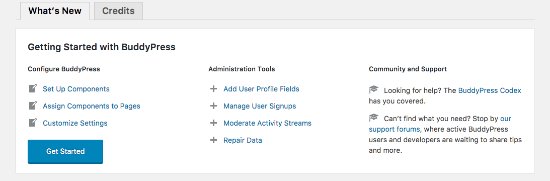
The screen will redirect you to the BuddyPress welcome screen. There, you’ll find links to the plugin settings area that will help you activate the components you need and otherwise setup your network.
Let’s begin by clicking on the Get Started button. You’ll be taken to the BuddyPress settings area.
You’ll need to do three things after you install and activate BuddyPress:
- Enable the components you want to use right away
- Create (and assign) pages
- Select the appropriate BuddyPress options
Let’s walk through each of one of these aspects of setup.
Step 1 – Enabling BuddyPress components
BuddyPress comes with 10 components, six of which are already active out of the box. Two of those components are necessary for BuddyPress to work correctly. All the others are completely optional so activate just the ones you need.
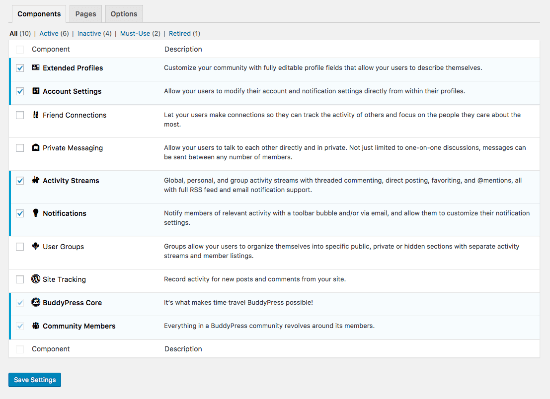
The components include:
- The BuddyPress Core: Needed for the plugin to function.
- Community Members: Needed for the plugin to function, allows visitors to register for your site as members.
- Extended Profiles: Gives users the ability to customize their profiles
- Account Settings: Users can edit settings related to their accounts and notifications.
- Friend Connections: If you want users to connect with one another, you’ll want to enable this component.
- Private Messaging: Allows users to send private messages to each other.
- Activity Streams: Global, personal, and group activity streams with threaded commenting, direct posting, favoriting, and @mentions.
- Notifications: Allows members to receive notifications of relevant activity either with a toolbar bubble or an email message.
- User Groups: Users can create and join public, private, or hidden sections that have separate activity streams and member listings.
- Site Tracking: This allows you to see new post and comment activity.
It’s worth mentioning that you can easily enable or disable components at any point in time so you don’t have to enable all of them at once. Once you’ve chosen which components your community or network will need, click on the Save Settings button.
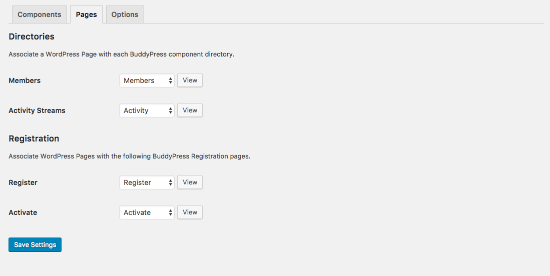
Step 2 – Setting up pages
With components activated, it’s time to configure the pages that will be used by BuddyPress. You’ll notice that most of the required pages are already there, however, you will need to create the pages for user registration and activation. You’ll also need to enable site registrations in Settings > General > Allow anyone to register for the site.
To create the necessary pages, go to Pages > Add New. Create a blank page, name it Registration and publish it. Then repeat the process to create the Activation page. You don’t need to enter any content, only create the pages as BuddyPress will automatically pre-populate the appropriate content.
Now, go back to Settings > BuddyPress > Pages and select the pages you made under the Registration section. Save changes and you’re done.
Step 3 – Selecting BuddyPress options
Once you’ve created and assigned the proper pages, you can move on to the next step which involves adjusting the settings. Click on the third tab called Options. As you can see from the screenshot below, you can change profile settings, adjust group and activity settings, and more.
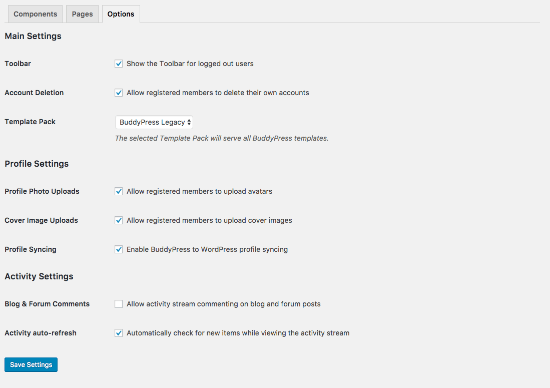
Once you’re done making changes, save your settings.
Managing BuddyPress users
Now that BuddyPress is set up, let’s discuss how to manage users that can register for your community. Keep in mind that BuddyPress doesn’t have any default member roles so you will need to set the user role of newly registered users yourself. The safest option is to choose a role with the least number of privileges necessary such as Subscriber or Contributor. Doing so will prevent them from modifying your site’s settings while still allowing them to edit their profiles and post on the site.
User profiles
Anyone who registers for your site will have their own profile. They can edit their profile from the admin area and enter additional information if you’ve enabled the Extended Profile Settings in Step 1.
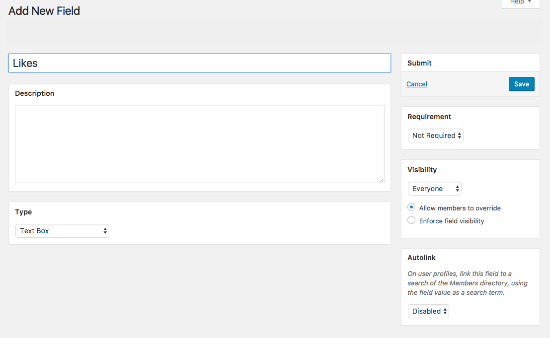
To make the most out of extended profiles, you will need to create additional fields the members can fill out. This can involve adding fields for their hobbies, interests, birthday, likes, and more.
To add extra fields go to Users > Profile Fields and create as many additional fields as you want to. You can even group certain fields together for better organization.
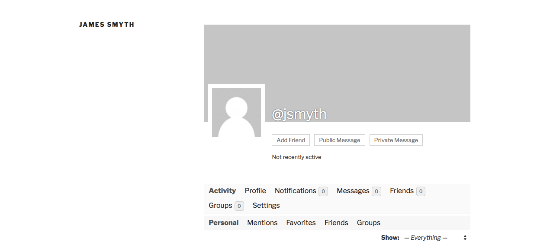
Each user has a profile page that’s publicly visible and includes plenty of information and features, including:
- Last Activity
- Profile
- Notifications
- Messages
- Friends
- Groups
- Settings
Aside from updating their settings, users can upload their own cover photos, similar to Facebook, and can also message other members, post status updates, join groups, and so on.
Working with Groups
If you’ve enabled the Group component, members of your site can create and join groups. The groups they create can be public so every member can join. If a group is public, then anyone who is a registered member will be able to see group activity.
Groups can also be private which means members will have to request to be added. While all the members of your community will be able to see a private group exists, they won’t be able to view the activity for that group unless their join request was approved.
Lastly, groups can be set to hidden which means the group as well as its activity will not be visible anywhere.
New members can be added to each of the group types in one of the following ways:
- Invited by group admins only
- Invited by group admins and mods
- Invited by any member of the group
Groups can be customized with an avatar and a cover image. This makes it easy to identify the group in the general activity tab.
Making use of menus and widgets
As a final step towards creating your community site, let’s create menus and widgets that will help your members quickly find the pages and features they want.
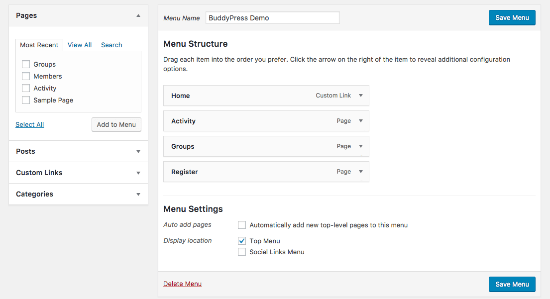
First, let’s create a custom menu that will have the links to our Register and Login pages.
Go to Appearance > Menus and enter a name for your menu. Click the Create menu button. You’ll need to choose a location for your menu and add the pages you want this menu to have. In my example, I’ve added the Registration and a few other pages and set the menu to the Top location.
Click Save Menu to update the settings.
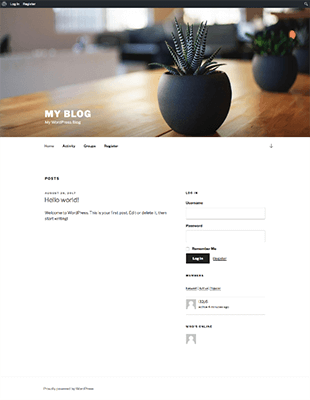
BuddyPress also comes with several widgets that you can add to any sidebar area on your site. For this part, go to Appearance > Widgets. Since I’m using the default Twenty Seventeen theme, I can add widgets to the sidebar or to the footer area. I’ve added the Login widget, Members, and Who’s Online widgets to my sidebar.
5 BuddyPress compatible themes for WordPress
As we mentioned earlier, there are plenty of beautiful BuddyPress themes that can help you customize your community even more. Here are five of the best themes on the market that are compatible with BuddyPress.
Woffice
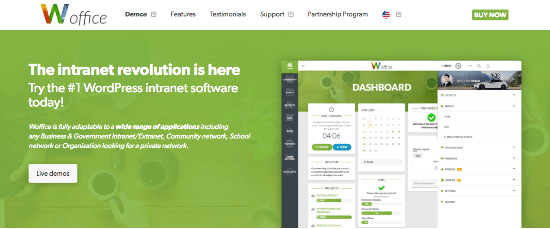
Woffice is a great choice for any business that wants to set up its own intranet. The theme can be used for a variety of business niches and has an attractive, responsive design. The theme is easy to customize thanks to a page builder and through an extensive theme options panel where you can tweak colors, fonts, and other settings.
Main features include:
- Projects management
- Calendar integration
- Wiki-like articles
- A custom login page
- Notification center
- Paid membership
- And much more
Price: $75
Socialize

If you want to build a powerful networking community, look no further than Socialize. The theme makes it easy to navigate through your site with AJAX navigation and makes it easy to create custom layouts with a page builder. Each BuddyPress widget has been included in the page builder for ease of customization.
Features include:
- Detailed profiles and member directories
- Live activity feeds and notifications
- Integration with WP Social Login plugin for easier registration
- Multiple layout possibilities
- bbPress integration
Price: $59
Thrive
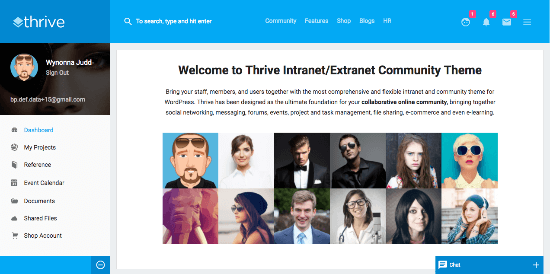
The Thrive theme can be used to create a community website as well as a company intranet. On top of that, you can create a completely private site with a secure login for members.
Other features include:
- Members can easily share messages, files, events, tickets, and forms
- Members can edit and collaborate on documents, and manage files and projects
- Responsive design
- Custom widgets
- WooCommerce and bbPress integration
Price: $67
Buddy
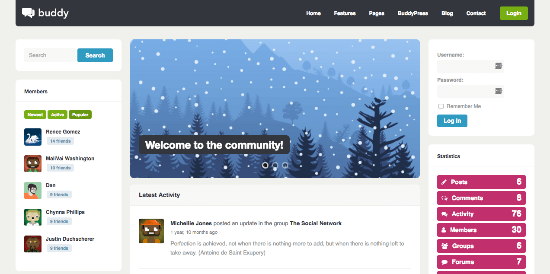
Buddy is a clean and simple theme with a responsive design. You can use it as a company intranet or as a community site for your school or a club.
Special features include:
- Shortcodes for various BuddyPress related widgets
- Custom icons
- SEO optimized structure
- Plenty of customization options on post and page level as well as global customization options
Price: $48
OneCommunity

OneCommunity features a bright and bold design that looks good no matter which device your visitors are using. The theme comes with more than 40 unique page templates and 9 color schemes.
Other notable features include:
- Ability to upload media and documents
- Private live chat
- AJAX powered search
- Integration with WPMU and WooCommerce
- Pop-up window with member notifications
- And more
Price: $59
Final thoughts
If you want to create a true community around your site, consider integrating BuddyPress. You can quickly create the type of network that will benefit your site the most, be it a company intranet, a support site for your customers and clients, or a full-featured social network.
Use our guide above to set up BuddyPress on your site and start building your community today.