In this post, we’ll look at the pros and cons of AVIF images and show you how to use them in WordPress. Let’s get started!
The pros and cons of using AVIF in WordPress
AV1 Image File Format (AVIF) is a next-generation image format that attempts to address some shortcomings of alternatives such as WebP. Like WebP, AVIF is based on a video coding algorithm. However, WebP can only support 8-bit resolutions. This means that images may appear blurry, smeared, or pixelated.
AVIF, on the other hand, can extend to 12-bit resolutions. To top that up, AVIF uses a more efficient lossy compression algorithm that’s ideal for animations, videos, and photos with transparent backgrounds. It can serve up clean, sharp image edges with very small file sizes.
Better yet, thanks to these smaller file sizes, using AVIF is a great way to lighten the load on your server. Not only can this save bandwidth, but it also enables you to create a stellar UX by improving loading times. Since speed is a ranking factor for Google, opting for AVIF could help you boost your search rankings.
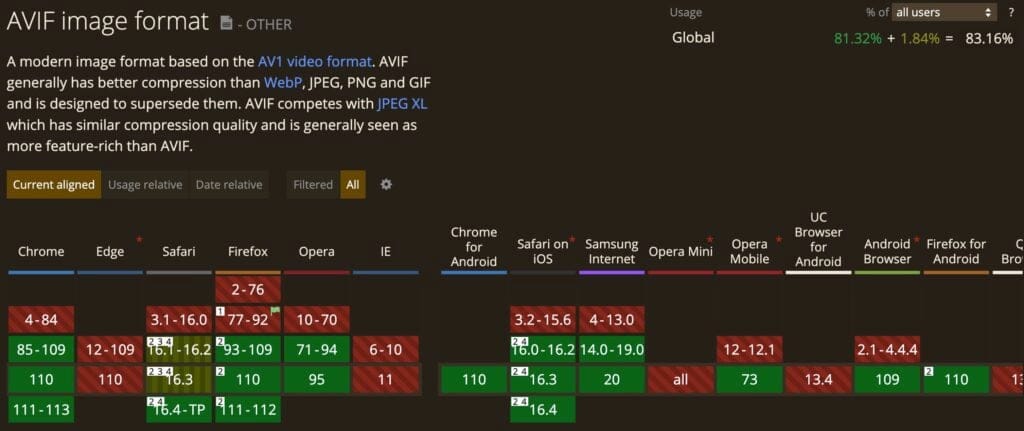
The main downside of using AVIF in WordPress is the lack of full browser compatibility.
Since AVIF is a relatively new format, it’s currently only recognized by Chrome and Firefox (and with Technology Preview support in Safari).
Overall, the resource website Can I Use estimates that only around 83% of internet users are using browsers that support AVIF as of early 2023 [1].
Plus, AVIF isn’t supported in WordPress by default.
Don’t worry, though – if you use the tool from our AVIF WordPress images guide below, it will add AVIF support to WordPress and automatically ensure that it only serves AVIF images to visitors whose browsers support the format.
How to set up AVIF WordPress images (in two steps)
If you’ve decided that AVIF is the way to go on your WordPress site, we’re here to help! Let’s take a look at how to use this image format quickly and easily:
Step 1: Install and activate Optimole in WordPress
One of the easiest ways to use AVIF in WordPress is to install a plugin such as Optimole. It is a full-service image optimization tool that enables you to resize, compress, and optimize all photos across your site.
Not only does Optimole enable you to use AVIF in WordPress, but you can also take advantage of other features such as lazy loading. Plus, you’re able to offload your images to Optimole’s state-of-the-art content delivery network (CDN).
First, you’ll need to install and activate the Optimole plugin. In your WordPress dashboard, navigate to Plugins > Add New. Then, search for “Optimole” in the search bar and click on Install Now:
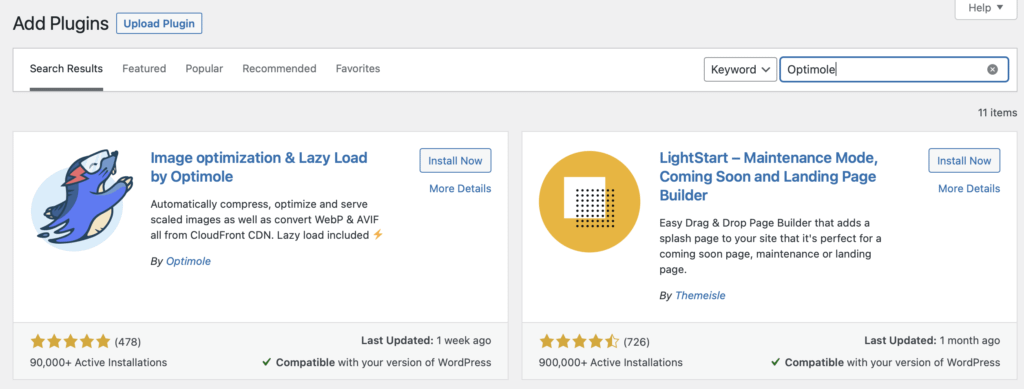
This will only take a few seconds. Then, hit Activate.
At this point, you’ll be asked to create an account and enter your unique API key to connect to the Optimole platform:
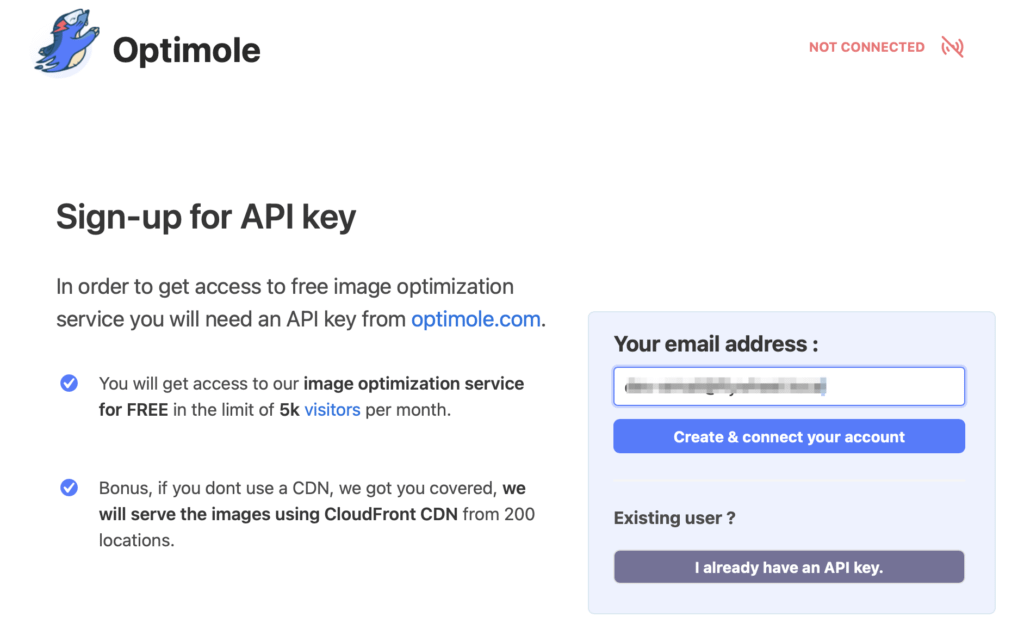
If your email address is correct, click on Create & connect your account.
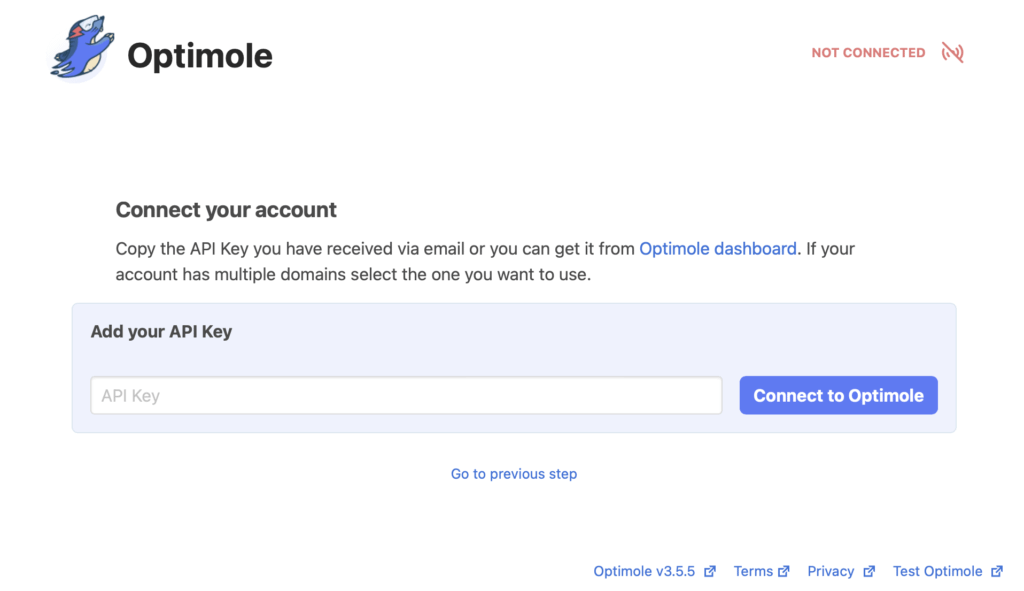
Next, you should receive your API key via email, so copy the key to your clipboard. Then, switch back to WordPress and head to Media > Optimole.
Here, select I already have an API key. Then, enter your key and click on Connect to Optimole:
One of the best things about Optimole is that it works automatically in the background of your site. So, if you’re looking for a simple image optimization tool, you can let the plugin do its job. However, to enable AVIF WordPress image conversion, you’ll need to move on to the next step.
Step 2: Enable AVIF WordPress image conversion
Now that you’ve got Optimole on your WordPress site, you can access a dedicated dashboard. Here, you’re able to monitor the number of images Optimole has optimized for you. Plus, you can find out your average compression rate and view your monthly visits.
Additionally, you can tweak the plugin’s settings in this dashboard. As we mentioned before, some of Optimole’s settings work automatically. However, you’ll need to toggle a specific setting to enable AVIF WordPress images.
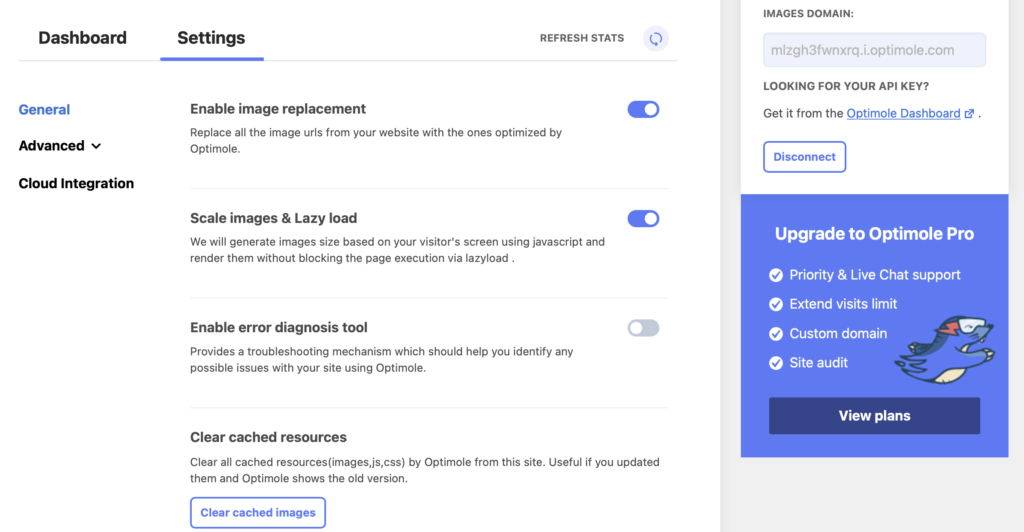
Head to Media > Optimole. Then, switch to the Settings tab:
You’ll need to open the Advanced tab and select Compression. Scroll down the page and find Enable avif conversion. Then, toggle the setting on to enable AVIF in WordPress:
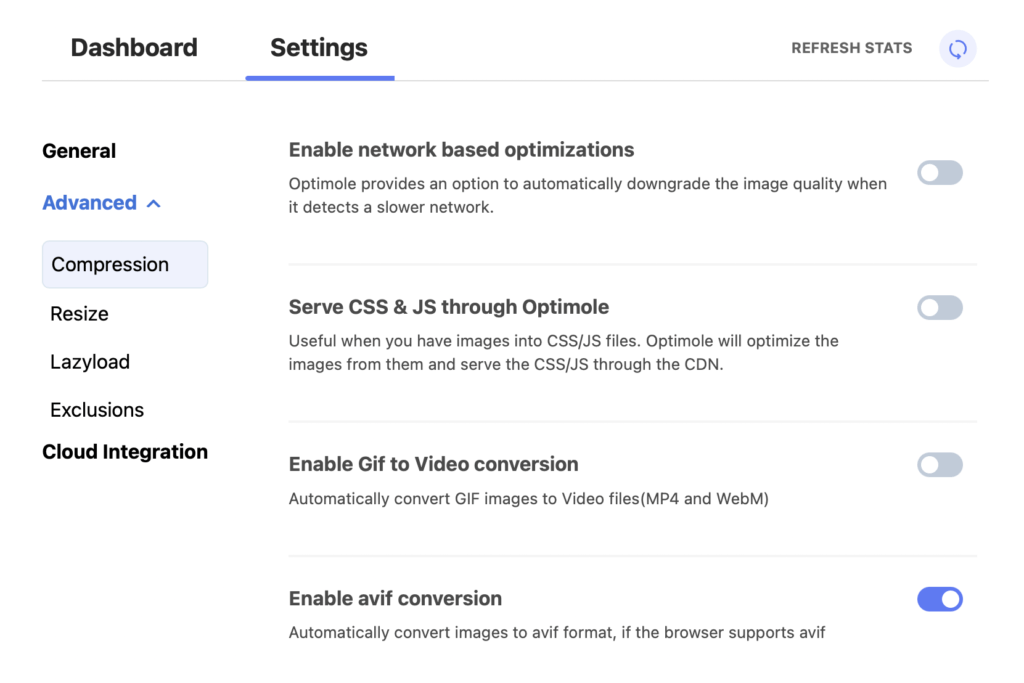
Once you’ve done this, Optimole will always serve your images in the AVIF format – of course, as long as your visitors are using a browser that supports it. If you ever change your mind about using AVIF, simply disable the image conversion setting in the Optimole dashboard.
Try AVIF WordPress images today ?
Adding images to your site is a great way to make your content more engaging and convey detailed information. However, if you’re trying to keep image files small, you might end up compromising on their quality.
This is where using AVIF in WordPress can be a great option for speeding up your website while delivering crisp, clear graphics.
? To recap, here are two easy steps to use AVIF in WordPress:
- Install and activate Optimole in your WordPress dashboard.
- Enable AVIF conversion in the plugin’s settings.
Do you have any questions about using AVIF images in WordPress? Let us know in the comments section below!