WPML is one of the most popular WordPress translation plugins out there. It’s always had detailed tools to help you manage your own translations or outsource them to freelancers or professional translation services.

However, in the past, WPML lacked the functionality for you to use machine translation to automatically translate your content.
That changed with WPML version 4.0 and its Advanced Translation Editor. Because of the improvements to machine translation as a technology, the WPML team added a new machine translation feature powered by Microsoft Azure’s translation engine.
To help you take advantage of this new feature, we’re going to show you step-by-step how to use machine translation with WPML via the new Advanced Translation Editor interface.
What You Need To Use Machine Translation In WPML
In order to use WPML’s machine translation functionality, you’ll need the Multilingual CMS package (not the cheaper Multilingual Blog version), as well as the modules for:
- String Translation
- Translation Management
If you don’t already have the Multilingual CMS package, you can purchase it by going here.
Beyond that, you might need to pay extra for the machine translation depending on the size of your site.
You can translate your first 2,000 words for free as part of your WPML license. After that, you’ll pay extra based on the number of words you want to translate:
- Personal – $0.99 for up to 1,500 additional words.
- Business – $9.99 for up to 20,000 additional words.
- Publisher – $40.99 for up to 150,00 additional words.
The reason you need to pay is because WPML has to pay Microsoft to use Azure’s translation engine – WPML isn’t just charging you for the sake of making more money!
Ready to get started? Here’s how to use machine translation with WPML…
In the first two steps, I’ll show you how to activate the Advanced Translation Editor on a new site. If you already have WPML configured on your site, I’ll show you how to activate the Advanced Translation Editor after-the-fact after those first two steps.
Step 1: Choose Who Will Translate Your Site
In this example, I’ll use machine translation to translate an English language site into Italian.
However, you can use machine translation for any language pair that Microsoft Azure supports, which is pretty much any widely-spoken language you can think of (full list here).
For this tutorial, I’ll assume that you already have the WPML plugin(s) installed and activated at your site.
From there, open the Translation Management interface and complete the setup wizard. If you’re already using WPML (and have already gone through the setup wizard), I’ll show you how to access this information after-the-fact in a second.
First, select who will translate your site. Since you’ll be using machine translation, you probably want to just select the Only myself option:

But if desired, you can also let third-party translators use the Advanced Translation Editor interface.
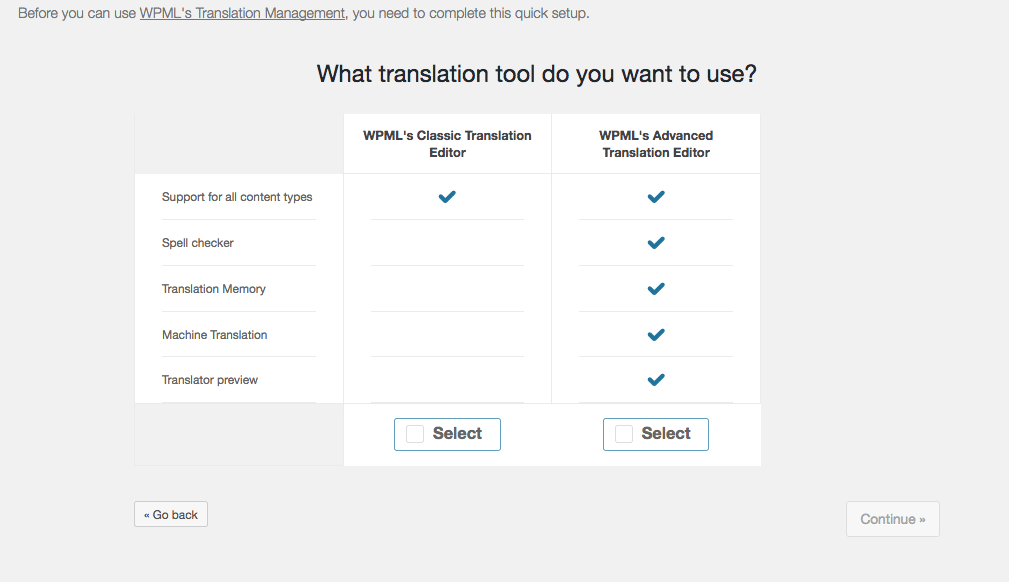
Step 2: Select Advanced Translation Editor
On the next screen, select the option for Advanced Translation Editor:
Already Using WPML? Here’s How To Activate Advanced Translation Editor After The Fact
If you’re working on an established site with WPML, here’s how to enable the Advanced Translation Editor.
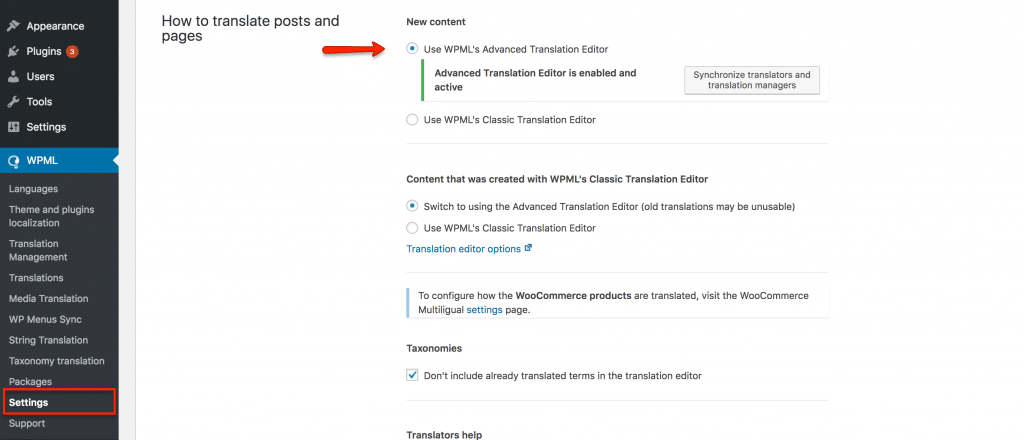
First, go to WPML → Settings and select Use WPML’s Advanced Translation Editor under the How to translate posts and pages section:
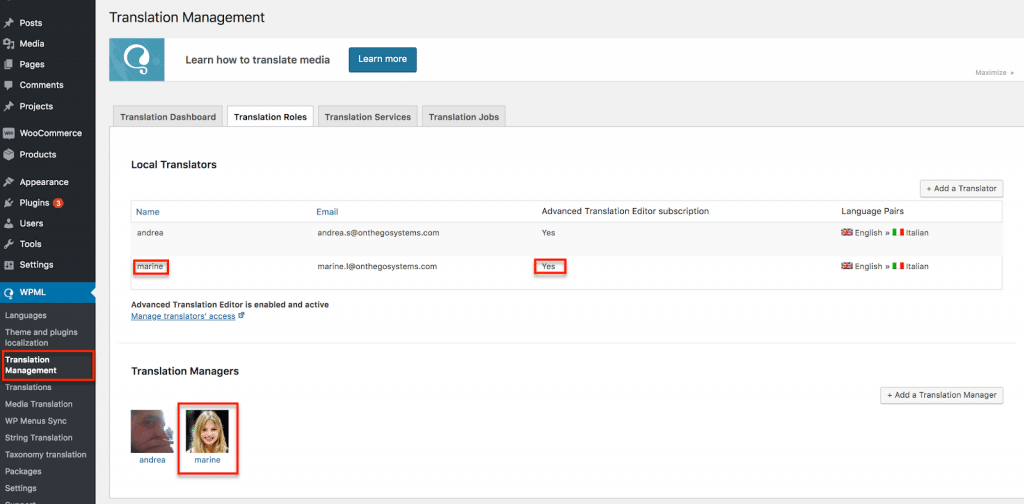
Then, to make sure that individual translators have access to the Advanced Translation Editor, you can go to WPML → Translation Management → Translation roles and look at the Advanced Translation Editor subscription column:
Ok, back to the machine translation tutorial!
Step 3: Create A New Translation
Once you’ve enabled the Advanced Translation Editor, you’re ready to start automatically translating your content.
To do that, go to the post, page, or custom post type that you want to translate and click the + icon:
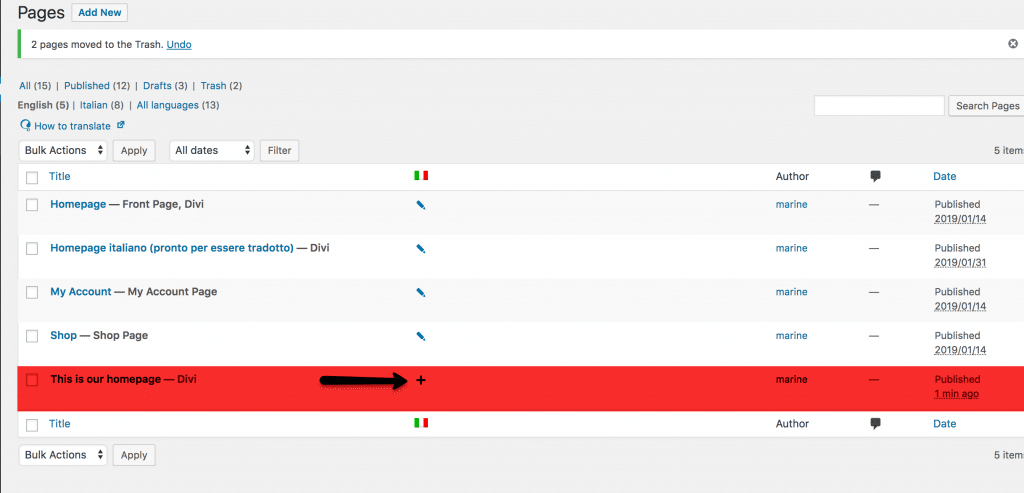
This should launch the Advanced Translation Editor.
Step 4: Use The “Translate Automatically” Button
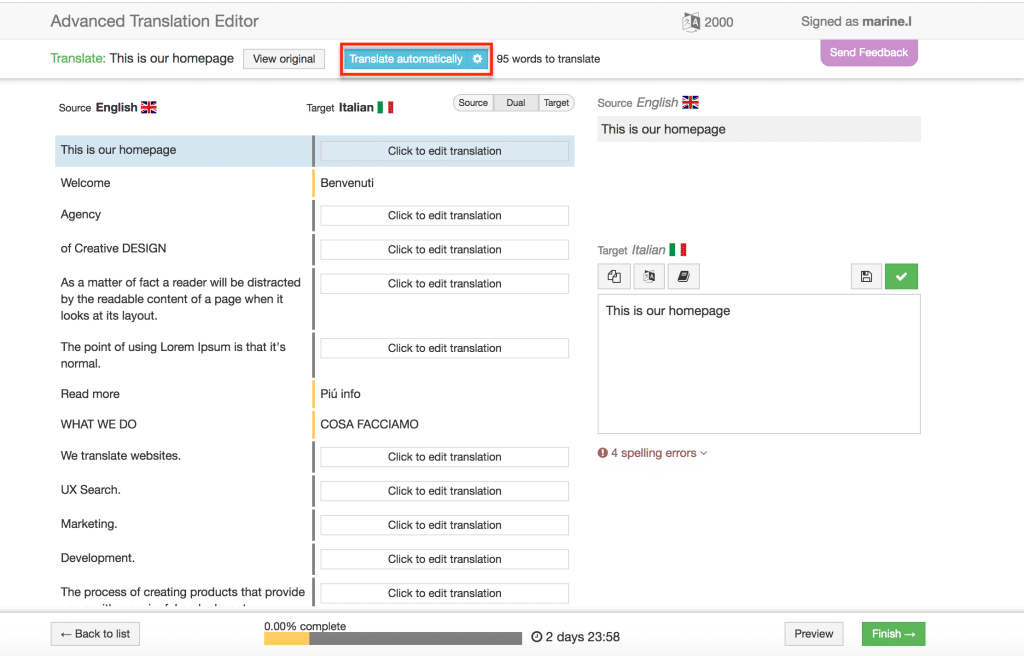
In the Advanced Translation Editor, you should see a Translate Automatically button at the top, as well as a word count for the page so that you know how many words are going to count against your quota.
For example, in the image below, you can see that using machine translation on the entire page will use up 95 words:
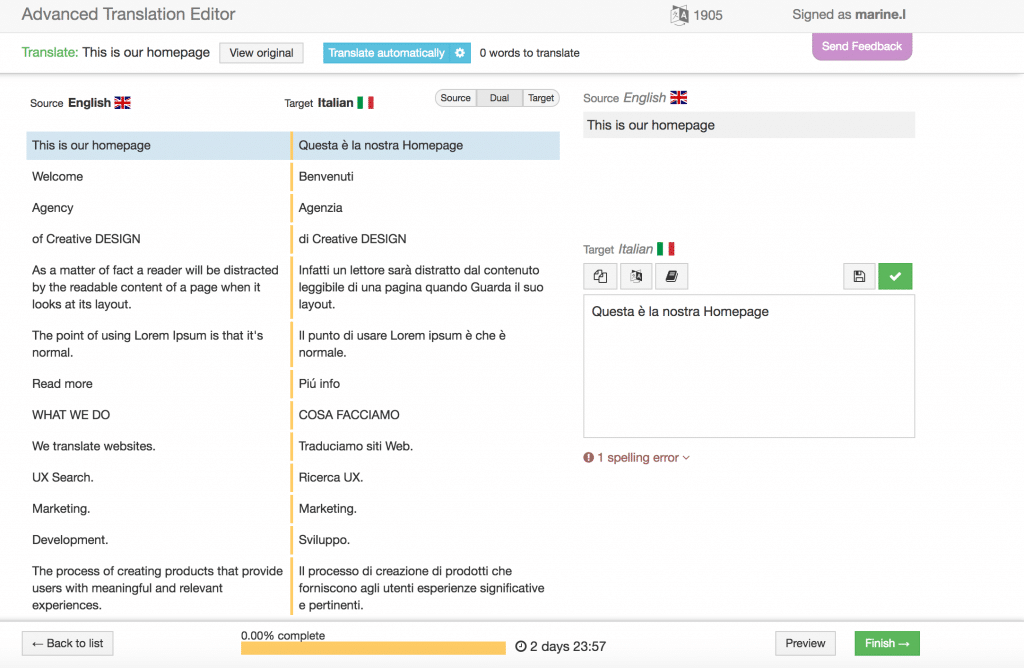
Once you click the Translate automatically button, you’ll see all of the translations appear (that’s Italian, for this example):
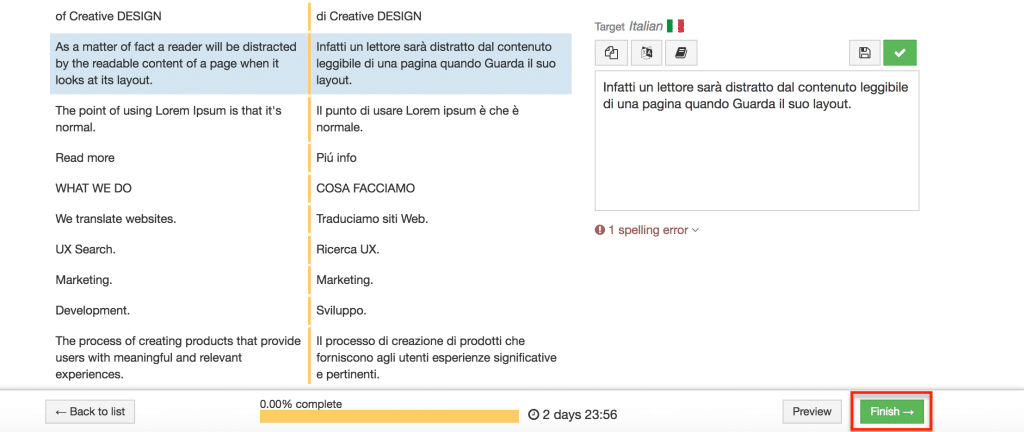
If you want, you can go through and manually review these translations and make edits, just as if you’d written the translations from scratch.
Once you’re happy with how everything looks, click the Finish button to make your machine translation content live:
And that’s it! Your content will function just as if you’d manually translated it yourself.
Once you go above the 2,000 free words included with your plan, WPML will prompt you to buy more words in the Advanced Translation Editor:
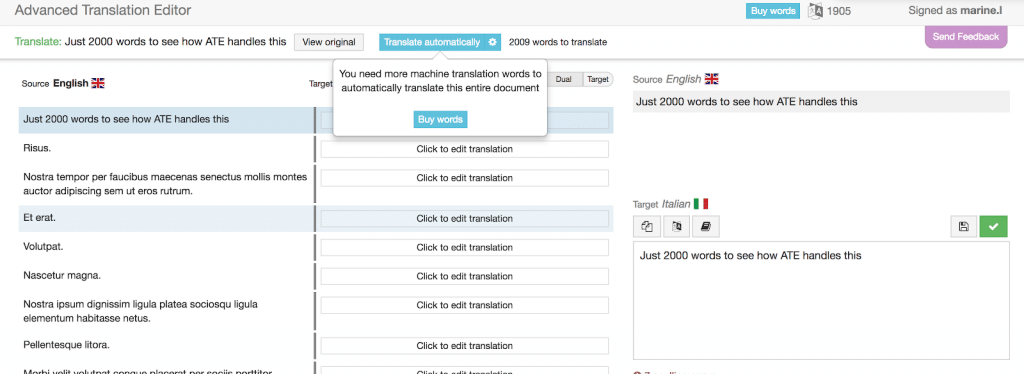
Clicking on the Buy Words button will open a purchase page where you can choose how many words you’d like to buy and pay with your credit card. Any words that you purchase will not expire, and there are no ongoing subscription fees.
That is, you’re basically buying a one-time set of credits, and those credits are available until you use them up (they won’t expire).
More On The WPML Advanced Translation Editor
In addition to letting you use machine translation, the Advanced Translation Editor also includes some other nice features in the form of:
- Translation memory – if you use the same text/sentences in multiple spots, WPML can remember this and automatically translate that text without using up your translation quota for duplicate content.
- Glossary – if you’re using third-party translators, the glossary lets you tell translators how you want to translate key phrases or sentences so that you can be consistent.
- Spell checker – the spell checker helps you find errors in whatever language you’re working in (there shouldn’t be spelling errors in machine translated content, but this comes in handy if you’re doing something manually).
Can You Turn Off The Advanced Translation Editor Later?
Yes! If you decide you want to stop using machine translation and the Advanced Translation editor at some point in the future, you can always go back to the Classic Translation Editor by going back to the same WPML → Settings area.
When you do this, WPML will automatically migrate all the translations that were marked as complete to the Classic Translation Editor to ensure that you don’t lose any of your work.
You can also just remove Advanced Translation Editor access for specific translators if you have multiple people working on your site’s translations.
Any Questions About Automatic Machine Translation In WPML?
That wraps up our post on how to use automatic machine translation with WPML via the Advanced Translation Editor interface.
Have any questions about anything? Leave a comment and we’ll try to help out!