Online shopping is an inherent part of many lives, especially during the global COVID-19 pandemic. Because of this, there is arguably no better time to enter e-commerce. However, in order to reach as many potential customers as possible, you’ll want to translate your WooCommerce website to broaden your user base.
While there is merit in using selective targeting to find new customers, there is also value in making your site multilingual. What’s more, there are plenty of WordPress plugins available to help you achieve your goals. The process for each one is unique, yet straightforward.
Throughout this post, we’ll introduce you to a few different plugins to help you translate your WooCommerce website. We’ll also show you how to do it in a few steps. Before this, let’s look at the benefits of translating your store.
Why You’d Want to Translate a WooCommerce Website
If you’re on the fence regarding the impact of e-commerce on buying habits, understand that it’s huge business. For example, revenue in the United States alone is around $500 billion. What’s more this accounts for around 15 percent of all retail sales, which is astronomical.
If you extrapolate from this to the rest of the globe, you have a healthy market that will continue to grow. With the COVID-19 pandemic, you have even more chances to capture eCommerce customers, and build brand loyalty. In fact, this is a good way to discuss the benefits of translating your WooCommerce website in general:
- You can play the numbers game, with more traffic and potential customers to present to.
- Localized content for a specific culture or region can give potential customers reason to trust your business.
- You have a greater chance to rank in Google, Bing, DuckDuckGo, and more. This is because of the additional Search Engine Optimization (SEO) you’ll carry out in order to translate your content.
There are lots more, but increased traffic, higher search rankings, and greater income are reasons enough to translate a WooCommerce website. However, the first consideration you need to make is which solution to opt for.
How to Choose the Right Translation Solution for WooCommerce
While there are lots of WooCommerce translation plugins available, not all are equal. As such, you’ll want to keep the following in mind when running through the options:
- Does the plugin implement a layer of machine translation? This is an automatic step that’s important to help you begin the process on the right foot.
- Does the plugin have a way to refine translations in the future? Once you carry out machine translation, you’ll want to tweak those translations to perfection. A good plugin will let you do this using a visual builder in many cases.
- Are there flexible options to tailor the multilingual experience to your site and brand? Of course, you’ll want to make any translation or language selection options look seamless, as this will give users an integrated way to switch languages.
- Will the plugin be kind to your budget? You’ll get better value from a tool that charges a flat subscription fee, rather than on a per-word or per-language basis.
With these in mind, you’ll want to prioritize getting answers for the questions that align with your goals. However, as you’ll see, most of the leading translation plugins can help you.
The Top WordPress Plugins to Help You Translate Your WooCommerce Website
While you’ll find lots of plugins on the market to help you translate your WooCommerce website, we have four to show you here.
Most users will know of the WordPress Multilingual Plugin (WPML). It’s a premium solution that comes with plenty of functionality:

For example, you can translate almost every aspect of your site (i.e. wherever text appears) with over 40 built-in languages. You’re able to use a layer of automatic translation and leave it there, or work with the advanced translation editor that includes a glossary, spell checker, and more.
With WPML’s WooCommerce Multilingual extension, you can also apply the functionality to the e-commerce platform too – ideal for our needs. This is only available on the Multilingual CMS tier, which is $79 per year.
Hot on the heels of WPML is Weglot – a translation solution with a massive user base and a super-simple workflow.
It’s a plugin we’ve given a review and a tutorial to in the past, which shows how revered it is at WPKube. It starts at €99 per year for one translated language, and offers immense value.
TranslatePress is another translation plugin we offer a tutorial to, and this is because it’s a professional and robust tool for the job.

This is one of the only plugins that offers a free version alongside the premium edition, and the €79 per year Personal plan is well-worth the outlay. It includes a language switcher, advanced translation options, and integration with Google Translate too.
Each of these will serve you well, and have developers who maintain and update the plugins on a regular basis. As such, the choice itself won’t matter at a technical level, but it will be a personal choice.
How to Translate a WooCommerce Website In 3 Steps
While you could turn the whole translation process into a months-long project, we’re going to focus on setting up and using your chosen plugin. This is because each plugin will let you carry out translations almost straight away. From there, you can refine the process on a technical level. Here are the steps we’re going to cover:
- Set up your chosen translation plugin.
- Use the plugin’s functionality to translate your WooCommerce website.
- Refine the translations until you’re happy.
For the steps below, we’re going to use the WPML plugin in the first instance. This is because it’s a top-notch, leading solution in the field, with good support, features, and documentation. However, we may discuss how to achieve these steps using other plugins too.
Regardless, these steps should transpose well between solutions, although you may need to consult the documentation for your choice in some cases.
1. Set Up the Translation Plugin on Your WooCommerce Website
The installation and set up process for WPML is admittedly more complex than other solutions. The premium plugin comes with four different elements:
- WPML Multilingual CMS. This is the way to add WPMLs core functionality to WordPress.
- String Translation. This component enables you to translate static and user-generated text without use of WordPress’
.mofiles – an important consideration for translations. - Translation Management. If you’re a developer, when a client receive their multilingual site, this component lets them manage the work in an efficient way.
- Media Translation. If you want to translate your site’s media, you’ll use the functionality of this component.
While the WPML website has full instructions on how install these four components, the process is similar to how you’d install other premium plugins.
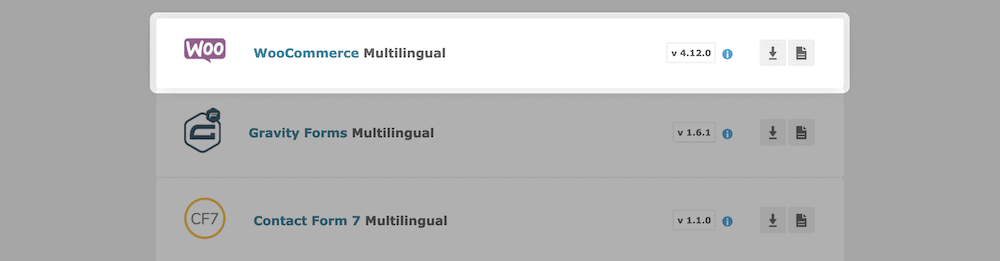
You’ll also want to install the WooCommerce Multilingual component too, in order to work with the e-commerce platform:
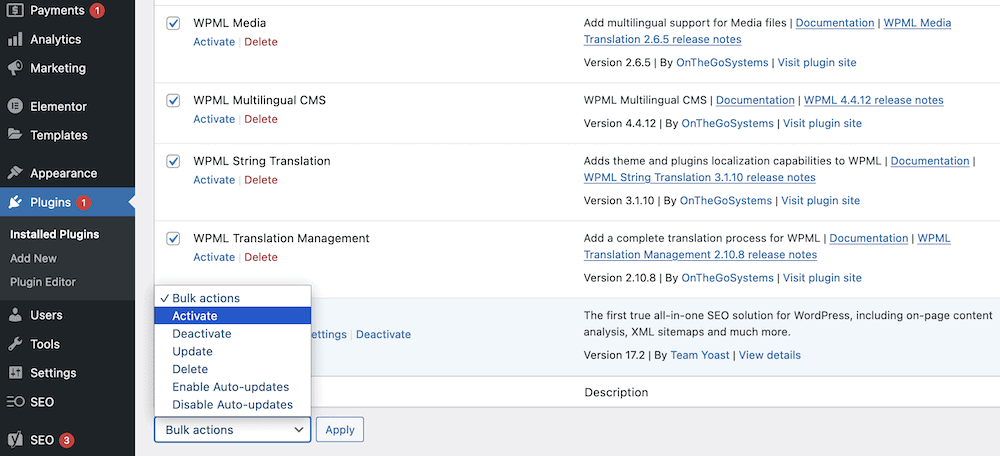
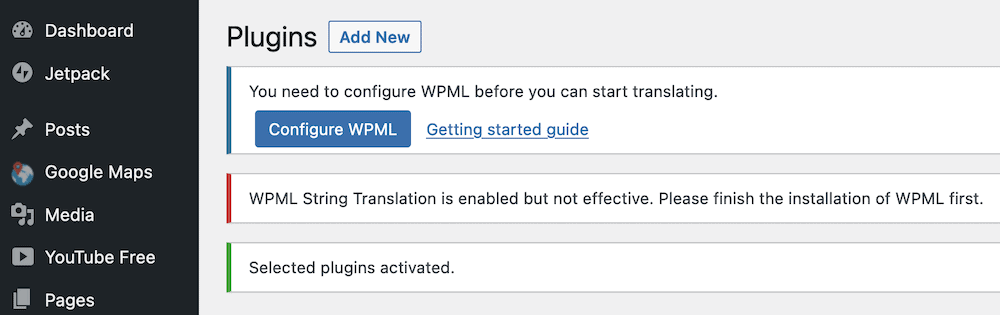
From here, you can begin to alter the settings to create an optimal experience. If you activate the plugins from the Plugins > Installed Plugins screen, you’ll note a link to configure WPML at the top of the screen:
Note that you can also get there through the WPML link in the WordPress dashboard’s sidebar. Regardless, the setup process is six steps long. The first two relate to your site and target languages:
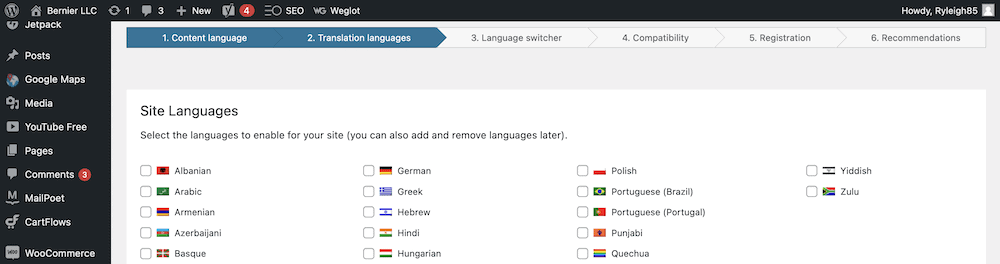
For your target languages, check the box next to every language you want to translate to, then click the Next button. Don’t worry if the list you check isn’t complete – you can alter it later.
Setting Up the Language Switcher
Next, you’ll set up your language switcher. This is a menu on each page of your site to help users choose the right language. As such, there are a few options here to integrate the switcher to your site:
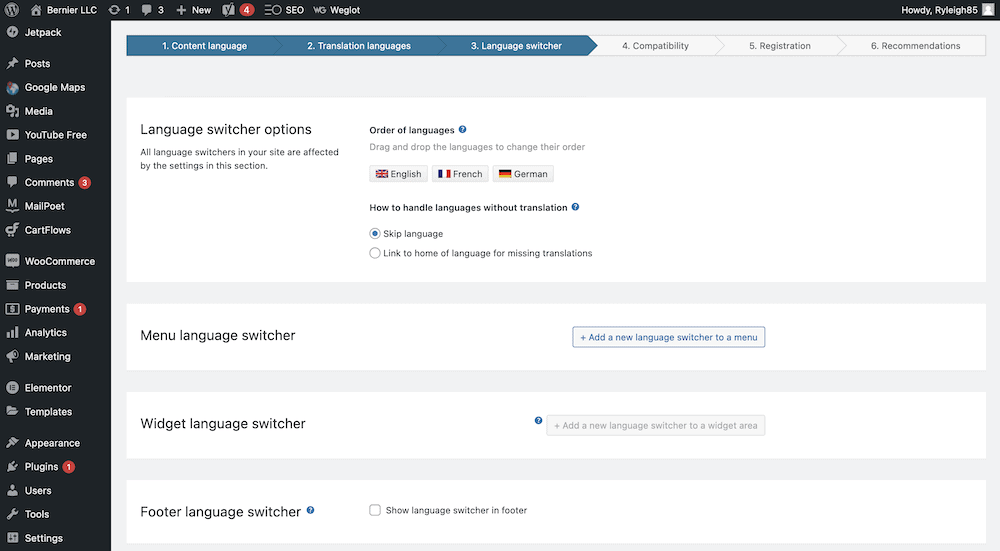
The options are intuitive, although remember to set the switcher to appear in either a menu or a widget area if possible. When you do this, a number of options will appear to help you integrate the switcher further:
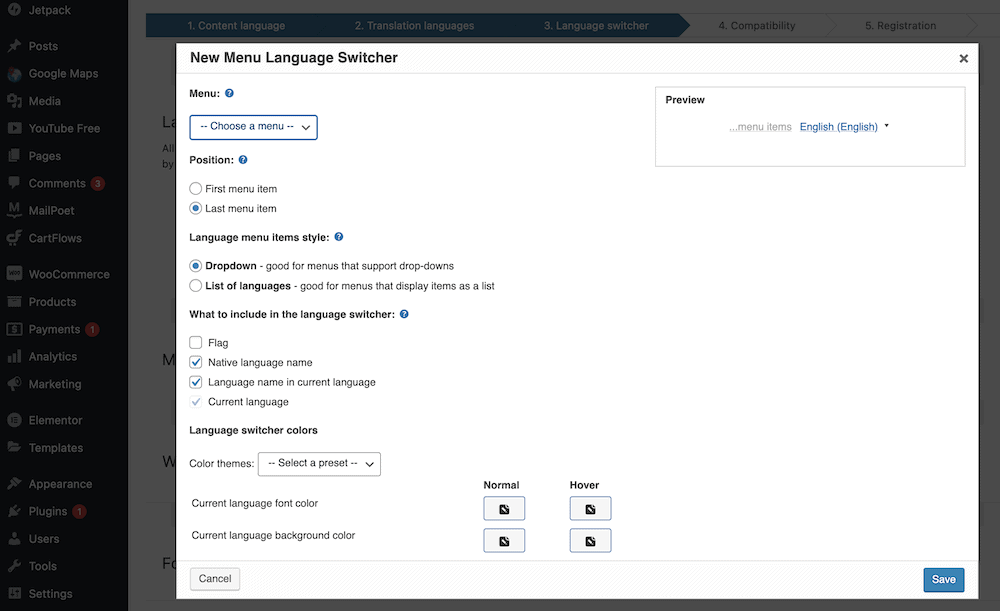
This is more about styling than functionality; you’ll want to set this up in whatever way you feel suits your site. The final three steps don’t need too much explanation:
- Compatibility. WPML can monitor your site and present compatibility options for its plugins and components. It’s up to you whether you enable this or not.
- Registration. You’ll need a site license key to register for WPML updates. While you don’t need to do this in order to follow this article, there’s a walk-through on the page that’s straightforward to follow.
- Recommendations. This is the final step, and if you need to enable some components (in our case for WooCommerce Multilingual) you’ll see a notice to do so here.
At this point, you’re ready to translate the rest of your site, starting with WooCommerce-specific elements.
2. Translate Your WooCommerce Website Using the Built-In Tools
Because WooCommerce sites have some unique elements relating to your store, you’ll need to translate those too. The WooCommerce Multilingual component handles this, and you’ll need to go through another set of steps to finalize them:
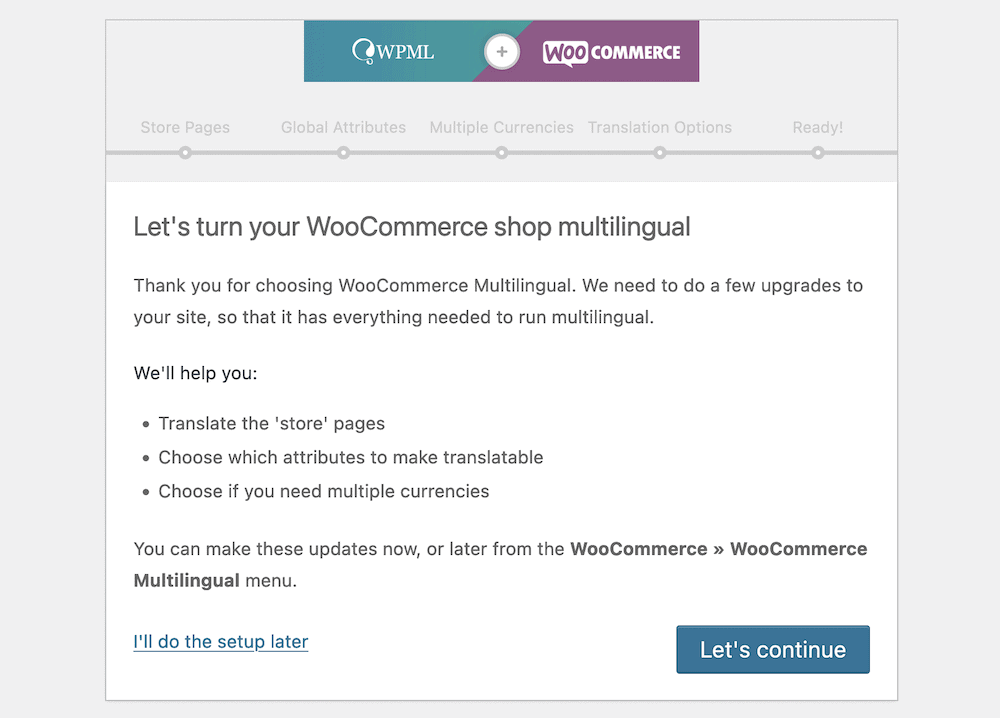
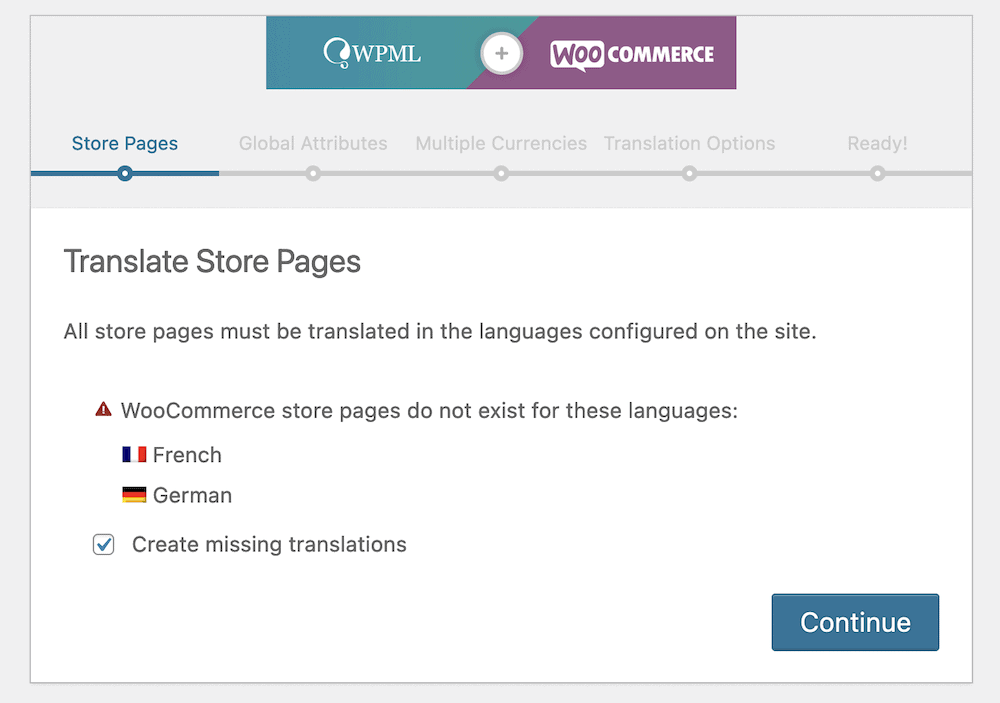
There are four steps here, and the first involves creating store pages for your chosen languages. The dialog will let you know which ones aren’t there, and will give you a choice to create them:
The next step – Global Attributes – might not seem clear at first. There are two checkboxes here, and they relate to the size and color of your products. We’d leave these at the default before clicking through to the Multiple Currencies step:
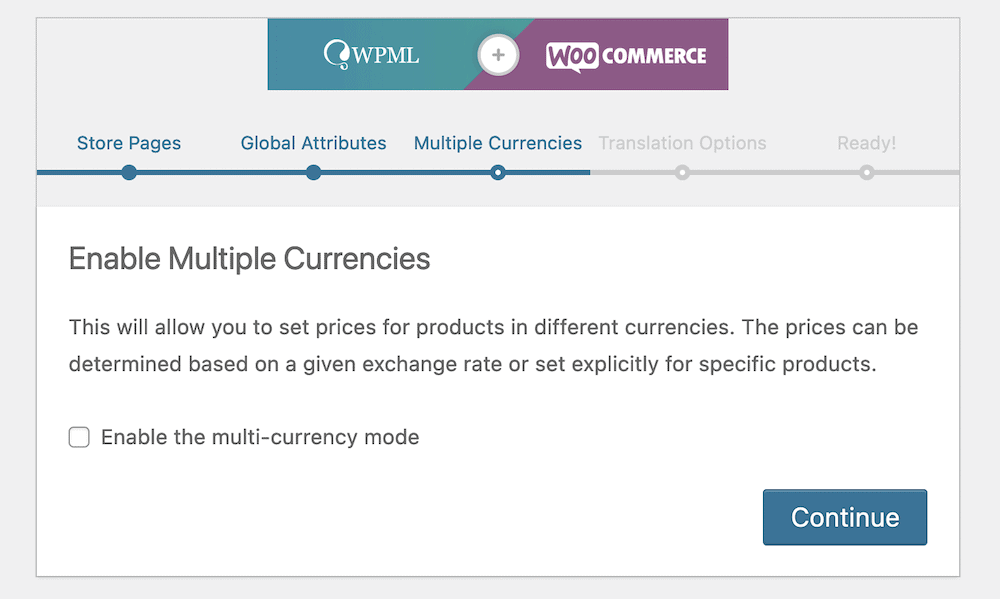
This lets you use the currencies for your target languages, rather than a global currency across the store. Using local currencies is a fantastic idea, as this is another element of trust and localization that can net you more loyalty and sales.
The Translation Options step gives you a simple choice: Do you want to show untranslated products on translated pages:
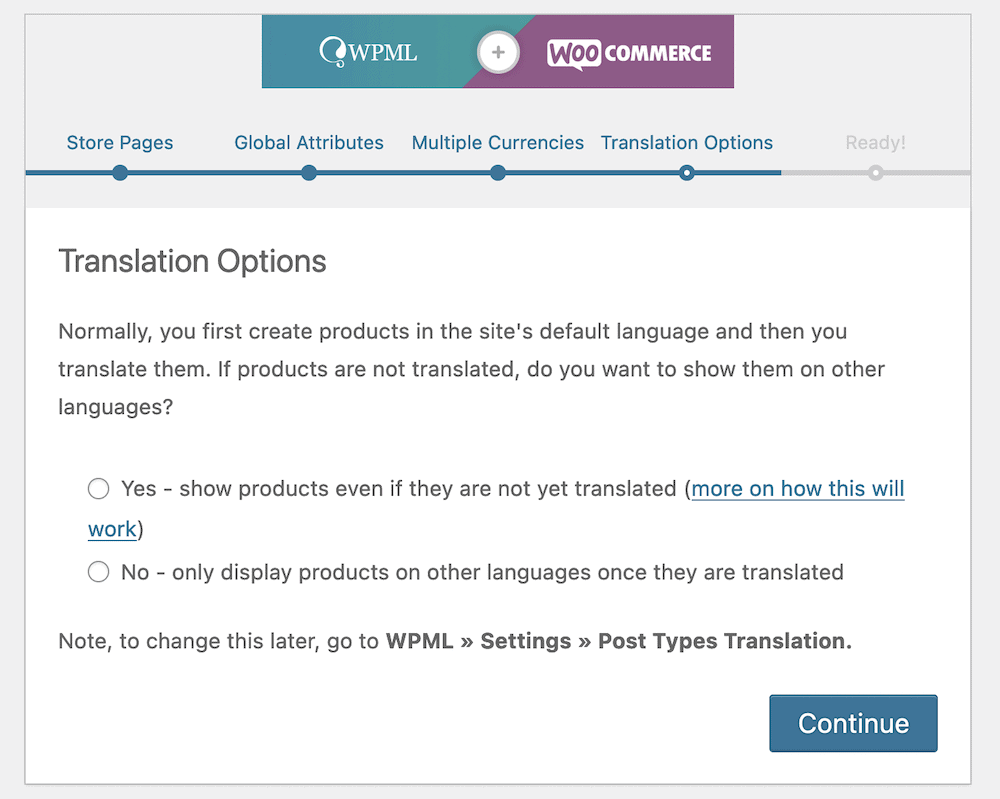
In our experience, you don’t want to do this, because there’s a chance of having duplicate content. This isn’t good for SEO. Instead, you’ll want to make sure all of your pages have the right translations in place, rather than mixed content.
From here, you can begin to refine translations before you publish your site.
3. Refine Your Translations and Publish Your Site
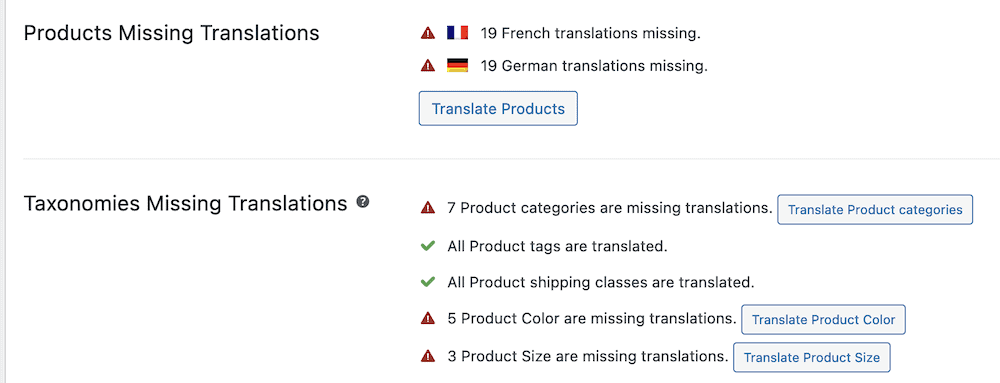
After you go through the two wizards, there will likely be more to do with regard to your translations. The WooCommerce > WooCommerce Multilingual > Status page will show you what you need to work on:
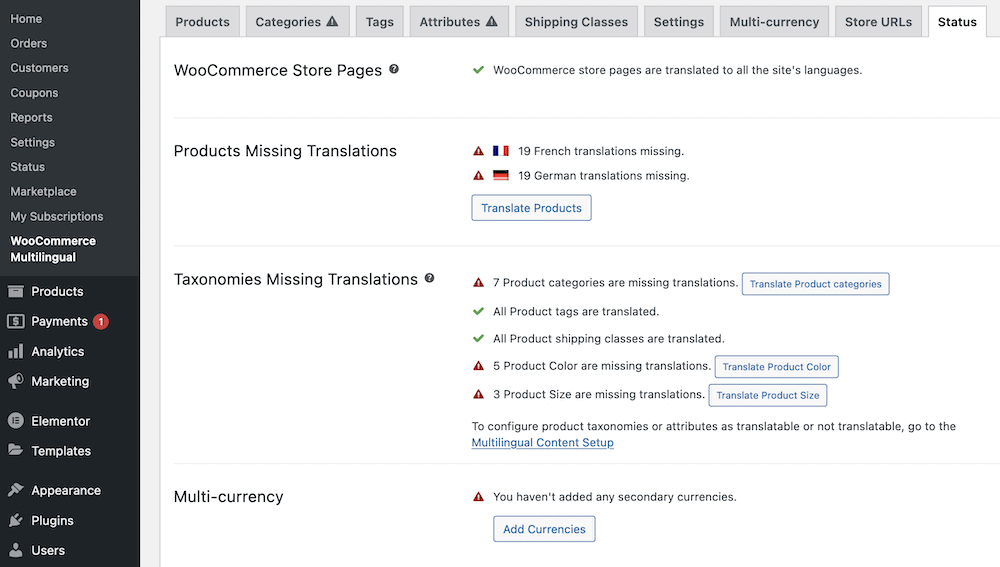
Everything with a warning icon needs your attention. In most cases, you can click on the relevant Translate button to begin the process:
However, this only lets you work with manual translations. To carry out automatic translations, head to the WPML > Translation Management page, then click the Translation Tools tab:
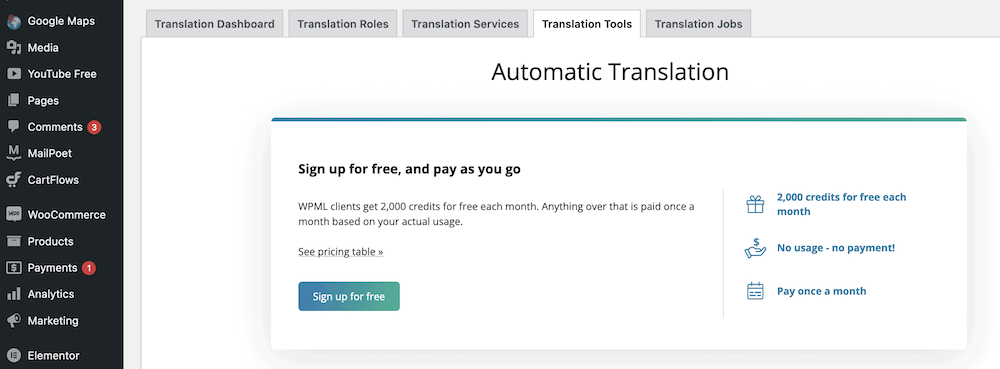
If you click the Sign up for free button, then fill out the fields, you’ll register for automatic translation. Note that you do get some free credits to use per month, but this is a premium service.
To carry out automatic translations, head to your Translations Dashboard, and check the posts and pages you want to add to your ‘basket’. The Translation Basket tab will show you what’s in the queue:
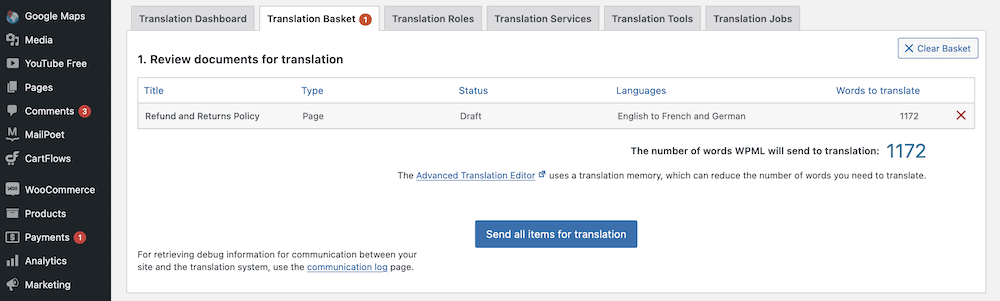
Once you click Send all items for translation, this will prepare the content for translation, and you can view the status on the WPML > Translations screen:
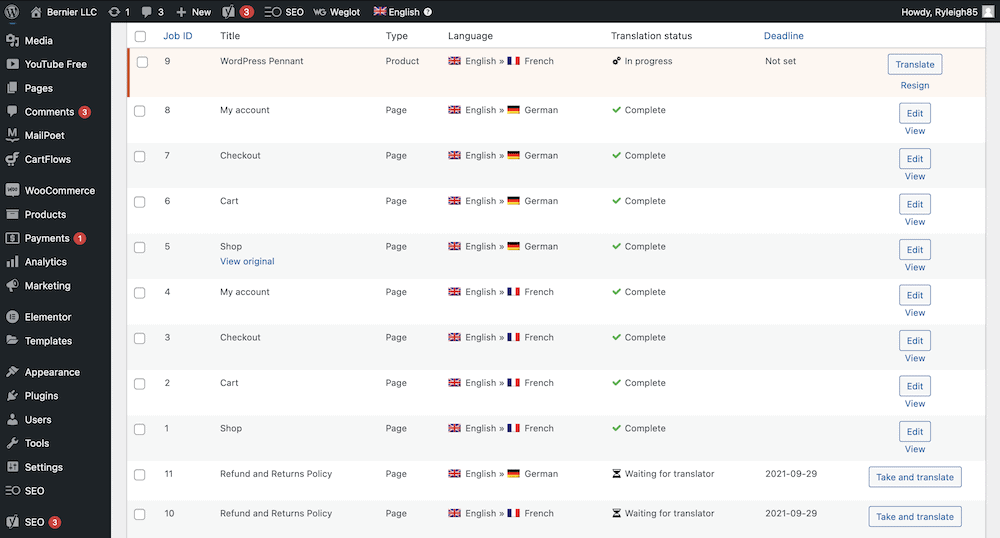
To carry out an automatic translation, click the Take and Translate button next to any page:

Finally, confirm those changes on the next screen, before you click the Save button.
In Conclusion
There are myriad benefits in running a multilingual WooCommerce store. Localizing your content will mean that potential customers can read your site in a relevant language, and this will build trust among your user base. In addition, you have more traffic to woo with your products and services. This is a direct way to increase the number of sales you make.
Throughout this post, we’ve looked at how to translate your WooCommerce website. The first step will be to choose a plugin – Weglot, WPML, and TranslatePress are all fantastic tools for the job. From there, you can use the individual functionality to parse and translate your content, at which point you can refine it to perfection.
Do you want to translate your WooCommerce website, or is a monolingual store the best way to make sales? Let us know your thoughts in the comments section below!