In this tutorial, we’ll show you how to set up a newsletter campaign in WordPress for free, using the MailPoet plugin.

Traditionally speaking, sending newsletters required signing up (or even paying for) email marketing services. Things have dramatically changed with the advent of WordPress.
Today, with plugins like MailPoet, you can send beautifully designed, responsive newsletters to your subscribers, using just your WordPress host — all for free.
Advantages of the MailPoet Newsletter Plugin
In today’s thriving WordPress’ ecosystem, there are a plethora of free/freemium newsletter plugins at your disposal. However, for our tutorial, we chose the MailPoet plugin due to the following reasons.
- You can design great looking responsive emails using its drag-and-drop email builder.
- You can set up email automation campaigns (such as post notification emails, welcome emails and automated emails for WooCommerce) using the plugin.
- You can maintain multiple email lists with unlimited subscribers.
- You can ensure that your emails reach the inbox and not land in spam, thanks to the choice of the email delivery partner. You can send emails using (a) MailPoet Email Sending Service (unlimited emails, free for up to 2000 subscribers), (b) a third-party service like SendGrid or Amazon SES, or (c) from your WordPress host to save cost.
Note: The plugin’s developers will be introducing a new free plan, wherein you get all the premium features with a list limit of 1,000 subscribers.
Apart from the features, here are some secondary advantages:
- MailPoet works right out of the box, with little or no configuration. You can go from design to sending the newsletter in a handful of minutes.
- Rapid feature improvements with weekly updates, built by a team of only 13 people — 60% of who are engineers.
- Active support that replies within a few hours, accessible from within the plugin.
- Used by over 200,000 active websites, with 400+ reviews.
- If you’re using the MailPoet Email Sending Service, you can send over 50,000 emails per hour (that’s over 13 emails/second). This is quite useful for processing large email lists.
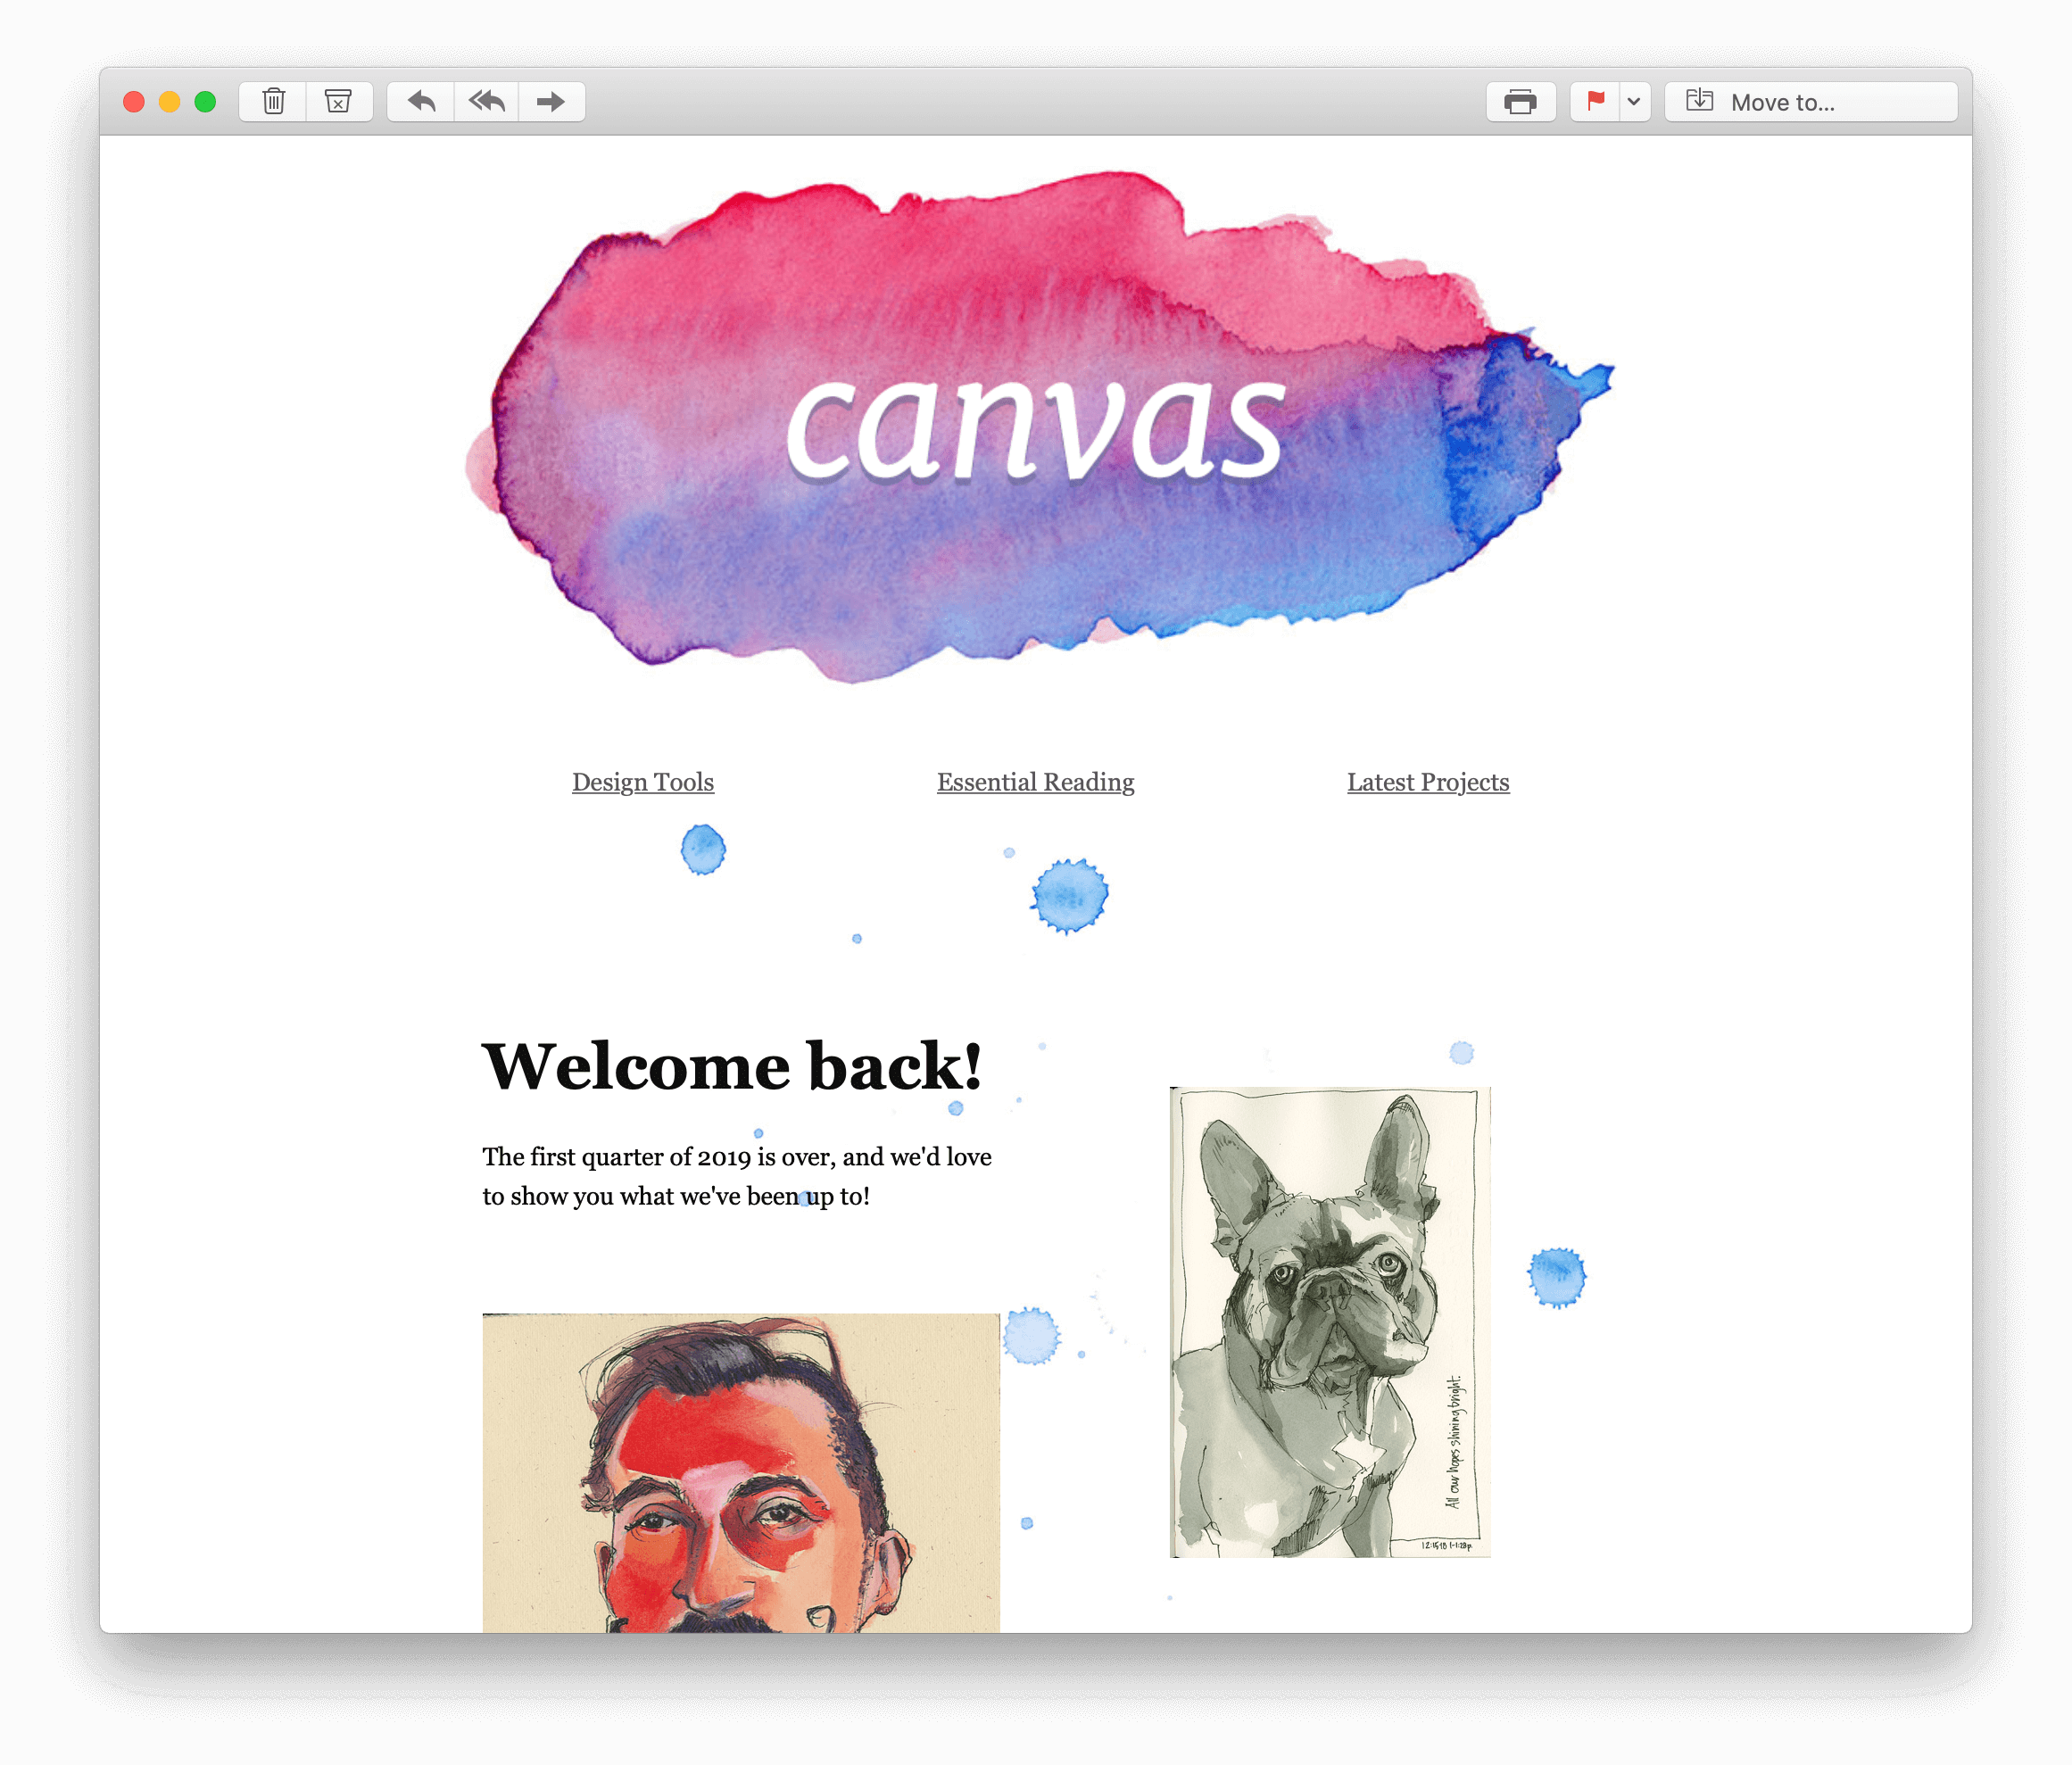
Following is a sneak-peak of a newsletter sent and designed using MailPoet.

Disadvantages of MailPoet
No plugin is perfect, and MailPoet isn’t an exception.
In rare cases, the plugins email scheduler might require additional setup on your host via cron jobs. This only impacts a small set of users. If you’re one of them — feel free to contact the MailPoet support team for help.
Tutorial Overview
Since this is a reasonably large tutorial, we’ve decided to start with the basics and slowly proceed to advanced topics.
- First, we’ll show you how to create an email list and configure a newsletter campaign.
- Next, you’ll learn how to add a signup form anywhere in your WordPress site.
- We’ll then show you how to change your email delivery partner — including MailPoet’s own email delivery service. (This step is optional, but recommended).
- Finally, as a bonus, we’ll show you how to create your first marketing automation campaign (sending post notification emails).
Feel free to try out a live demo of the plugin without having to create a new WordPress installation for it. Let’s get started!
Installing & Configuring the MailPoet Newsletter Plugin
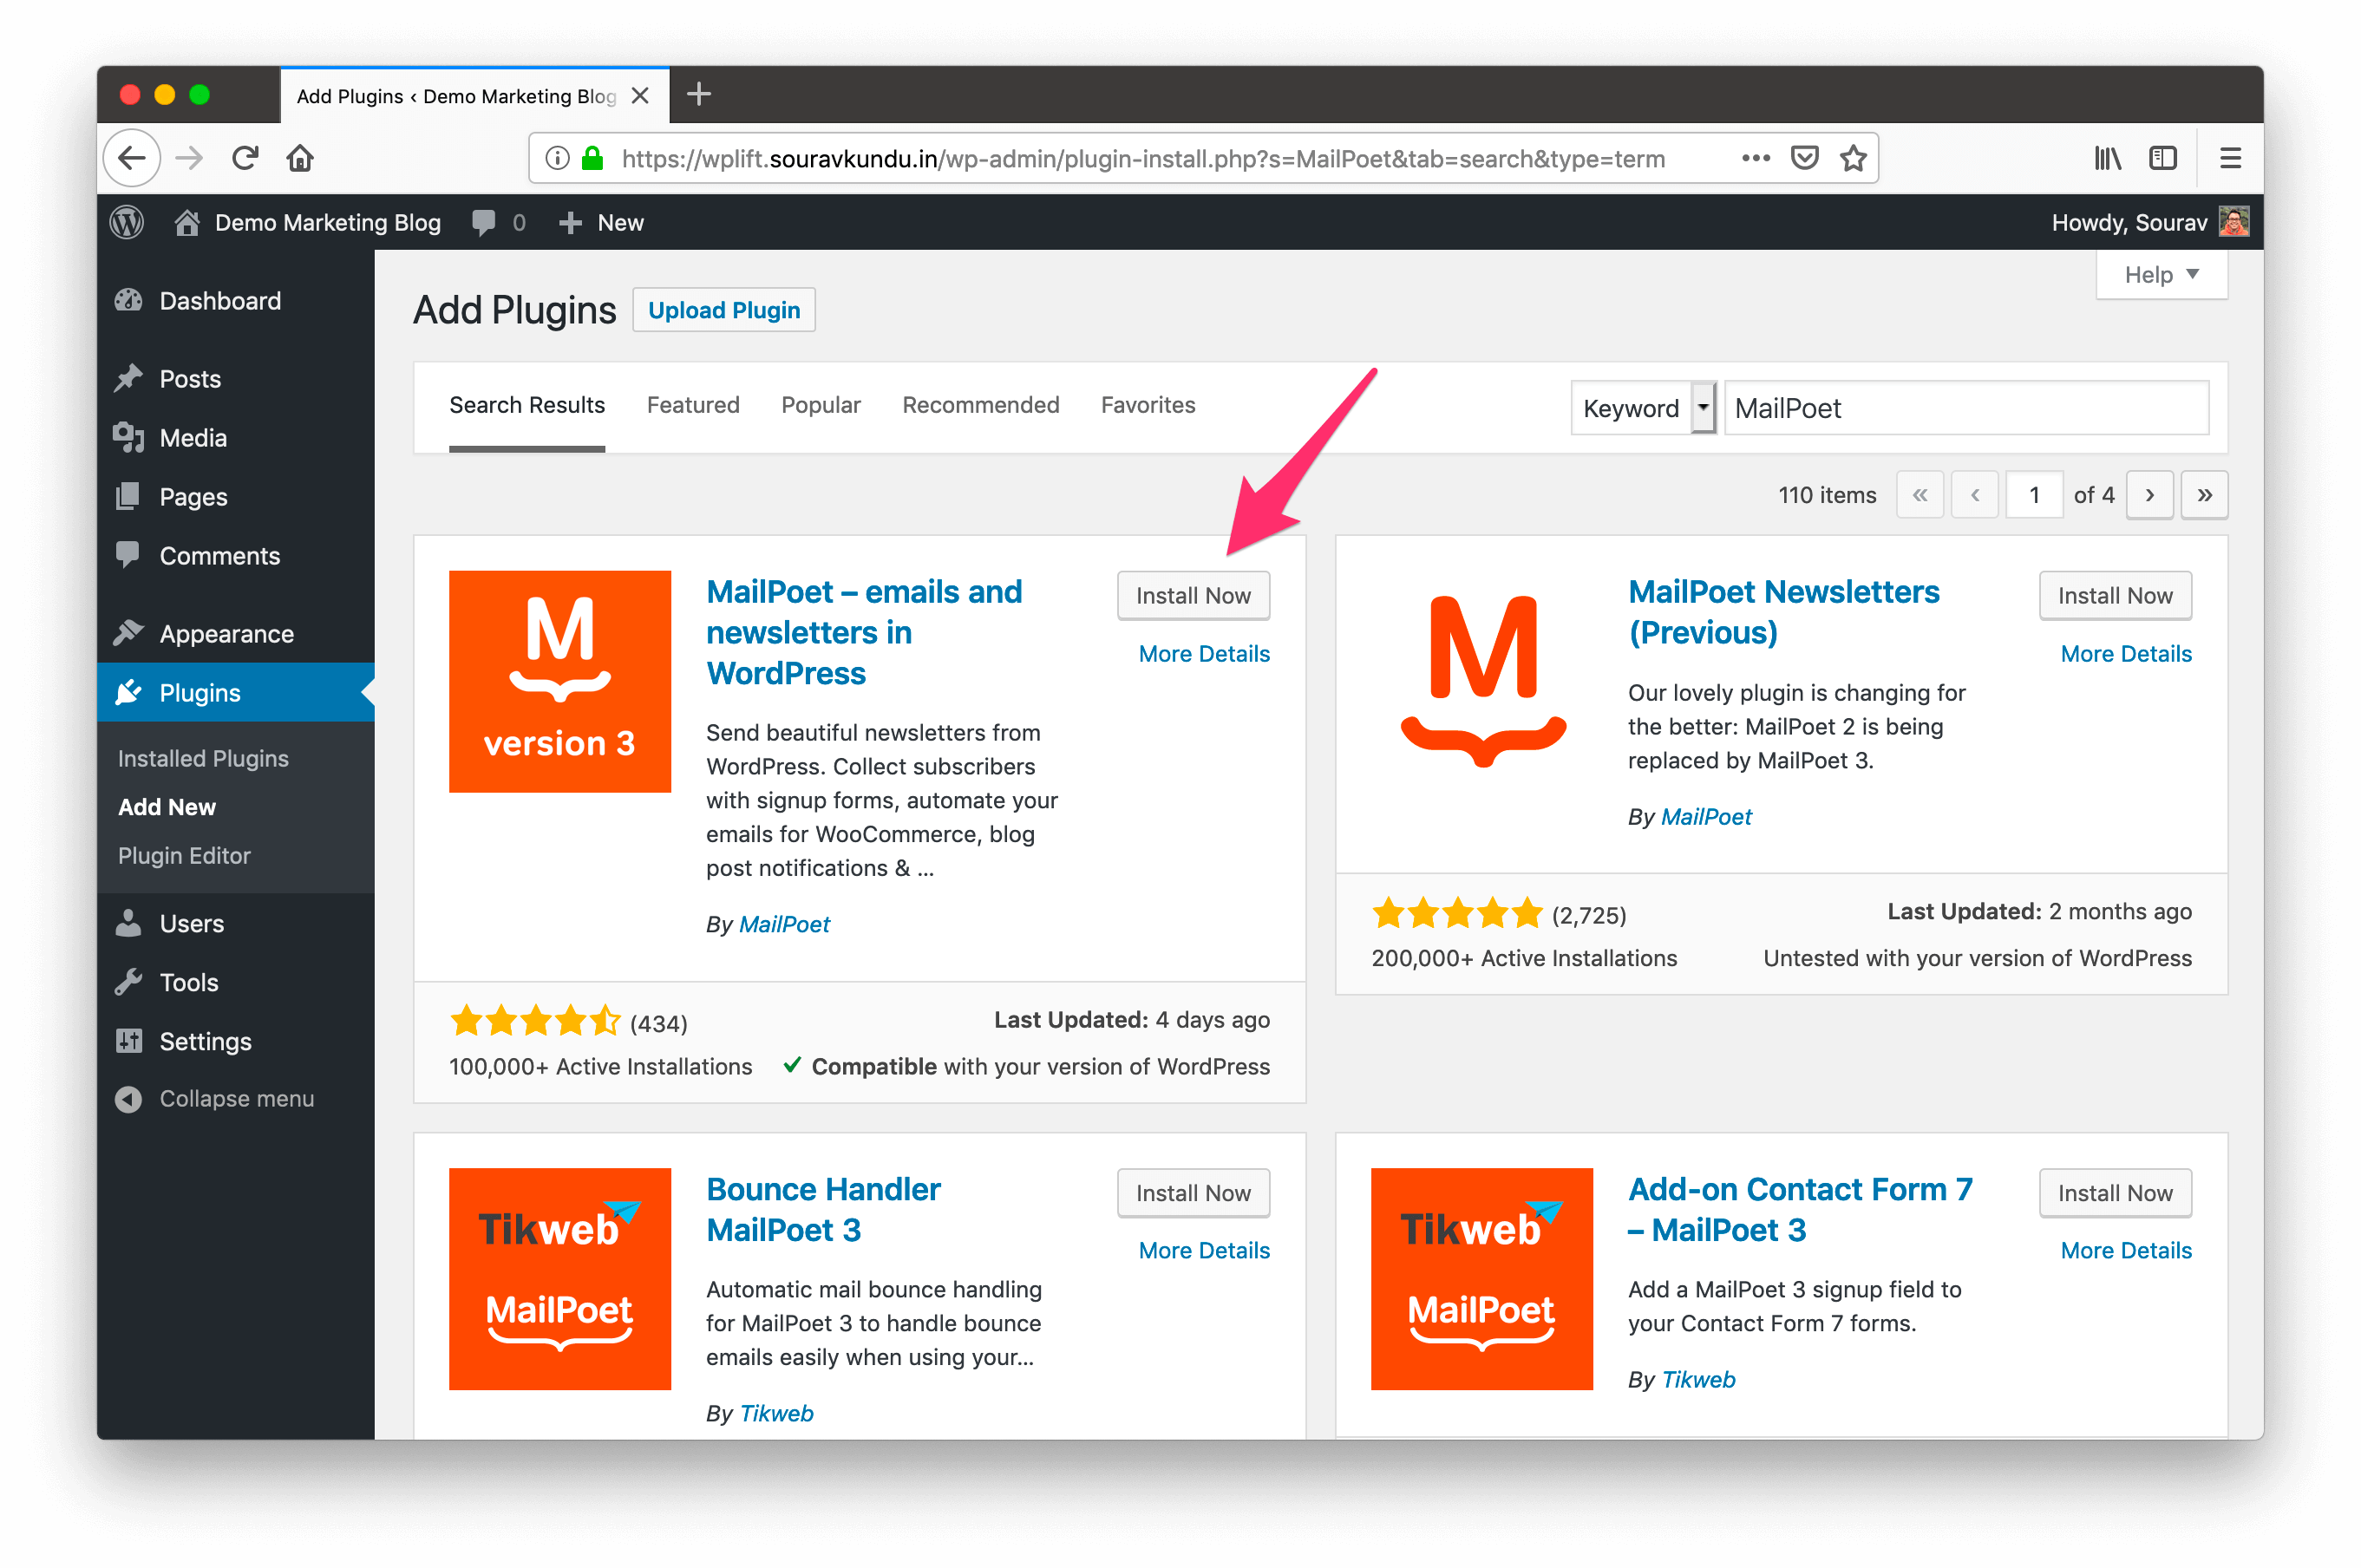
Start by heading over to the WordPress dashboard → Plugins → Add New and search for “MailPoet”.
Press on Install Now to install and activate the plugin.
MailPoet Plugin: Initial Configuration
Once the plugin is activated, you’ll see a new entry in the WordPress sidebar called “MailPoet”. Click on it to begin the plugin’s initial setup.
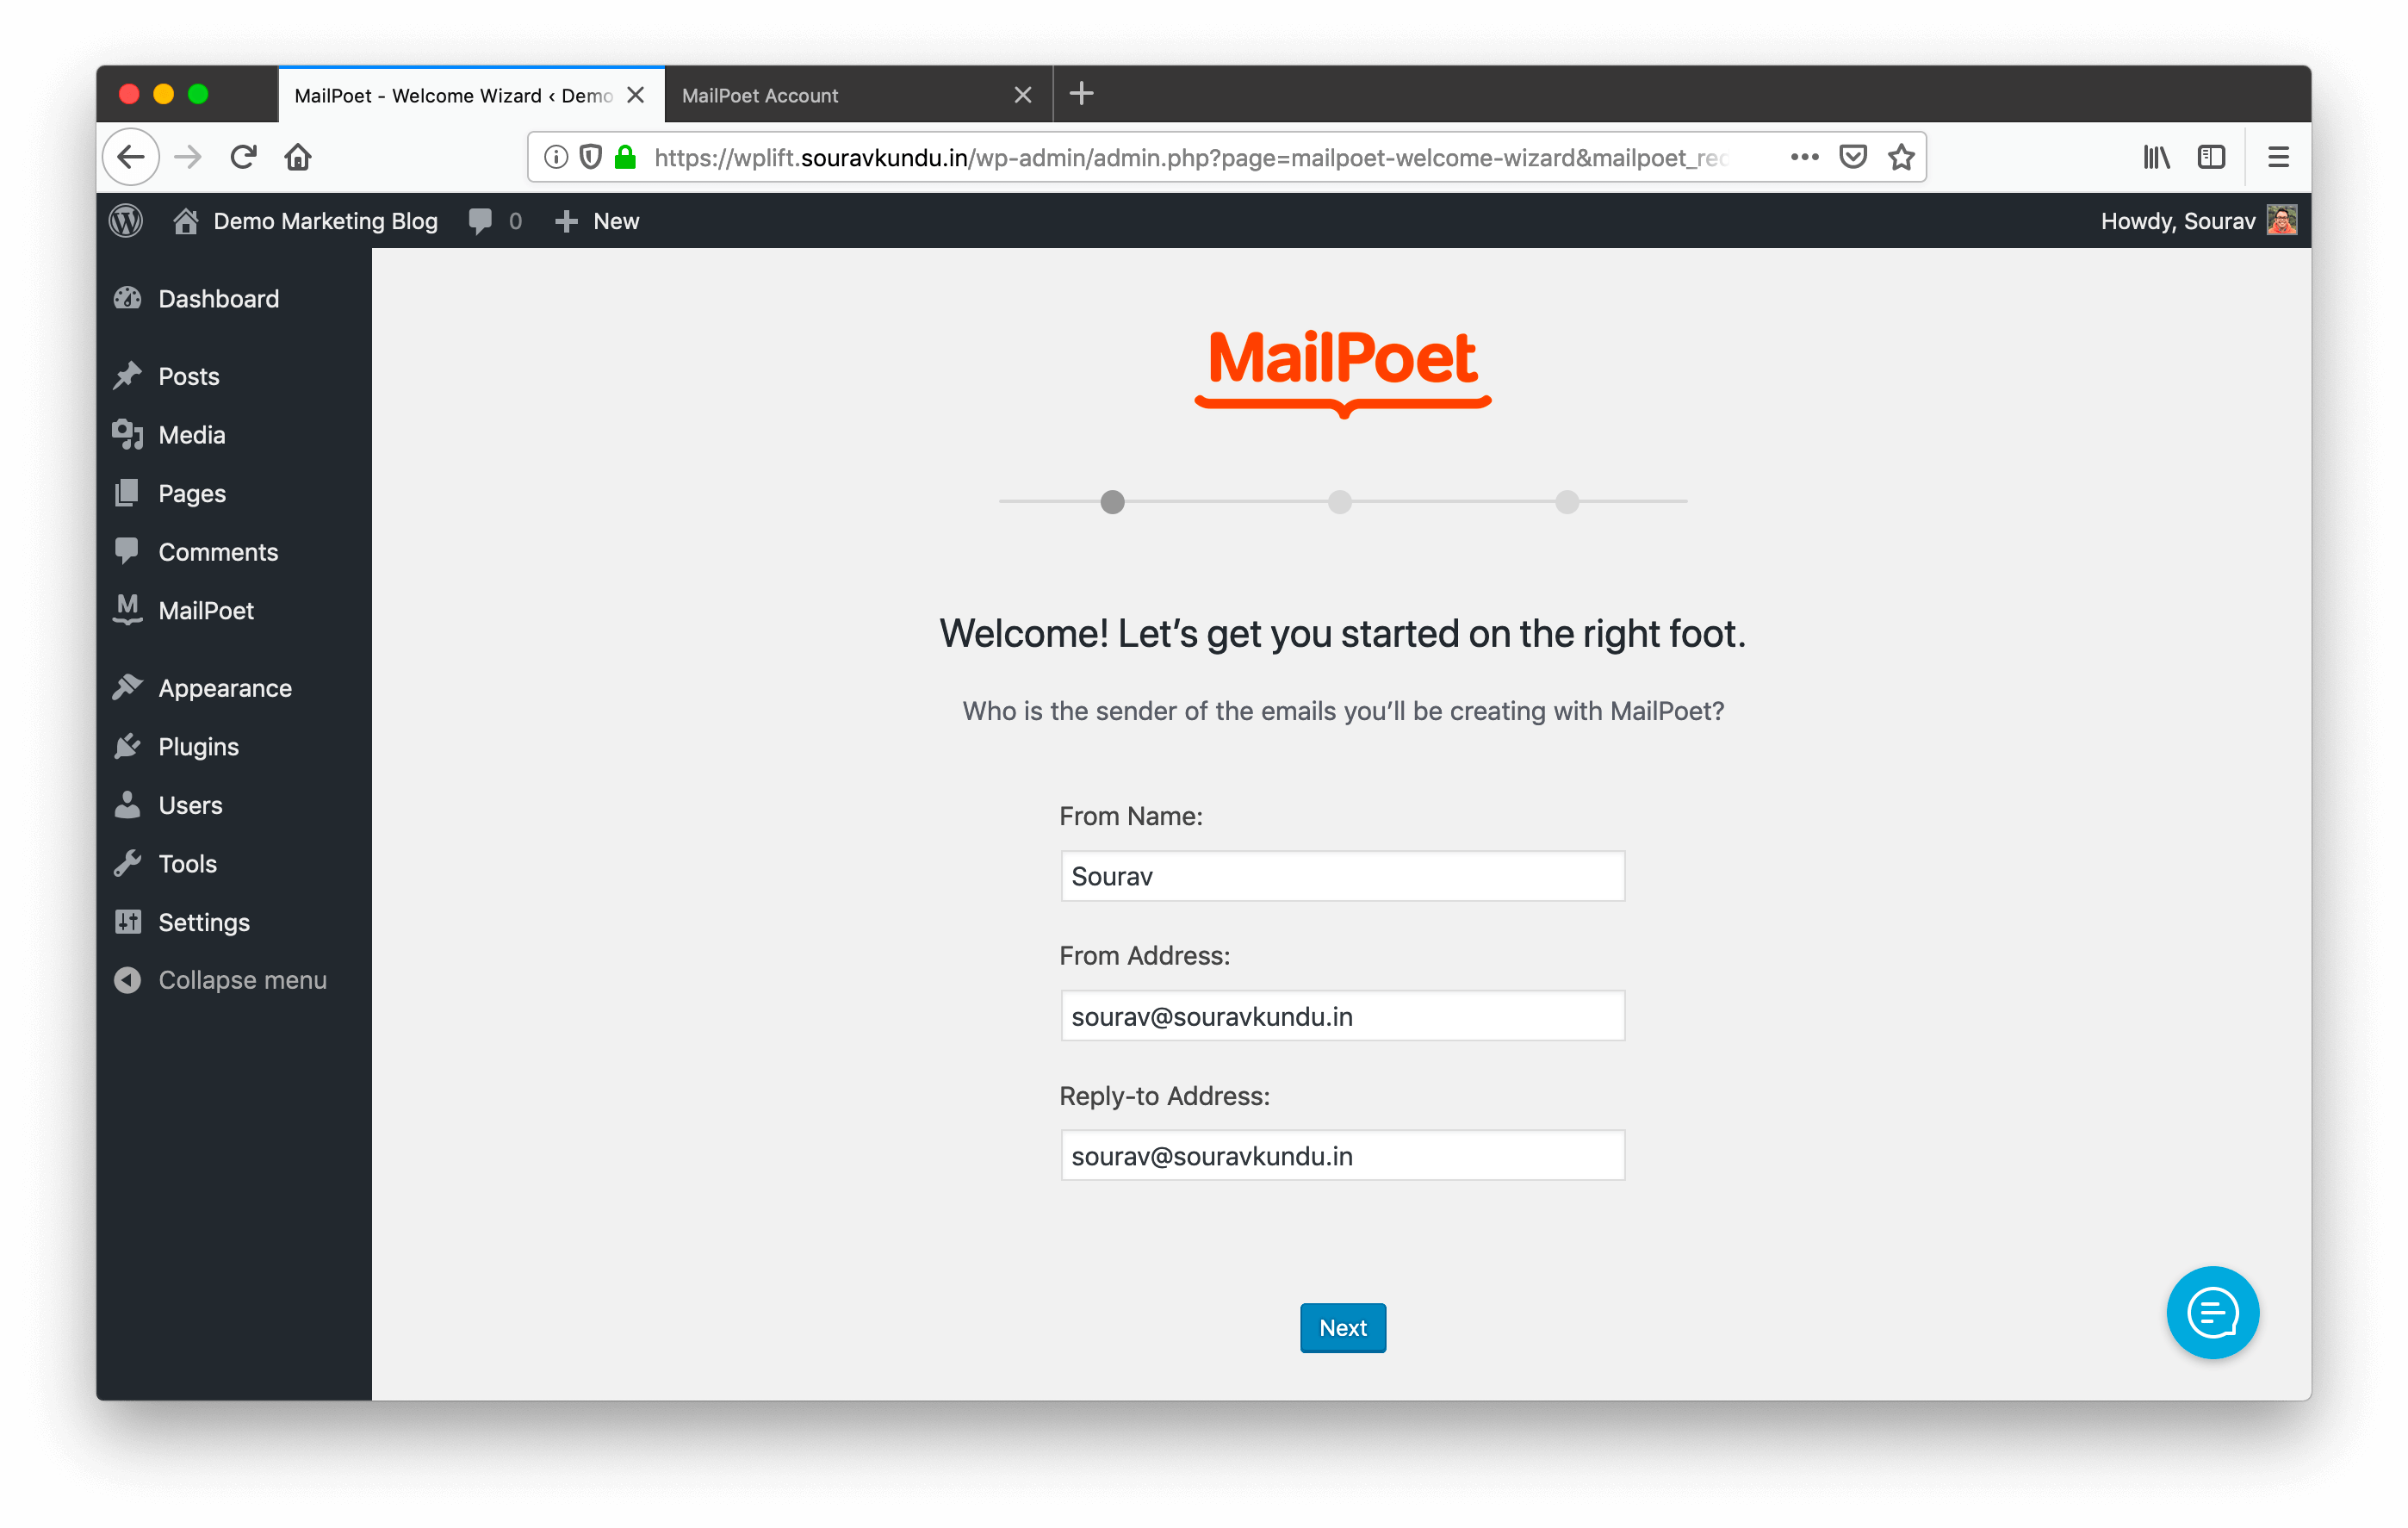
In the above screenshot, the fields represent the sender’s information. When you send a newsletter, this data will be displayed to your subscriber. Here’s an example of how that looks:

It’s a good practice to use the same email ID for the from and reply-to email addresses, for newsletters pertaining to personal blogs. This makes communication easy — by enabling your subscribers to hit “Reply” from their email client directly.
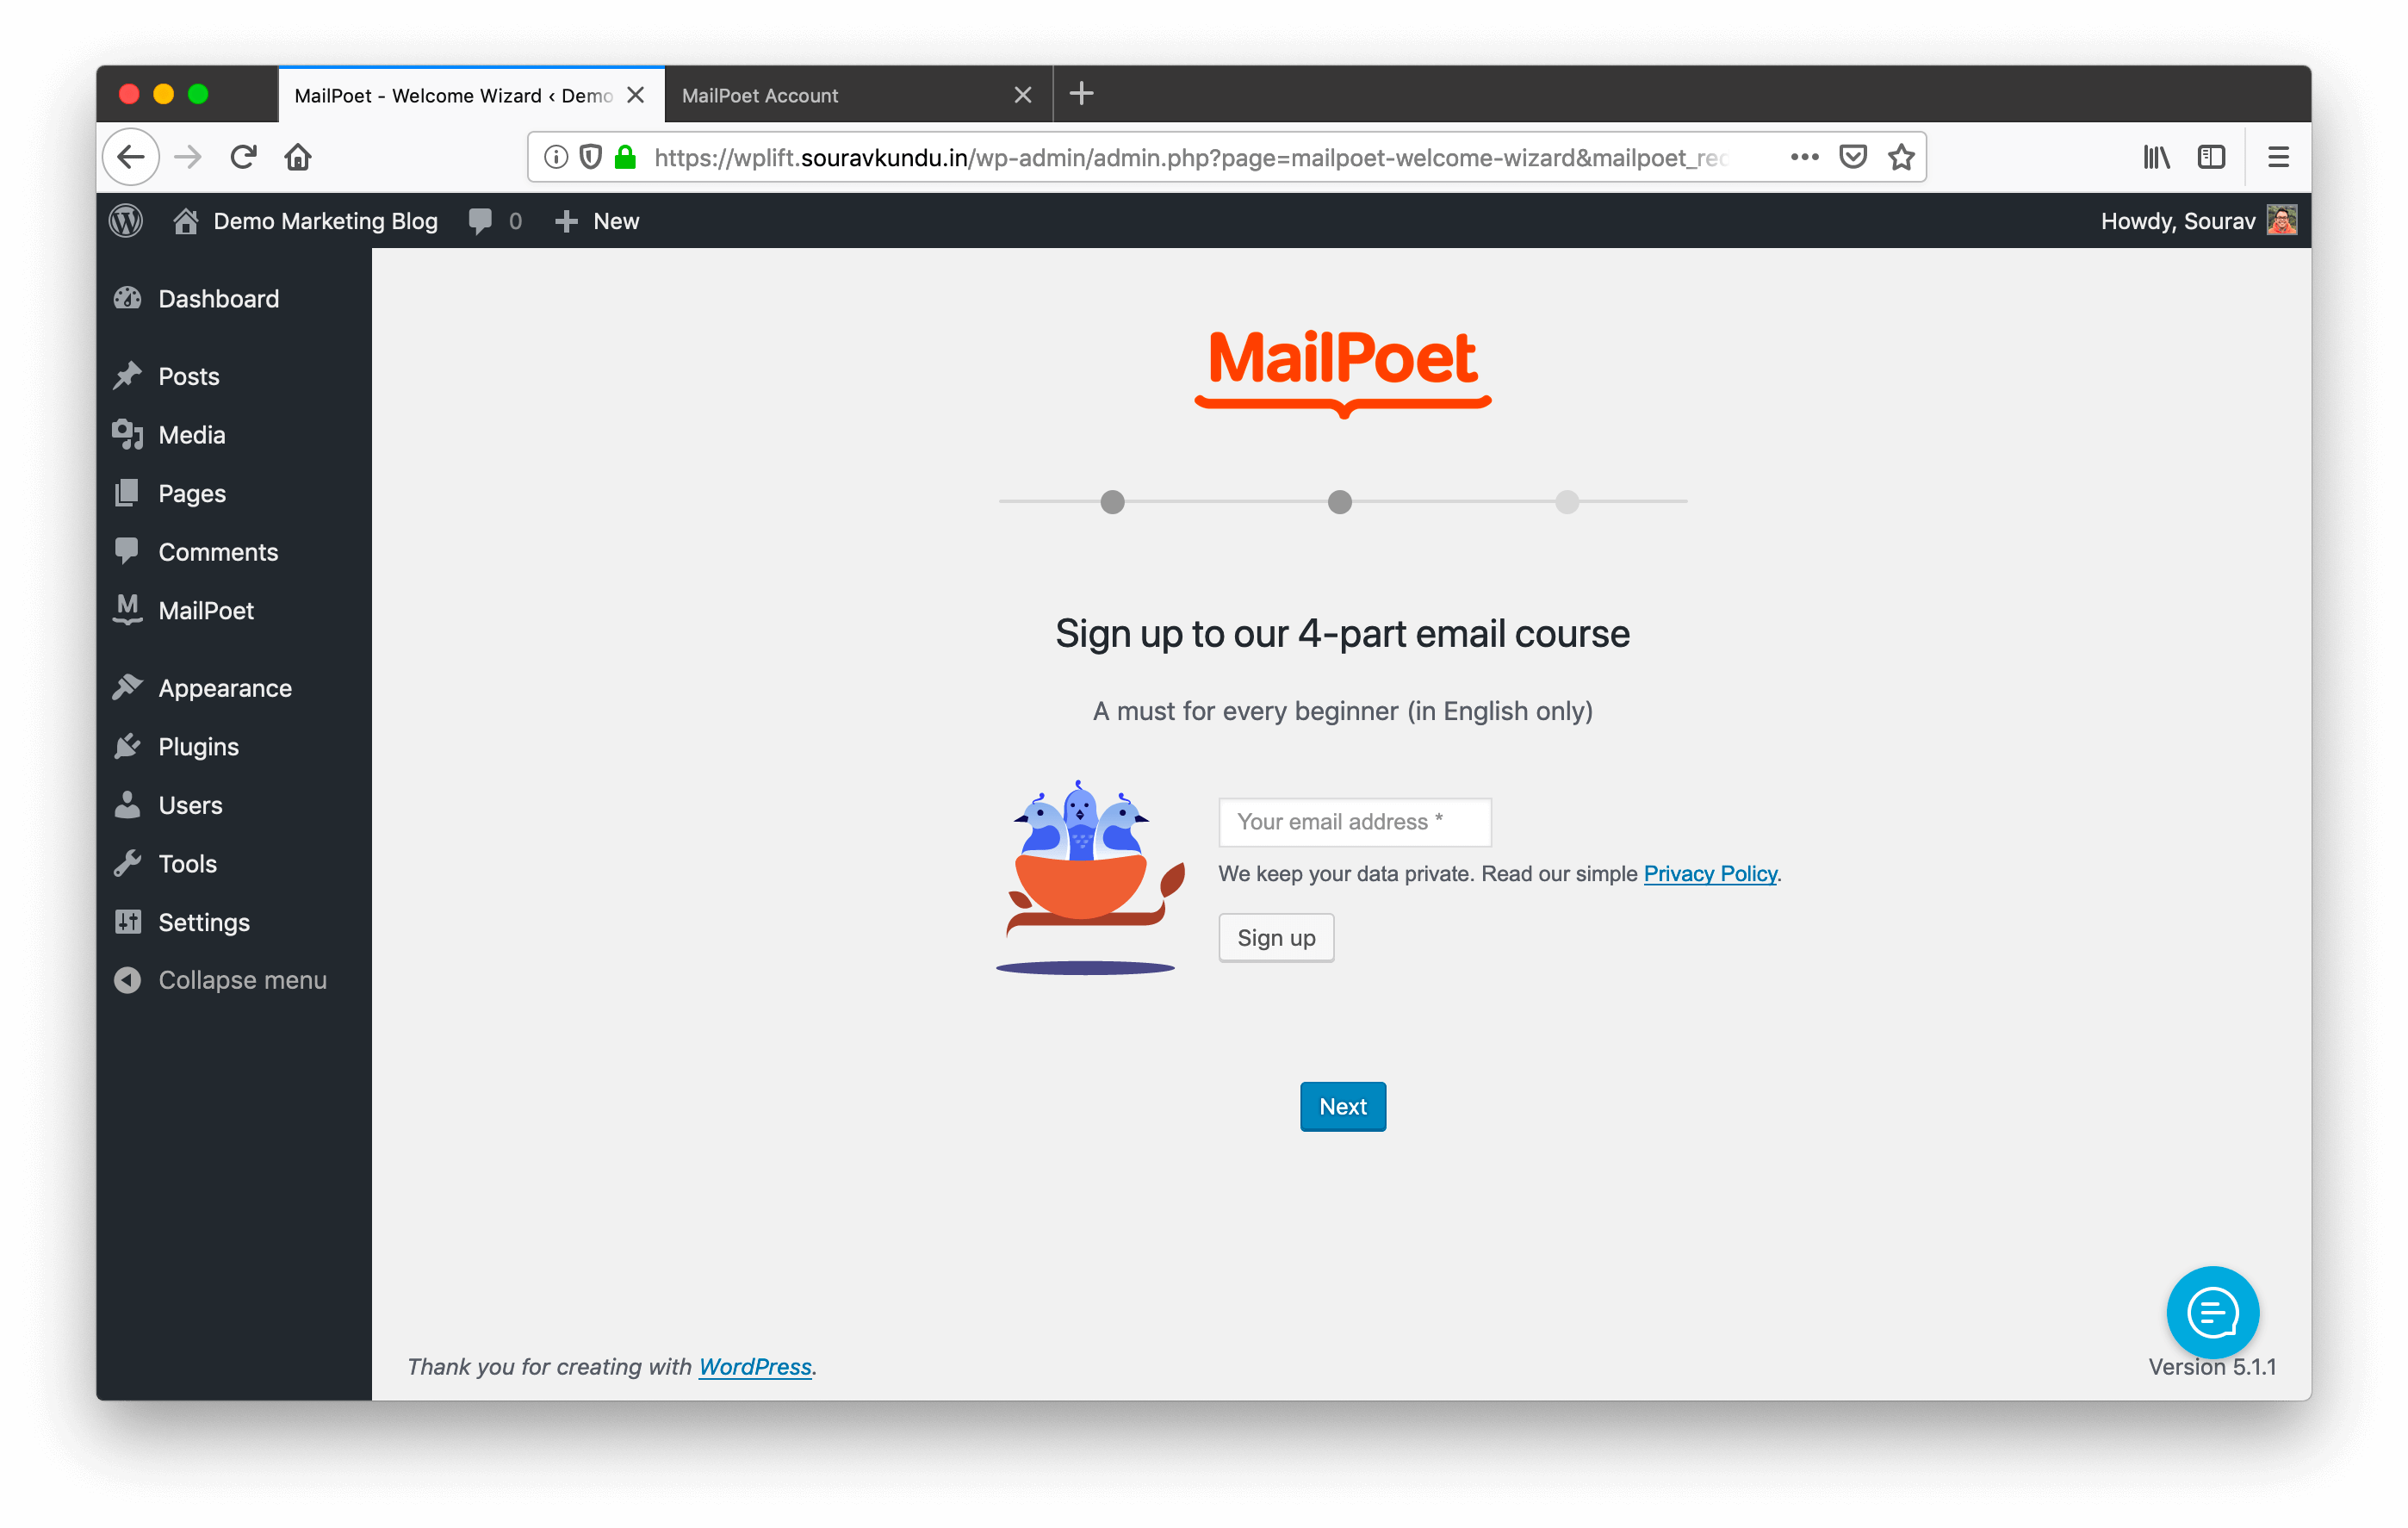
In the second step, you have the option to subscribe to MailPoet’s own email marketing course. If you’re new to the game, you should subscribe. Moving on to the next step!
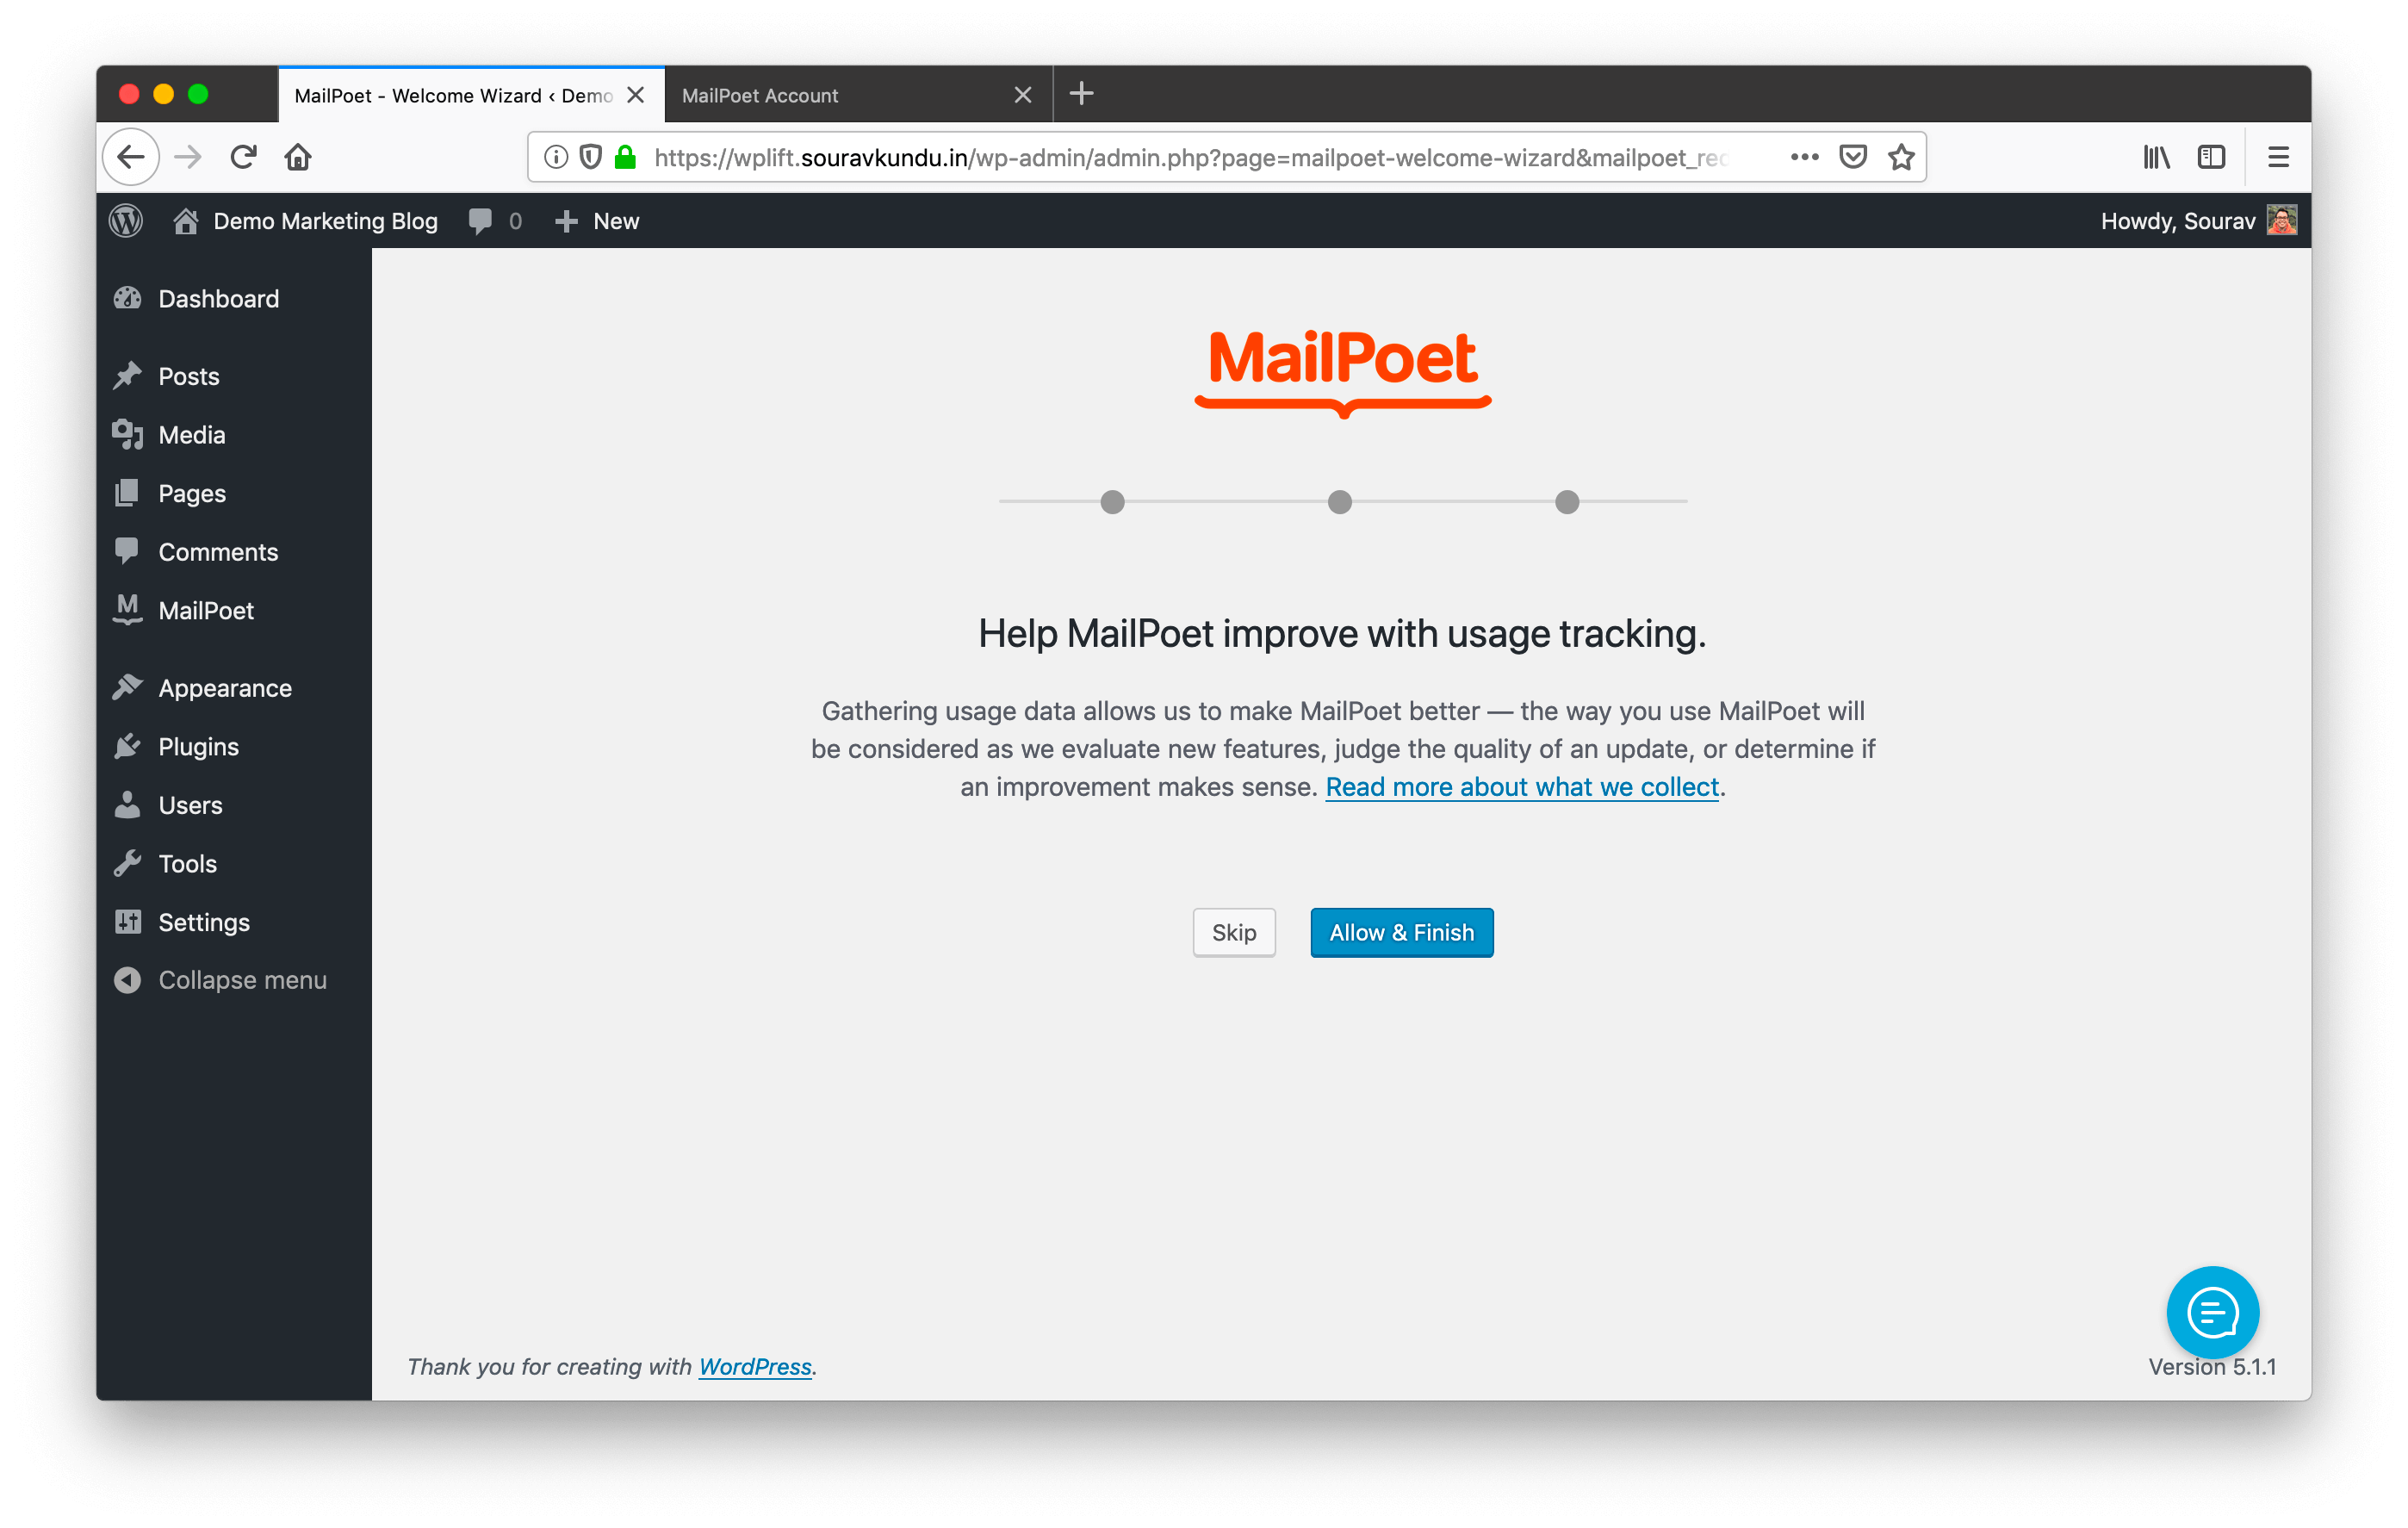
In the final phase of the configuration, you can share anonymized usage data that would help improve the plugin. (I always prefer to share this!).
That concludes the initial plugin configuration. Next, we’ll show you how to create an email list.
Creating your First Email List in MailPoet
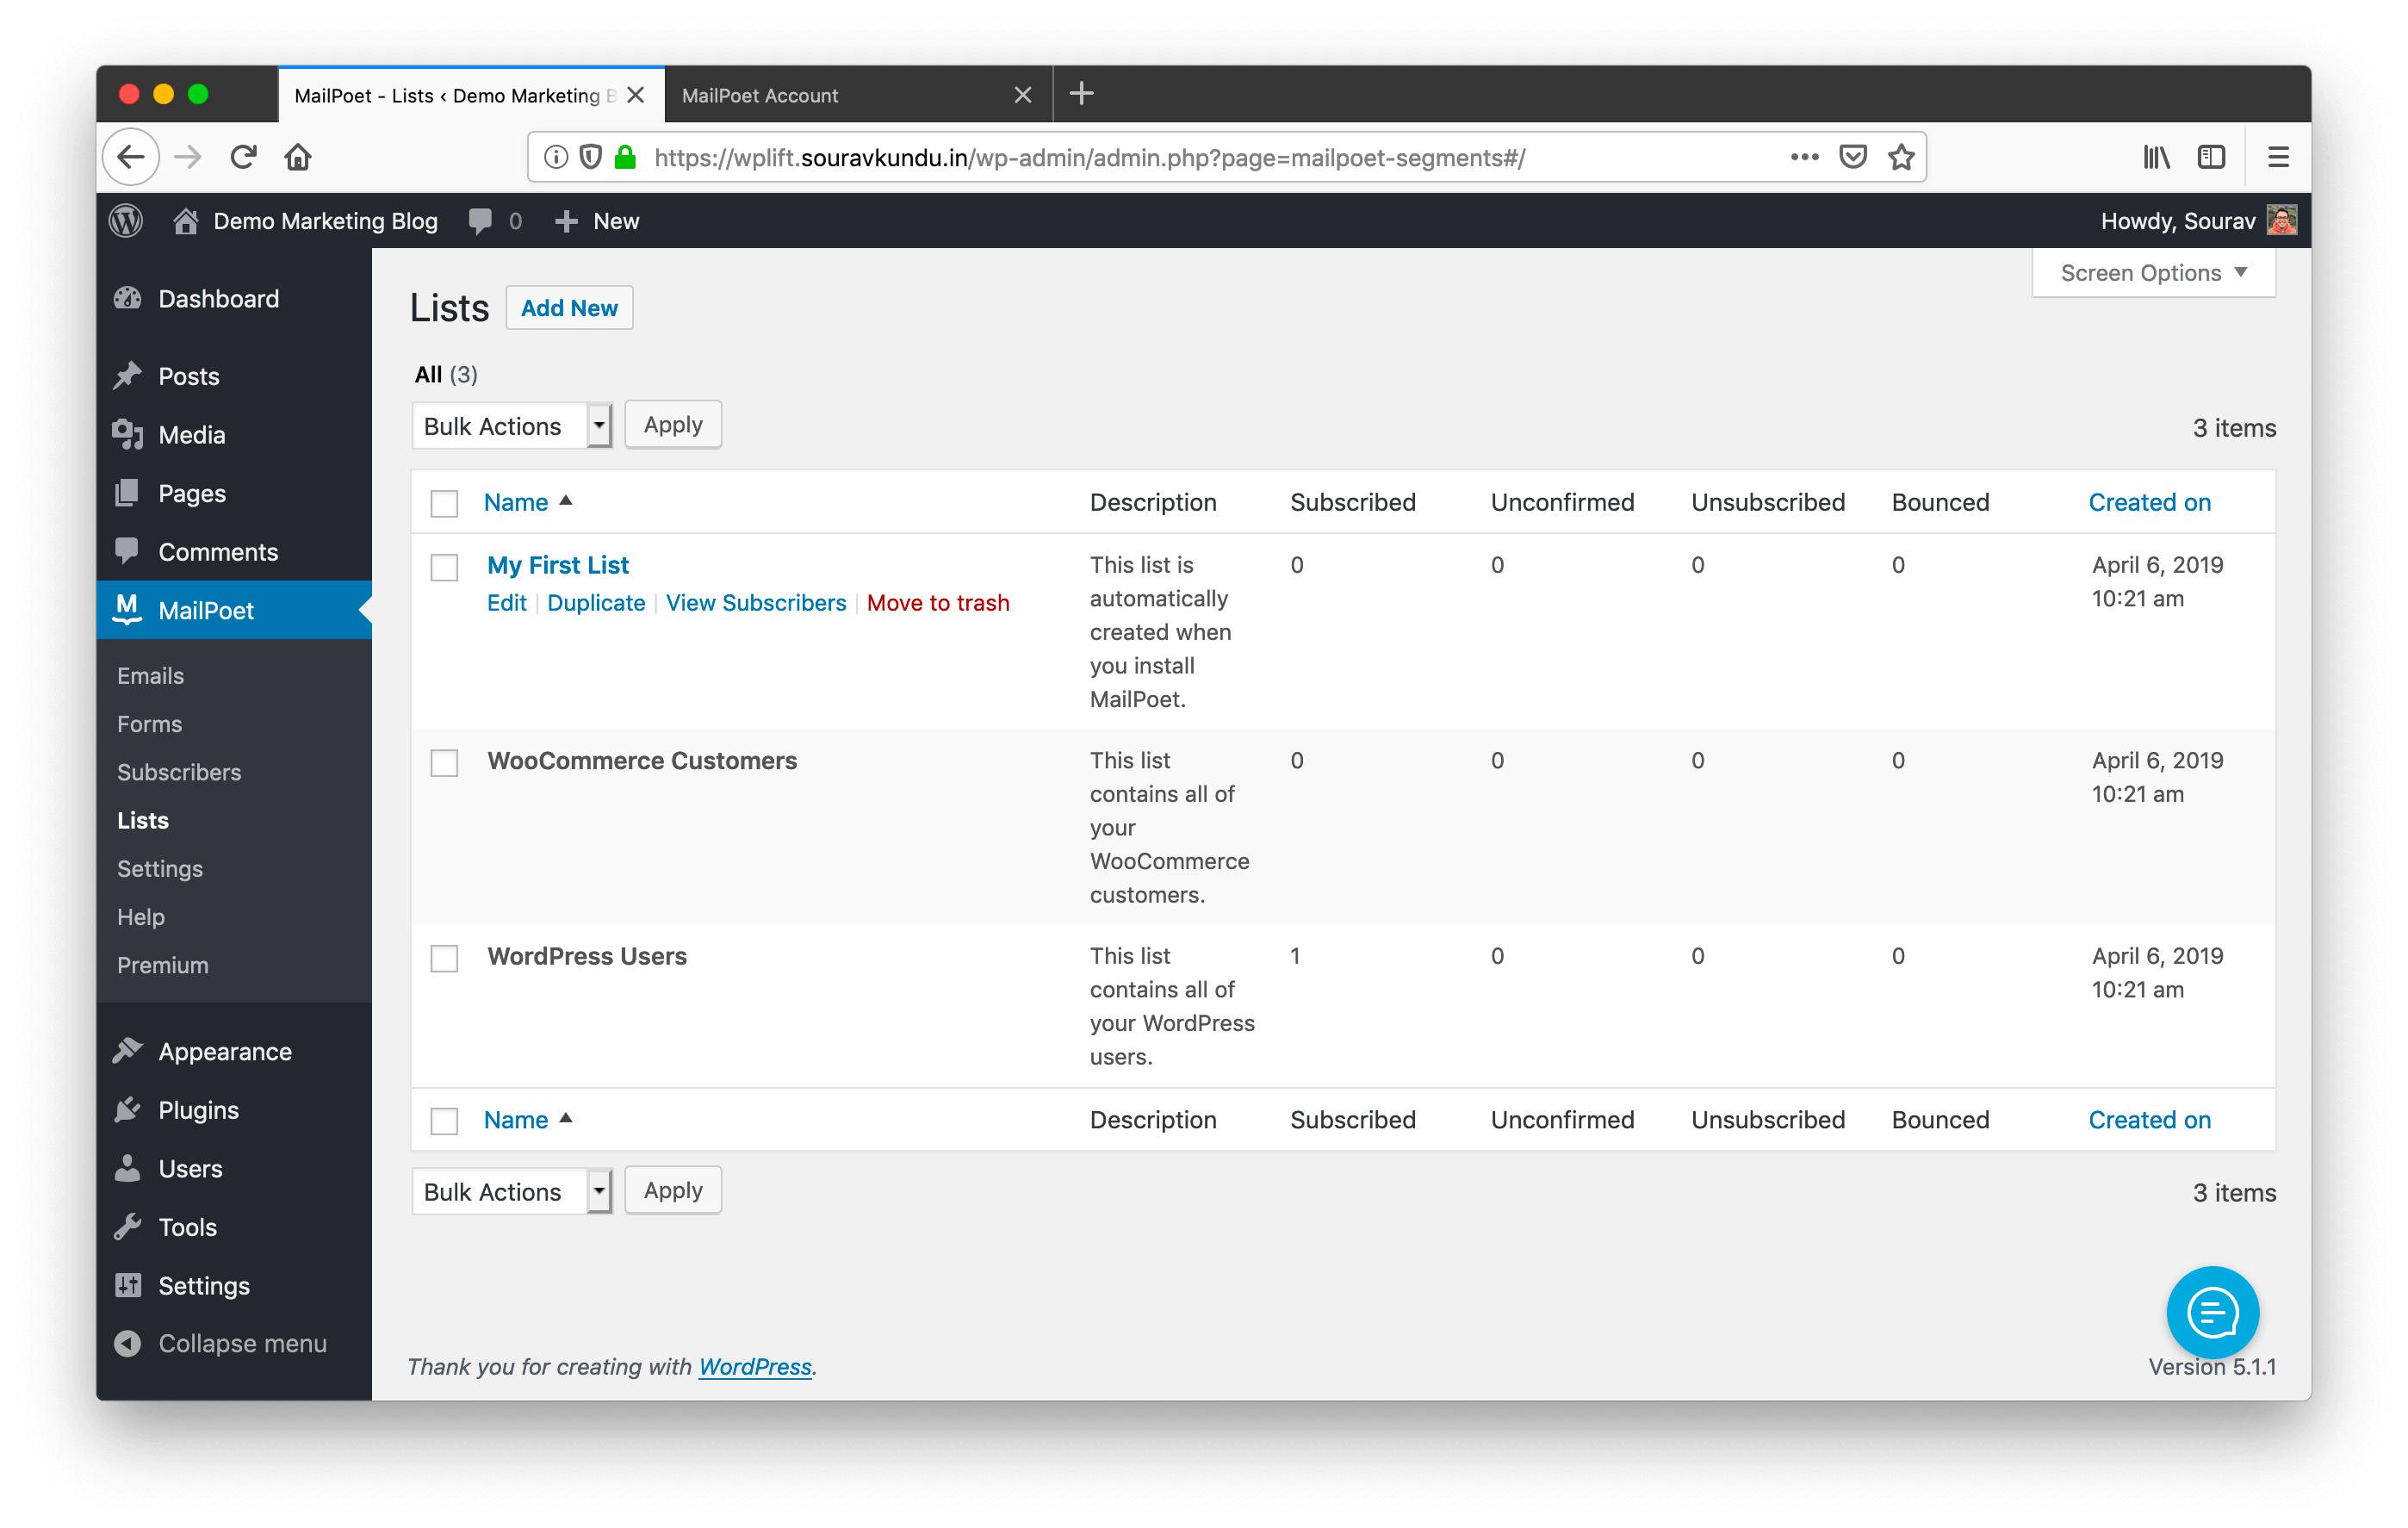
MailPoet comes with three default email lists:
- A demo list called My First List.
- A WooCommerce Customers list that automatically imports your WooCommerce customers, if the plugin is installed.
- A WordPress Users list that imports all your existing WordPress users. This is the same set of users that are present in the Users tab in the WordPress sidebar.

In our tutorial, we’ll rename the My First List to Newsletter Subscribers and use it as our primary email list.
Importing Existing Subscribers to MailPoet
If you have a current list of email subscribers, you can easily import them to any list in MailPoet.
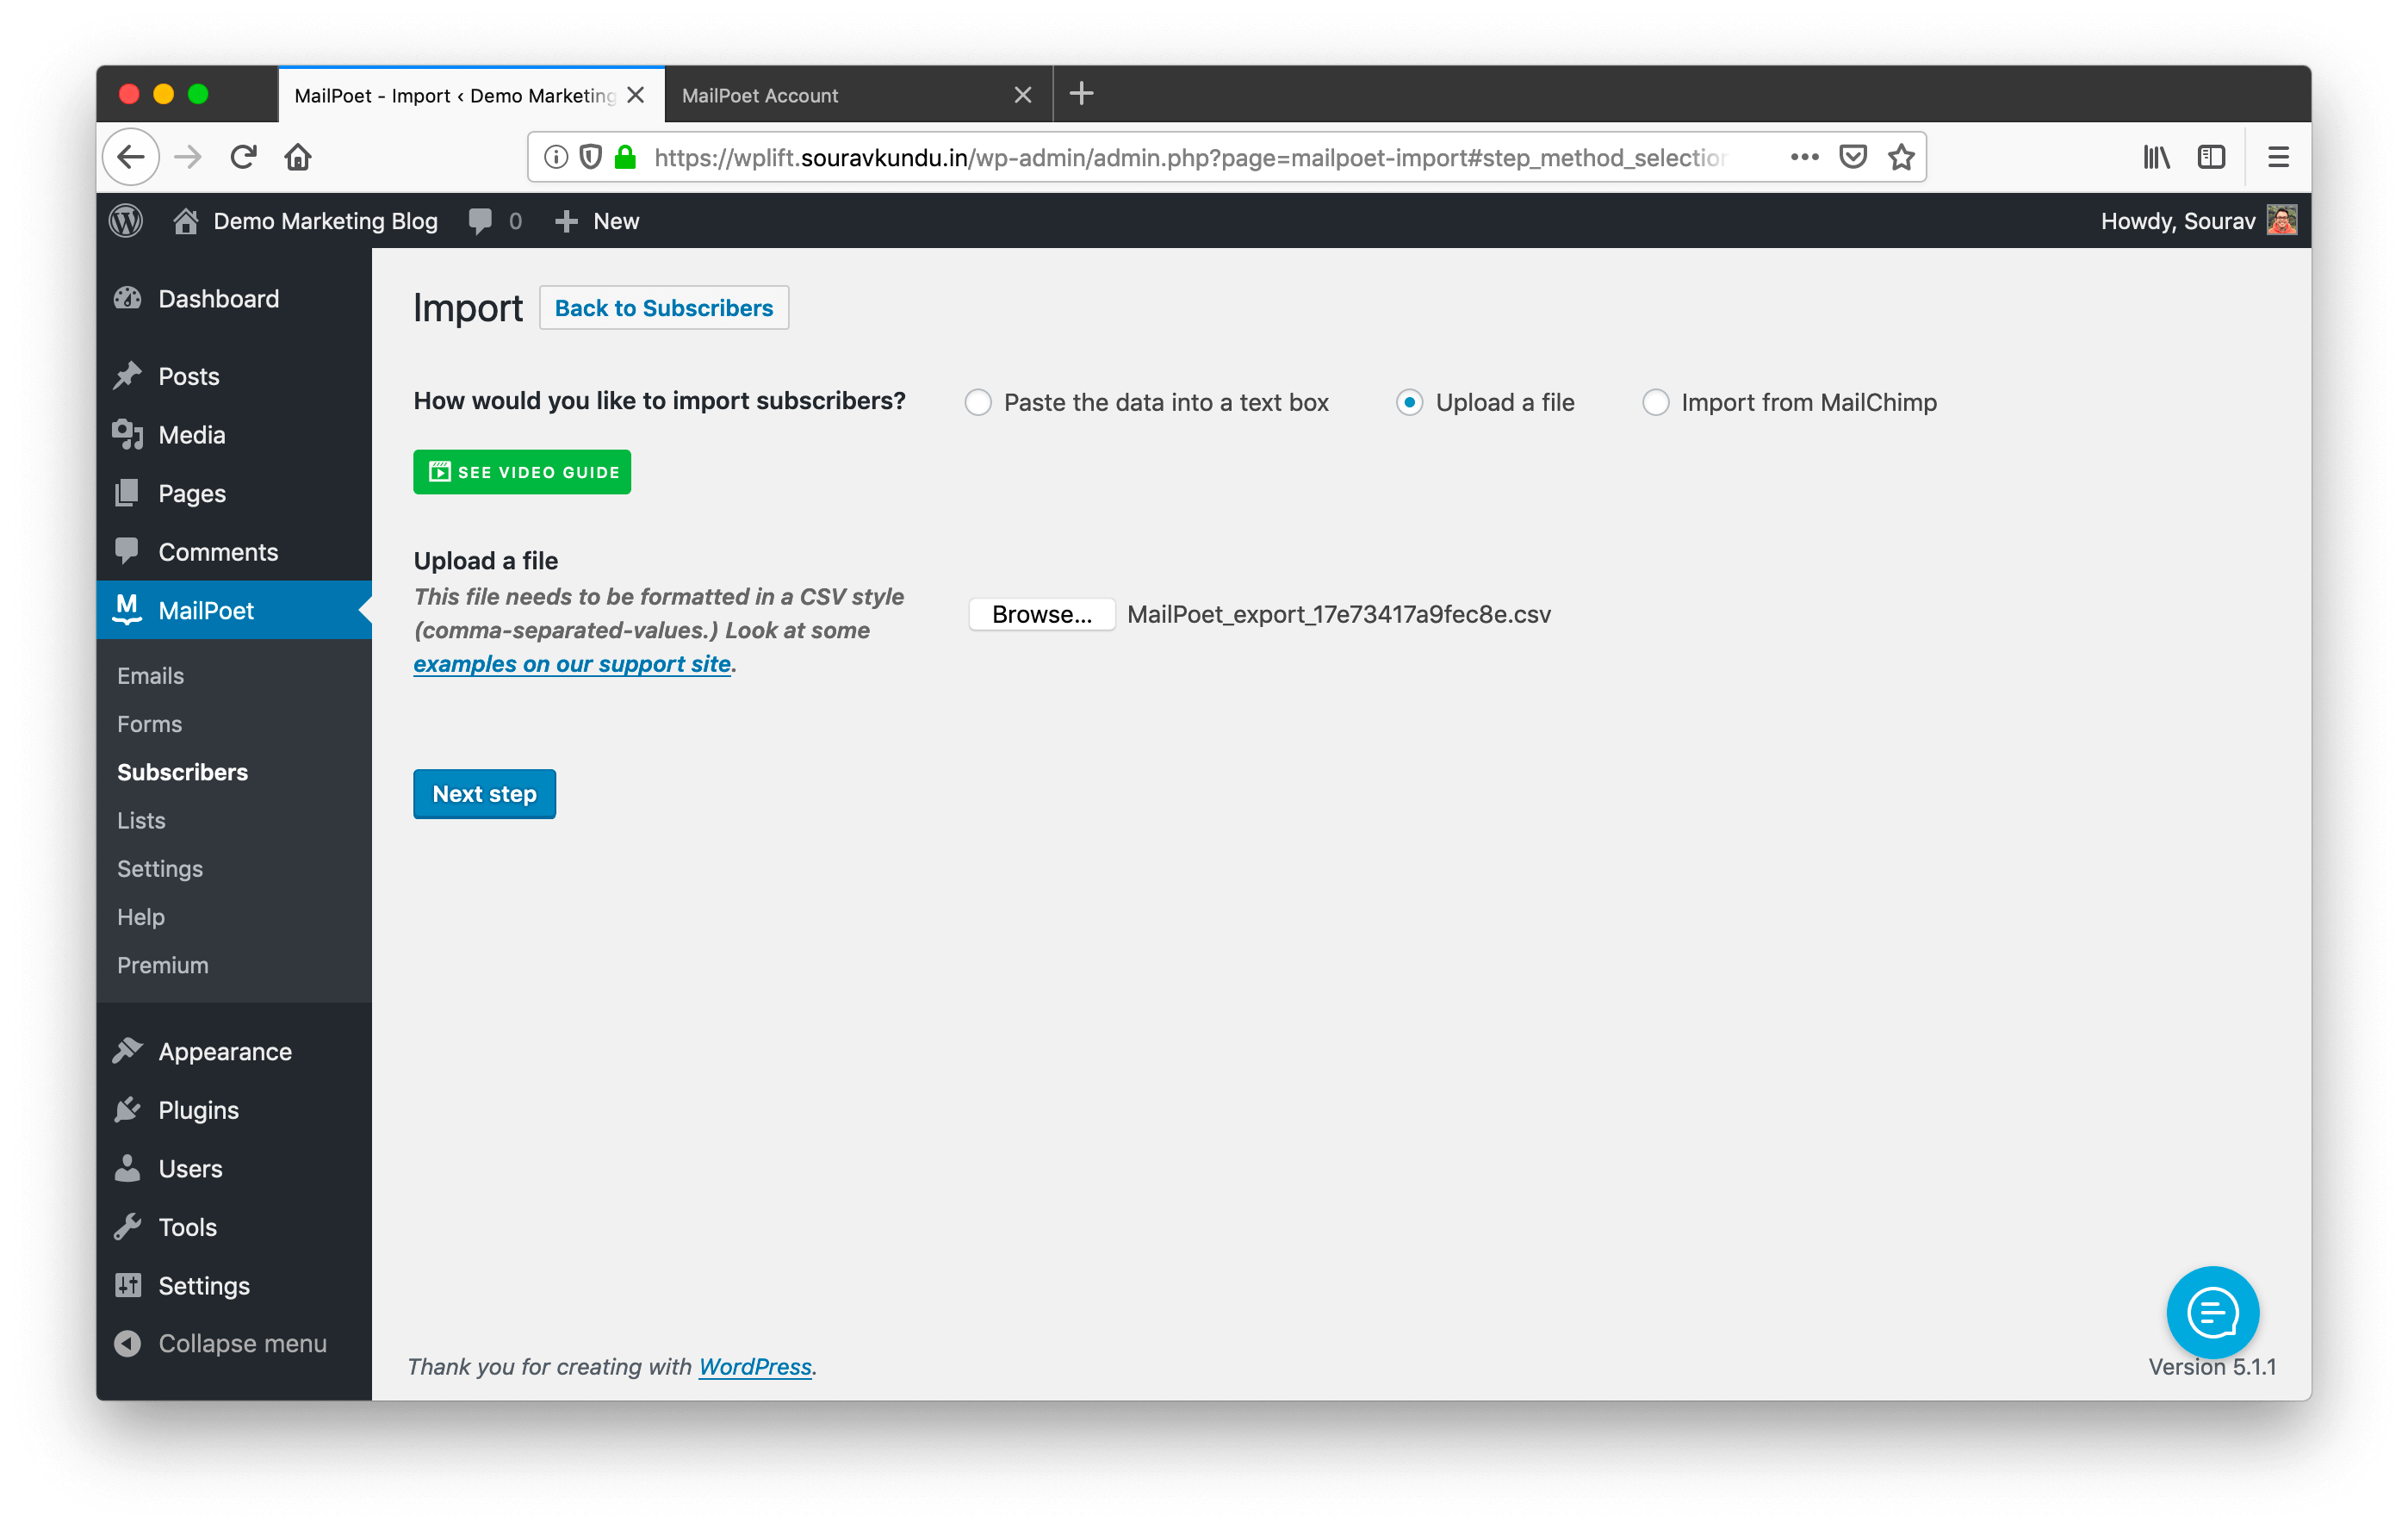
Go to WordPress dashboard → MailPoet → Subscribers and click on Import.
You can either copy-paste user information or upload a CSV file. If you’re using MailChimp, then you can directly import subscribers via their API.
Creating a Newsletter in WordPress using MailPoet
There are three types of newsletters you can create with MailPoet:
- The first one is the default newsletter, which is manually designed and sent. You can also schedule these newsletters to be sent at a specific date and time.
- The second one is an automated newsletter which is sent every time a new user signs up to your email list. These are popularly known as Welcome Emails.
- The third one is a Post Notification campaign, wherein email notifications are sent whenever a new post is published in your blog. This is great for sending quick email updates to your subscribers, without a single click.
Here’s how to create a simple Newsletter campaign in MailPoet.
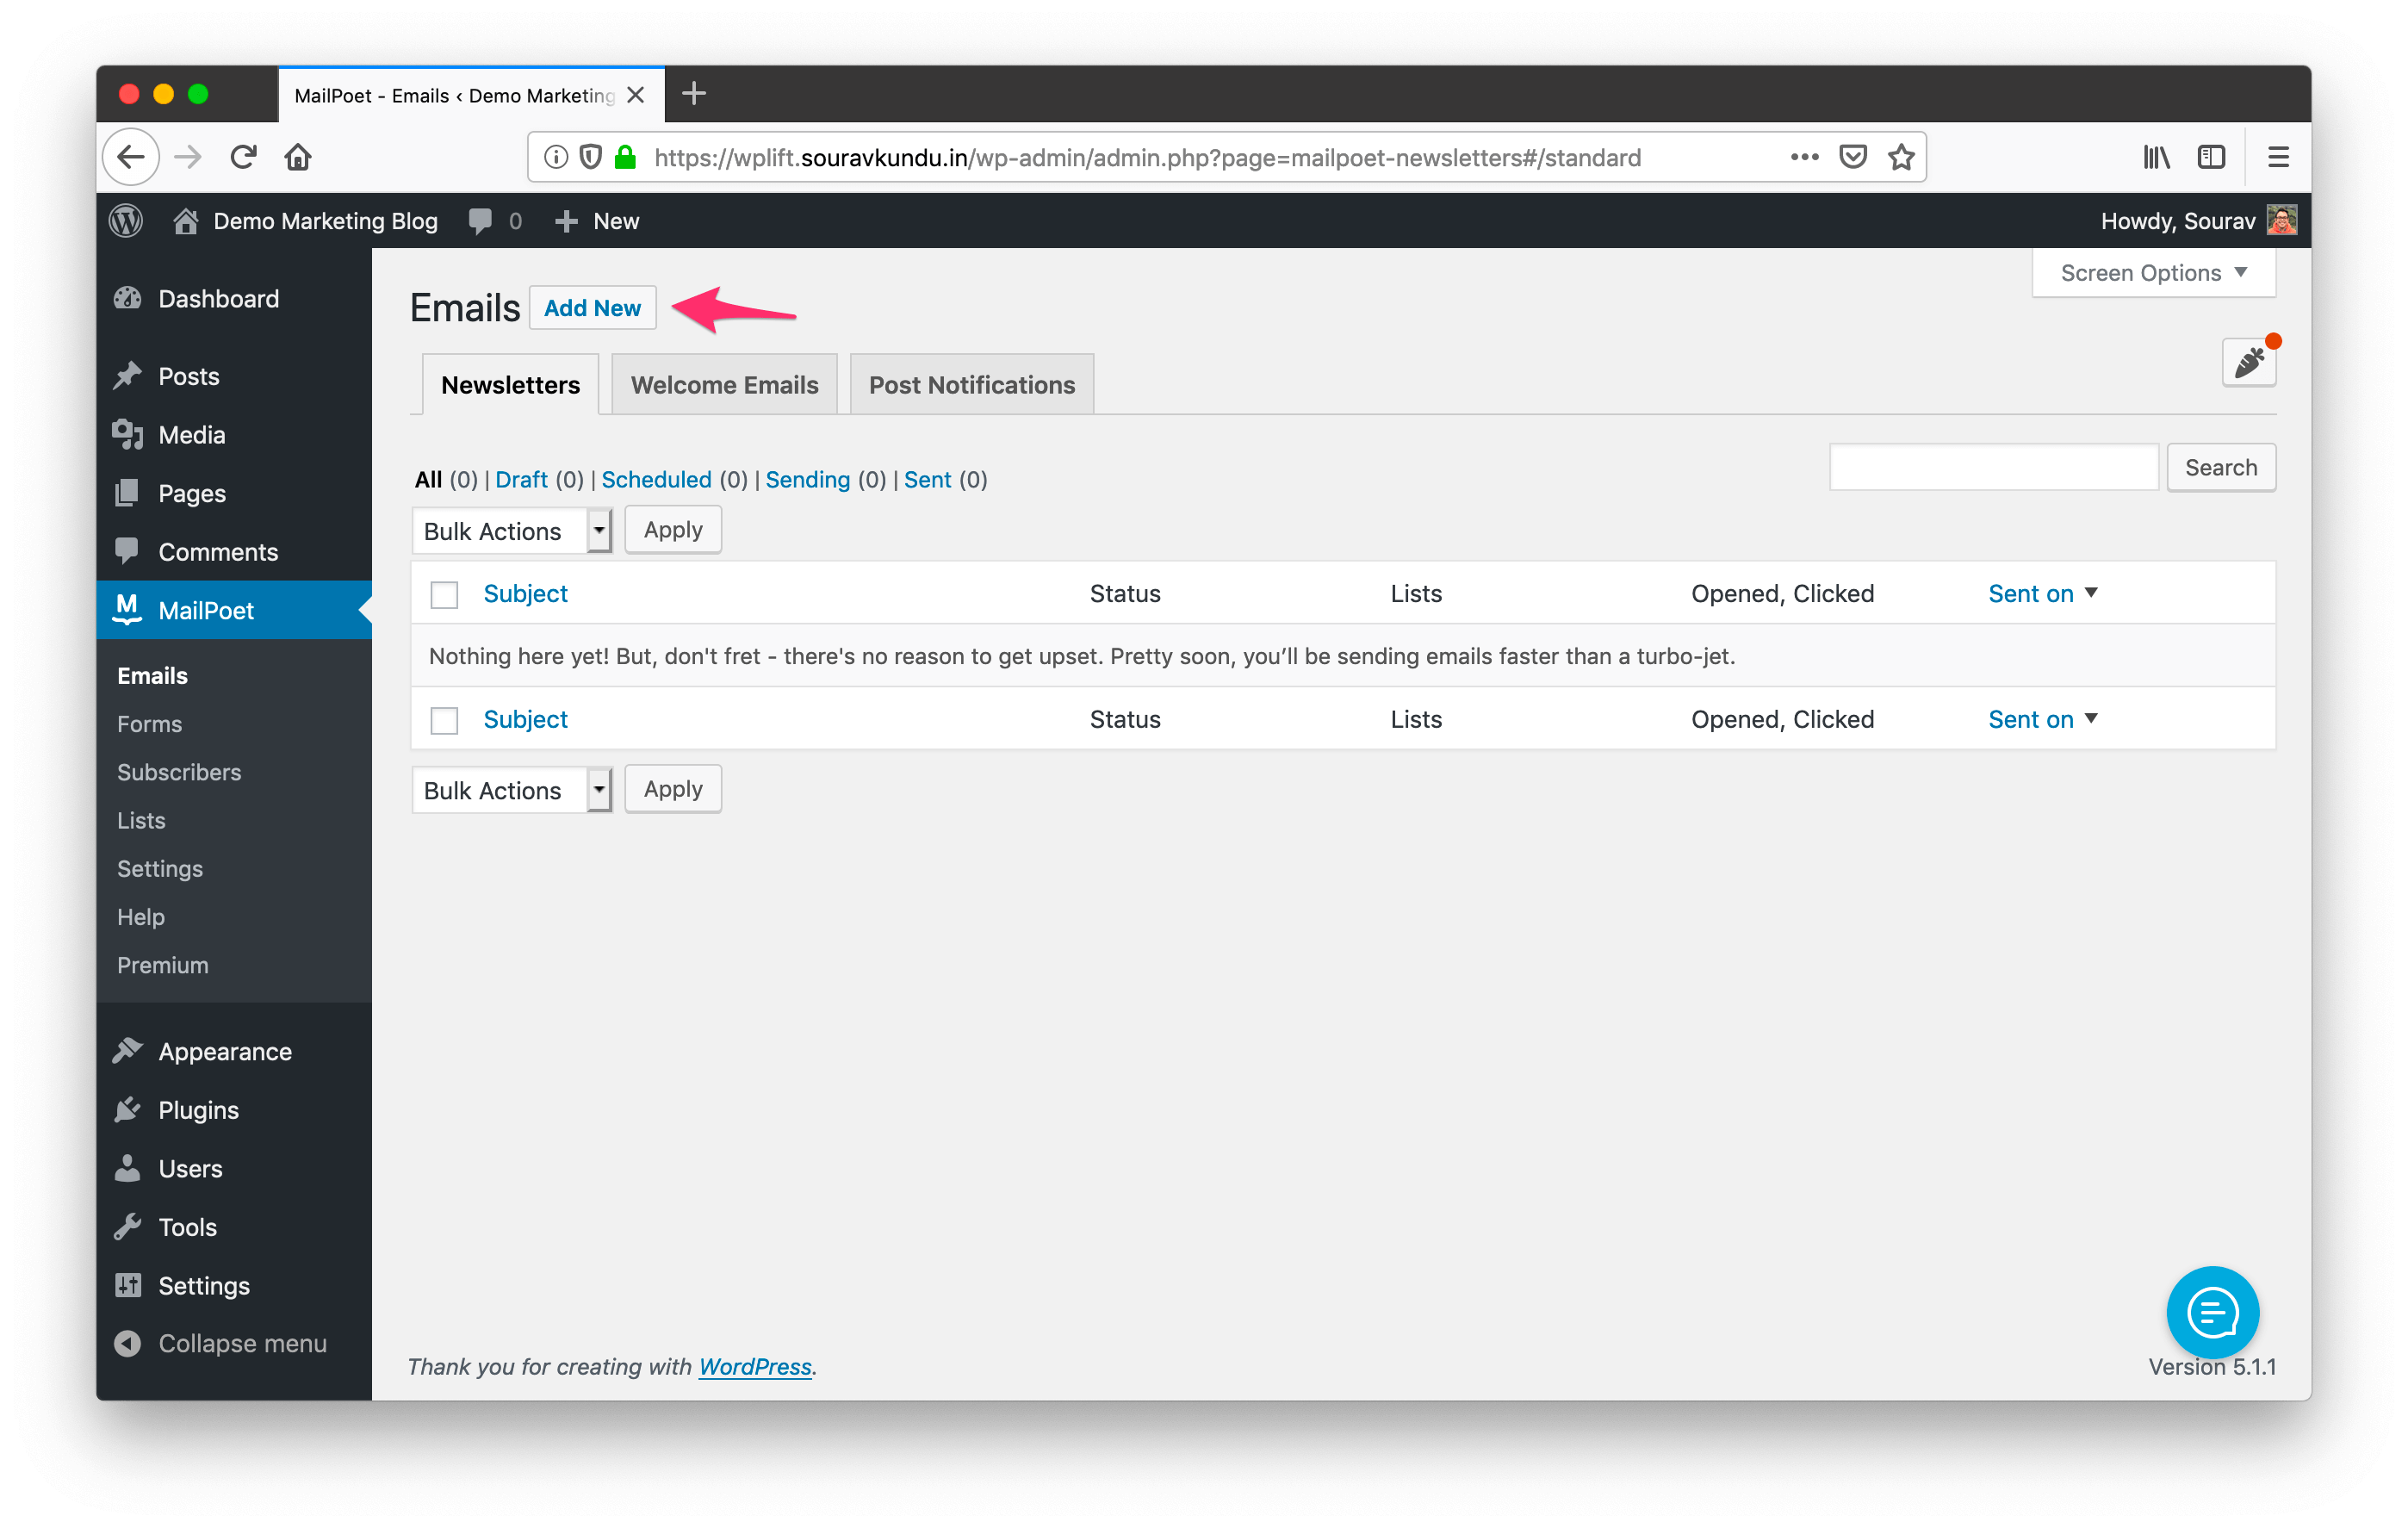
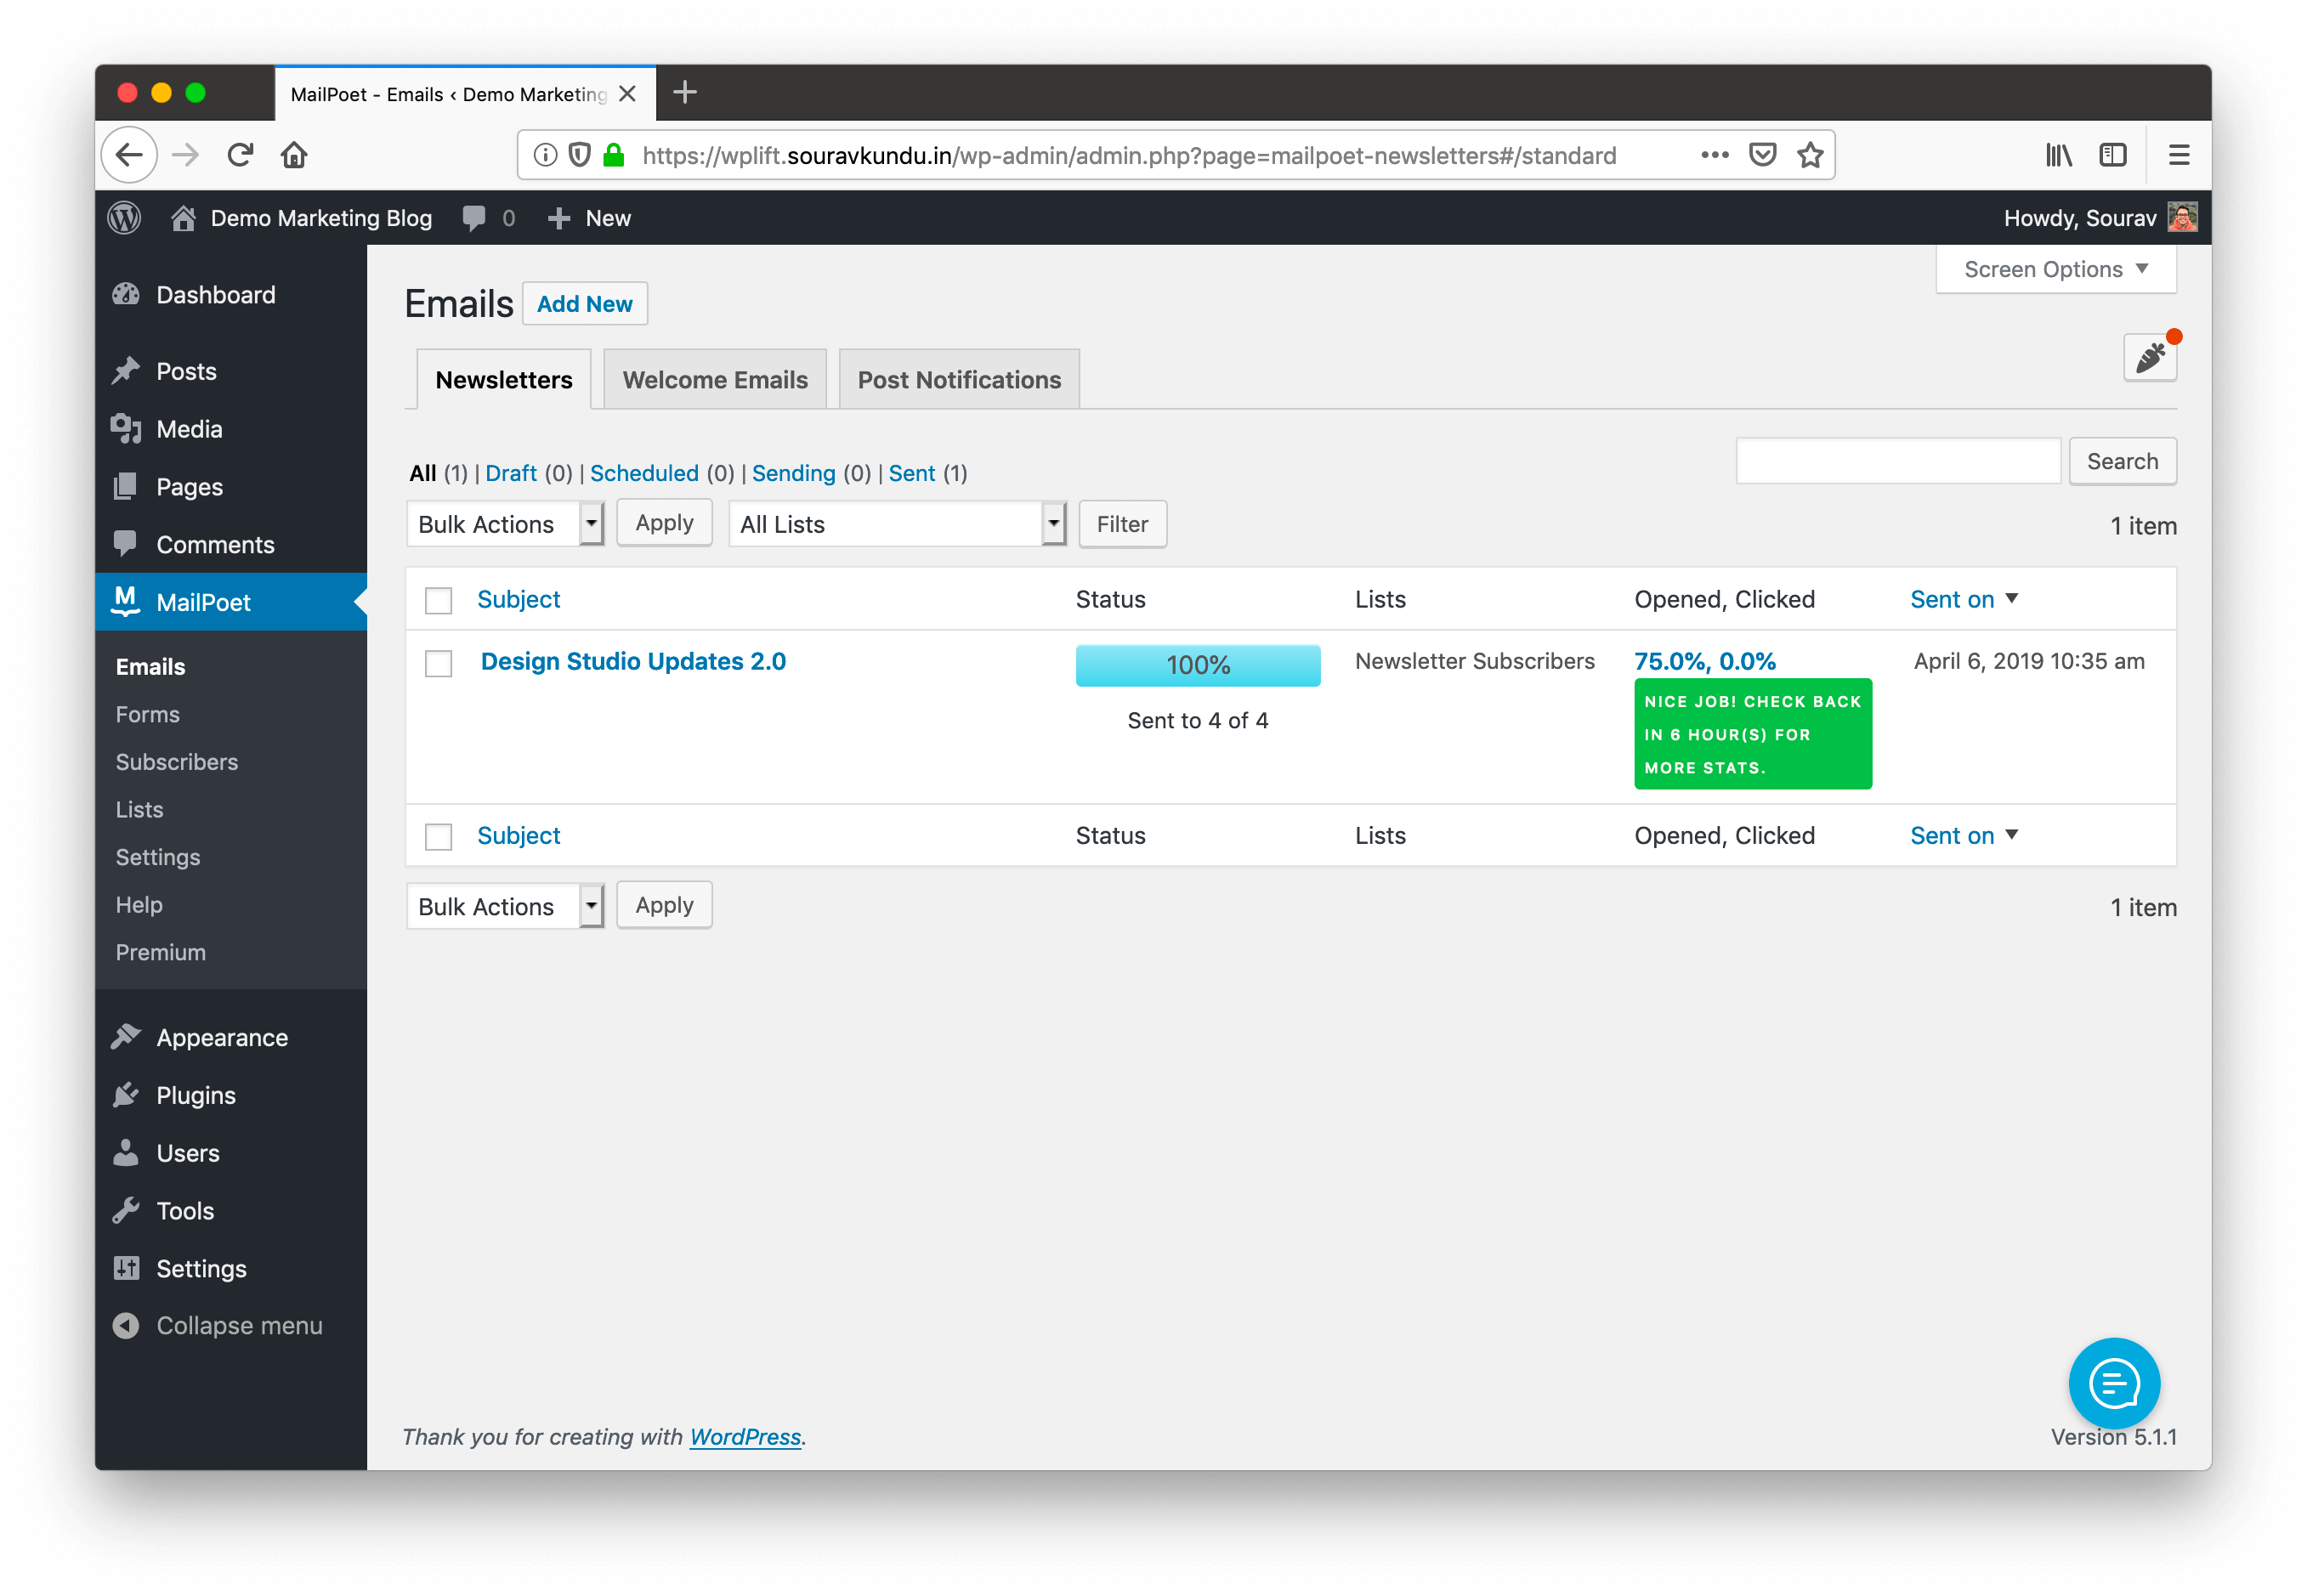
Start by heading over to WordPress dashboard → MailPoet → Emails. Click on Add New as shown in the screenshot above.
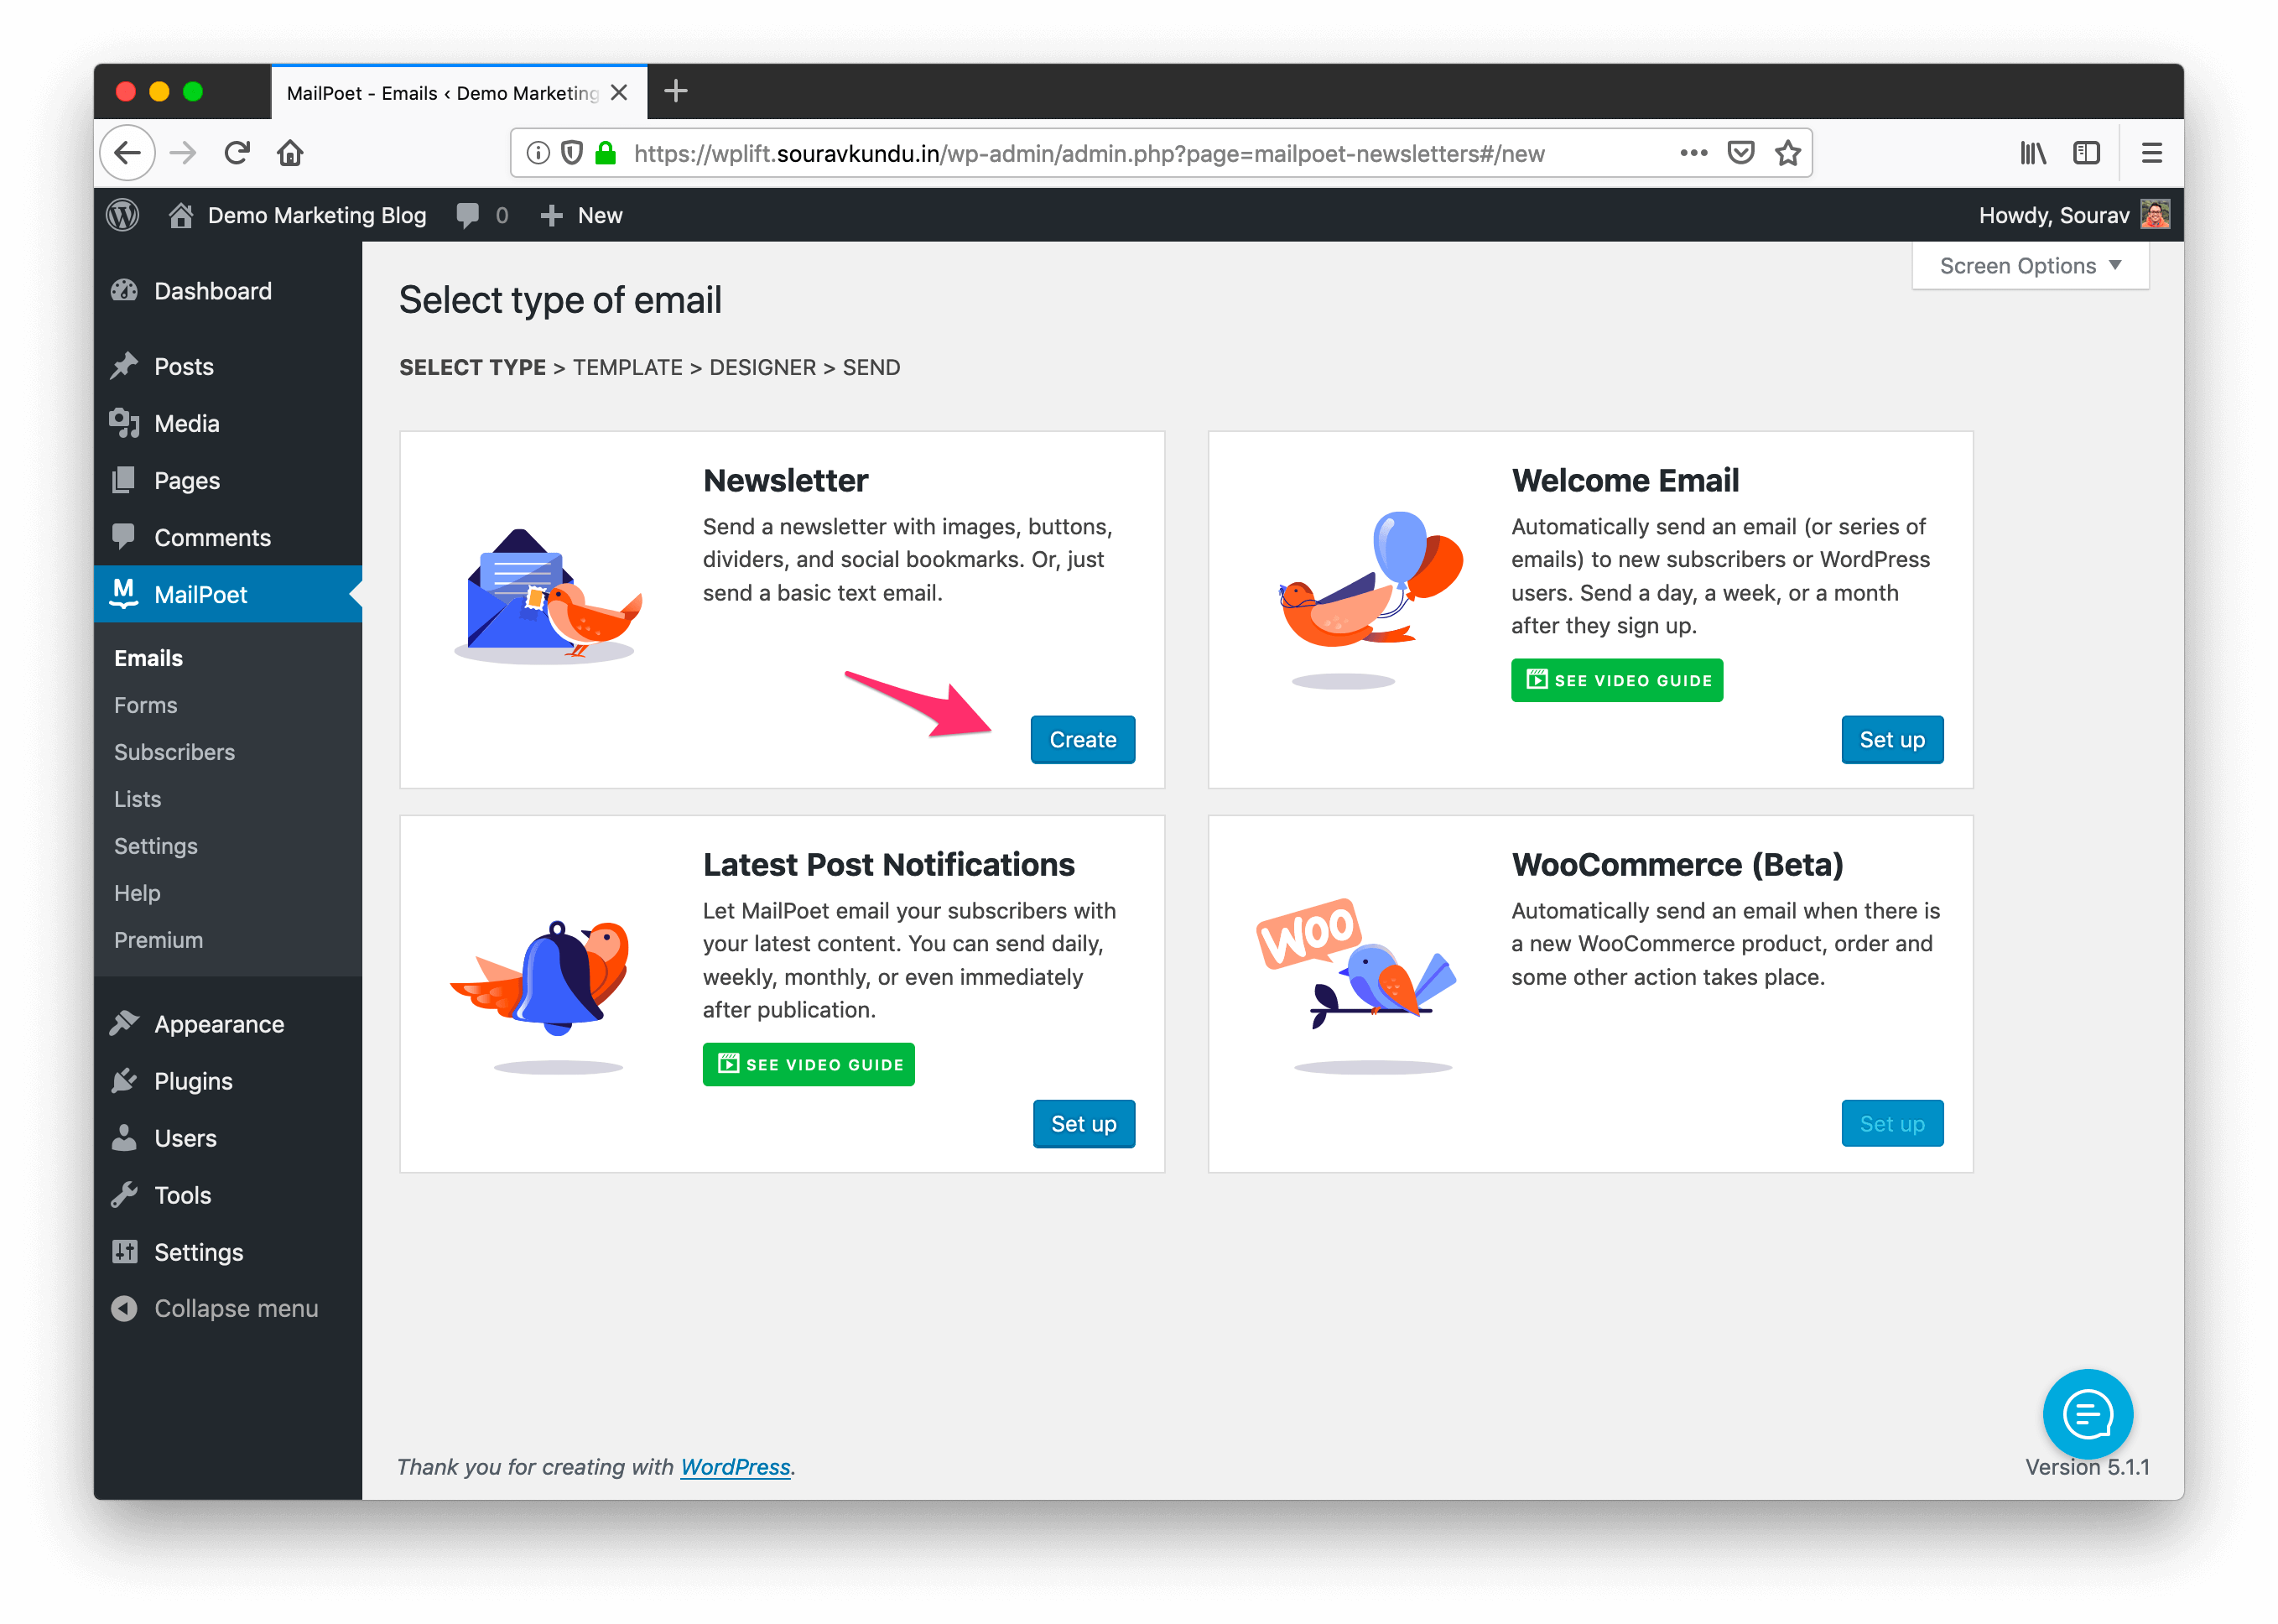
In this step, choose the type of campaign. Under the Newsletter box, click on Create to proceed to the next step.
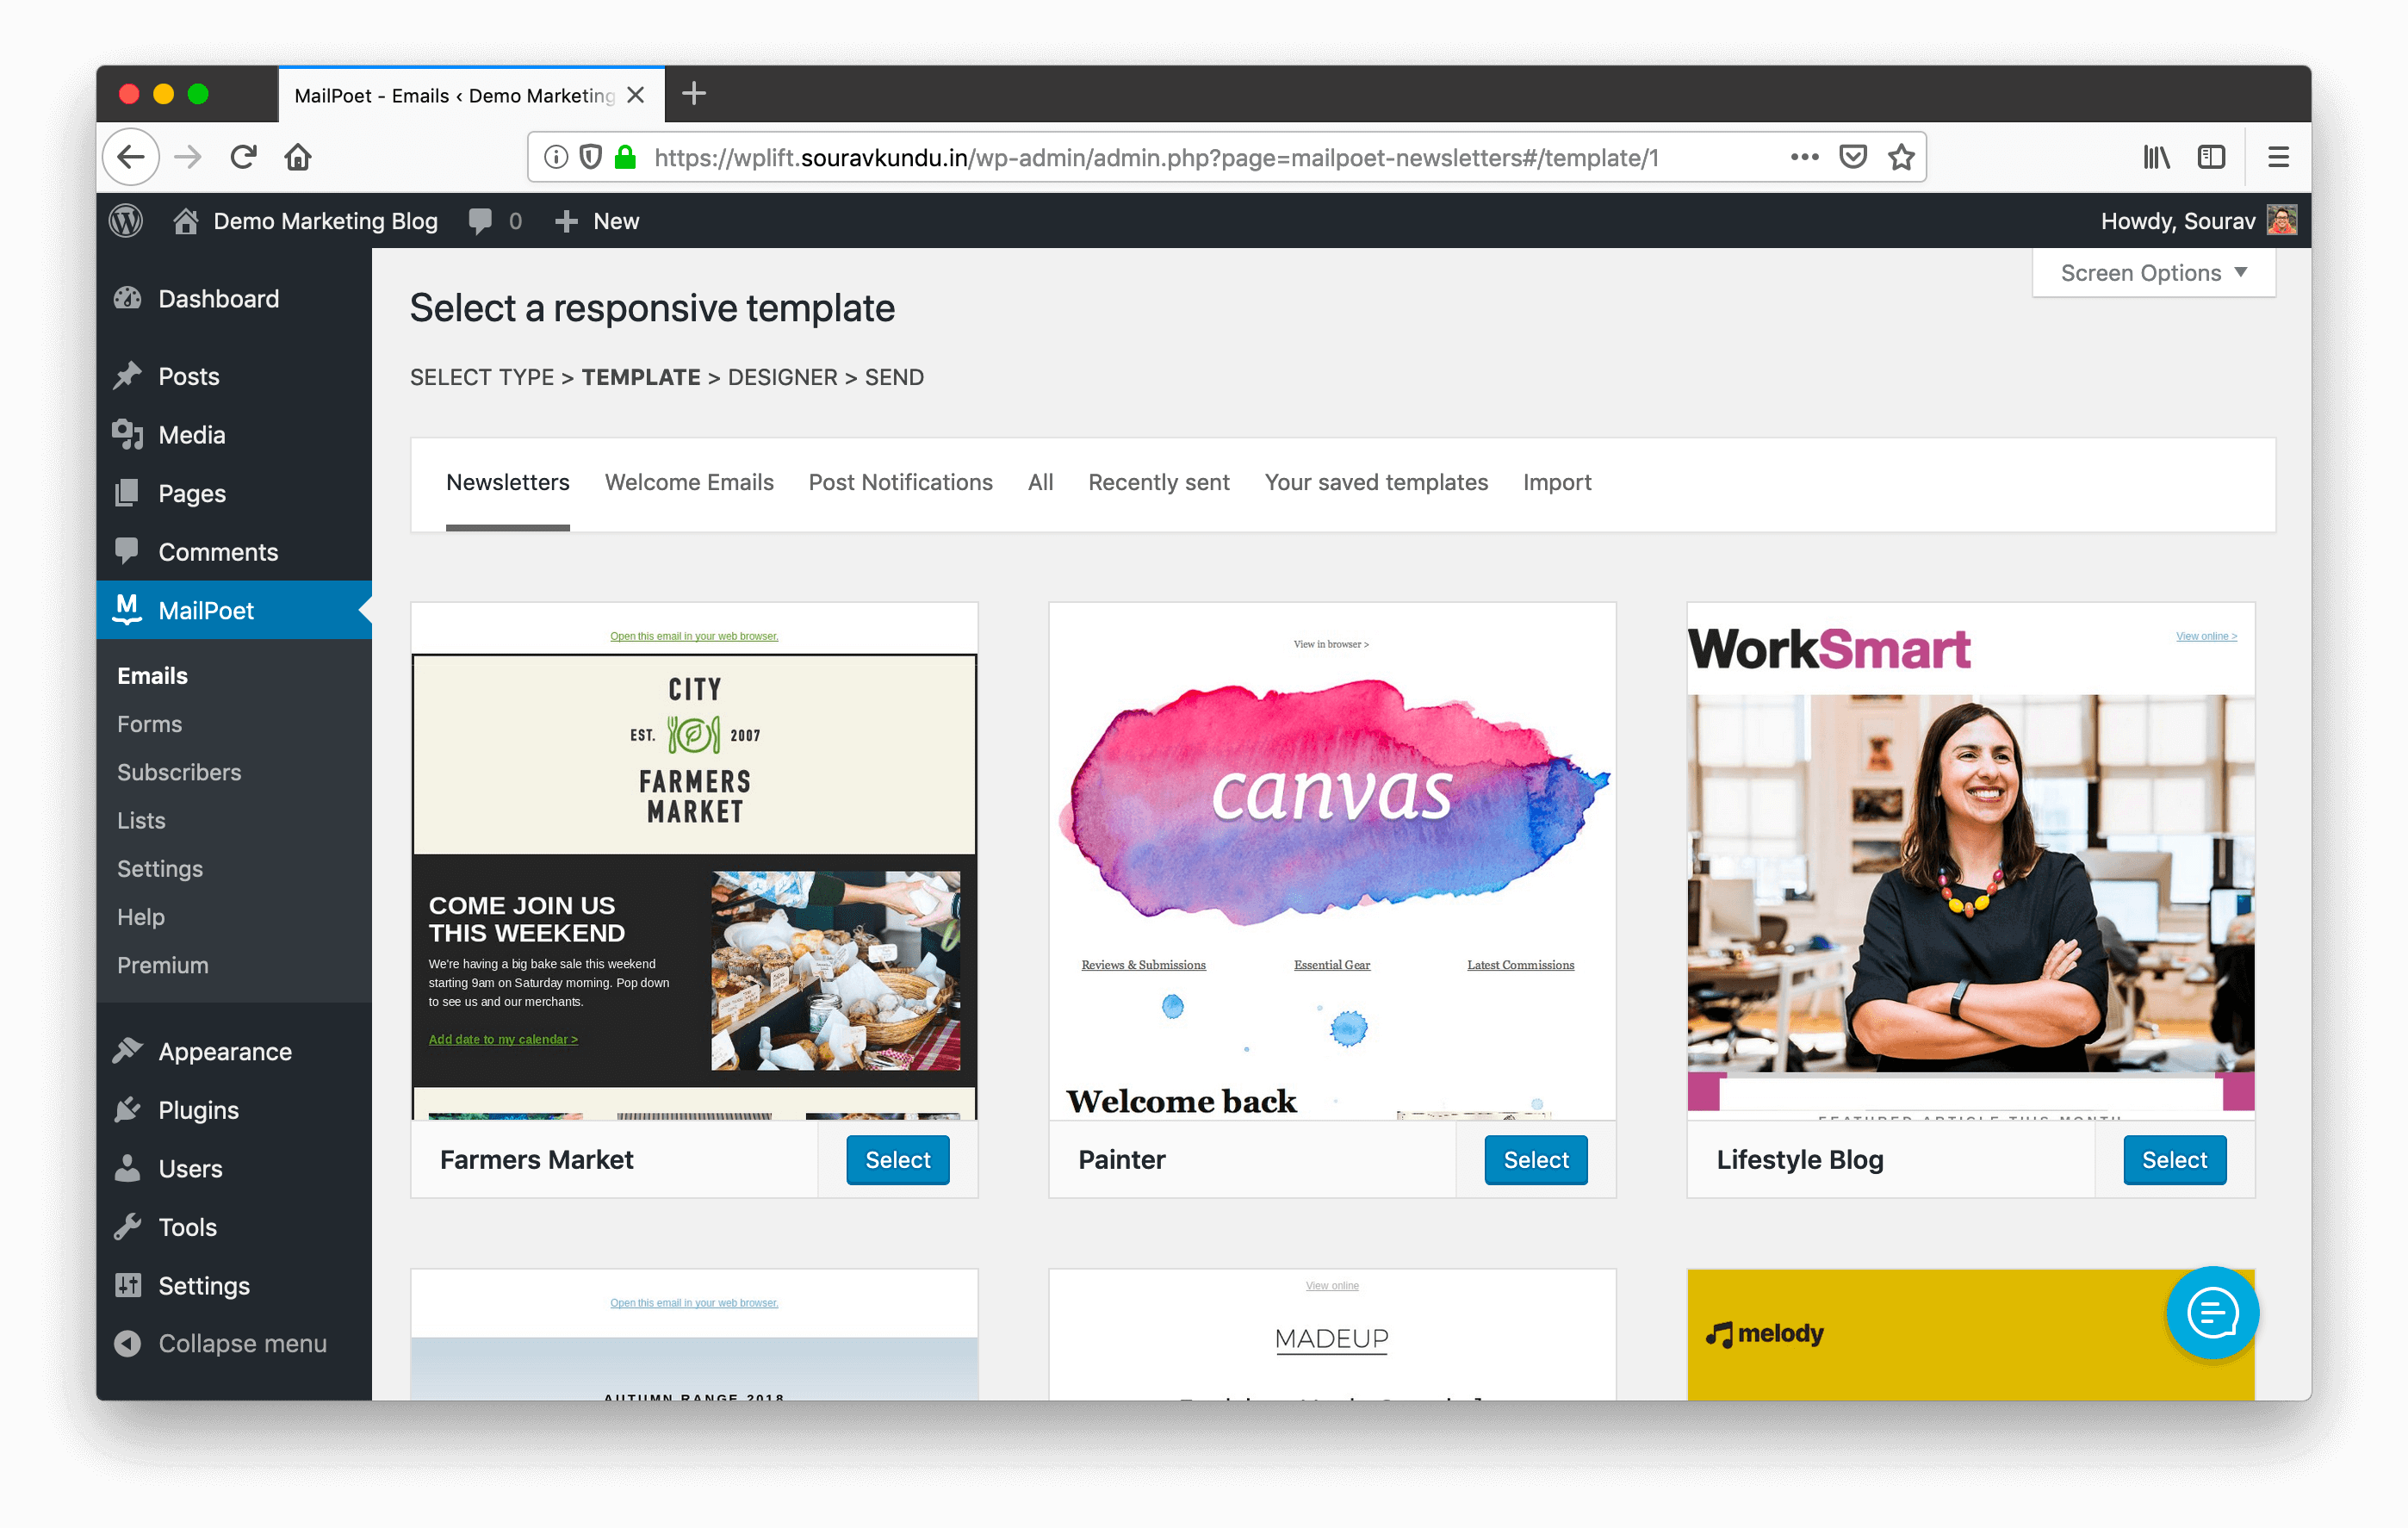
Select a newsletter template. MailPoet offers over 50 different templates across three campaign types. Select one that you like and proceed to the next step.
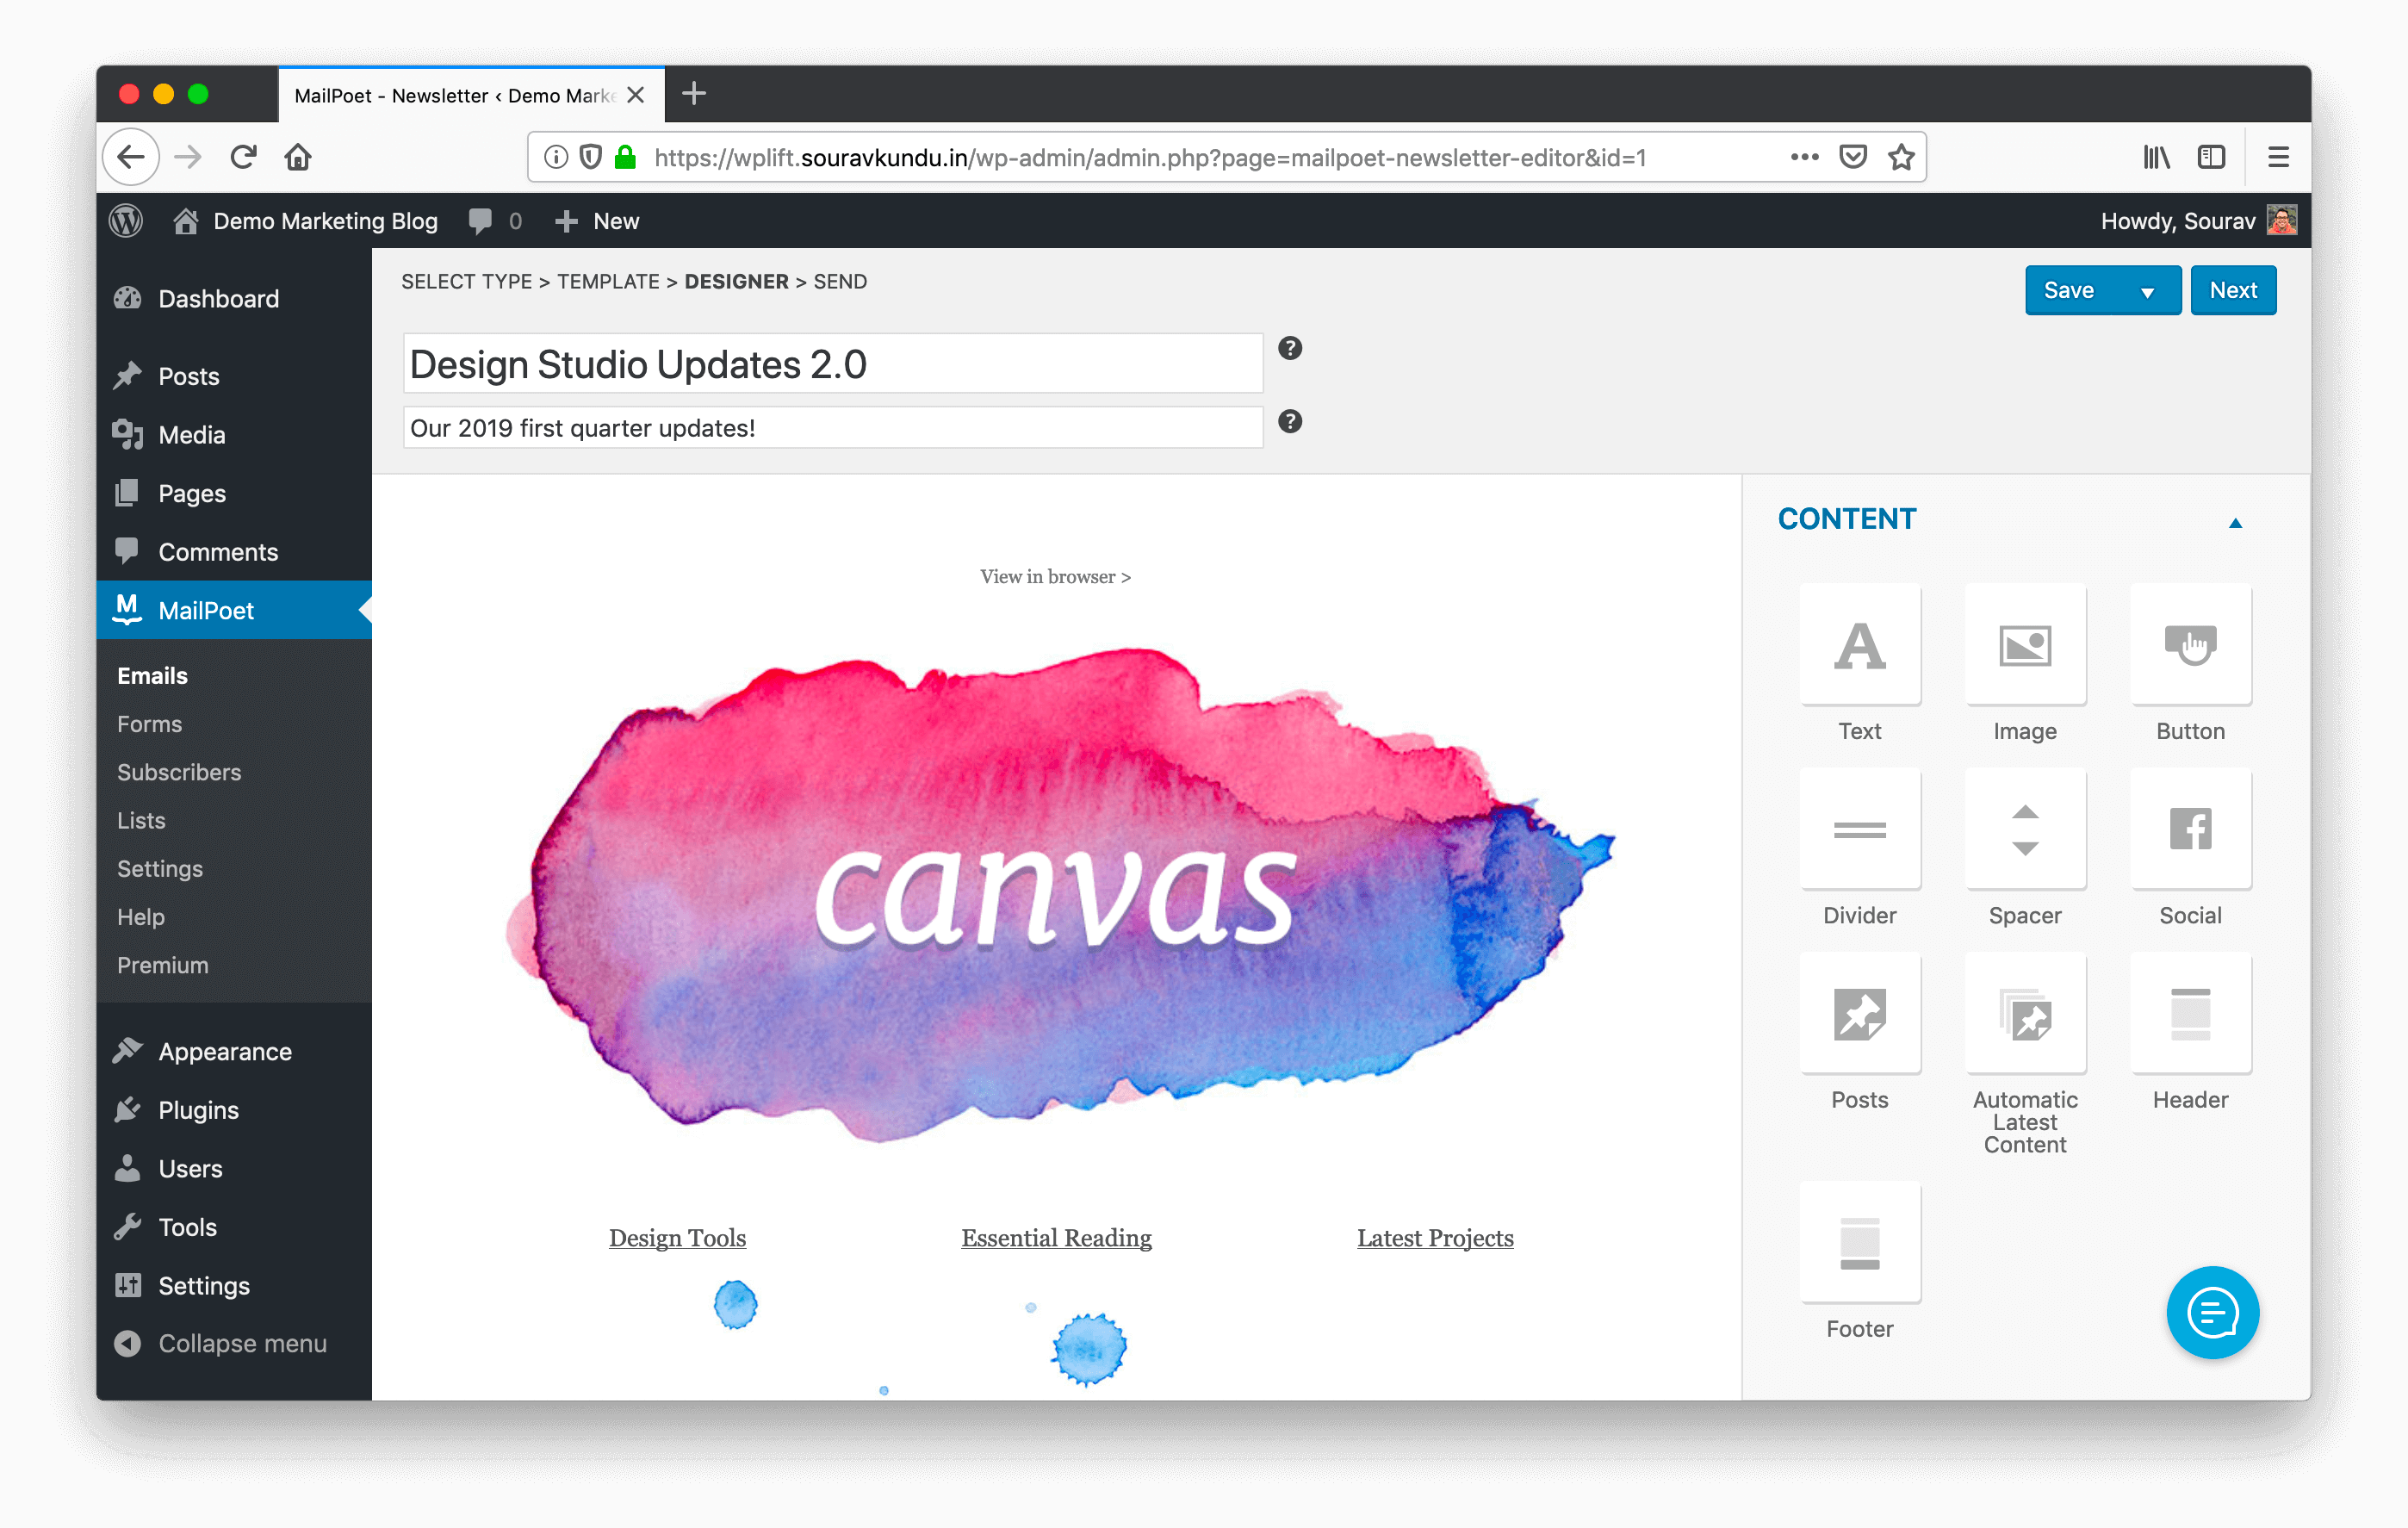
In this step, you can design the newsletter using MailPoet’s drag-and-drop email builder. Each Content Block on the right can be used to implement various aspects of your newsletter’s design.
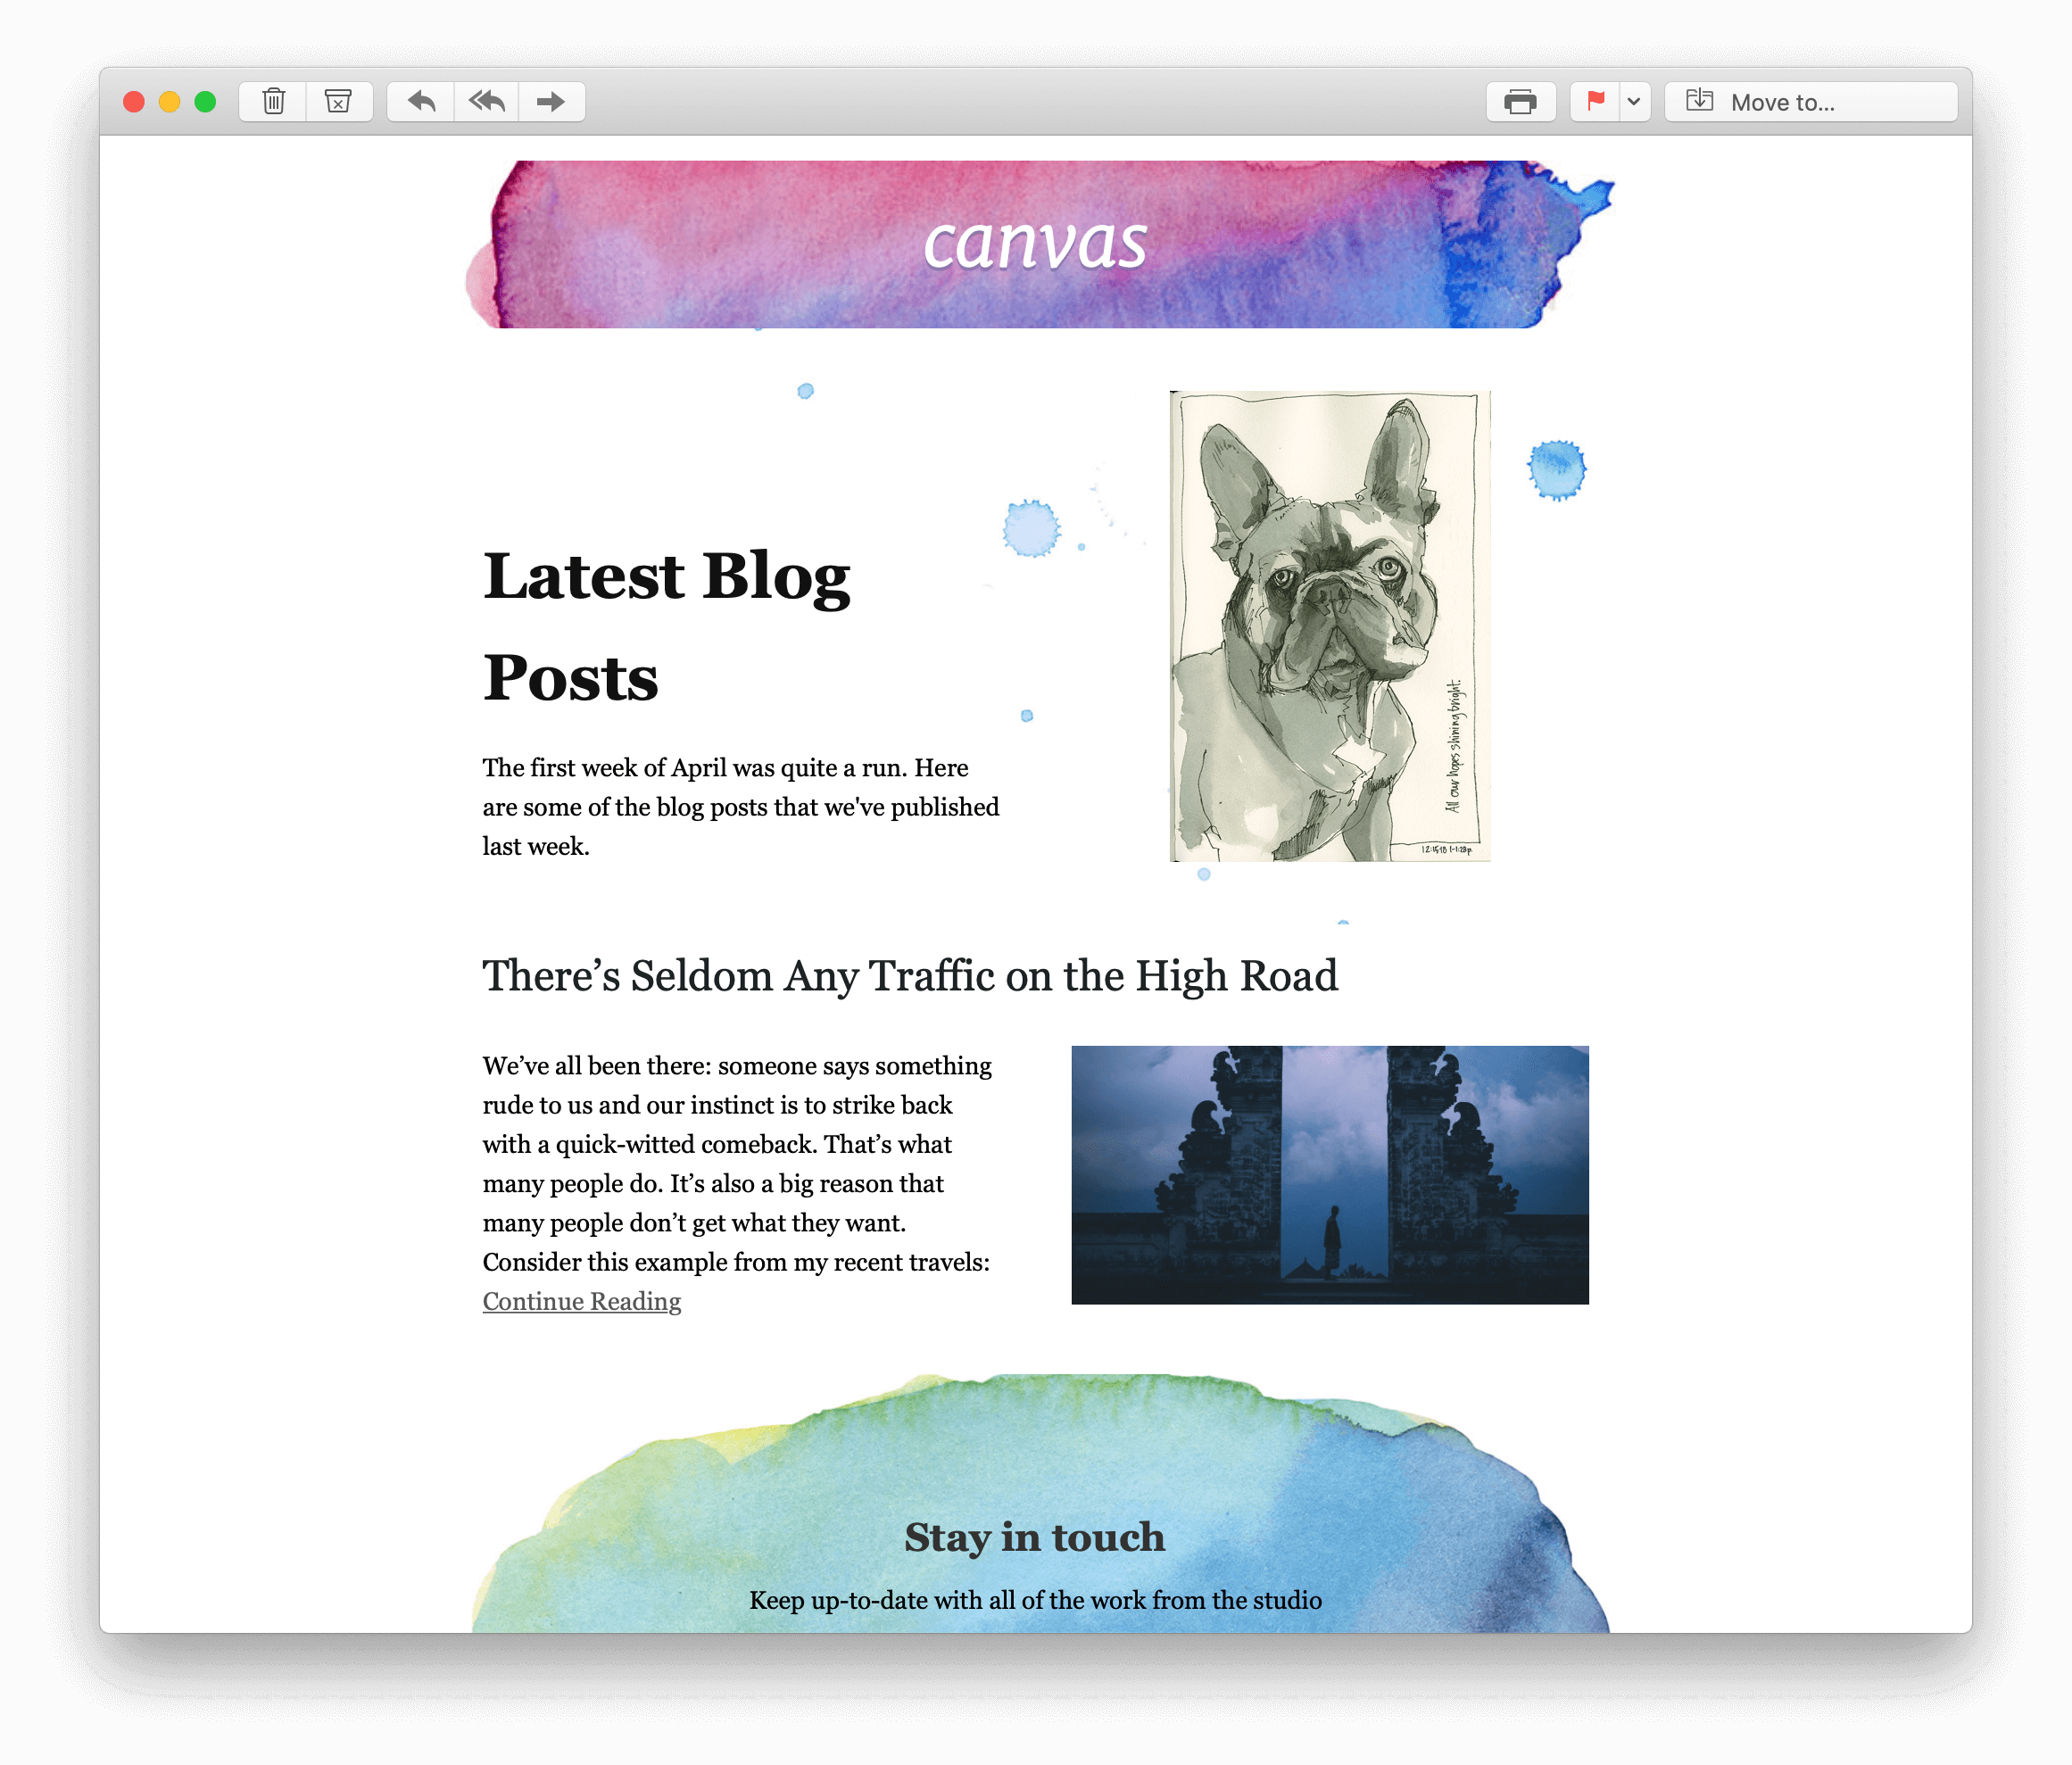
The outcome is a responsive newsletter that looks great on any device — desktop or mobile!
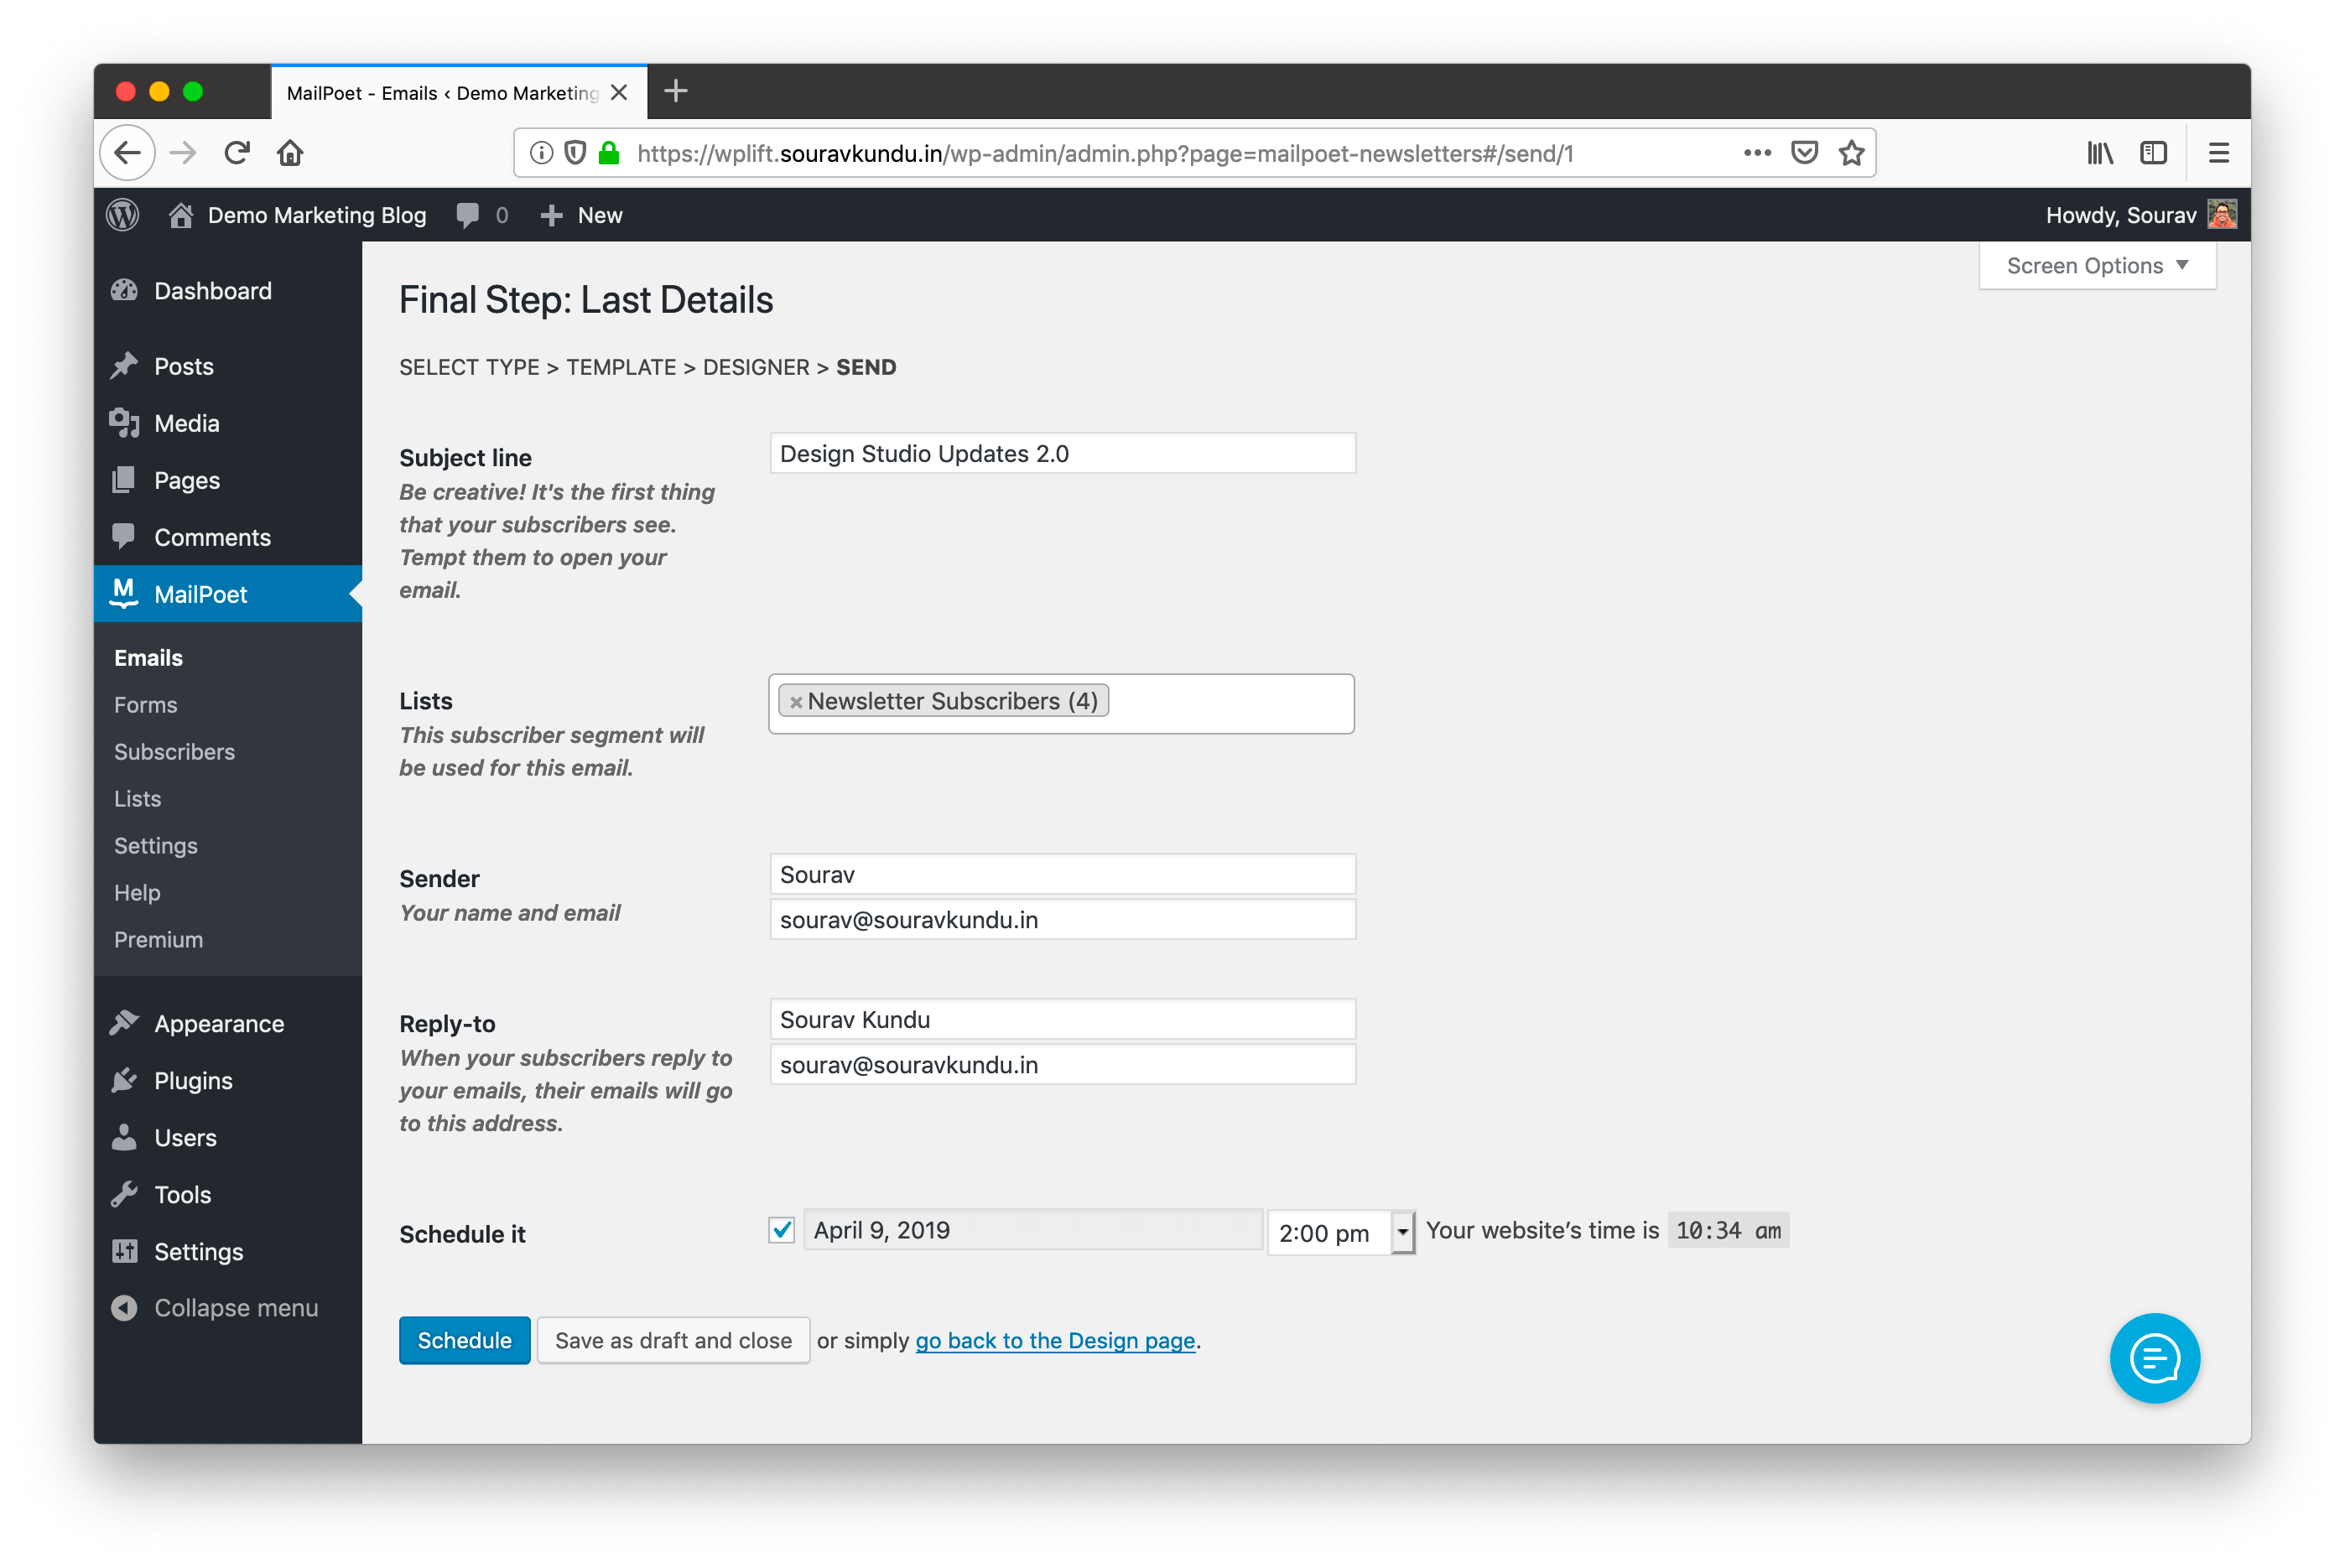
Once you’ve designed the newsletter, it’s time to send it. Select (a) an actionable subject line, (b) list to which to send the newsletter and (c) sender and reply-to info (make sure to double-check the emails). Once done, hit Send.
Note that in our tutorial, we’ve chosen to schedule the campaign (as shown in the screenshot above).
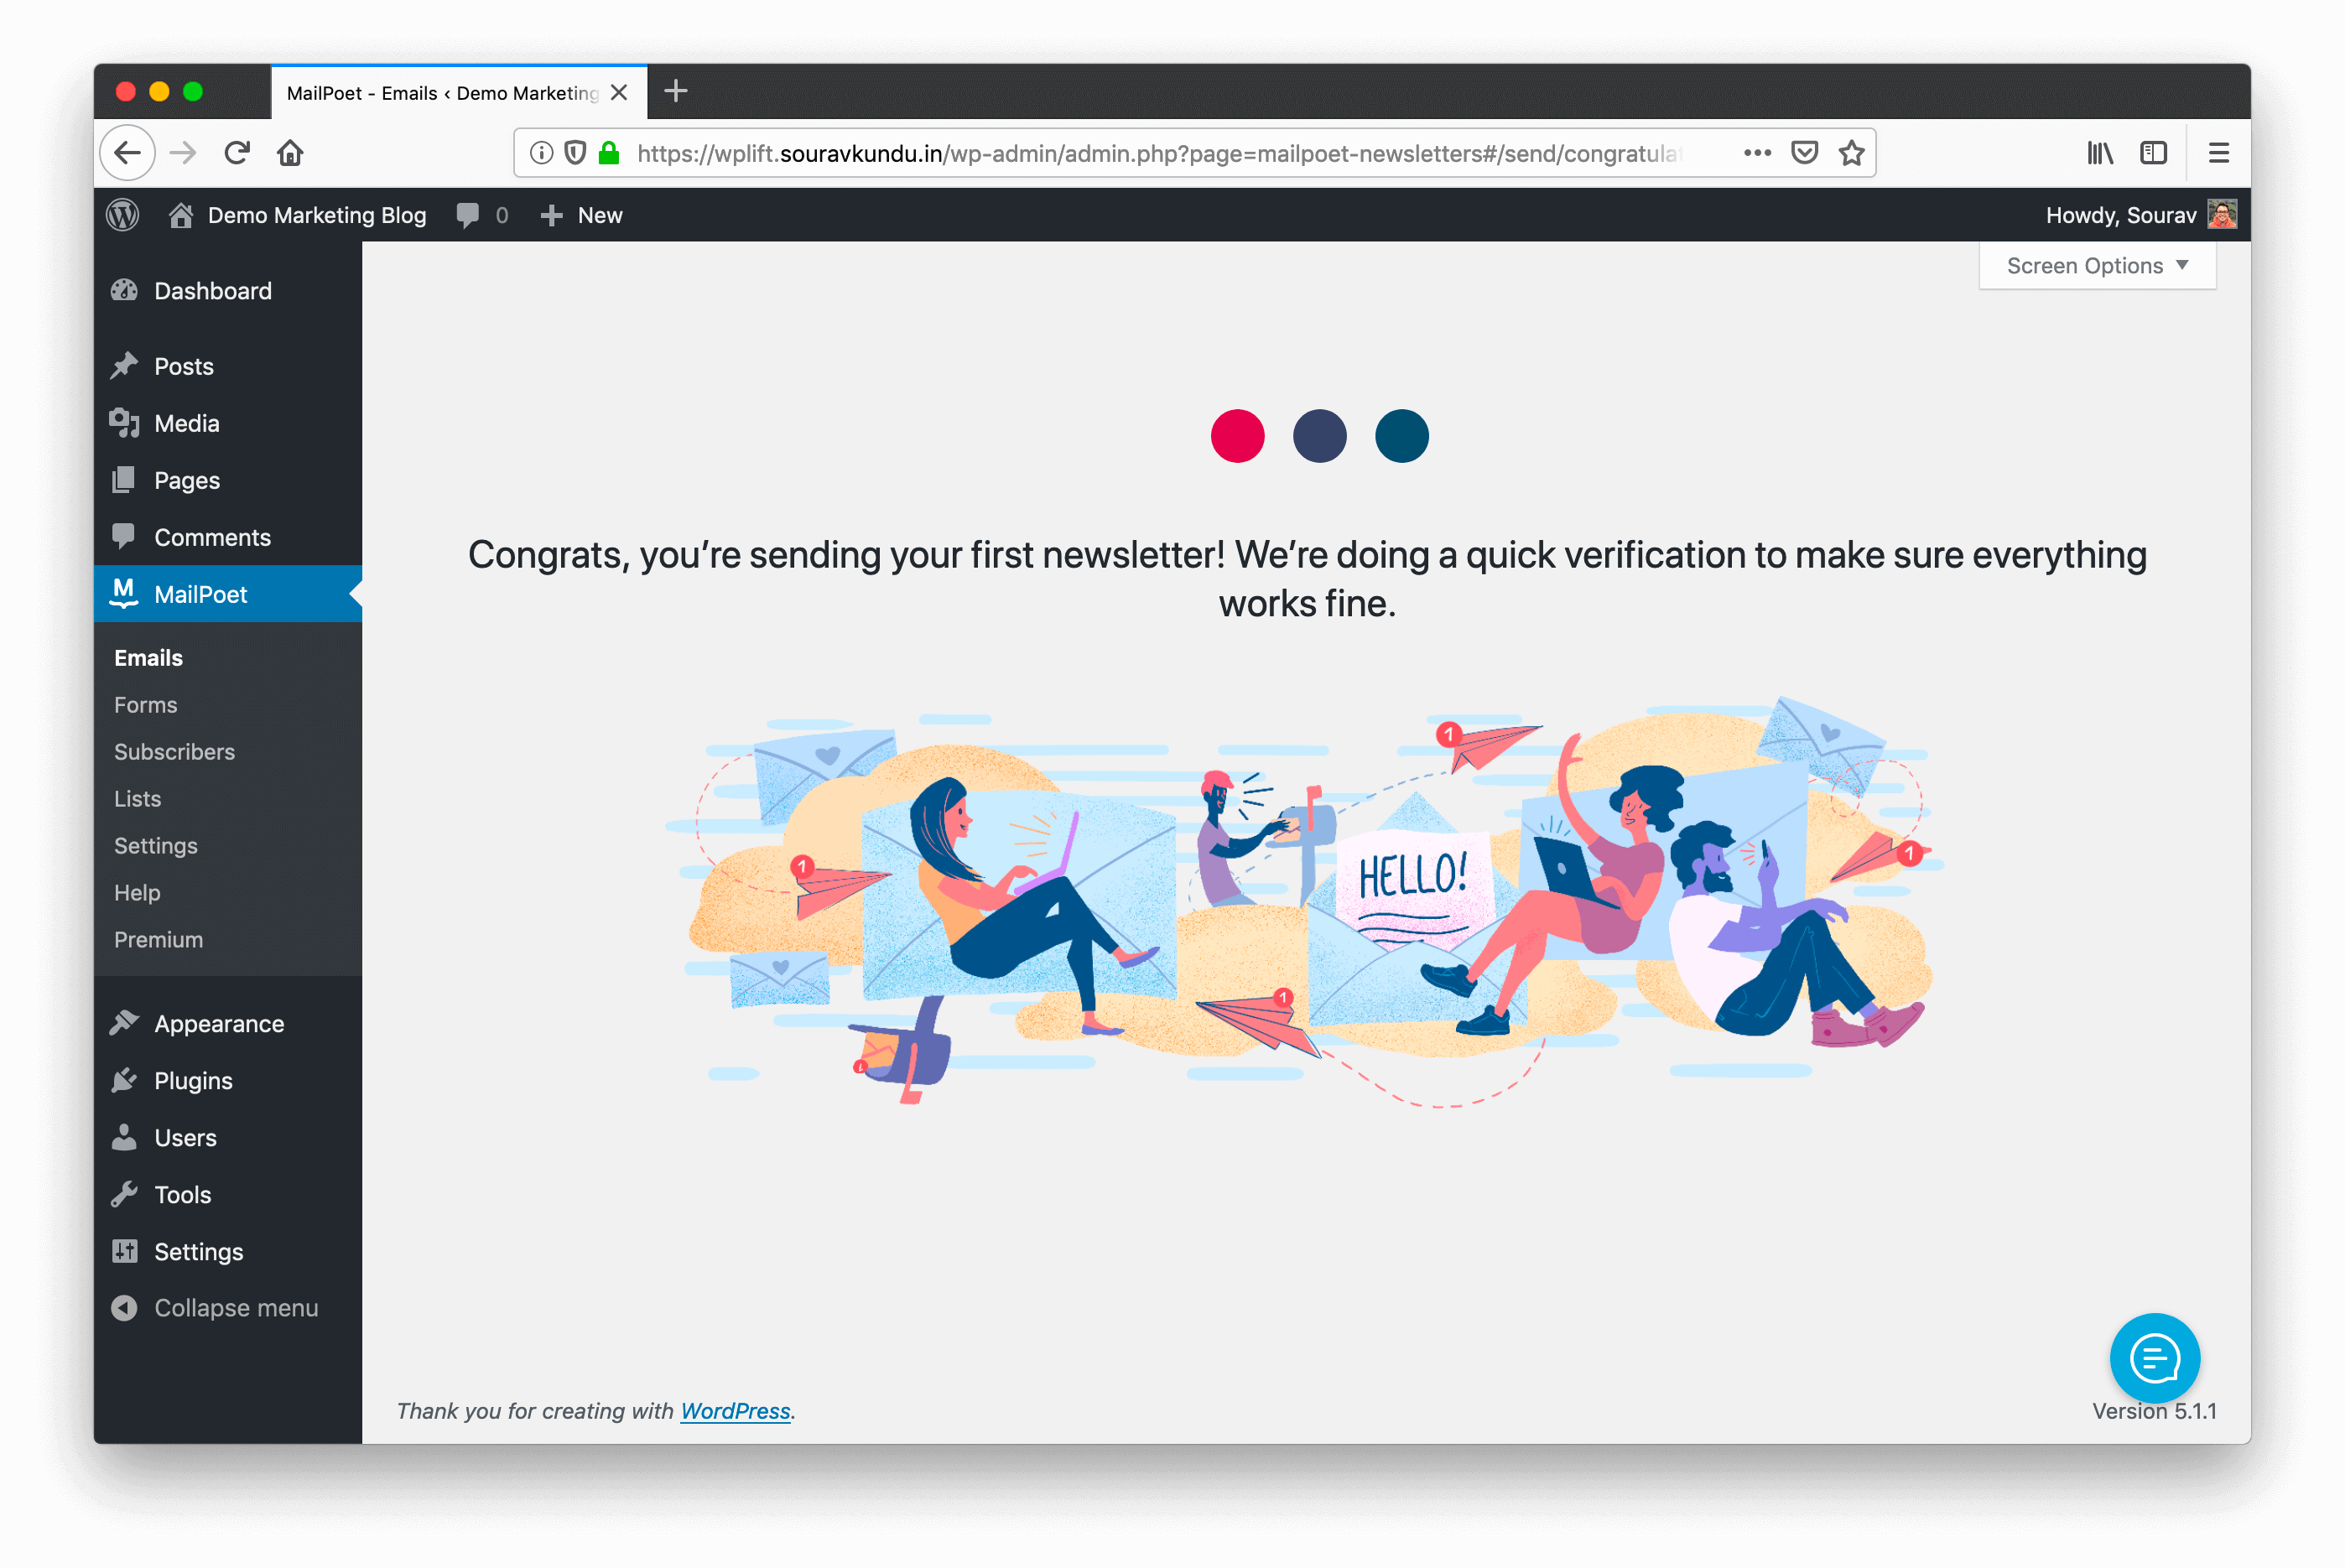
MailPoet will now send (or schedule) the campaign and your first newsletter will be on its way.
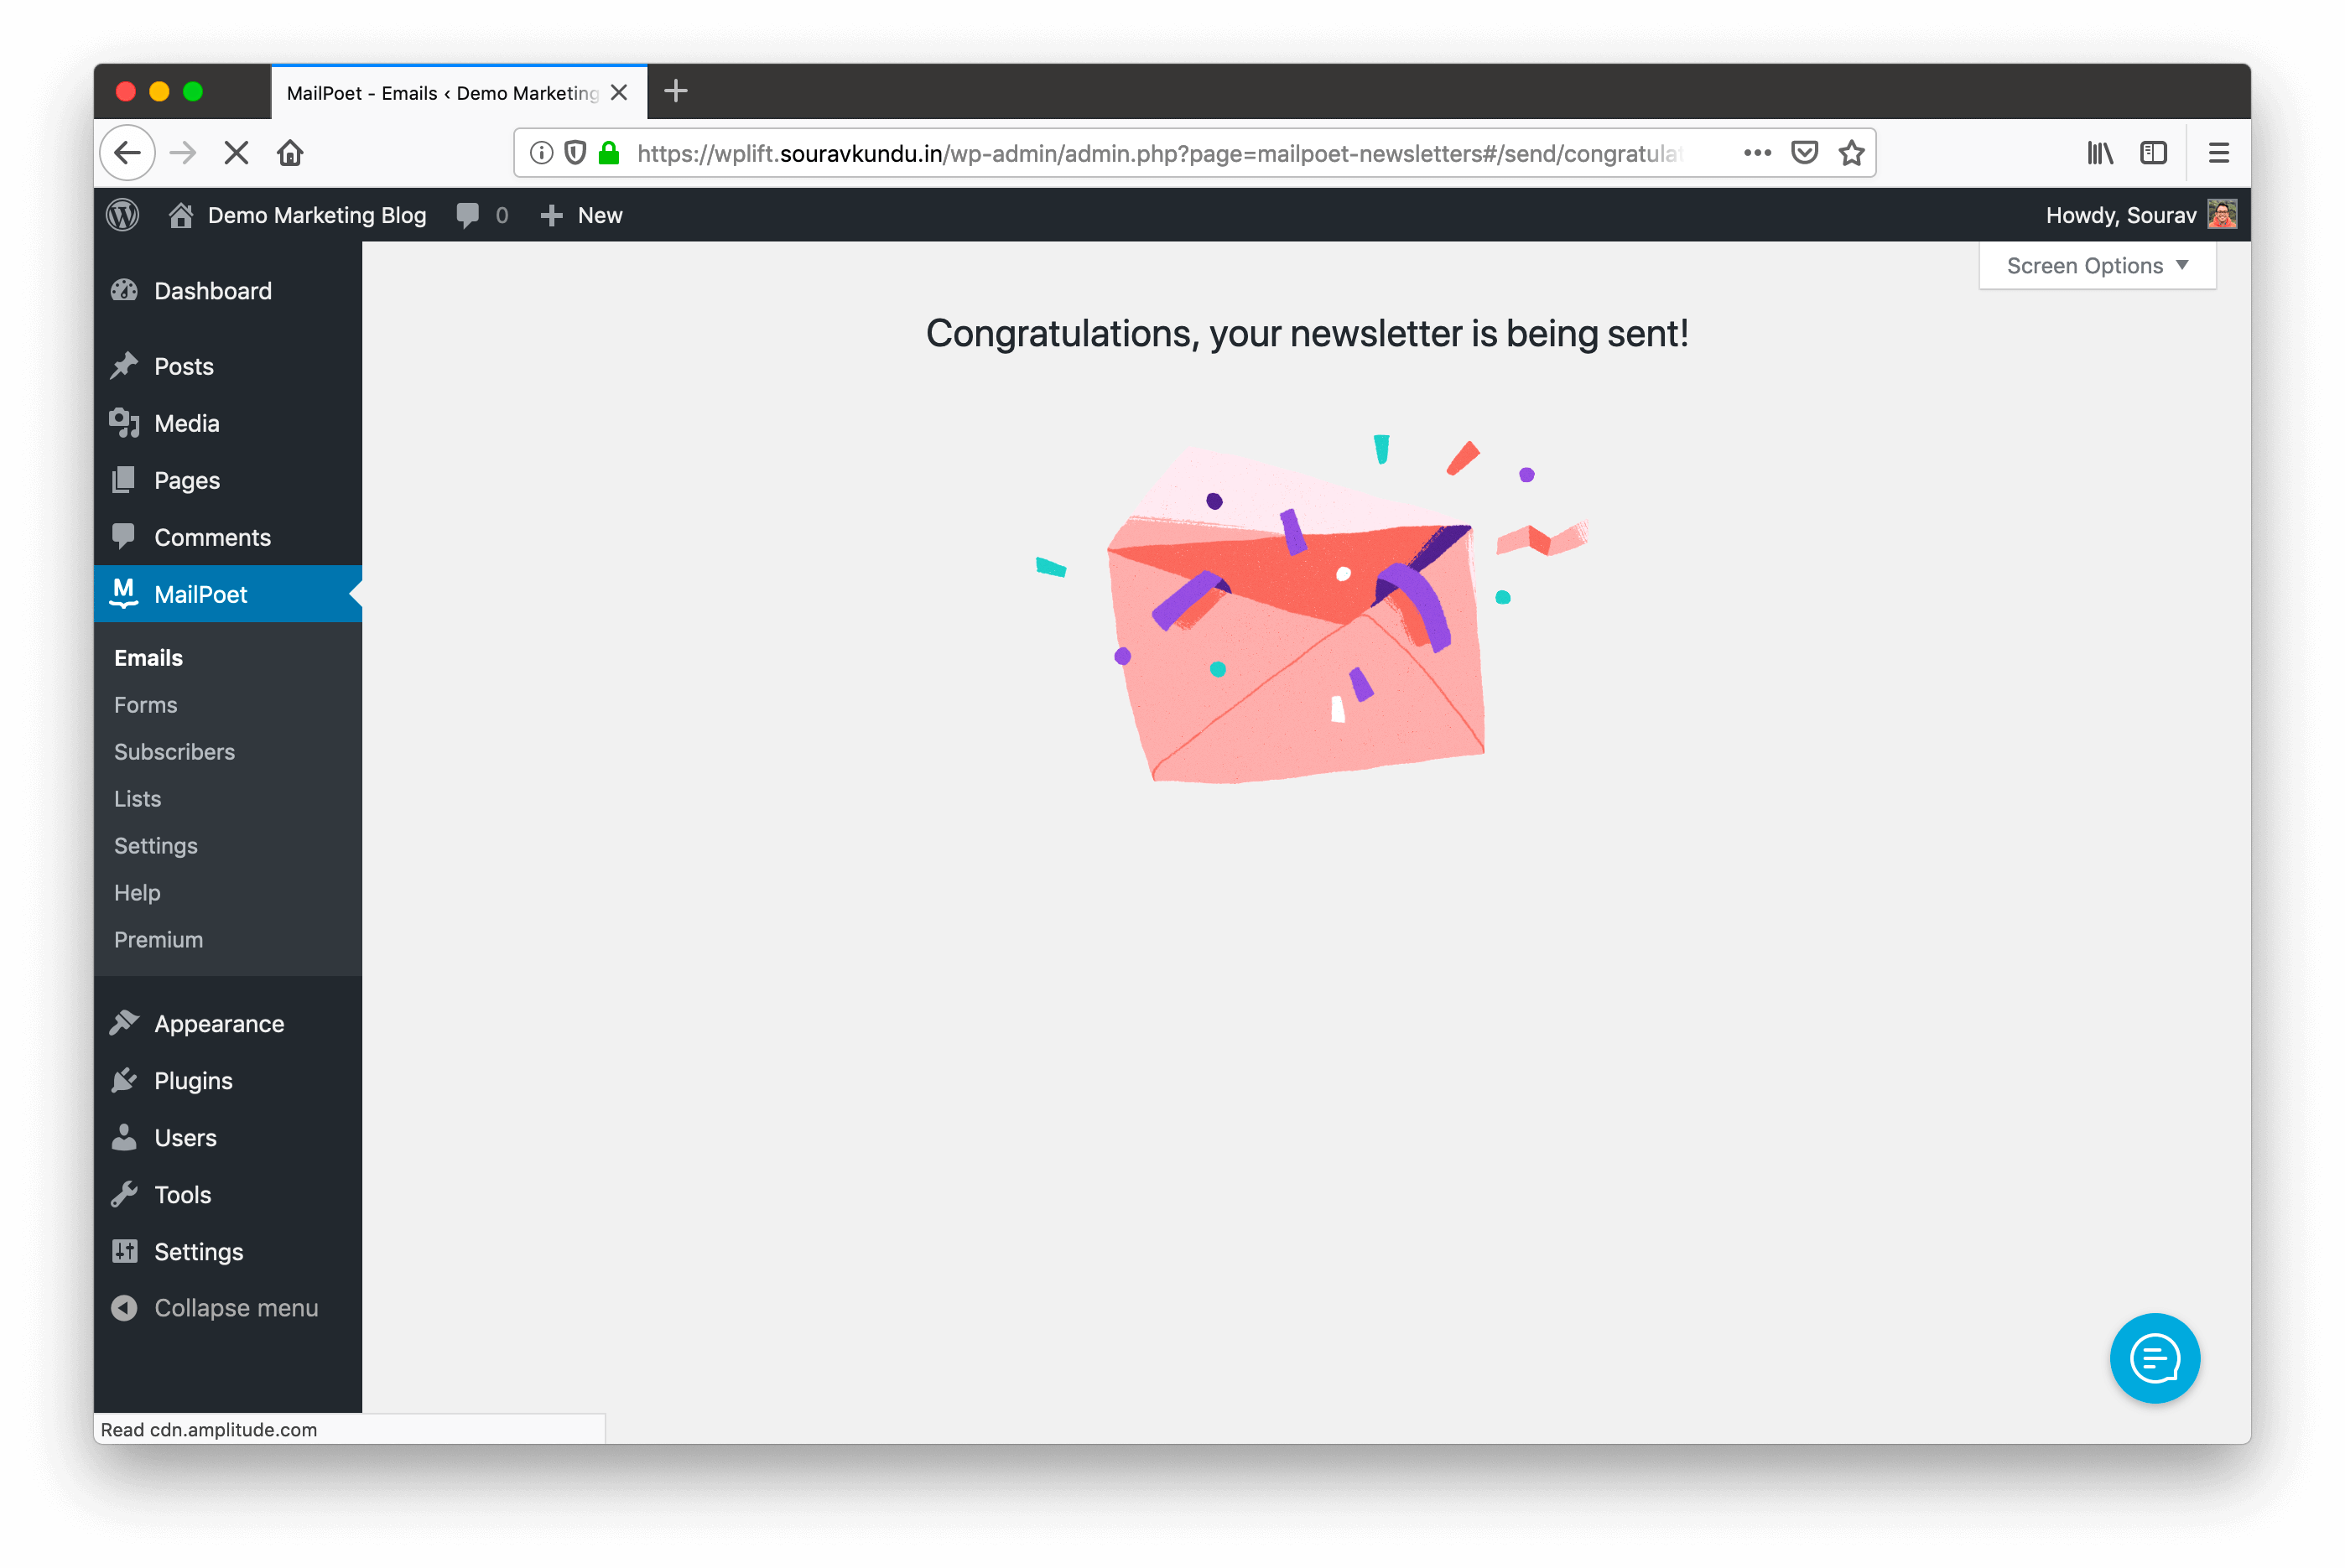
This is the status message that’s displayed when the newsletter campaign successfully sent. Following is a screenshot of the newsletter opened in the Apple Mail client in MacOS.
Monitoring Campaign Statistics
The free version of MailPoet gives you basic email statistics such as open and click rate. You need to upgrade to the premium version for detailed analytics.
Later this year, there will be a new free plan where you can enjoy all the premium features of the plugin, limited to 1,000 subscribers.
Creating Signup Forms in MailPoet
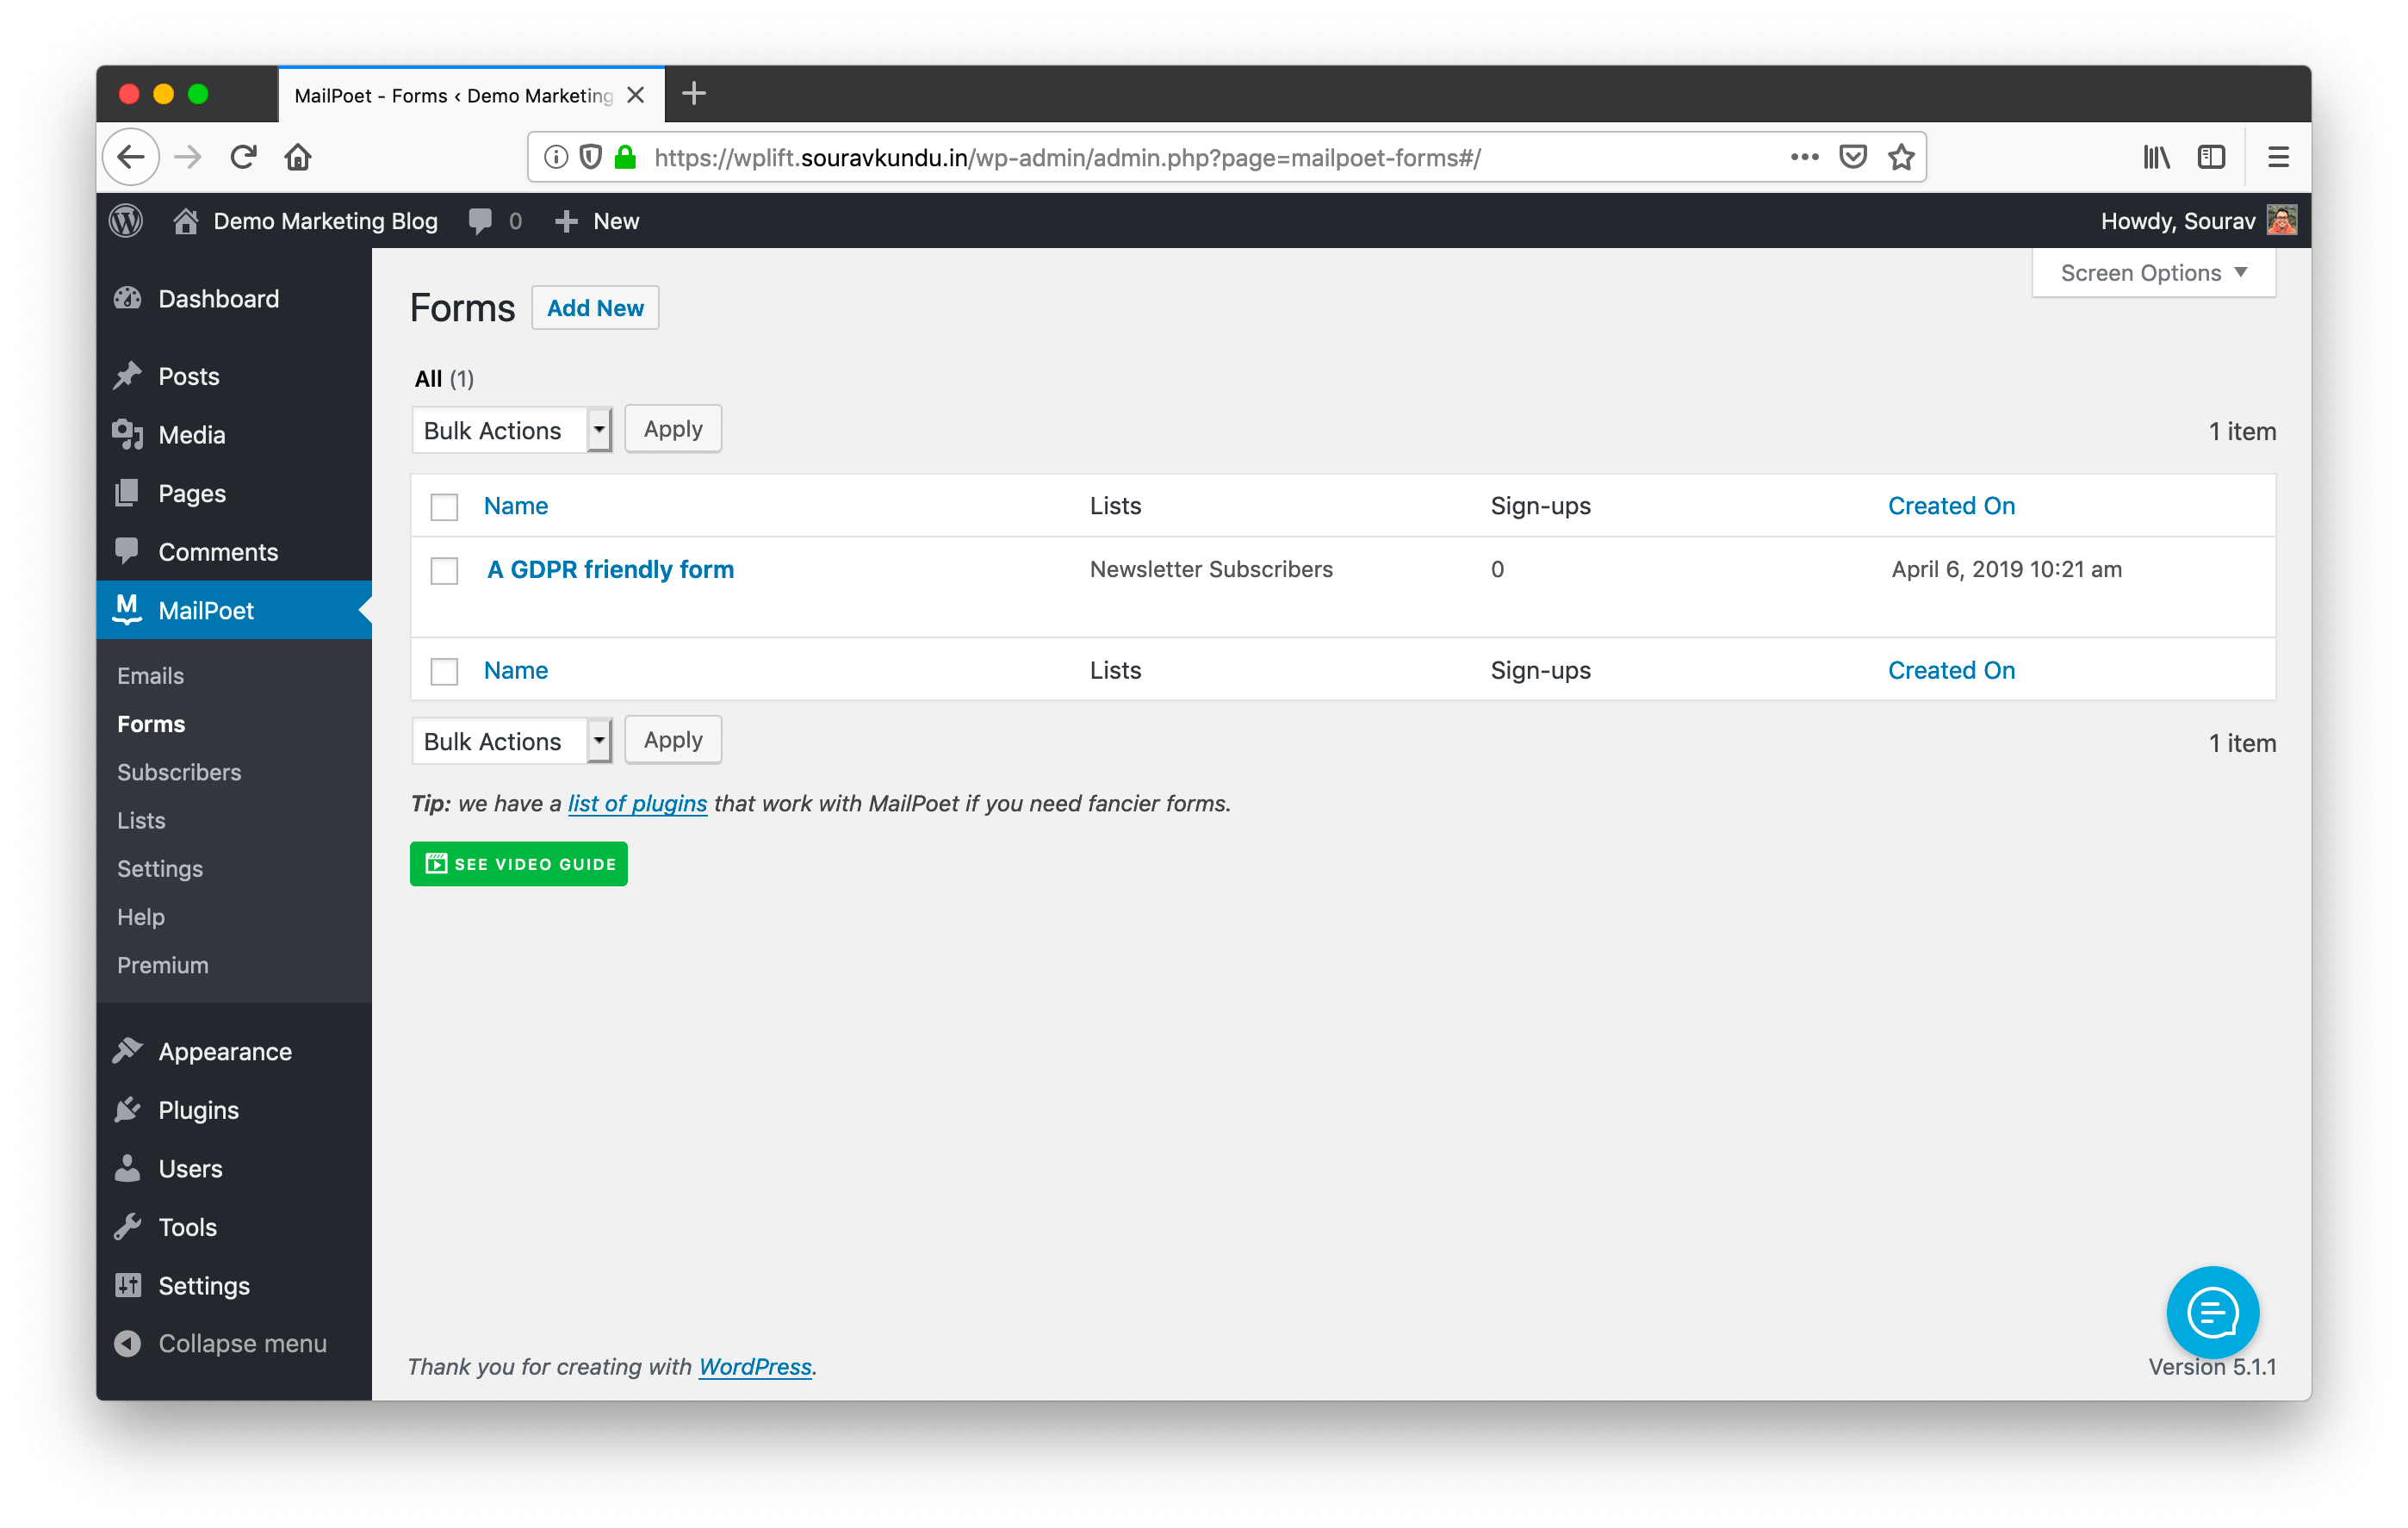
MailPoet ships with a GDPR Friendly Form by default, which is linked to the My First List email list.
(You might notice in the screenshot above that the form’s linked list is Newsletter Subscribers instead of My First List. This is because we had updated it in the previous step.)
Modifying the Default Signup Form
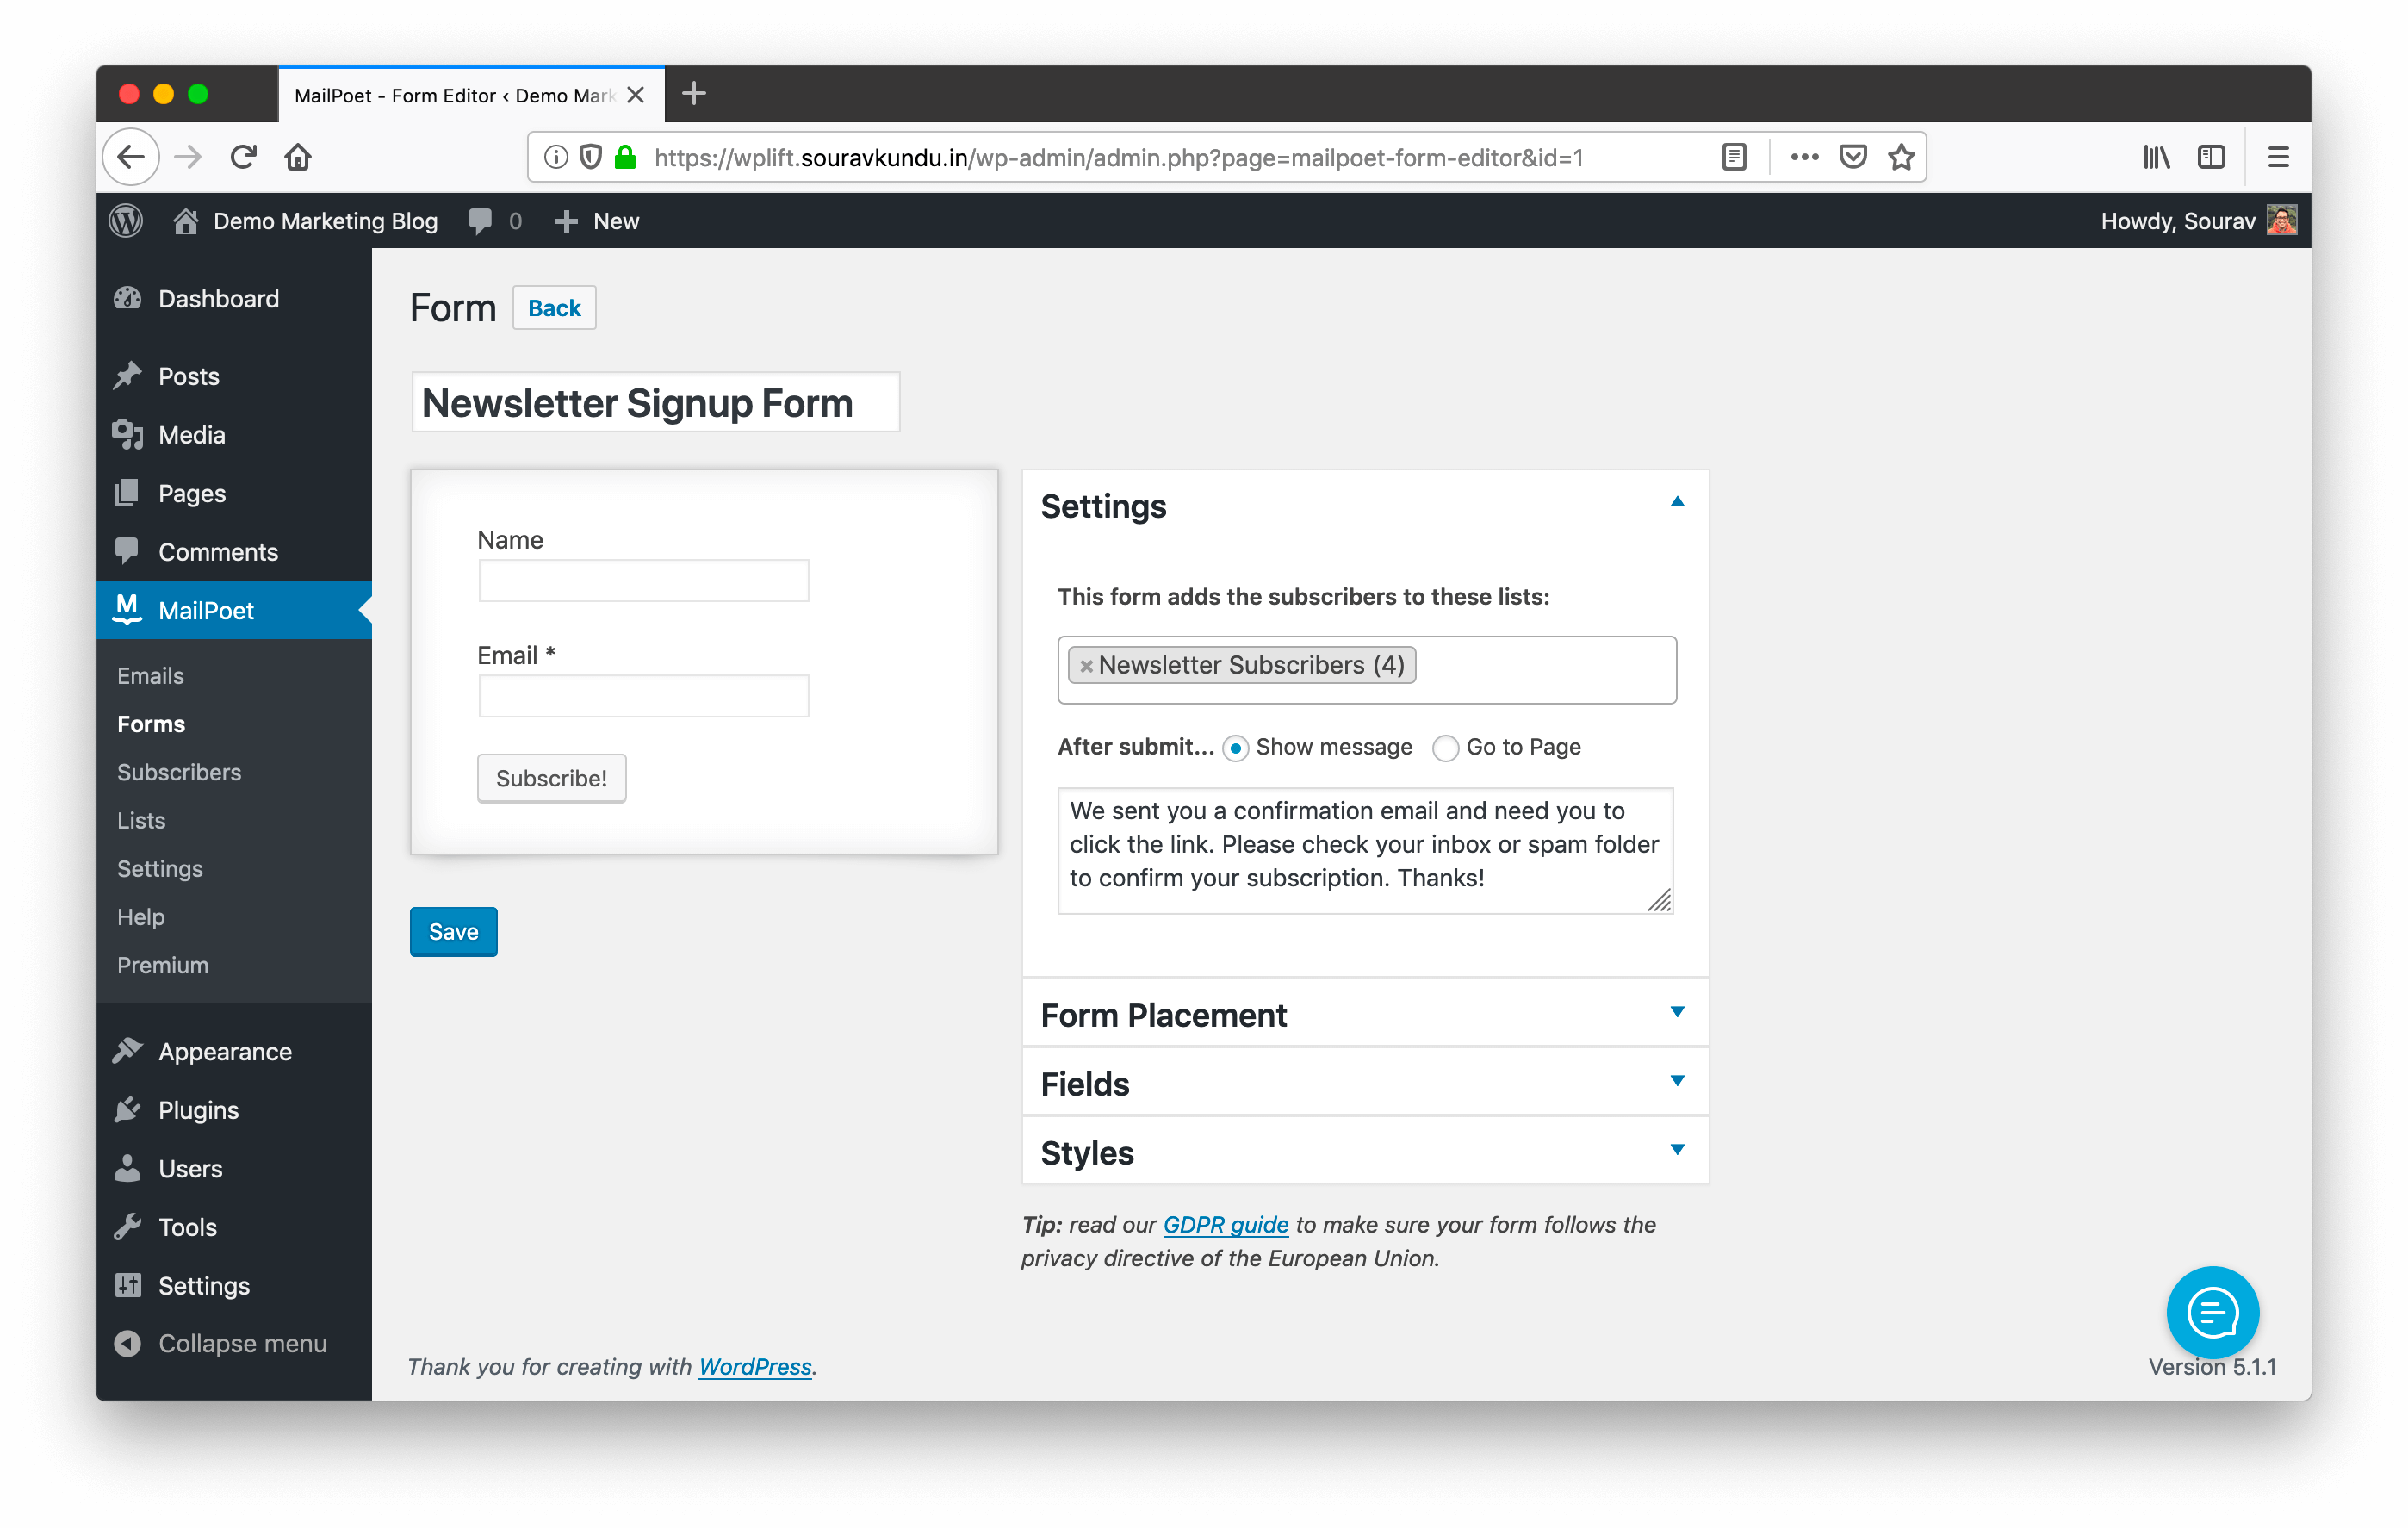
Similar to the email list, we’ve updated the default signup form to Newsletter Signup Form. We’re using only two fields — Name and Email. Any signups in this form will be saved in the Newsletter Subscribers list.
Note: We found the form builder to be a bit feature-light. The plugin’s authors did inform us that they’ll be improving the form editor, later this year.
Adding Newsletter Signup Form in WordPress
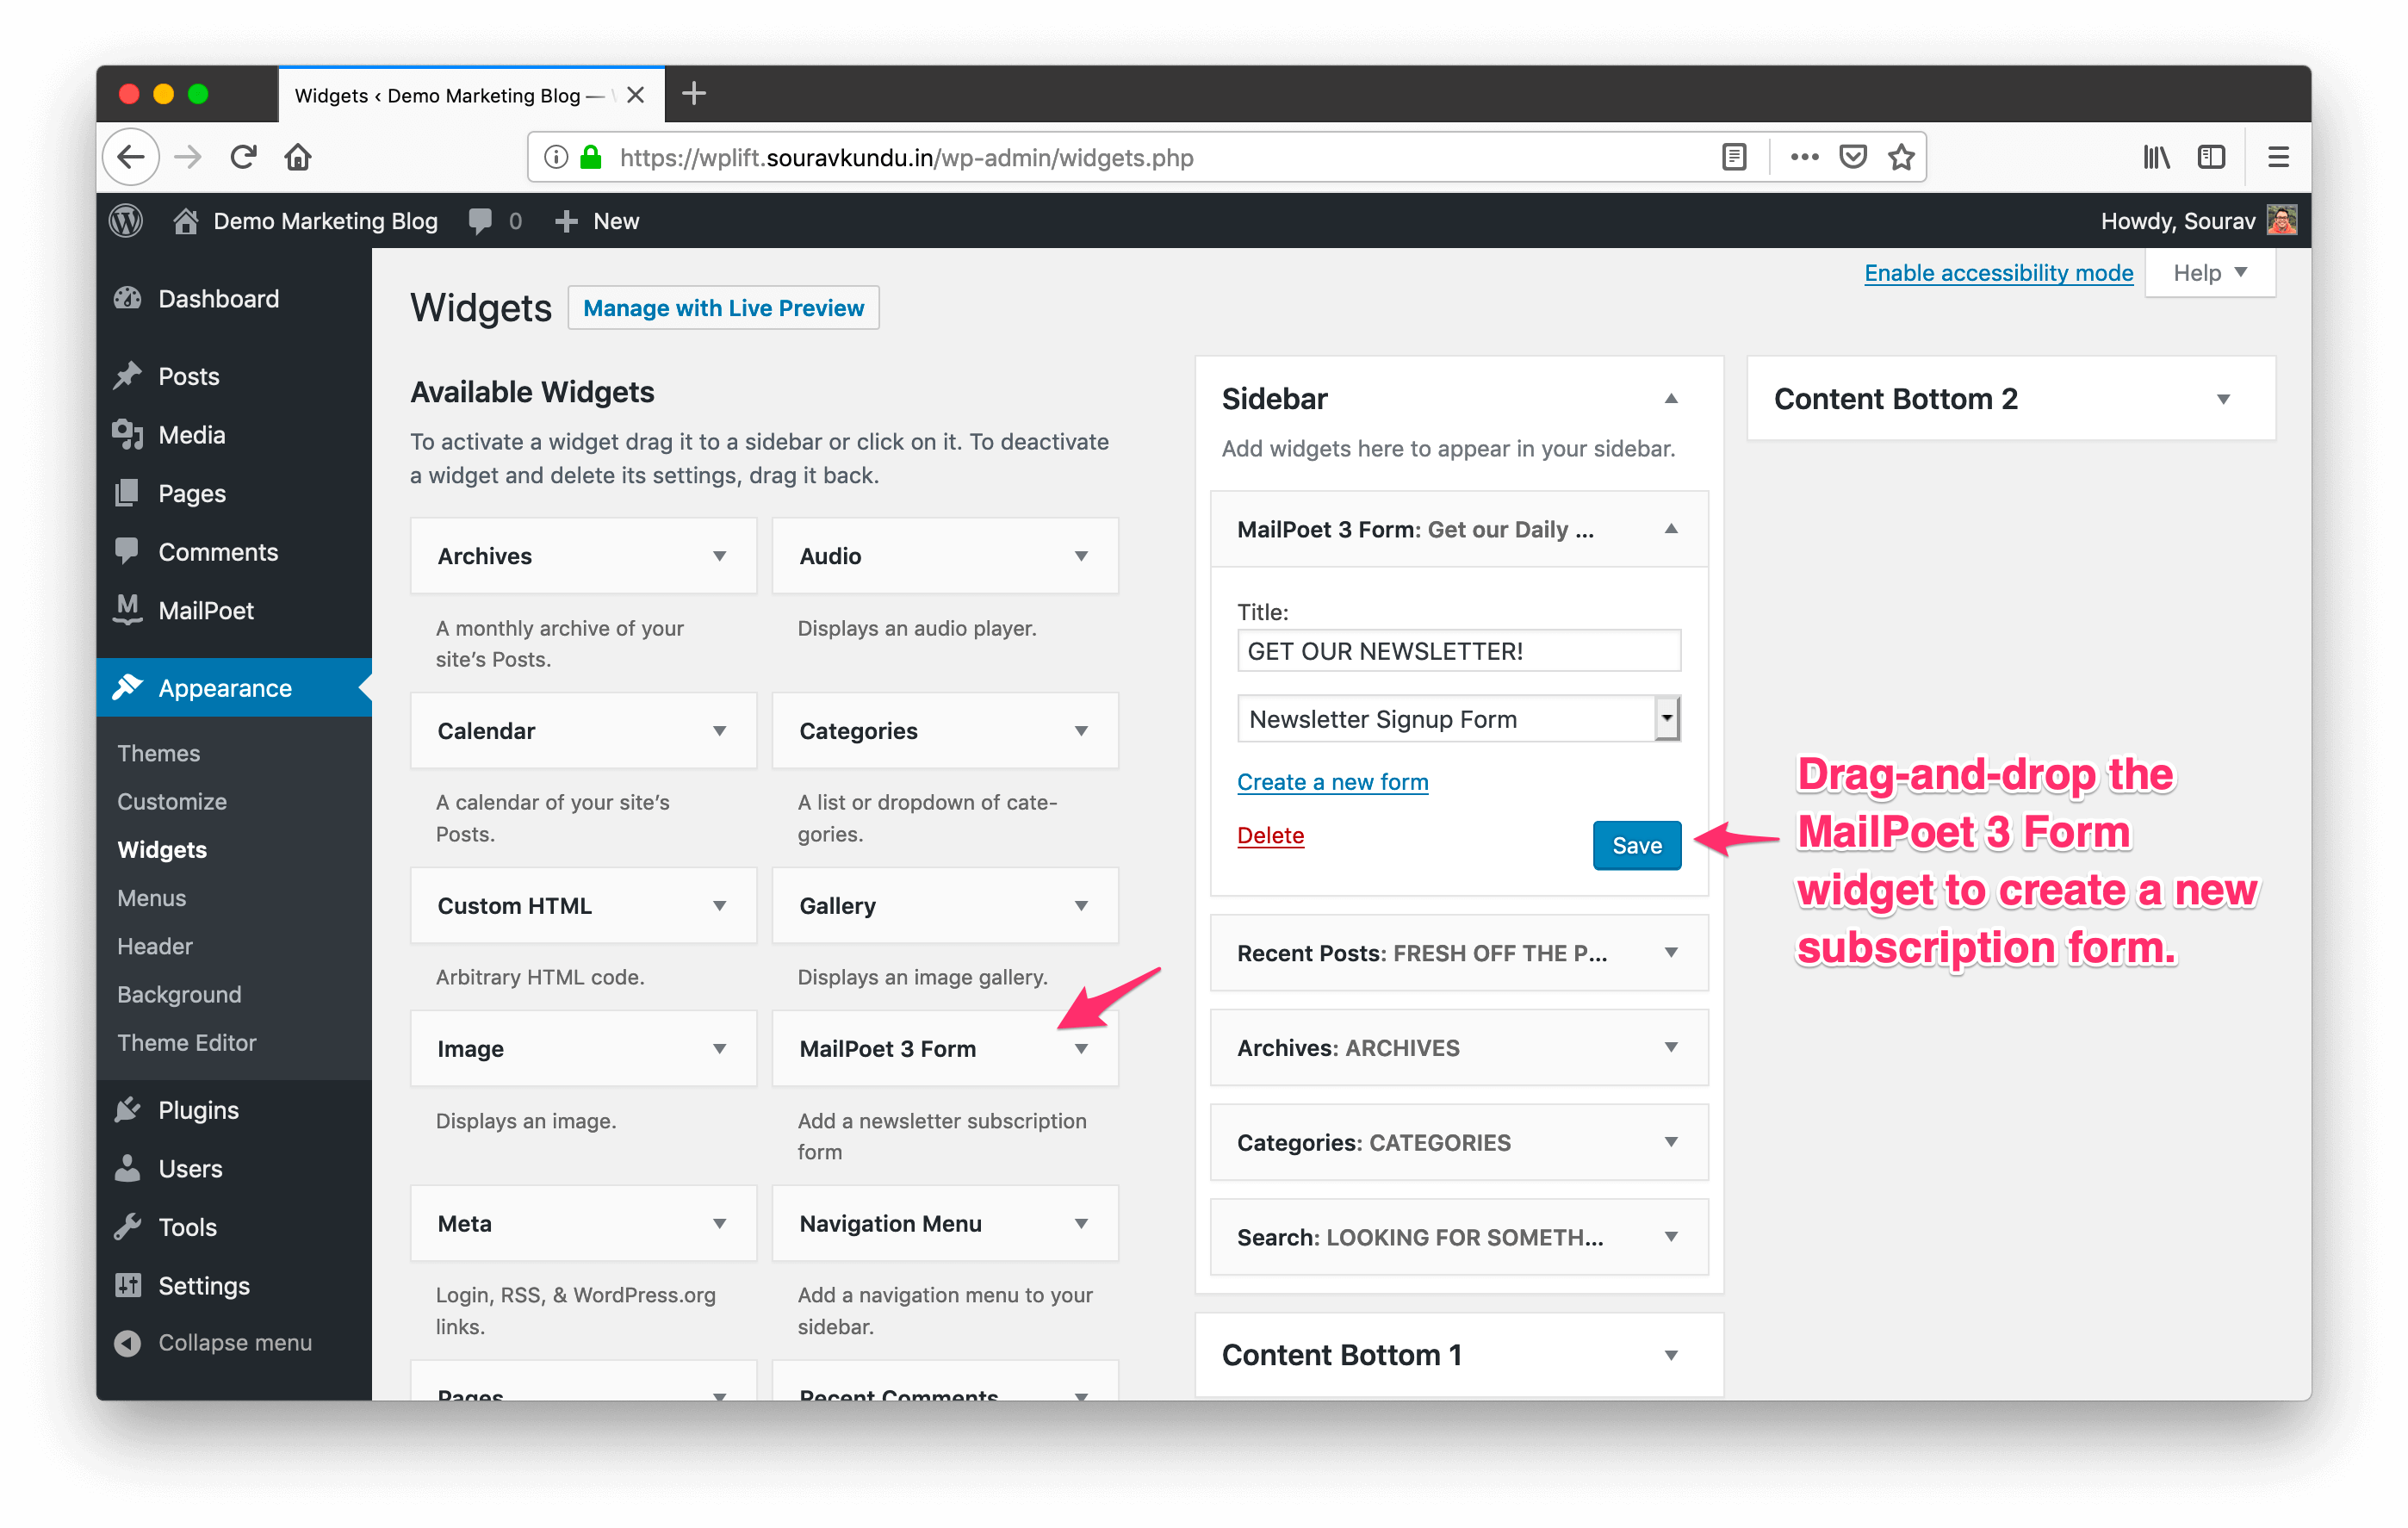
Now that you’ve prepared the signup form, it’s time to add it to your site. You can do this by using the MailPoet widget, or by using the plugin’s shortcodes in your posts and pages.
In the screenshot above, we’ve used the MailPoet widget to add a signup form in our site’s sidebar. The following screenshot shows a default subscription form in the Twenty Sixteen theme.

Advanced: MailPoet Email Delivery Configuration
The last thing you want with your newsletter is the emails landing up in the spam folder. They almost never get seen and are eventually deleted.
Email deliverability is one of those technical factors that decide whether your newsletters reach the inbox, or end up in spam. That’s why ESPs (email service providers) invest a lot of resources on their email infrastructure, to enable top-notch email deliverability.
MailPoet enables you to send emails in three different methods:
- Via your web host.
- Via third-party services.
- Via their own email delivery service.
Let’s discuss each of them.
Sending Newsletters from your WordPress Web Host using MailPoet
By default, MailPoet will use your WordPress host to send the newsletters. This helps you cut costs even when you have a large list.
However, each host has a limit on the number of emails you can send per hour. Check out this KB article that enlists all the supported hosts and their sending limit.
To configure your email delivery method, go to WordPress dashboard → MailPoet → Settings → Send With tab. Under the Others box, select Configure. You should see the following settings as shown in the screenshot below.
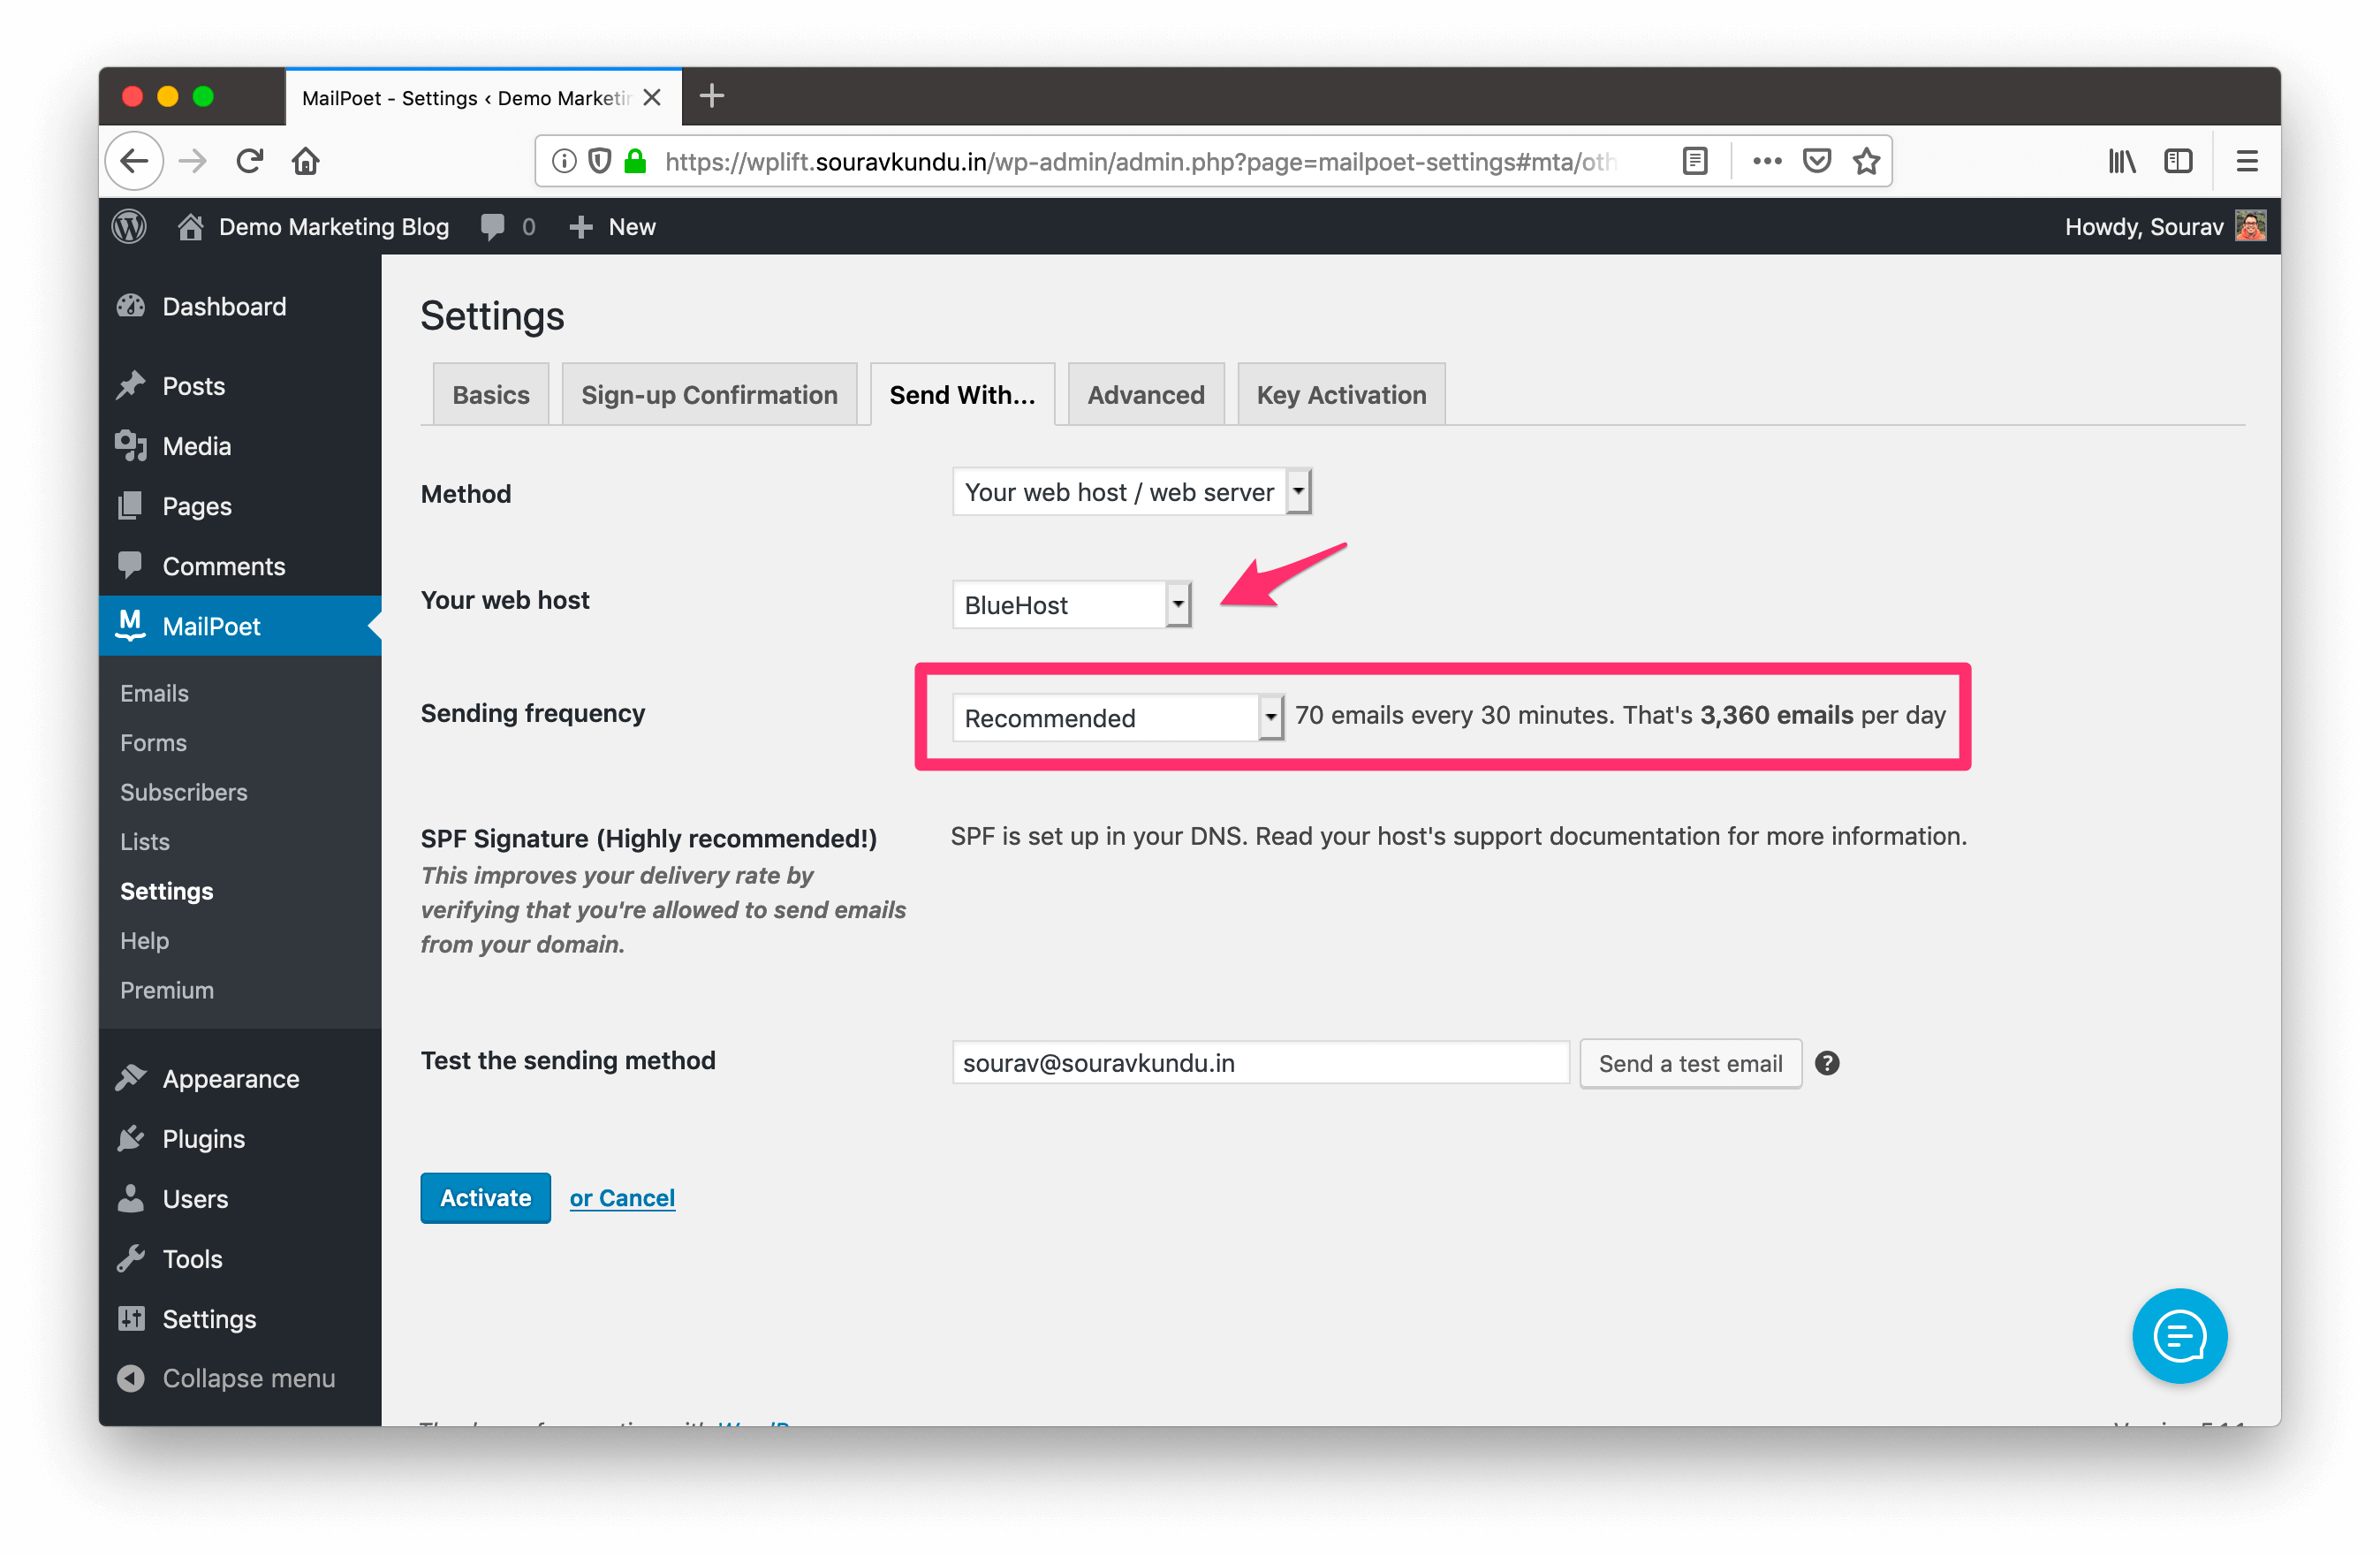
- Select the Method as Your web host/web server.
- Under the Your web host dropdown, choose your web hosting provider. MailPoet will automatically determine the sending frequency.
- Send a test email to check if the emails are landing in your inbox. If not, then you need to configure the SPF Signature settings by consulting your web host’s support team.
- Click on Activate to save the settings.
If your web host is not mentioned in the list, you need manually configure the sending frequency. You can start with a limit of 50 emails per hour.
Furthermore, you can increase or decrease the limit based on any account overuse notice from your web hosting provider.
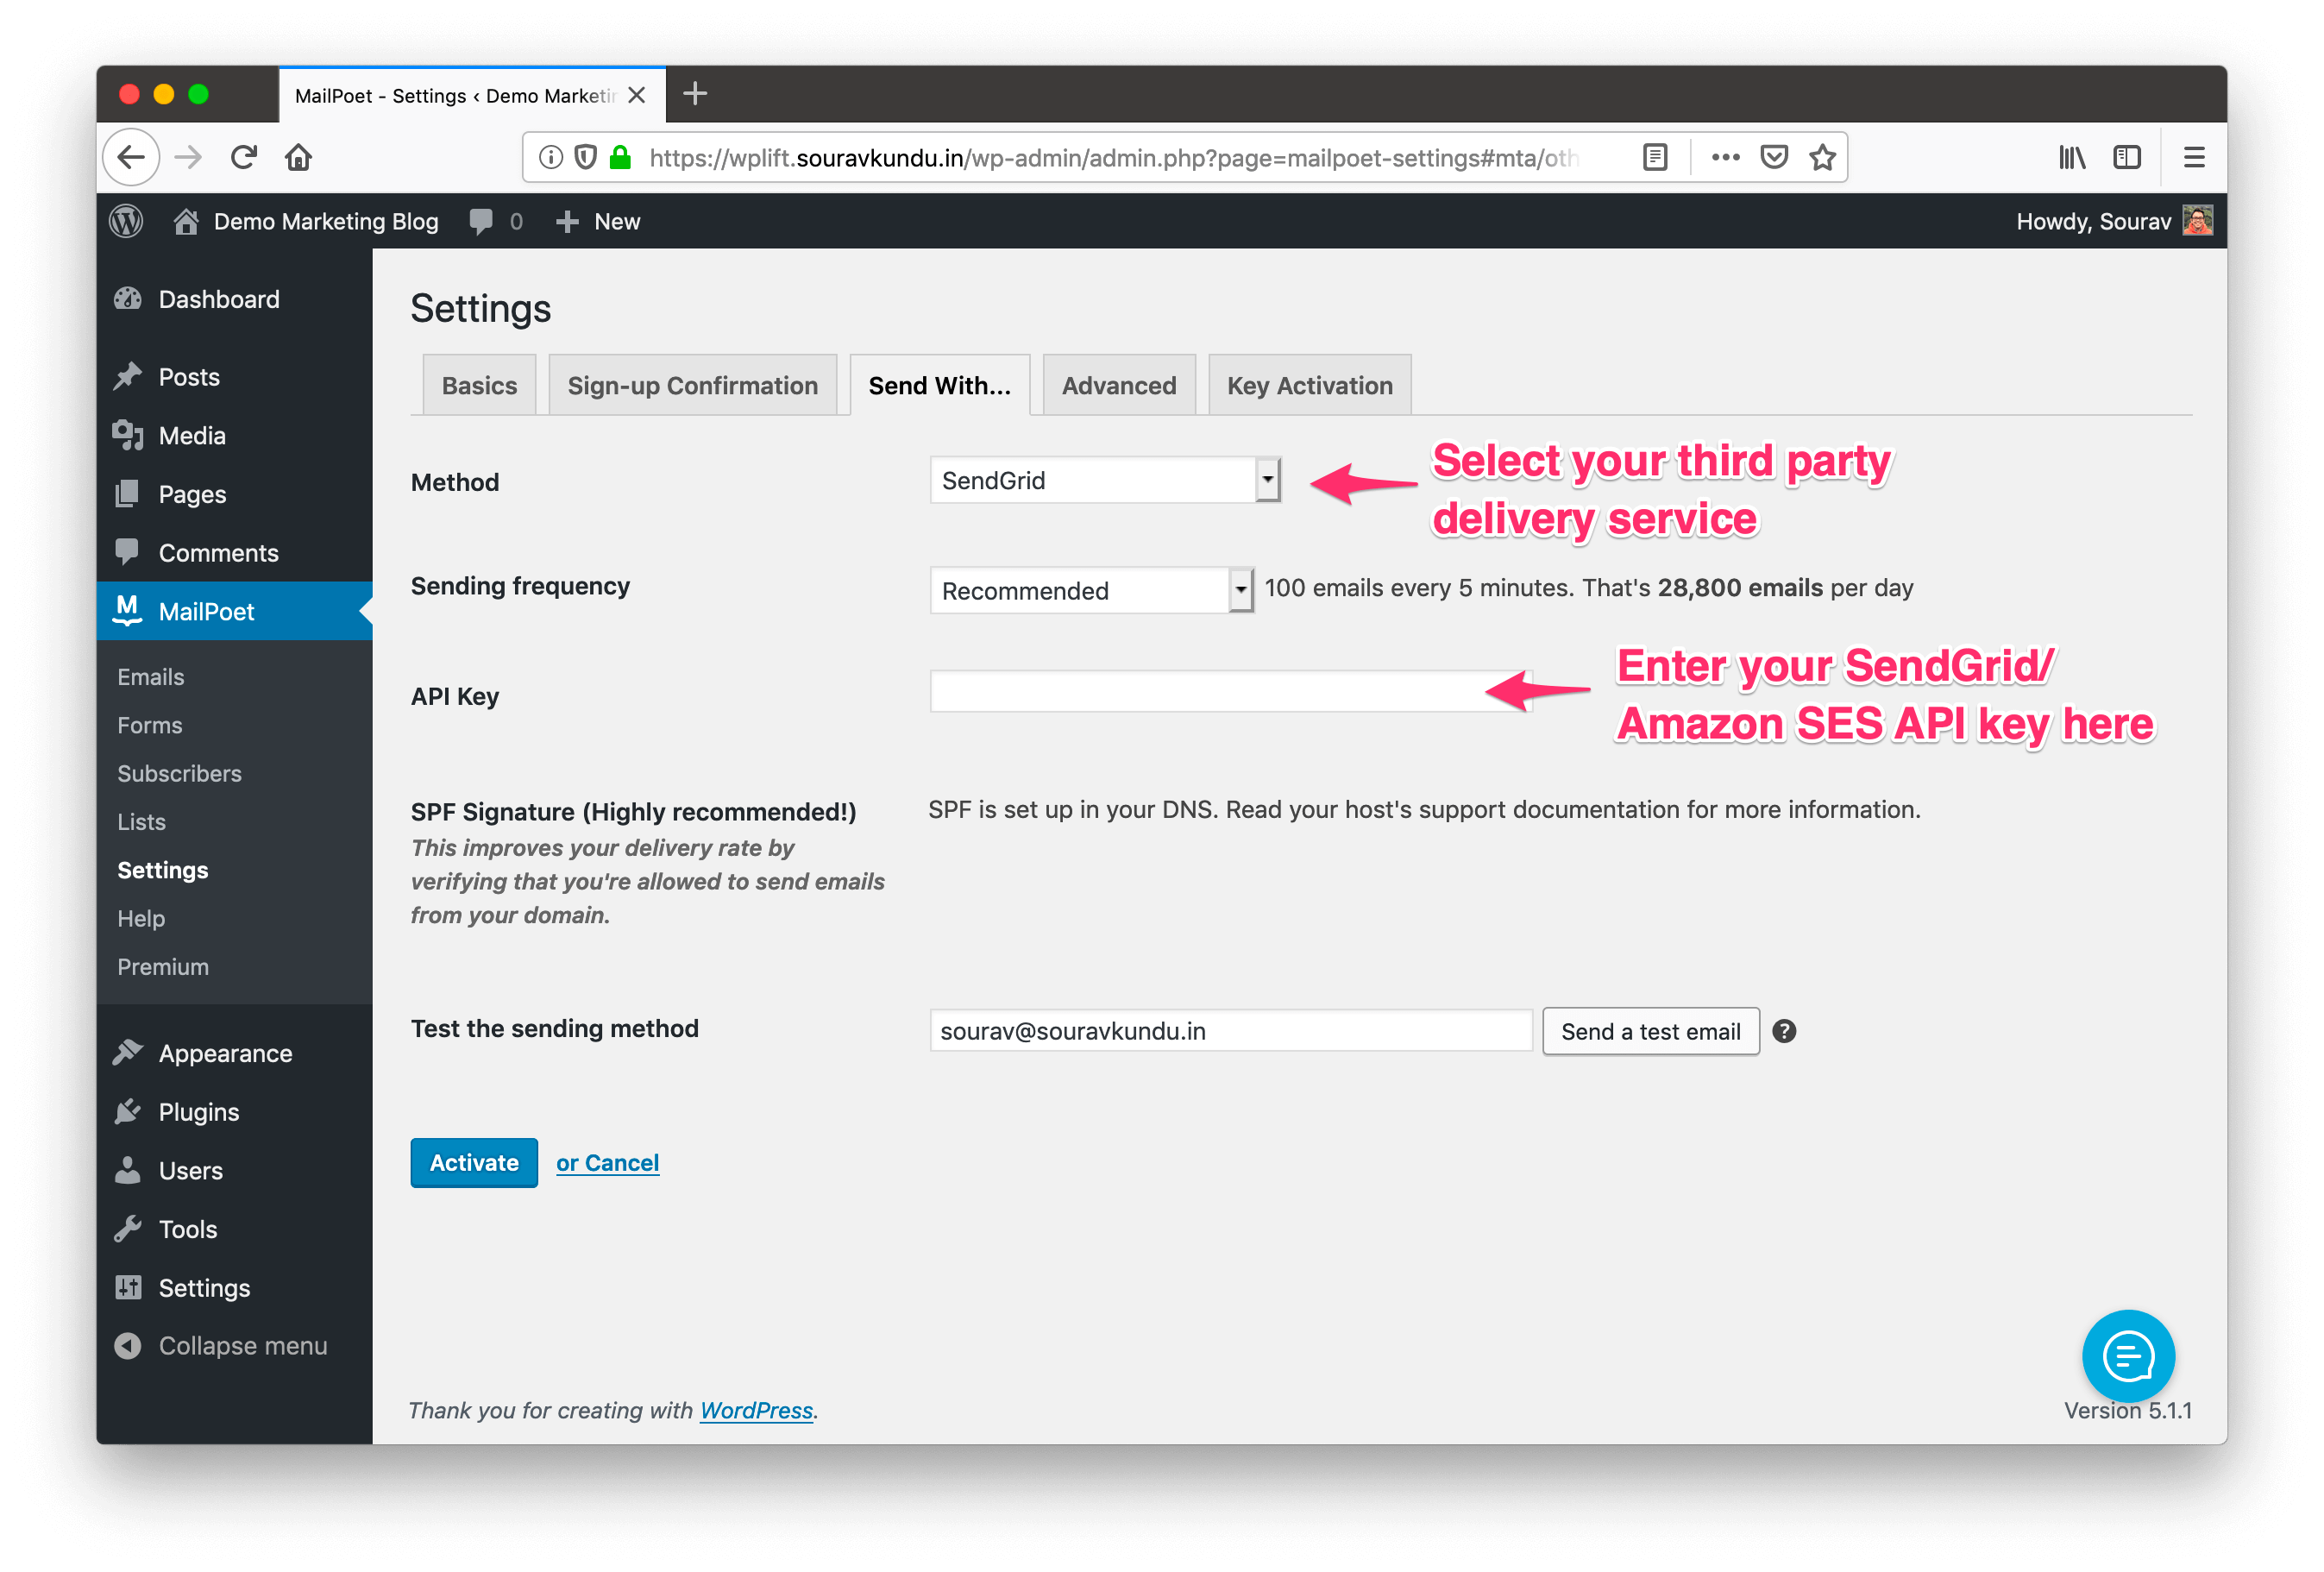
Sending Emails using 3rd Party Services in MailPoet
If you have a large number of newsletter subscribers, it may not be possible for you to send the emails via your web host. MailPoet supports third-party email delivery services such as SendGrid and Amazon SES to deliver your emails.
However, configuring a third-party email delivery partner involves multiple steps and requires a paid plan. Due to its technical nature, we’ve decided it to be beyond the scope of this tutorial.
Configuring MailPoet’s Free Email Delivery Service
Consider these two aspects of a newsletter plugin:
- Ease of use — This involves minimal plugin configuration, where users can simply design their newsletter and hit send (without even leaving the WordPress dashboard).
- Robust email deliverability — An infrastructure that ensures that your emails land in your subscribers’ inbox.
So far we’ve seen that we can have either one of them. The moment you want to configure email delivery options, you’ve somewhat lost the ease of use factor. What if there was a way you could have both?
Enter MailPoet’s free email delivery service. Think of it like SendGrid, but easier to use. It lets you send unlimited emails for free, for up to 2,000 subscribers.
When you activate this service, emails are sent using MailPoet’s own infrastructure — giving you top-notch email deliverability. Configuring the service is as simple as getting an API key and entering it in your plugin.
Sounds interesting? Here’s how you can do it:
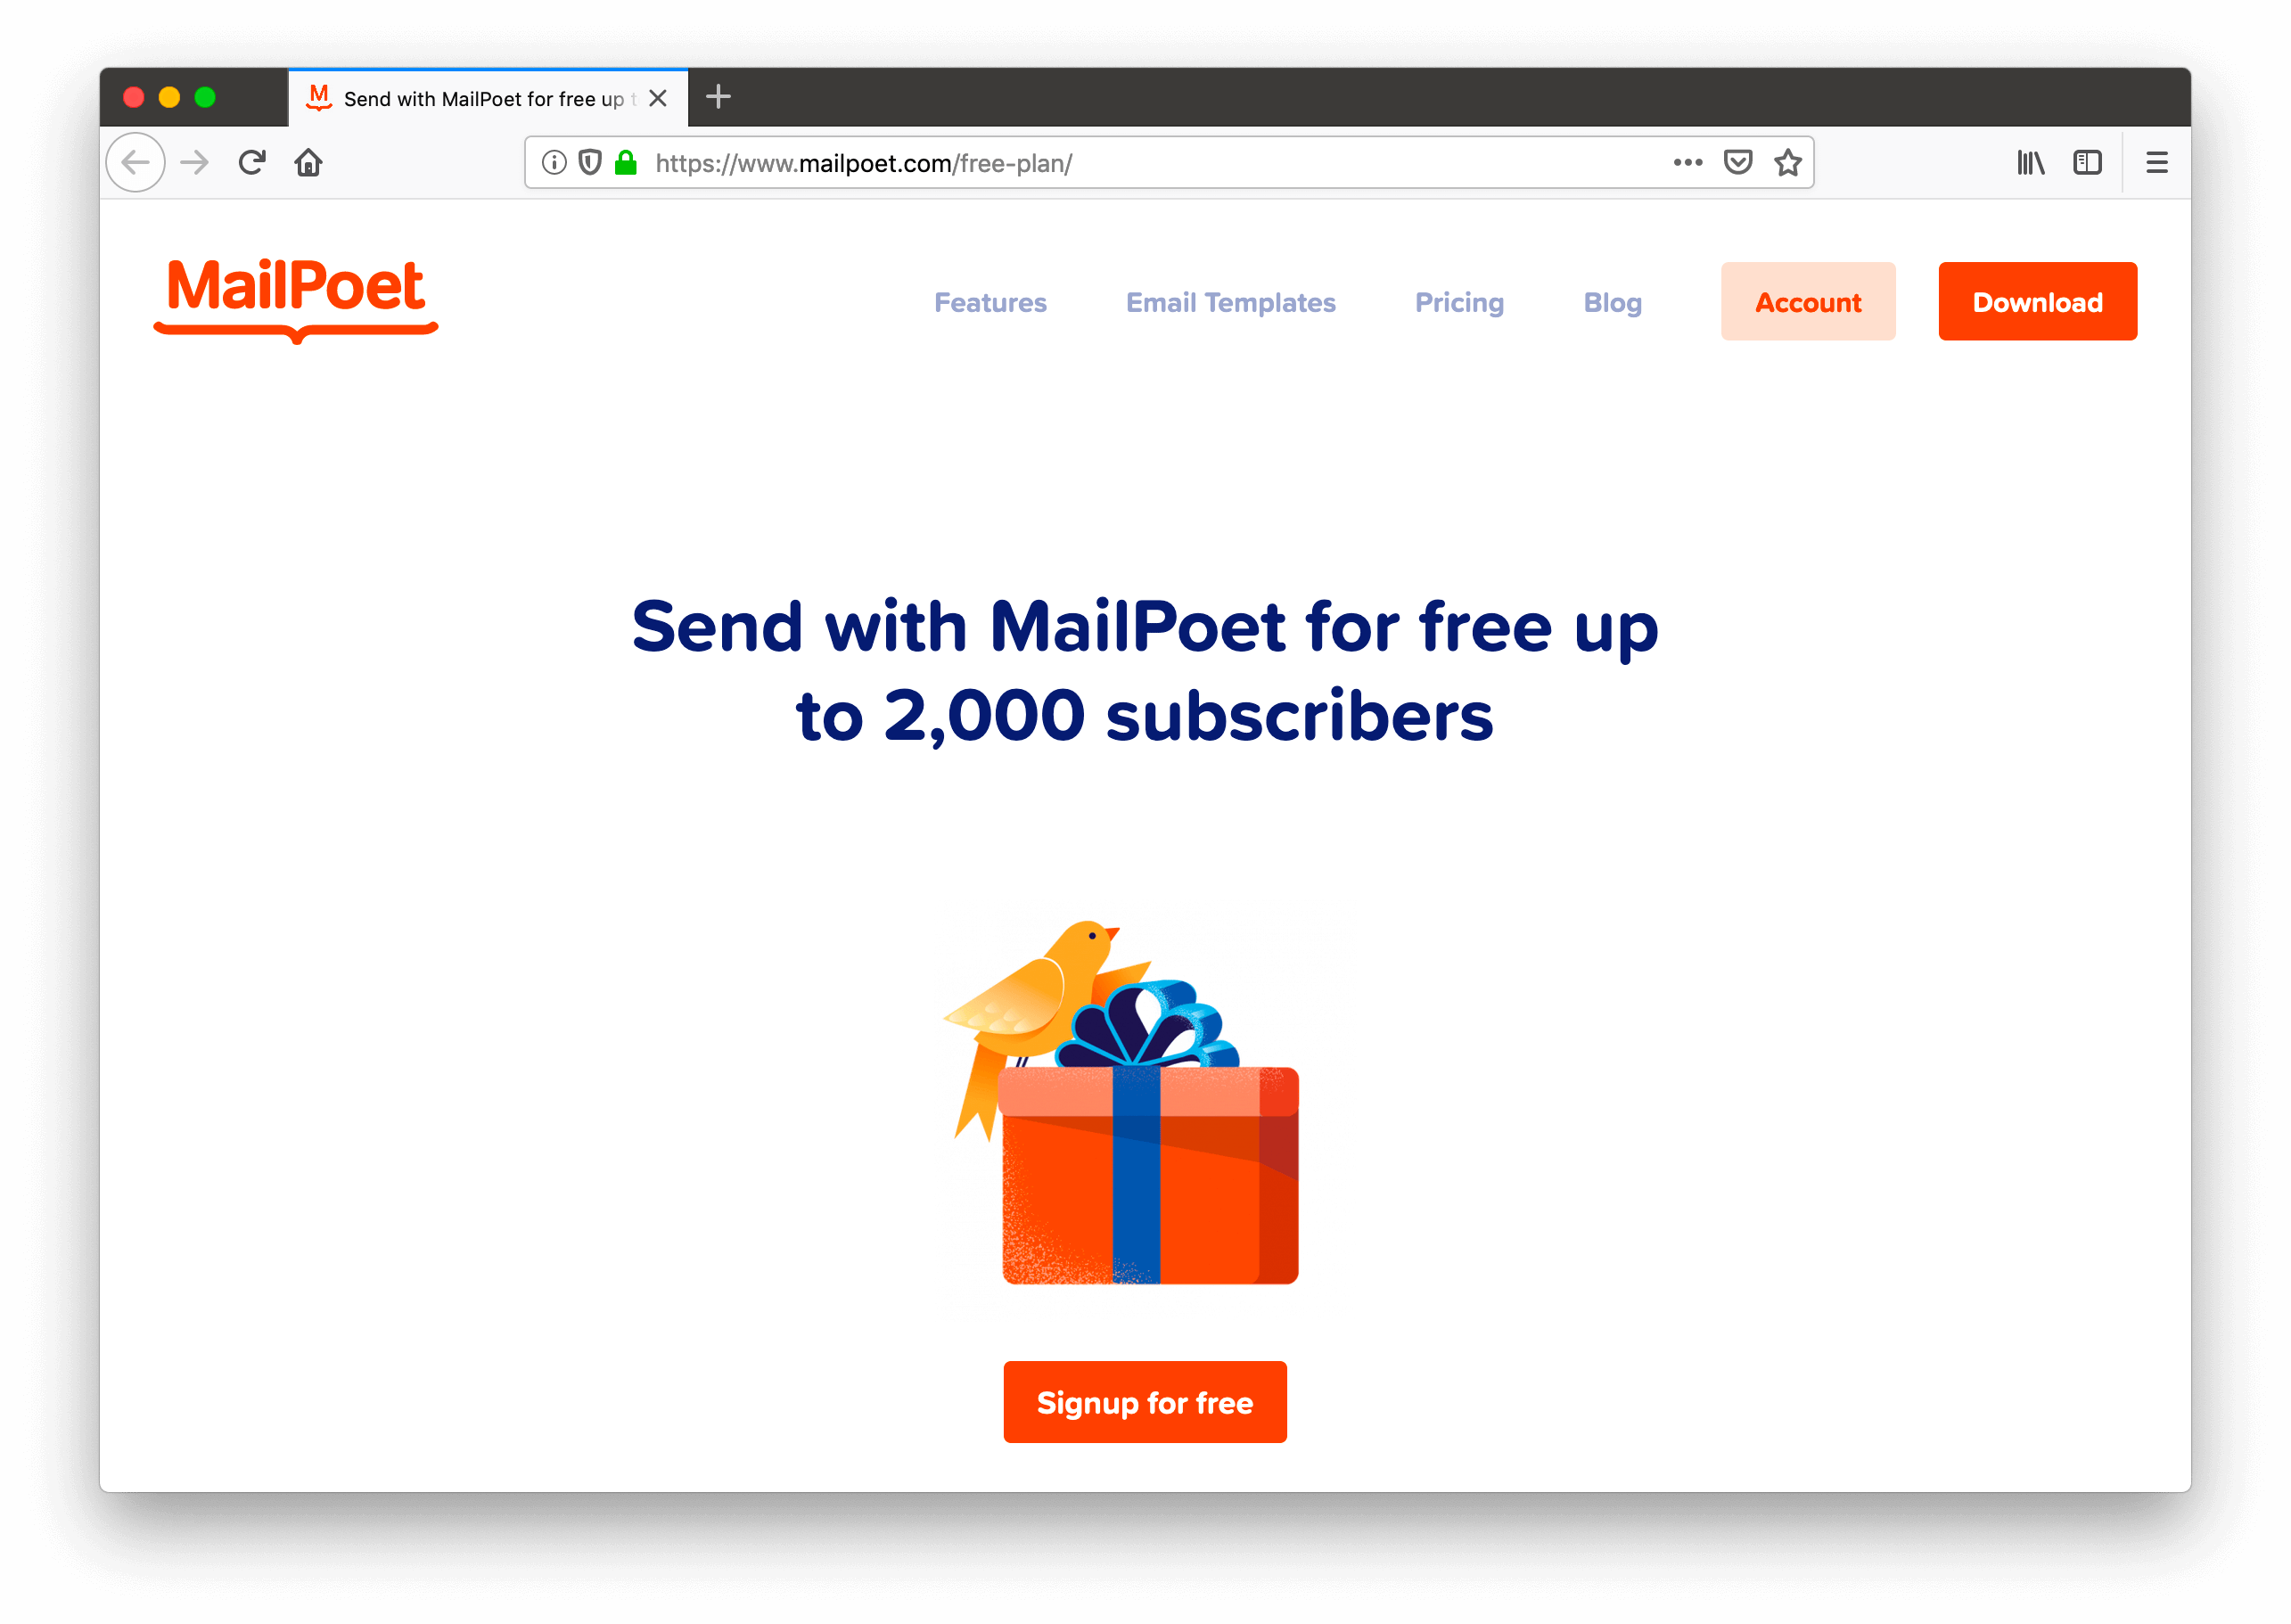
The first step is to signup for MailPoet’s free plan.
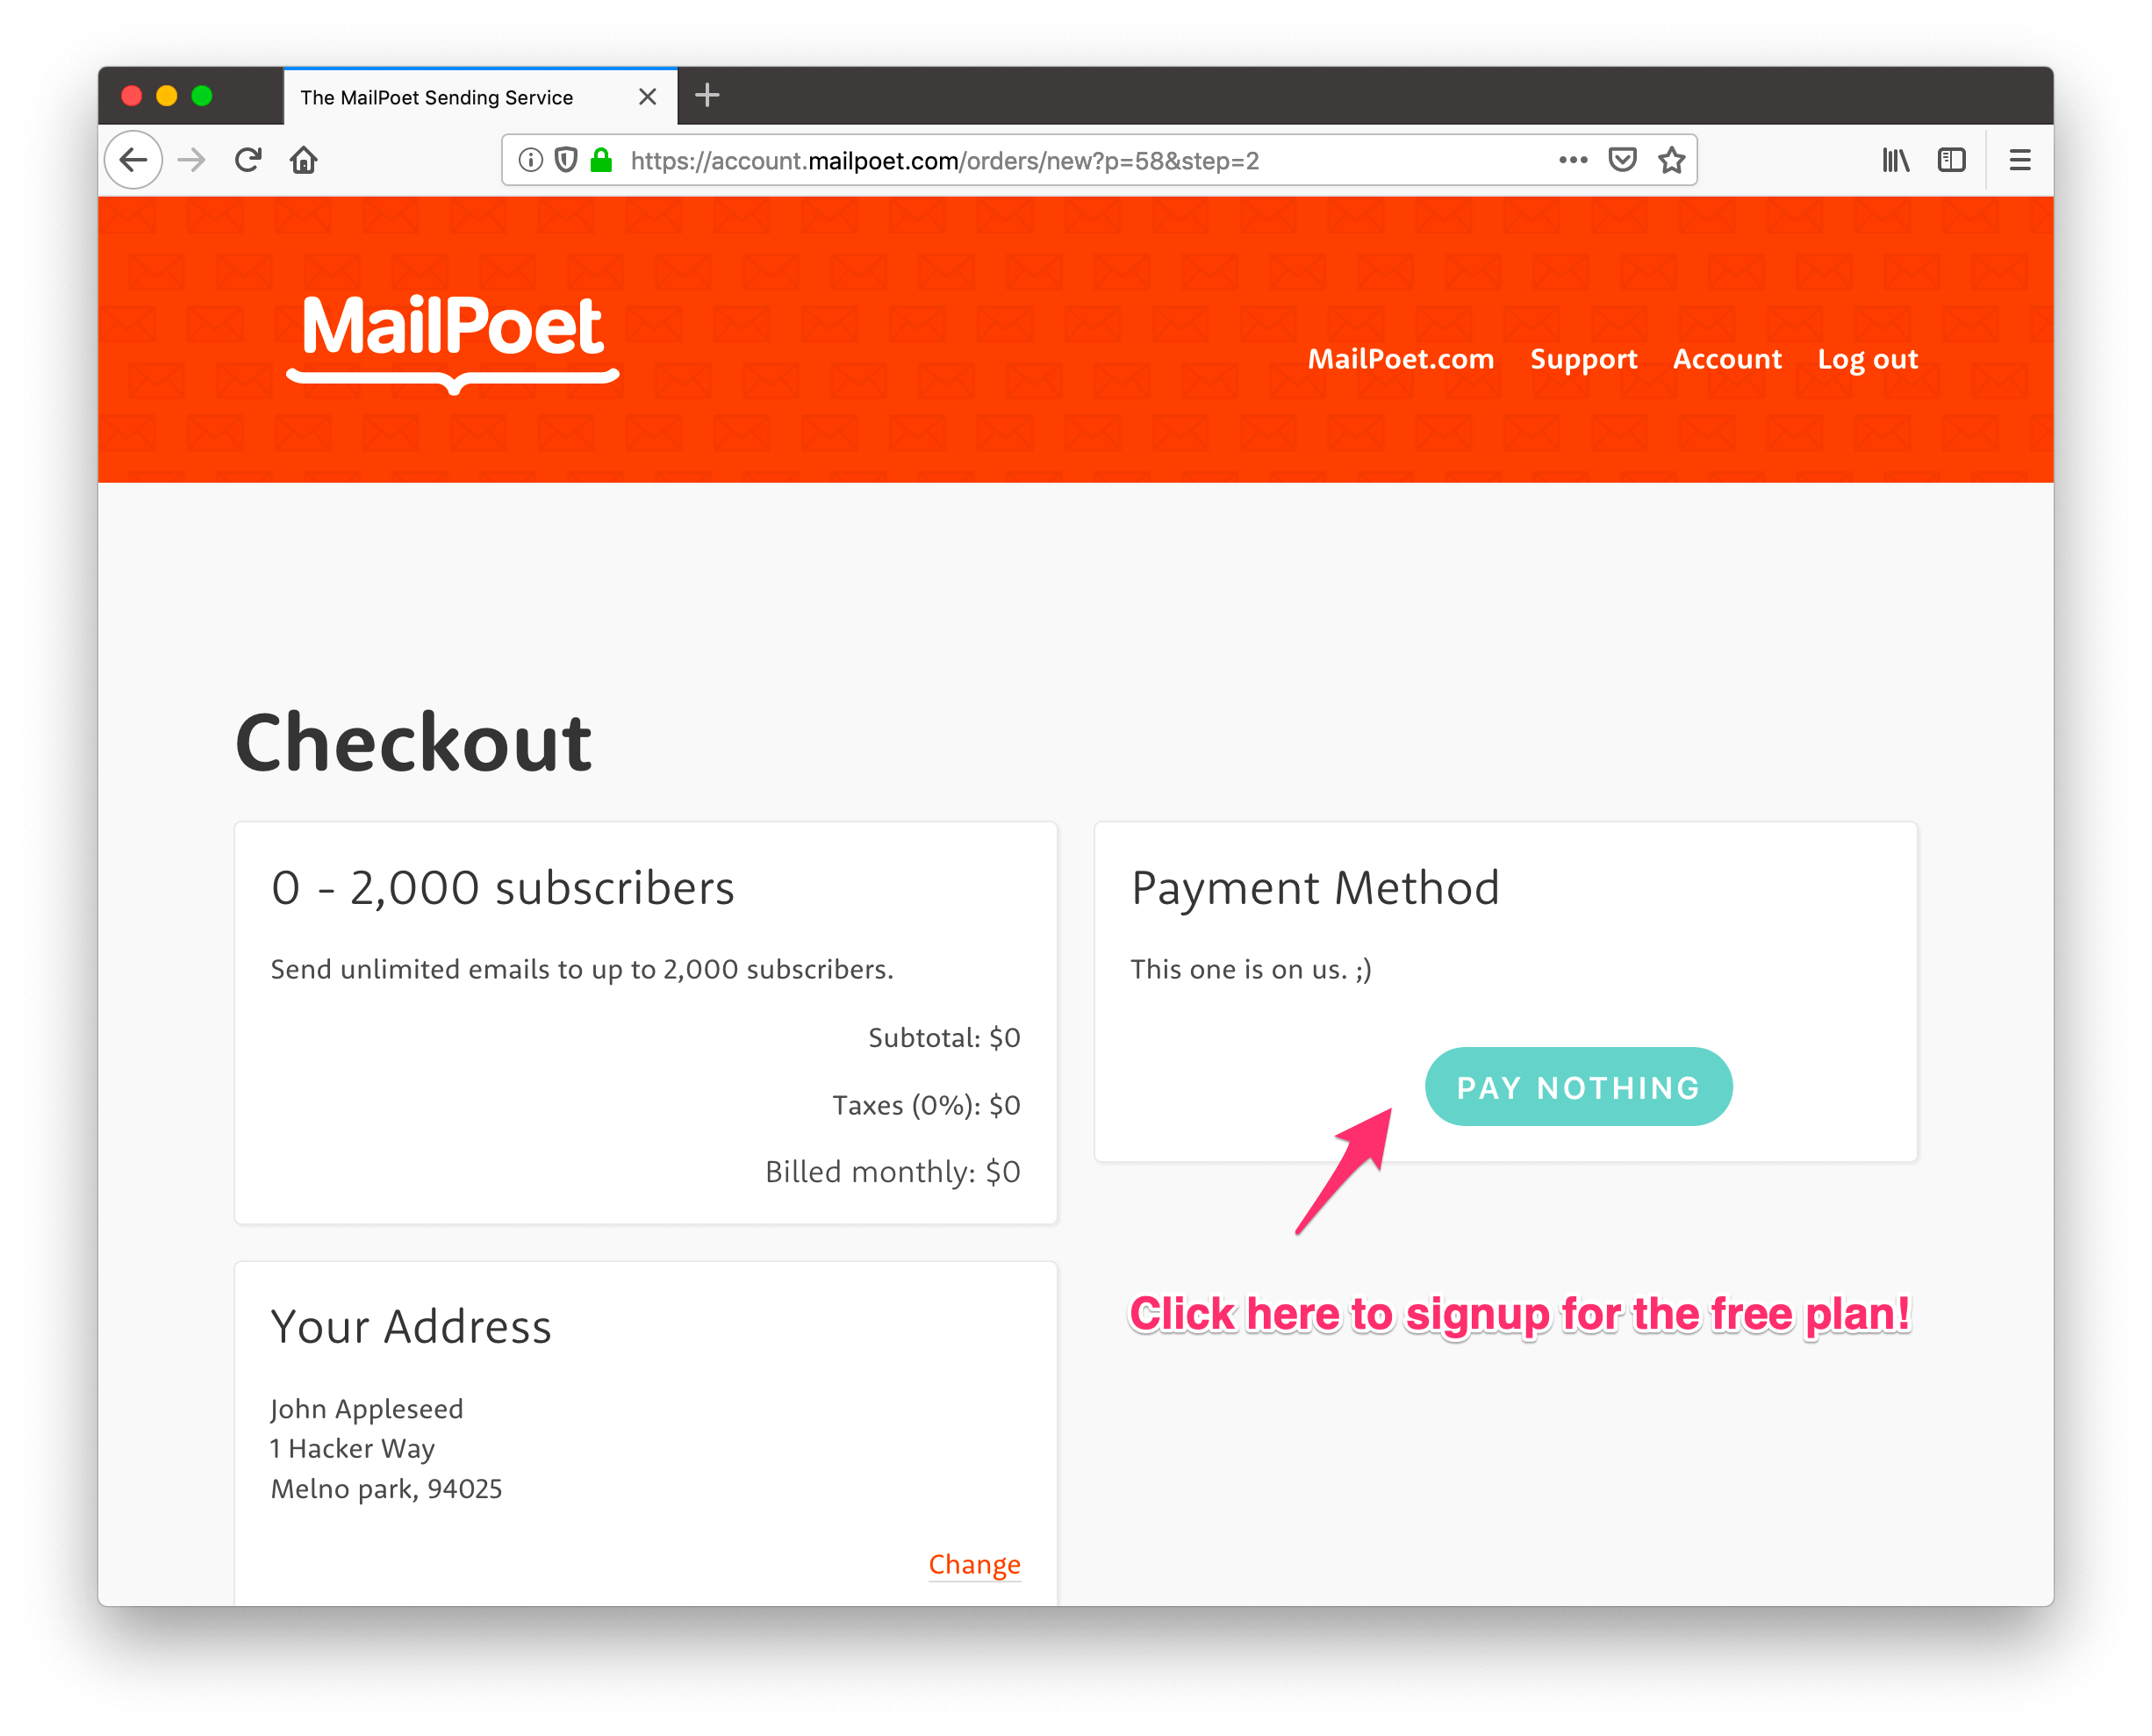
Once you’ve created an account, go to your Account settings in MailPoet.com and click on the Pay Nothing button to subscribe to their Free Plan.
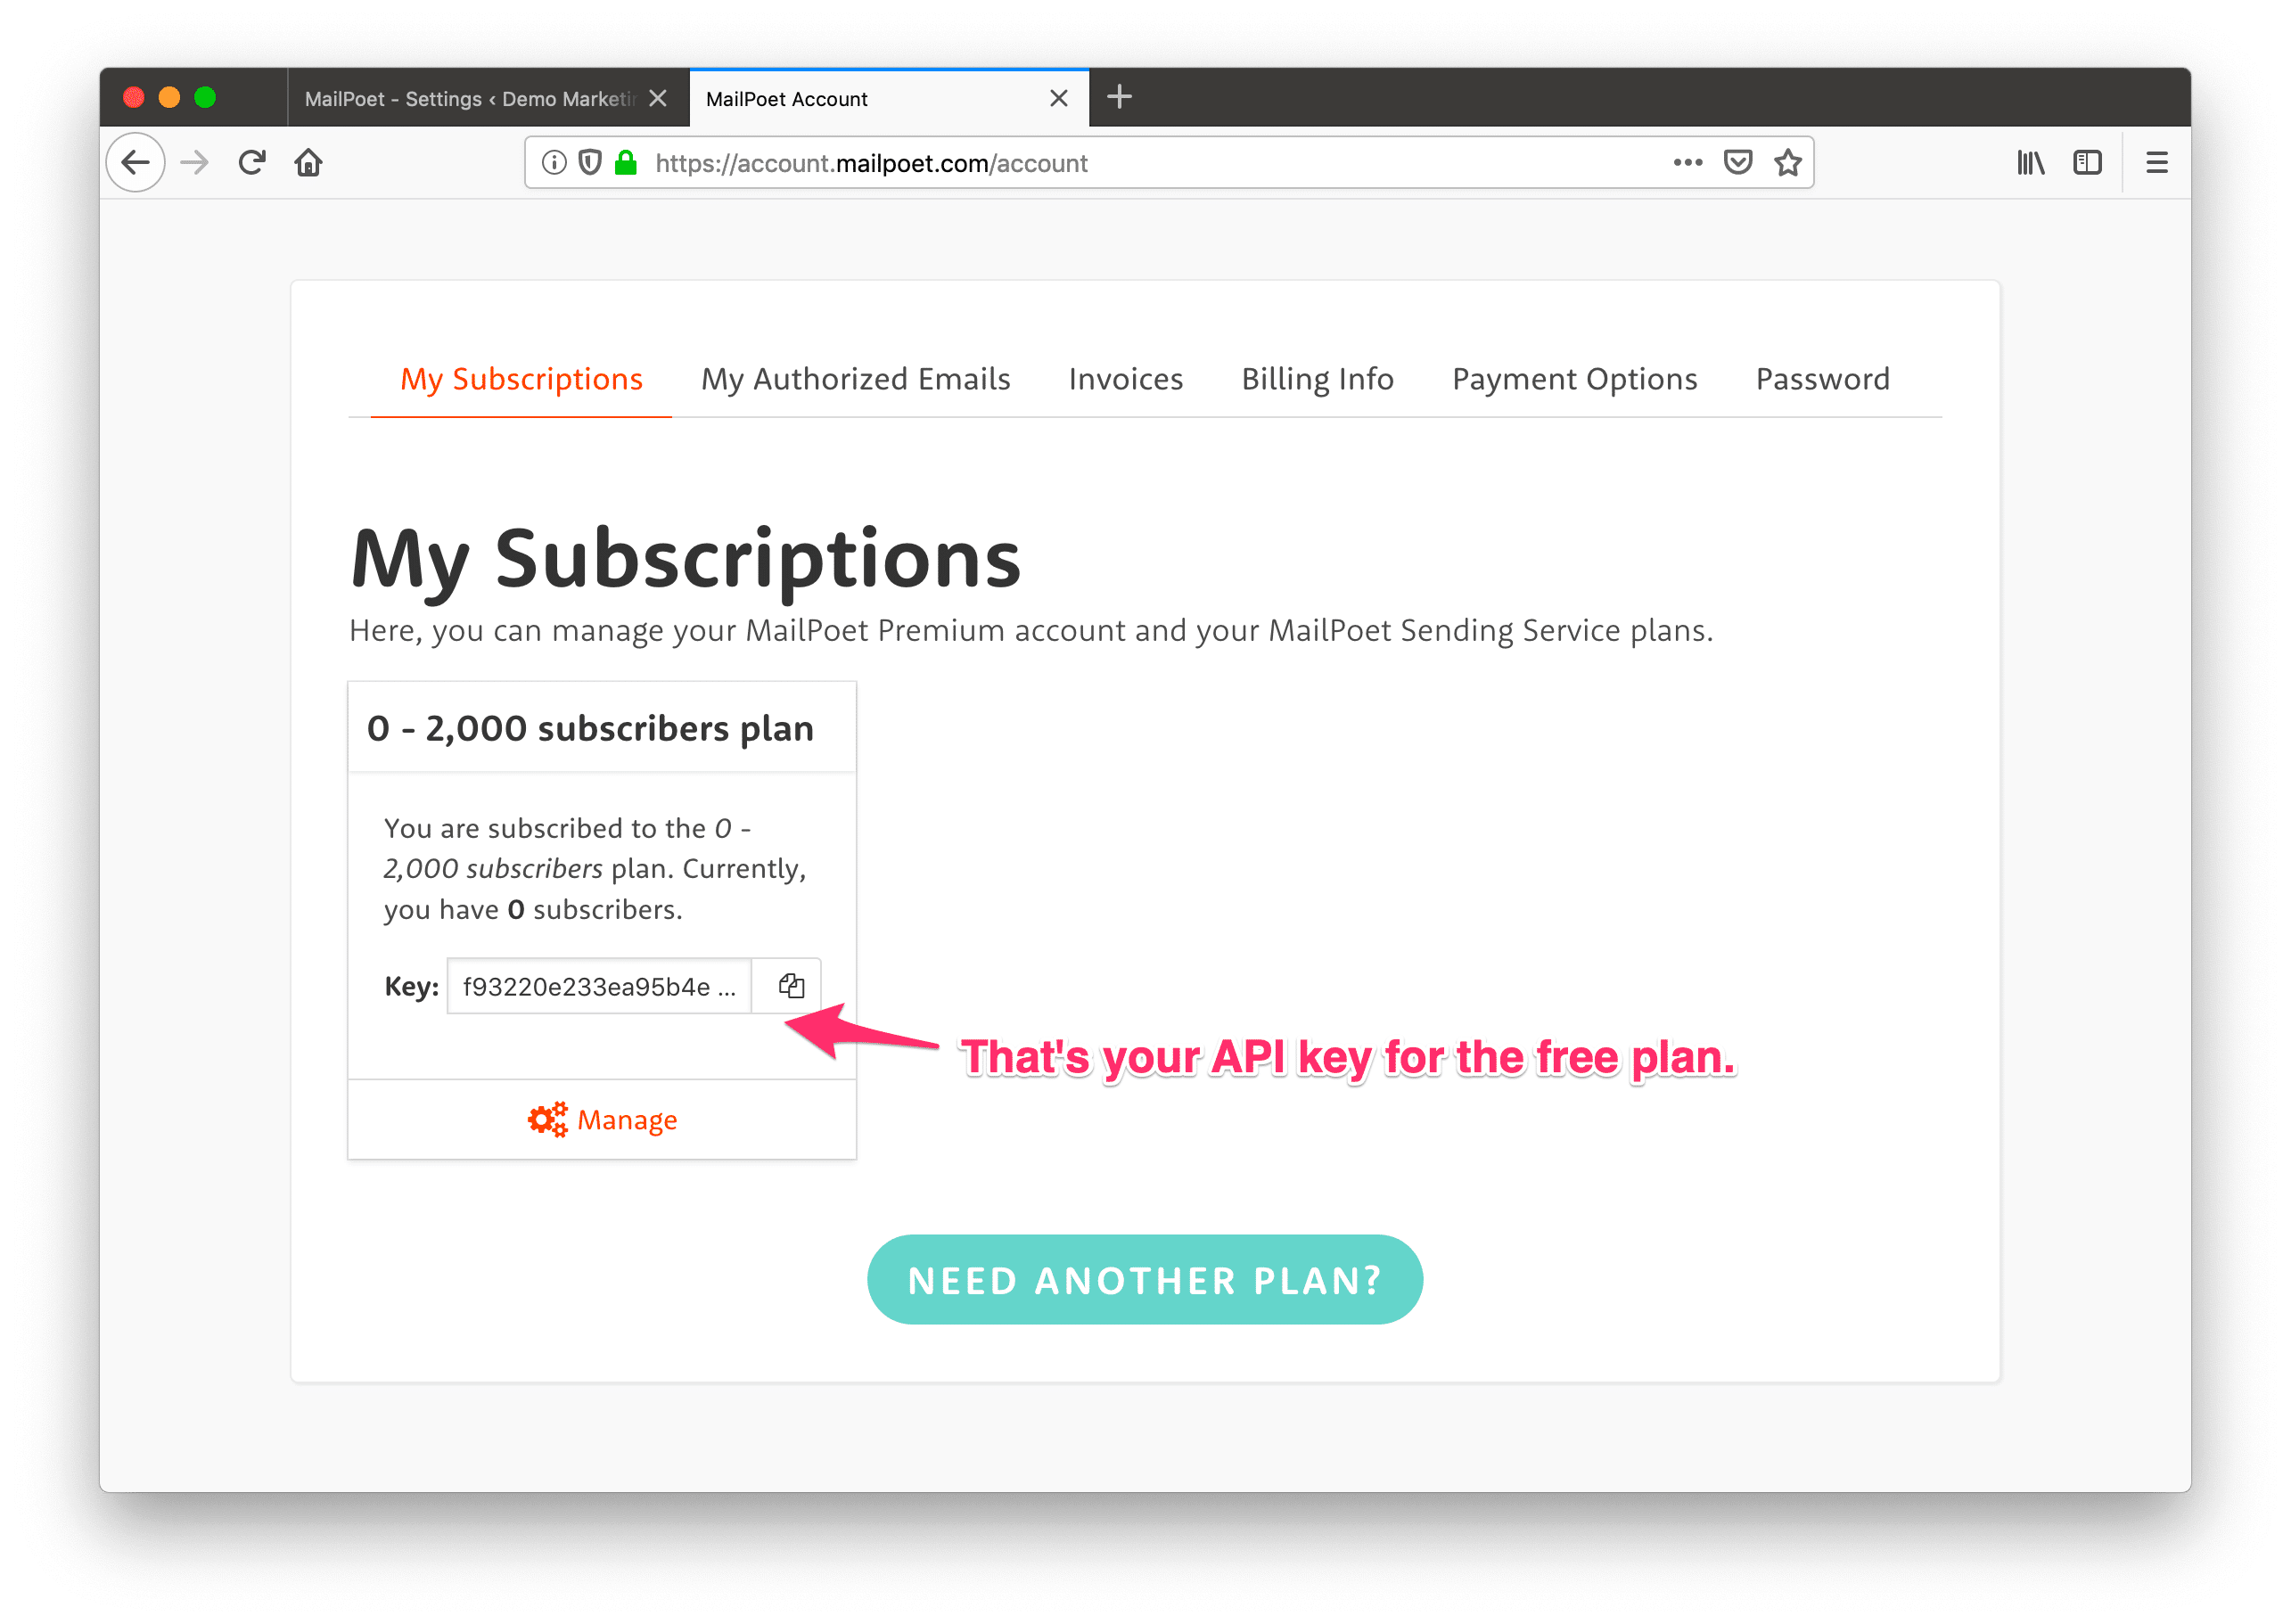
That will generate your API key. You’ll need to copy-paste this in the MailPoet plugin in your WordPress site.
Adding an Authorized Email in MailPoet
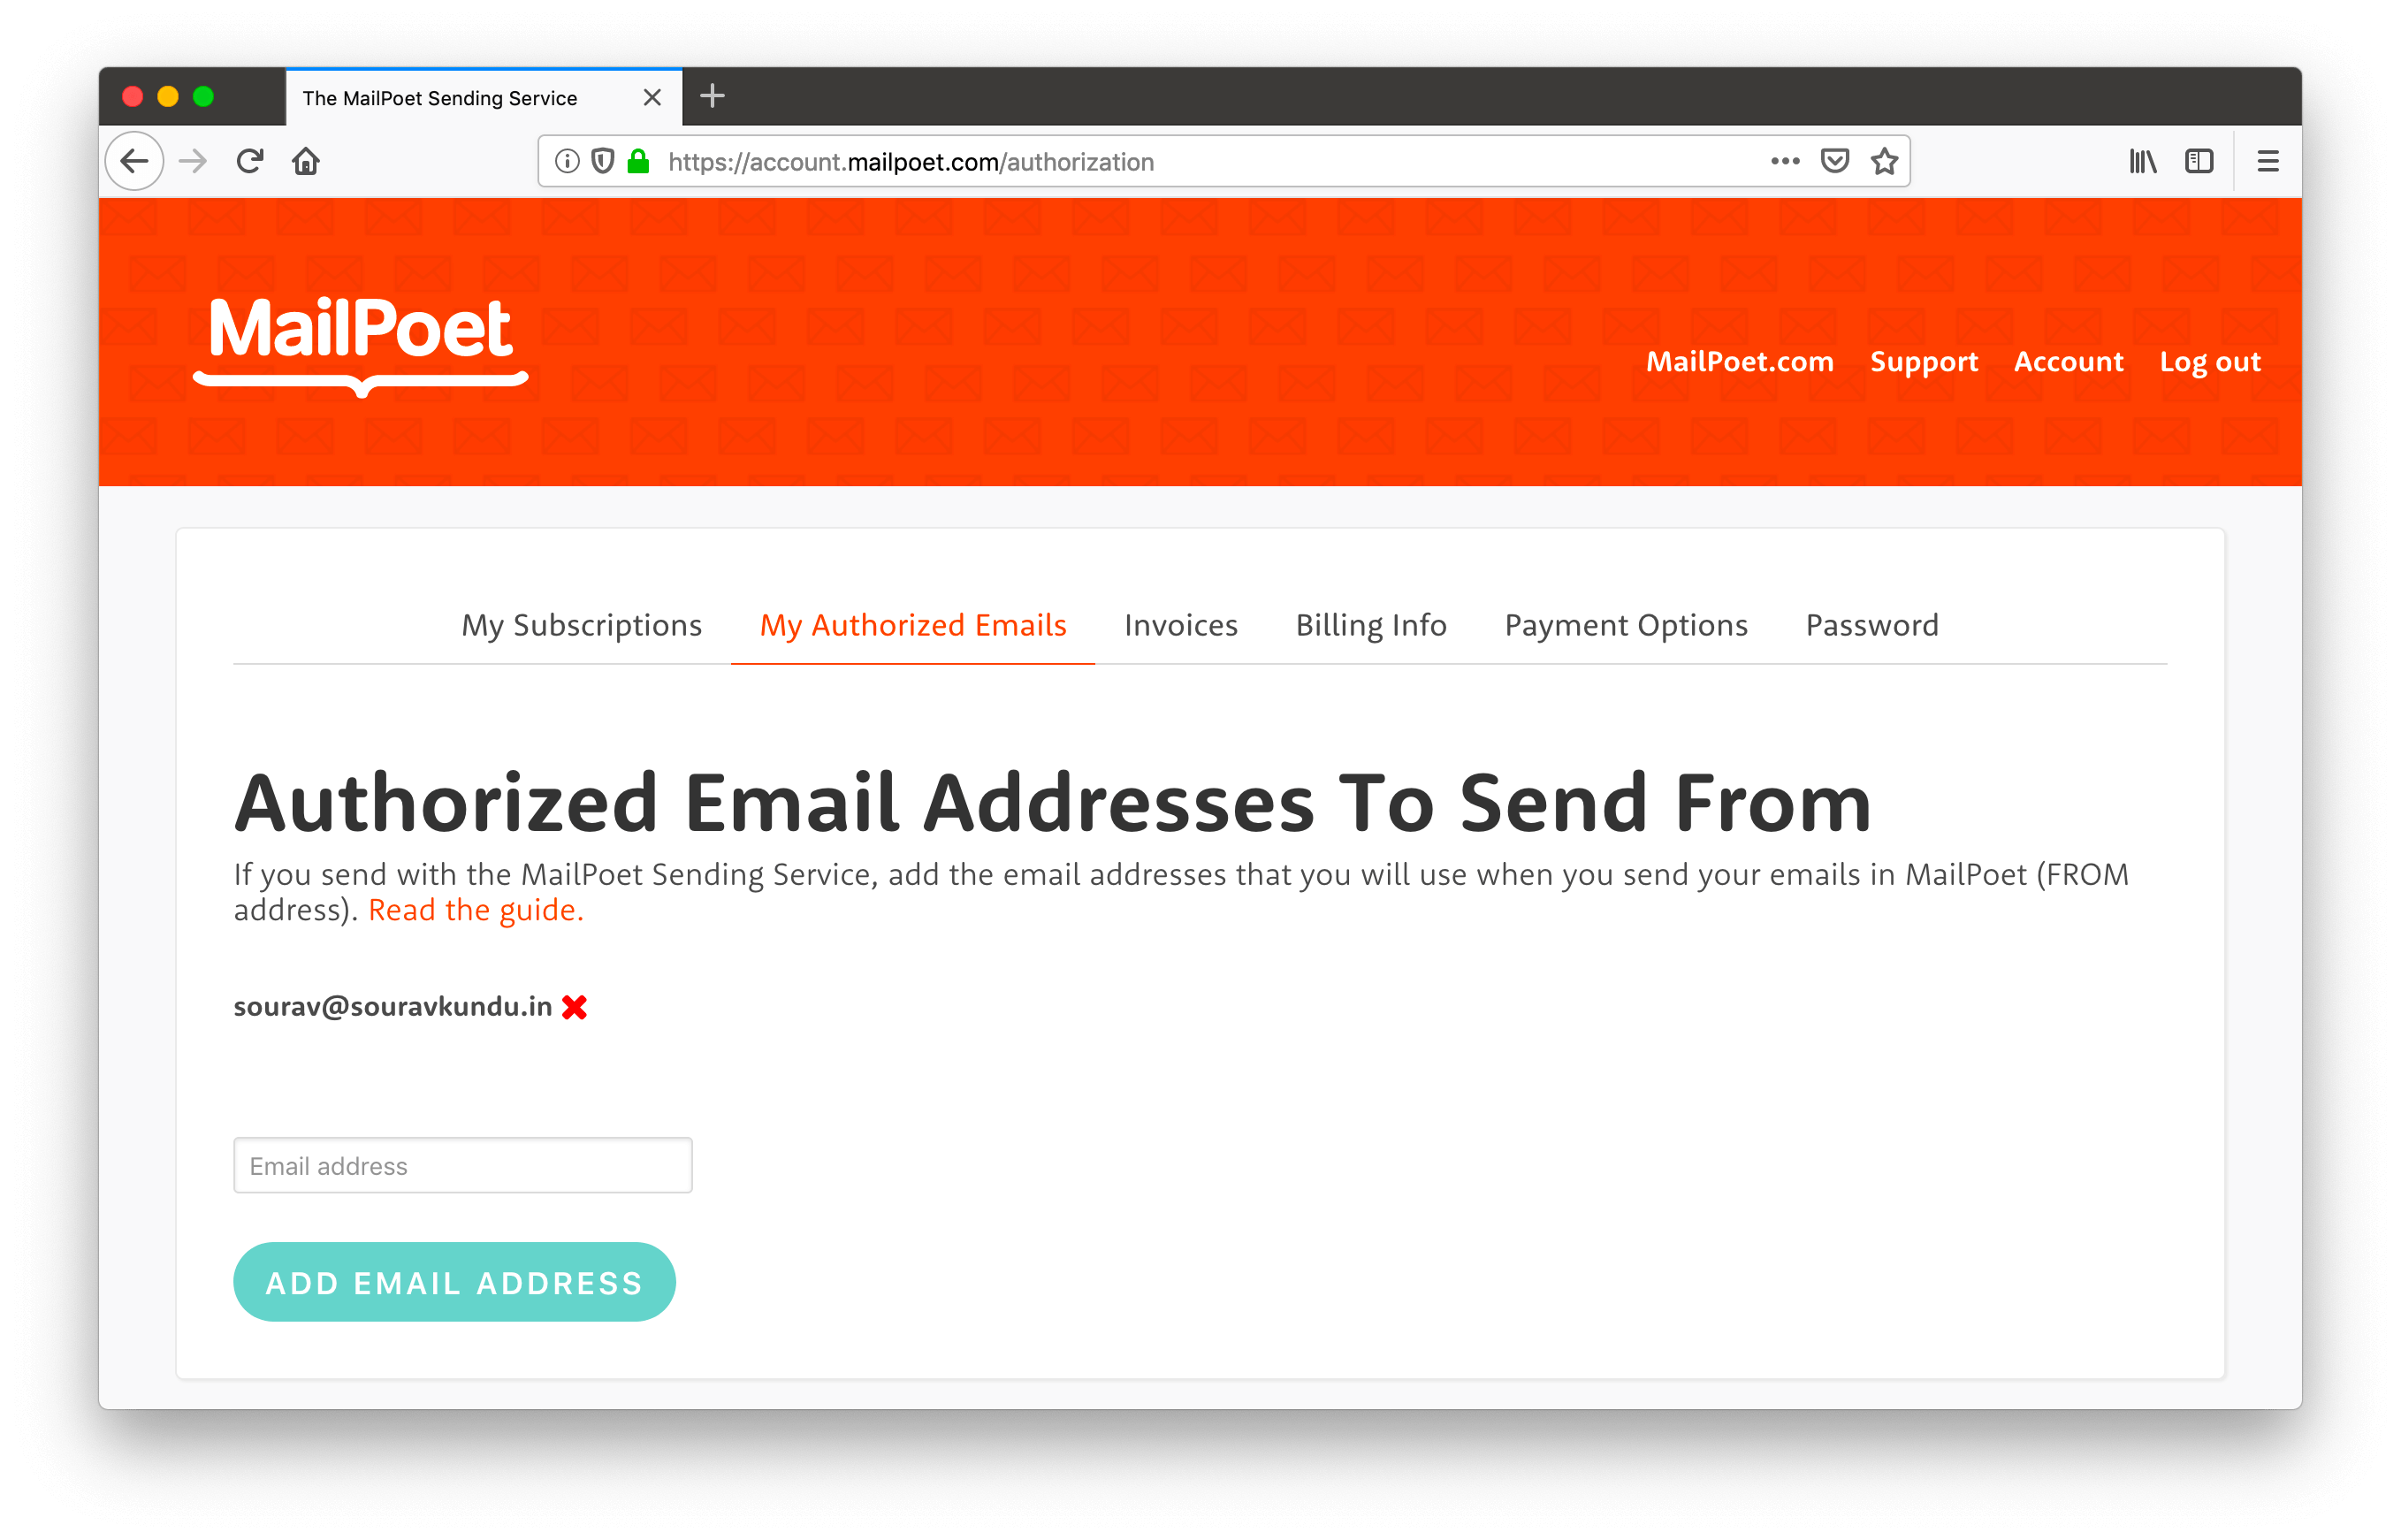
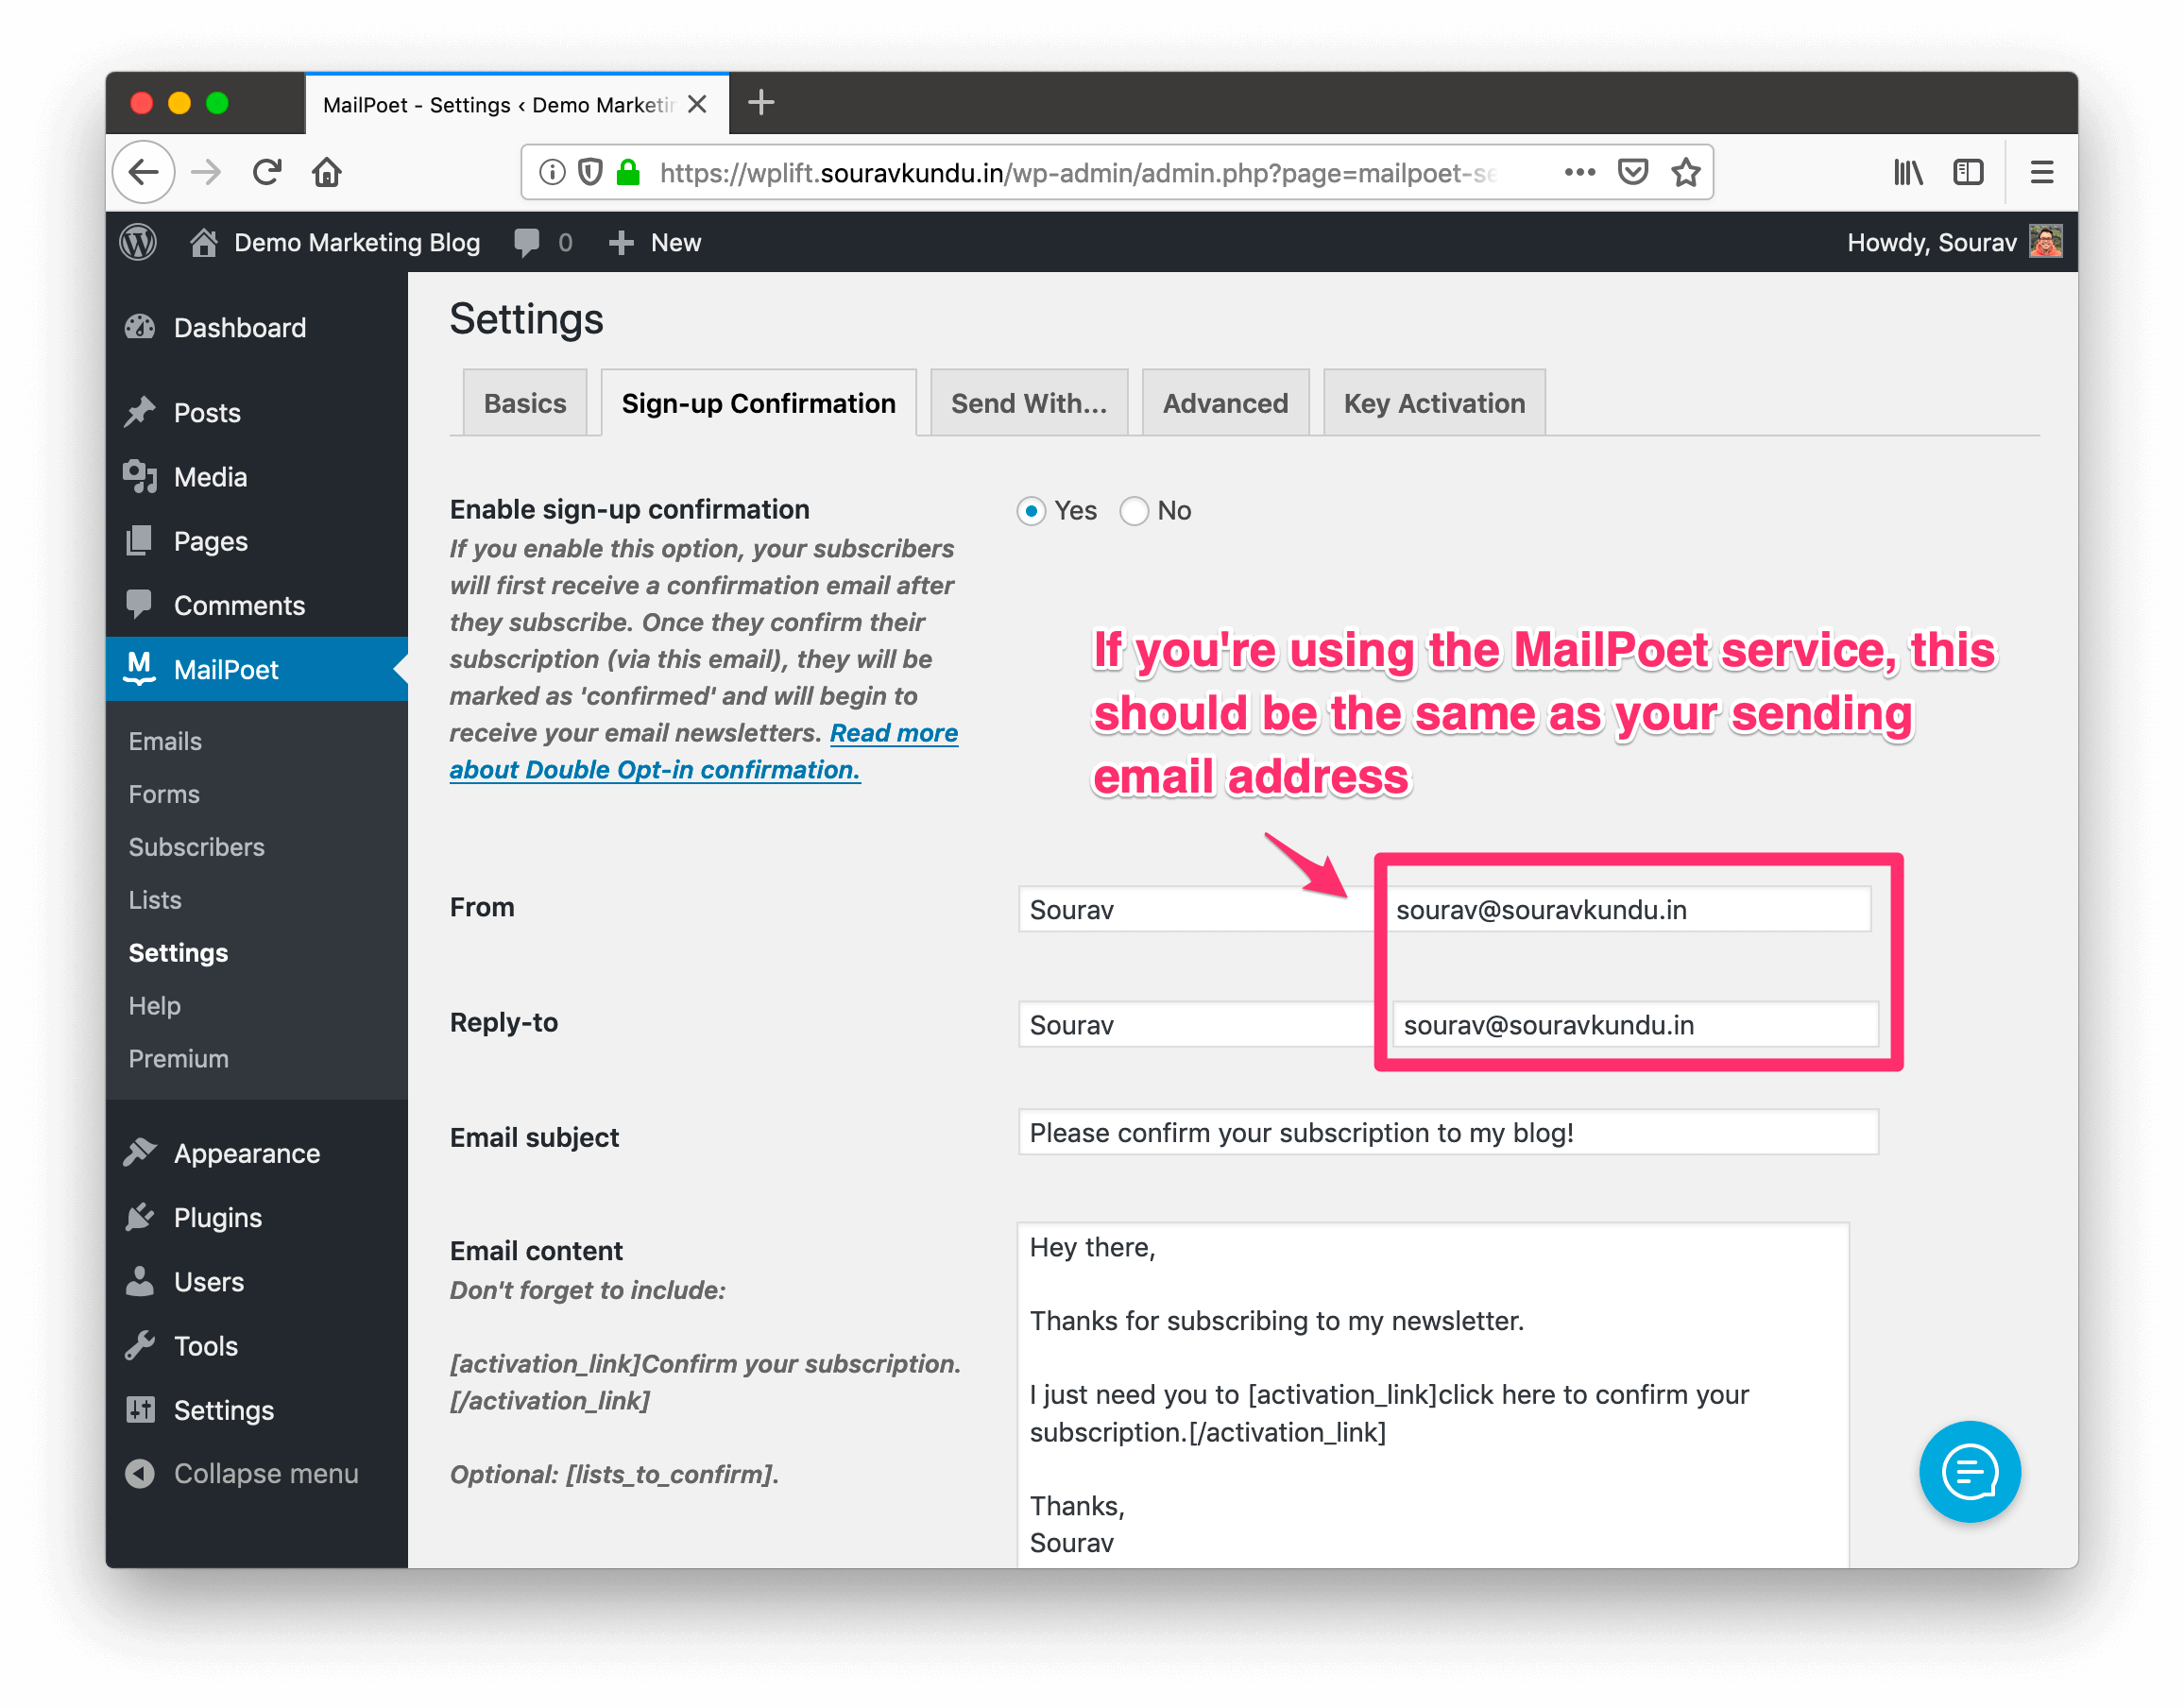
In this step, you need to add an authorized email in your MailPoet.com account. This is the email that you’ll use to send your newsletters. It should be the same email used in the From field you had initially configured in the beginning of this tutorial.
Here’s a screenshot to remind you:
- In the My Authorized Emails tab, enter the email in the Email address field and click on Add Email Address.
- A confirmation email will be sent to this address.
- Click on the link in the email to complete the process.
Once done, go to the My Subscriptions tab and copy the API key, and head over to your WordPress dashboard.
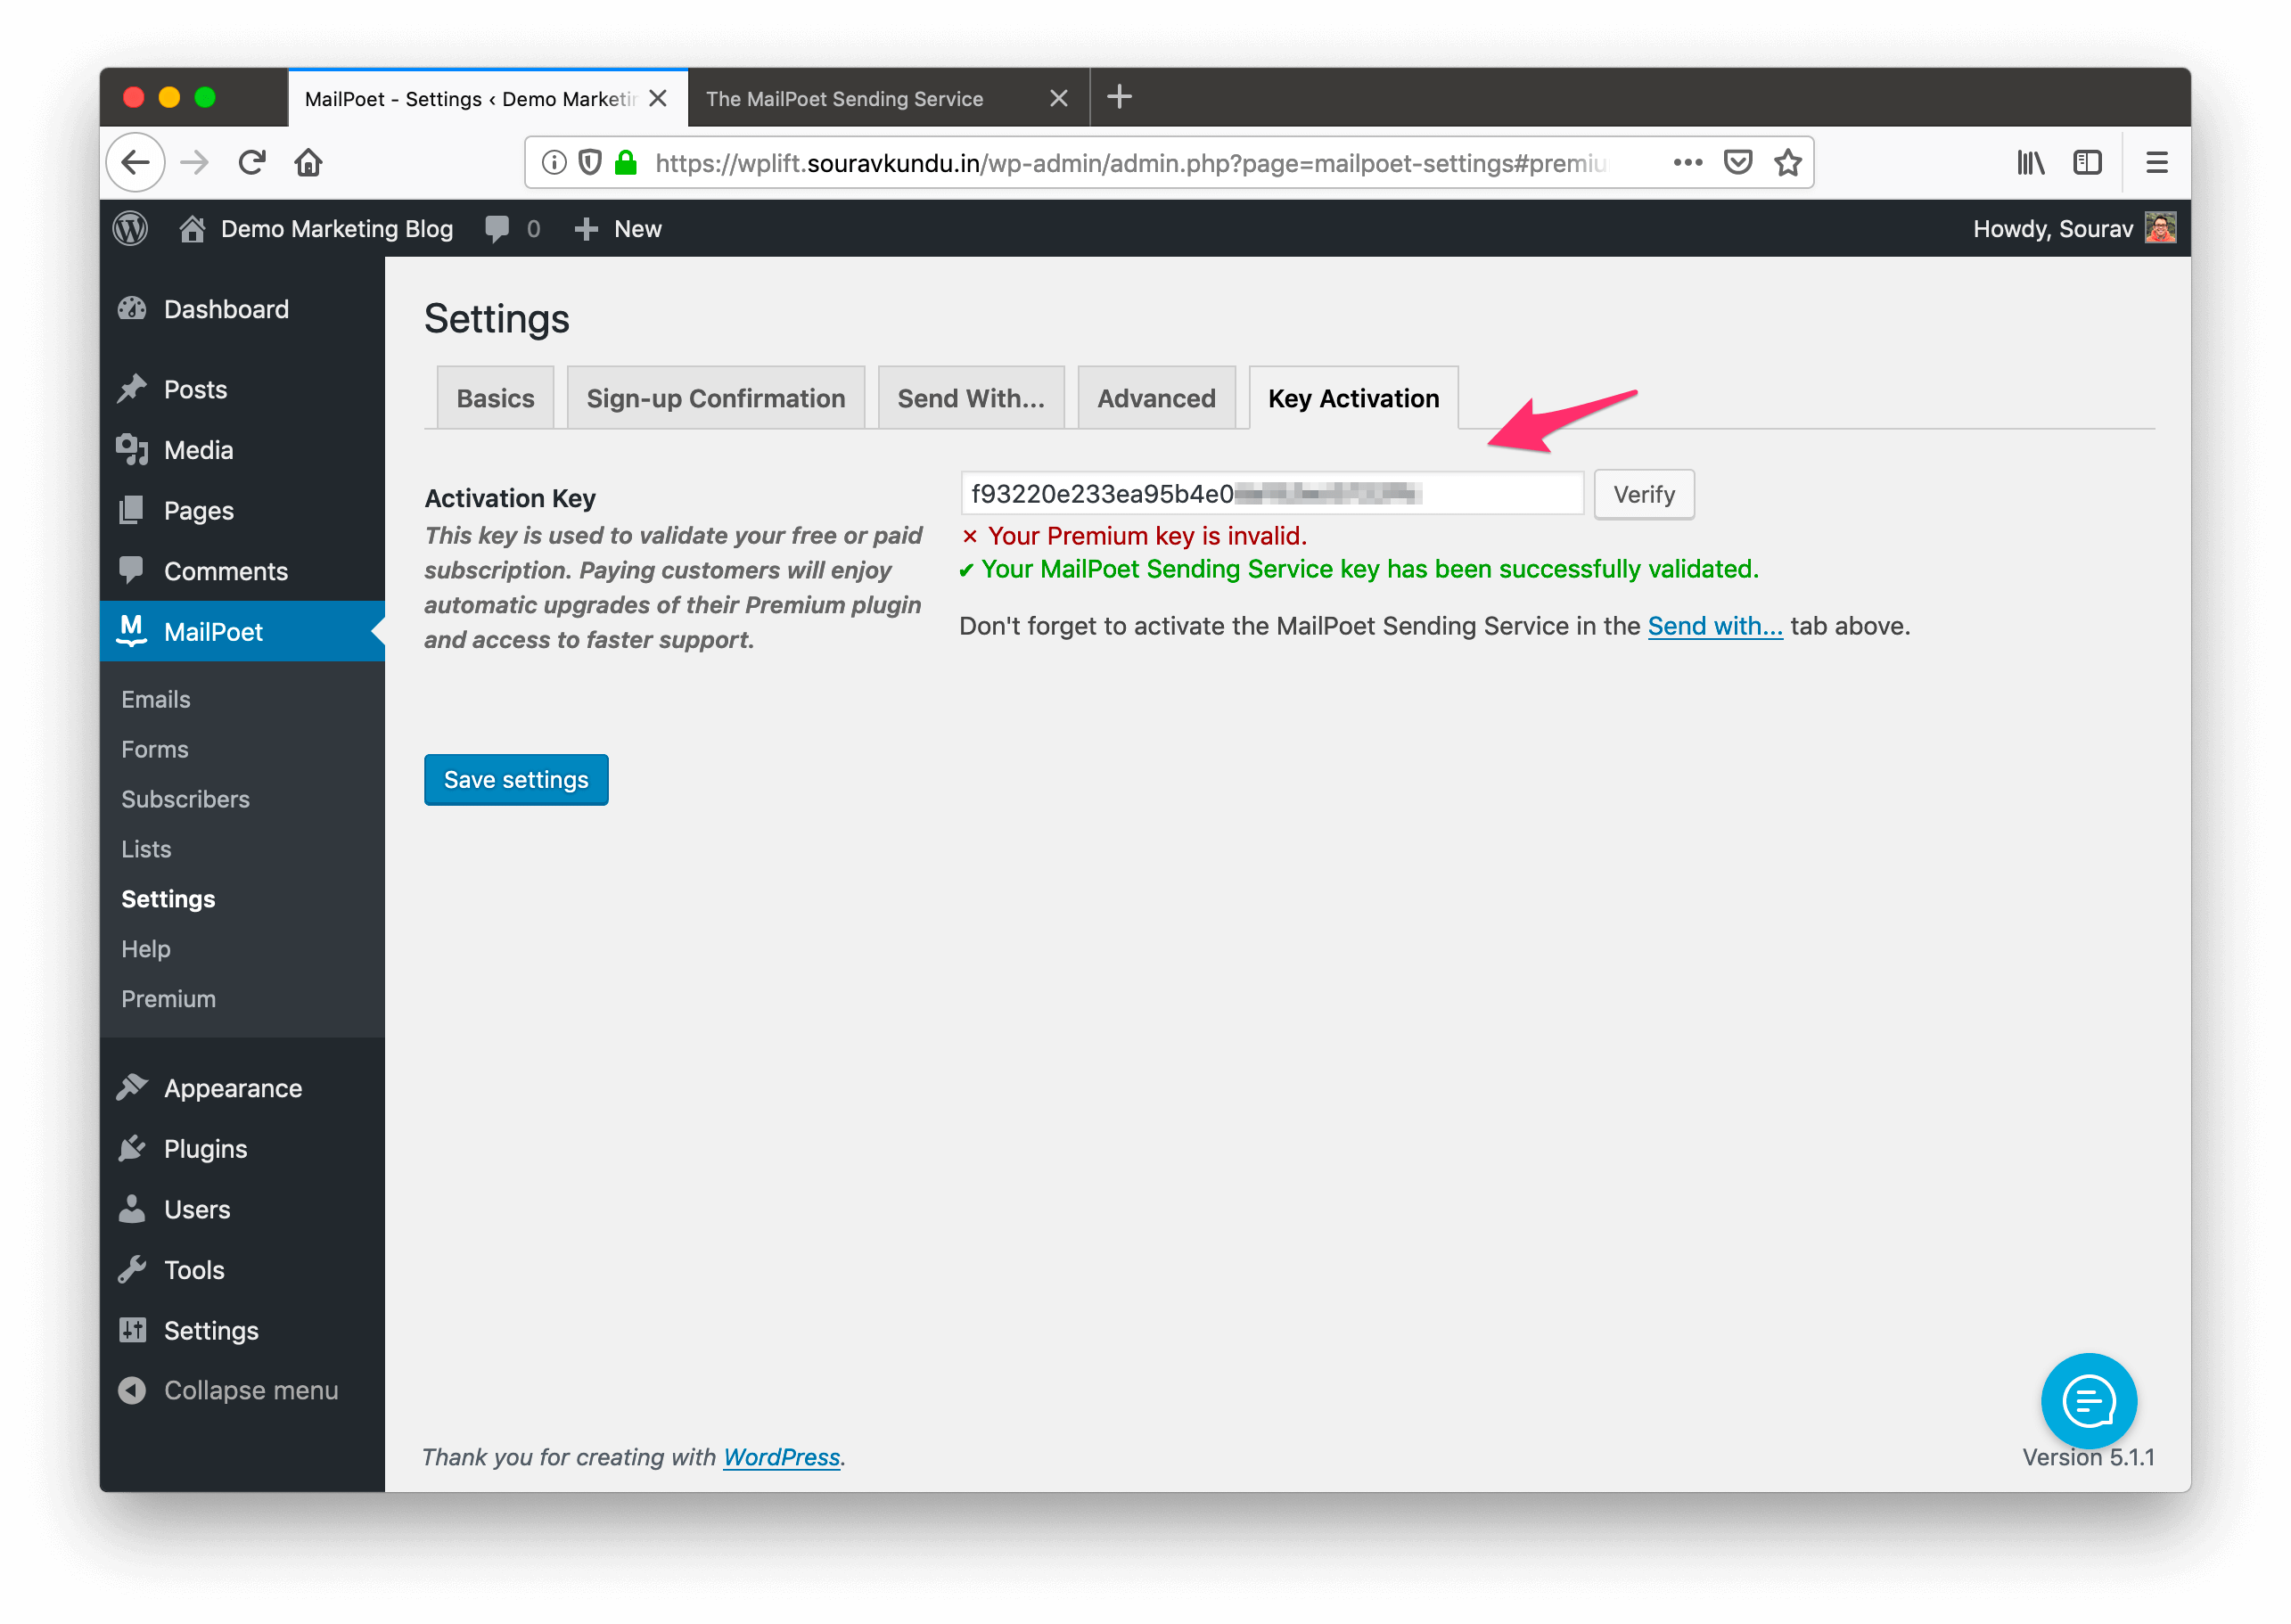
Next, we simply paste the API key under the Key Activation tab in the plugin’s settings. Click on Verify to validate the key. You should get a similar message as shown in the screenshot above.
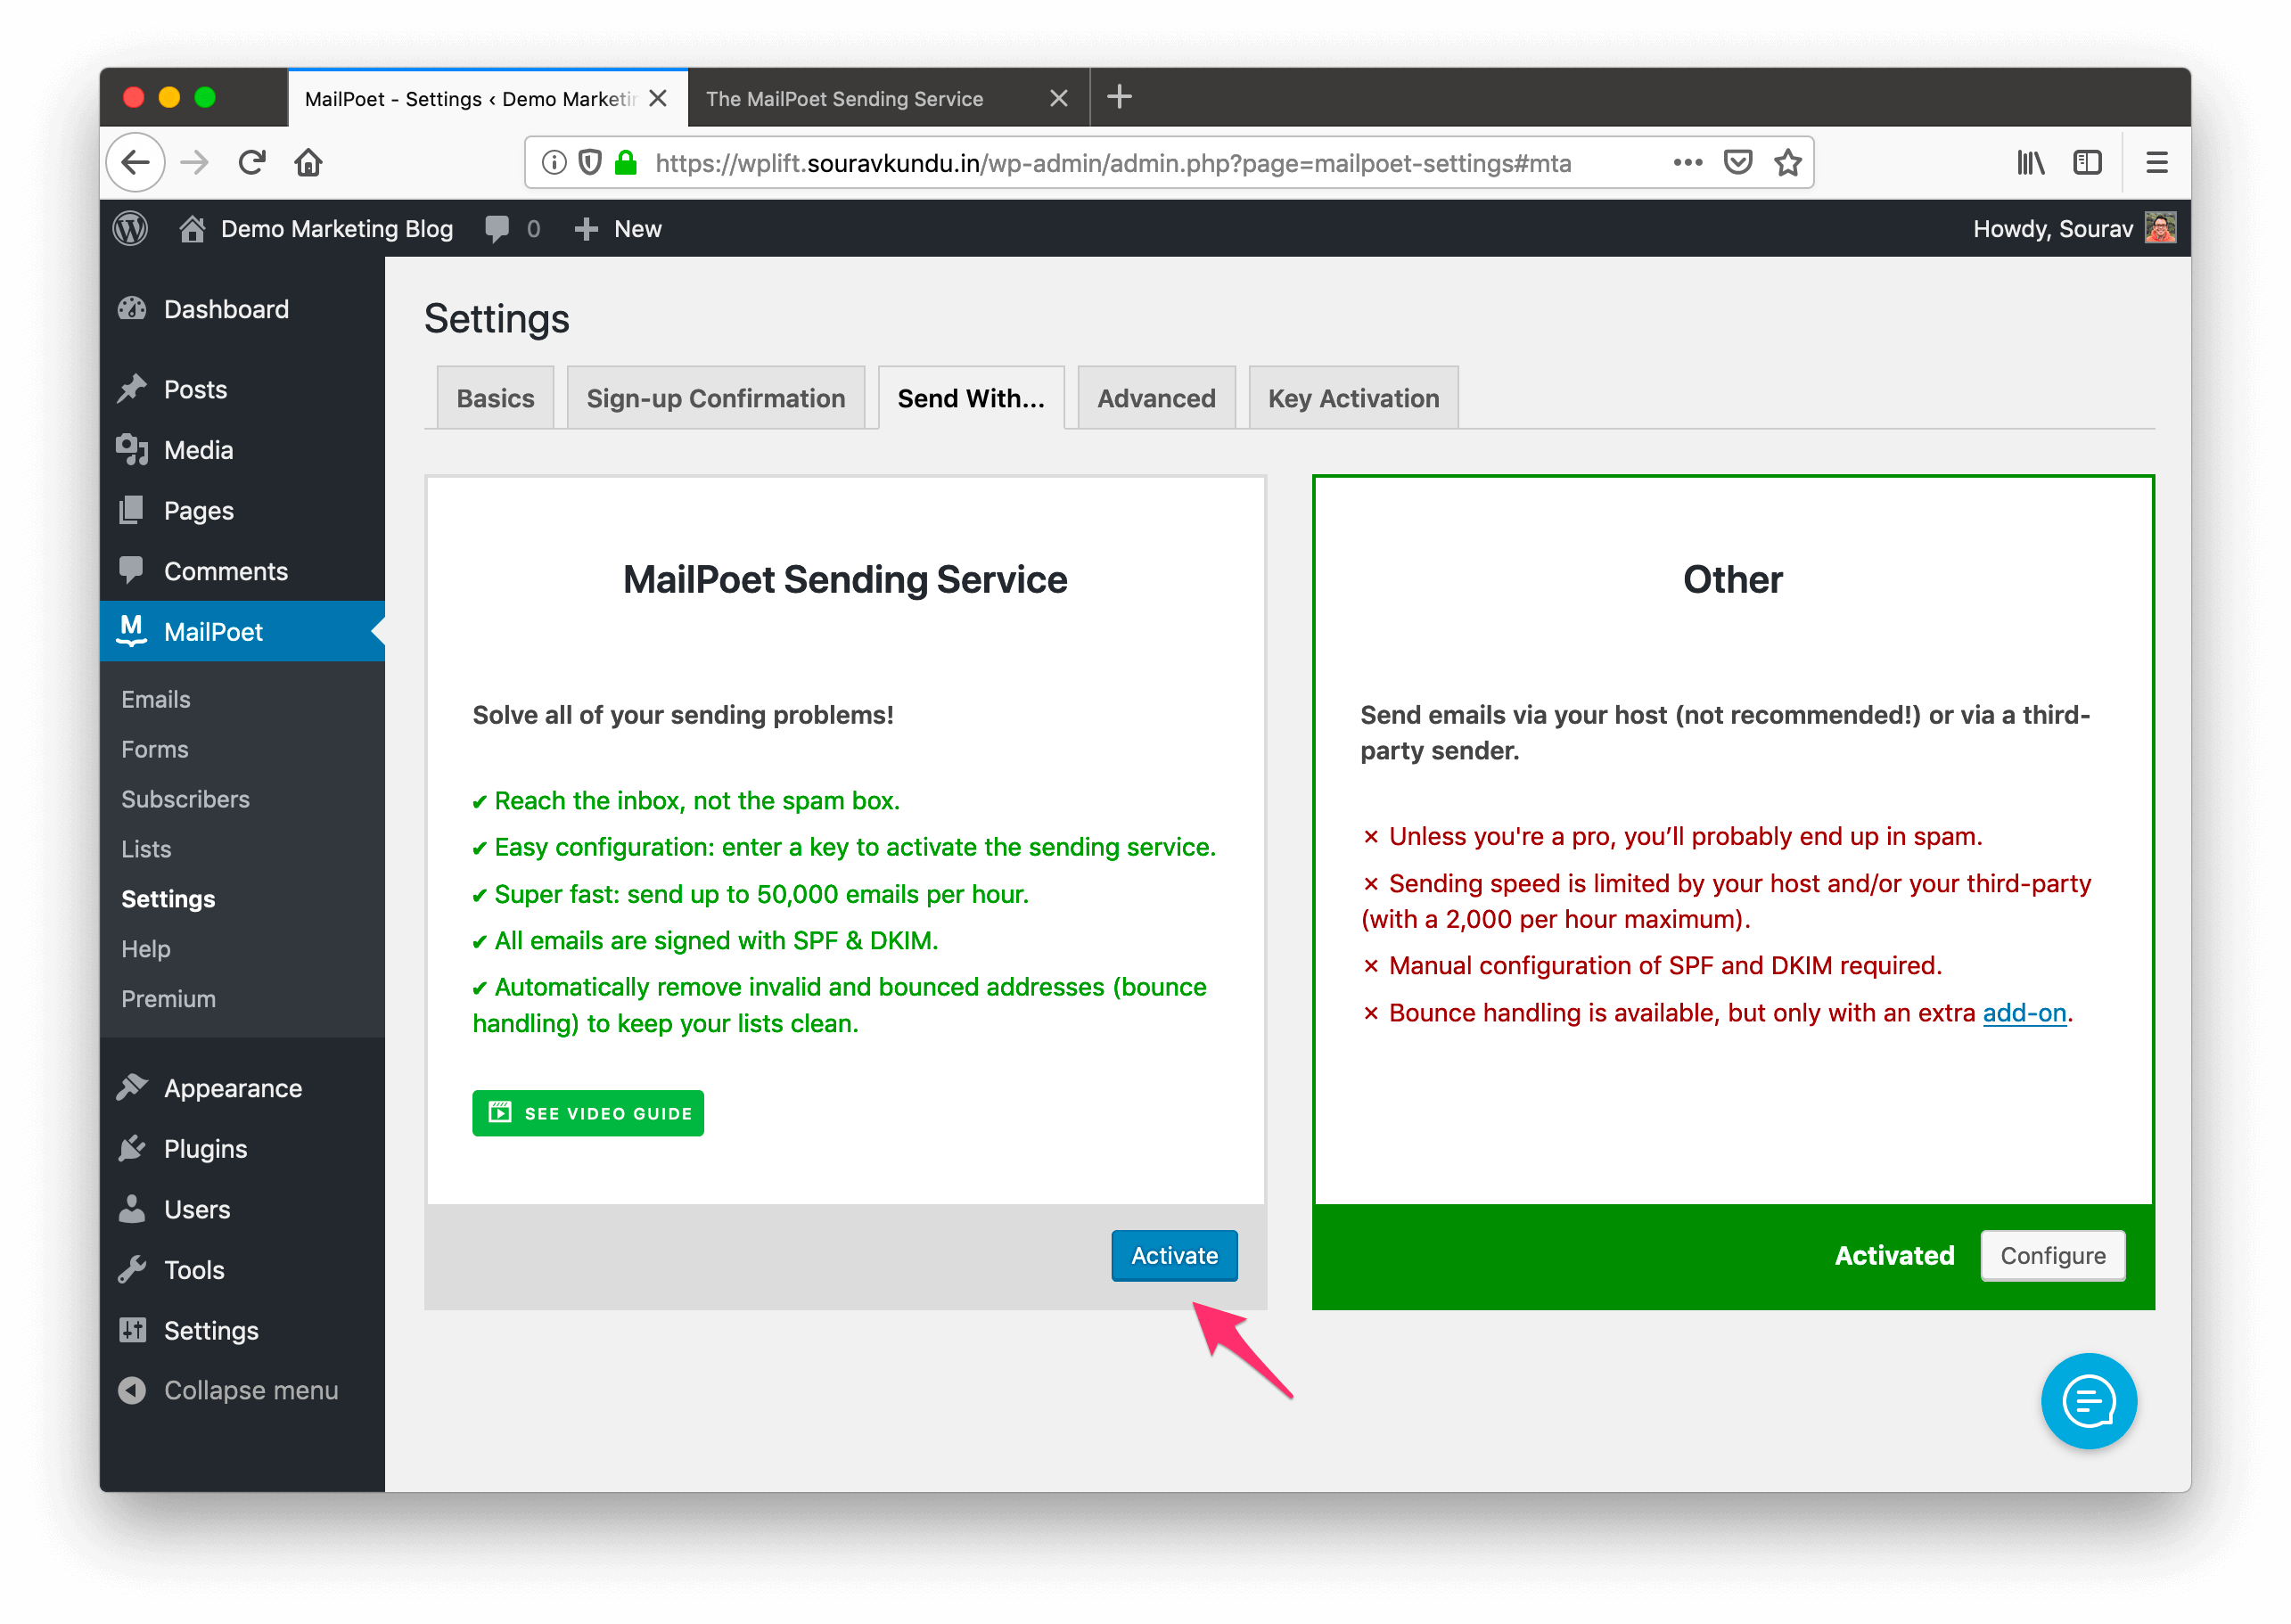
Once you’ve configured the API key, head over the Send With tab (under MailPoet’s settings) and Activate the MailPoet Sending Service.
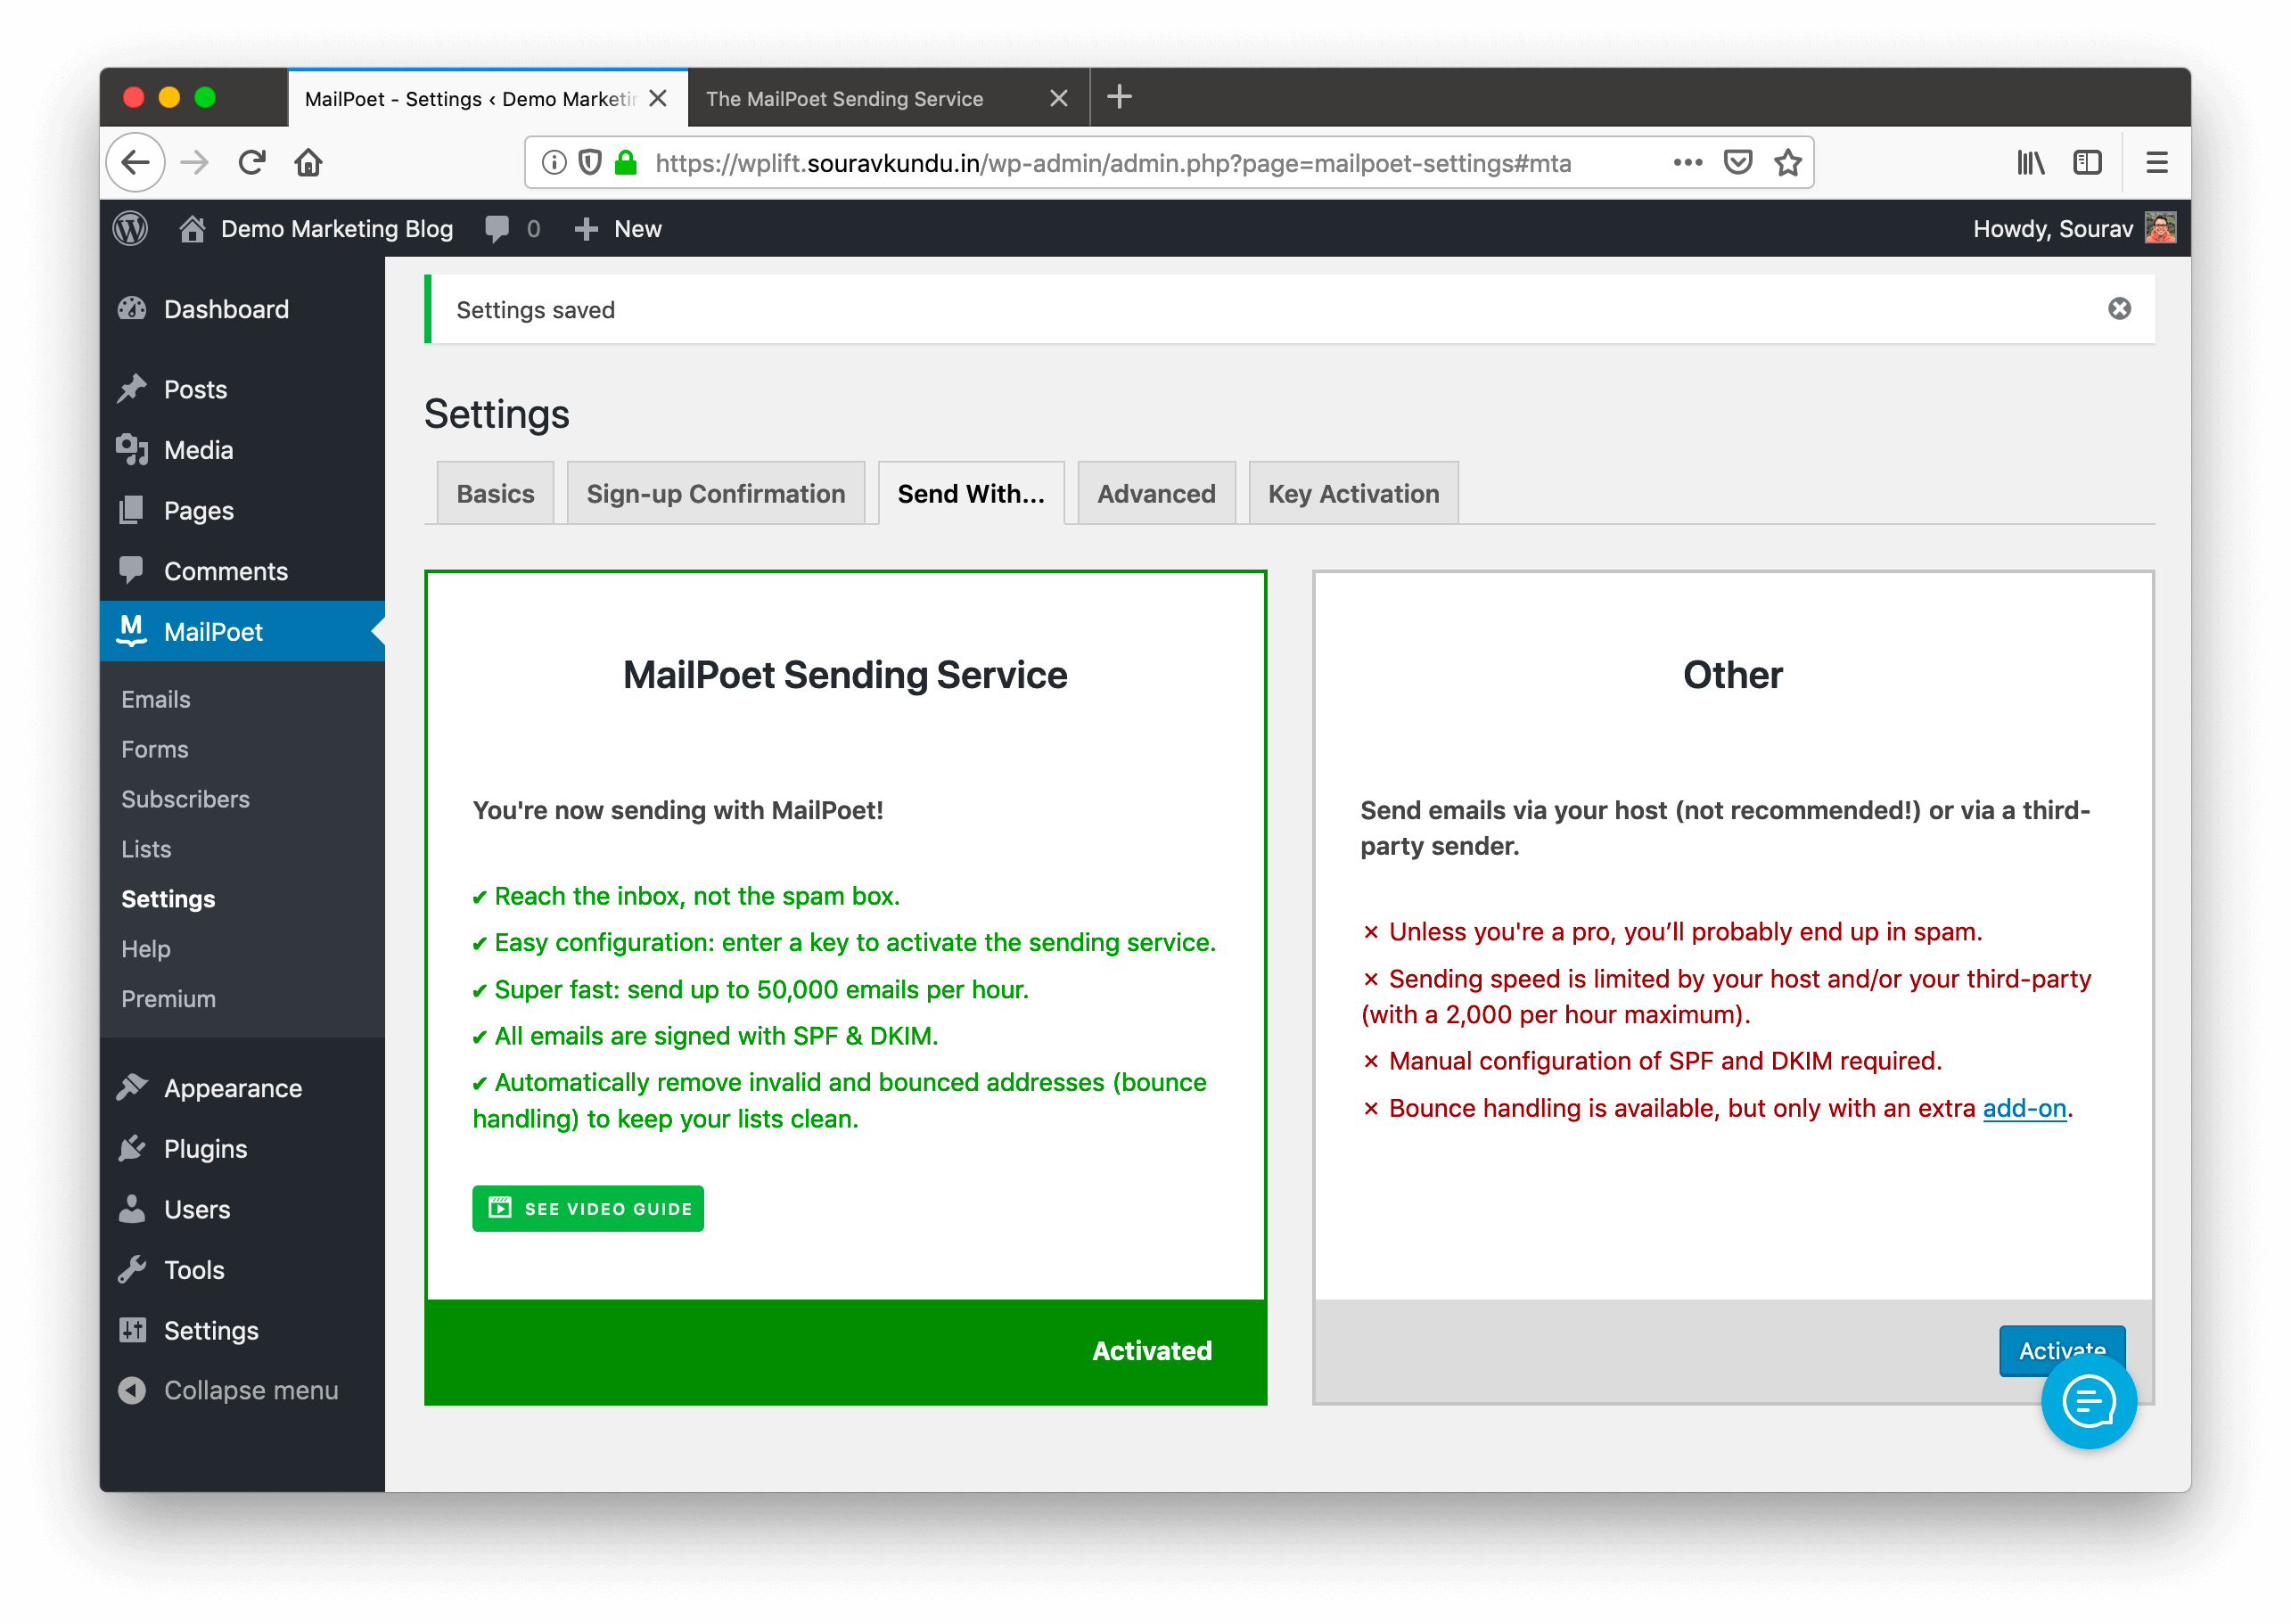
This is the confirmation that the sending service is now activated. All newsletters will now be sent using MailPoet’s email delivery service.
Configuring Newsletter Signup Confirmation Emails in MailPoet
MailPoet also enables you to configure double opt-in subscriptions. This means that when someone subscribes to your email list, an activation email is sent to them. Users need to click the link in the email to confirm their subscription to your newsletter.
If you are using this feature, make sure that the From and Reply-to fields have the same email address that you have previously configured in My Authorized Emails in MailPoet.com.
Marketing Automation: Sending Post Notification Emails using MailPoet
MailPoet offers two unique marketing automation campaigns in the free version of the plugin. The first one is Welcome Emails and the other is Post Notification emails.
While Welcome Emails are fairly common, Post Notification emails help you save time in your publishing workflow.
Once the campaign is active, any new post published in your site will trigger a post update email to be sent to your subscribers. You can choose to send the email immediately, or schedule it as a daily, weekly or monthly newsletter.
You don’t need to create a new campaign every time you publish a blog post. Simply hit Publish in your WordPress editor, and MailPoet will send an email notification to all your subscribers.
Sounds interesting? Let’s learn how to set one up!
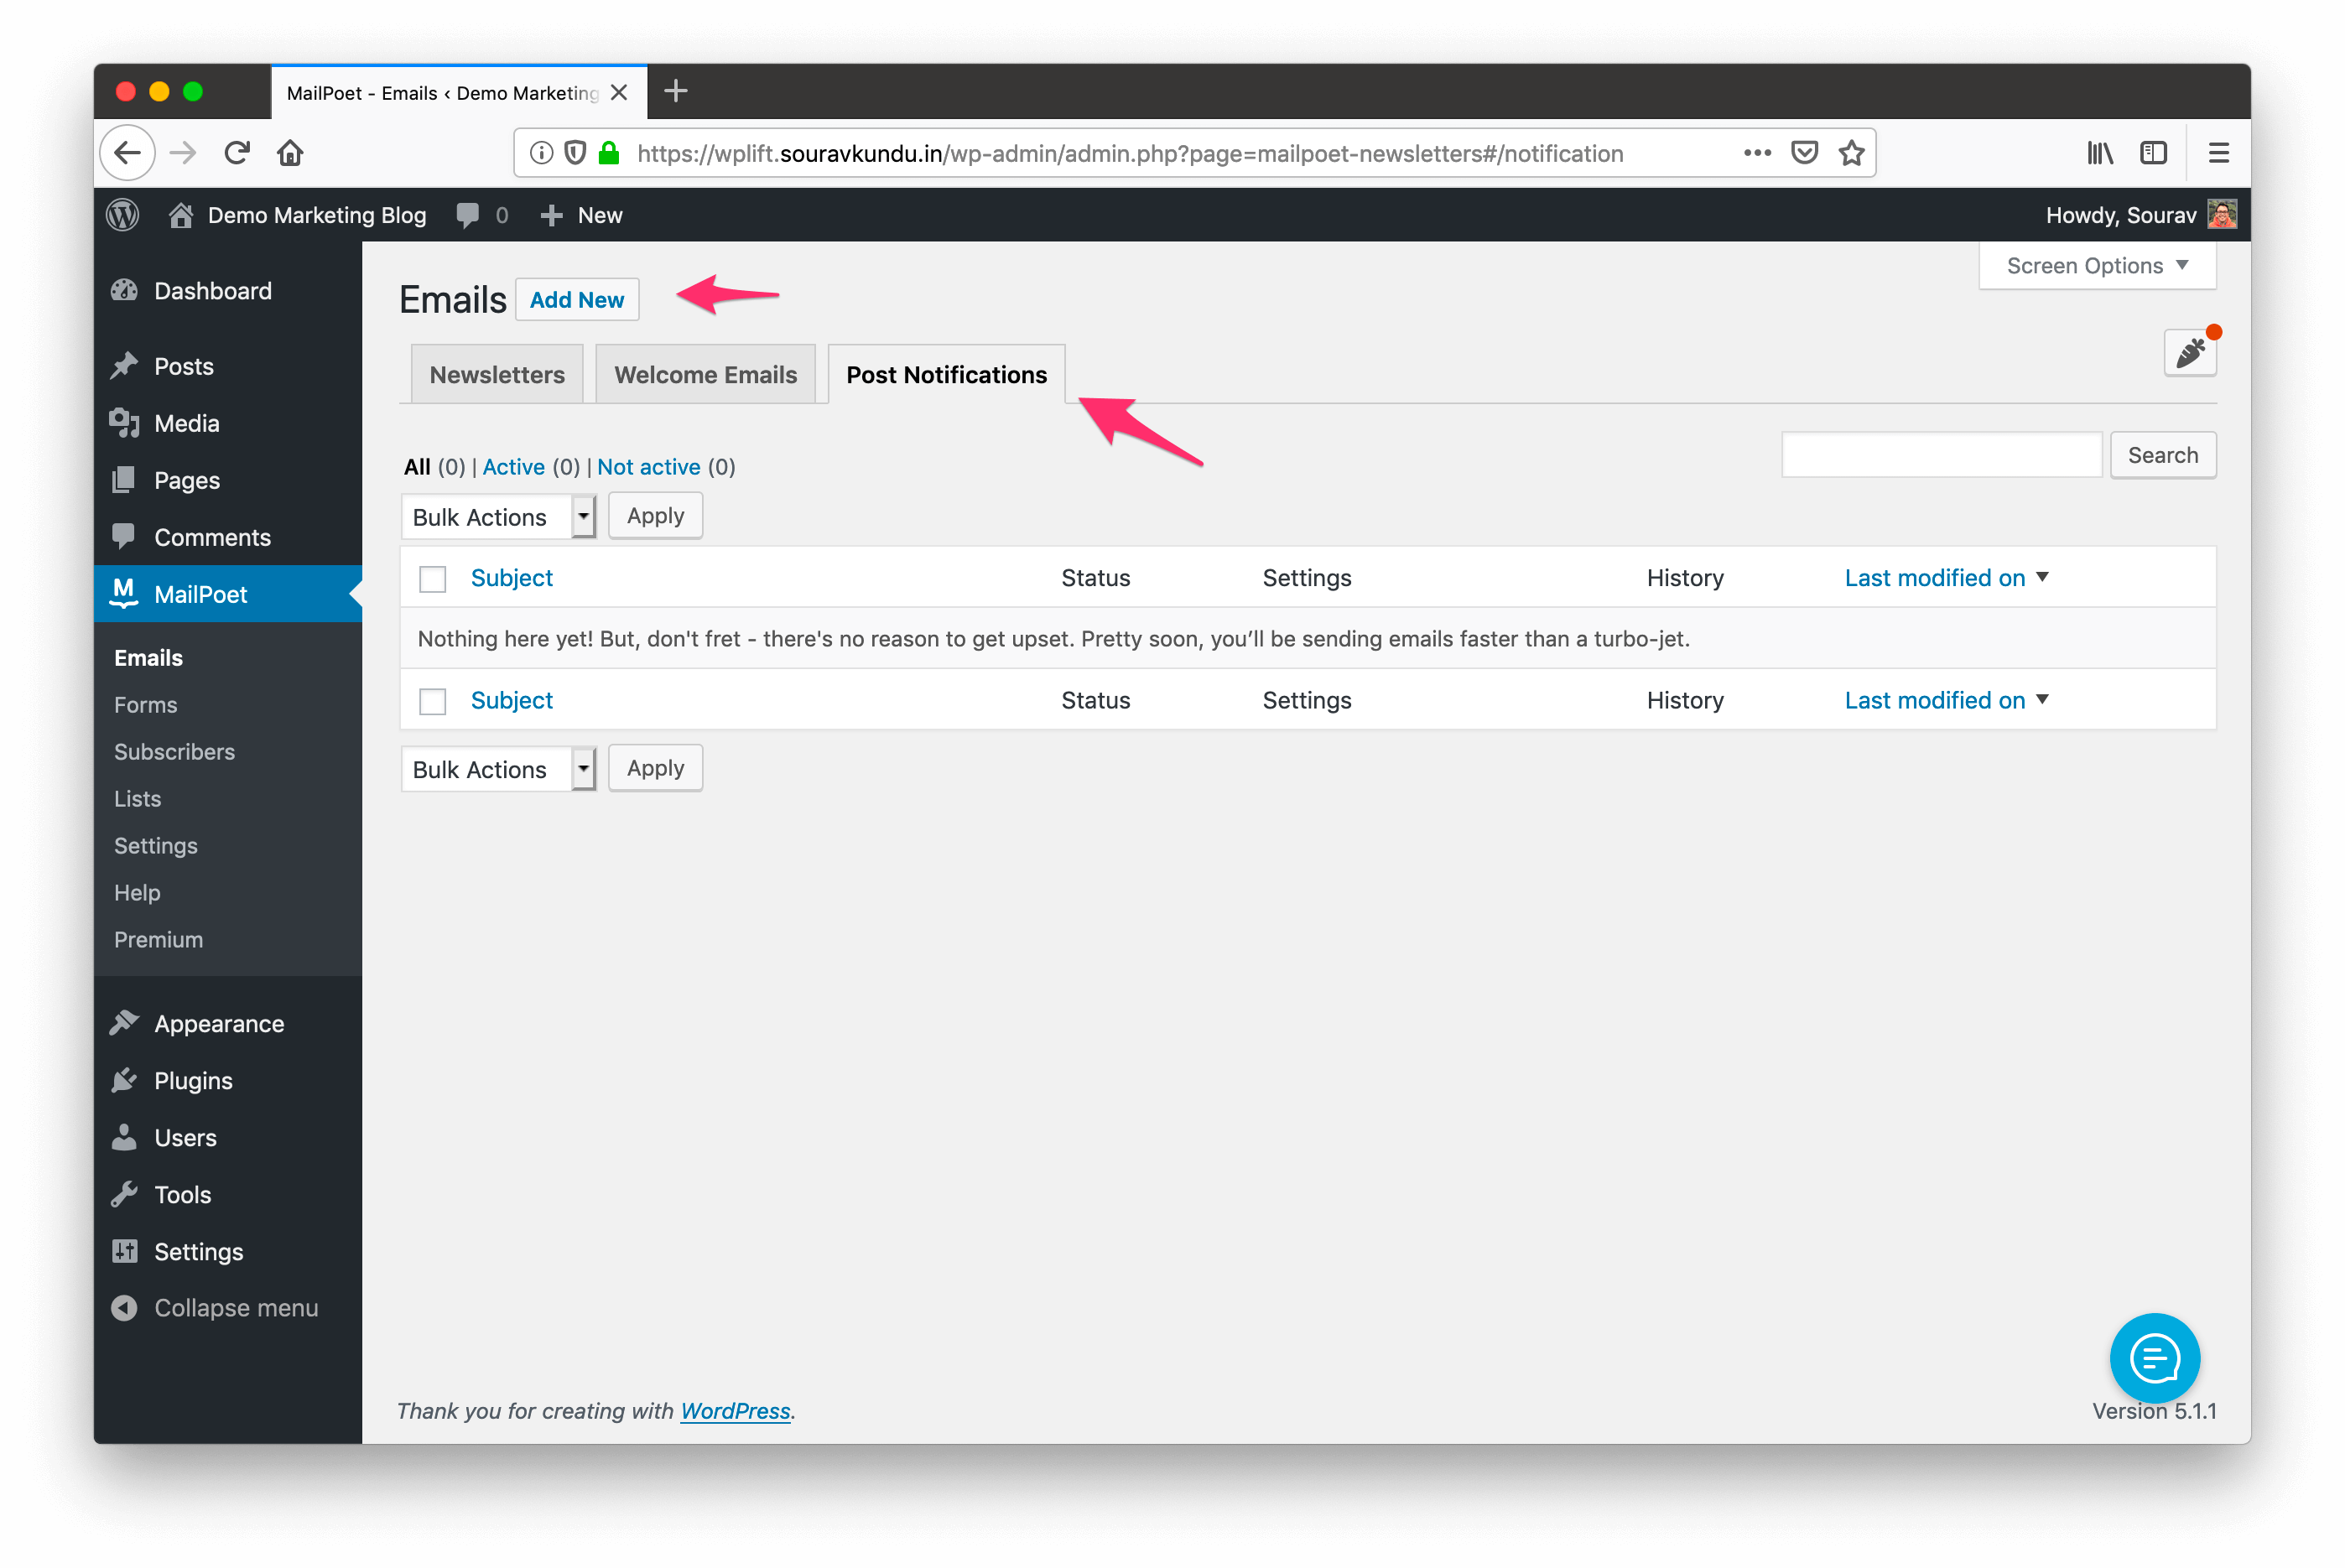
The first step is simple. Head over to your WordPress dashboard → MailPoet → Emails and click on Add New.
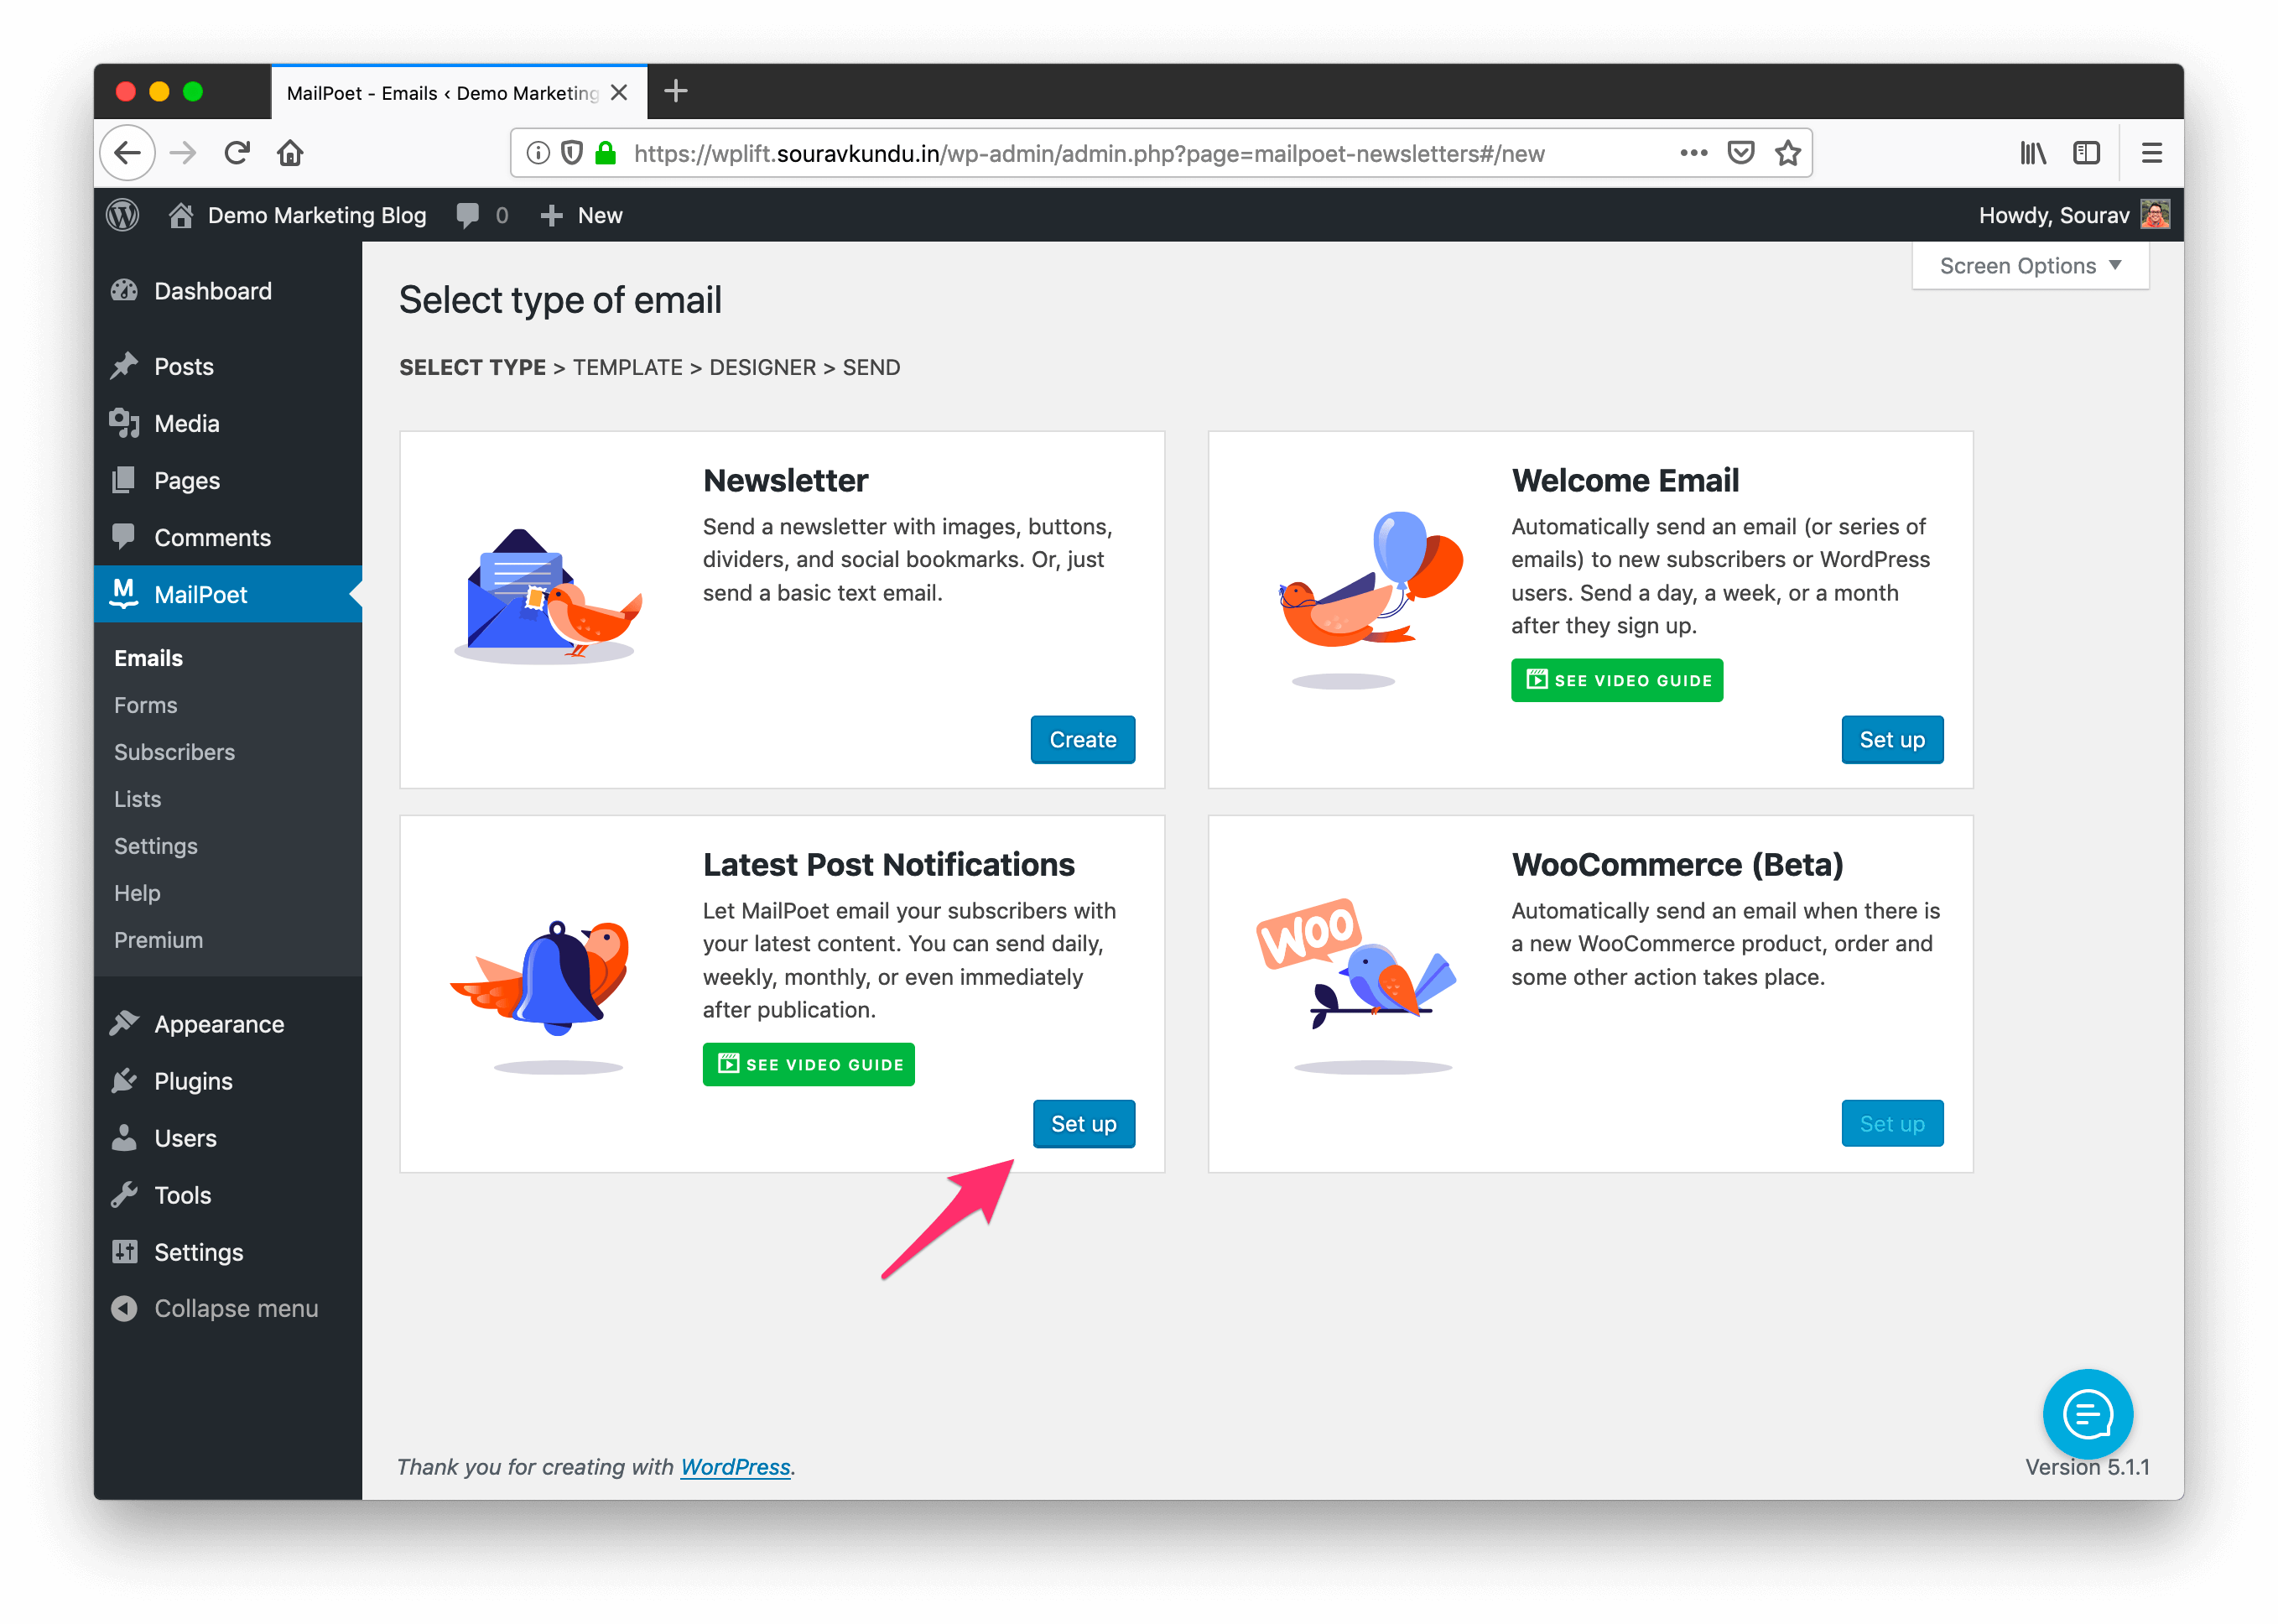
Click on Set up under the Latest Post Notifications tab and choose an email template in the following step.
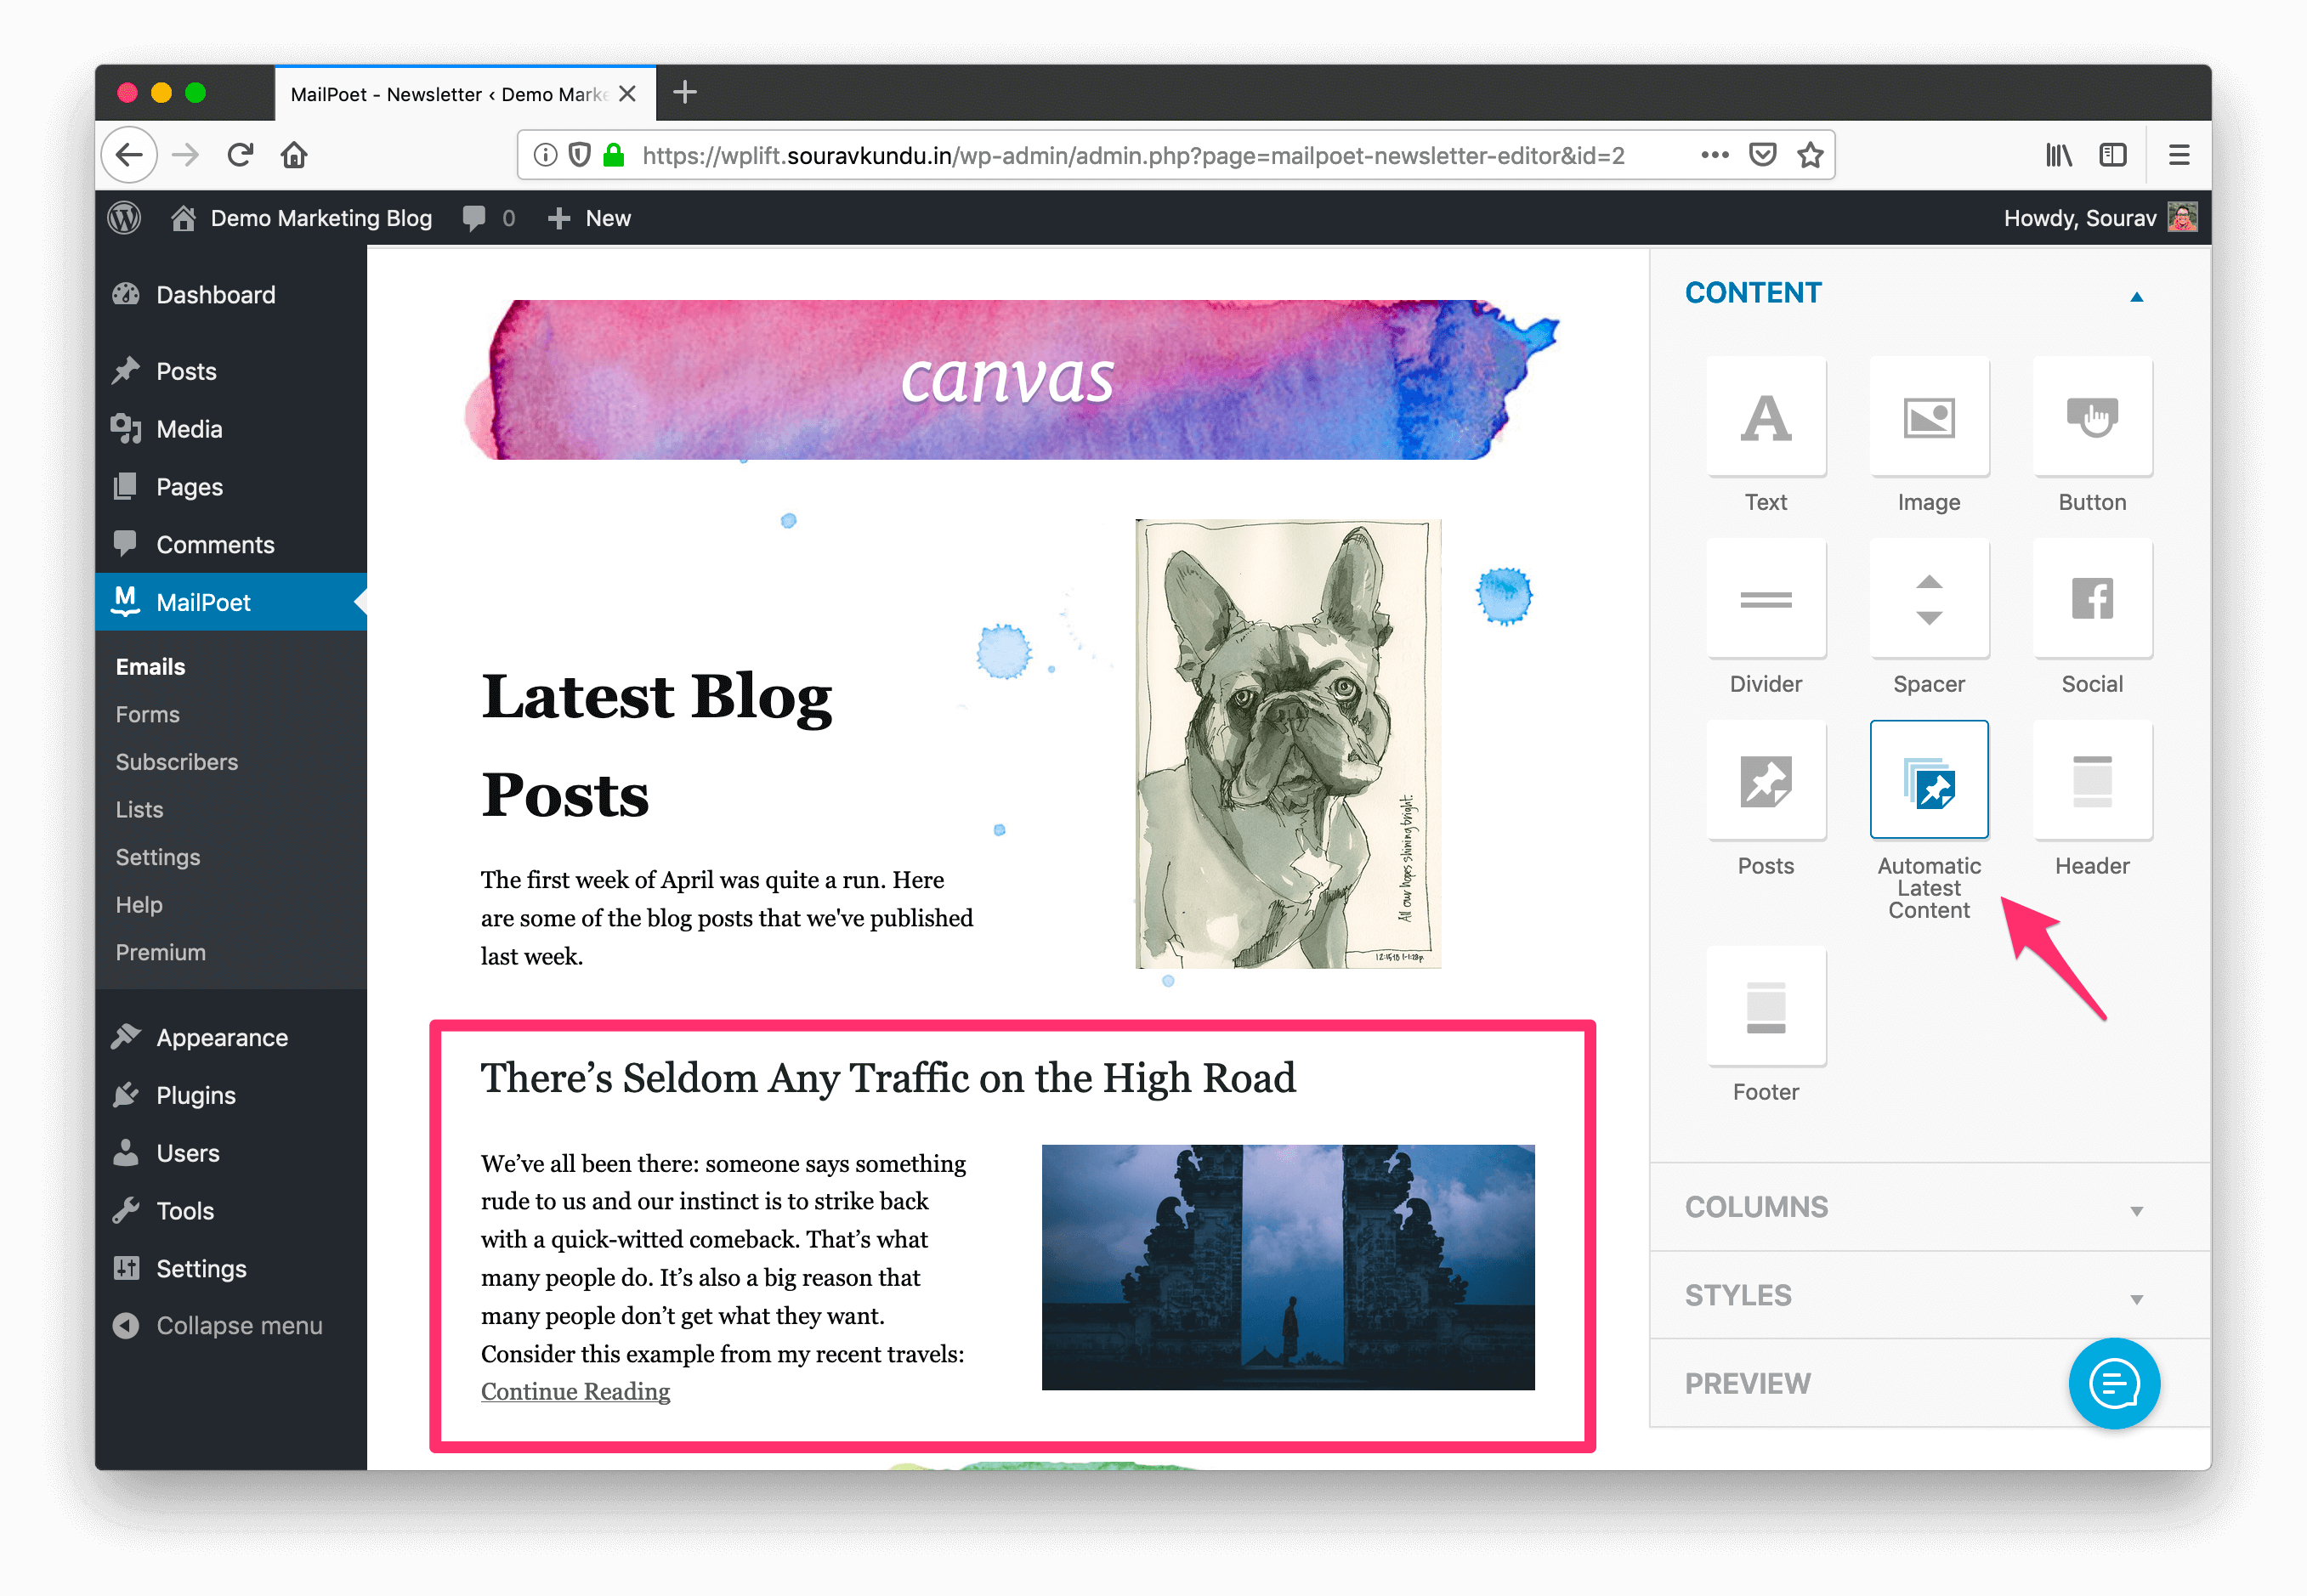
In the email designer, drag and drop the Automatic Latest Content content block in your email. This dynamic module picks out the last “X” published posts in your blog and adds it to your newsletter.
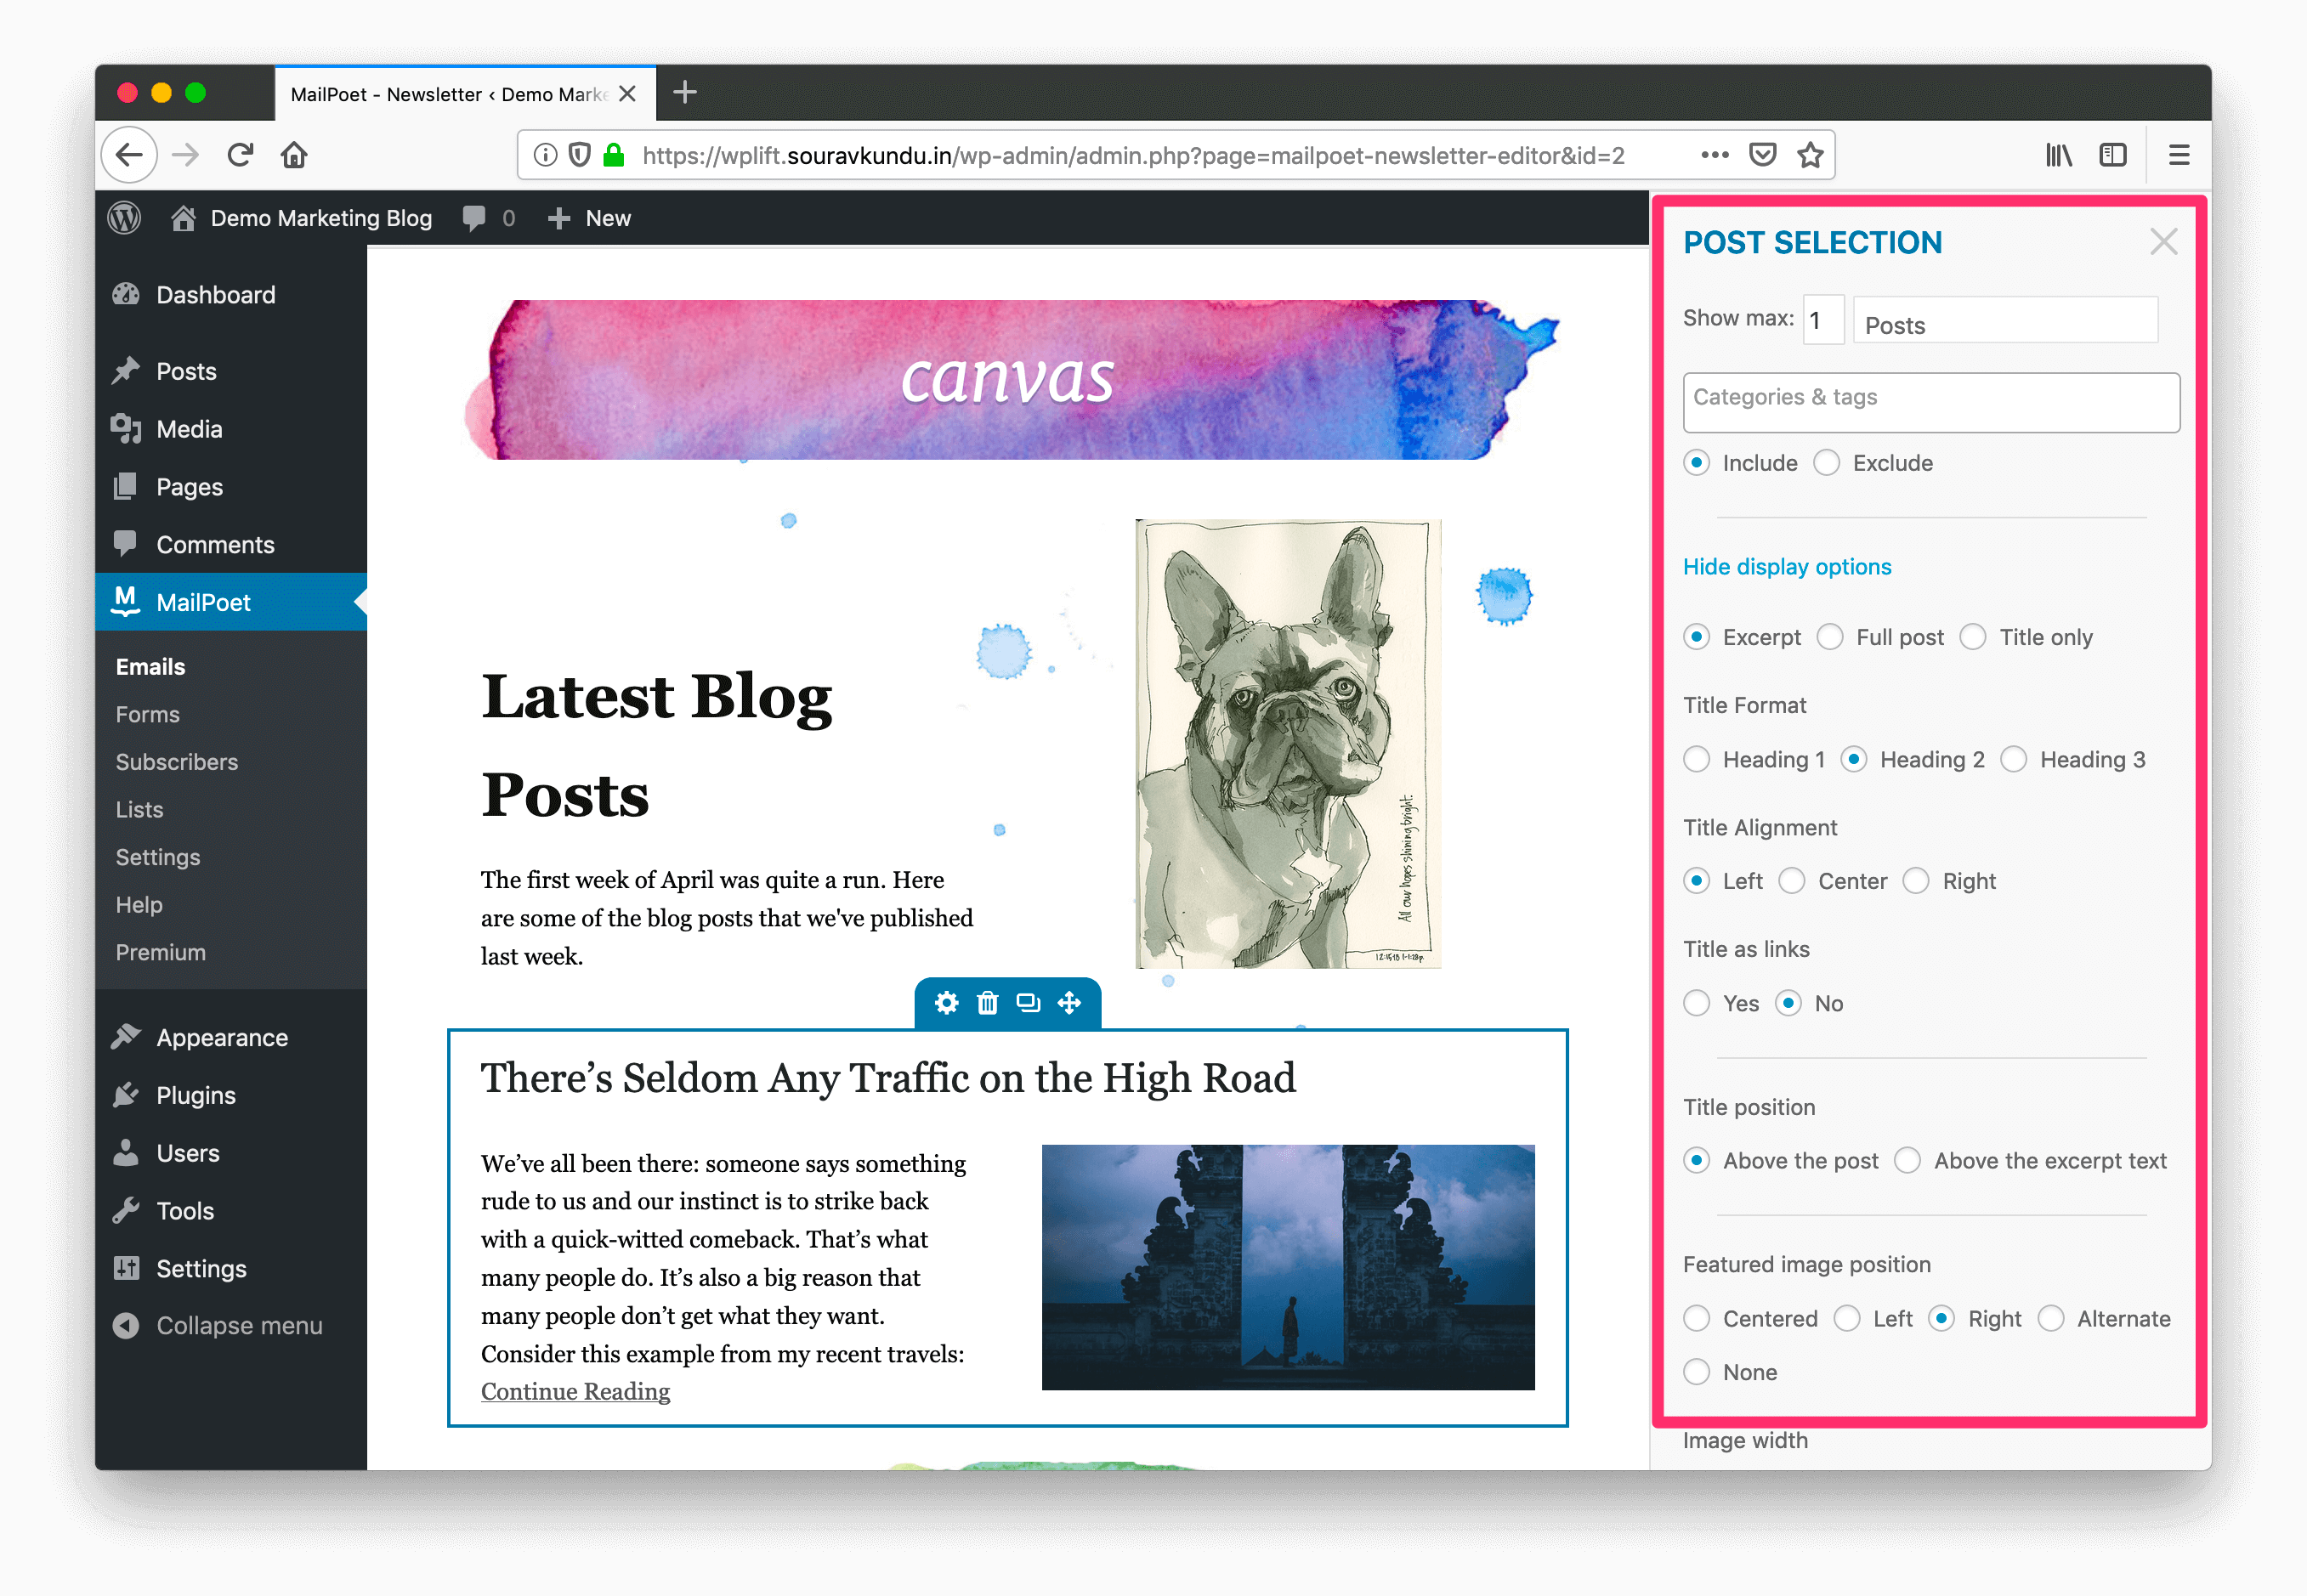
You can configure the Automatic Latest Content block to show a maximum number of posts, and design the layout of the block with the various options shown in the screenshot above.
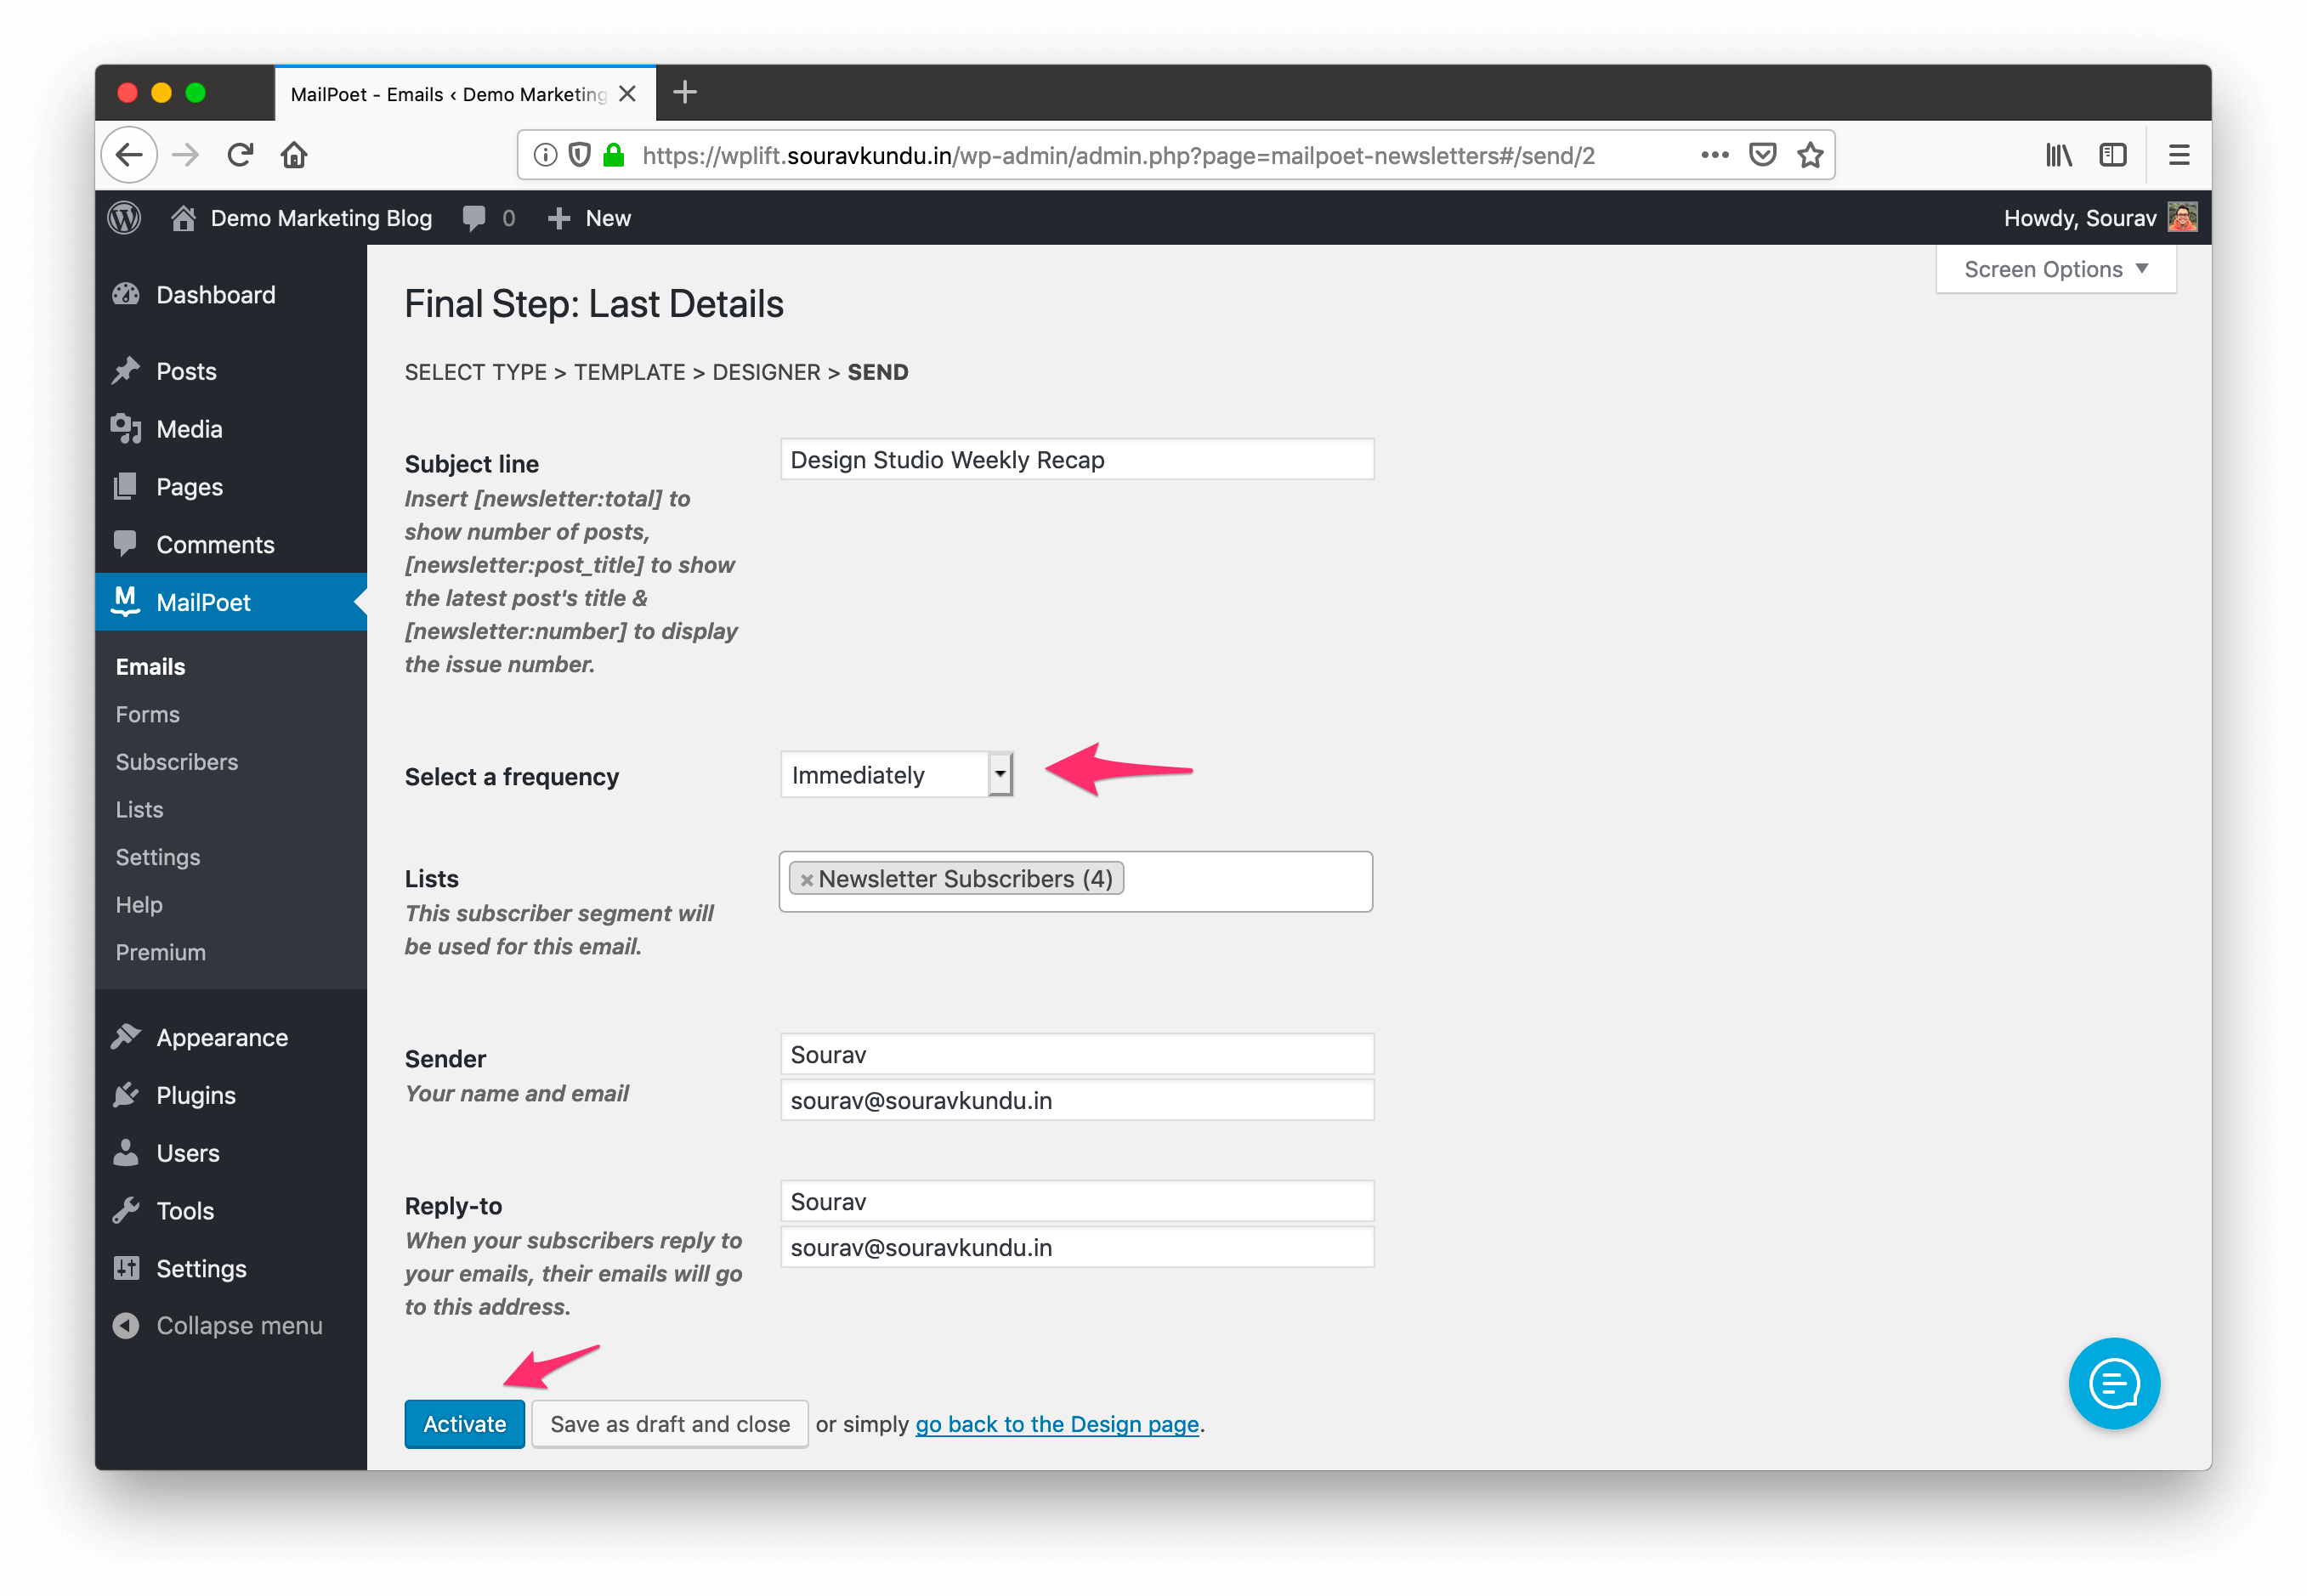
Finally, you can schedule your Post Notification campaign to be sent immediately, or at a scheduled time. Pick an actionable subject line, the sender info and click on Activate to launch the campaign.
When you publish a new blog post, a notification email is sent to your subscribers. The following screenshot shows a post notification email that we designed in the course of this tutorial.
Wrapping Up — MailPoet as an Alternative to Mailchimp
The advent of WordPress has sprawled an ecosystem of freemium themes, plugins and services that was just not possible a decade ago. MailPoet is a product of the WordPress ecosystem. It differentiates itself from email marketing behemoths like Mailchimp, along the following lines:
- It’s much faster to setup, with little or no configuration — you can send your first newsletter campaign in 15 minutes.
- There’s a short learning curve. In case you’re stuck there’s fast support for free users.
- It helps you save money — either by using your own host to send newsletters, or the free email sending service. Even in the paid plan, it’s considerably cheaper than existing solutions.
The success of your email marketing campaign is determined by a multitude of factors, including a consistent publishing calendar, inviting comments to your newsletters, and replying to emails from your subscribers.
Sending newsletters in WordPress is just the beginning of your email marketing journey. MailPoet helps you kick it off on the right foot!
How do you like this tutorial? What could we have done better? I look forward to your comments!