Searching for a WordPress activity log plugin so that you can keep track of what’s happening on your site?
WordPress activity logging can help you secure your site by spotting suspicious activity before it becomes a problem.
But a WordPress activity log isn’t just useful for security – it can also help you manage genuine user activity on your site, such as keeping track of your content team or monitoring your eCommerce store staff.
So – how can you set up these types of activity logs? That’s the topic of our review/tutorial.
WP Activity Log, formerly known as WP Security Audit Log, is a freemium plugin that helps you set up a WordPress user activity log to track key areas on your site such as the WordPress admin, plugin usage, content creation/editing, and lots more.
In our honest, hands-on WP Activity Log review, I’ll share a little more about how the plugin works and then go into a step-by-step tutorial on how to set up a WordPress activity log.
WP Activity Log Review: What Can It Do?
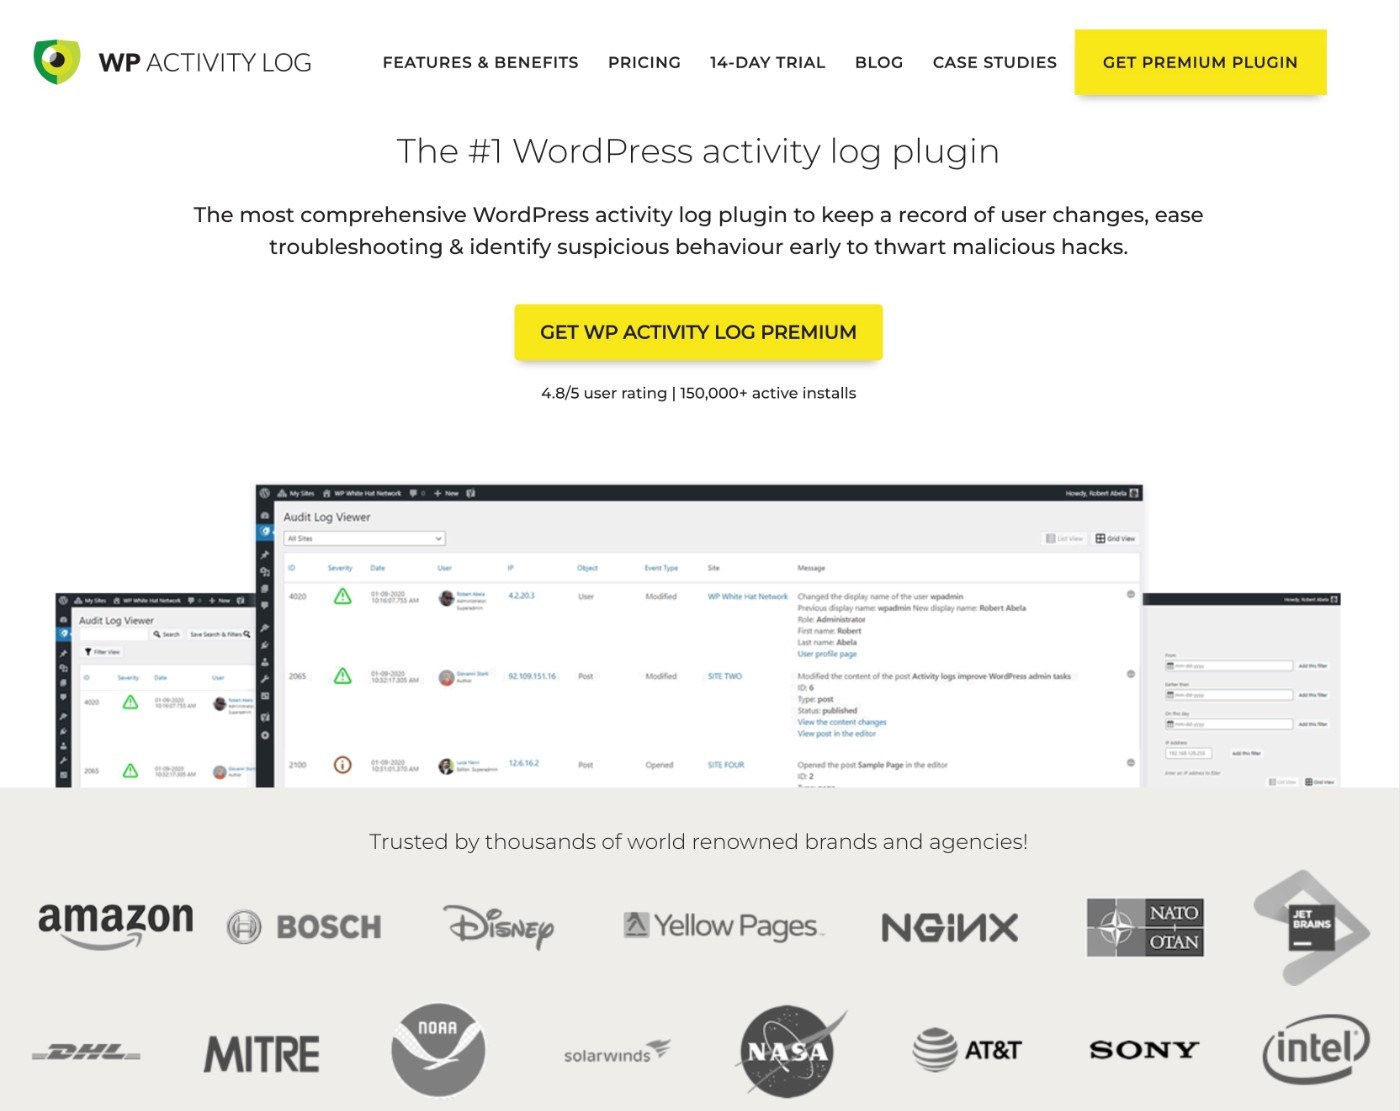
WP Activity Log is a freemium WordPress activity log plugin that can help you log all types of activity on your site.
Originally, the plugin was named WP Security Audit Log because it specifically focused on improving WordPress security.
However, in 2020 it rebranded to WP Activity Log to reflect a broader focus on overall WordPress monitoring.
It still has strong security monitoring functionality, but you can also use it for general WordPress user activity logging for various areas such as:
The core feature of the plugin is a detailed activity log of every action on your site:
The really nice thing is that you can customize the activity log to be as detailed as you want. If a certain type of monitoring isn’t important to your use case, you can easily turn it off.
The plugin offers a few preset monitoring configurations, but you’re also free to enable/disable the logging of individual actions as needed – with hundreds of actions to choose from.
To help you work with your audit logs more efficiently, the plugin is packed with helpful features:
- Search and filter the activity log by user, action, severity level, and lots more.
- Set up real-time alerts via email or SMS for important events.
- Create custom reports that are delivered via email on your preferred schedule.
- Manage logged-in users on your site, including setting timeouts or even manually logging them out.
- Integrate with third-party plugins like WooCommerce to track activity in those plugins.
The plugin also gives you tons of control over your setup and integrations:
- Choose how long to retain logs (or retain them permanently).
- Store your logs in an external database (or archive older logs).
- Delete targeted activity log data (useful for GDPR compliance).
- Integrate with MainWP to view logs for all your WordPress sites in your unified MainWP dashboard. Learn more in our MainWP review and save with our MainWP coupon.
How to Set Up and Use Your WordPress Activity Log
Now that you know a little bit more about what the plugin offers, let’s get into an actual step-by-step guide on how to set up an activity log on your site using WP Activity Log.
You’ll learn how to set up a complete activity logging system, complete with reports and notifications to help you keep track of things without needing to manually browse your activity log every day.
1. Install WP Activity Log and Complete Setup Wizard
To get started, install and activate the WP Activity Log plugin on your site. We’re using the premium version for this tutorial, but there’s also a free version at WordPress.org – more on pricing later.
You can purchase the premium version here – make sure to save with our special WP Activity Log coupon.
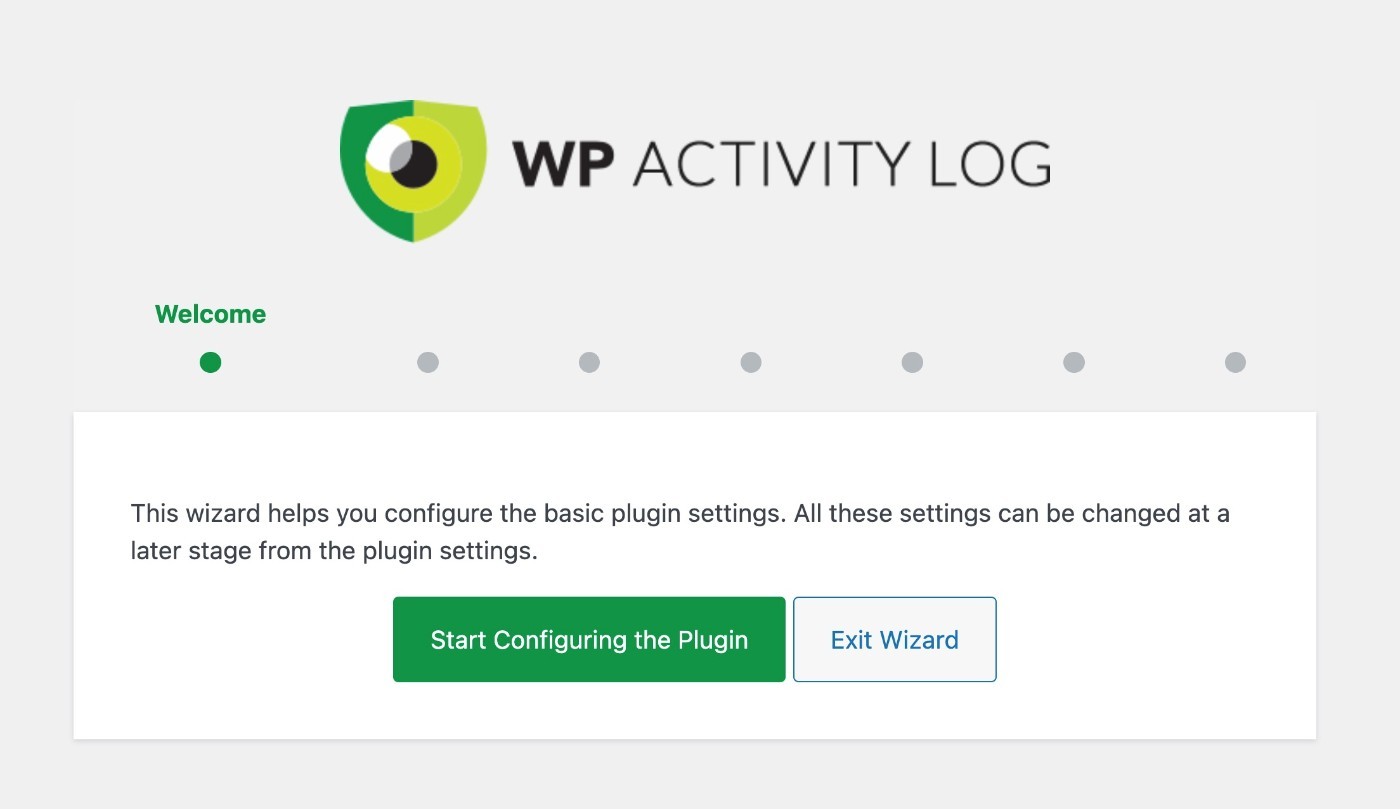
As soon as you activate the plugin, it should show a prompt to launch a setup wizard to configure basic settings.
Then, you’ll be in the setup wizard, which looks like this:
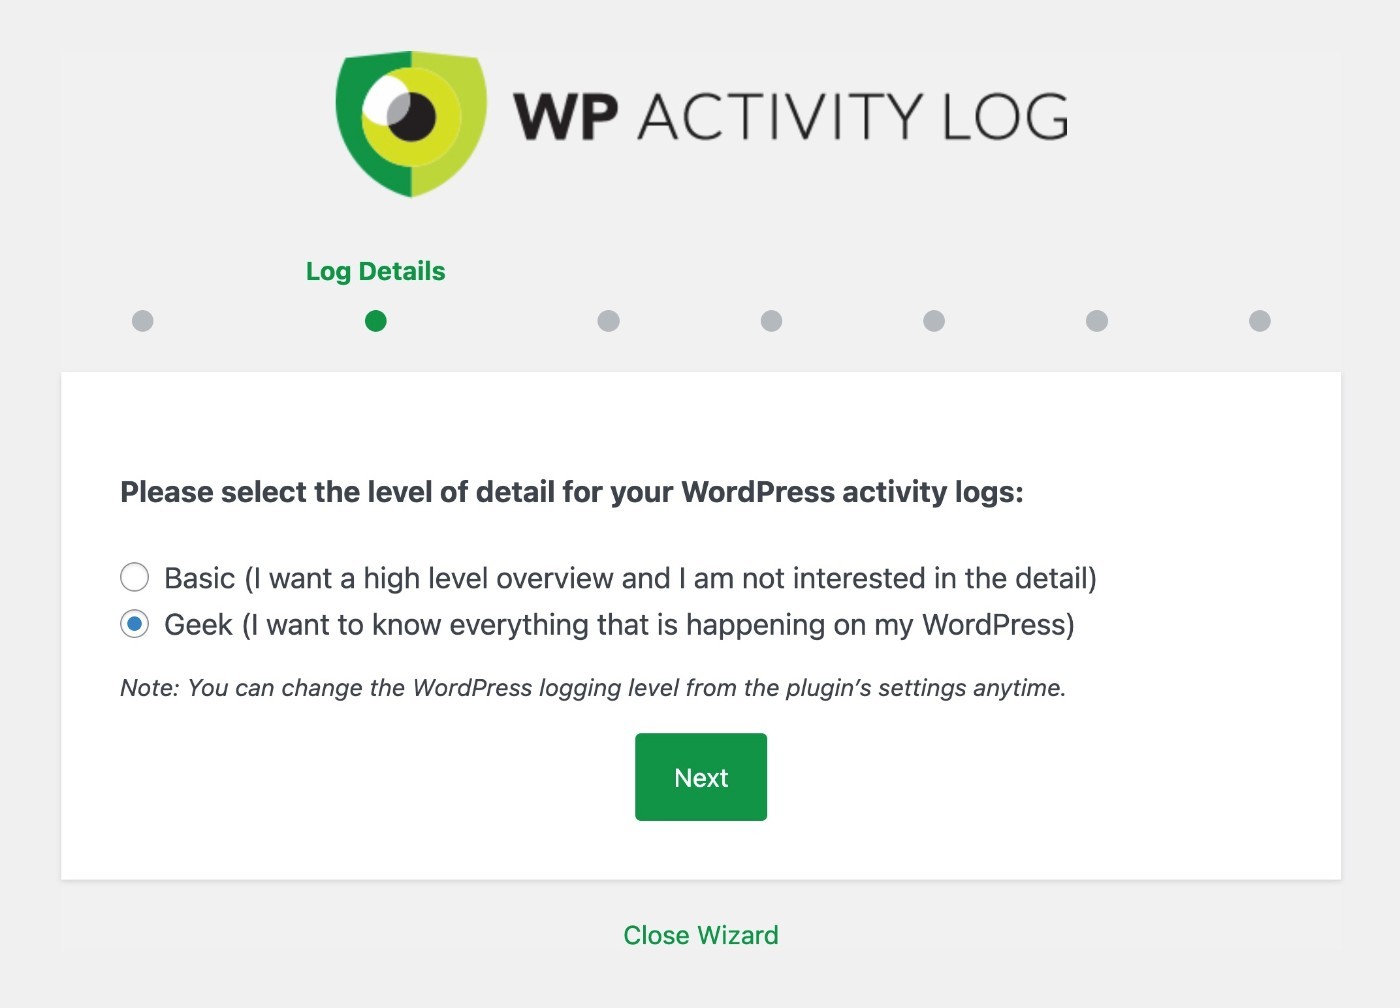
Logging Detail
On the first step, you can choose what level of detail you want for your audit logs:
- Basic – a high-level overview of actions.
- Geek – logs pretty much every single action, big or small.
Don’t stress too much here – you can easily change this later on from the plugin’s settings or create your own custom logging configuration. Just choose whichever one sounds right to you and then adjust as needed if you want more or less detail.
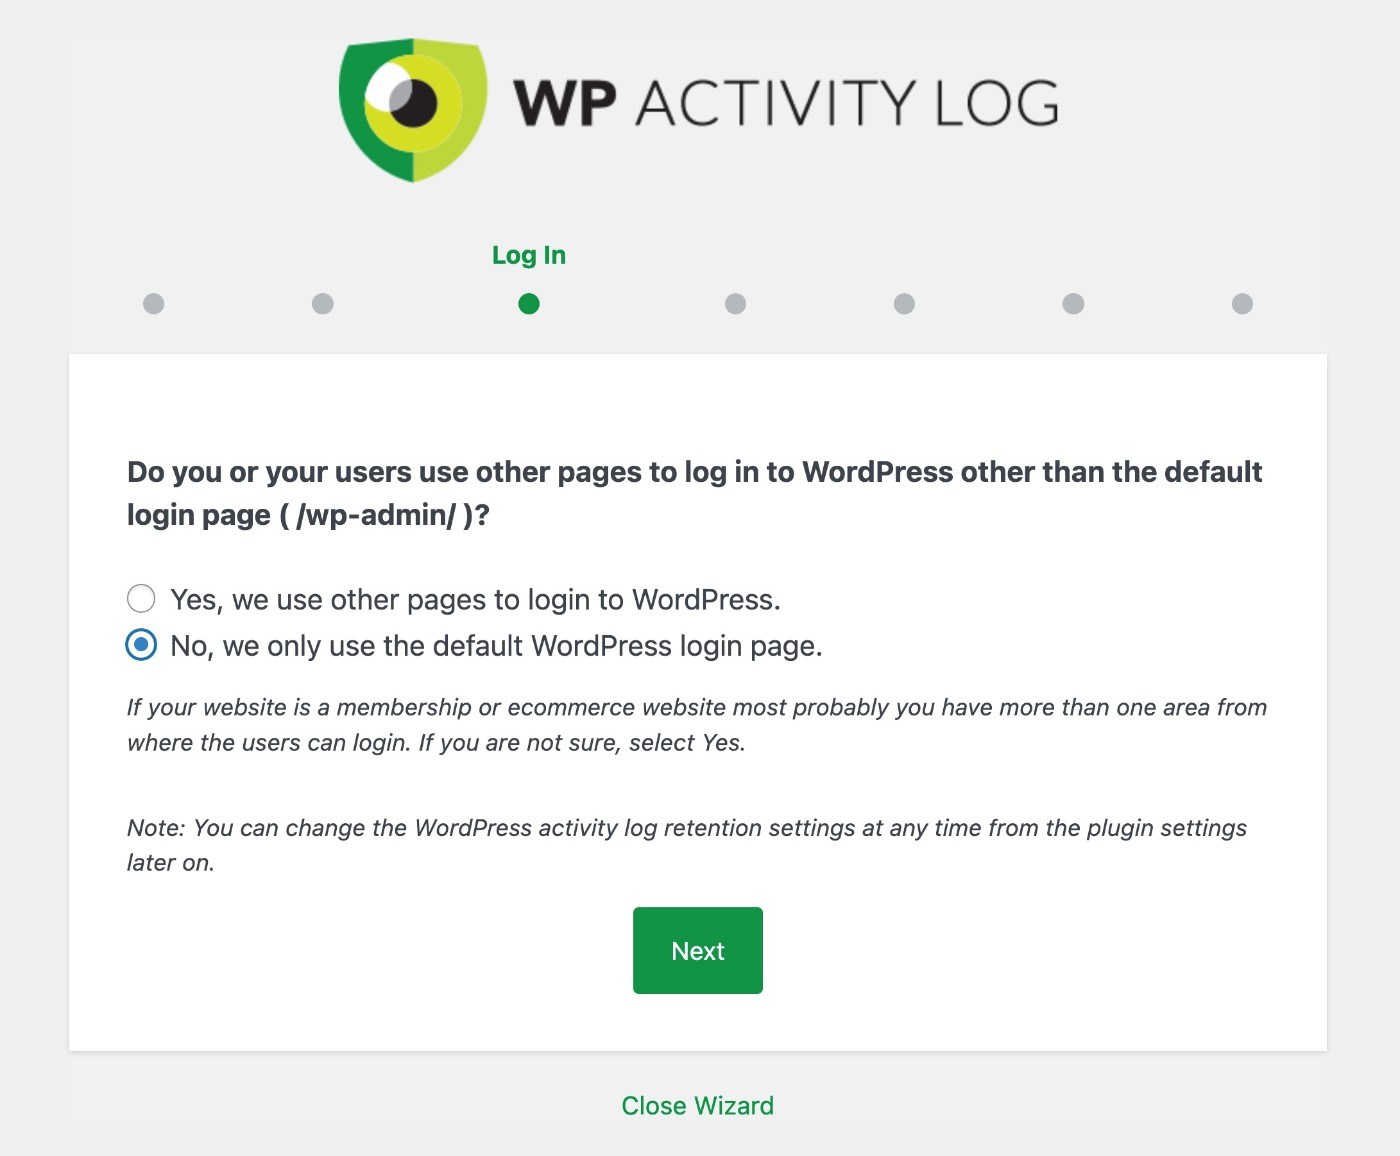
Login Page
Next, you should indicate whether or not you use a custom login page for your site.
For example, if you have a membership site, online course, or eCommerce store, there’s a good chance you created a custom frontend login page rather than forcing users to log in from the default login page.
On the other hand, if you just have a blog or brochure website, you probably don’t have a custom login page.
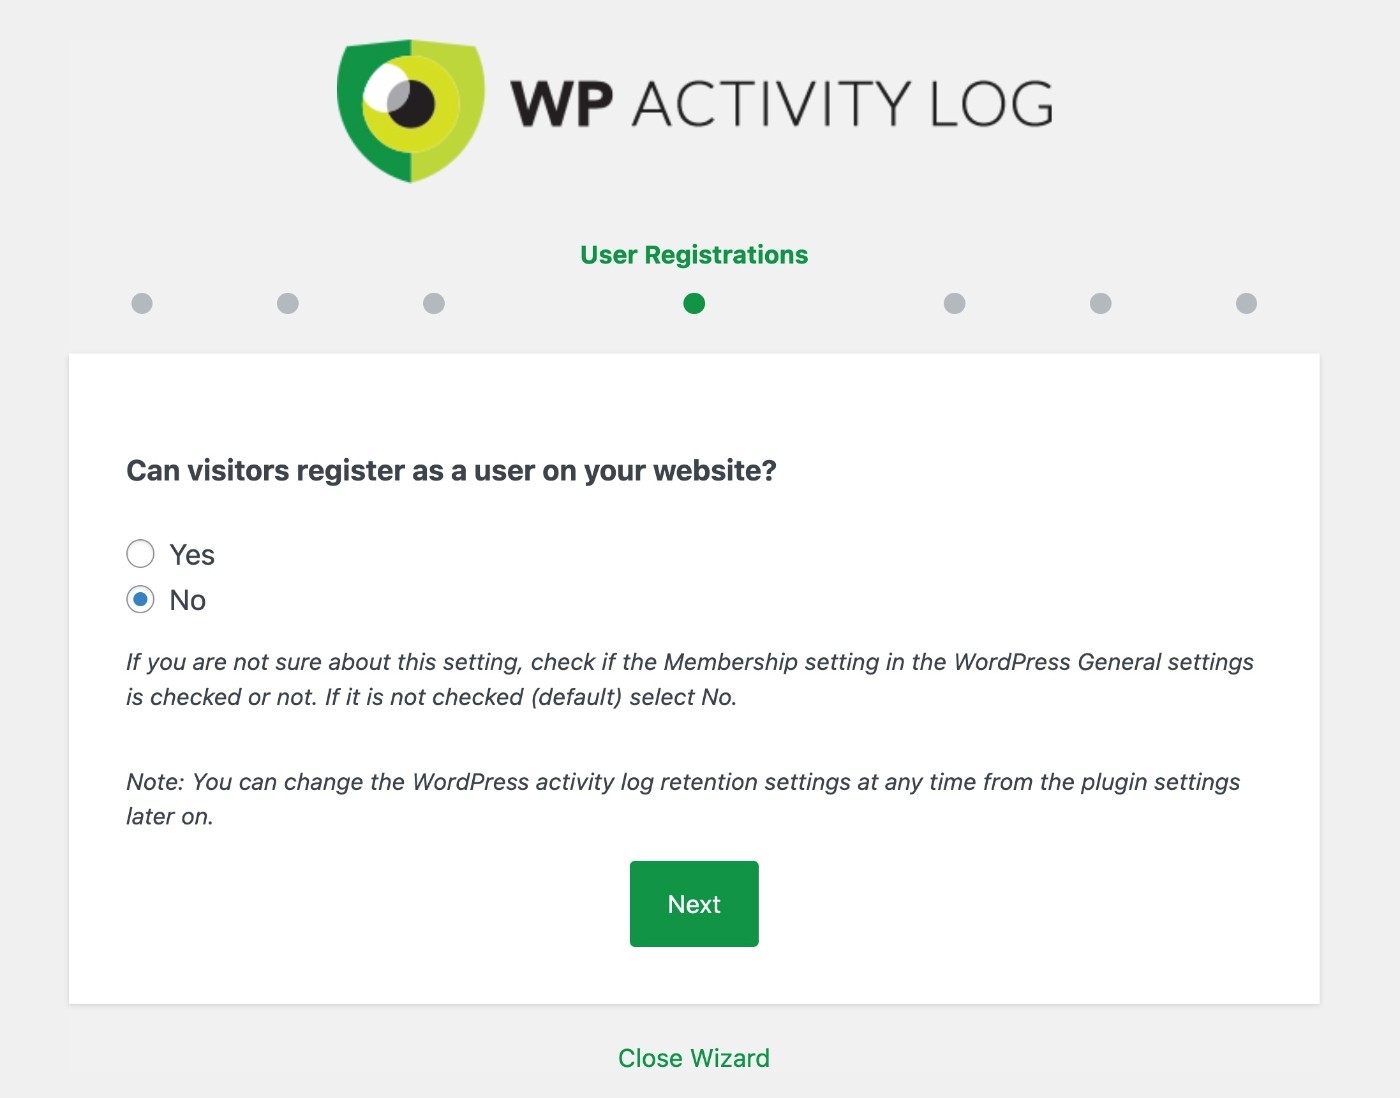
User Registration
Next, choose whether or not you allow other users to register on your site.
Log Retention Period
Next, choose how long you want to retain your activity logs. You have three options:
- 6 months
- 12 months
- Forever
You can also set up custom logging periods in the plugin’s settings later on.
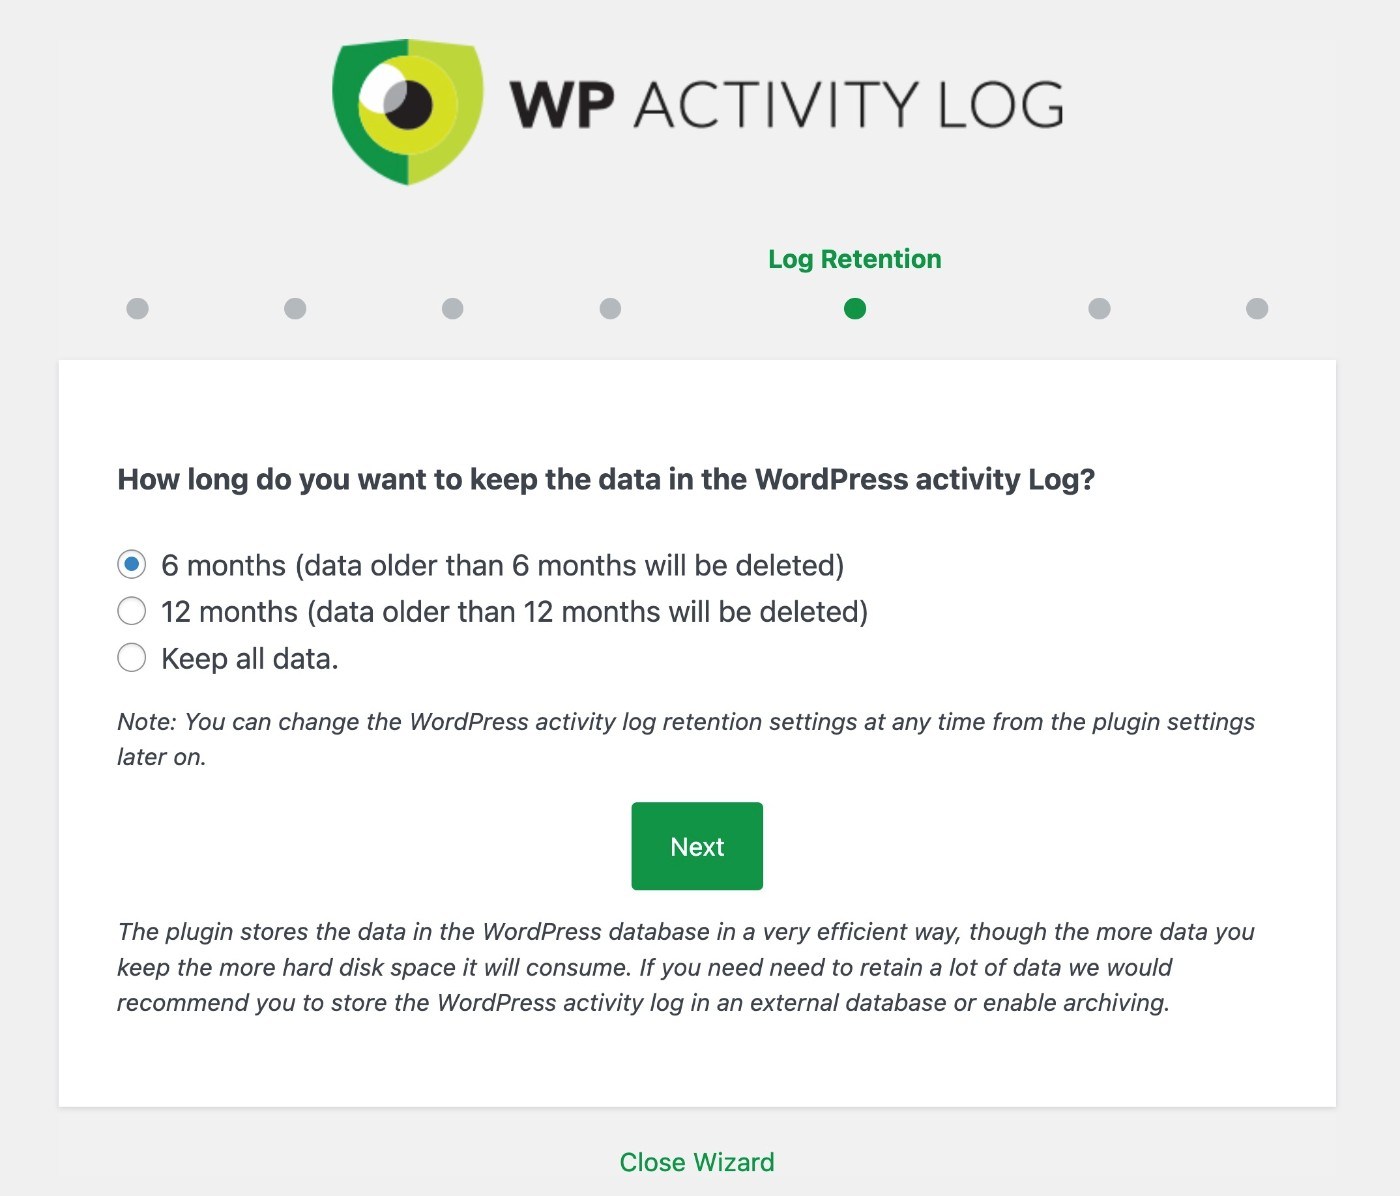
Keep in mind that this data will take up space in your site’s database, which can add up over time (especially for a very busy site).
If you want to keep data forever, you might want to log it to an external database (which is a feature that the plugin supports).
For most sites, six months is a good starting point – you can always extend it if needed.
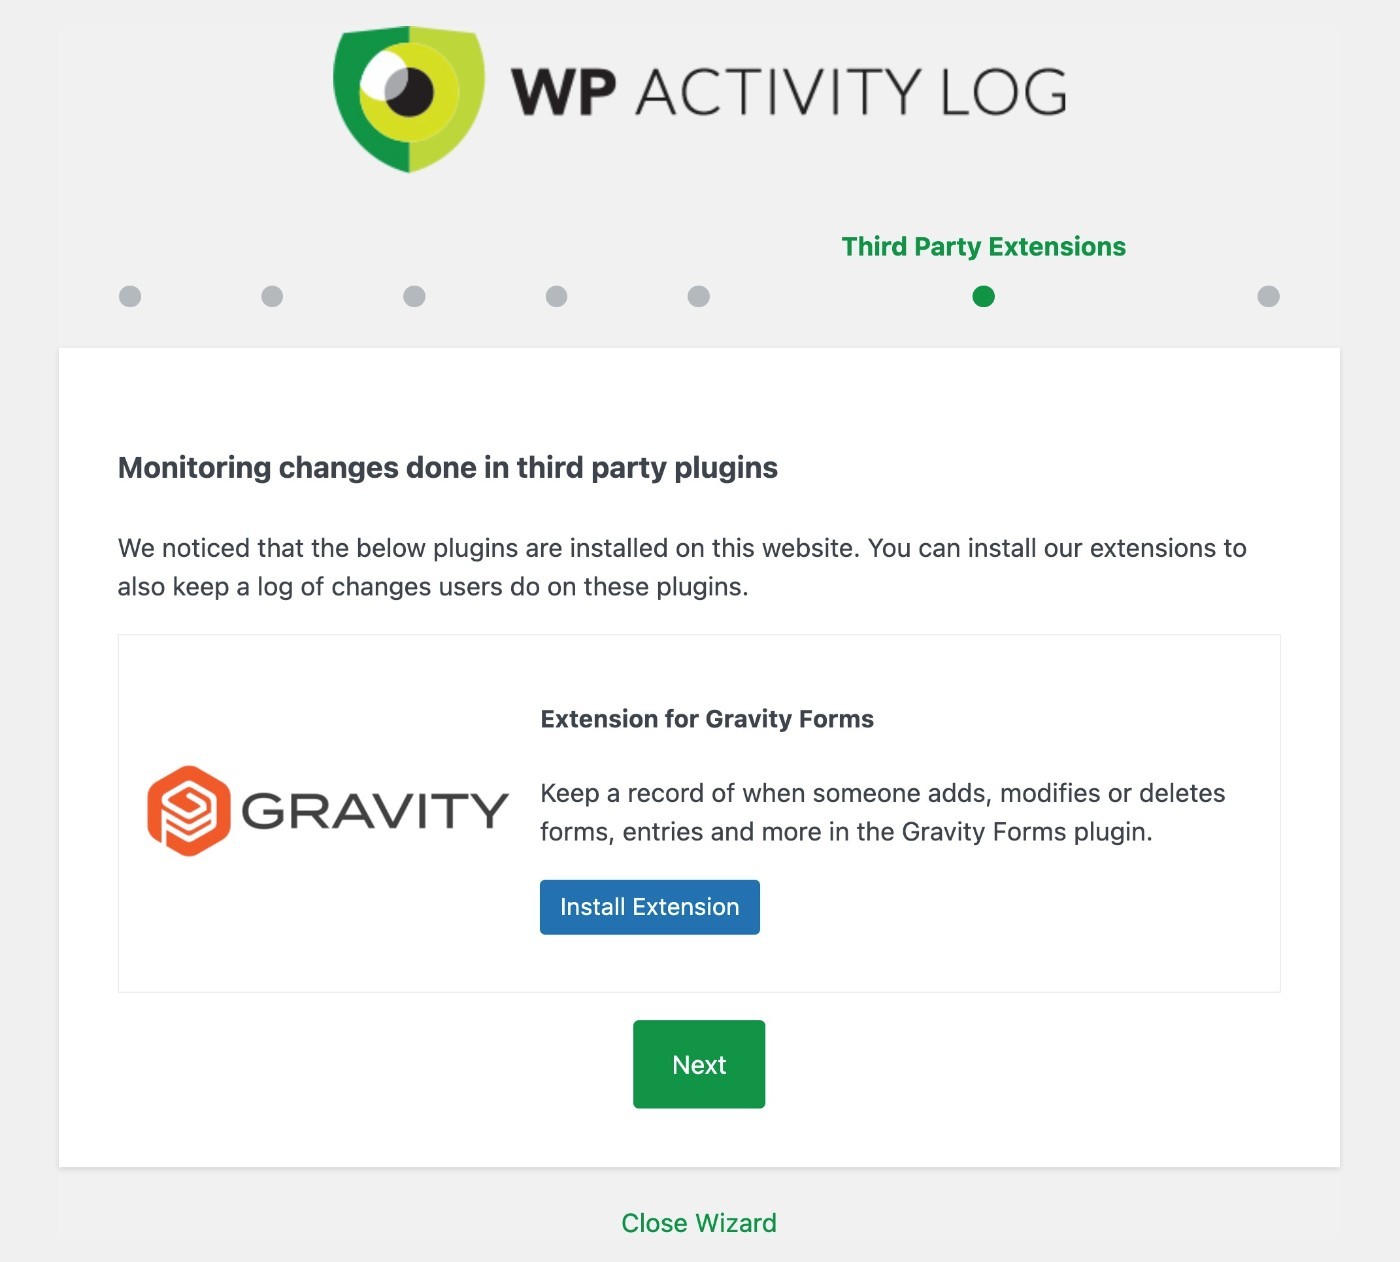
Integrations With Other Plugins
On the next screen, the plugin will give you the option to install extensions to improve compatibility with certain plugins on your site (if available).
For example, I have Gravity Forms installed, so it suggests the Gravity Forms extension so that I can track activity in Gravity Forms.
If you want this added logging ability, you should install any relevant extensions.
And that’s it! You’re all set up.
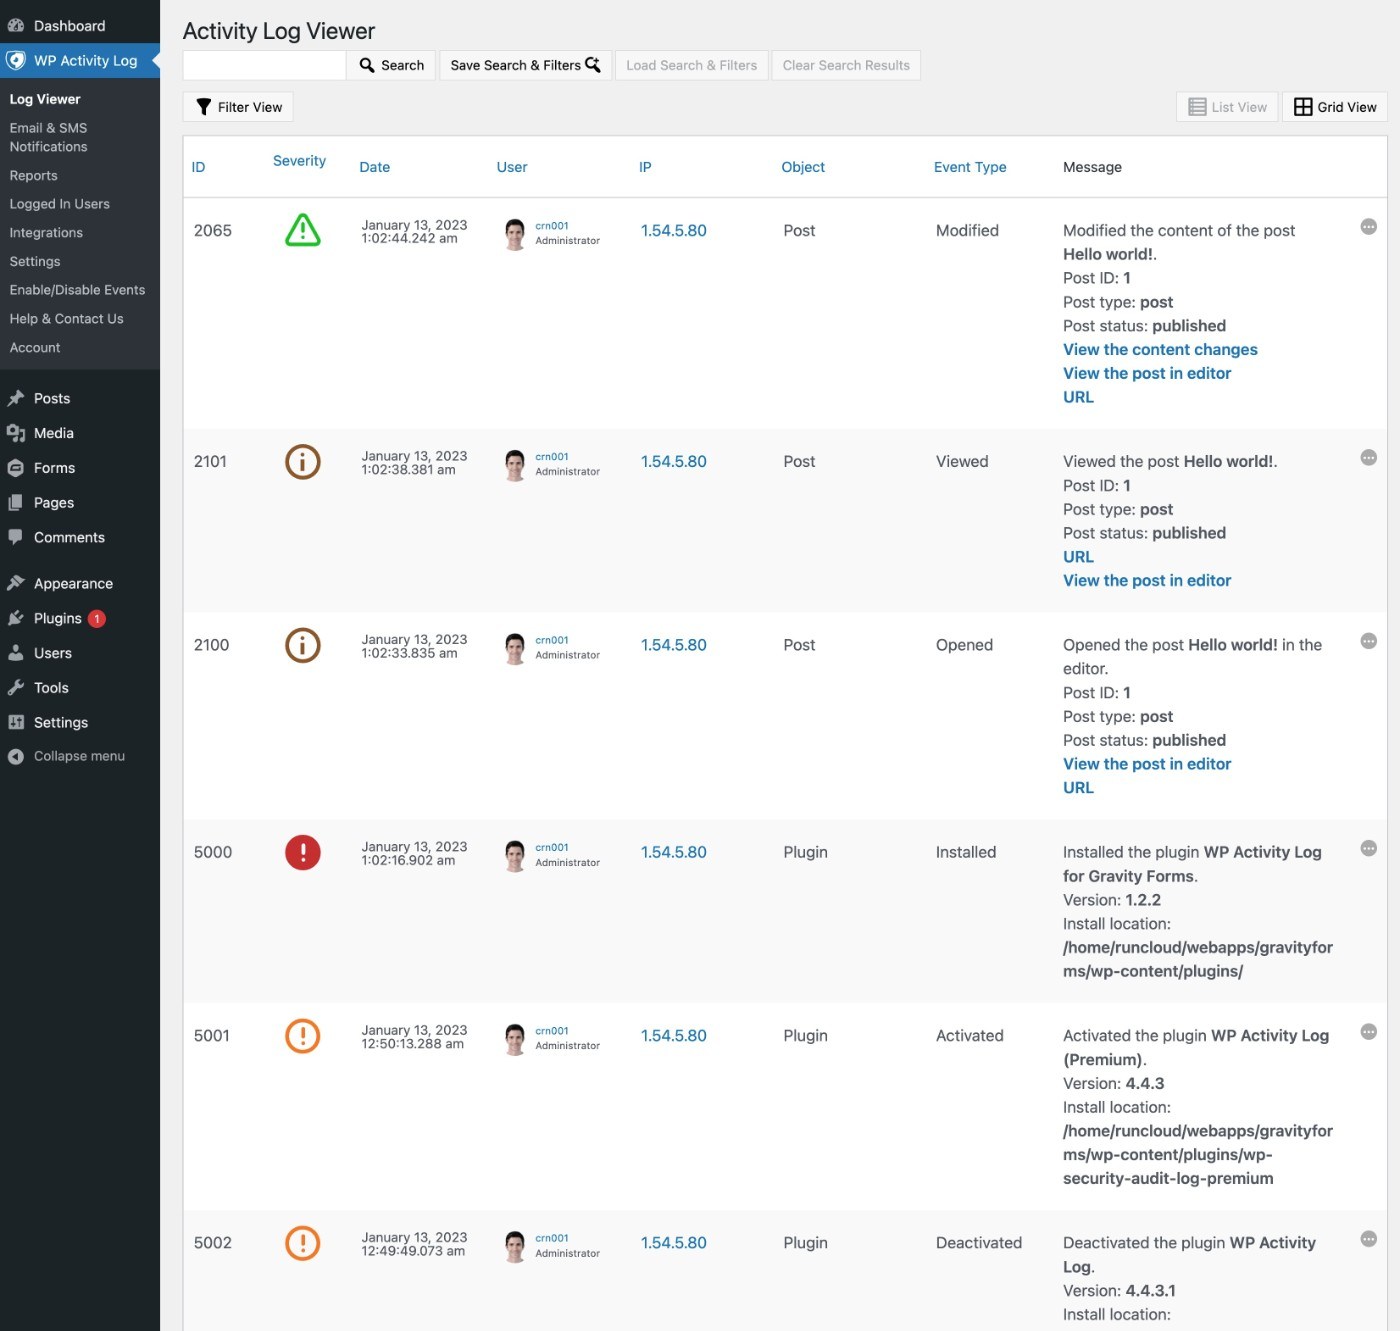
2. View Your Activity Log
At this point, your WordPress activity log is already functioning.
While I still recommend configuring a few other details (more on those next), you can jump into your log right away to get a feel for how it works.
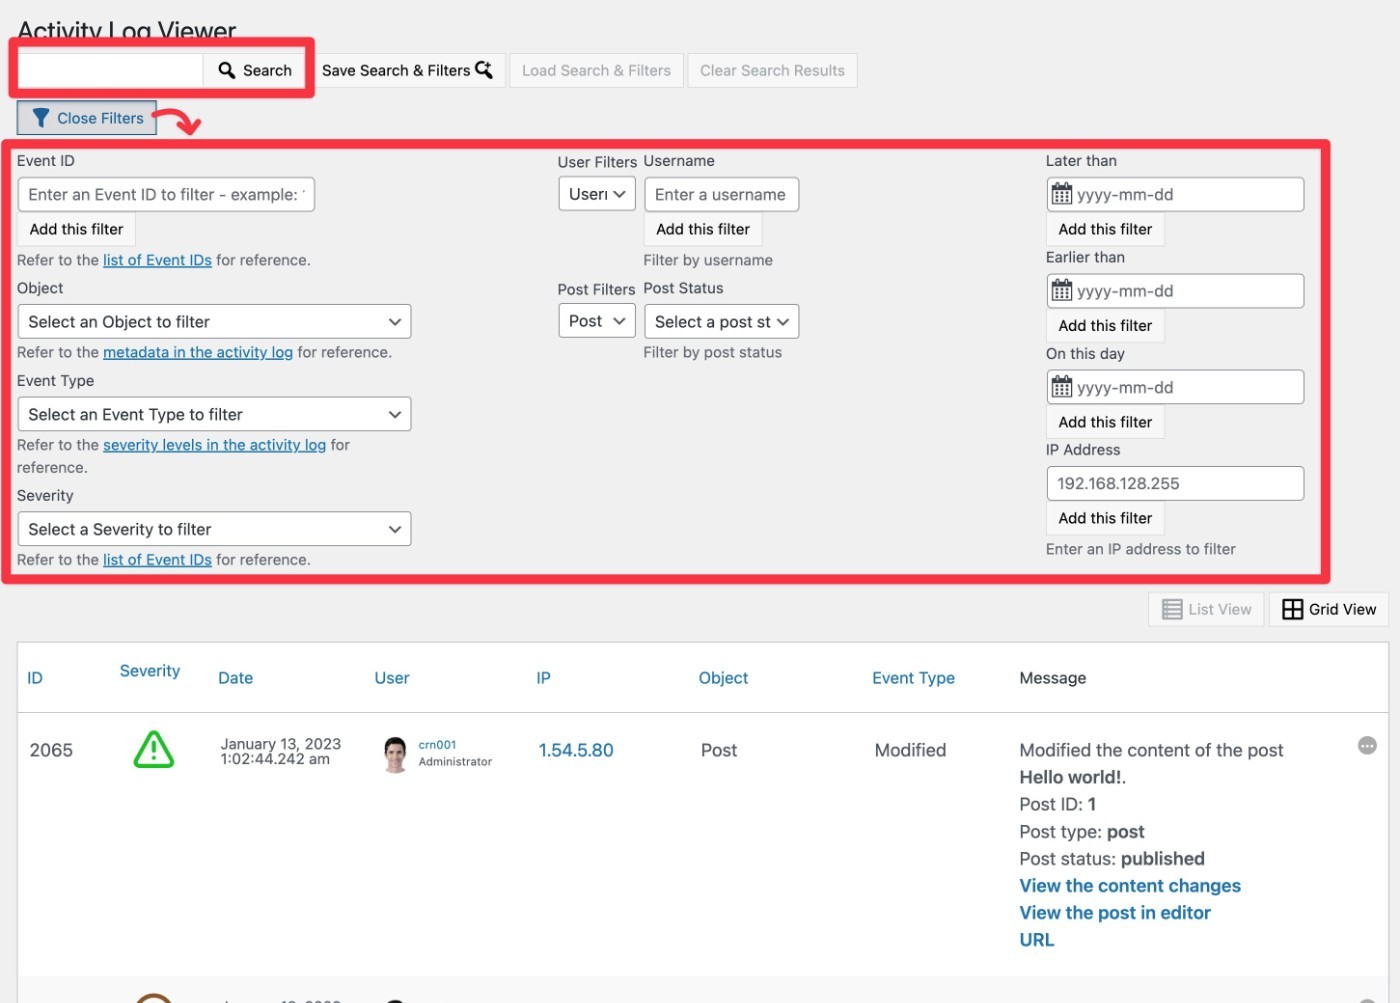
To access it, go to WP Activity Log → Log Viewer.
With the “Geek” logging level, you can see that the plugin logs literally every action, even down to something as small as just opening a post (even without making changes).
To help you find specific events, you can search by name. Or, you can click the Filter View button to filter events by details such as:
- Severity level
- Event type
- User
- Time
- …lots more
You can also save filter settings to quickly reuse them in the future, which is really handy.
3. Include/Exclude Events That You Want to Track
To help you only see the audit events that matter to you, WP Activity Log lets you manually include or exclude individual events from logging (in addition to giving you the choice between preset “Geek” and “Basic” levels).
To access this capability, go to WP Activity Log → Enable/Disable Events.
Here, you’ll see a long list of every single action that the plugin is capable of logging.
To enable or disable a specific action, you can use the checkboxes.
You can also search and filter the actions to more quickly find the right one.

If you have multiple sites, one really neat thing here is that you can save your own presets to reuse those logging rules later on.
4. Set Up Notifications and Reports
To avoid needing to manually browse your activity log to stay on top of your site, WP Activity Log lets you set up instant notifications for key events, as well as general reports:
- For the real-time notifications, you can receive them via email and/or text message. Text messages require integrating the Twilio service.
- For the reports, you can receive them via email and also browse them from your WordPress dashboard.
Notifications
To set up notifications, go to WP Activity Log → Email & SMS Notifications.
Here, you can set up the built-in notifications, which are spread across different tabs.
To enable a notification, just check the box and enter the email to which you want to send that notification.
If you want to receive text messages, you’ll need to install the helper plugin and then you can enter a phone number, as well.
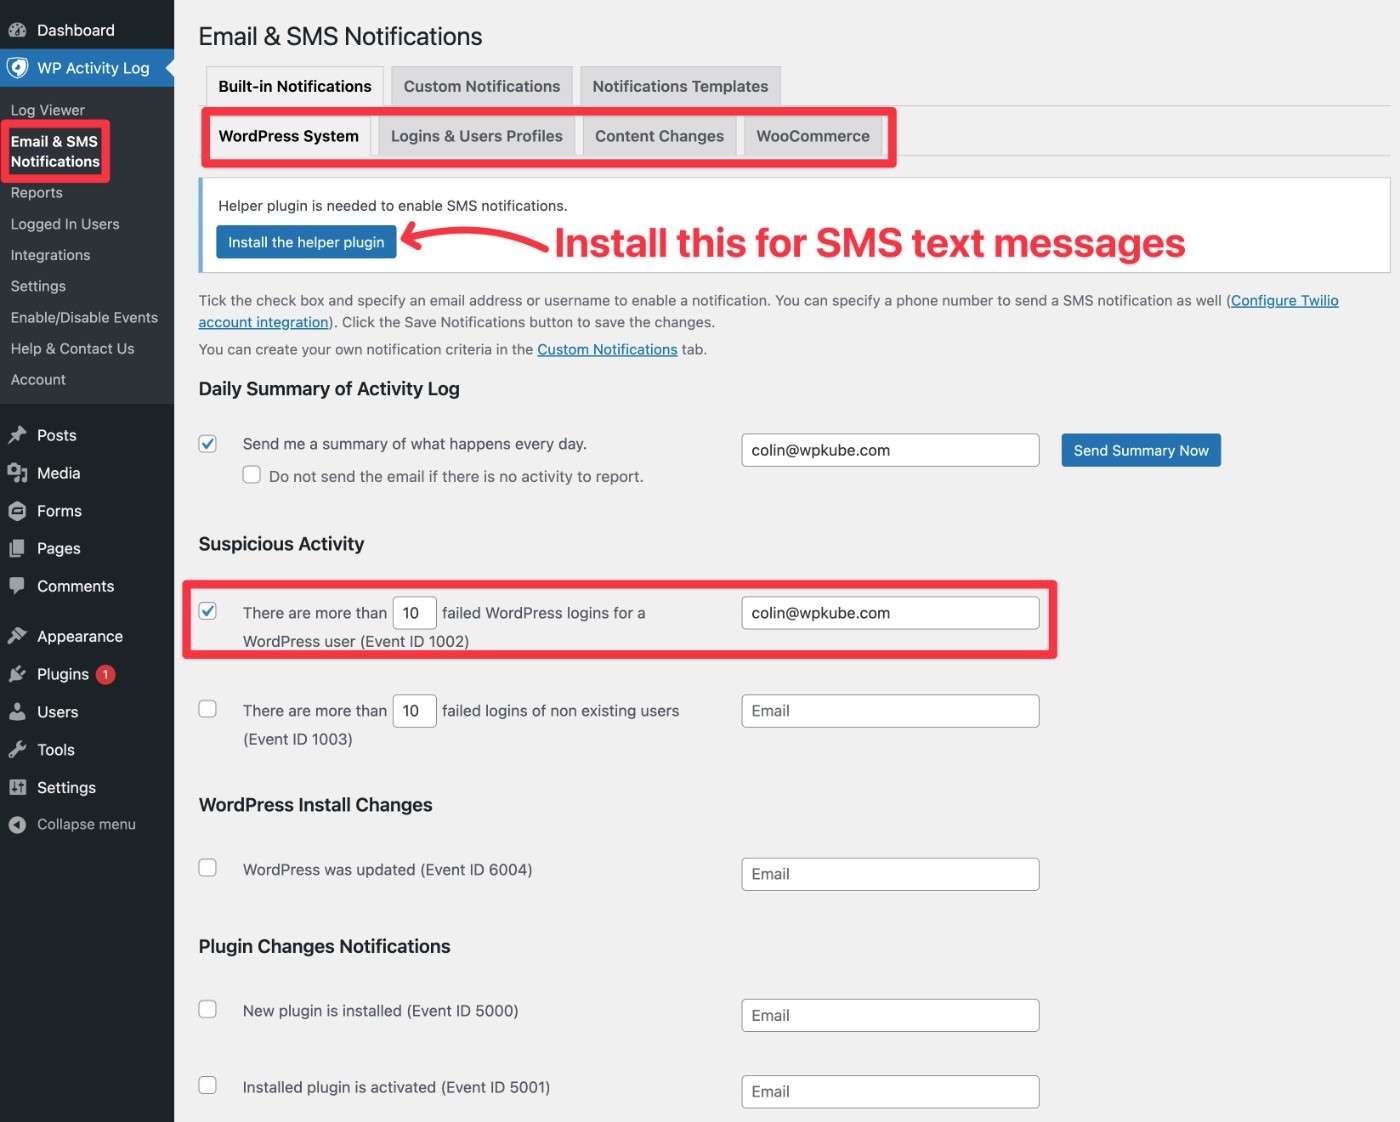
You can also set up custom notifications from the Custom Notifications tab based on any combination of triggers.
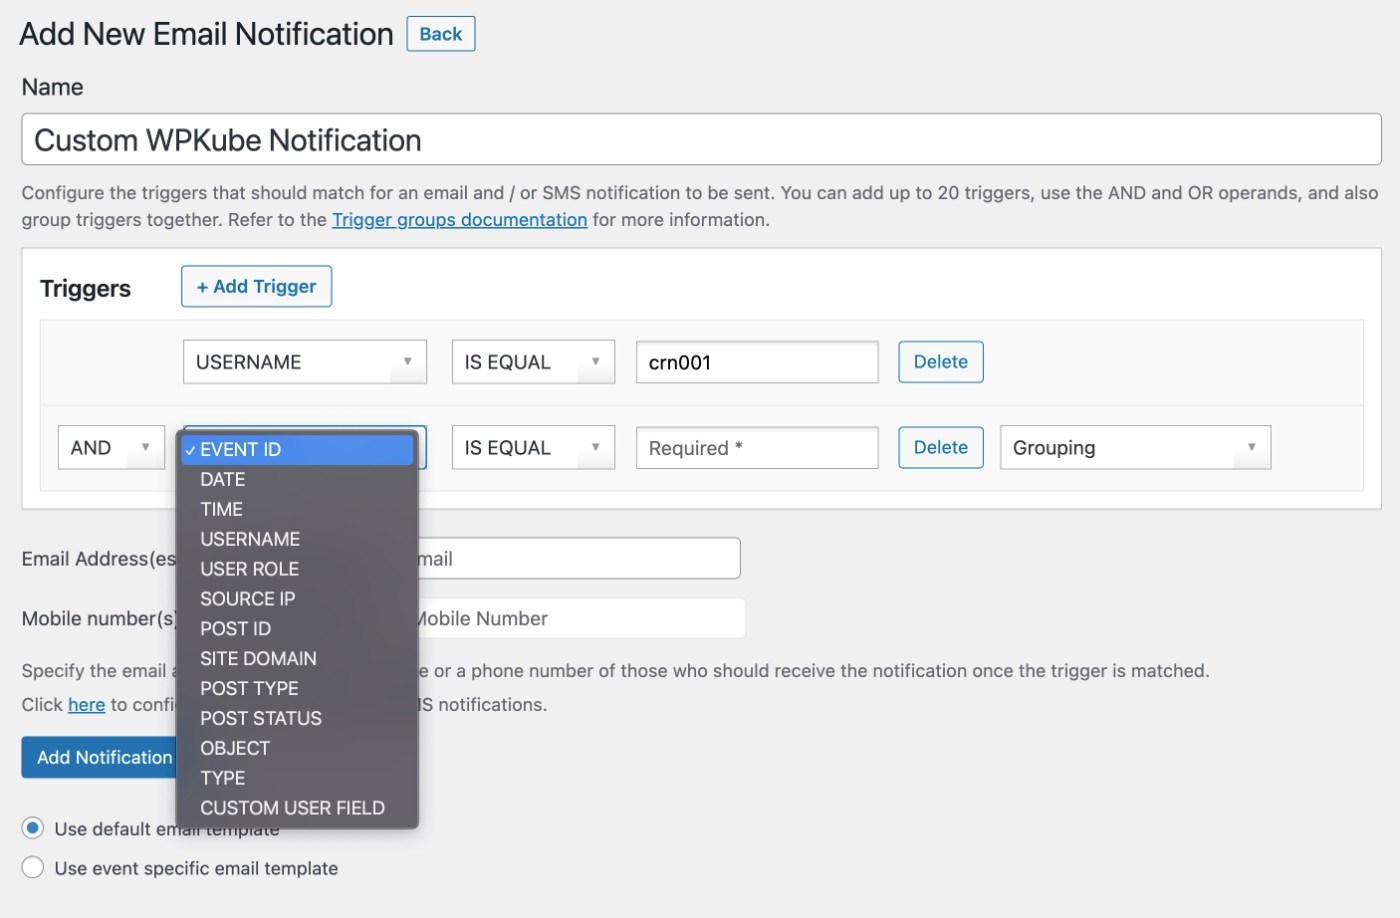
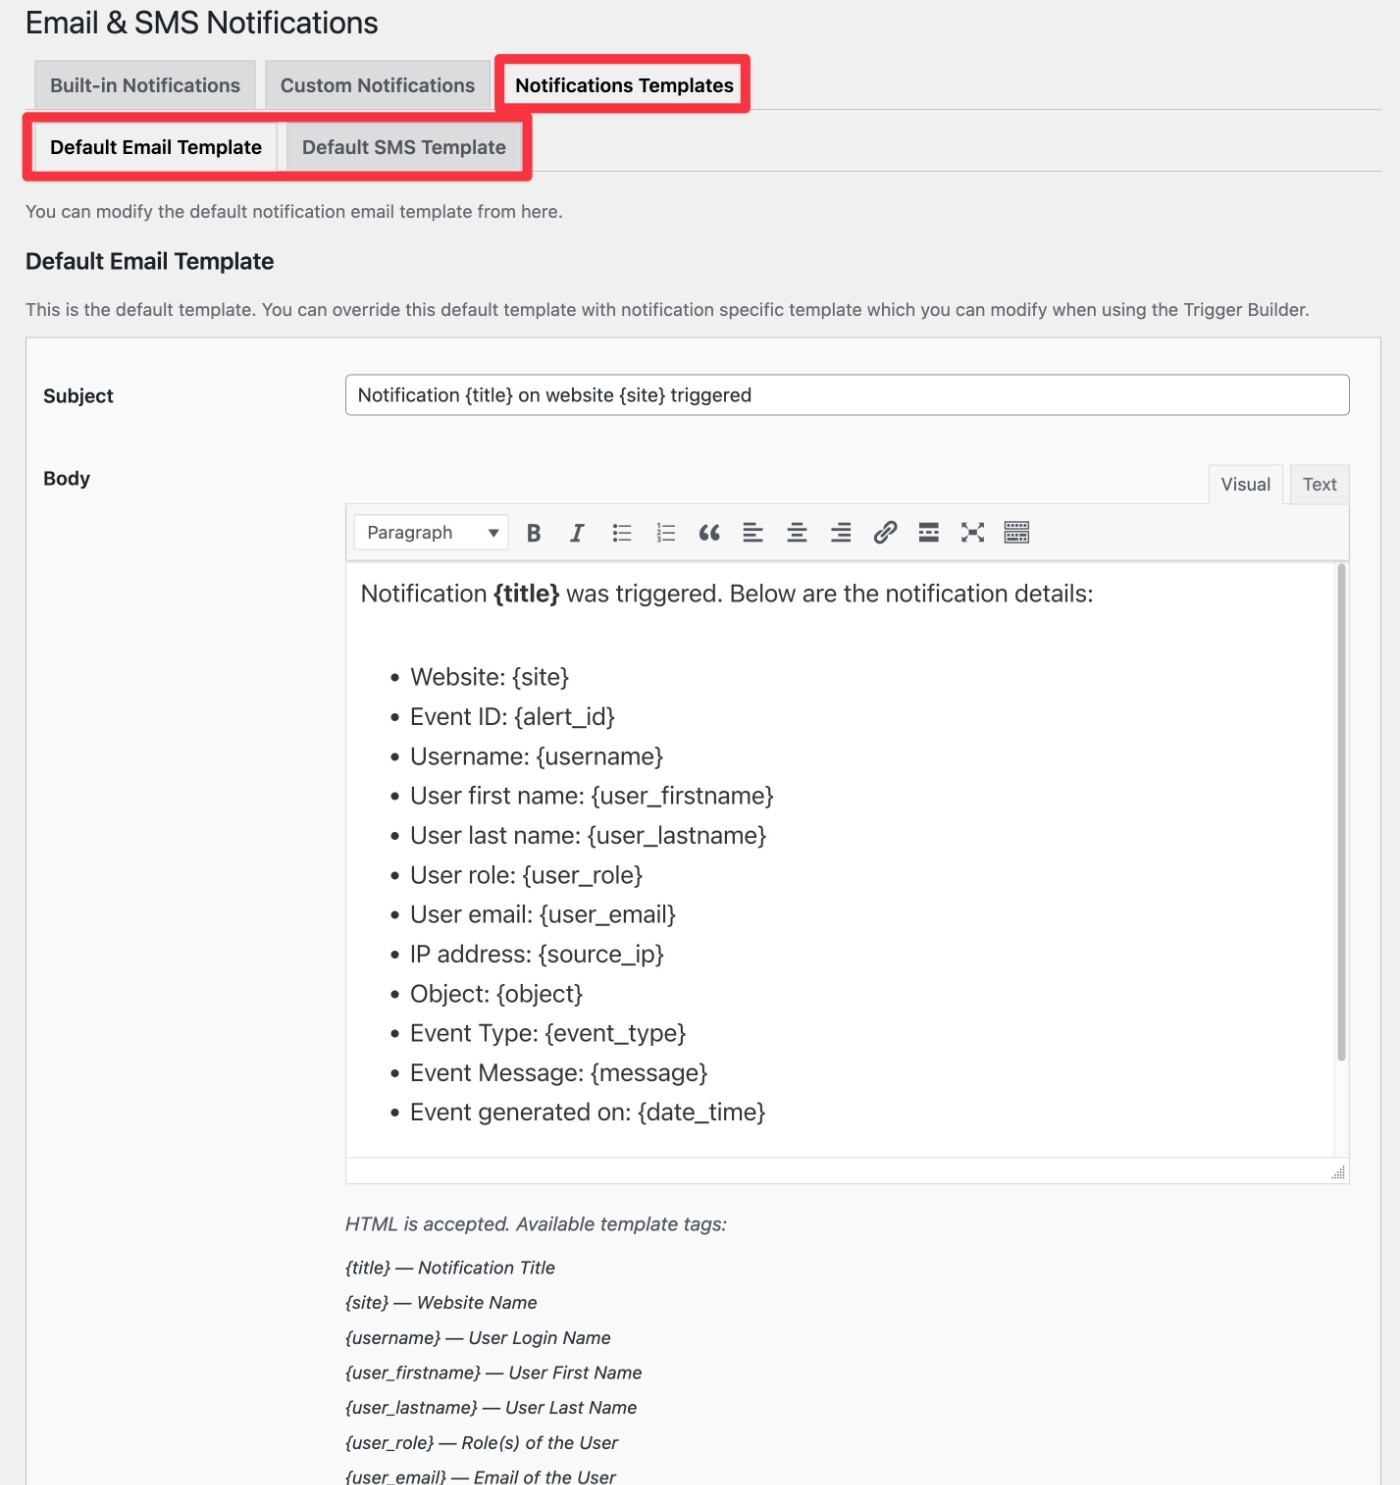
And if you want to customize the email or SMS template, you can do that from the Notifications Templates tab.
Reports
To set up a report, you can go to WP Activity Log → Reports.
At the top of the interface, you can choose the type of report to generate:
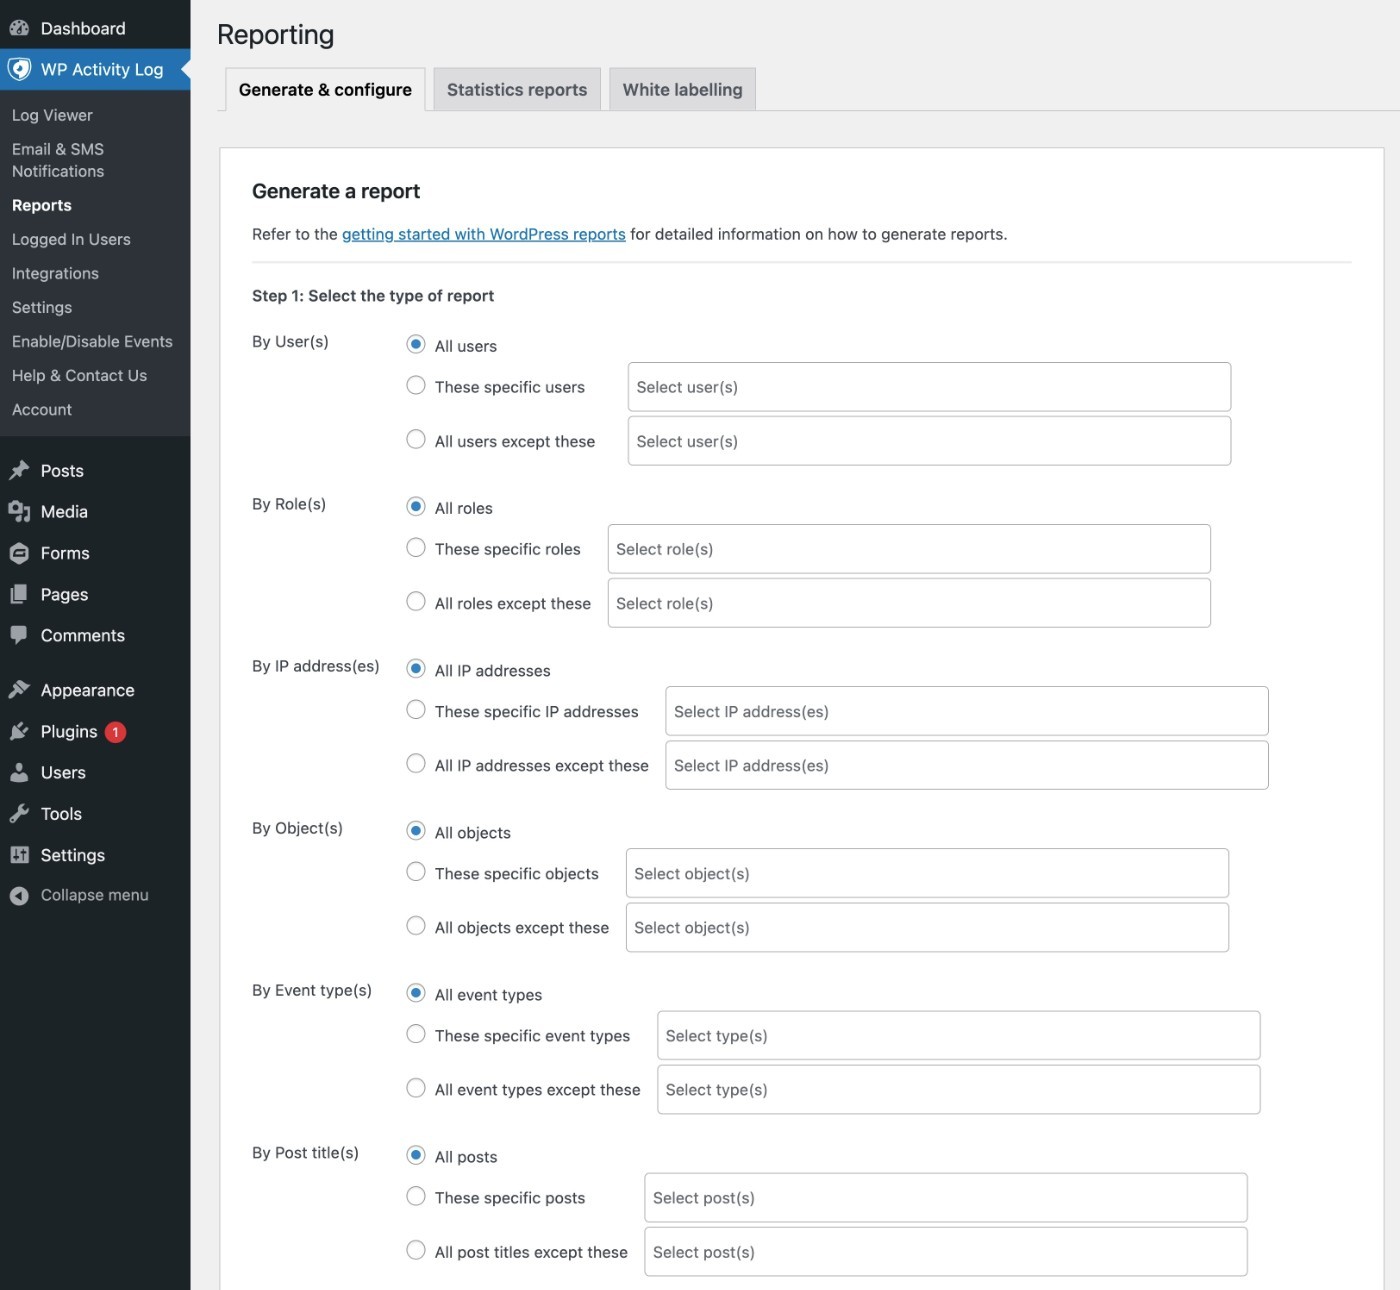
Further down the screen, you can choose the start/end date and the report format.
You can also generate a one-time report or set up an automatic schedule to send the report via email.
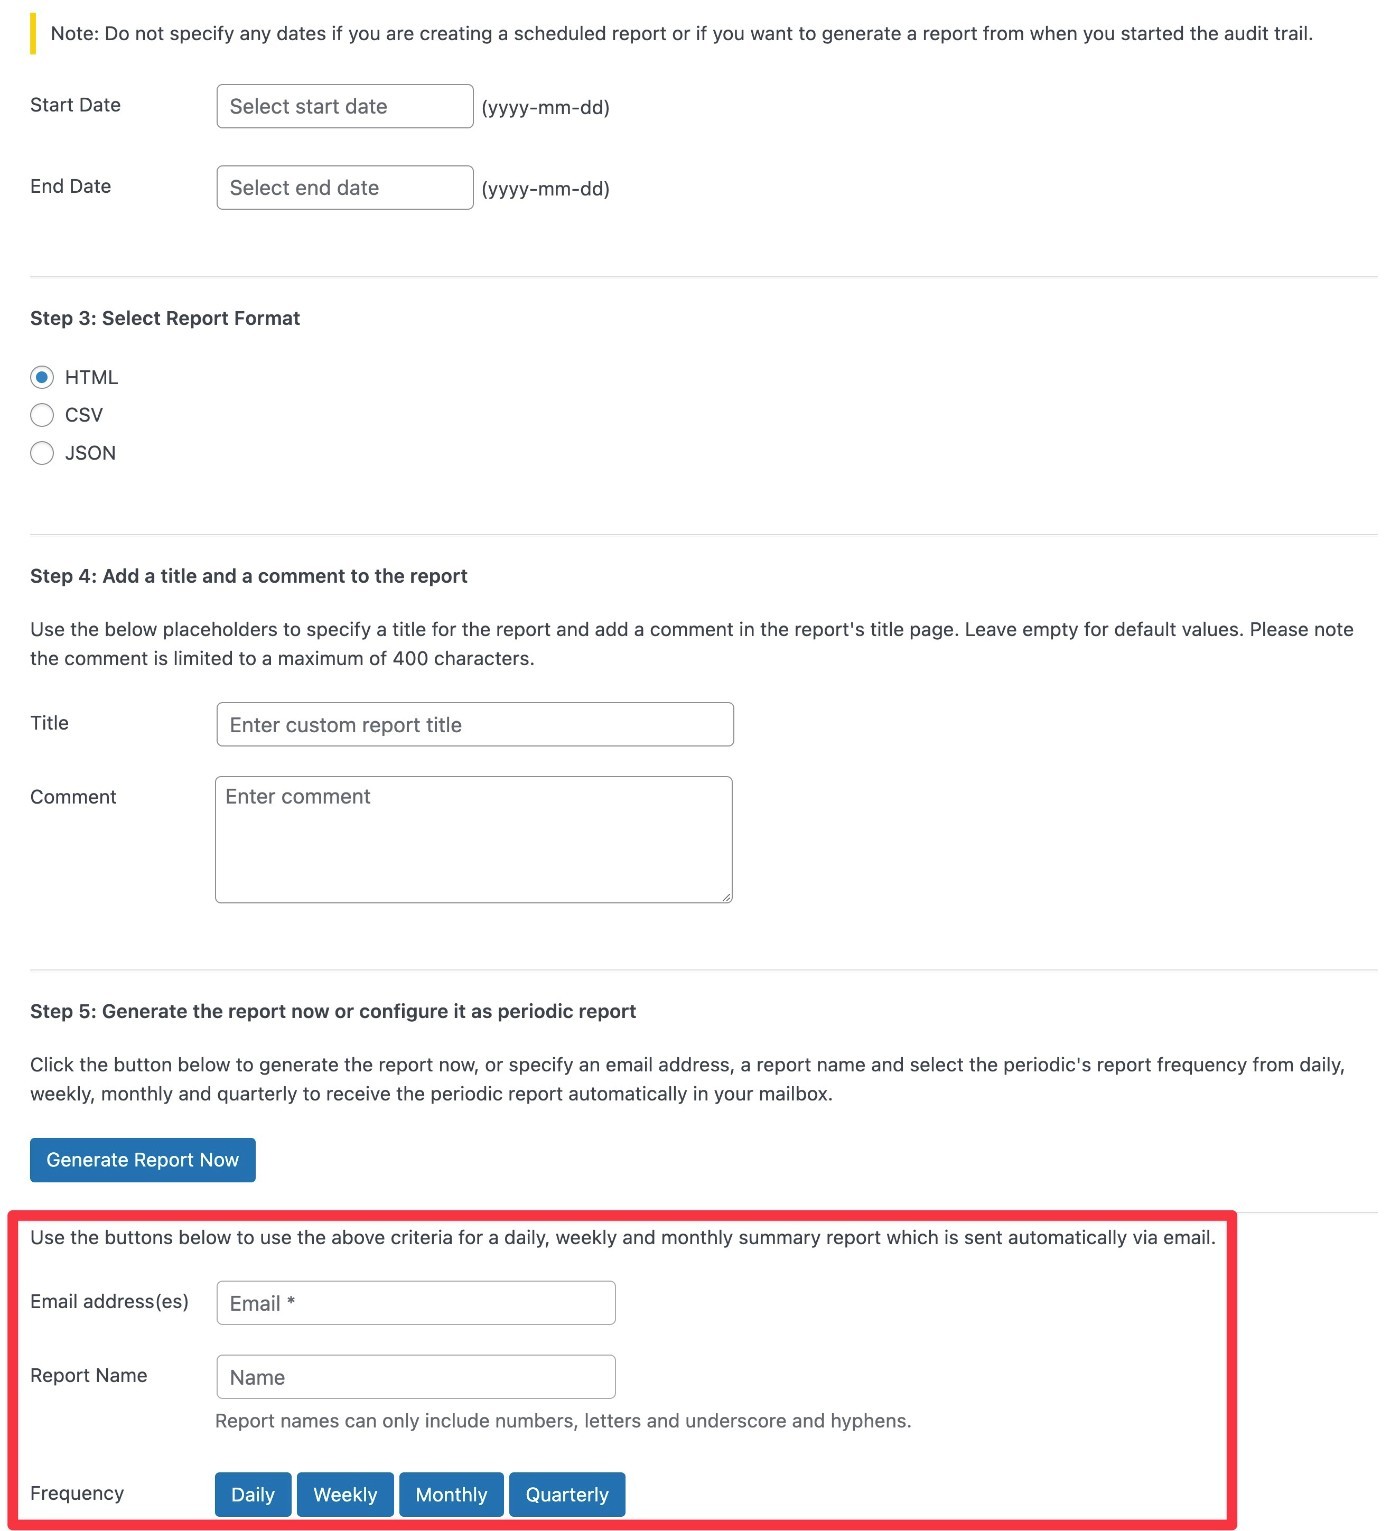
If you’re working with a client, there are also options to white-label these reports.
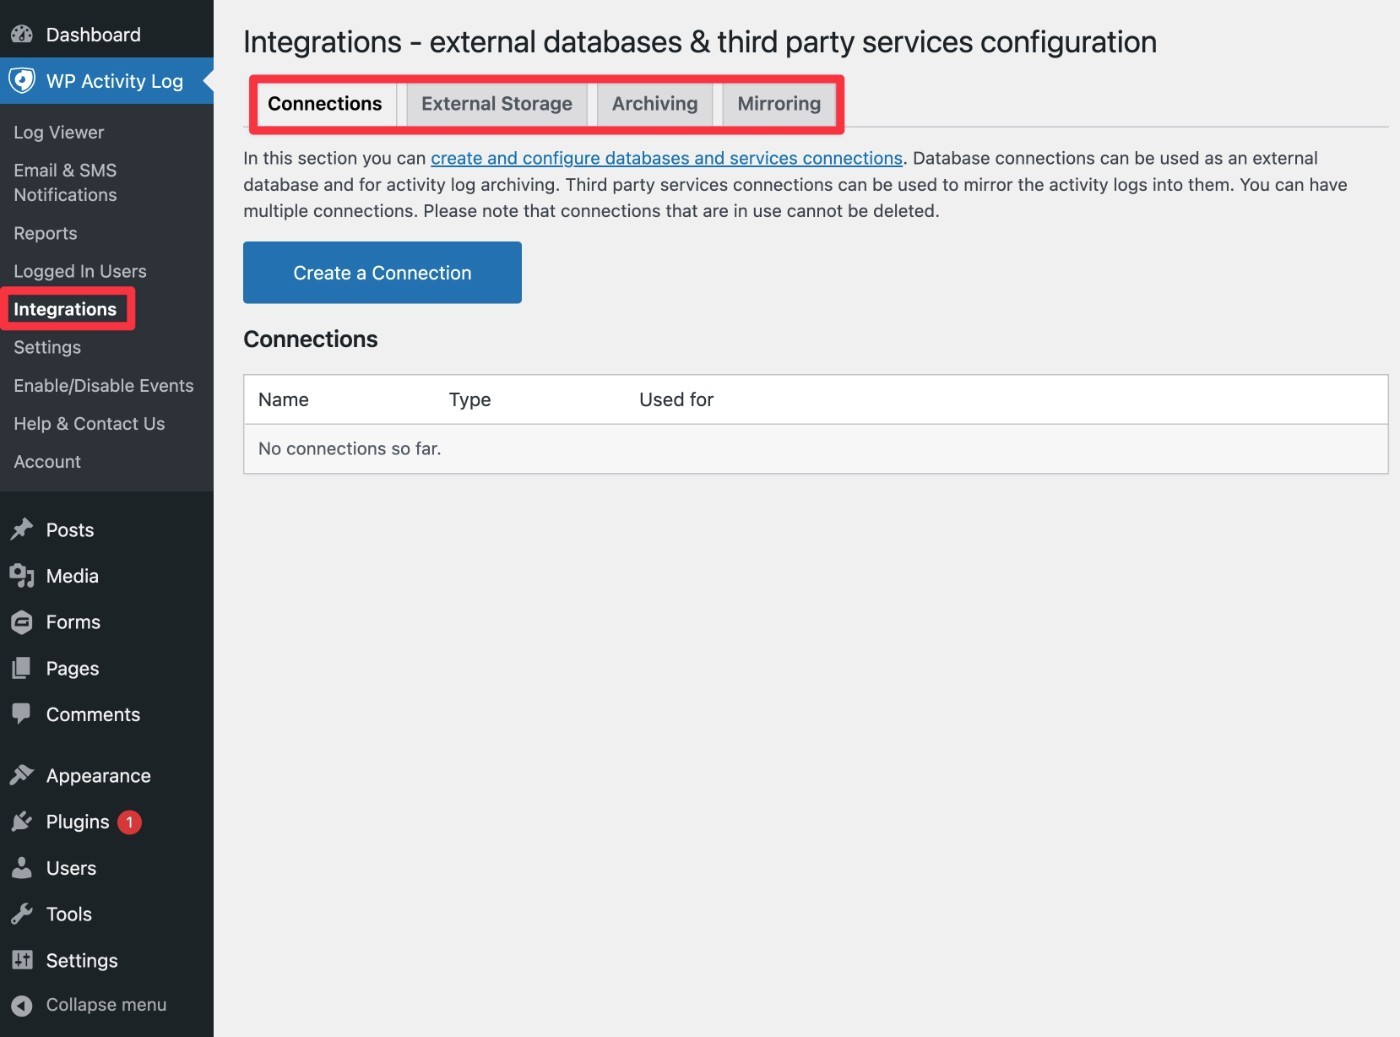
5. Set Up External Logging or Other Integrations
This step is 100% optional…
But for more advanced use cases, WP Activity Log also gives you the option to integrate/mirror your log with third-party services, archive your logs to third-party services, and/or store your activity log in an external database (rather than your WordPress site’s database).
If you want to use this functionality, you can set it up by going to WP Activity Log → Integrations.
Each tab in this interface includes instructions on how to set everything up.
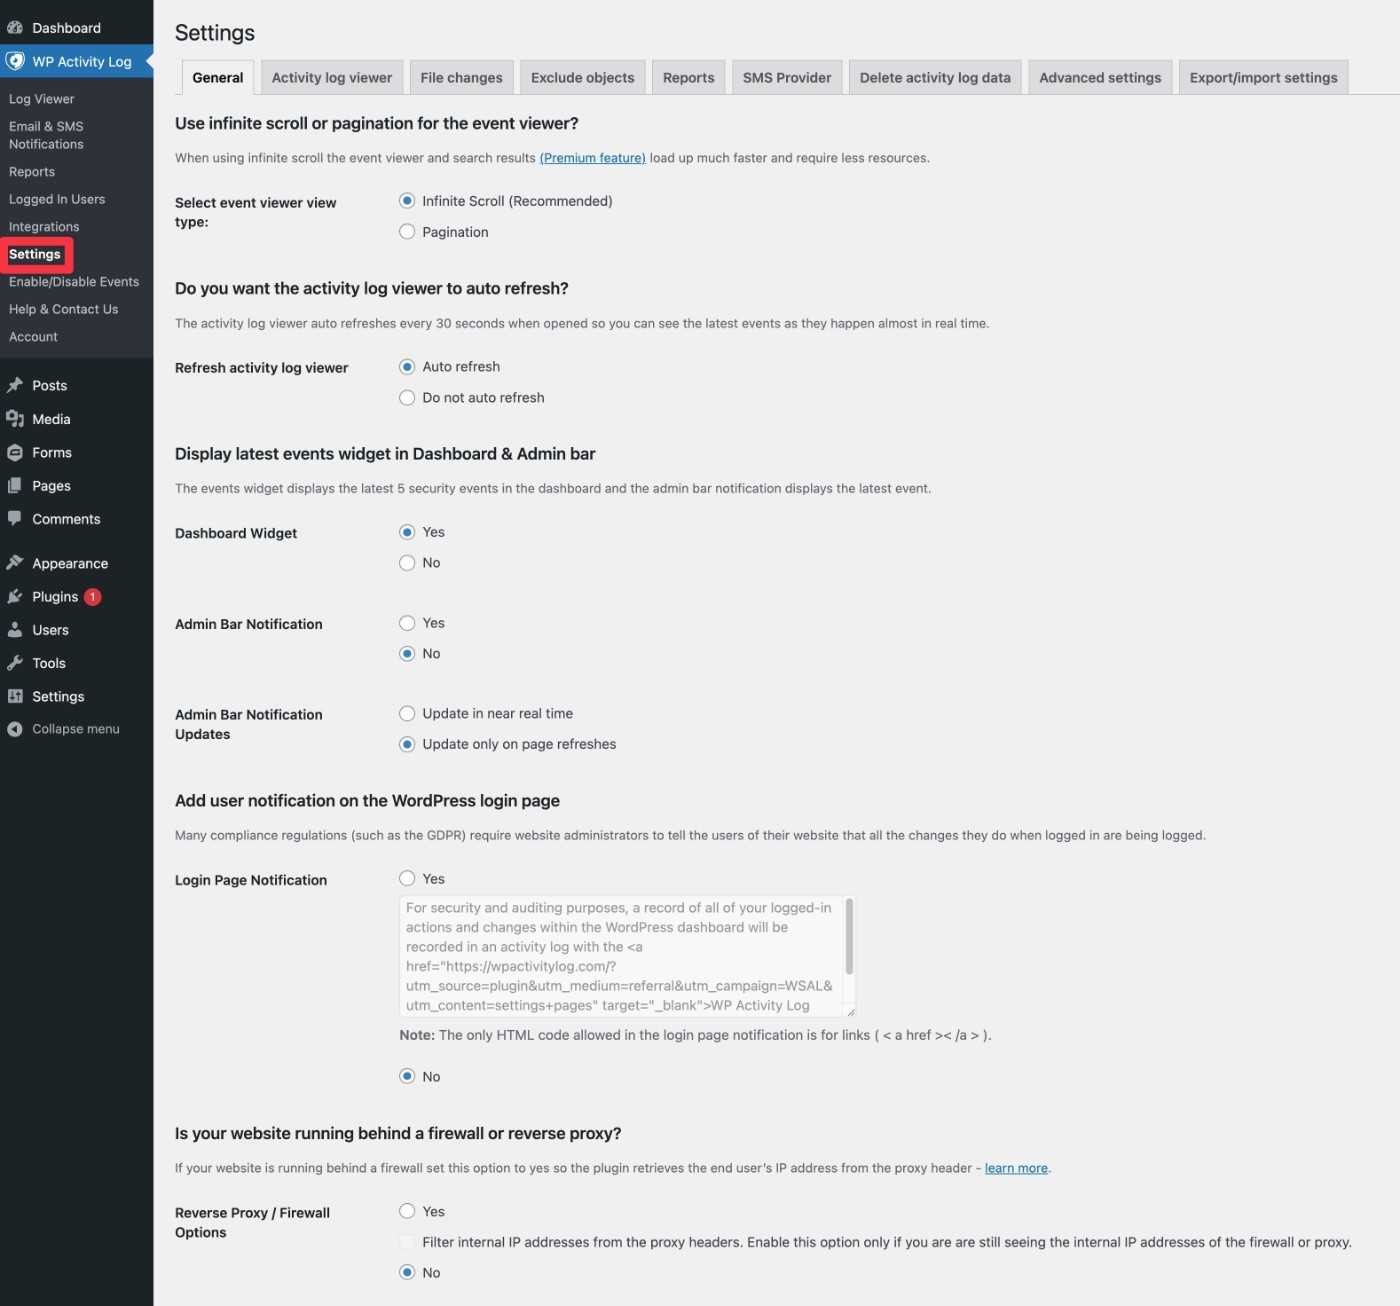
6. Explore the Other Plugin Settings
While the plugin’s default configuration should work fine for most sites, you do get a detailed settings area that you might want to explore to see if you want to tweak anything.
You can access this by going to WP Activity Log → Settings.
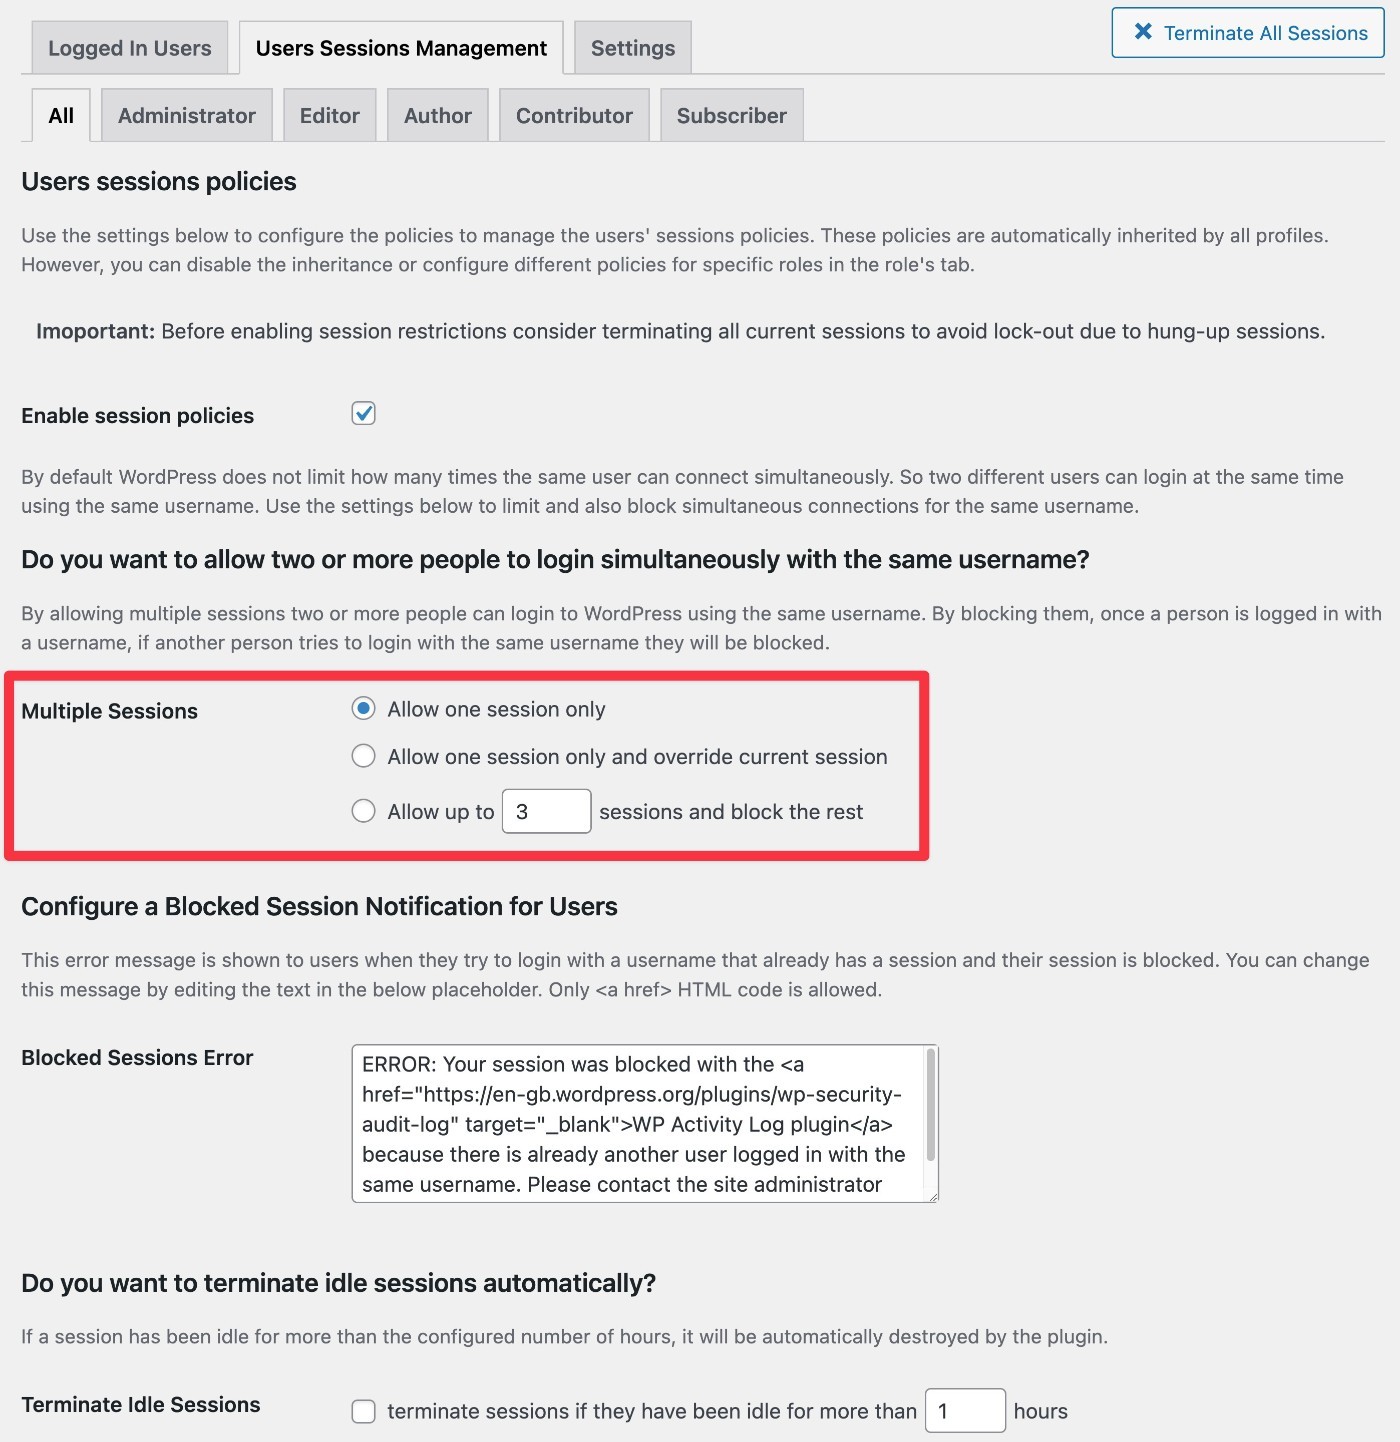
7. Manage Logged In Users
Finally, WP Activity Log also gives you a tool to manage logged-in users on your site, which you can access at WP Activity Log → Logged In Users.

You can easily terminate sessions for individual users or all users at once.
You can also set up session policies, such as blocking two different people from signing in with the same username simultaneously.
This can be great for preventing account sharing on your membership site or online course.
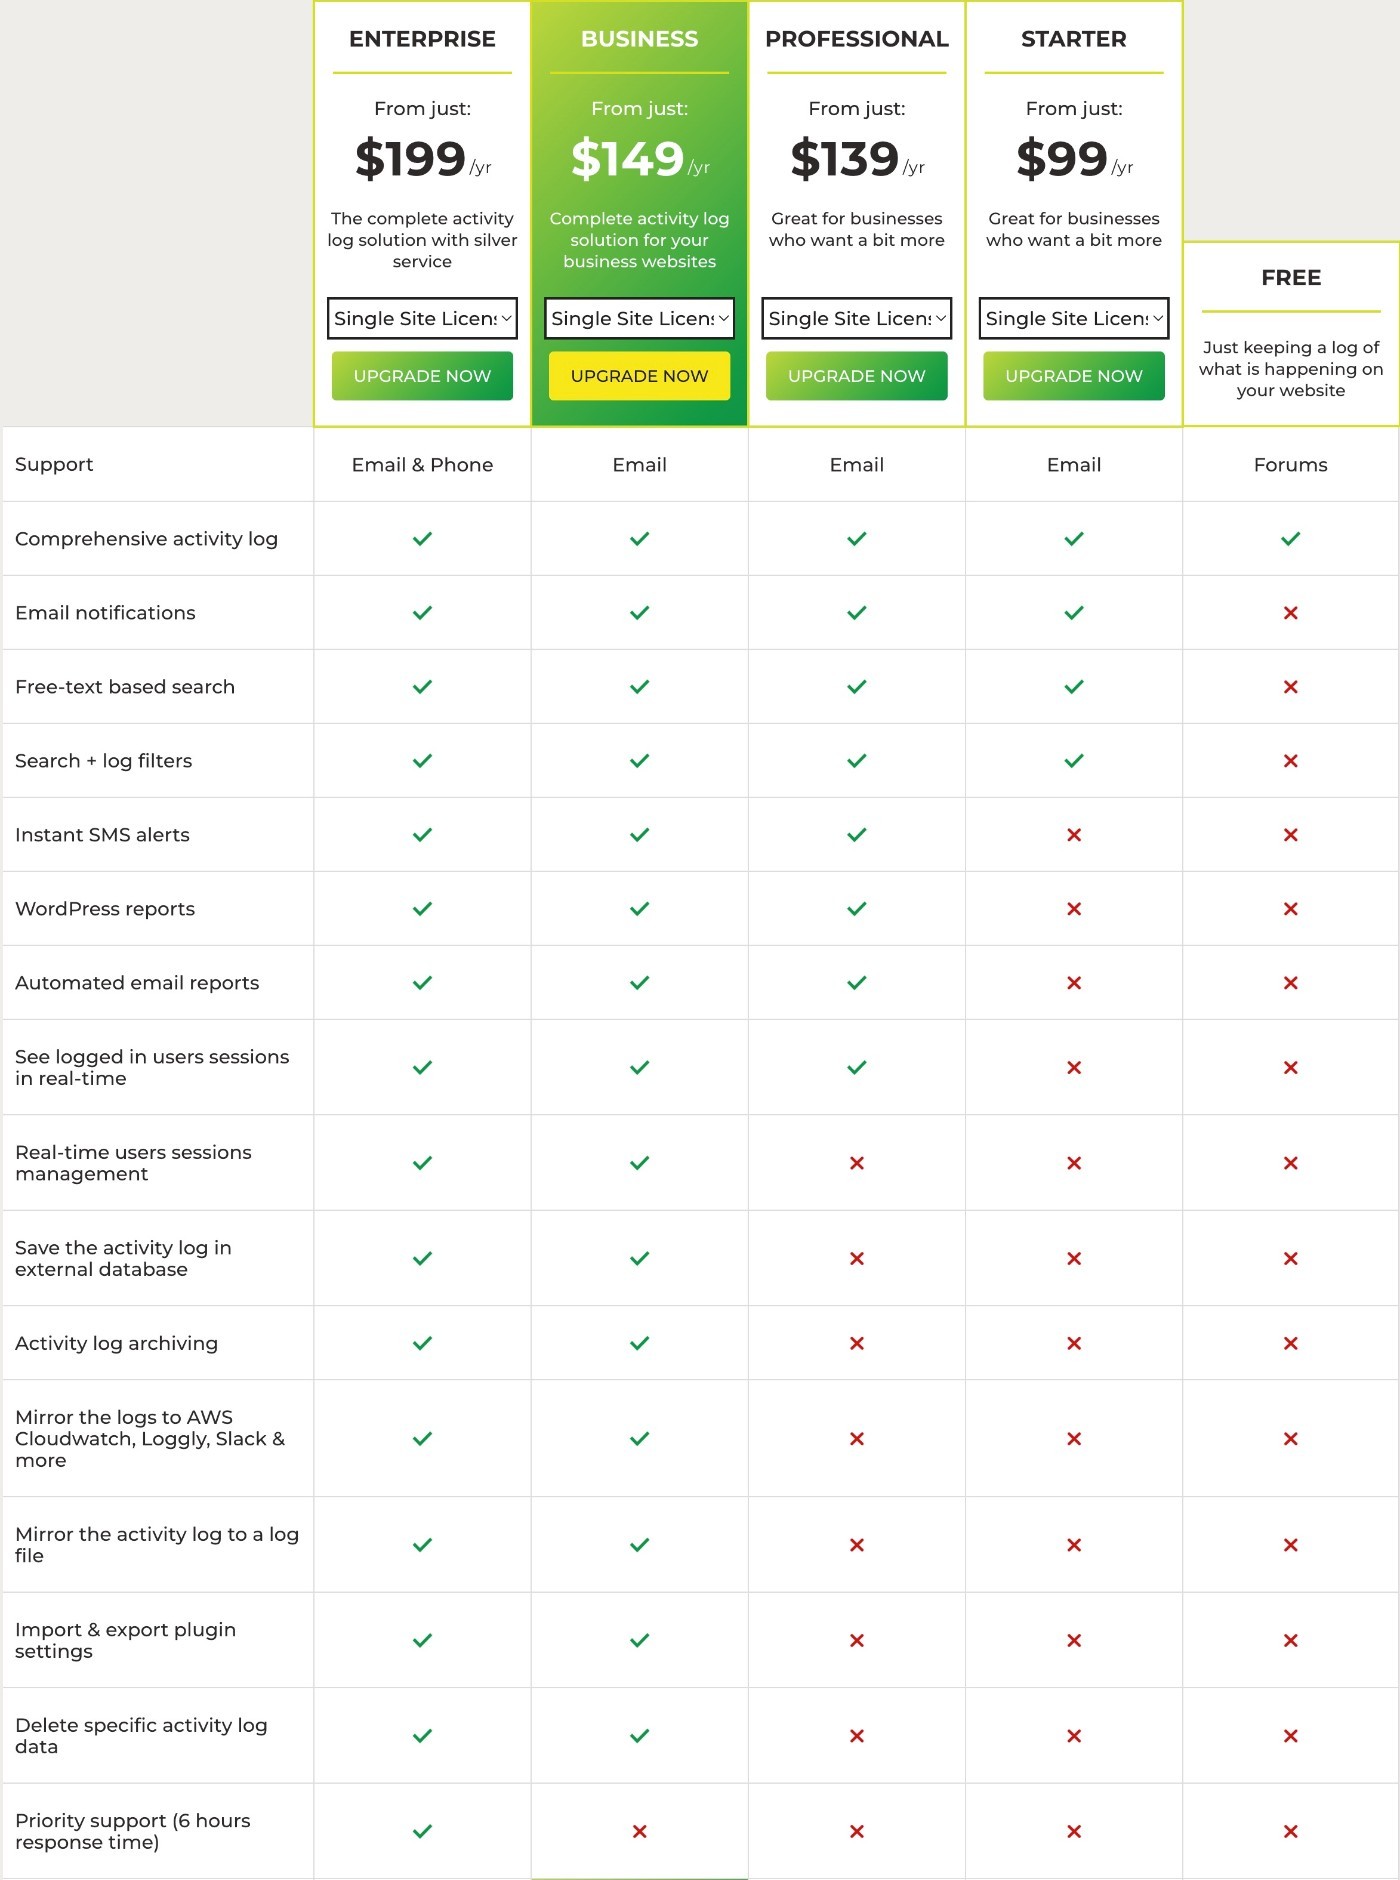
WP Activity Log Pricing
WP Activity Log comes in both a free version at WordPress.org and then a premium version that adds more features.
If you’re serious about wanting to log WordPress user activity, you’ll probably want the premium version. However, even the free version alone is useful.
While the free version does include the core logging functionality, the premium version adds a lot of features to help you work more efficiently:
- Instant email notifications and SMS alerts – with the free version, you need to manually check your site’s activity log. But if you upgrade, you can receive instant notifications for important changes, which helps you respond to potential issues a lot faster.
- Automatic scheduled reports – for another way to better manage your site’s activity, you can set up automatic reports to see overall site activity or even just the activity for a specific user. You can also receive these reports via email on a schedule that you set.
- User session management – you get a real-time view of every user who is logged into your site. You can also limit concurrent sessions, remotely terminate a user’s logged-in session, and automatically log out inactive users.
- External log storage – you can store, mirror, or archive your logs to external databases or third-party services.
If you want those premium features, WP Activity Log normally starts at $99.
However, if you use our exclusive WP Activity Log coupon code, you can get 20% off any license.
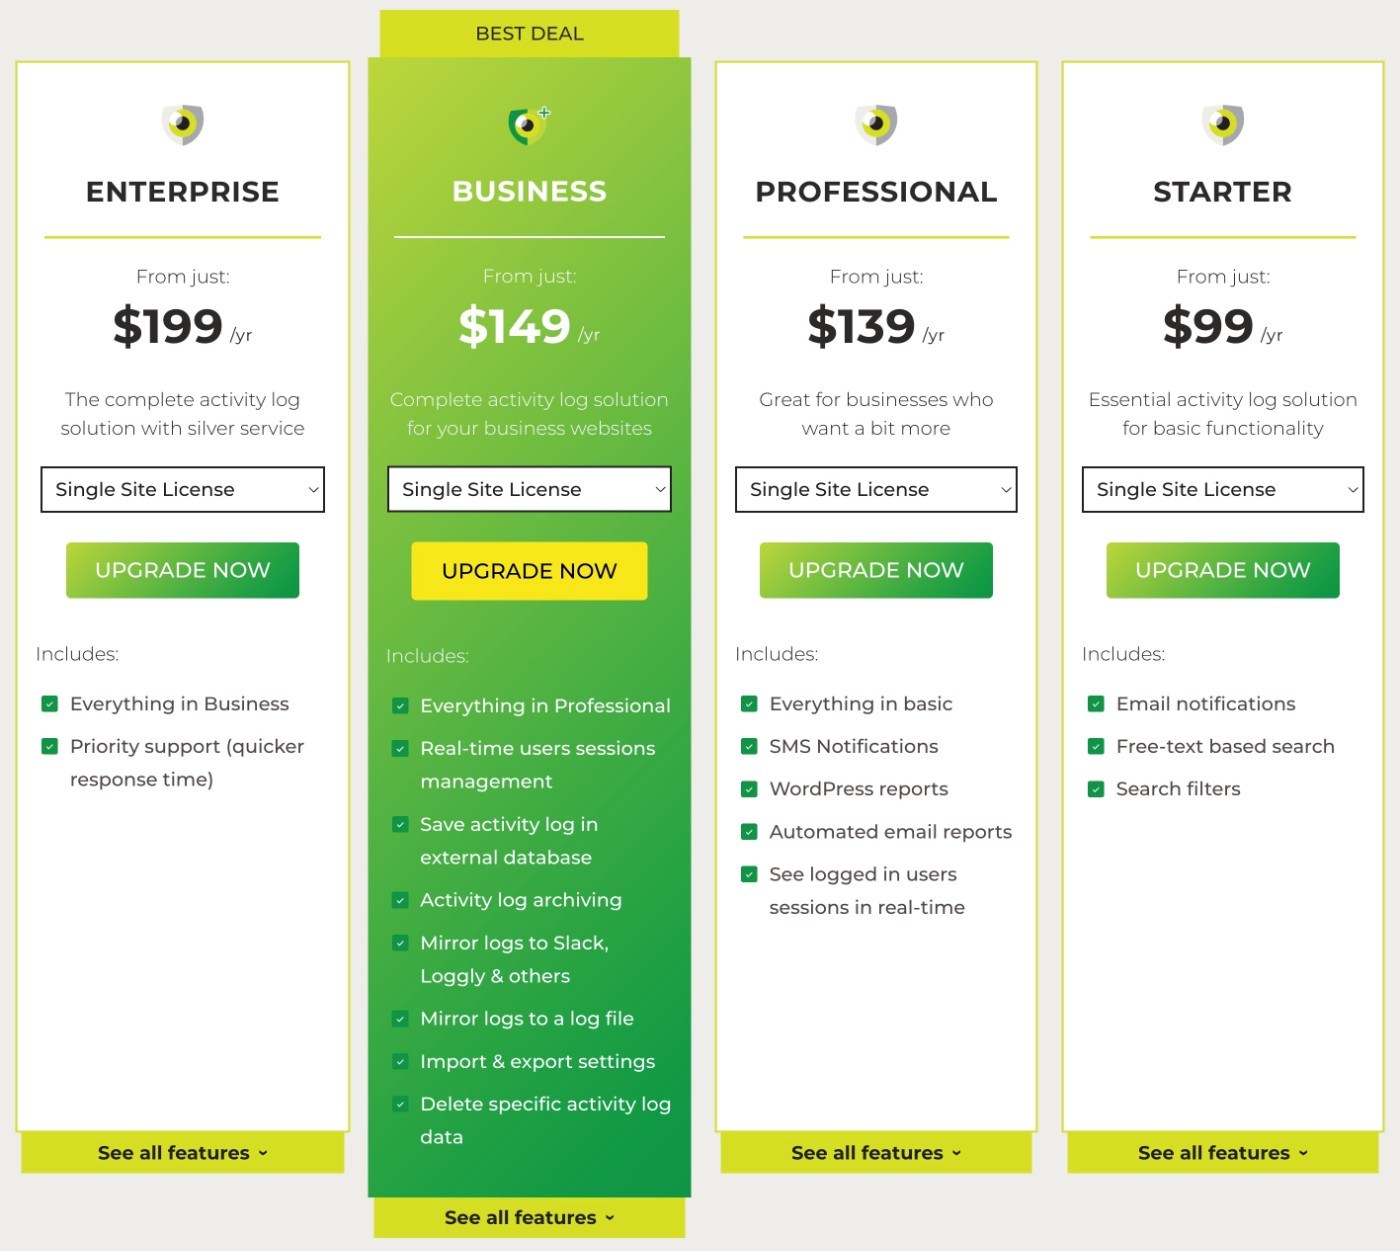
Here are the prices for a single-site license when you use our WP Activity Log coupon:
- Starter – $79 (normally $99)
- Professional – $111 (normally $139)
- Business – $119 (normally $149)
- Enterprise – $159 (normally $199)
Here’s a full feature comparison of the different plans:
Final Thoughts on Our WP Activity Log Review
Overall, WP Activity Log offers one of the top solutions for setting up activity logging on your WordPress site.
It can work both for security audit logging, as well as for just generally helping you keep track of user activity on your website, blog, membership site, online course, WooCommerce store, and more.
There is a capable free version at WordPress.org. However, if you’re serious about logging, I recommend purchasing the premium version.
The notification and reporting features alone are worth the money for serious websites because they save you from needing to manually check the log every day and help you detect issues faster.
If you want to save some money, you can use our exclusive WP Activity Log coupon to get 20% off any license.
Do you still have any questions about our WP Activity Log review or how to set up a WordPress activity log on your site? Let us know in the comments!