Note: this post has been updated as of 12th December 2018, to fix errors in the code towards the end of the post.
Thinking about moving your blog from Tumblr to WordPress?
Good choice!
Not that Tumblr is a bad place to hang out. It’s a fun social media platform with a tight-knit community, and a great place to interact with others who share your hobbies and interests.
But if you’re blogging with a goal in mind – building an audience, monetizing your blog, or marketing an existing business – self-hosted WordPress is the way to go.
Why WordPress instead of Tumblr?
WordPress has a ton of benefits for serious bloggers.
With self-hosted WordPress:
- You own your platform. Tumblr, on the other hand, belongs to Yahoo. Your tumblog has to follow their rules, and if it doesn’t they can delete your site.
- You can more control over design and function of your website, using themes and plugins or even delving into the code.
- There are a TON more options for monetizing your blog.
- You can reap the SEO benefits if your blog on your own website, instead of giving away your link juice to Tumblr (they don’t need it).
- Your website will be based on more reliable, stable software. If Yahoo decides to close Tumblr down, you’re out of luck. But WordPress is open source and maintained by a huge community. Even if the community were to completely fall apart, WordPress software would still exist.
It may seem daunting to switch if you’ve been using Tumblr for a while. Is all your hard work going to be wasted? Will it be too difficult to learn a new platform?
Not to worry: As a Tumblr user, you already have all the skills you need to use WordPress, and to transfer all your existing content to your new WordPress site.
Step 1: Setup your new WordPress blog
Before we start moving your content, you need somewhere to move it to.
So, we’ll start by setting up your new WordPress website.
First you’ll need to purchase your domain and web hosting. Check out our recommended hosting page to find a good WordPress host.
Most of the hosts we recommend will offer easy installation of WordPress. The details of the process will differ depending on the host, so be sure to follow their instructions for setting up WordPress and contact your host’s support if you have any questions or need help with the process.
Note: need more help? Check out our detailed guide on how to start a WordPress blog.
Tumblr-style WordPress themes
We have tons of WordPress theme reviews and roundups for you to browse, but if you’re looking for something a little more familiar, check out these Tumblr-style WordPress themes:
- PixelPower – Responsive HTML5/CSS3 WordPress Theme: This tumblog-style theme includes lots of different post formats and lots of style options.
- OldCar – Responsive Blog & Grid WordPress Theme: This top-rated theme has a side menu and fluid grid layout that reminiscent of Tumblr.
- Dulce – A Tumblr Style WordPress Theme: As the title suggests, this theme was designed for personal and professional microbloggers.
For help installing your new theme, check out our guide on 3 Easy Ways To Install A WordPress Theme.
Step 2: Import your Tumblr posts
Once WordPress is setup and your theme is installed, you’re ready to grab your Tumblr content.
You can do that right from your WordPress dashboard by temporarily installing a special plugin that will do all the work for you.
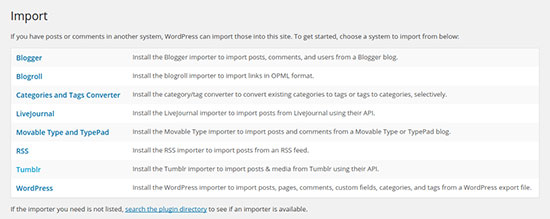
From your WordPress dashboard, click on Tools > Import.
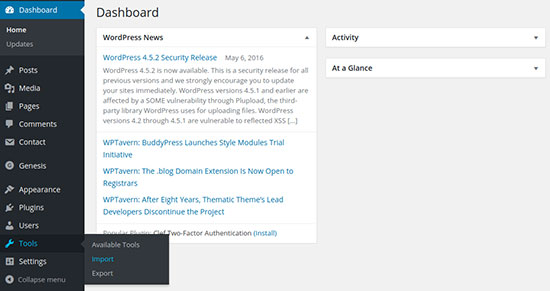
Then click on Tumblr (second to last on the list).
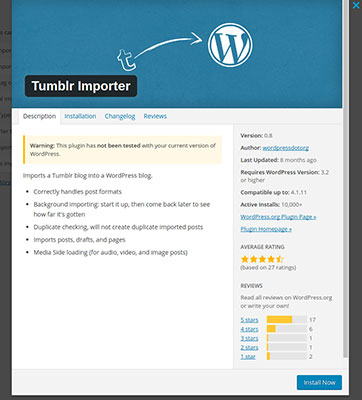
In the popup window, click the Install Now button at the bottom right.
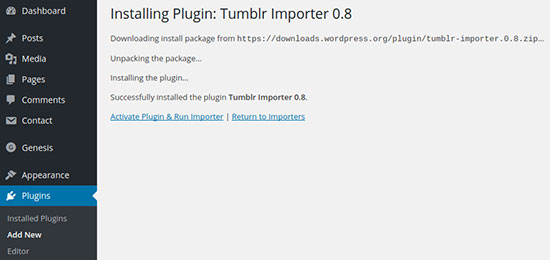
Wait a few moments for the plugin to install.
Once it’s complete, you’ll see the screen below. Go ahead on click on the Activate Plugin & Run Importer link.
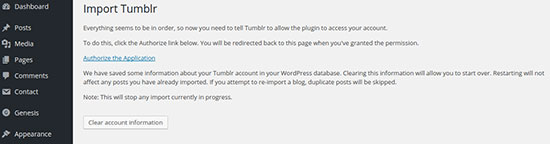
On the next page, you’ll see some instructions on how to give your WordPress site access to your Tumblr posts:
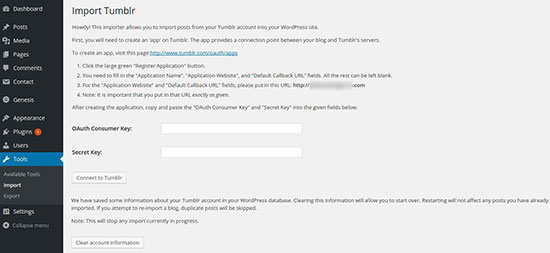
As the text explains, you need to create an “app” in order to provide your WordPress website access to your Tumblr account. It may seem a bit strange, but don’t sweat the details; this is just a temporary way to get WordPress and Tumblr talking to each other.
Per the instructions given, visit the Tumblr Applications page in a new tab (keep your WordPress dashboard open!) and click the Register Application button:

On the following page, fill out the required form fields:
- Application Name: This is just an internal reference, so it doesn’t really matter what it’s called. You can just enter the name of your website, or Export Tumblr to WordPress.
- Application Website: Enter your WordPress website URL, as given in the directions displayed on your WordPress dashboard. (e.g. http://example.com)
- Application Description: Again, this doesn’t matter. You can enter something simple like “Export Tumblr to WordPress.”
- Administrative contact email: Enter your own email address here.
- Default callback URL: Again, enter your WordPress website URL (e.g. http://example.com)
These are the only fields you need to fill out; you can ignore the rest.
Click Register at the bottom to continue.
Now you should see your new “application” displayed at the top of the page:

Copy the OAuth Consumer Key and paste it in the corresponding field in your WordPress dashboard.
Back on the Tumblr Applications page, click on Show Secret Key and copy and paste that into the corresponding WordPress field as well.
Then click the Connect to Tumblr button.
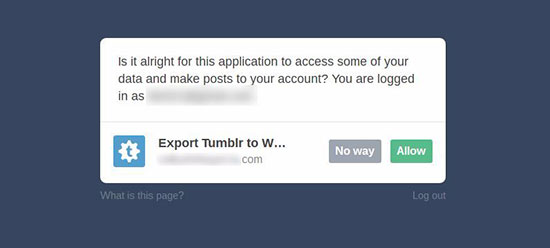
On the next screen, click the Authorize the Application link:
Click Allow:
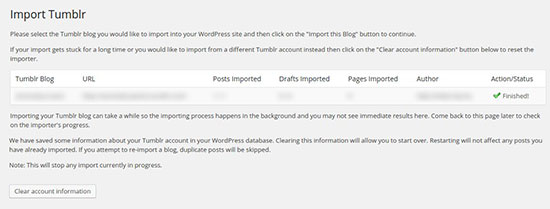
Verify that the details look correct, and click the Import this Blog button on the right:

Depending on the size of your Tumblr account, this may take some time! Be patient and give it time to work.
When it’s done, the Import button will now say Finished!
Go ahead and navigate to Posts > All Posts to double check your posts from Tumblr. You may need to add titles, categories, and other details.
Step 3: Redirect your domain from Tumblr to WordPress
If you were using your own domain (e.g. “www.yourname.com”) with Tumblr
If you were already using your own domain (such as www.yourname.com) with your Tumblr site, you’ll need to redirect it to your new WordPress site.
There are a lot of ways to do this, but the best way is to make sure that each of your old Tumblr posts will automatically redirect to the same post on your new WordPress site. You can do this in two steps.
Step one is to redirect your domain. When you first set up your domain with Tumblr, you probably followed these instructions to point your domain to your Tumblr account. You’ll have to go back and edit your DNS records to point to your WordPress host now. The specific steps to do this depend on the domain registrar you bought your domain with, and the web hosting company you’re using for your new WordPress site. If you need help with this, contact your domain registrar or hosting company (which may be the same company).
Step two is to set up your individual post redirects.
This is a tedious step because you’ll have to redirect each post individually. You may not want to do this if you have a lot of old posts from Tumblr. But if you have the time to enter each redirect, this will help you to avoid broken links, keep your visitors happy, and preserve any SEO rankings each Tumblr post used to have.
To set up the redirects, we’ll use a plugin called Simple 301 Redirects. (If you need help installing a plugin, check out our post on 3 Easy Ways To Install A WordPress Plugin).
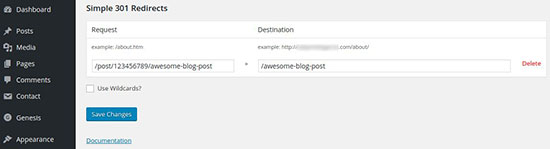
Install and activate the plugin, and then navigate to Settings > 301 Redirects from your WordPress dashboard.
Now, for each post, you’ll need to enter the old Tumblr address on the left, and the new address on the right (minus the domain name). It should look something like this:
Don’t forget to test your old links to make sure they’re redirecting correctly.
If you were using a Tumblr subdomain (e.g. “yourname.tumblr.com”)
Unfortunately, this will limit your options a bit. The best option when you move something permanently on the web is to use a permanent 301 redirect, which is what we did above.
But you can’t do this with a Tumblr subdomain. So your options are:
- Abandon your old posts, and just post a notice that you’re now blogging at a new address. This is okay if you didn’t get a lot of traffic to your Tumblr blog – you can just start fresh with your new WordPress blog instead.
- Implement a Javascript redirect for each post. This isn’t a great option since Google bots can’t always follow Javascript redirects. This won’t necessarily do anything for your SEO, but it will help people to find your new blog. If you get a LOT of traffic to your old Tumblr posts, this might be worth the trouble.
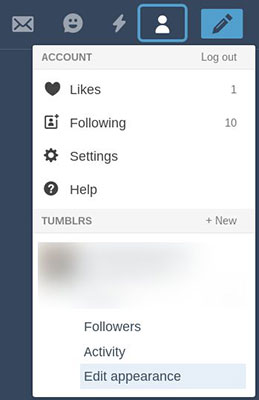
To implement a Javascript redirect, log into your Tumblr account, click the Account icon, and click on Edit Appearance.
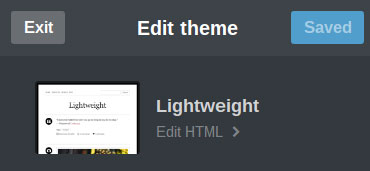
Click the Edit Theme button at the top of the page.
At the top of the menu on the left, click the Edit HTML link beneath the name of your theme:
Search the code for </head>. Right above that tag, paste the following code:
<meta name="description" content="Redirecting this post to the same content on my new WordPress blog!">
<script type='text/javascript'>
var new_slug = window.location.pathname;
var new_root = "http://yourname.com";
var new_url = new_root + new_slug;
document.write("<link rel="canonical" href="" + new_url + "">");
</script>
(Be sure to replace http://yourname.com with your actual new domain name!)
Right after the </head> tag should be the <body> tag.
On a new line immediately after the <body> tag, copy and paste this code:
<script type='text/javascript'>
window.location = new_url;
</script>
That’s it! Your posts should now redirect to your new WordPress site.
Step 4: Notify your followers
Last but not least, don’t forget to notify your followers of your new address! Consider making announcements on your website, social media accounts, and your email newsletter, and ask your followers to subscribe if they haven’t already.
Next steps
Now you’ve moved your blog over to WordPress, it’s time to take your blog to the next level with a rockin’ WordPress theme that makes your content stand out.
Check out our post on great WordPress themes for bloggers to get started.