For fast websites, caching is an important tactic. It will store files that see a lot of use in a portion of memory, which is faster to recall than loading them from the server. As such, there are lots of WordPress plugins available. A perennial option is WP Super Cache, for a few reasons.
In contrast to other plugins such as W3 Total Cache, WP Super Cache is super simple. In many cases, you’ll use a minimal-click setup that will still give you a boost to your site’s speed. However, there are more settings under the hood, and it can fit your needs regardless.
For this post, we’re going to go over how to install and setup the WP Super Cache plugin. Along the way, we’ll look to explain almost everything you need to know about the plugin.
What the WP Super Cache Plugin Does for Your Site
Your website’s server contains many different files, some of which will load more often than others. A fundamental of the internet is that files will move between servers, often across the globe. However, this distance coupled with the constant loading stream of data can slow down your site, and cripple it in the worst case scenario.
This is where a plugin such as WP Super Cache comes in. It hooks into your site to provide a temporary storage option for those files your server will load on a frequent basis. This ‘cache’ will pull files out when there’s a request, which cuts down on loading time. It’s a near-essential piece of functionality you can implement in minutes.
There are lots of WordPress caching plugins available. For instance, the WPKube blog uses WPRocket. However, WP Super Cache has a charm of its own, along with a nifty feature set.
Looking at the WP Super Cache Plugin’s Features and Functionality
WP Super Cache is almost as old as WordPress itself. It’s a longstanding option to cache files, and it’s also a ‘first-party’ plugin. This means Automattic looks after its development and maintenance, much like WordPress itself.

This plugin takes your ‘dynamic’ WordPress files and turns them into ‘static’ HTML ones. The contrasting PHP files will be heavy and slow to move around. The HTML ‘copy’ of sorts is light and will give you the same level of interactivity in most cases. Here’s what else it can offer:
- It offers two modes: Simple and Expert. These will suit different types of users. In fact, most will likely choose the Simple option and never look back.
- There’s also a WP-Cache option, which handles the caching process for known users, certain URLs, and others. It’s more complex and slower than the typical caching options, but it also provides a greater level of dynamism with regards to your content.
- You can connect a compatible Content Delivery Network (CDN) if you use one, and WP Super Cache can leverage its functionality.
There’s lots more to discover about WP Super Cache, but the best way to find out about it is to use it. Over the rest of the article, we’ll run over how to do so.
How to Install and Setup WP Super Cache (In 3 Steps)
WP Super Cache is so straightforward that in many cases you won’t need a tutorial. However, there is much more to the plugin than selecting the Simple mode and leaving it alone.
The next few steps will look at the following:
However, you’ll need to install and activate the plugin before anything else. Let’s deal with this first.
1. Installing the Plugin and Finding Its General Settings
In the beginning, you’ll need to install and activate the WP Super Cache plugin. Because it’s free, you can do this directly from your WordPress dashboard. We have an in-depth guide on how to do this without fuss.
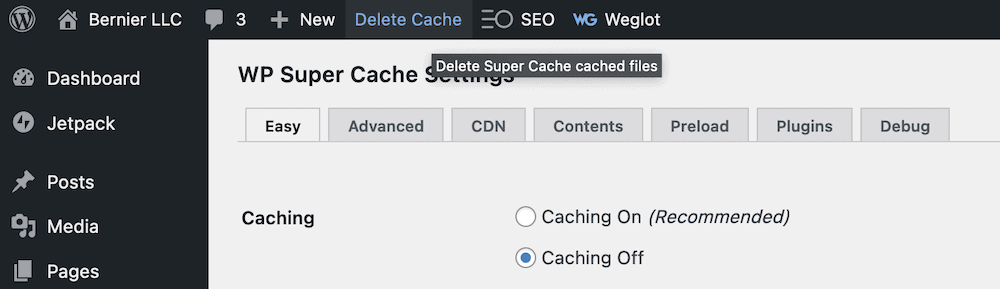
Once the plugin is live on your site, head to the Settings > WP Super Cache screen:
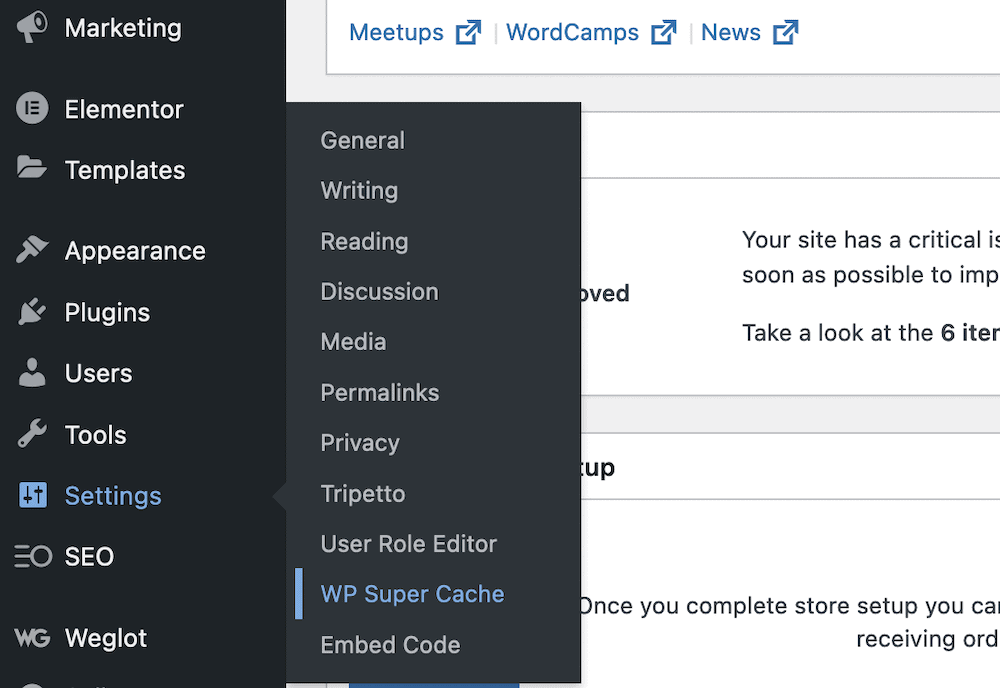
You’ll pop up on the Easy tab. The first radio button here will give you the option to turn caching on or off:
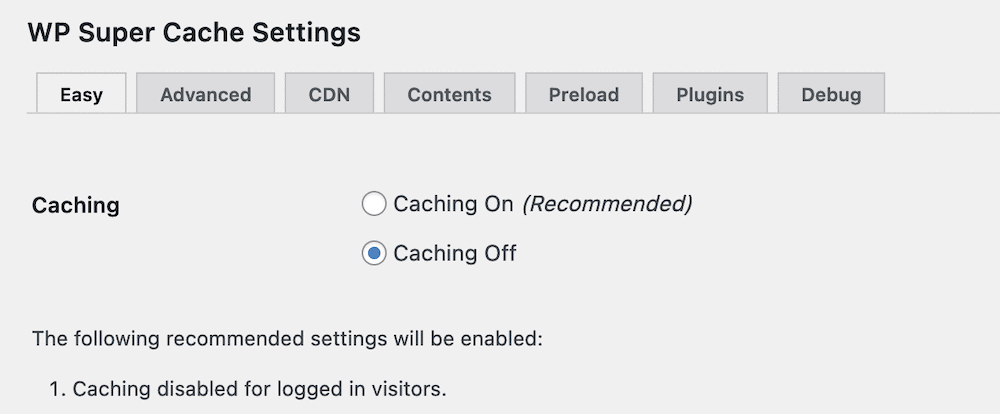
However, we’d recommend you keep this to Off for now. This is because you’ll want to tweak all of the necessary and relevant settings before you pull the trigger. Speaking of which, we can look at this in the next section.
2. Customizing the Advanced WP Super Cache Settings
The real main settings screen for WP Super Cache is the Advanced tab. This contains almost every option you’ll need, but requires heavy use of your scroll wheel:

The top few options are simple to understand. There’s an option to turn on caching, then to choose the appropriate delivery method:
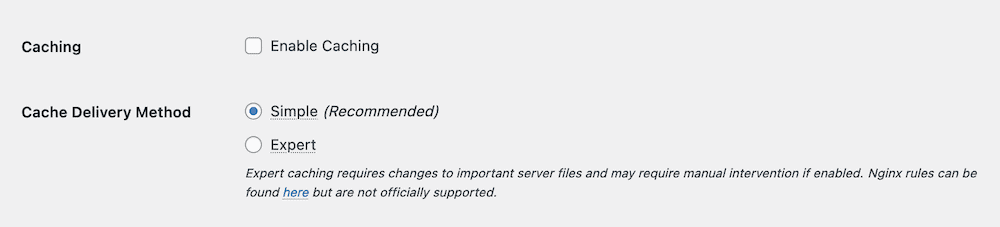
The difference between delivery methods can be complex, but Simple uses PHP to serve cached files, while Expert uses your .htaccess file or Nginx rules. It also enables a few other options to leverage.
If you use custom permalinks, you may not need to tinker within your server’s files. However, the Expert mode still requires some technical knowledge to implement well. While it’s faster, the negatives could outweigh the positives. Our advice is to use Simple mode, unless you are comfortable poking around within WordPress’ files.
As for the other sections on the Advanced screen, let’s look at them in turn.
Miscellaneous
This section will help you determine how caching works for different users. The recommended approach is to disable caching (and associated functionality) for those users who log into your site. This is because the dynamic functionality is important for them.
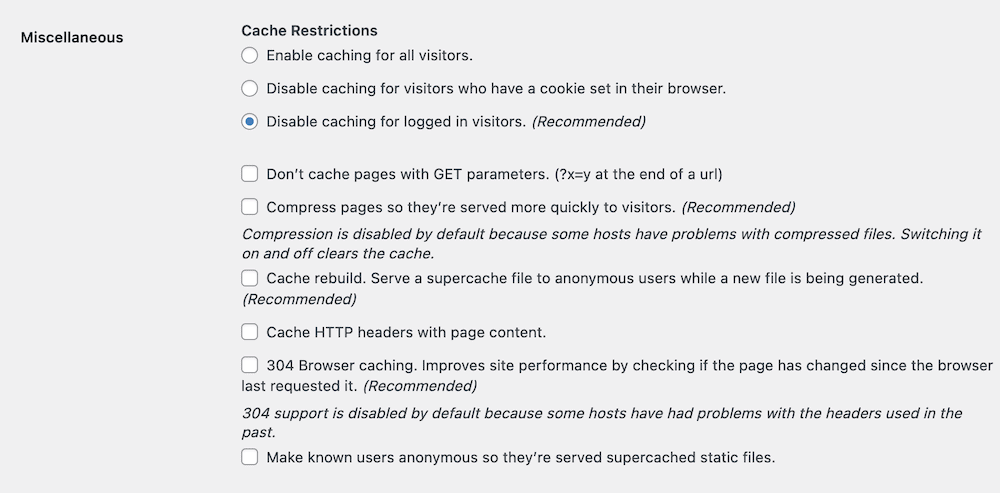
The plugin does a good job to note which options you should tick – everything that states its Recommended is a good idea. Here’s a quick list of options to go for:
- Disable caching for logged in users.
- Compress pages so they’re served more quickly to visitors.
- Cache rebuild.
- 304 Browser caching.
As for the other settings, the only optional one you’d set is Don’t Cache Pages with GET Parameters. These types of pages will render on a per-user basis. As such, you’ll want to preserve the dynamic nature of this content.
From here, you can move onto the Advanced section.
Advanced
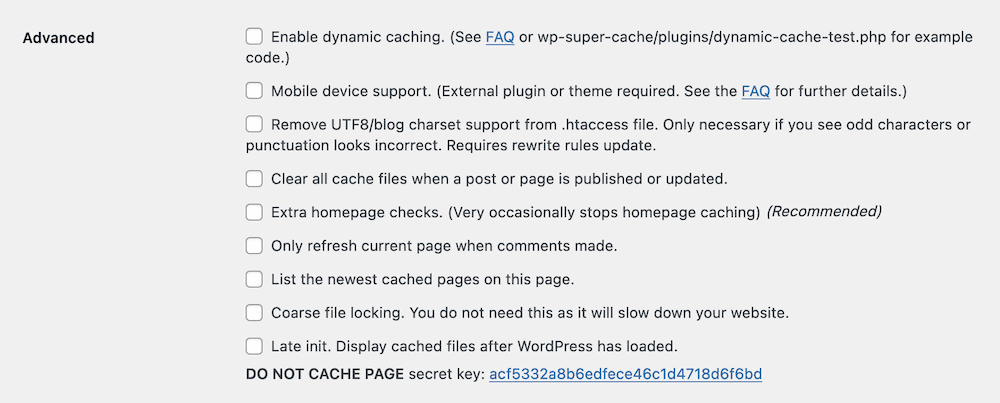
There’s only one recommended option to set here: Extra homepage checks. However, there are a few other optional settings that we’d suggest you consider:
- Enable dynamic caching. This will generate static versions of content such as ads and share counters, or hit counters if you live in the 90s.
- Clear all cached files when a post or page is published or updated. This setting will automate clearing your cache when you make changes to a live post or page. It will help end users see current rather than old content.
- Only refresh current page when comments made. In a similar vein to above, this setting will ensure that visitors see the current status of your comments sections, rather than older versions.
Combined, this will make sure you can deliver the most recent content despite using static HTML files. However, you’ll also want to look at how long you store files in the cache, which is the subject of the next section.
Expiry Time & Garbage Collection
In simple terms, this section will help you determine when WP Super Cache looks for old content to replace on your site. With the settings in the Advanced section, you’ll mitigate the need to reply on these options too much. However, they still serve a purpose.
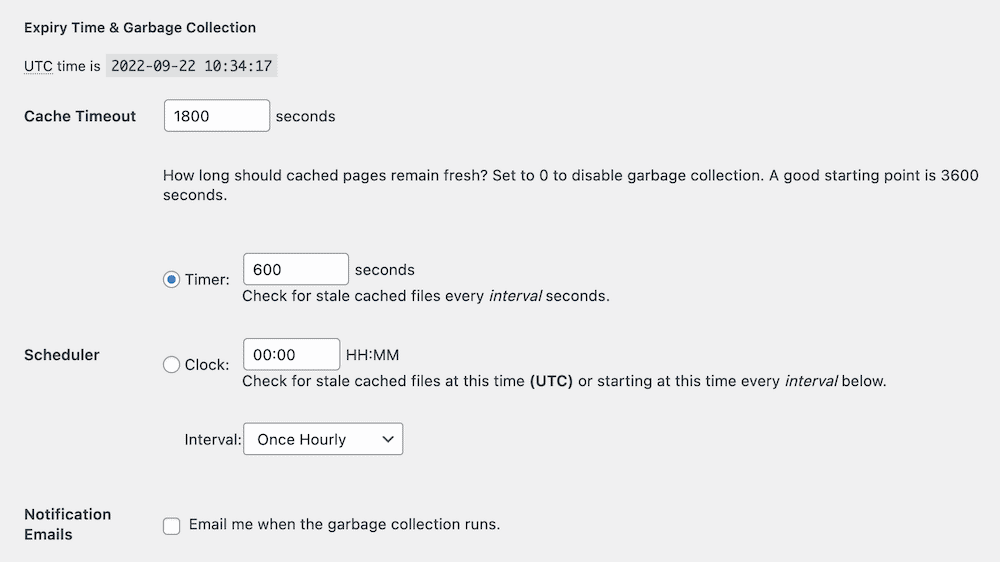
The default is to store cached files for 30 minutes, then generate a new version. As the tooltip on the settings screen notes, you can bump this up to one hour (or 3,600 seconds) without a hitch.
You also have some further settings to tweak the check duration. For example, you can use time instead of seconds, and set a different internal. However, we recommend you leave these at the default, as they work well with most sites.
Accepted Filenames & Rejected URIs
This final section lets you choose which file types, pages, and posts you don’t cache.
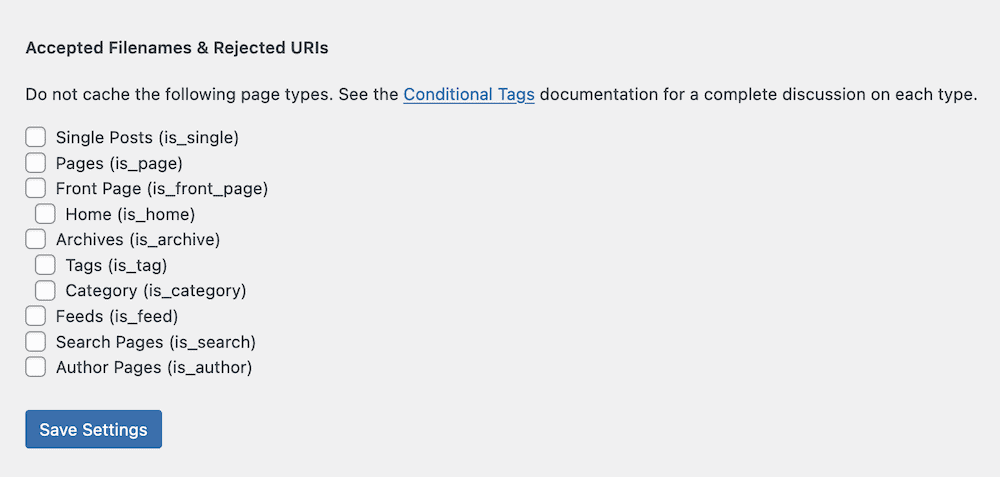
The file types you choose here will be unique to your needs. However, a good rule of thumb is to ensure you cache content that is more ‘permanent’ – pages and posts are two good examples. Author Pages will be safe to cache too.
However, you might not want to cache certain dynamic pages such as checkouts or feeds. This is because you will need to offer the latest and greatest content on them. If a user sees old information when they shouldn’t, you could erode your site’s usability and the overall experience.
You also get the option to not cache certain ‘strings.’ There are a few different fields for cookies and URL strings, along with the option to always cache certain filenames. This will be good for content that has a date in the URL, for example.
As such, you can choose not to cache those pages and posts. However, if you add a filename to the Always Cache Filenames box, this will override any settings you make elsewhere. It gives WP Super Cache a level of flexibility for advance users, while you can keep things simple if caching feels overwhelming to you.
3. Activate a CDN If You Use One
WP Super Cache can also work with a number of CDNs, to help you deliver fast and consistent site content to users no matter where they are. You’ll find the relevant settings under the Settings > WP Super Cache > CDN screen:

This is arguably the most technical part of using the caching plugin, and there’s a different setup process for various CDNs. For example, Cloudflare doesn’t use an off-site or zone URL per se, which is a requirement here. However, solutions such as KeyCDN do.
Our advice here is to check with the support for your CDN of choice. They will be able to tell you whether it is compatible with WP Super Cache, and direct you to the right instructions to set things up. On the whole, if you have a zone of off-site URL, you’ll enter that into the relevant field and save your changes.
How to Clear Your Cache Using WP Super Cache
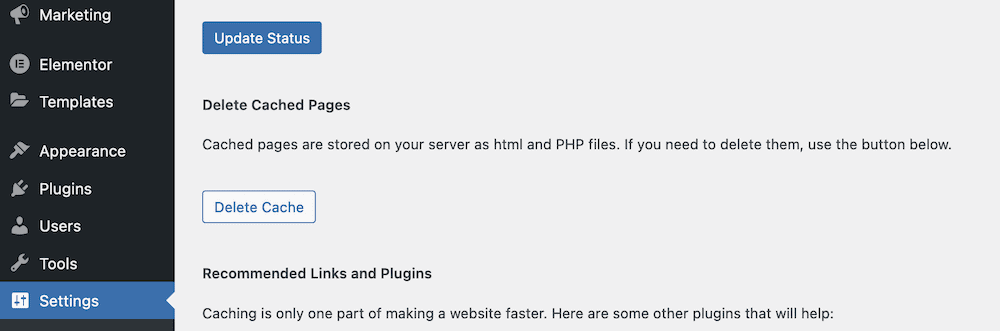
In keeping with the rest of WP Super Cache, clearing your own cache is easy. There are two buttons available. There’s one on the Settings > WP Super Cache > Easy screen, under the Delete Cached Pages section:
The more accessible place is within the WordPress admin toolbar. You’ll see the Delete Cache link. If you click this, you’ll start the process:
You’ll use this option at times when you see old information or content on the front end of your site. In most cases, you won’t need to refresh or delete the cache. However, it might still be a good idea to do this after you install something new on your site, or update the design.
Conclusion
A quick website that loads in a consistent way for all users should utilize caching. This creates temporary storage for files the server delivers on a regular basis. In turn, this can speed up your site, because there is less to process, fetch, and display.
A WordPress caching plugin helps to implement this on your site, and WP Super Cache is one of the best plugins available. It has Automattic’s seal of approval, and gives you a near one-click option (using Simple mode) to implement power caching functionality. However, for advanced users, there is a lot of scope to tinker. You can even add your own CDN to help connect all of your speed saving tools.
Do you have any questions about using WP Super Cache? Ask away in the comments section below!