
For the longest time, I’ve been fascinated with hosting WordPress on DigitalOcean by myself. I’ve seen people sharing pictures of how fast their tiny $5 per month Droplet was loading WordPress for billions of requests and I got those jealous pangs deep in my gut.
But there was always a problem…
I have no idea what the heck I’m doing when it comes to the actual nuts and bolts of running my own server! Like – “I’ve never SSH’ed into a single thing in my entire life” levels of “no idea”
But then I came across a tool called SpinupWP that claims to make hosting WordPress on DigitalOcean something that even a non-techie person like me can accomplish.
So, I did what any person would do – I asked Daan to pay me to write a post to see if I could really do it ?
That’s what this post is about – how to host WordPress on your own DigitalOcean droplet. Keep reading for the step-by-step guide!
It’s important to note that this post is not sponsored by SpinupWP/Delicious Brains, nor did we even talk to them at any point in the process. We just thought it was an interesting new tool and wanted to write about it.
What’s the Deal With Hosting WordPress on Your Own DigitalOcean Droplet?
If you’re not familiar with what’s going on here, DigitalOcean is a popular cloud hosting provider that lets you create your own “droplet” for as little as $5 per month. It’s kind of like your own free-form server sandbox that you can use for anything.
What’s more, you can actually get your WordPress site to load pretty fast, even with just that $5 droplet. Seeing someone serve 4.6 billion requests per month on a $5 droplet (with full page caching) definitely caught my attention, and you can see similar stories here and here.
However, the problem with just going to DigitalOcean and signing up for your own Droplet is that you’re responsible for properly setting up everything so that it’s:
- Functional
- Secure
- High-performing
- Reliable
If you’ve never done that before, it’s super intimidating (this was always my problem).
SpinupWP is a control panel that aims to make that process a lot less intimidating by properly configuring everything to secure and optimize your site and giving you a much simpler way to manage your droplet.
The end result is that you get something akin to managed WordPress hosting performance at a fraction of the price…or at least that’s what I’m hoping for.
How Much Is All This Going to Cost, Anyway?
To follow this, you’ll need to pay for two things:
The cool thing is that the price is super flexible and there are no long-term contracts. So if you want to upgrade or downgrade your Droplet in the future, you can do that (say goodbye to paying for 12 months of hosting at a time!).
Additionally, you can host as many WordPress sites as you want – there’s no extra fee for more sites (though you might need to upgrade your Droplet at some point to handle the load, especially if you’re not using full page caching).
How to Host WordPress on Your Own DigitalOcean Droplet
Ready to get your hands dirty? Now is the part when I’m going to actually dig in and show you how it works.
Two notes before I start:
- I am not a developer or sysadmin – I’m just a regular dude, though I do know a bit more than your average WordPress user.
- I’m writing this post on my first run-through. I’m doing this to give you an accurate idea of how easy/difficult the process is. If I encounter any problems, I’ll tell you about them.
With that out of the way, let’s dive in!
Step 1: Create a DigitalOcean Account
To get started, head to DigitalOcean and sign up for an account.
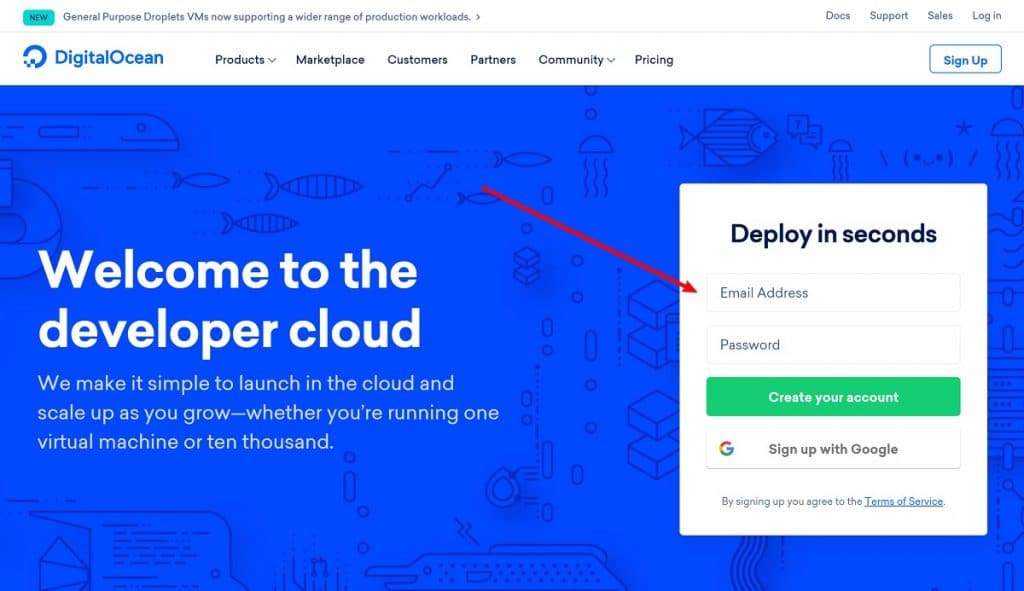
Once you’ve signed up, go to the Billing tab and enter a payment method so that you’re able to create new Droplets:
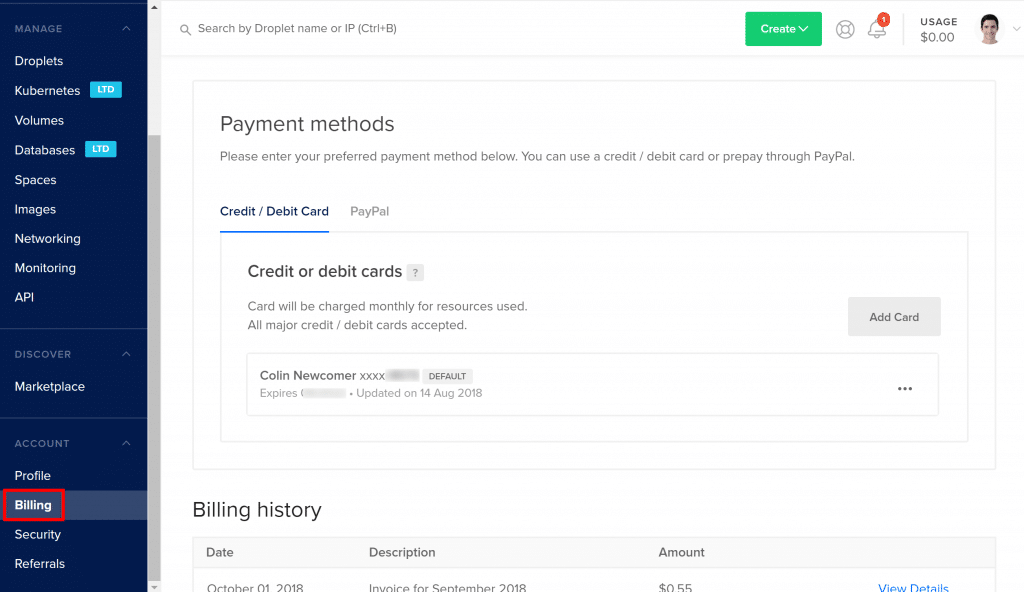
You won’t need to pay anything just to sign up – you’ll only pay once you actually create your droplet:
Step 2: Create New DigitalOcean API Key
Next, you need to create an API key, which you’ll eventually use to connect SpinupWP to DigitalOcean.
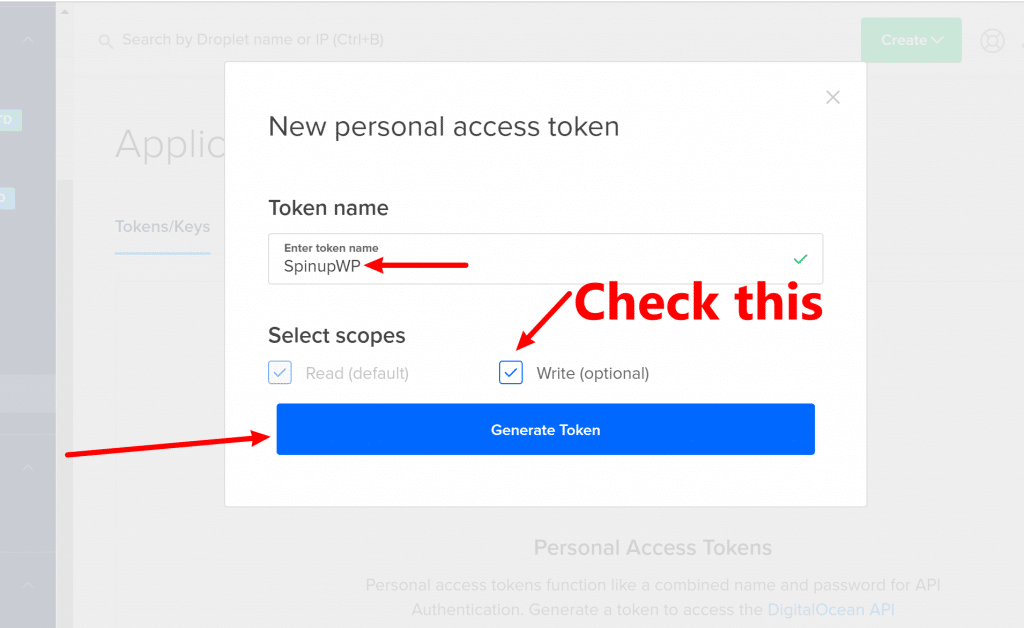
To do this, go to the API tab in your DigitalOcean dashboard and click the Generate New Token button:
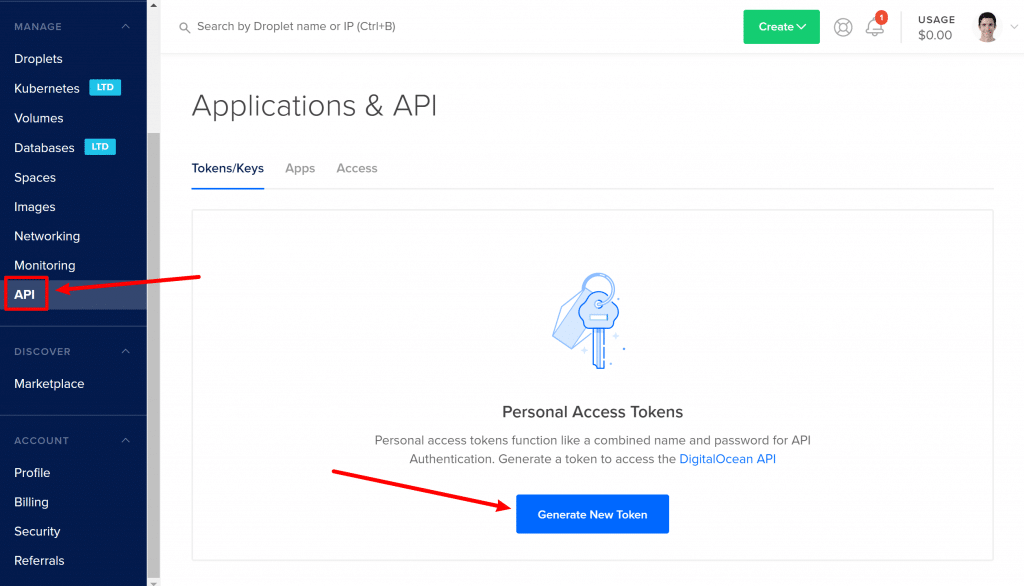
Give it a memorable name – like “SpinupWP” and make sure the Write box is checked. Then, click Generate Token:
You should then see your new API key:
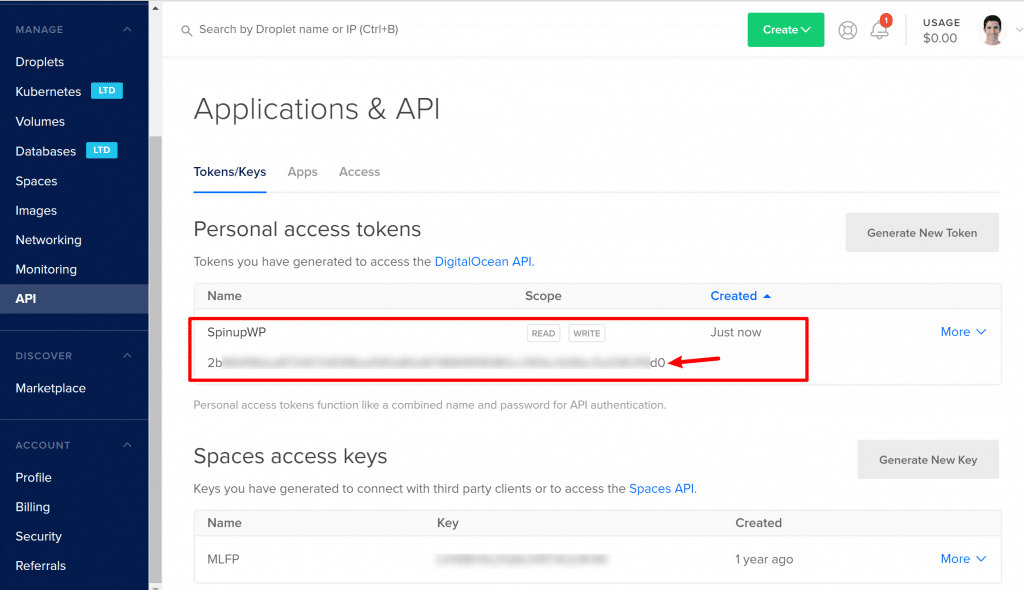
Keep this screen handy because you’re going to need it in a second. However, right now, you’ll need to do a little work in SpinupWP.
Step 3: Sign Up for SpinupWP
Next, you head to the SpinupWP site and sign up. I’m using the cheapest Personal plan, which costs $12 per month.
You’ll need to create your username/password and pay for your first month, but it’s otherwise quite simple.
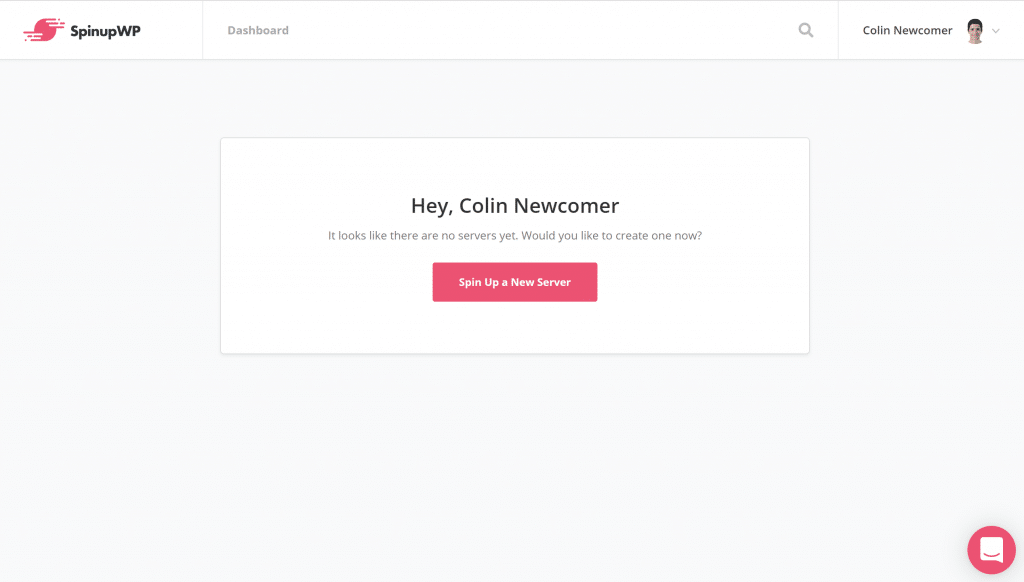
Step 4: Spin Up a New Server
Once you’ve registered for your account, SpinupWP will give you an option to Spin Up a New Server:
Go ahead and click that.
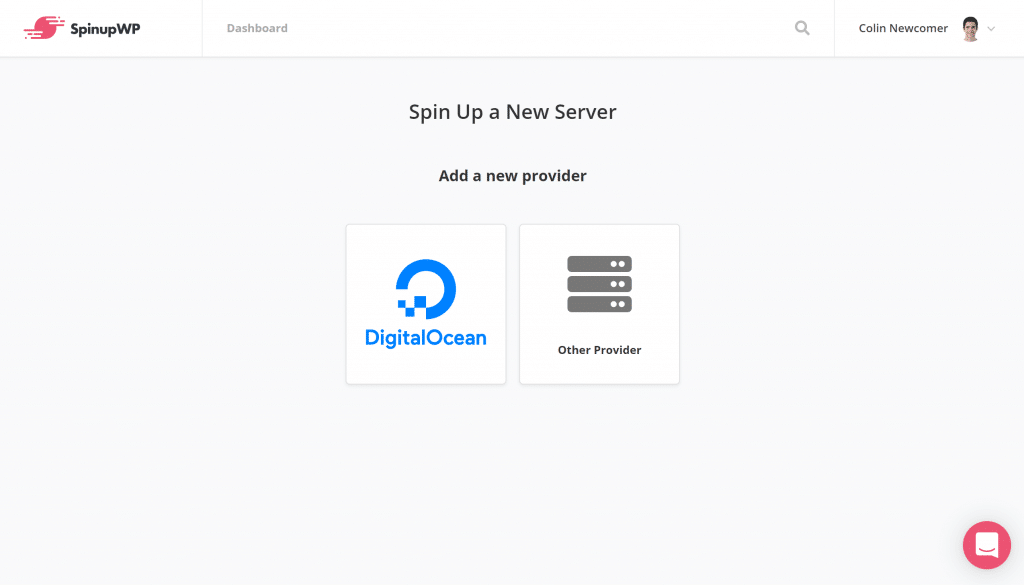
Next, you’ll choose your provider, which is DigitalOcean in this case:
Now, you’ll need to enter your:
- Name – this is purely internal and helps you remember what this server is
- API Token – copy the DigitalOcean API key that you created in Step 2
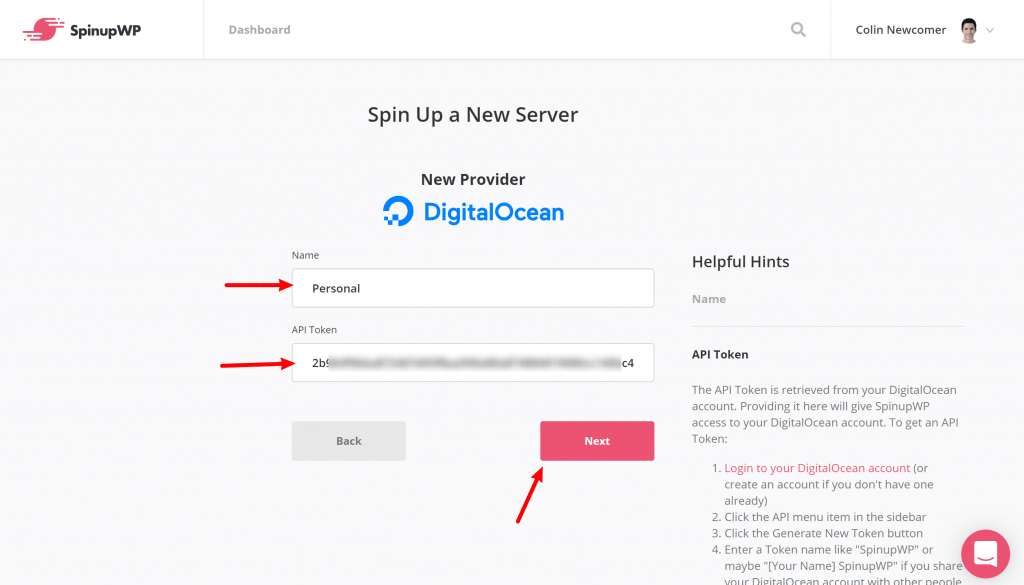
Then, click Next.
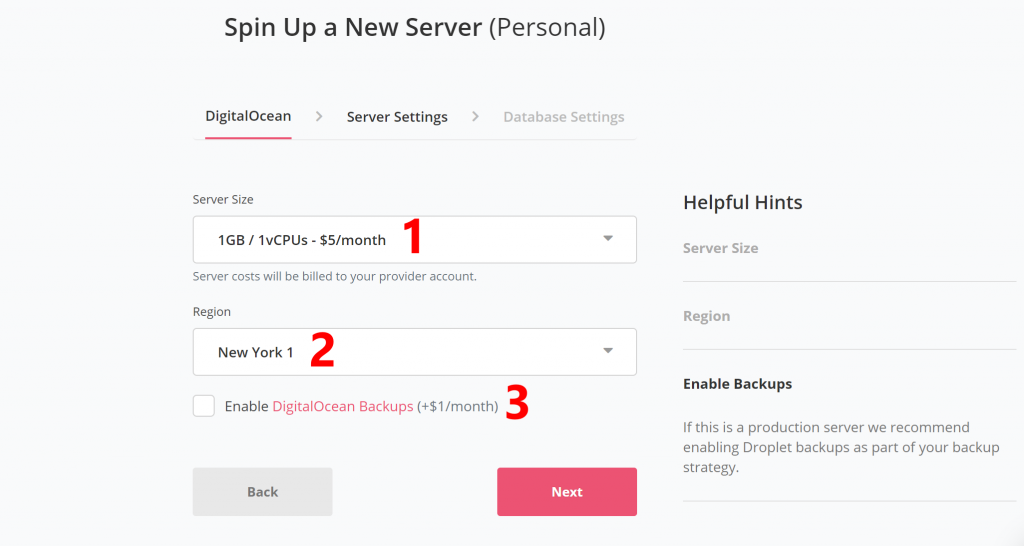
On the next screen, you’ll need to choose:
- Server Size – I’m going to use the cheapest $5 per month droplet, but you can go bigger if you want.
- Region – choose the location that’s nearest to your site’s target audience.
- Backups – choose whether or not to have DigitalOcean back up your entire Droplet (SpinupWP includes a tool to help you back up just your WordPress site)
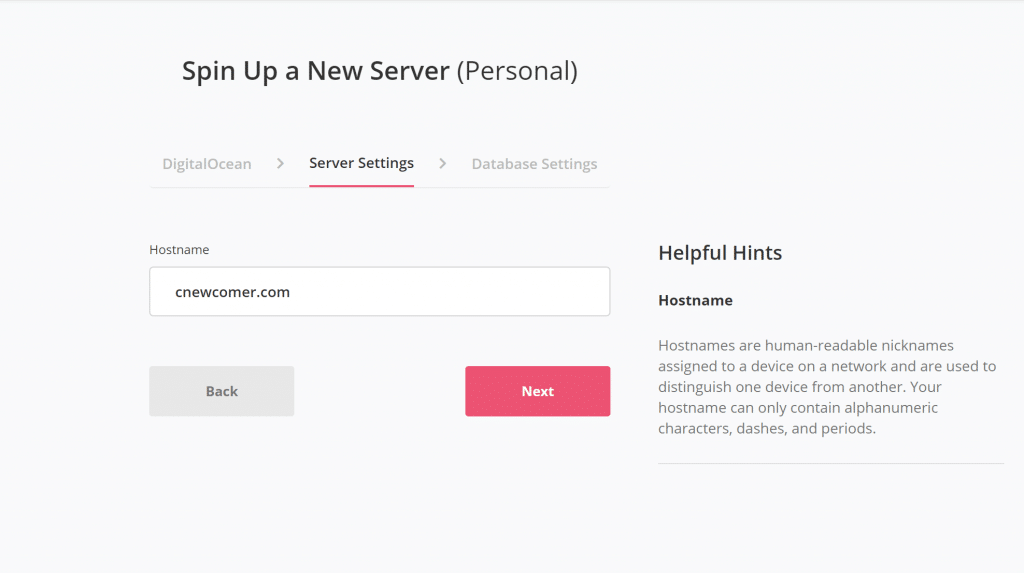
On the next screen, you’ll need to give your droplet a Hostname. This is basically the “name” of your droplet, and you can make it anything.
If you’re not sure what to put here, just enter your domain name – e.g. yourdomain.com:
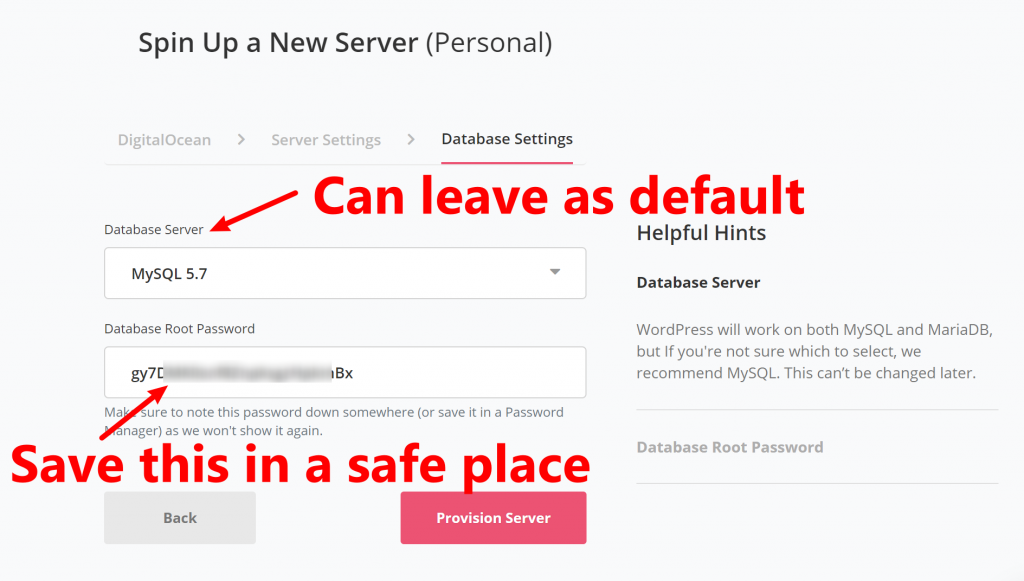
Next, you’ll need to choose your Database Server. You can just leave this as the default. Also, make sure to save your Database Root Password in a safe place. I put it as a note in my password manager:
Then, click the Provision Server button to launch your new droplet.
After that, you’ll see a bunch of stuff happening in what looks like a terminal. You’ll need to wait for ~10 minutes while SpinupWP works, but you don’t need to do anything yourself:
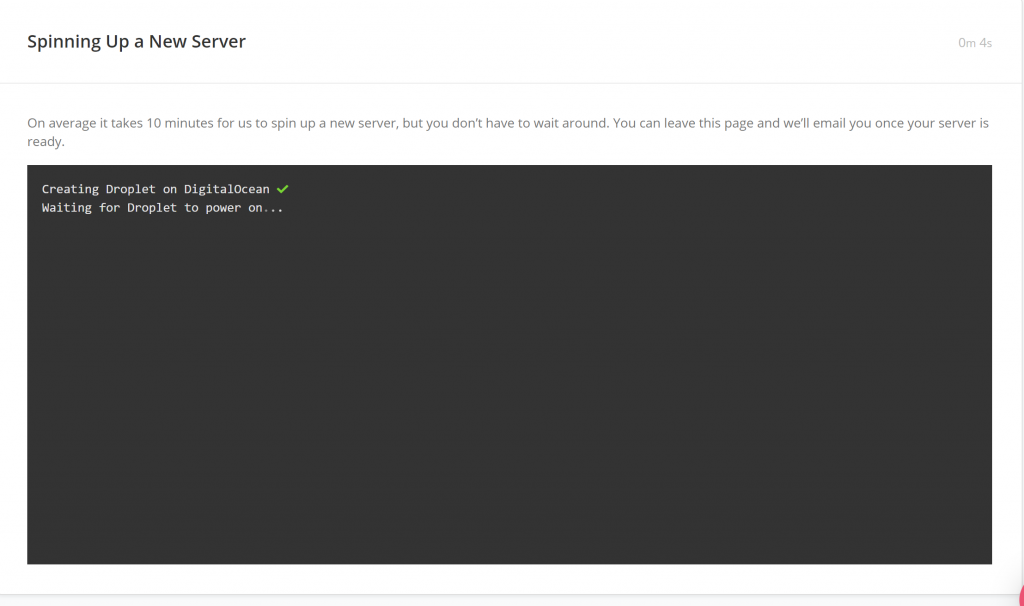
Basically, SpinupWP is installing the necessary packages and configuring everything to be secure and work efficiently…all the things that I found really intimidating about trying to host WordPress on DigitalOcean.
While SpinupWP is doing this, let’s handle one other bit of housekeeping…
Step 5: Point Your Domain Name to DigitalOcean
Before you can create a new WordPress site, you need to point your domain name to your new DigitalOcean droplet.
For this example, I want to use this domain name – “colinexample.space” (I use weird cheap TLDs for my test sites).
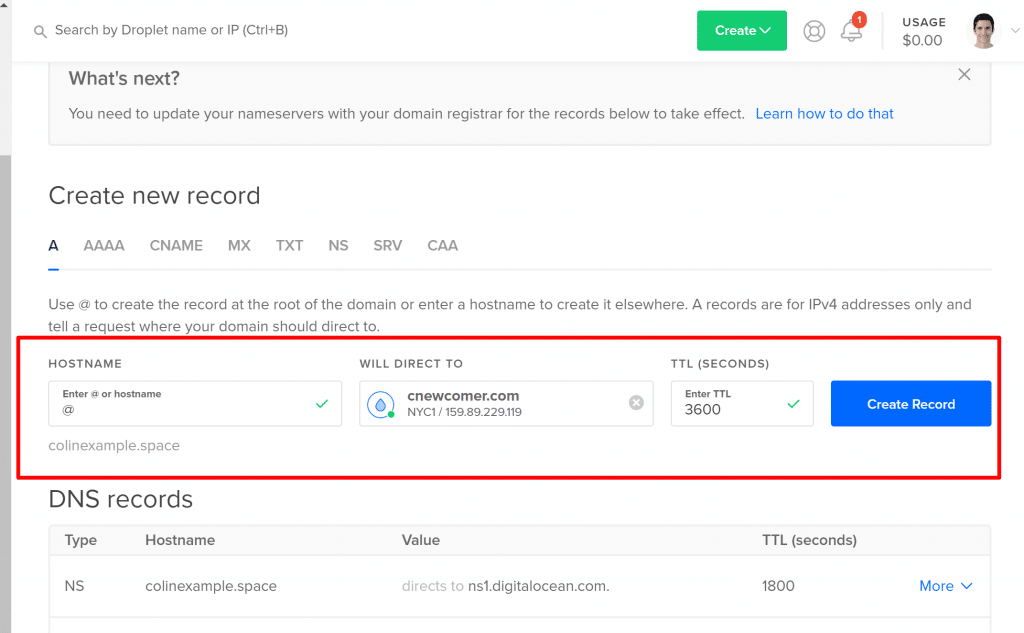
To do that, go to the Networking tab in your DigitalOcean dashboard and add the domain name:

Once you do that, scroll down to the Create new record section and:
- Enter @ in the Hostname box
- Click on the Will Direct To box and select your droplet
- Click on Create Record
To finish things out, go to wherever your registered your domain name (Namecheap in my case) and point your domain to DigitalOcean’s nameservers:
- ns1.digitalocean.com
- ns2.digitalocean.com
- ns3.digitalocean.com
Step 6: Create a New WordPress Site on Your Server
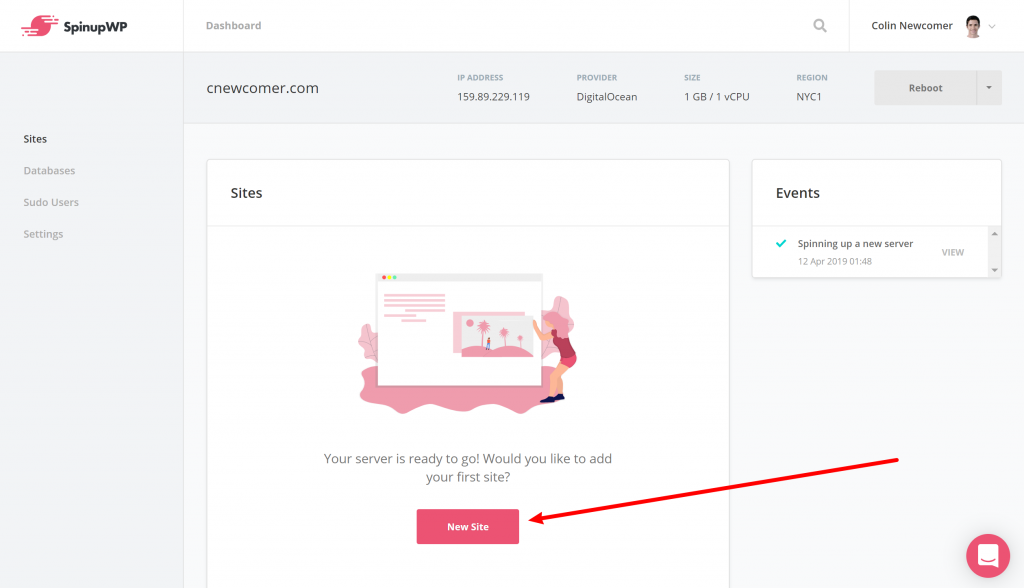
Once SpinupWP finishes, it will automatically send you to your server admin page. Or, you can just log in to your SpinupWP dashboard and click on your new server.
Now, you need to create an actual WordPress site on your sparkling new server. To do that, click the big New Site button:
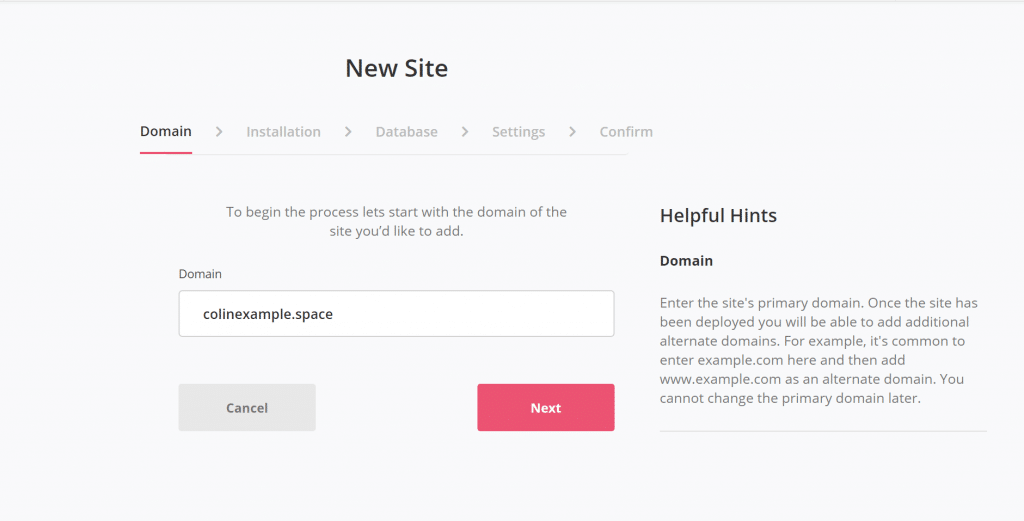
This setup wizard should feel a lot like how you’d install WordPress at any “regular” host.
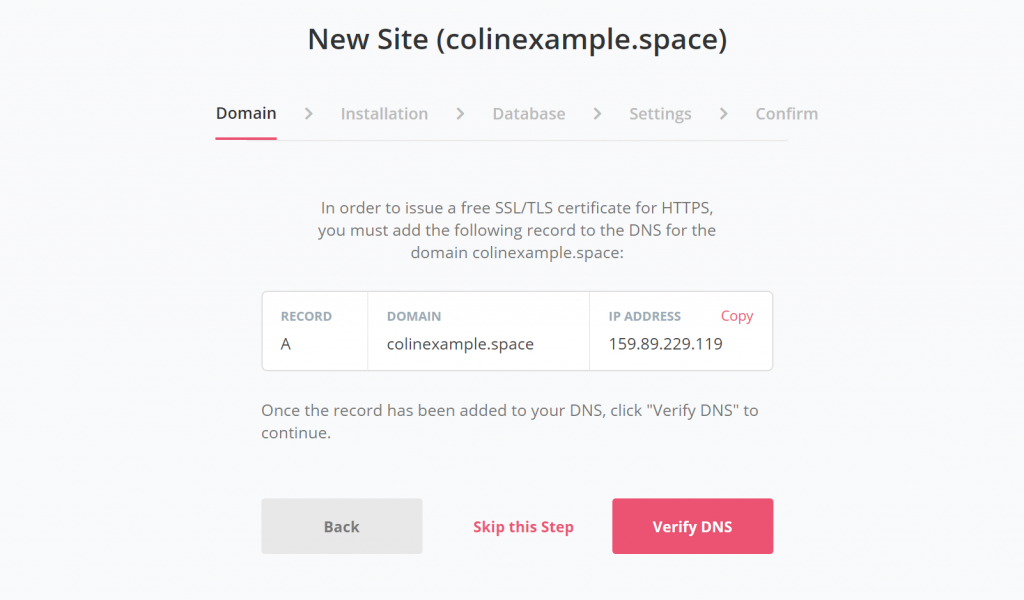
First, you’ll enter the domain name of your site:
Then, if you want to use a free Let’s Encrypt SSL certificate, you’ll be prompted to add an A record to your DNS. This is what you already did in the previous step, so you can go ahead and click Verify DNS:
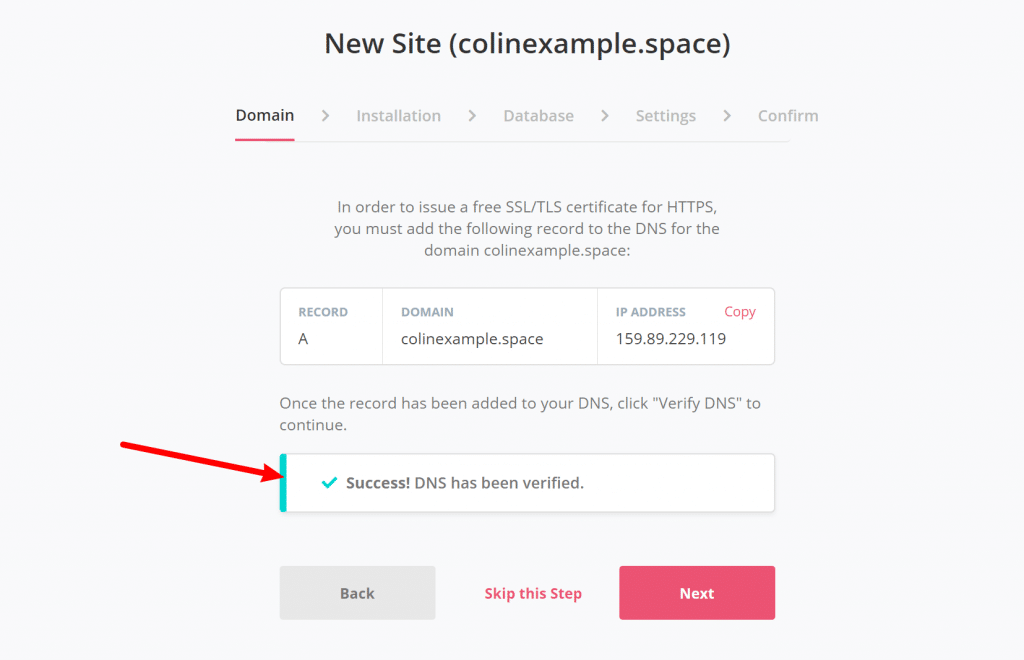
If all goes well, you’ll see a success message:
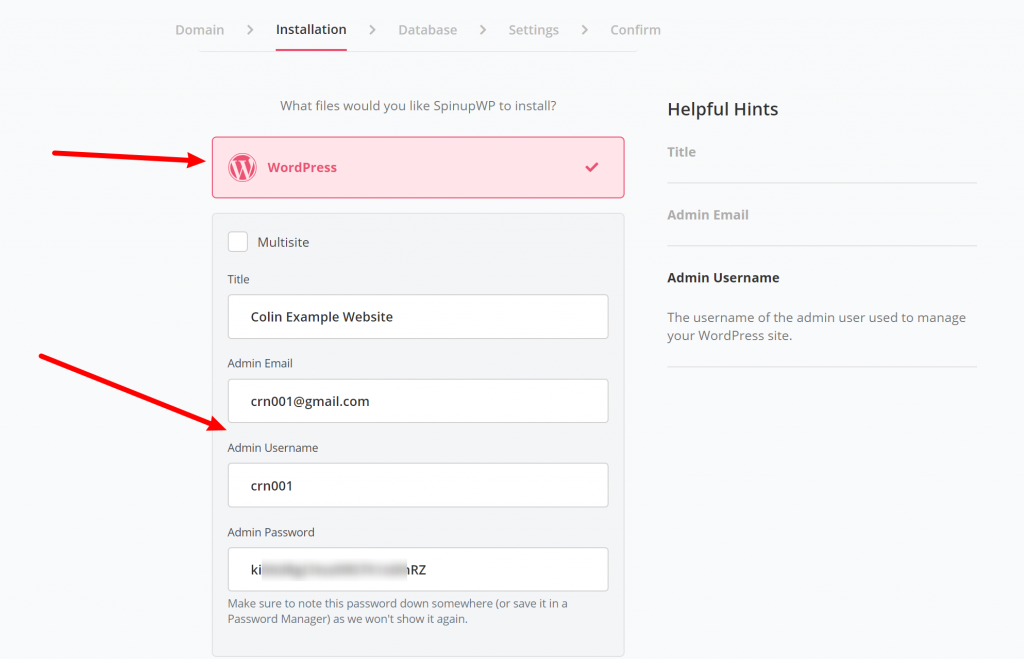
Next, tell SpinupWP you want to install WordPress. Once you do that, you’ll enter the basic details for your site:
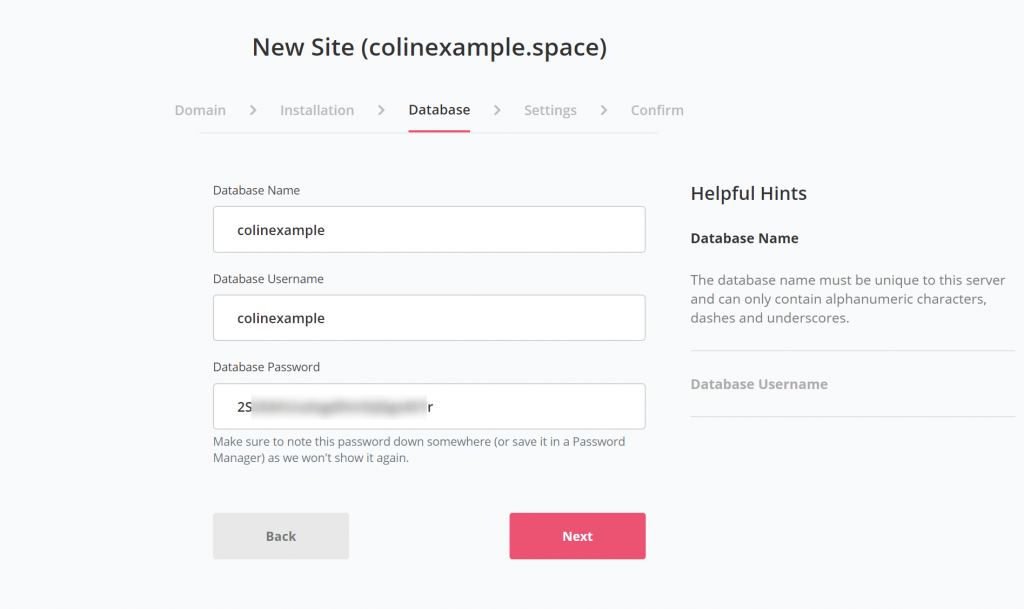
Then, you’ll configure the Database information. You can leave these as the defaults – just make sure to note down the username and password in a safe place (again, I put these as a note in my password manager):
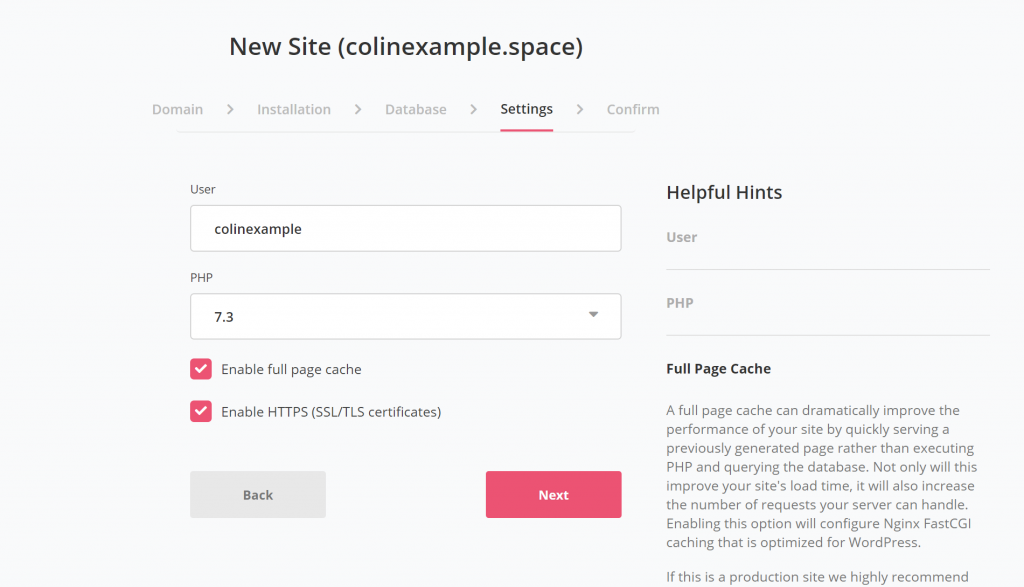
After that, you’ll configure some basics:
- User – leave this as the default
- PHP – I recommend using the latest version, but you can choose a different version of PHP if you want (note, PHP 7.1 is the minimum version)
- Enable full page cache – this will greatly improve the performance of your site/server, but it will also break any server-side dynamic functionality. So if you have a dynamic site – like a WooCommerce store – you should not enable this.
- Enable HTTPS – you should leave this checked because HTTPS makes your site more secure.
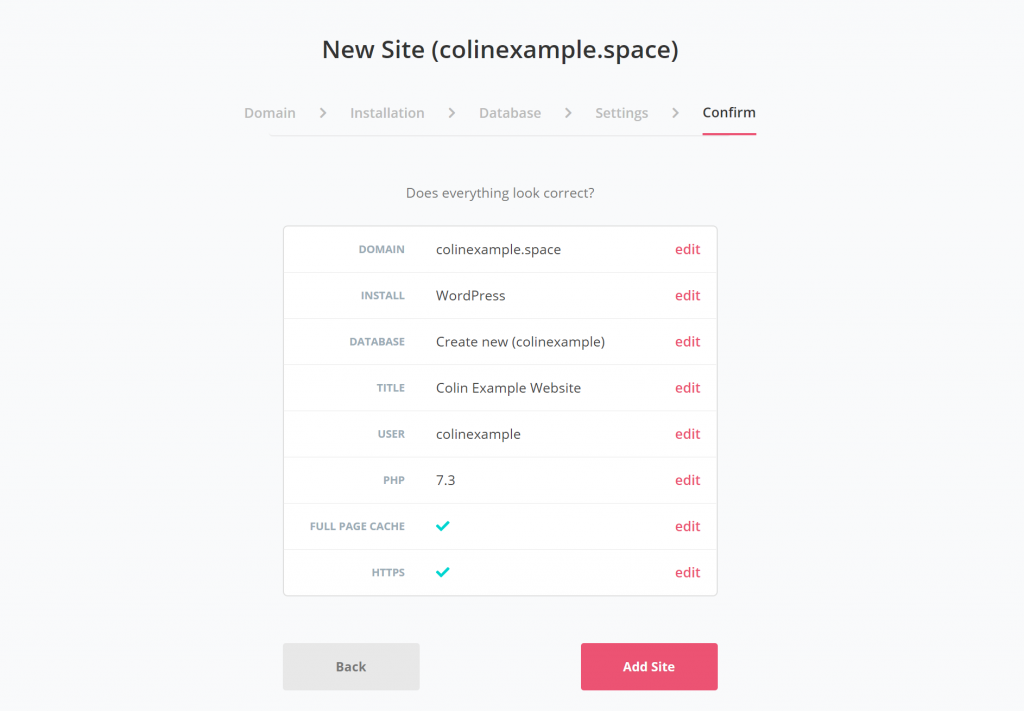
On the final page, you’ll see a summary of all your settings. If everything looks good, click the Add Site button:
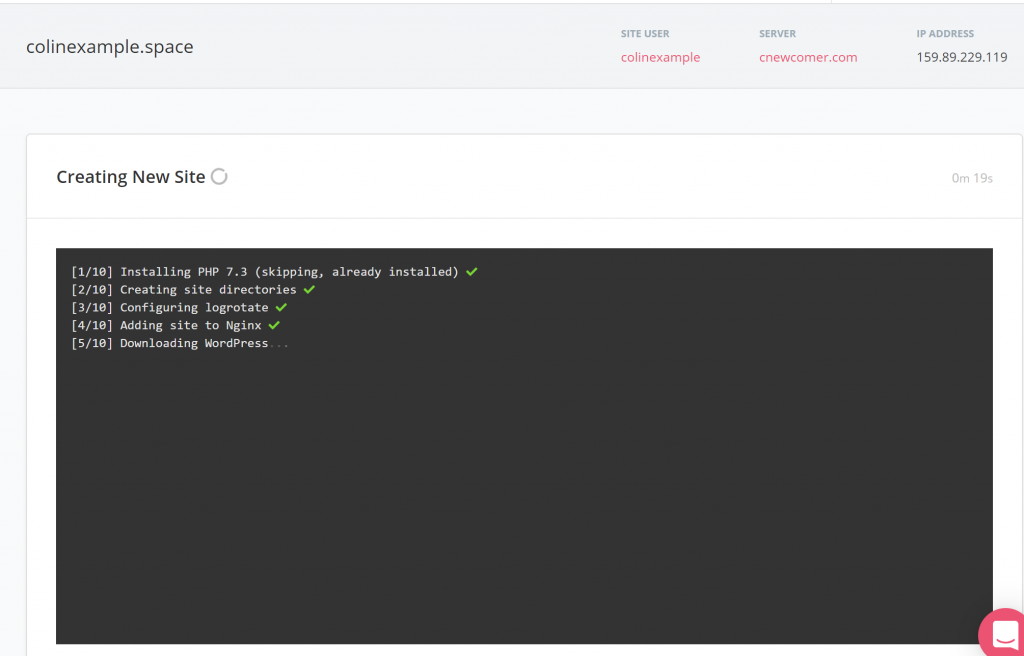
You’ll again see a terminal where SpinupWP tells you what’s happening. But like before, this doesn’t require any manual input from you:
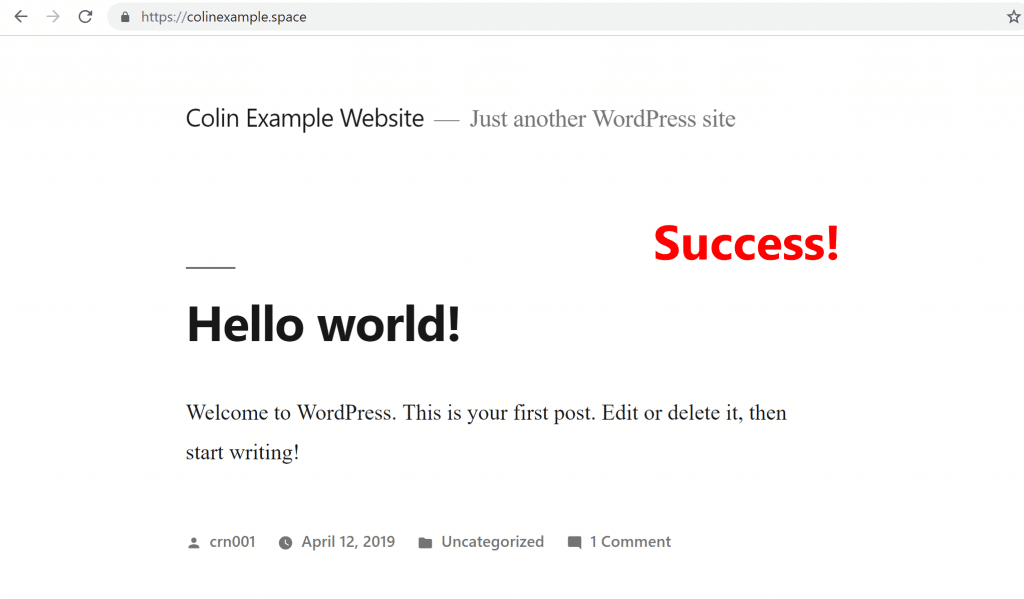
And that’s it! You now have a working WordPress site hosted on your own DigitalOcean droplet:
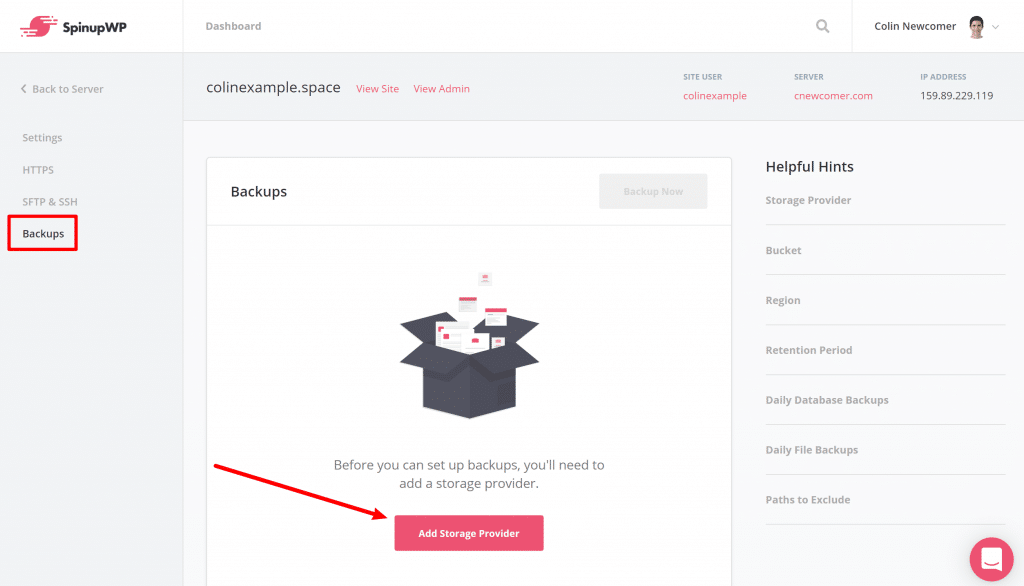
You can also manage your site from the SpinupWP dashboard, including an option to set up automated WordPress backups and offload them to your storage provider of choice:
- Amazon S3
- DigitalOcean Spaces
- Google Cloud Storage
So Can Anyone Host WordPress on DigitalOcean?
After having gone through the process, I feel pretty confident in saying that anyone can do this – you don’t need to be a WordPress developer.
The one thing I’ll be keeping an eye on is what the day-to-day maintenance is like. Will everything be similarly simple? Or will there be situations where I have to put out fires with technical knowledge I don’t have?
I don’t have the answers to those questions yet. But I will be hosting some non-critical sites here and seeing how things go.
Beyond that, there are definitely some other important differences to note.
For example, while you can install phpMyAdmin yourself, it’s not installed by default. That means you’ll need to use a desktop app and SSH to edit your database (though SpinupWP does give you detailed instructions for this).
Beyond that, you’ll need to find another way to handle email:
- For transactional emails, you can use Mailgun, which lets you send 10,000 emails per month for free (instructions here)
- For email hosting (e.g. using an email like [email protected]), you can use $5 per month Google G Suite or another service (Zoho Mail offers free email hosting)
Time will tell if differences like that have any meaningful impact on my life.
But right now, I can say that, if you’ve been interested in how to host WordPress on DigitalOcean by yourself, you should give this method a try because it’s the most accessible solution I’ve found.


