Looking for a way to host Google Fonts locally on your WordPress site? Google Fonts is awesome because it unlocks a whole heap of potential font choices for your WordPress site. But it can also result in a ton of external requests to Google’s servers, which is why you might prefer to just host the fonts locally instead.

While I’ve framed this post as “how to host Google Fonts locally on WordPress”, the manual method that I’ll show you will actually work with any font, so it’s by no means limited to just Google Fonts.
Beyond that manual method, I’ll also share a plugin that makes it easier to host Google Fonts locally (but only works with Google Fonts – not with other fonts).
Why Bother Hosting Fonts Locally, Anyway?
I actually don’t think that most sites need to host their fonts locally. But it is a good option for some sites.
First off, hosting fonts locally opens up the whole world of fonts on the web. You’ll be able to use any font that you find and have the legal rights to. And that’s pretty cool!
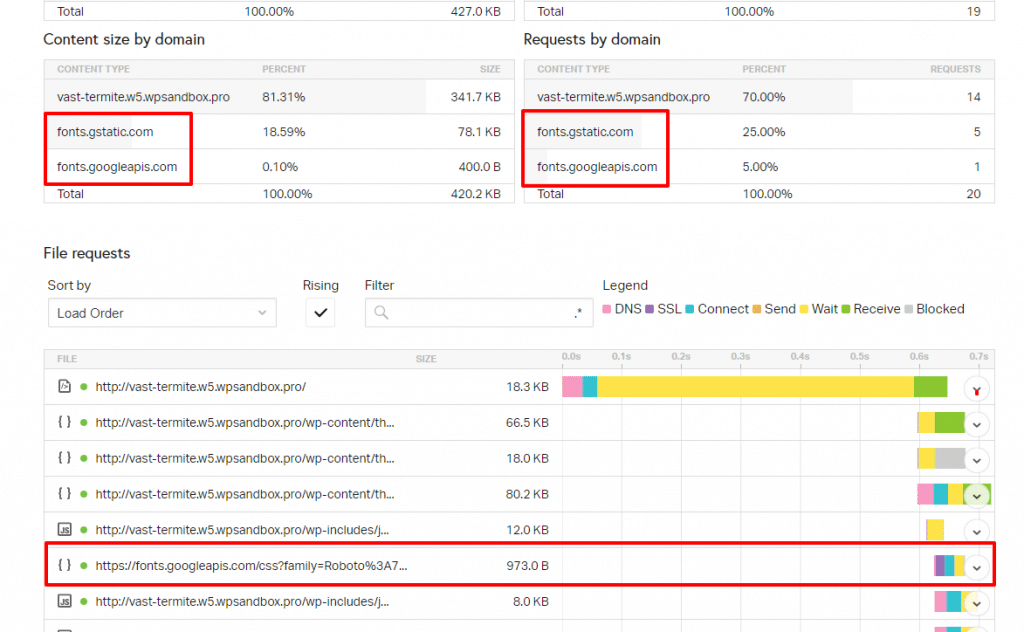
Beyond that, there can be a performance boost from hosting fonts locally because you’re able to cut out external requests to whatever server is hosting your fonts. For example, you can see that external request to Google’s servers for a font in the Pingdom Tools waterfall on my test site:
Now, this definitely doesn’t mean that hosting fonts locally will always make your site load faster.
When you’re talking about Google Fonts, Google’s servers are already pretty fast and Google Fonts has its own CDN to ensure fast global load times. Additionally, it’s possible that someone’s browser already has the font cached, especially if you’re using a popular font like Lato or Roboto.
Basically, I would encourage you to test your site before and after to make sure that hosting your fonts locally is indeed speeding up your site.
How To Host Google Fonts Locally On WordPress: The Manual Method
Alright, now let’s get into the how-to part and I’ll show you how host Google Fonts locally on WordPress.
Remember – while I’m using Google Fonts as an example, this manual method will work with any other font, as well.
Step 1: Download The Font File
To get started, you’ll need to download the font file that you want to use.
At Google Fonts, you can click the Select This Font link. Then click the download button:

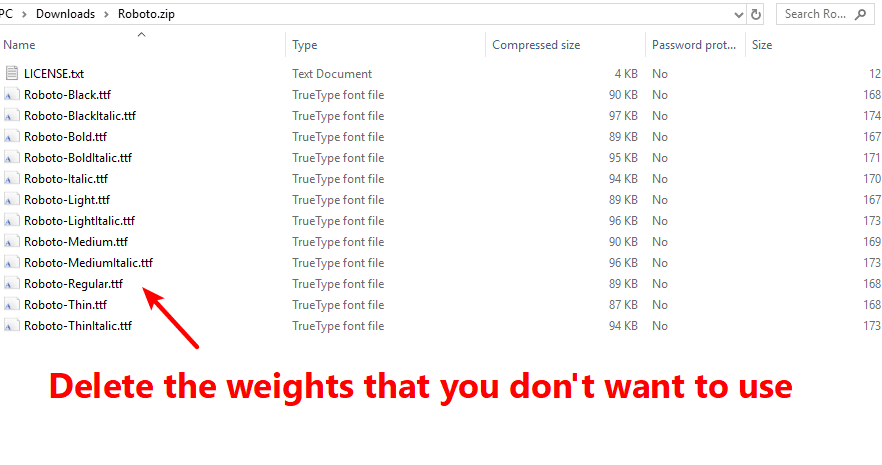
When you click the download button, Google Fonts will give you a ZIP file of all the font’s various weights.
However, I recommend only picking the minimum number of font weights needed – don’t use every single weight. A good stack is one each of:
So, extract the file and delete all the fonts that you don’t want to use:
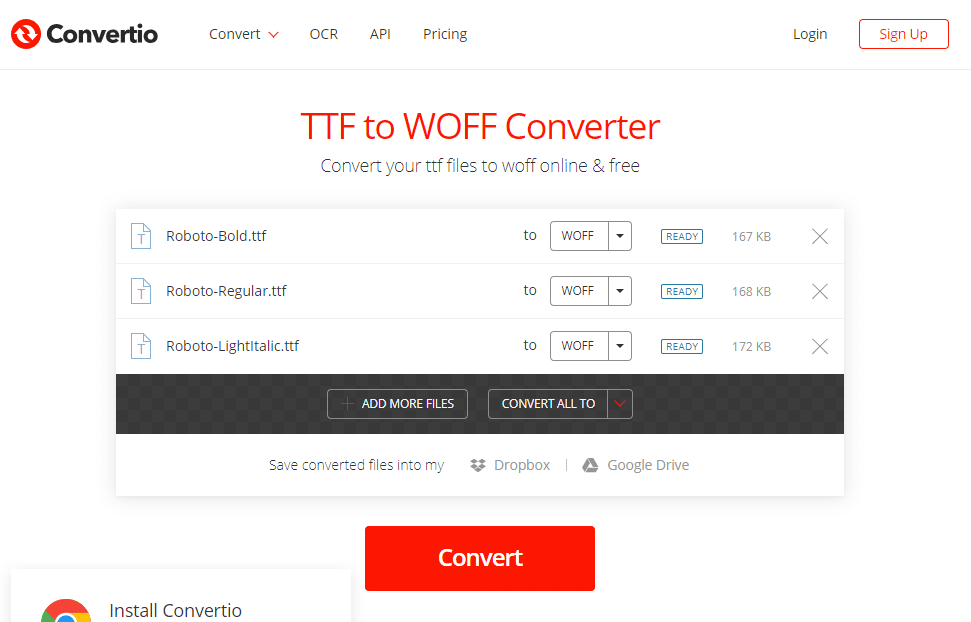
Step 2: Convert To WOFF Format (If Needed)
When you download a font from Google Fonts, it gives you the font in TTF format. To ensure cross-browser compatibility, most sources that I’ve read seem to recommend using the WOFF or WOFF 2.0 formats.
So if your chosen font isn’t already in that format, you can use the free Convertio tool to convert it to WOFF:
Step 3: Upload Font Files To Server
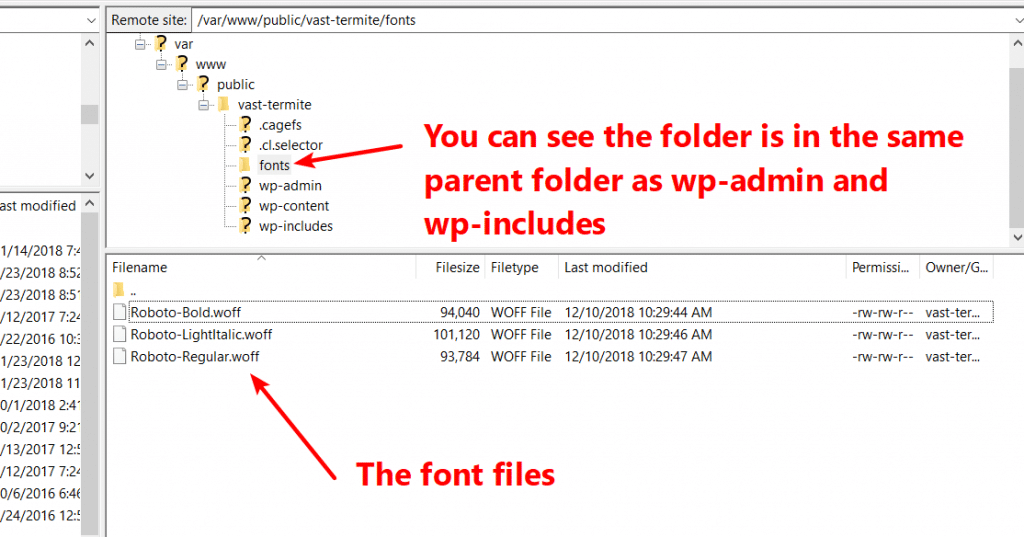
Next, take those font files and upload them to your server using FTP or cPanel File Manager. Check out our guide on how to use FTP on WordPress if you’re not sure how to connect to your server via FTP.
To make your font files easy to find, you can add them in a folder called fonts. For this example, I created the fonts folder in the root folder of my site. You can see what it looks like in the screenshot below:
Step 4: Add CSS For Font Face
Once you’ve uploaded the font files to your server, you need to include those fonts in your site’s CSS by using @font-face.
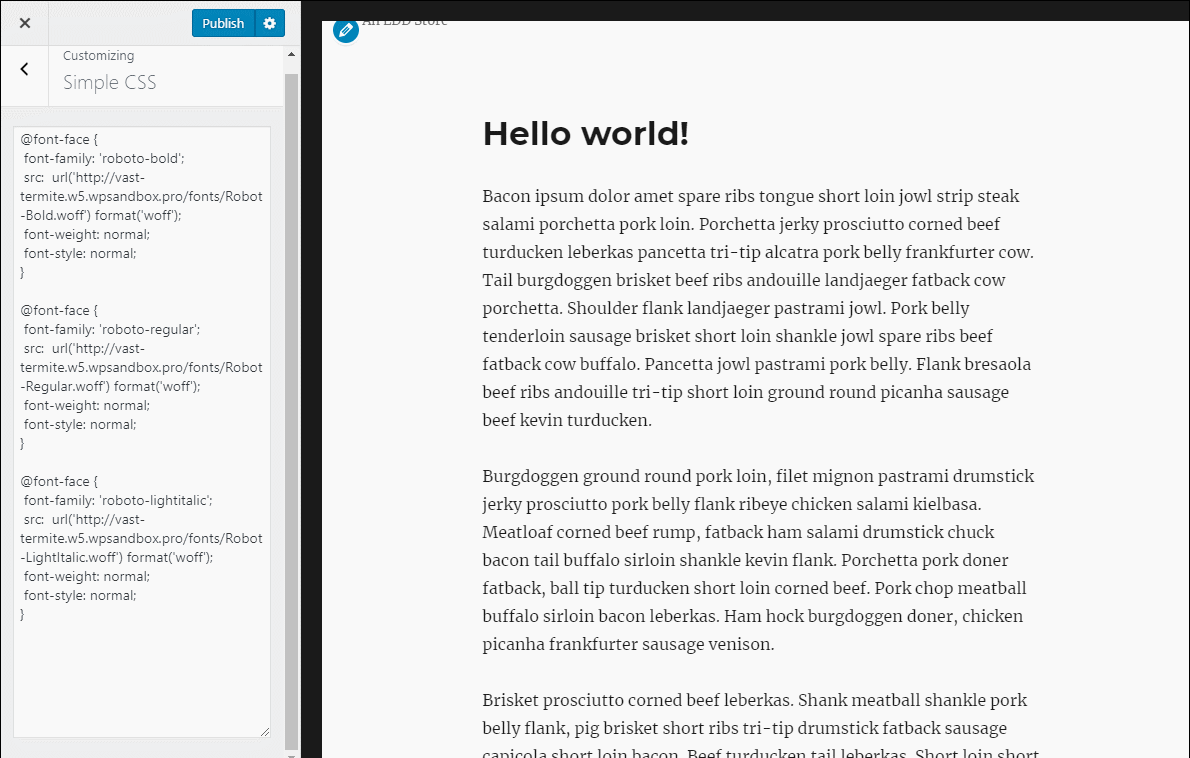
To do this, you can either use the Additional CSS tab of the WordPress Customizer. Or, you can use a plugin like Tom Usborne’s Simple CSS, which is what I’ll do for these screenshots. For more, check out our post on how to safely add custom CSS to WordPress.
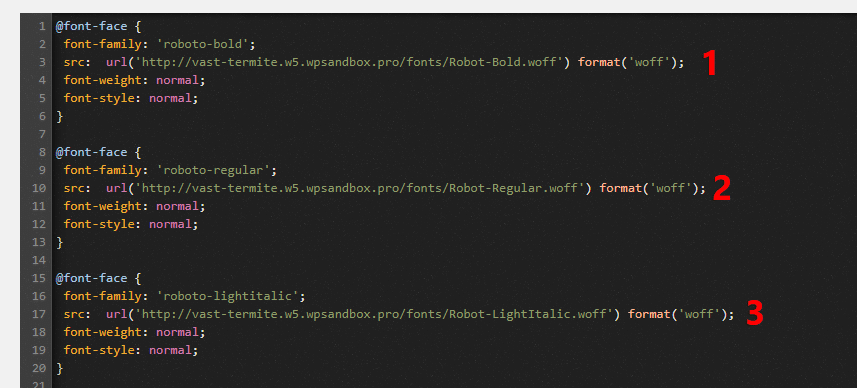
Once you’ve chosen your method to add custom CSS, here’s the exact CSS that you’ll need:
@font-face {
font-family: 'roboto-regular';
src: url('https://vast-termite.w5.wpsandbox.pro/fonts/Robot-Regular.woff') format('woff');
font-weight: normal;
font-style: normal;
}
For this code snippet:
- Make the font-family the name of the actual font family
- Replace the URL with the actual URL to the relevant font file on your server
You’ll also want to repeat the code snippet for each separate font file that you’re using. Here’s what it looks like for the three font files on my site:
Step 5: Add CSS For Where To Use Font
Now, all that’s left to do is actually start using your fonts in your CSS!
For example, if I wanted to make all my body text use the Roboto Regular font that I’m now self-hosting, I would use this CSS:
body {font-family: 'roboto-regular', Arial, sans-serif;}
You can add this CSS in the same location that you added the CSS code from Step 4.
I’ll show you the difference using a GIF of the WordPress Customizer. Watch the body text as I add the new CSS:
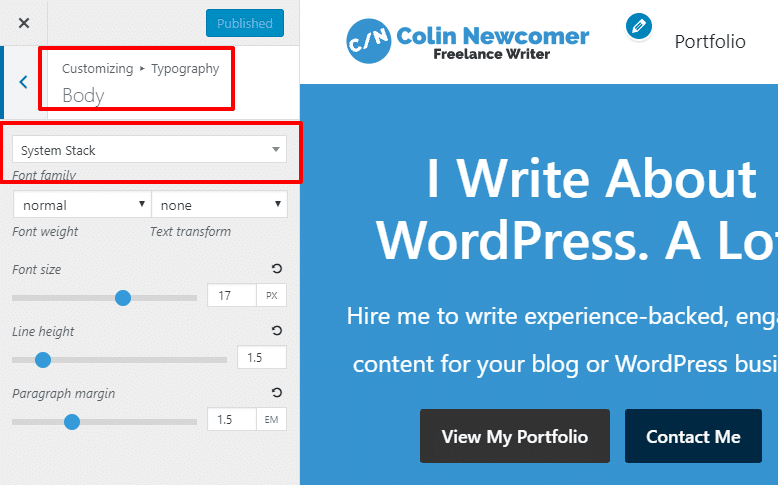
Step 6: Stop Theme From Loading Google Fonts
If your site is still loading fonts from the Google Fonts server, it might be because your theme thinks it still needs to use the fonts hosted on Google Fonts’ servers.
To stop that, you can try setting your theme to use a system font stack (if available). For example, GeneratePress lets me make that choice in the WordPress Customizer:
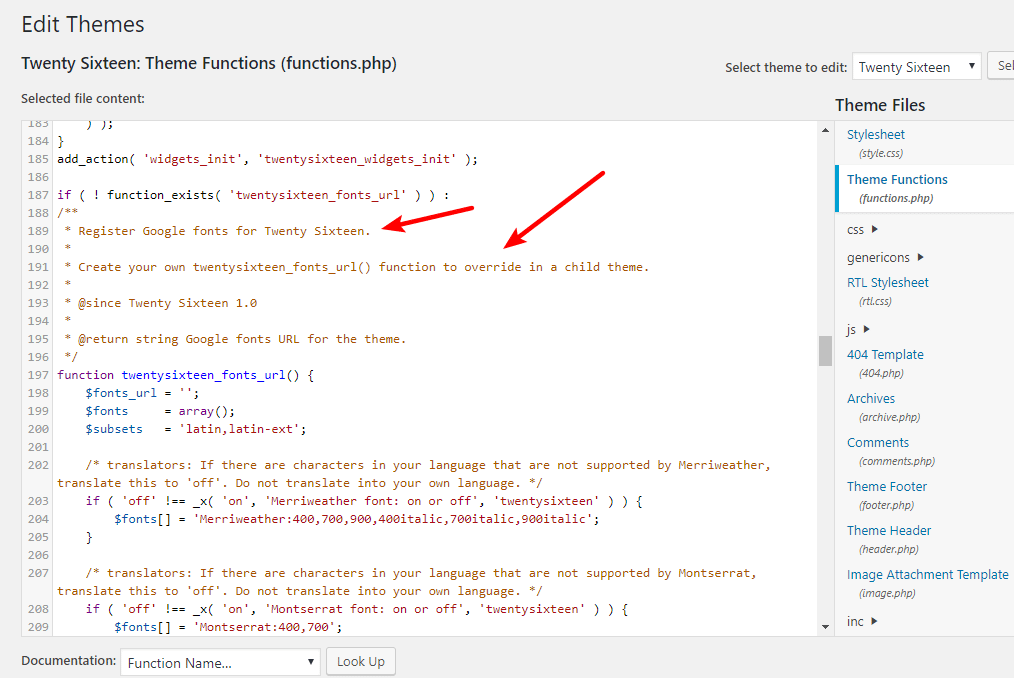
Or, you can also usually remove the relevant portions from your theme’s functions.php file. Or, as the comment indicates, you can use a child theme to override it:
You can also try the Disable Google Fonts plugin, though there’s no guarantee that it works for every single theme.
How To Host Google Fonts Locally With A Plugin
If you’re overwhelmed by the manual method, you can also host Google Fonts locally using a WordPress plugin called CAOS for Webfonts from Daan van den Bergh.
I haven’t widely tested the plugin, but it seems pretty easy to use. All you do is search for the font by name and click Generate Stylesheet:
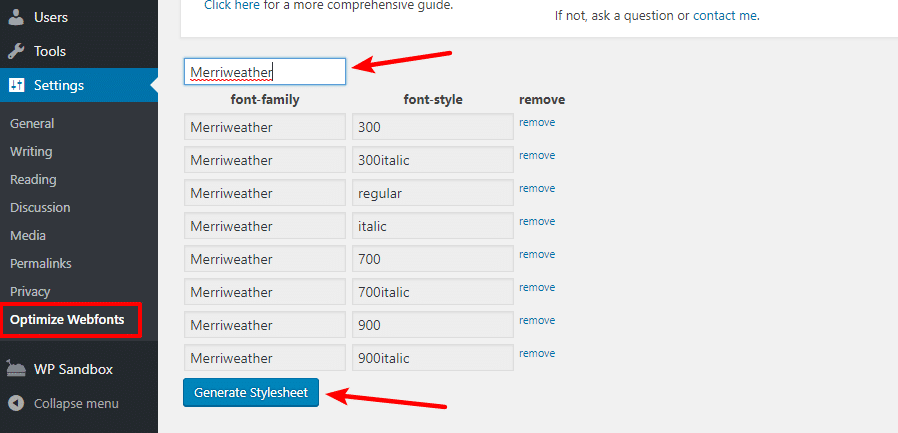
You can also choose exactly which weights to include.
Once the plugin generates the stylesheet, it will add it to your theme’s header.
While the plugin is super easy to use, it will only work for Google Fonts, whereas the manual method will work for any font.
Try Hosting Fonts Locally Today
Hosting fonts locally is a great way to open your site up to new fonts and possibly speed up your site.
If you’re specifically looking to host Google Fonts locally, there are plugins that can help you do it. Or, you can always go the manual route which will work for any web font.
Finally, as with any significant change to your WordPress site, I’d always recommend testing to see whether hosting fonts locally does indeed speed your site up. If you find that you’re not getting the performance benefits that you expected, you might want to look into using a CDN to serve up your font files.
Have any other questions about how to host fonts locally on WordPress? Let us know in the comments and we’ll try to help!