If you run a membership website, you’ll need an easy way for people to get in touch with one another. This means making everyone’s contact information and other key details readily available. To do that, you can put together a WordPress member directory.

For best results, however, you’ll want to design this directory carefully. It should be easy to use, well organized, and dynamic. This means that instead of simply listing out all your members by hand, you’re better off finding a WordPress member directory plugin that can get the job done:

In this post, we’re going to talk about why you’d want to set up a WordPress membership directory, and what it might look like. Then we’ll show you how to build one. Let’s get started!
Membership sites are an excellent way to build a community. If you want that community to thrive, however, you’ll need to give people a way to get in touch with one another. That’s where a WordPress members directory comes in handy.
There are many benefits of adding this kind of directory to your site, including that:
- Members can contact one another for help and collaboration.
- You can keep track of everyone who’s registered on your site.
- New visitors will see that you have an active community, encouraging them to join up as well.
If you like, you can simply create a page on your WordPress site and list out each member’s name and contact details. However, this isn’t the best way to set up a WordPress user list. Let’s look at an example of a directory that’s a little more user-friendly.
The best WordPress user directories are ‘dynamic’, which means they’re meant to be used rather than simply scrolled through. For a better idea of how this works, you can check out the Childhood and Early Parenting Principles (CEPPs) directory:
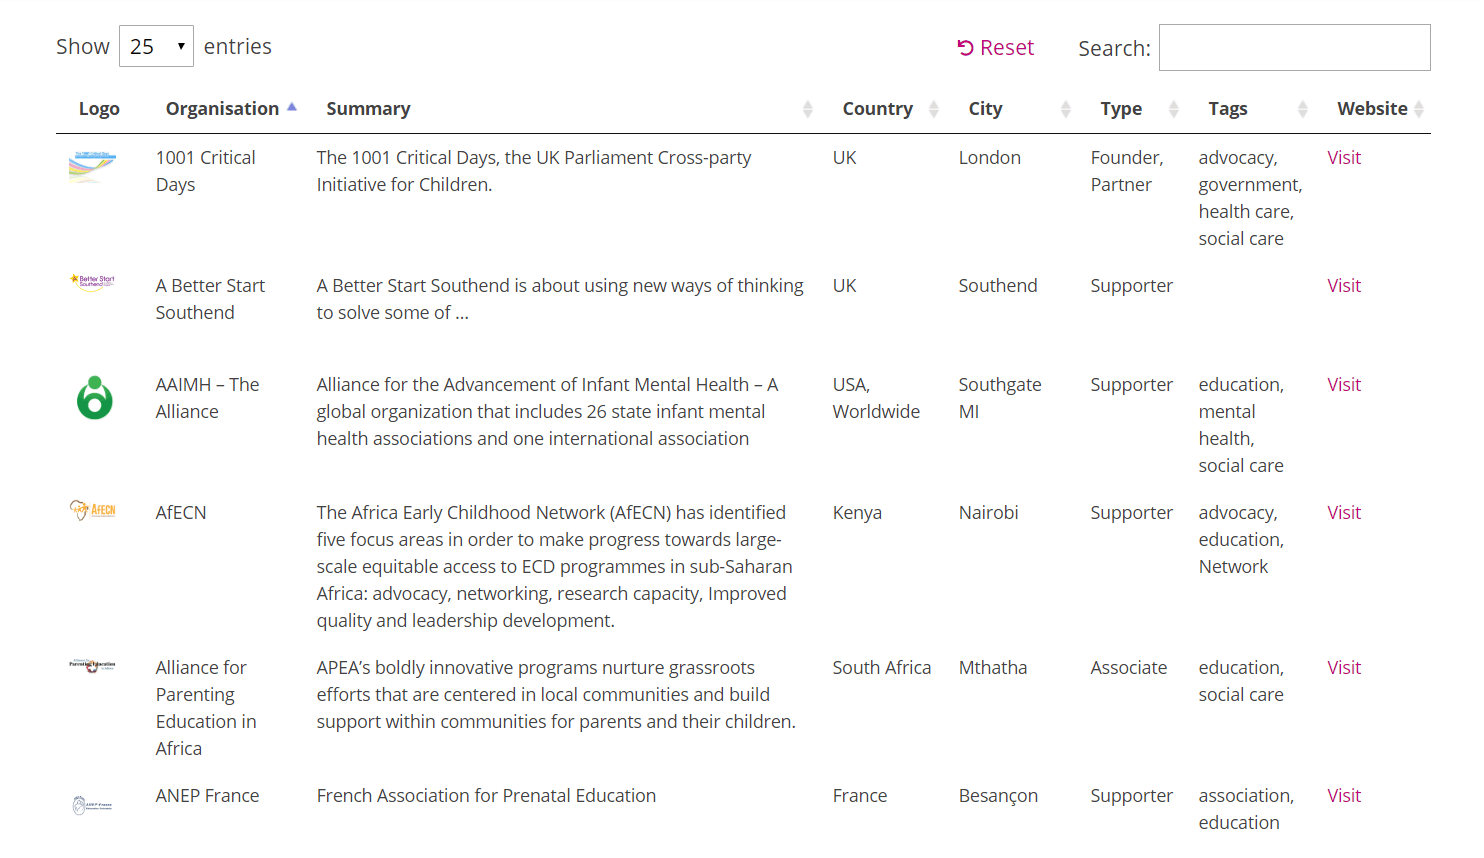
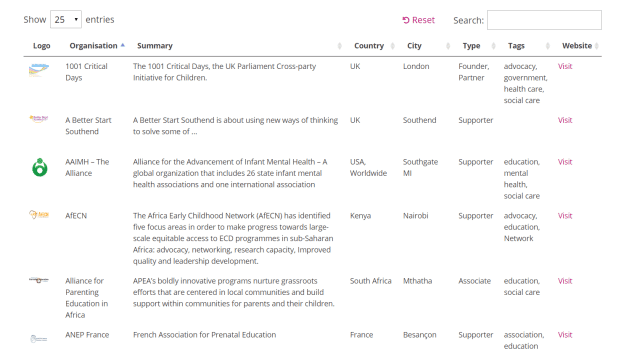
This directory lists out the various partners, supporters, and other members involved in the CEPPs network. As you can see, these members are organized on a single page in a table format, which offers a number of advantages.
First and foremost, it’s an attractive layout, with clearly defined columns of information and even a small logo for each entry. It also contains a large amount of useful information, without being cluttered.
If you visit the site, you’ll also find that this WordPress member directory is very usable. You can click on the arrows next to each column title to sort the table, for example, and the search bar at the top lets you find what you’re looking for quickly. There are also links to each member’s website, right within the table.
To create a WordPress member list like the one on the CEPPs website, you’ll need the right tool. Setting up a table like that from scratch would take a lot of coding work. Fortunately, you can streamline the process using a WordPress membership directory plugin – Posts Table Pro:
This plugin lets you create a dynamic, organized, and attractive table to place anywhere on your WordPress site. It’s flexible enough that you can build tables for a wide range of purposes. This includes setting up a WordPress member database.
Using Posts Table Pro, you can:
- Determine exactly what information will be displayed in your directory, and in what order.
- Add as many members to your list as you’d like, and keep it updated easily.
- Add sorting, searching, and filtering capabilities to your directory, making it easy for users to quickly find what they need.
- Include links out to further information, such as websites, email addresses, or individual member pages.
Best of all, this plugin is easy to get started with and highly customizable. Let’s look at how you can use it to set up your own WordPress membership directory.
Naturally, the first thing you’ll want to do is download and install the Posts Table Pro plugin. You can do that by following the directions in this documentation article. Then, you’re ready to get to work!
Step 1: Add a custom ‘members’ post type to your website
Posts Table Pro is a WordPress plugin, which means it works by taking advantage of the platform’s innate functionality. More specifically, it lists information in your table by pulling data from a type of WordPress content that you choose – either posts, pages, or a custom post type.
If you want to keep things simple, you can create a post for each member in your directory, and use that to generate the table. However, this only enables you to include a few pieces of information, and isn’t the best choice if you already use posts for something else, such as blog entries or news updates.
Instead, a better strategy is to create a custom post type just for your site’s members. This may sound intimidating, but it’s actually fairly easy to do. All you’ll need is a dedicated plugin, such as Custom Post Type UI:

With this tool, you can create and customize any post type you’d like. For a step-by-step walkthrough on how to set up your ‘members’ custom post type, check out the following video:
Once that’s done, you’ll need to tell Posts Table Pro to use this new post type. To do that, head to Settings > Posts Table Pro in your dashboard:
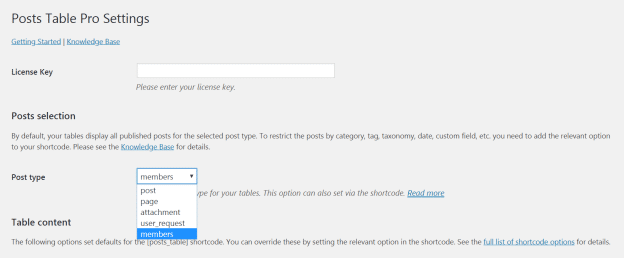
From the Post type drop-down menu, select the name of the custom post type you created. Then, save your changes to the page.
Step 2: Set up custom fields for your members post type
At this point, you’re well on your way to getting your WordPress member directory off the ground. However, there’s one more plugin to install.
If you want to display more than a few types of information about each member, you’ll need to add custom fields to your new post type. For instance, you might include one field for each person’s email address, another for their location, and a third for their rank or standing within the organization.
Here, the free Advanced Custom Fields plugin can help you out:

After installing and activating this plugin, you can use it to create whatever fields you like. To do that, go to the new Custom Fields section in your dashboard:
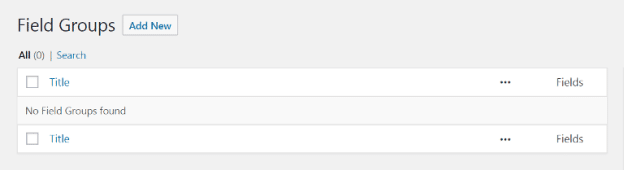
Select Add New, and enter a name that will describe the group of fields you’ll be creating:

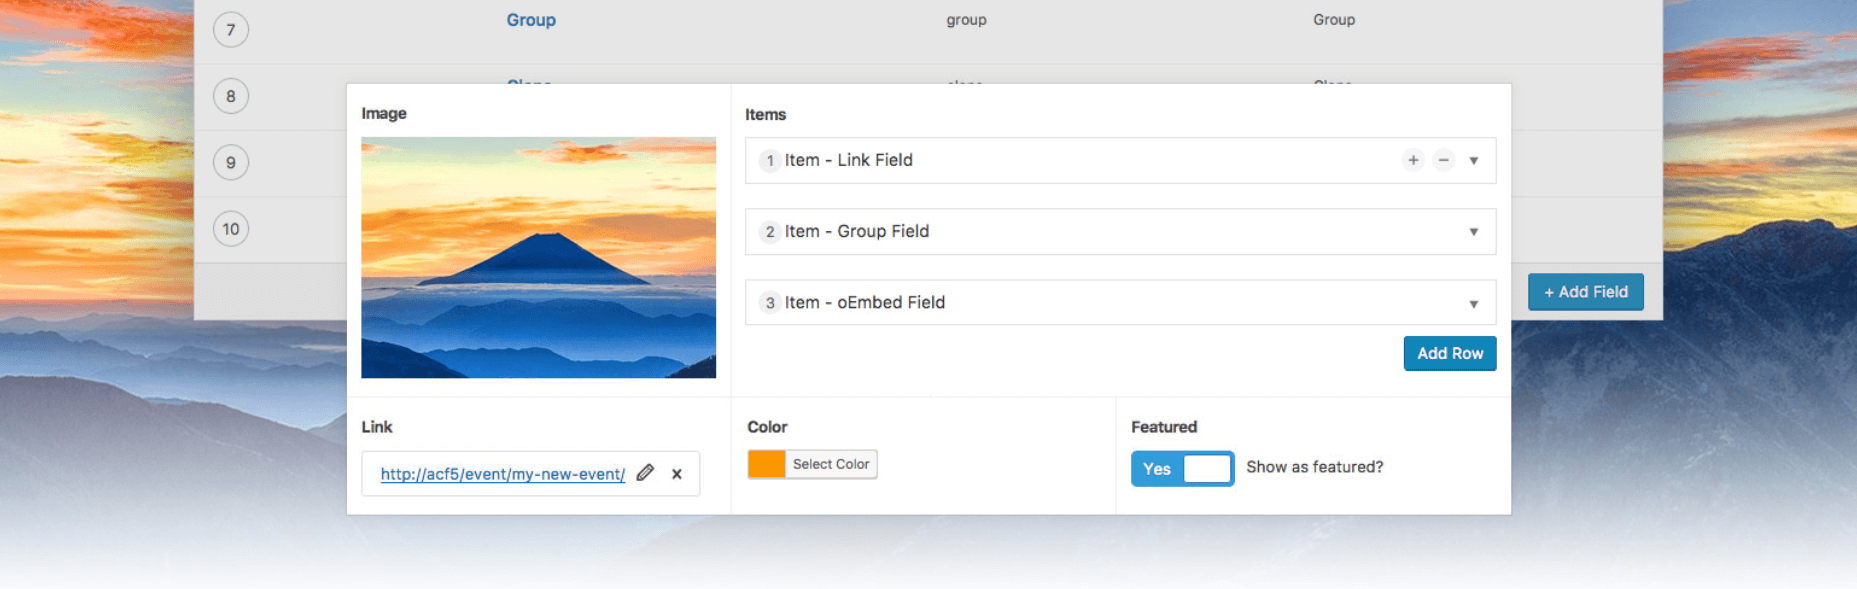
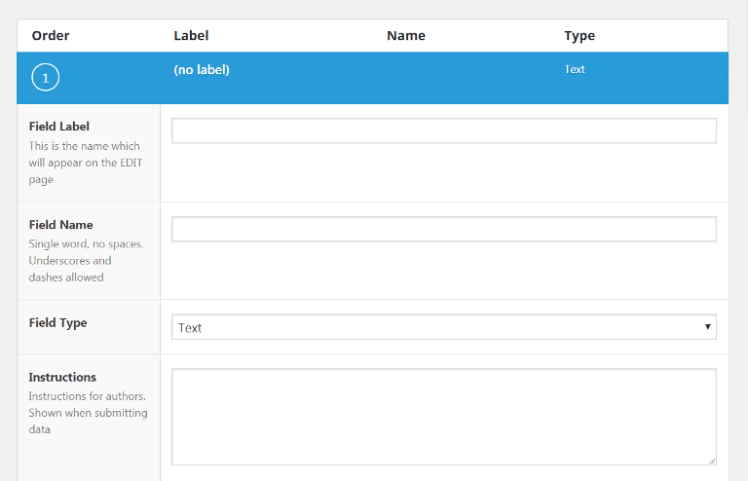
Then, using the Add Field option, you can set up each individual field. You can give it a name, choose what type of information it contains, and so on:
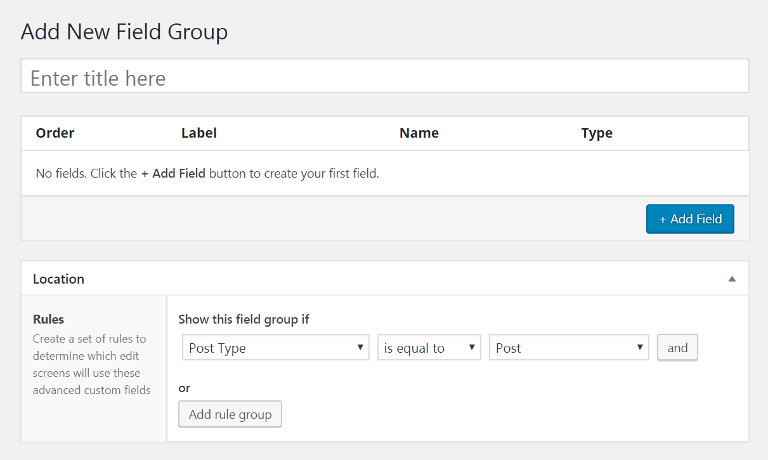
After that, all you need to do is ensure that these fields will show up on your members custom post type. To do that, find the Location section for your field group:
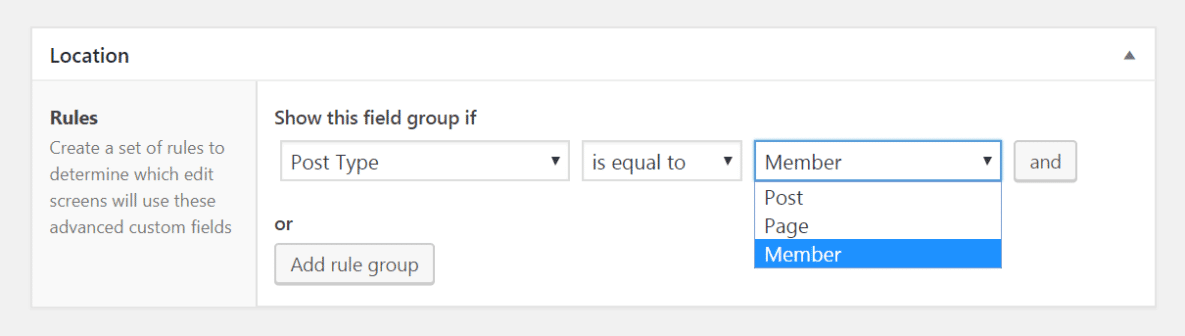
Then, create a new rule under Show this field group if. Select Post Type in the first drop-down menu, is equal to in the second, and the name of your custom post type in the third.
Don’t forget to hit Publish to save your changes when you’re done here. Then, you can open up the tab for your custom post type, and start entering in the information for each member. All your new custom fields should show up, enabling you to include whatever details you’d like.
Step 3: Create and customize your WordPress member directory
Finally, you’re ready to set up your WordPress membership directory. To do that, open up a post or page in your dashboard. Select the Toolbar Toggle icon, and then click on Insert Posts Table:
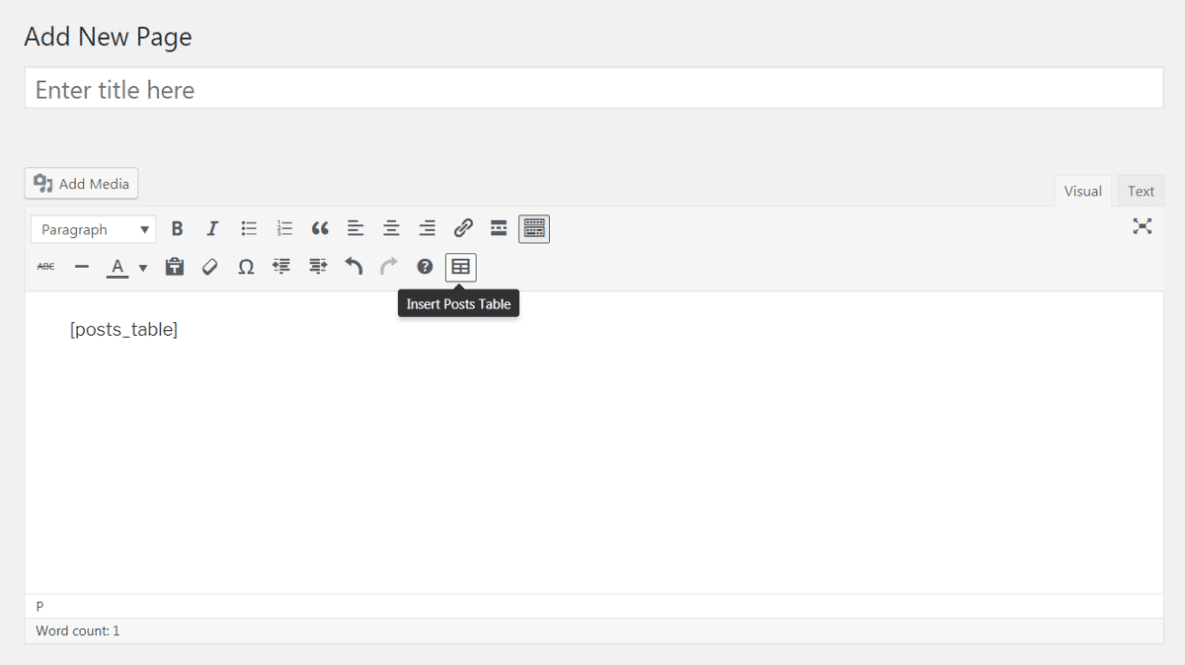
A shortcode will be placed within the editor, which you can position however you’d like. This code will pull in the information you entered about your site’s members, and display it all in a dynamic table within that page or post.
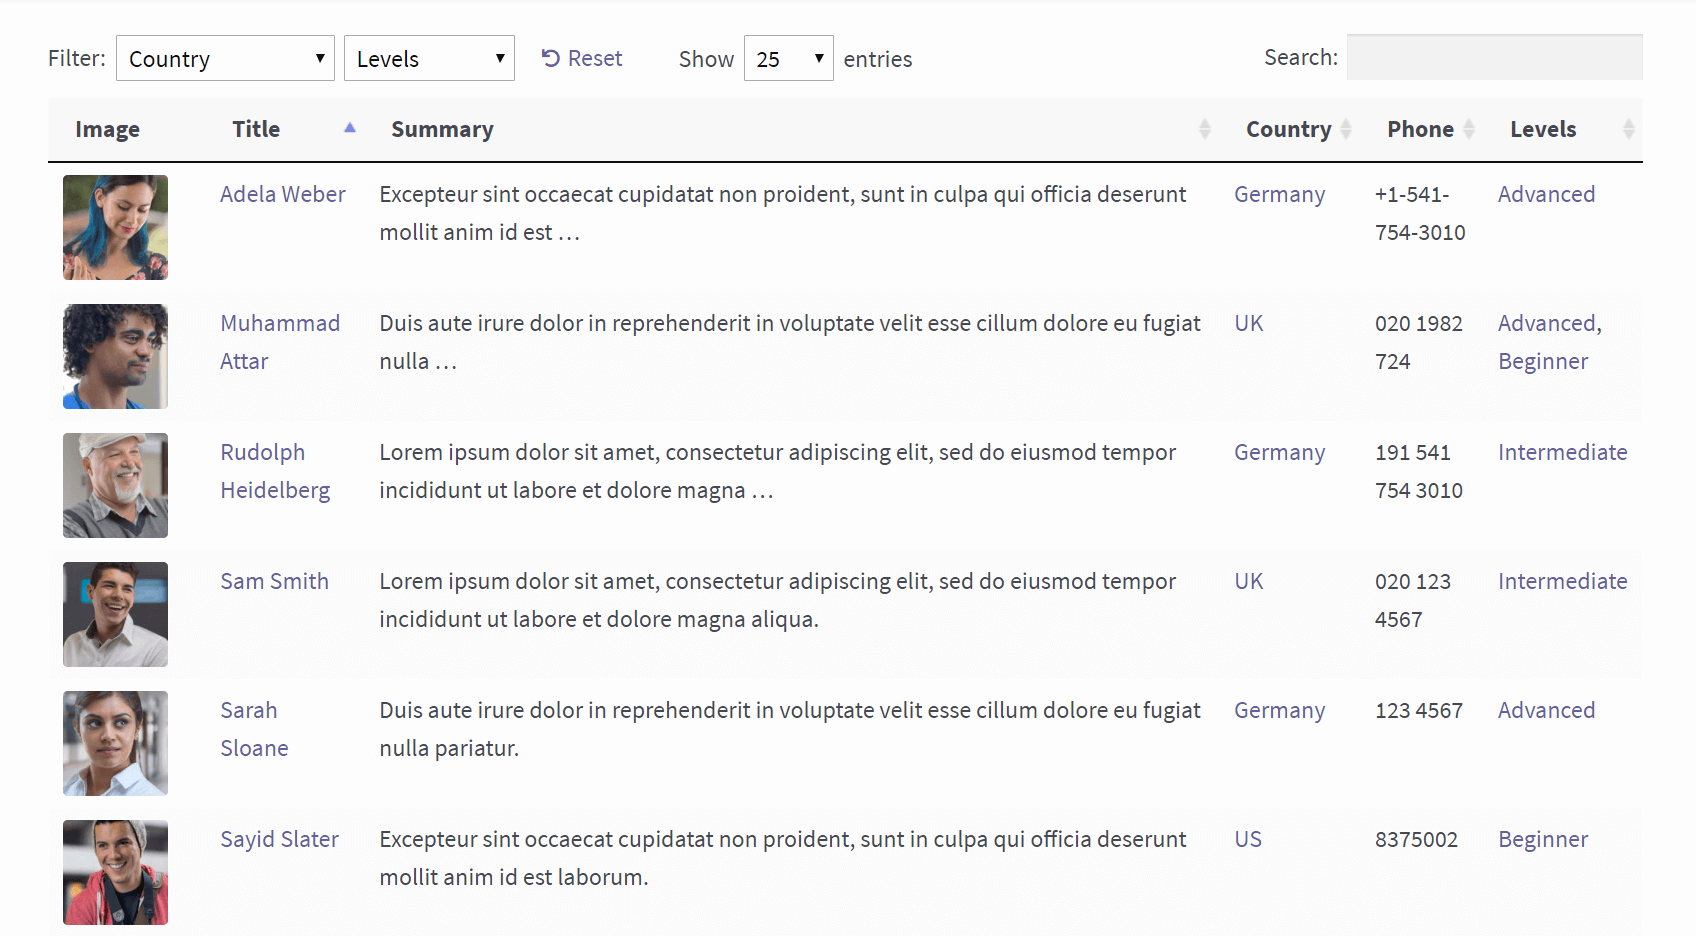
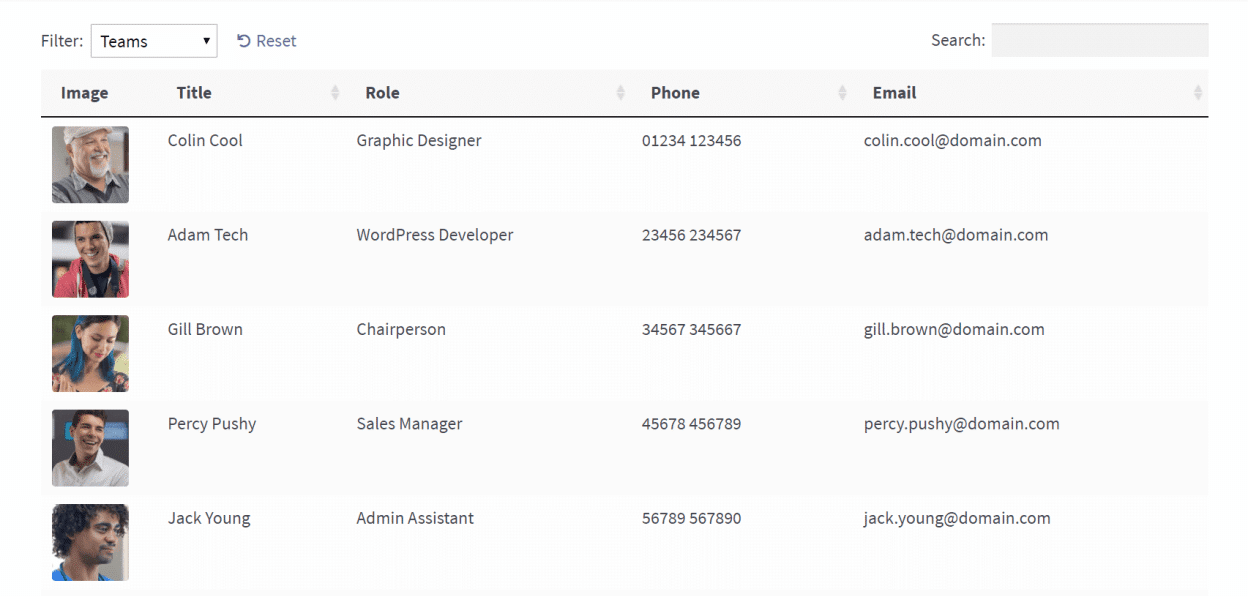
If you check out your page or post on the front end now, you should see a WordPress member list that looks something like this:
Your WordPress membership directory is now up and running! Of course, you can continue to make changes to it, such as altering the columns that are displayed so that each of your custom fields is included. You can read about all the options that can be configured in the Posts Table Pro documentation.
In addition, for even more help setting up this WordPress membership directory plugin, you can check out this comprehensive guide to the process. With a little time and tweaking, you’ll have a directory that both looks great and is a breeze to use.
It’s almost always a smart idea to include a directory on your membership website. You’ll be showing off your active community, keeping tabs on everyone who’s registered, and helping people get in touch with each other easily – all at the same time.
To set up your own WordPress member directory, all you need are the right tools. This means installing the Posts Table Pro plugin, and then:
- Adding a ‘members’ post type to your website, using the Custom Post Type UI plugin.
- Setting up custom fields for your members post type, using the Advanced Custom Fields plugin.
- Creating and customizing your WordPress membership directory.
Do you have any questions about how to set up your WordPress user directory? Ask away in the comments section below!