Restrictions put in place in the wake of the global Covid-19 have forced many restaurants to close their doors to the public. Yet if your business is one of them, that’s no reason why you can’t keep on serving your customers. In this guide, we’ll show you how to create a quick and easy online ordering system so that you can offer a full delivery service without paying commission fees to third-party companies like Deliveroo or Just Eat.
In today’s online, on-demand culture, more customers than ever expect to be able to order from your website via the web.
The good news is that over the last few years, a number of third-party services have sprung up which make it easy to meet that demand, allowing customers to order from your menu via their website and having that order sent on to you.
The bad news, however, is that these services charge a hefty commission, typically taking anywhere between 15% – 20% off every order.
Fortunately, there is a better way. By learning to create a restaurant ordering system in WordPress using nothing more than your existing website and a handy plugin, you can stop handing your money over to other companies and still provide your customers with a safe, secure, and seamless online ordering experience.
Today, we’ll show you exactly how easy it can be to create your own online ordering system in just a few simple steps.
How Much Does it Cost to Create a Restaurant Ordering System in WordPress?
For the sake of this guide, we’re going to assume that you already have a WordPress website up and running. If not, you’ll need to consider the cost of web hosting and a quality restaurant WordPress theme. Otherwise, you can create your ordering system using the site that you already have along with the following plugins:
Realistically, the WooCommerce Product Table Plugin from UK-based developers Barn2 is the only initial investment you’ll need to make.
As you’ll see for yourself, the $89 USD entry-level package should be enough for most small-medium businesses with just one site. However, if you’re a growing chain, one of the higher-priced options may be more suitable.
Though close to a hundred US dollars may seem more expensive than using a third-party service for your restaurant’s online ordering, it’s worth remembering that with this option, you keep 100% of the profits.
In other words, by no longer losing money via those eye-watering commission fees, your whole system is likely to pay for itself in no time.
Payment Processing Fees
Beyond this, the only other costs involved are the fees charged by online payment processors such as PayPal or Stripe.
While the latter charges a lower fee, we’ll be using PayPal as we find it much easier to configure. If you do want to use Stripe, then you may find our detailed guide on how to accept Stripe payments helpful.
Even though there are fees involved in using PayPal, these are only 2.9% + $0.30 per transaction, far less than the 15-20% charged by third-party delivery services.
We should also point out here that accepting online payments isn’t essential for this to work.
You may choose to have customers pay your delivery driver’s by cash or by card via your existing mobile card payment system.
Creating Your Ordering System in WordPress
So far so good, but doesn’t creating an online ordering system require all kinds of complicated coding and technical wizardry?
Not all.
Here’s how it’s done:
1: Install WooCommerce
WooCommerce is the world’s most popular eCommerce solution, used by over 5 million online stores around the world.
This simple-yet-powerful platform will serve as the foundation of your restaurant’s online ordering system, enabling your customers to add menu items to their order, go through the checkout process, and make online payments.
You can install WooCommerce the same way you would any free plugin:
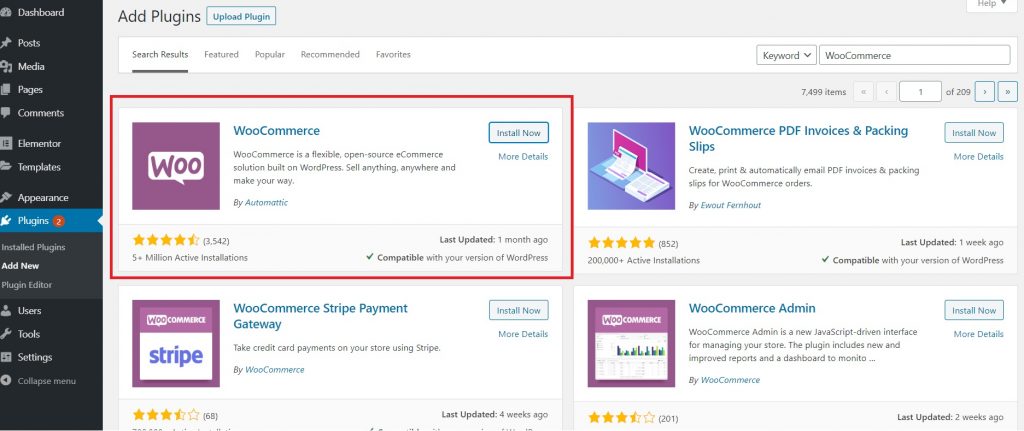
- Go to Plugins – Add New from your dashboard menu
- Search ‘WooCommerce’
- Click ‘Install’ and then ‘Activate.’
Once the plugin is installed, you’ll be asked to go through the WooCommerce setup wizard which is the easiest way to configure basic settings such as currency and your physical location.
The wizard will also ask you if you want to turbocharge your eCommerce offering by integrating other tools such as Jetpack and the WooCommerce Facebook plugin.
While these can prove invaluable for growing your business, they’re not what we’re focusing on today, so we’ve simply skipped past them for now.
Add Payment Information
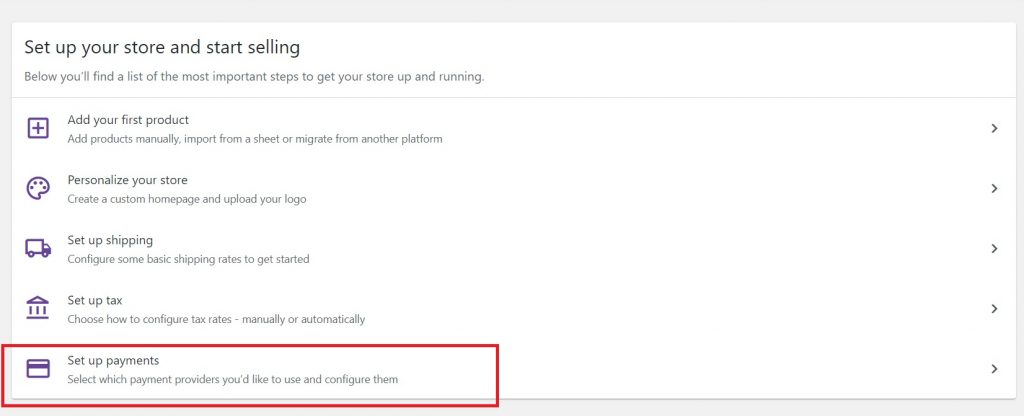
At the end of the wizard, you’ll be able to decide which payment providers you want to use to accept online payments.
Again, we’re going to use PayPal for the purposes of this tutorial, but other options are available.
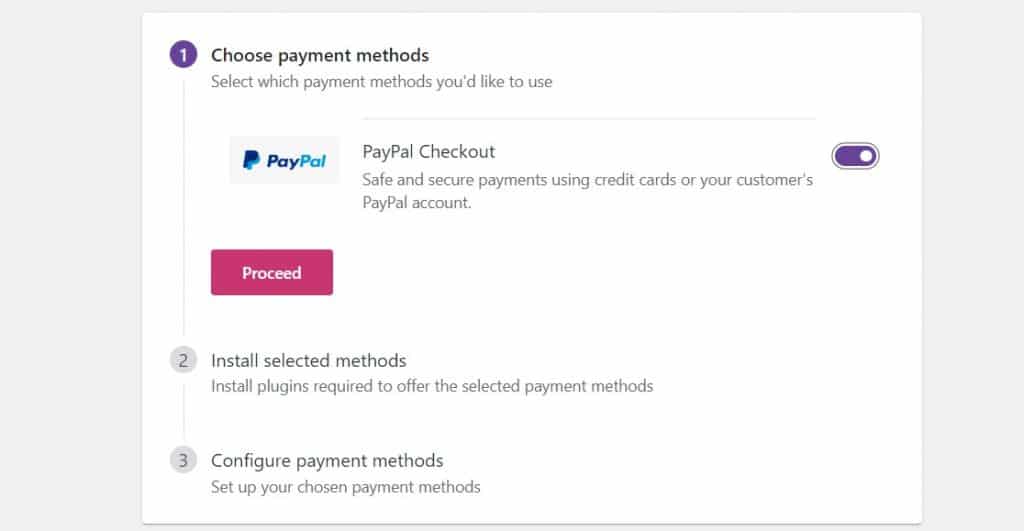
Alternatively, you can always select ‘Cash on Delivery,’ if you require your customers to pay directly to their delivery driver.
2. Add Your Menu Items
Now it’s time to start adding all of your menu items into your system.
To begin, go to Products in your left-hand dashboard menu and select ‘Categories.’ From there, you’ll have a new dashboard where you can view your existing categories and add new ones.
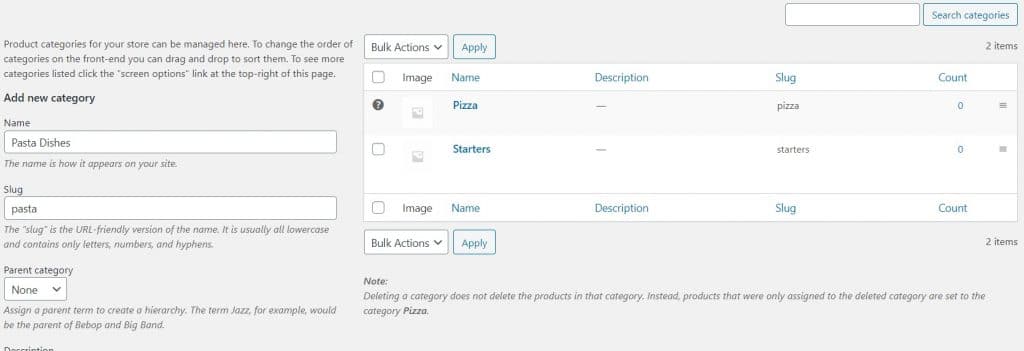
As you’ll see from our example, this is as simple as replicating the categories that you already have in your restaurant’s menus, such as starters, main courses, desserts, and so on.
With that done, go to Products – Add New, and create a new product page for each new dish or menu item.
This is pretty straightforward and involves simply filling in key details such as the name and price of each item, along with a description and relevant images.
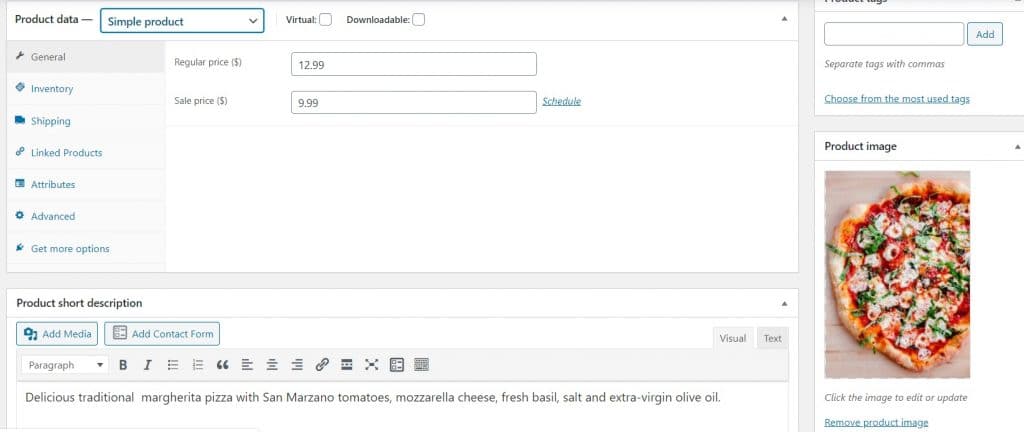
If you need more help with adding products, you’ll find everything you need in our in-depth WooCommerce tutorial.
Otherwise, all you need to do is follow the same process for each item on your menu, and when you’re done, you should have pages that look like the one below:
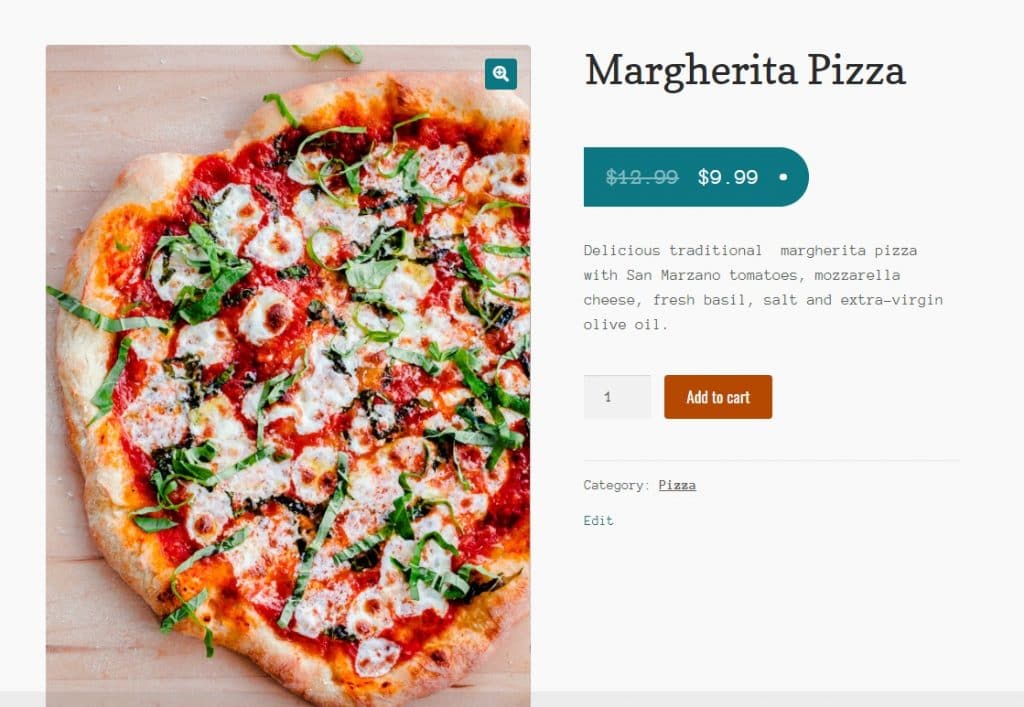
Though this is definitely the most time-consuming and laborious part of the whole process, it’s pretty much plain sailing from here on in.
Including Additional Information About Your Food
To help your customers make smart, informed decisions about the food they order, you may want to include additional information on each item, such as whether the item is vegan, vegetarian, or gluten-free.
You can do this simply by using the product tags option which will look familiar to you if you’ve ever used tags on your website’s blog posts.
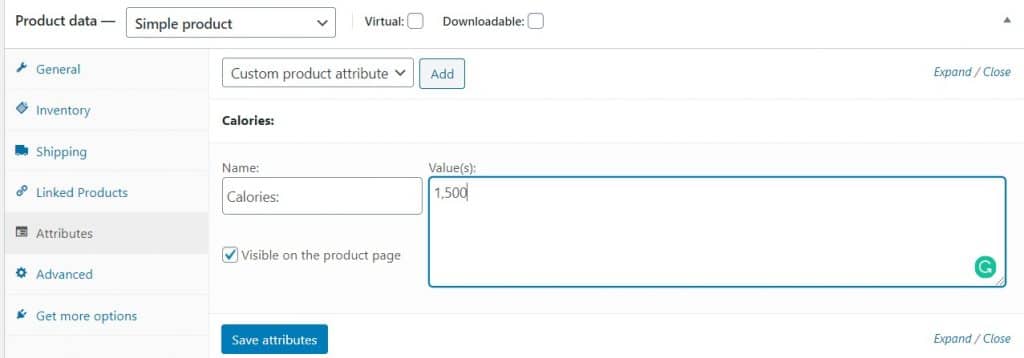
You can also use Product Attributes (found in the Product Data box as shown above) to add in details such as calorie count and allergy warnings.
Creating Product Variations
Sticking with the example of our delicious margarita pizza above, you may want to offer that pizza in multiple sizes.
Rather than creating a different product for each pizza size (which, let’s face it, would make things messy and complicated), you can simply change your product to a variable product using the drop-down menu at the top of your Product Data box.
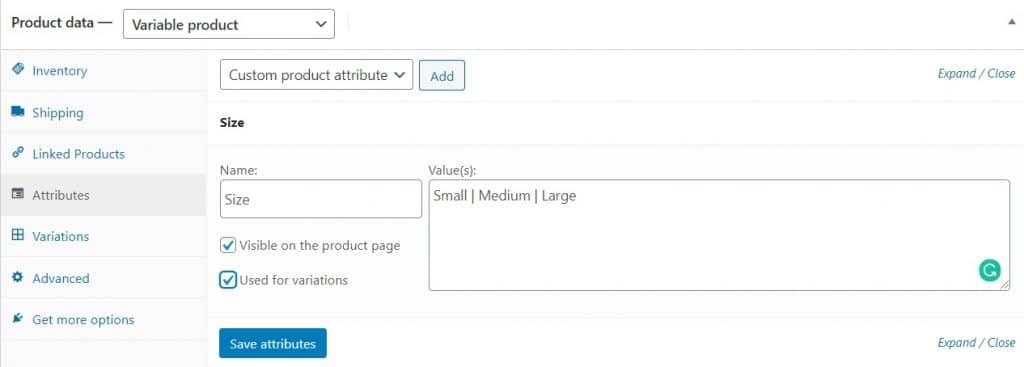
From there, create your variations as an attribute, being sure to check the “Used for Variations” box. Then, go to variations, select the attribute you want to use, and click ‘expand.’
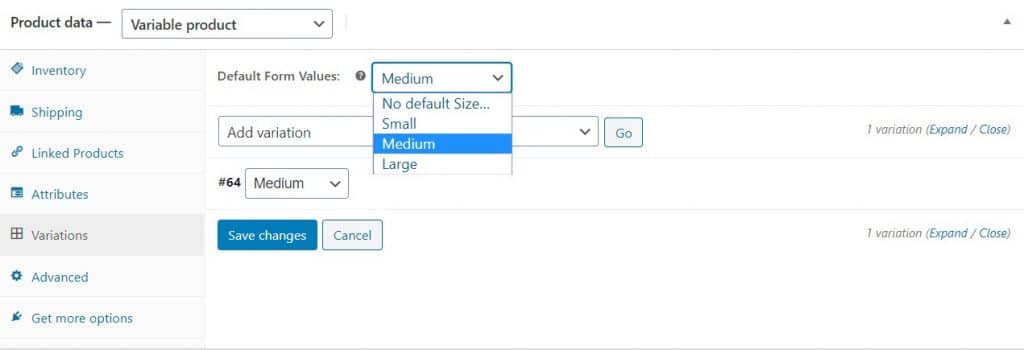
This will reveal more options so that you can set different prices for each size.
3. Add Delivery Options
To set up your delivery rates, go to WooCommerce from your dashboard menu, then select Settings – Shipping and add a new shipping zone.
You can add multiple shipping zones if, for example, you wanted to charge one rate for deliveries within a three-mile radius, another for deliveries within a five-mile radius, and so on.
If you’re anything like most restaurants and only charge one fee no matter how much a customer orders, you can click ‘Add shipping Method’ and select ‘Flat Rate.’
To allow for collections, select the ‘Local pickup’ option.
4. Configure Your Email Notifications
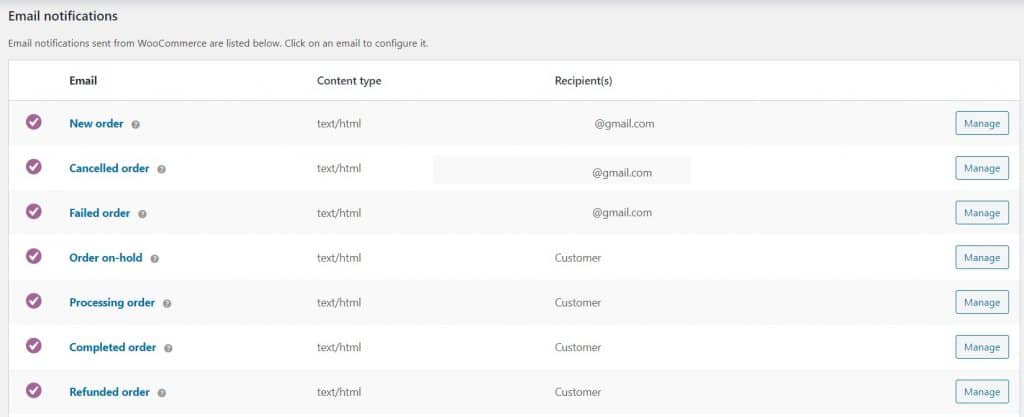
Naturally, you need to be notified whenever somebody orders from you.
To set that up, head back to the settings page and select ’email.’
Here, you can also configure which emails (such as order confirmations) are sent to your customers.
5. Configure Payment Options
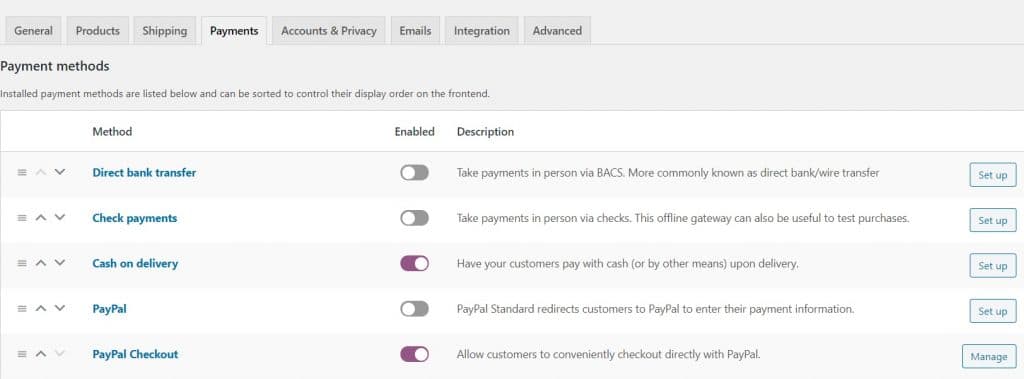
Still on the settings dashboard, head to payments to determine how you’ll accept payments. If you want to use a payment solution like Stripe, you’ll have to install and configure it before it will show up in this list of options.
For a list of alternative payment solutions, you can check out the WooCommerce Extensions Directory.
Otherwise, you can choose the PayPal Checkout and Cash on Delivery options as we have here.
6. Set up Your Menu Page
Now that you have all your menu items added to your site, it’s time to display them in a functional, easy-to-read menu that customers can use to place an order.
This is where the WordPress WooCommerce Product Table Plugin that we mentioned earlier comes into play.
After buying and downloading the plugin, upload and install it as you would any other.
Next, add a new page, and on that page, add sub-headings for each of the categories you made earlier.
Under each subheading, paste the following shortcode, replacing “<category-id>” with the actual ID for that category.
[product_table category=”<category-id>”]
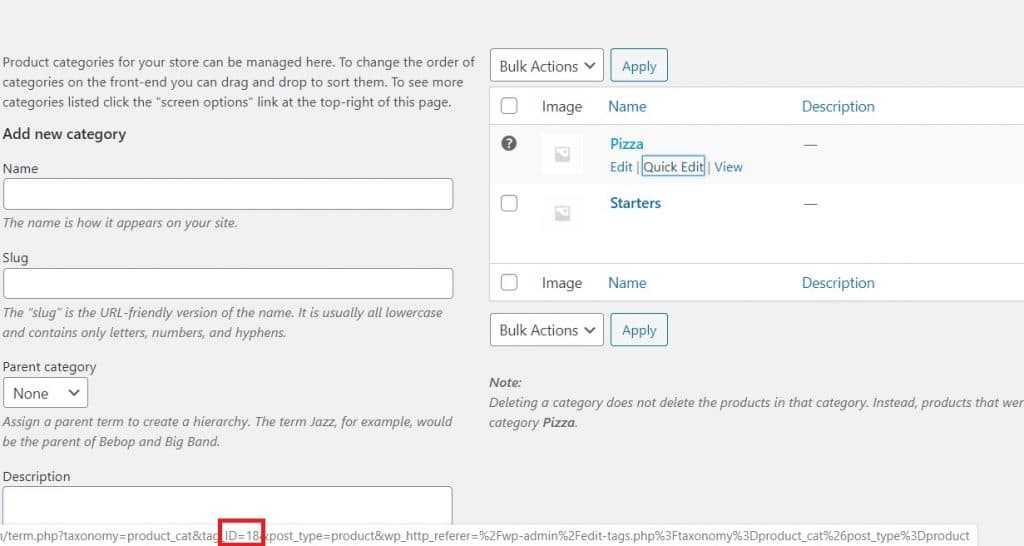
You can find the category ID by going back to your main list of categories, hovering over the link for a particular category and looking at the URL in the bottom of your browser as shown below:

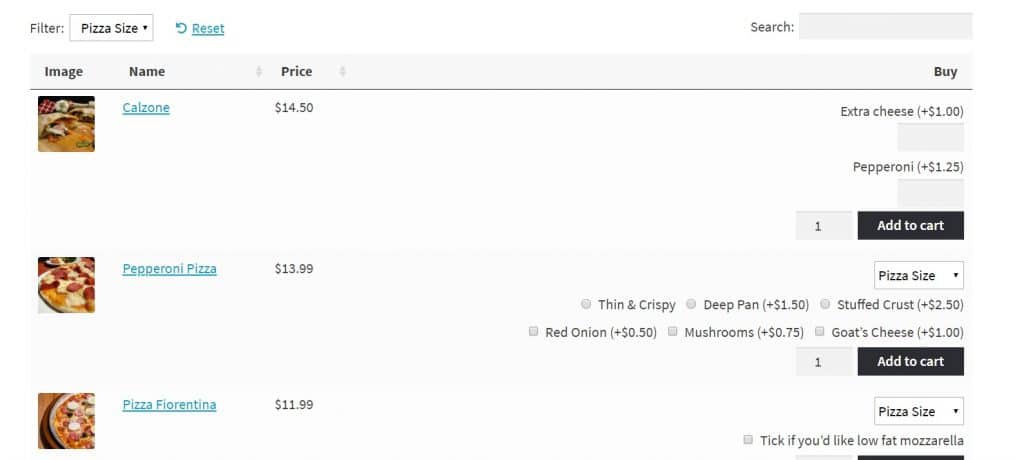
Do this for each of your categories, save the page, and by the time you’re done, you’ll have a fully functioning online menu that your customers can use to select their favorite foods and place an order.
Finally, you can use more shortcodes to create your order form. You’ll find those shortcodes included in the WooCommerce Product Table Documentation.
How to Manage Your Orders for your Restaurant
With that, you’re all set up and ready to start receiving orders. When they start flooding in, there are a few things you can do to keep on top of them.
While the email notifications will work well if you’re a small operation with only a handful of orders, busier restaurants may require something a little bit more substantial.
Thankfully, you have a few options at your disposal:
1.Sound Alerts
Install the handy YITH WooCommerce Desktop Notifications plugin so that every time a new order comes in, you receive a sound notification on your computer or tablet.
2. Automatic Printing
You can also integrate WooCommerce with your printer so that new orders are automatically printed off as soon as they come in. This may be the best option for busy venues.
3. Mobile Alerts
You can use the official WooCommerce app for Android and Apple IoS devices to receive notifications directly to your smartphone or tablet device.
How to Upgrade Your Restaurant’s Online Ordering System
By using the tools above, you’ll have everything you need to create a fully-functioning online ordering system, but if you really wanted to deliver the best possible online experience for your customers, there are a few things you can do to make your system even better:
Allow For Add-Ons and Menu Upgrades
Remember how we talked about offering variations earlier? Well, what about if you wanted to offer more options such as additional pizza toppings, adding a sauce, or even combining a main menu item such as a burger with side dishes and a drink to create a meal combo?
To do that, you can use the WooCommerce Product Add-Ons plugin. At $49, it does increase the overall cost of your system, but given the amount of potential upselling opportunities it presents, it may be well worth the investment.
Add Delivery Slots
While some customers may want you to deliver their food as soon as it’s ready, others may want to order in advance. For example, they may be browsing your menu during the day, but only want you to deliver when it’s time for dinner.
To do this, you’ll need to use the WooCommerce Delivery Slots upgrade. Though this does cost $99 to use, it also comes with a 14-day free trial so that you can test out whether it’s a feature your customers are likely to use.
Offer Deals and Discounts
Last but by no means least, the popular WooCommerce Dynamic Pricing extension ($129) can prove invaluable for offering all kinds of upsells, cross-sells, and special promotions such as Buy One Get One Free, Buy One Get One Half Price, or other value deals.
The Easy, Cost-Effective Way to Create a Restaurant Ordering System
By now, you’ve seen for yourself how simple and straightforward it is to create your own online ordering system for your restaurant, all with nothing more than a few helpful plugins and no more technical ability than it would take you to manage any other aspect of your WordPress website.
Sure, there are some initial costs involved, especially if you don’t already have a website to begin with, but in the long-run, your ordering system truly does pay for itself by offering the best of both worlds:
All of the business-boosting benefits of meeting your customer’s expectations with a secure, easy-to-follow online ordering system with none of the excessive fees charged by third-party services.
Instead, you keep 100% of the profits, and 100% of your happy customers.


