While it might seem hard to design a website without some coding experience, it’s a straightforward process if you have the right tools to do so. With Gutenberg and its extension plugins, you can design a professional-looking website that has dynamic content.
Toolset Blocks is an example of an extension plugin, which you can use to customize your website. It works with Gutenberg to help you build your website visually without using any code. Unlike a standard WordPress website that is only limited to two fields (heading and body), a website that is integrated with Toolset Blocks lets you add custom fields.
In this post, we are going to show you the basics of using Toolset Blocks and how to add dynamic content to your site. Let’s get right into it.
What Is Dynamic Content
Before we get into the nitty-gritty details, let us first gain a deeper understanding of dynamic content.
Simply put, this is content that changes depending on the post you have clicked on. WordPress pulls the accurate content that relates to each post and gives you every detail you are searching for.
Let’s say you are looking for your next vacation destination on a travel website. When you click on a Bahamas post, you’ll get the right info that relates to the Bahamas. On the other hand, if you click on a Berlin post, you get information related to Berlin.
Such content is referred to as dynamic. The general layout of different fields remains the same as the content changes. In the past, building a website with dynamic content required you to know Javascript, PHP, and HTML. However, Toolset Blocks changed the game.
Benefits of Using Toolset Blocks
Besides letting you add dynamic content to your website, this plugin packs other benefits that make it easier to design your website. Here are the benefits of using Toolset Blocks:
- You can see how your website will appear directly from the back-end. You don’t need to edit elements and switch to the front-end to preview your website’s outline. How the site appears on the back-end is how it will look like on the front-end. Think of the back-end as a replica of the front-end.
- Creating a website is straightforward. Building a website previously required you to develop your pages on another software and look for a developer to implement them on WordPress. With this plugin, you can do everything on WordPress.
- No coding experience required. Whether you are an experienced developer or a non-developer, Toolset Blocks helps you design your website visually without using any code.
- There’s no documentation. Unlike other plugins that have lengthy documentation, Toolset Blocks is straightforward to test and use.
- No need for using numerous plugins. Toolset Blocks has different features that allow you to add custom posts, custom fields, and front-end forms. This saves you from the trouble of installing multiple plugins to achieve that.
- You don’t have to compromise your project. If you are a non-developer looking to build something unique, you won’t have to compromise it because of complex code.
Building A Website Using Toolset Blocks
Now that you’ve gotten some insight on the benefits of having Toolset Blocks installed on your WordPress website. Let’s dive deeper and look at the basics of using this plugin. We are going to use a gym demo website to show you how to use different features. Here’s a quick overview of what we will cover in this post:
- Adding, editing, and moving blocks
- Displaying your content side-by-side
- How to navigate through blocks
- Displaying fields on a single block
- Combining fields with text in a single block
- Styling blocks
- Typographical controls
- Creating a template
- Building archive pages
- Adding a custom search
Adding, Editing, Moving And Deleting Blocks
While this might seem like a mystery the first time you try it, it’s straightforward to do it.
- Open the post or page you want to edit, then click the + button to add a block.
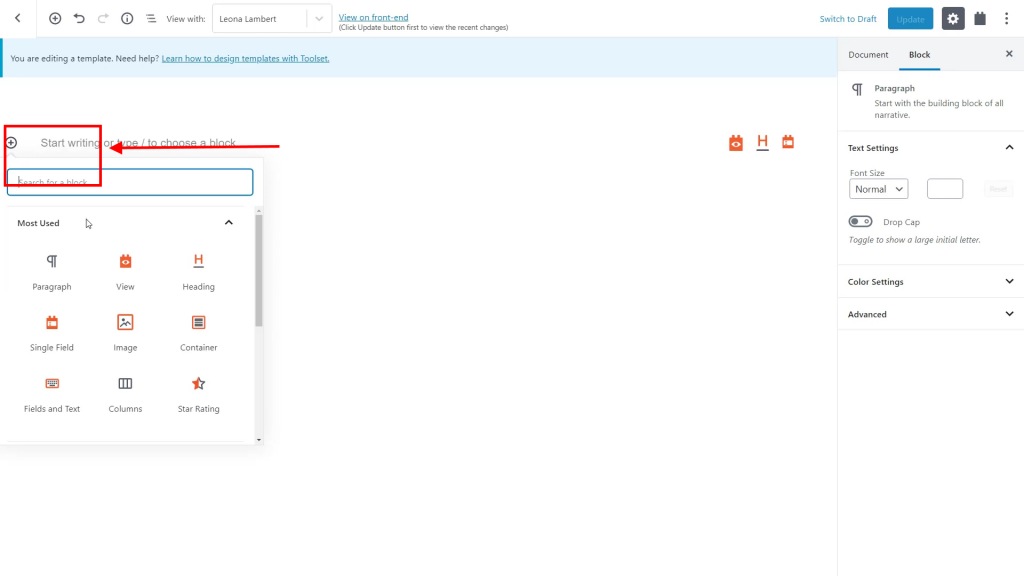
- A menu with different types of blocks will appear. You can either select the block you want to use from the menu or search for it on the search bar.
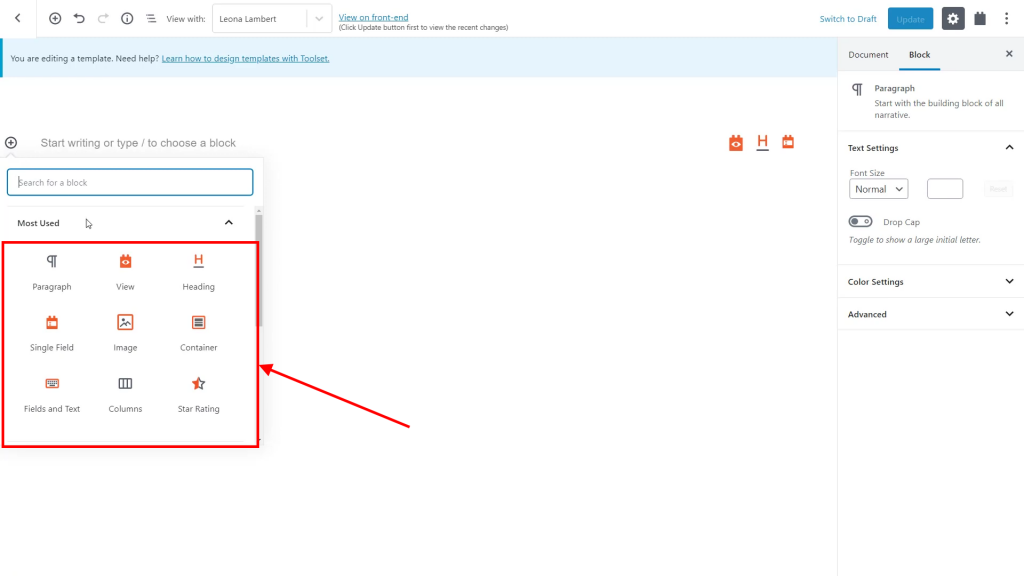
- Once you have selected a block, add the preferable content.
- Use the controls on the left side of the block to drag and drop it to a different position.
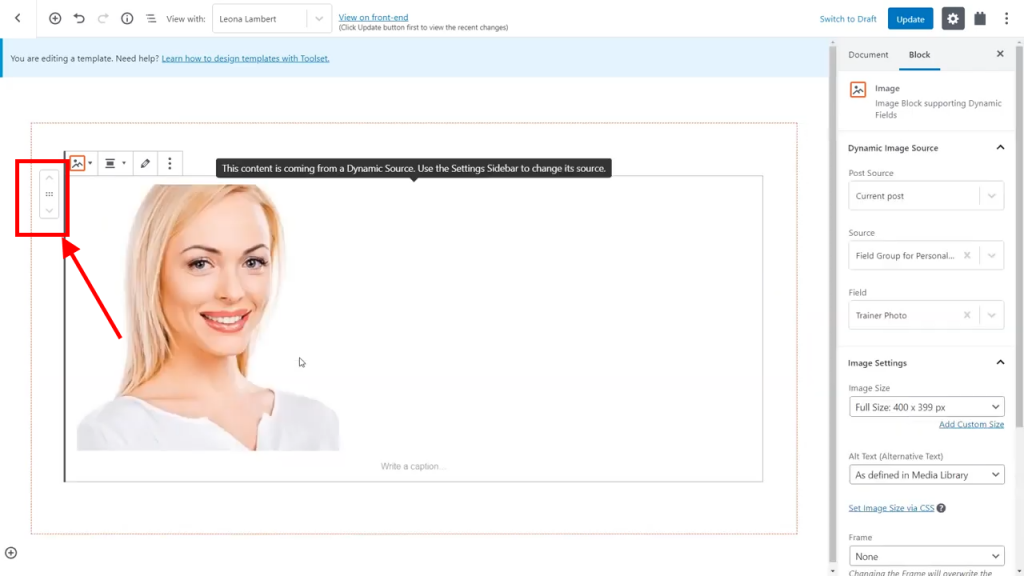
- Edit and tweak the block from the right sidebar. It’s also worthwhile to note that different blocks have different editing options so that things might change a little bit.
- Find additional options on the three dots menu. Such options include Duplicate, Remove, and Group the block.
How To Display Content Side-By-Side Using Columns
If you don’t want elements to occupy the whole width of your page, you can display them side-by-side. To achieve this, use the WordPress built-in columns block.
- Simply click the + button on your block.
- Choose the Columns blocks option.
- Different column layouts will be displayed. Choose the column layout that suits you the most and insert it on your post.
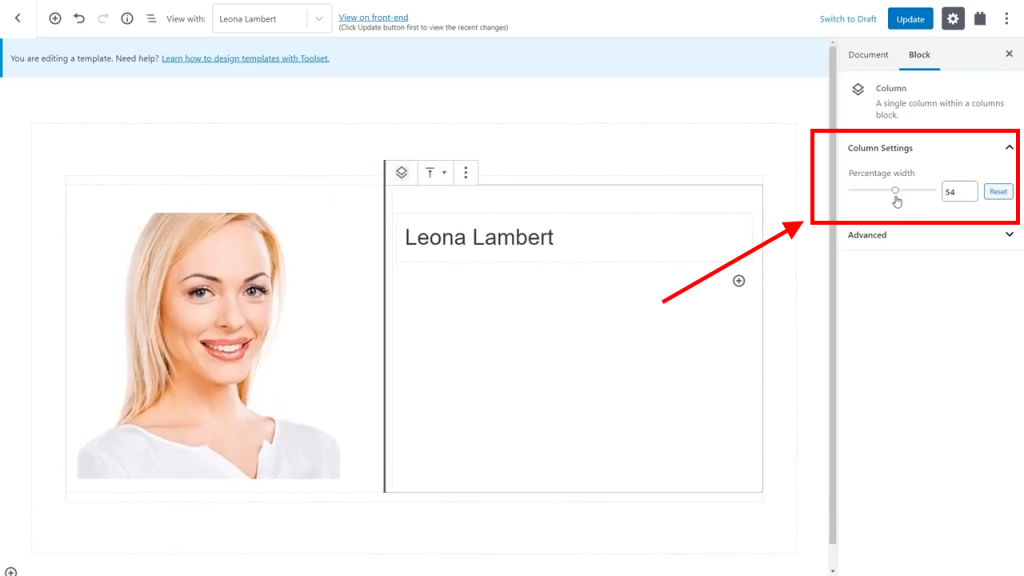
- Change the column’s width from the right sidebar by selecting the column you want to edit, and moving the toggle button to the left.
How To Navigate Through Blocks
As you continue to build your website, the number of elements might increase, leaving you with multiple blocks. Navigating through such blocks manually without using any tool can be hectic. Well, the Navigation button located on the top part of the editor lets you see the structure of your post’s elements and their hierarchy.
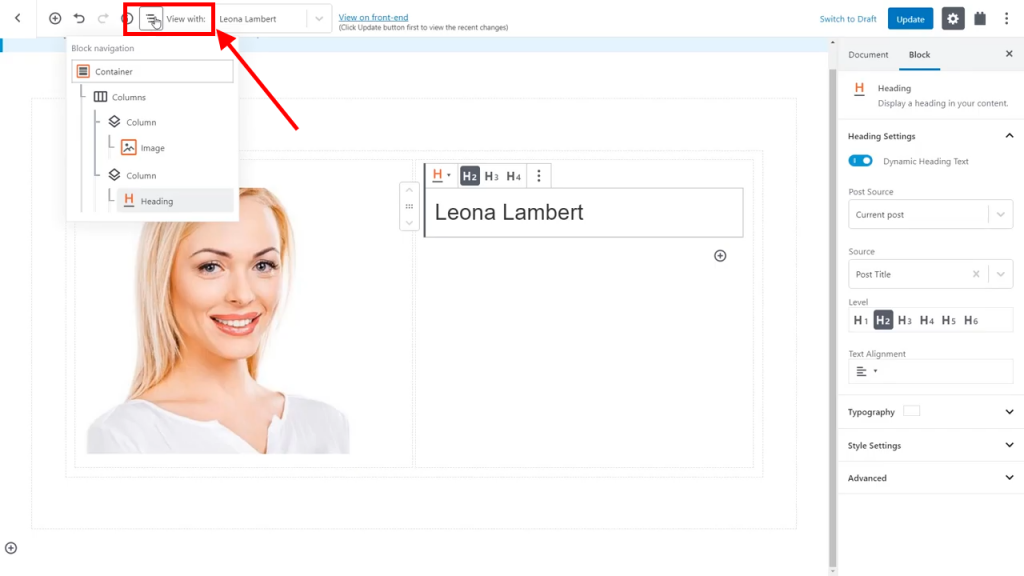
Not to mention, it lets you choose the element you want to edit.
Displaying Fields On An Single Block
Toolset Blocks lets you display different individual fields and custom fields as a block. In the example below, we inserted a Content field on the gym website demo using a Single Field block. Here’s how you can do it yourself:
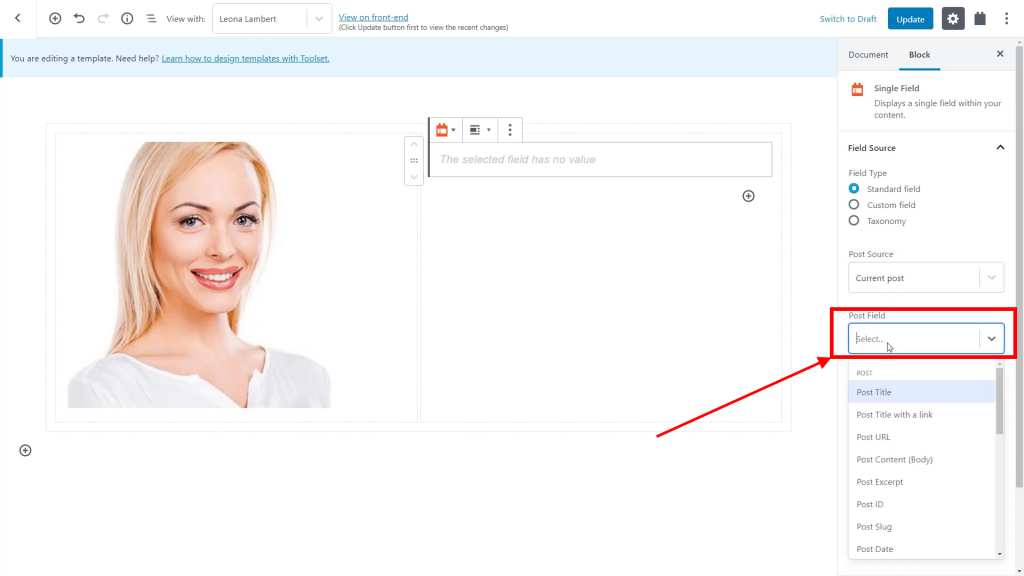
- Click the + button and choose the Single Field block.
- From the right sidebar, select the Standard Field option. It is located under the Field Type section.
- Choose the Post Content field under the Post Type section.
Combining Fields With Text In A Single Block
From time to time, you might need to combine values from a particular field with free form text to pass more information. Well, Toolset has a block suited for that purpose. To add that block to your post, follow these steps:
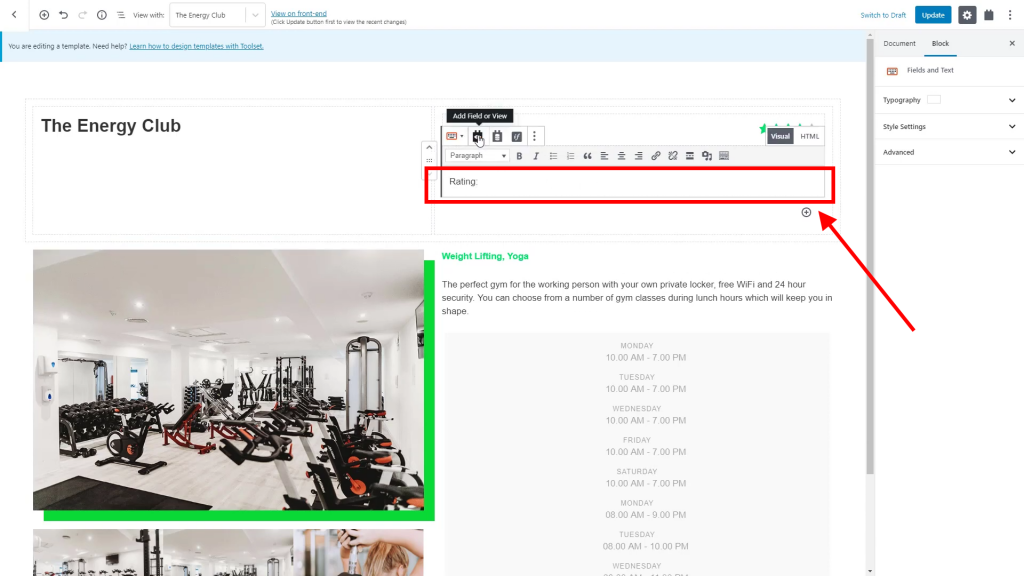
- Click the + button and search for the Fields And Text block.
- Select it and insert it to your post.
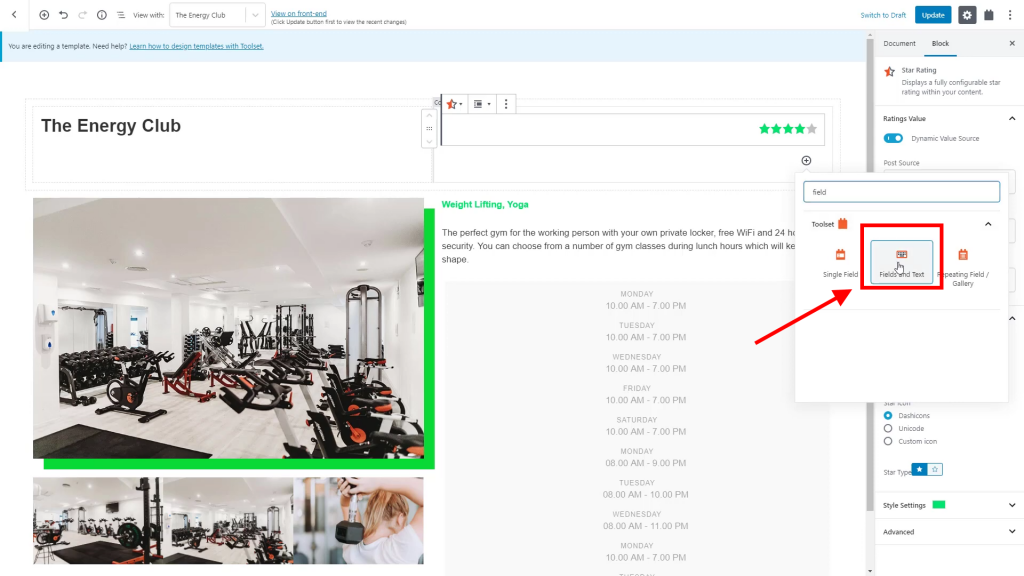
- Click on the block’s editor to add your preferred label in text form. On the gym website demo, we added ‘rating’ as the label of the field.
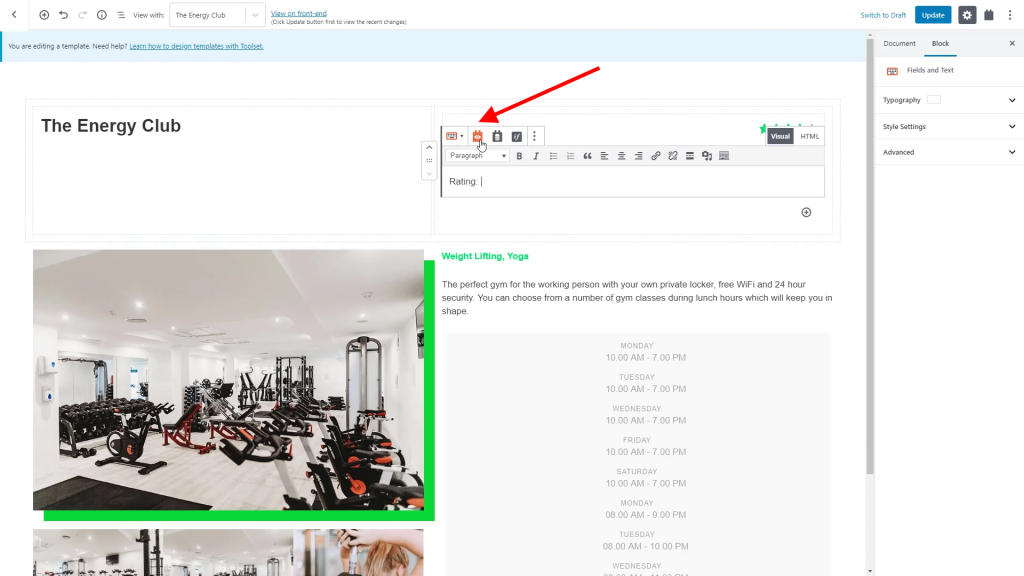
- Click the Views button on the top toolbar, and select the custom field you want to add.
- Choose the format of the custom field. Click the Insert Shortcode button to display the field on the block.
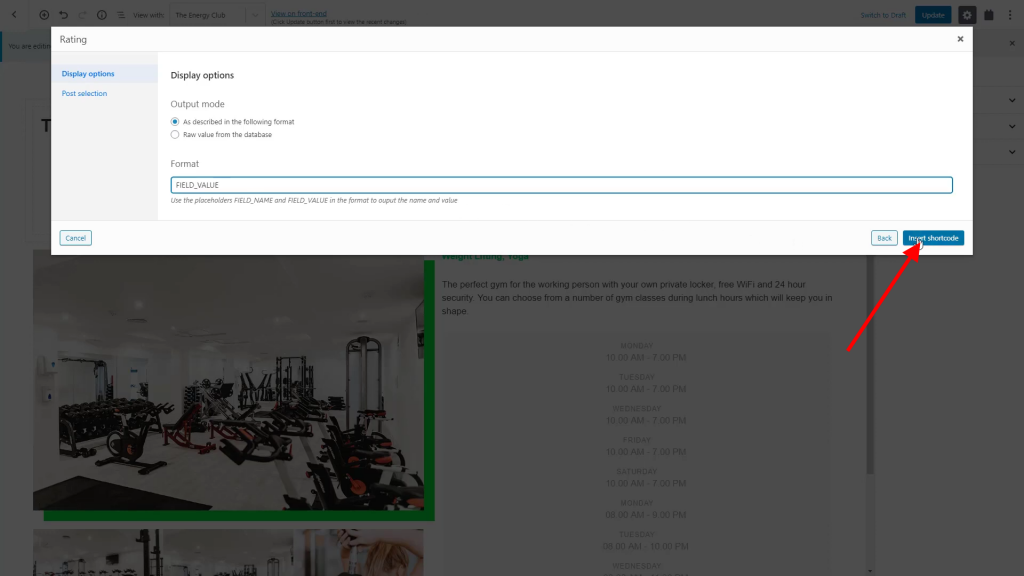
- You can also use the Form and Conditional buttons found on the top toolbar to add more features to your block.
Styling Blocks
One of the best features that Gutenberg and Toolset Blocks packs is the ability to let you customize your website to suit your style. You can easily change the text’s font, color, and the background of the blocks.
You can style blocks in two different ways:
Using The Interface
- Choose the block you want to style.
- On the right sidebar, click the Style Settings options to expand its menu.
- From there, you can tweak the border, padding, and background color.
Each block has unique styling features that can be used to improve the design. Image blocks have options that let you change the size while text blocks have options that let you change the font.
Using The Container Block
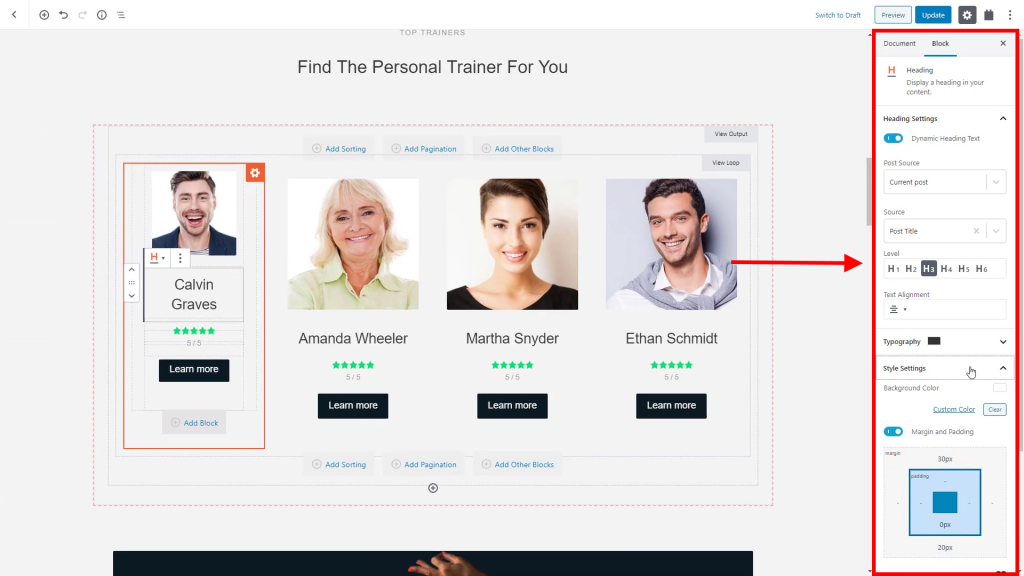
The Container Block lets you group different blocks, making it possible to style them as a whole.
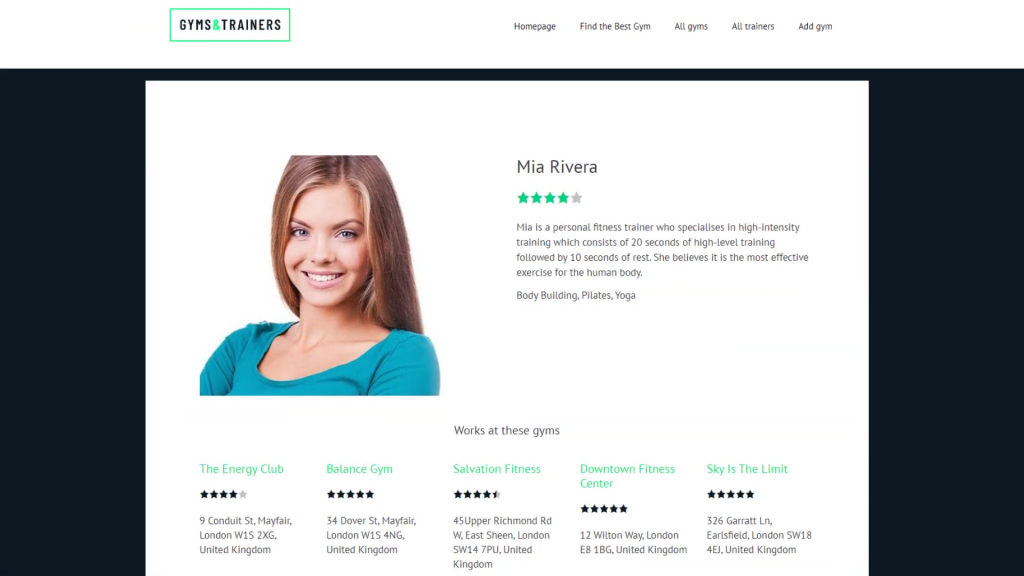
An example of styling elements using a container block is well-illustrated on the gym website demo. A Container Block was used to display various information about personal trainers. It displayed post and custom fields such as the name, specialties, and rating of each trainer.

Typography Controls
With this plugin, you can format your posts’ text from the typography section located on the right toolbar. Here are some of the typography controls it offers you:
- Font style; this lets you choose the most suitable font for your text.
- Text transform; this lets you format your text with either uppercase or lowercase letters.
- Text color
- Text shadow
- Font size, line height, and letter spacing
Creating Templates To Display Custom Content
Setting up the main structure of your website requires you to have custom post types with custom fields and taxonomies. Without creating a template, your custom posts will only display the heading and body on the front-end of your website. WordPress default output option doesn’t display various custom fields.
A Toolset content template lets you display custom fields. Once you design a single template, everything on that template is automatically applied to all related posts.
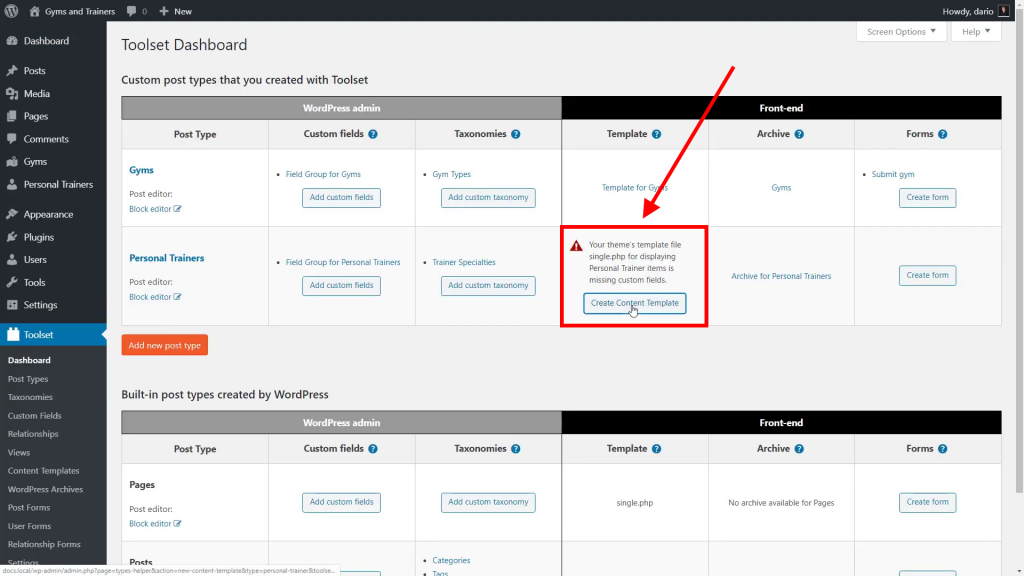
In this example here, we created a gym content template. It is referred to as a content template because you only need to design different parts that display your post’s content. Other sections of your website, like the header, menu, titles, sidebar, and footer, will be generated from your integrated theme. To design a template, follow these simple steps:
- On your WordPress admin menu, navigate to the Toolset Dashboard, then click the Create Content Template button. In our case, we choose to create a template that will display personal trainers’ content.
- A template will be created automatically, and you will be directed to a Block Editor section.
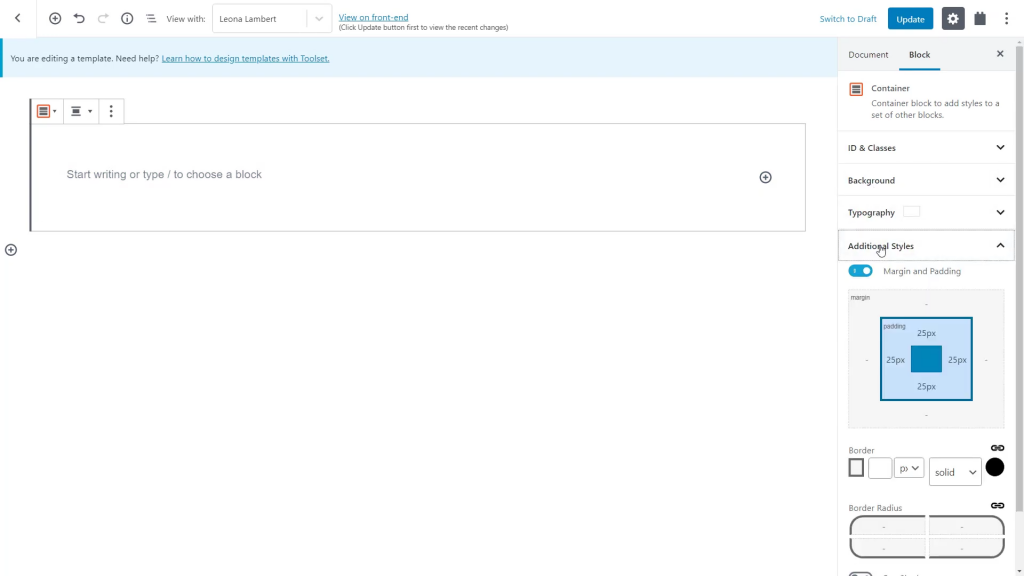
- Insert the different blocks that will be used to add fields to your template. Use Image, Content, and Heading blocks to display various fields.
- Once you finish adding content to your template, save it. The template layout will be applied to related custom posts.
Building Your Archive Pages
In WordPress, different post types and taxonomies get an index page where all related posts are listed. Such index pages are referred to as archives. An example of an archive is your blog page—all your posts all listed there. While themes can be used to display archive pages, they don’t generate impressive layouts. Most themes only display the post title and body, limiting your ability to design and display custom fields.
With Toolset Blocks, you can customize your archive pages and display custom fields. To create a custom archive page, follow these steps:
- Head to the Toolset Dashboard from your WordPress admin menu, and click the Create Archive button.
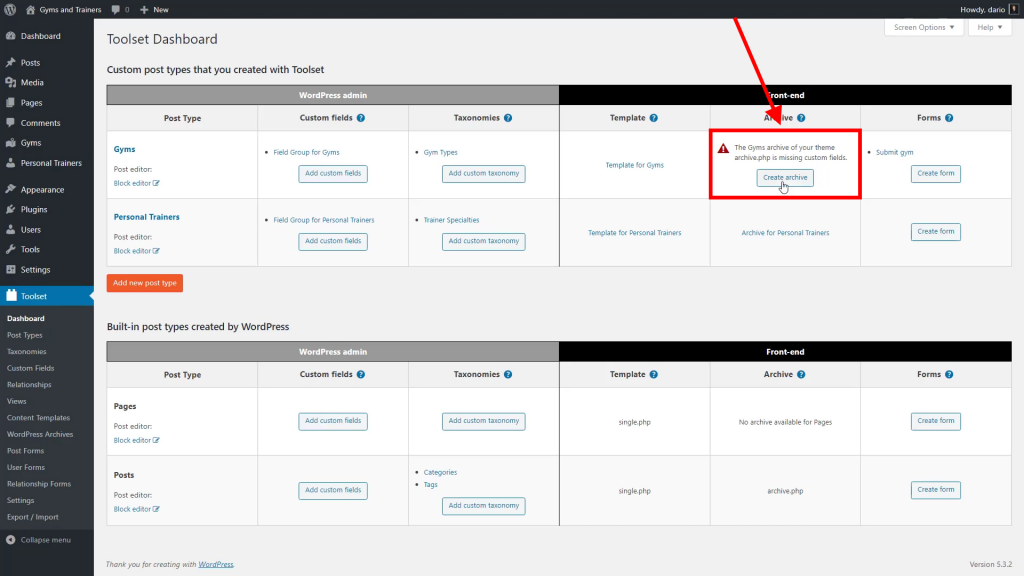
- Choose the type of posts that will be listed on the Archive page.
- A Toolset Archive will be automatically created; then you will be re-directed to the Archive Editor.
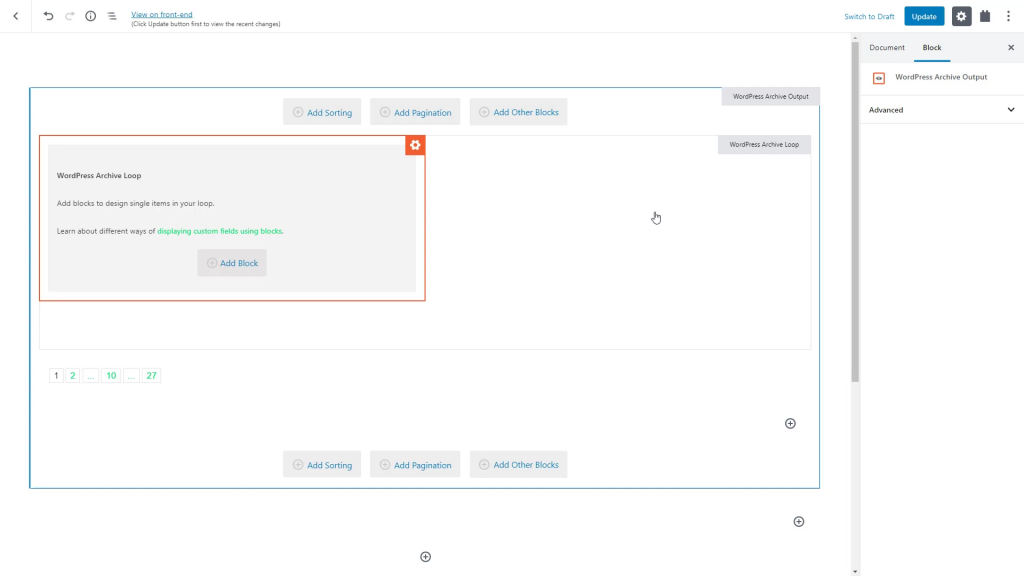
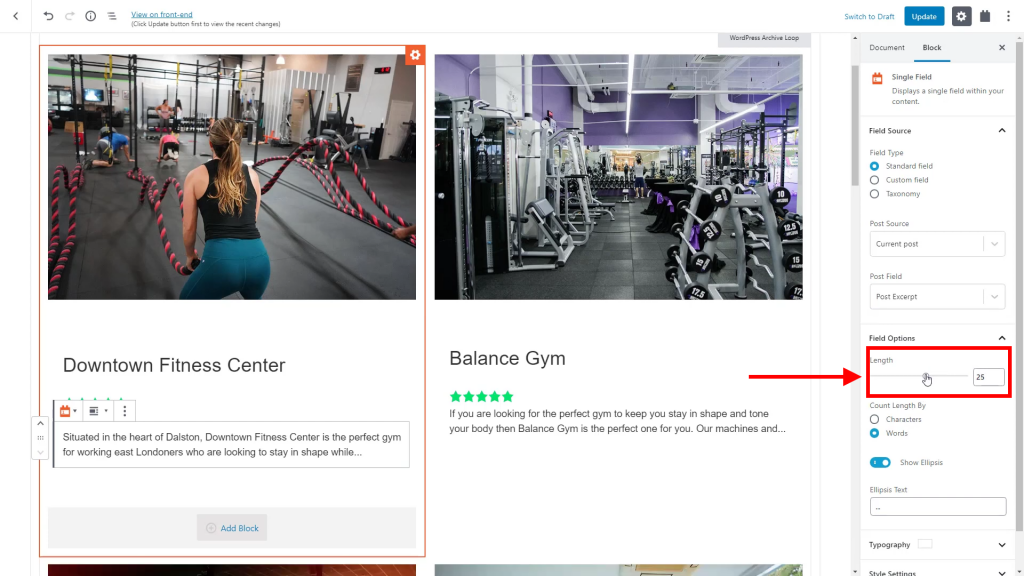
- Insert the different types of blocks you will be using to design your archive. In the gym website demo, we used Heading, Single Field, and Image blocks.
- Adjust the number of words you want to display on the Single Field Block from the right sidebar.
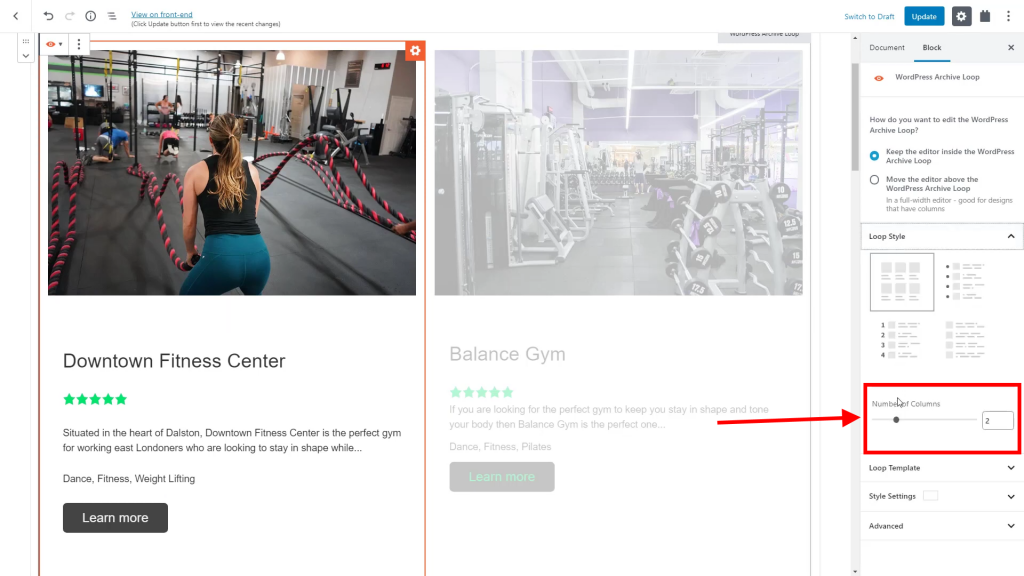
- For a faster workflow, duplicate blocks by clicking the three-dots button, then choose the Duplicate option.
- To change the number of columns on your archive, click the Navigation button, and select the WordPress Archive Loop option. Under the Loop Style Section on the right sidebar, change the number of columns and the layout.
Displaying a Custom list of content
With this plugin, you can add a view block and customize it to display different fields as a list. Follow these steps to do it:
Go to the Toolset Blocks’ Dashboard and create a new custom content template based on what you are planning to display. In the demo, we created a ‘gym’ custom post type.
- Click the + button, then key in ‘view’ to locate the View block.
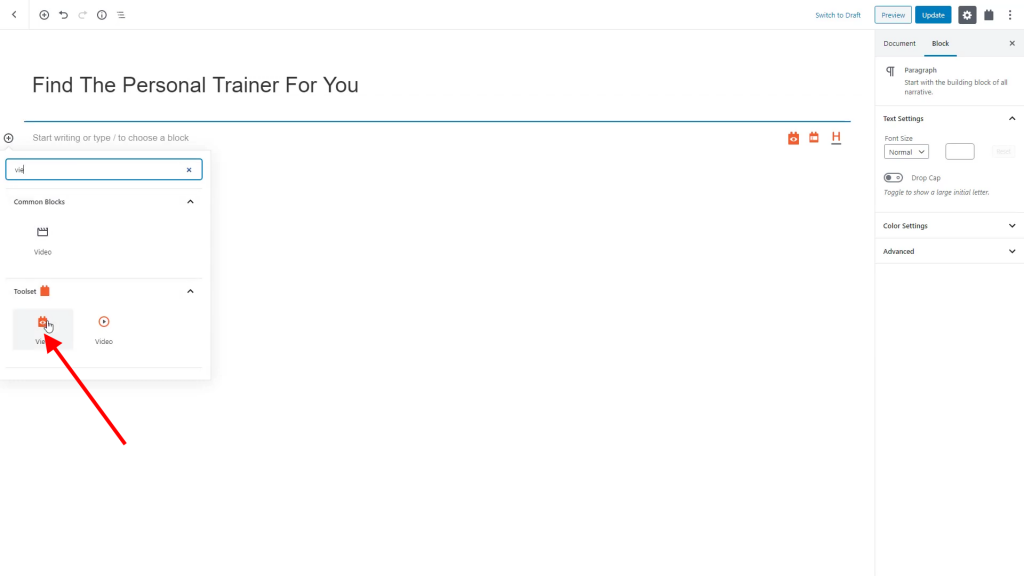
- Select the View block, then name it and choose your desired layout.
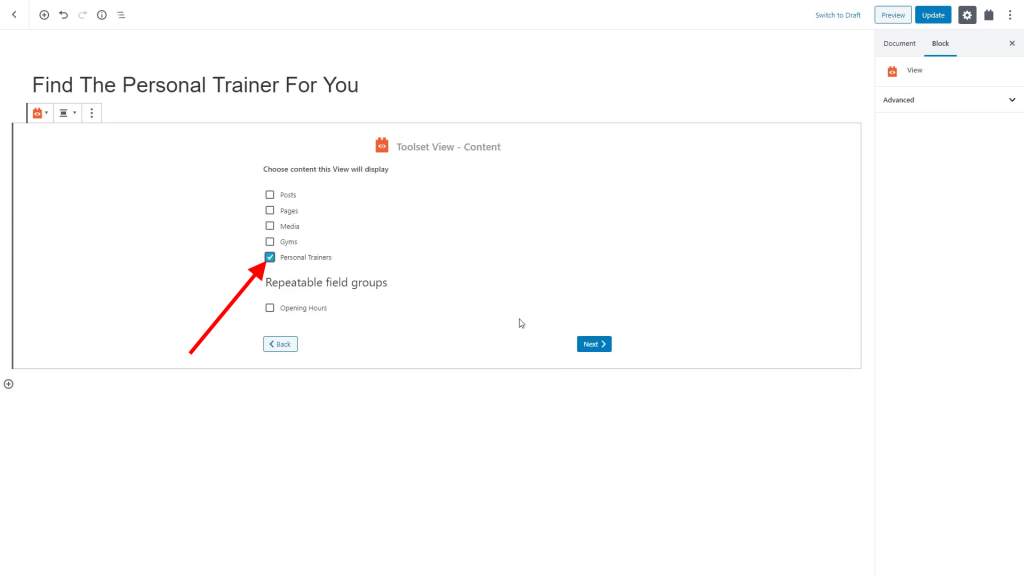
- Choose the content that should be displayed on the view block. In the gym website demo, we selected personal trainers’ details.
- Once everything is set up, you can start adding fields to your view using different blocks.
- Add a Heading block and turn on the option for displaying dynamic content.
Adding A Custom Search
Navigating through multiple lists of posts can be hectic. A custom search helps your website visitors to locate different posts they might be looking for. For instance, if a user is looking for a gym that offers aerobics, searching for it will easier than browsing through different pages to find it. To add a custom search to your website, follow these steps.
- Add a View block to your page.
- Activate the Search option on the view creation wizard.
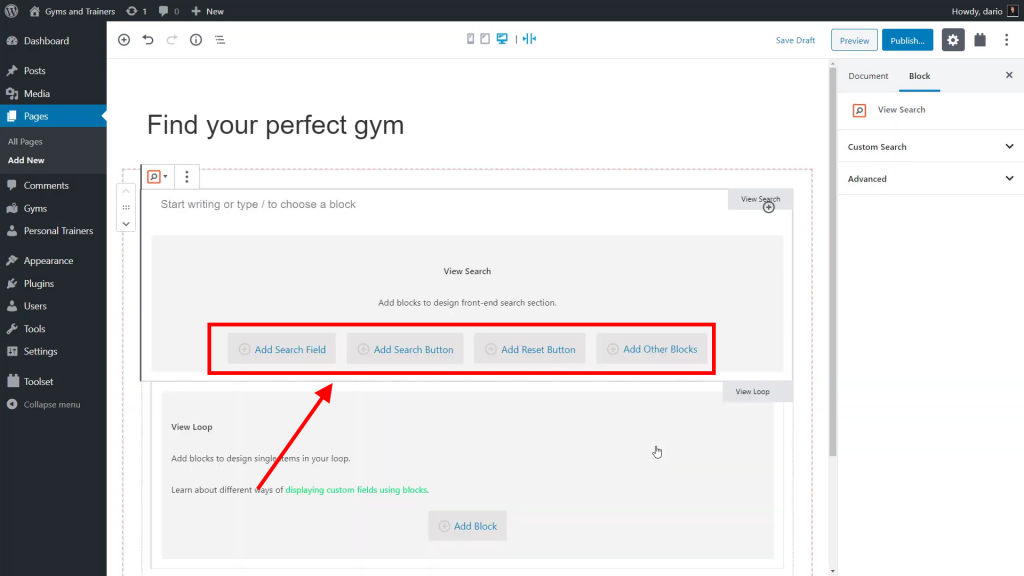
- From the view editing section, add search buttons and choose the search fields that should be displayed.
- Tweak settings for the search fields on the right sidebar.
Over To You
Now that you’ve learned the basics of using toolset blocks, it is time to install it and try it out on your website. It will help you save your time while building a website. With Toolset blocks, you are not required to have any knowledge of HTML and PHP to have a professional-looking website.
Have you ever tried to build a website before? What was your experience? Let us know in the comments below