Looking for a way to create a custom WordPress registration page? If you allow public registration on your site, the default WordPress register page isn’t super user-friendly.
To fix that, you can customize it to meet your needs or even create a completely brand new registration page that collects additional information about your soon-to-be users.
In this post, we’ll show you step-by-step how to customize your WordPress registration page in a few different ways.
Let’s dig in!
Two Ways to Customize the WordPress Registration Page
To create your custom registration page, you can go two main routes:
- Customizing the default page
- Creating a completely separate registration page
Let’s go through the different methods…
Customizing the Default Registration Page
If you allow public registration on your site, the default WordPress registration page looks something like this:
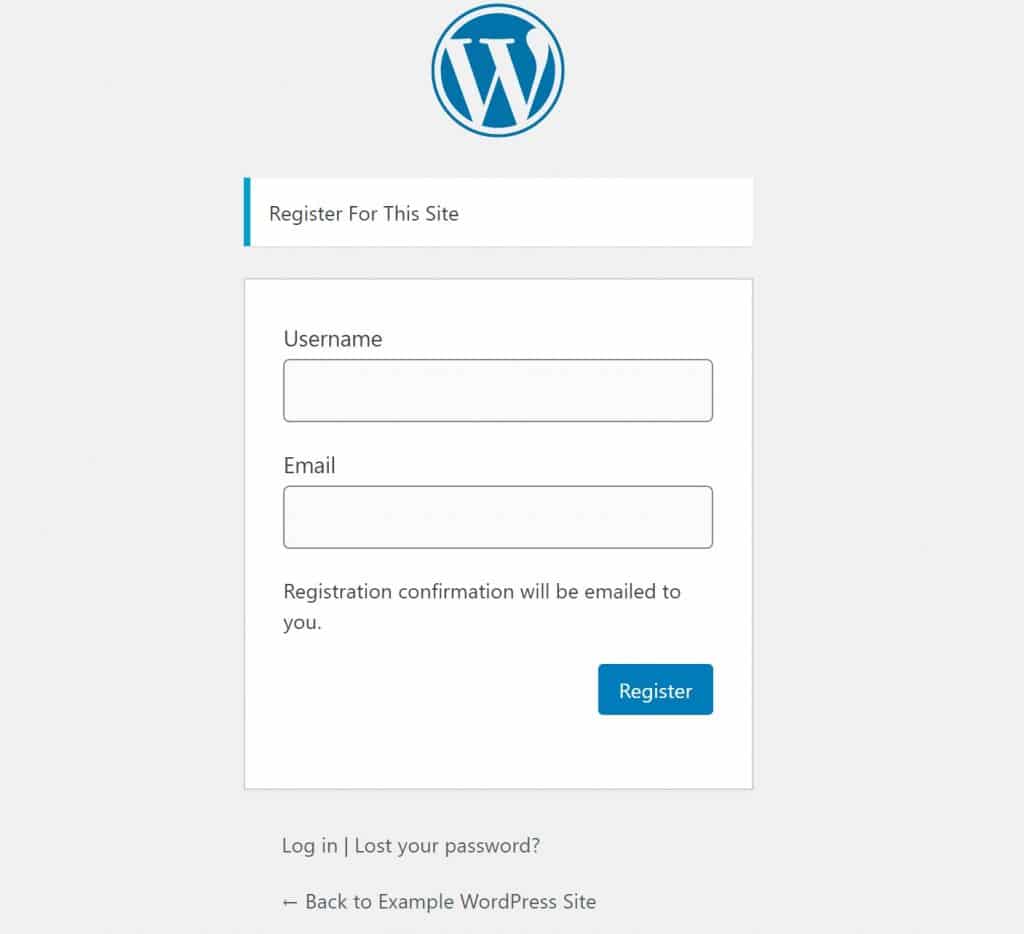
It’s also located at yoursite.com/wp-login.php?action=register
With this method, you can customize this default page to:
- Add your own logo
- Change the colors to match your branding
- Etc.
It will maintain the same basic layout, just with your own styles and branding.
For simple situations, this might be all you need. However, the drawbacks of this approach are that you can’t:
- Add more custom fields to collect additional user profile information.
- Make huge changes to the layout.
- Change the URL to something more user-friendly – e.g.
yoursite.com/register
For more flexibility, you might prefer the second method.
Creating a Separate Registration Page
If you want even more customization options, your other option is to create a completely new registration page with your own registration form.
For example, you can go to Pages → Add New and then add a block for your registration form, while maintaining full control over all the content, layout, and style choices on the page. Or, you can even include your registration page in a design that you’ve built with a page builder like Elementor.
Personally, I think this is the best approach for most public-facing sites because it gives you full control over the experience.
In the next sections, I’ll show you how to set up both methods.
Method 1: Customize the Default WordPress Registration Page
The default WordPress registration page is really just an offshoot of the default WordPress login page, so you can customize it using any login page customization plugin.
There are a bunch of options here, but I like the free Login Designer plugin from Rich Tabor because it has the best user experience (at least in my opinion).
Once you install and activate it, you can open the WordPress Customizer (Appearance → Customize) and go to the new Login Designer section in the Customizer.
Login Designer includes a few pre-built templates that you can choose from:
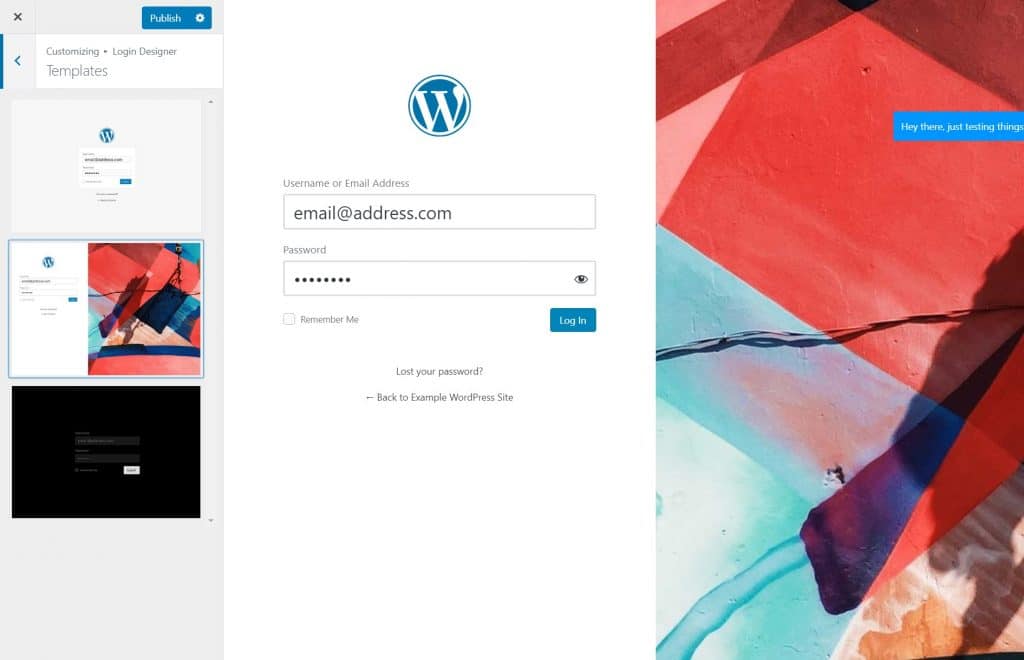
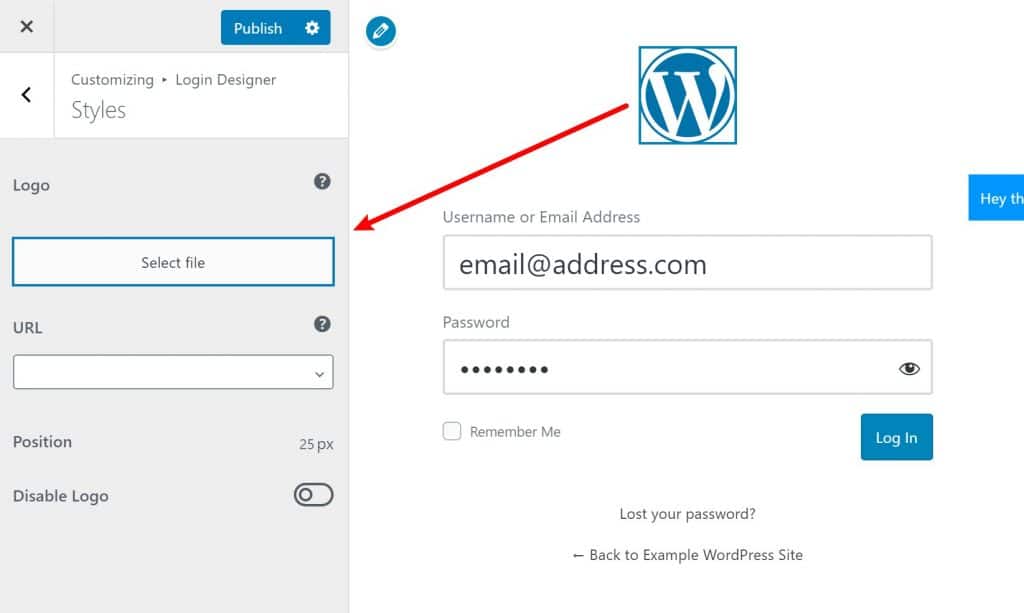
To customize individual parts of your registration page, all you do is click on them in the live preview. For example, if you want to change the logo, you can click on it to open the logo settings:
You can do the same thing for the form fields, and so on:
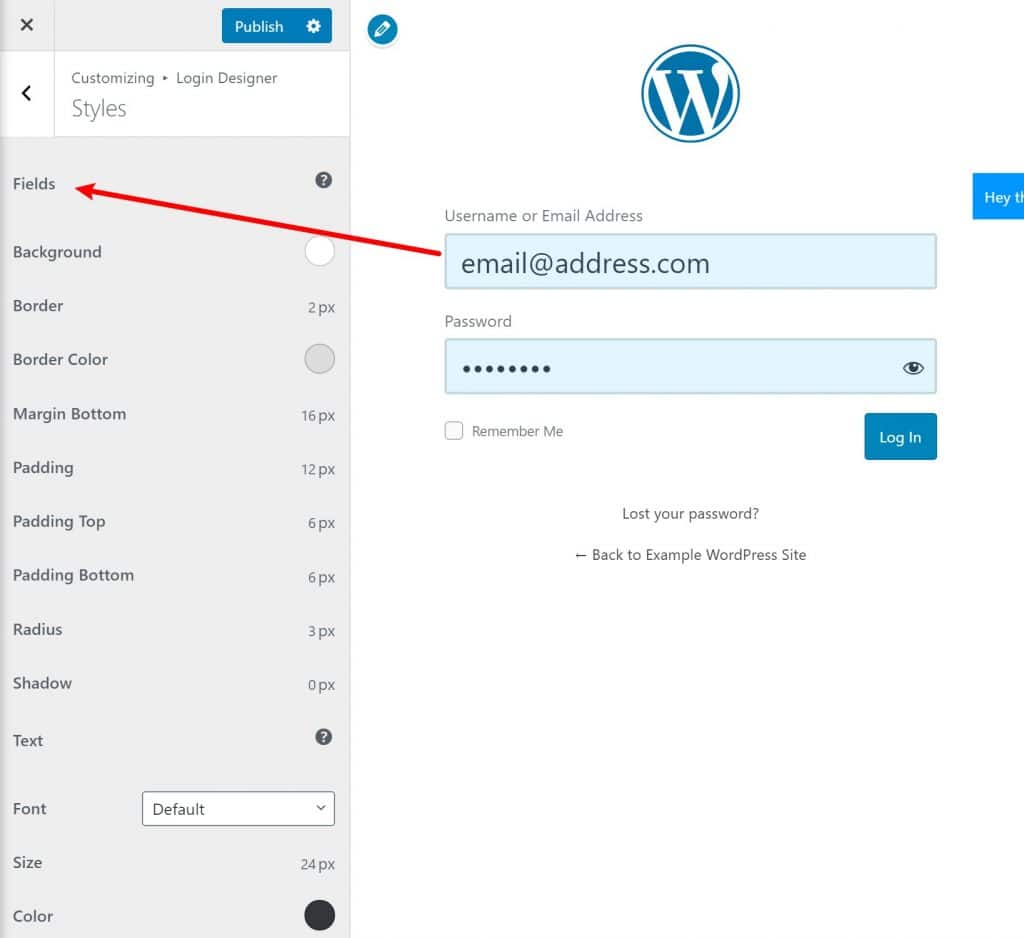
Remember – while the live preview shows your login page, the same design will apply to your registration page.
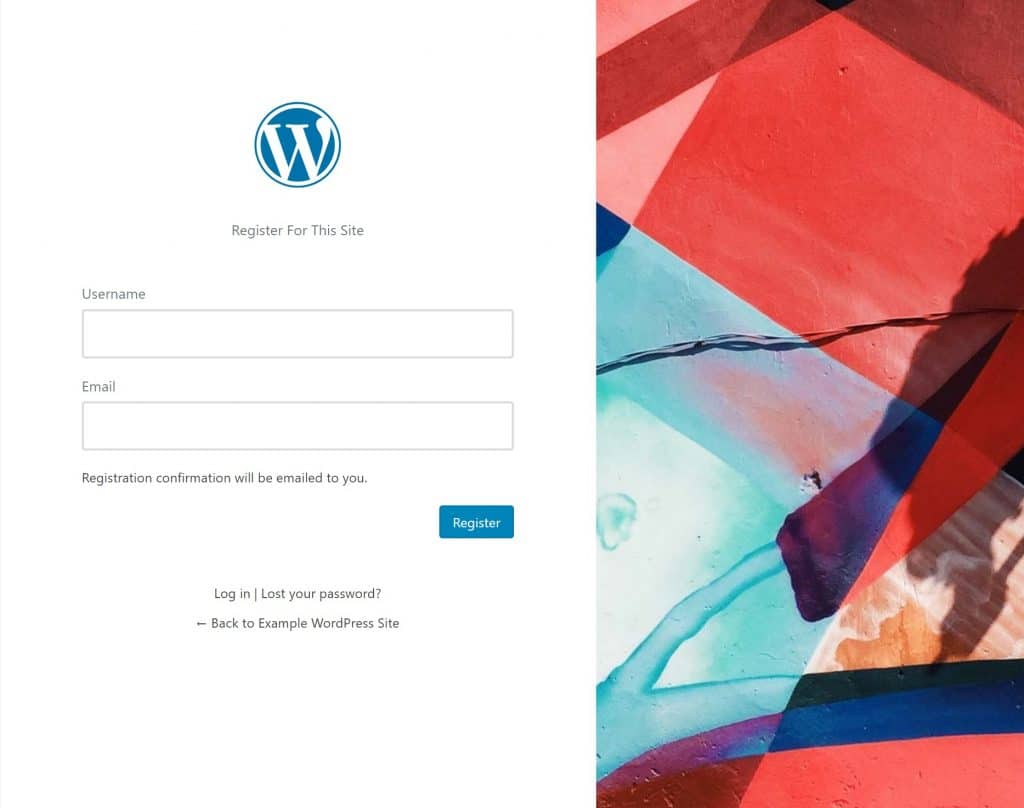
And that’s it! When you finish up your design, your new registration page will use the design:
Method 2: Create a 100% Custom Registration Page
With this second method, you can build your own registration page from scratch. Here, you have a lot more options in terms of which plugins you can choose. I’ll show you three methods:
- Profile Builder – this is a good option if you want to add more fields to your registration form to collect additional user profile information.
- User Registration – this is another good option if you want to customize the fields on your registration form.
- Elementor + UAE – this is the best option if you want the most design flexibility. You do get some choices for customizing the form fields, but not nearly as many as the other plugins.
Profile Builder
Profile Builder is a freemium plugin that improves how WordPress works with registered users. As part of that, it lets you create a custom registration form that collects as much (or as little) information as you want from users when they register.
You can add extra profile fields to your registration form and you can also let users manage all of their profile information from the front-end.
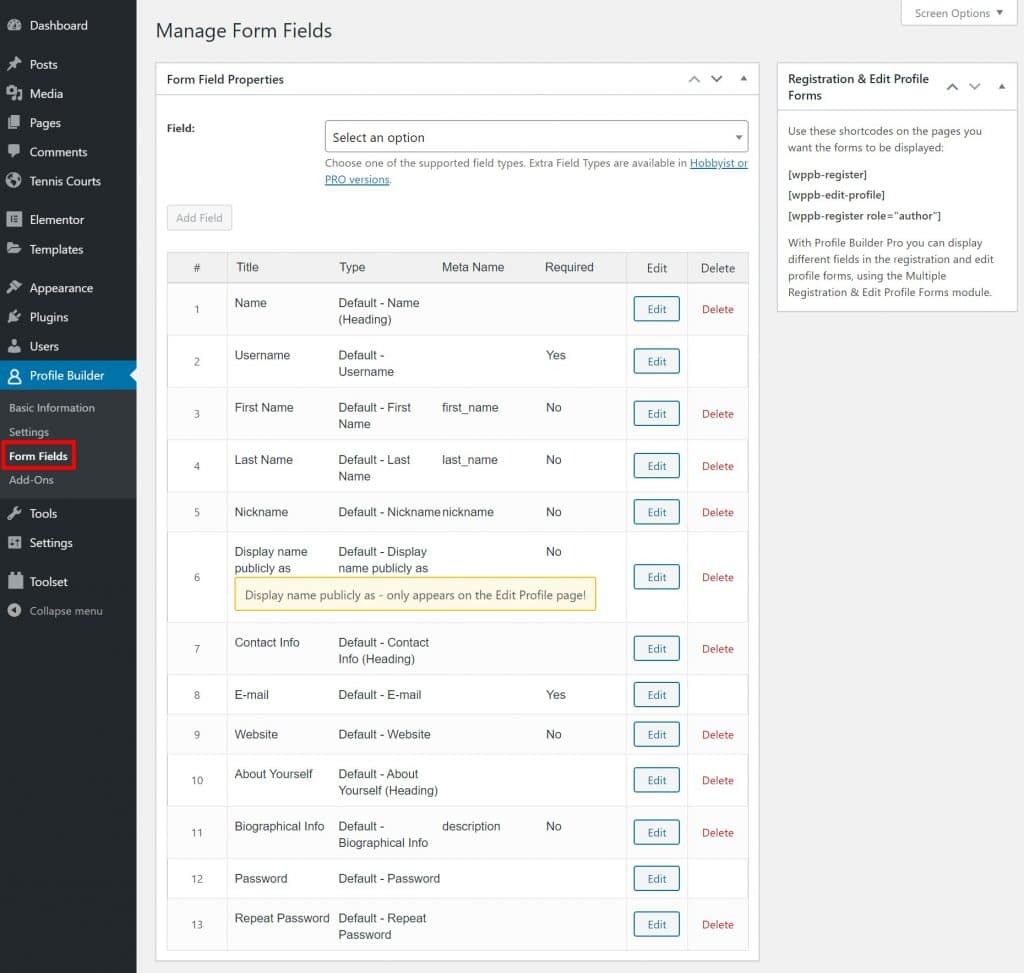
To get started, install, and activate the free plugin from WordPress.org. Then, go to Profile Builder → Form Fields to control which fields to use on your registration form.
With the free version, you can choose from all the default WordPress profile fields. For example, you can let people add:
- A biography
- Their website
- Nickname
- Etc.
You can also use drag-and-drop to rearrange the order of the fields:
If you want to add your own custom fields to the registration form, Profile Builder can do that…but you’ll need the Pro version. Specifically, you’ll want the $69 Hobbyist version.
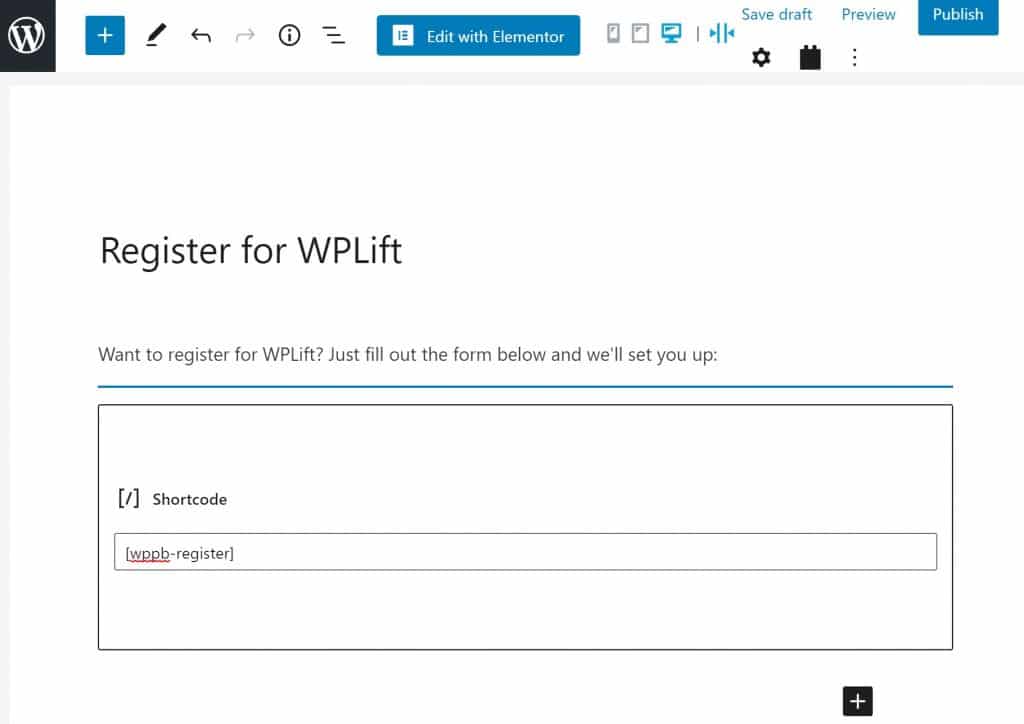
Once you’ve set up the fields to use on your registration form, you can add the form anywhere on your site using the [wppb-register] shortcode. If you use this shortcode in the block editor, you’ll be able to take advantage of all the block editor’s native features to add content and customize the layout of your registration page:
User Registration
User Registration is another freemium plugin that shares a lot of similarities with Profile Builder. It also lets you use drag-and-drop to create your own custom registration form.
One advantage it has is that it lets you add custom fields even with the free version. You can create your own custom text input fields, as well as radio buttons or checkboxes. If you’re willing to pay, you can also unlock additional fields like:
- Phone
- Profile picture
- Time picker
- Etc.
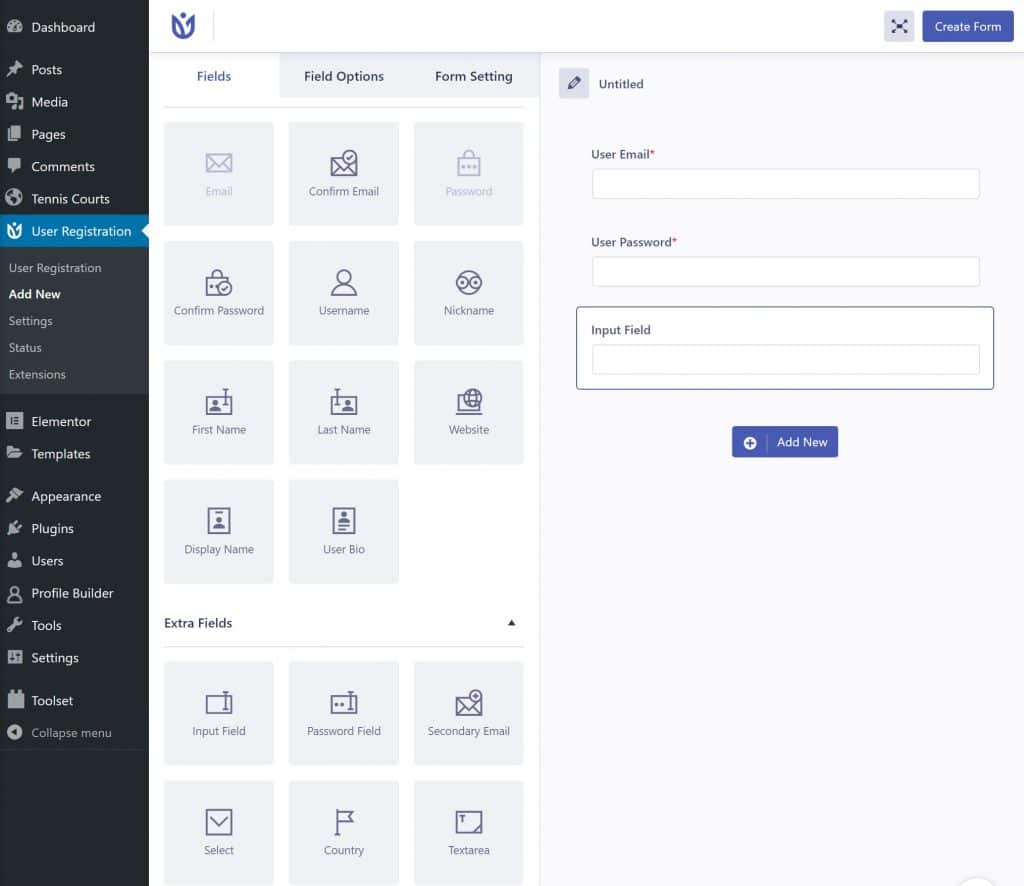
Once you’ve installed and activated the free plugin from WordPress.org, go to User Registration → Add New to create your custom registration form:
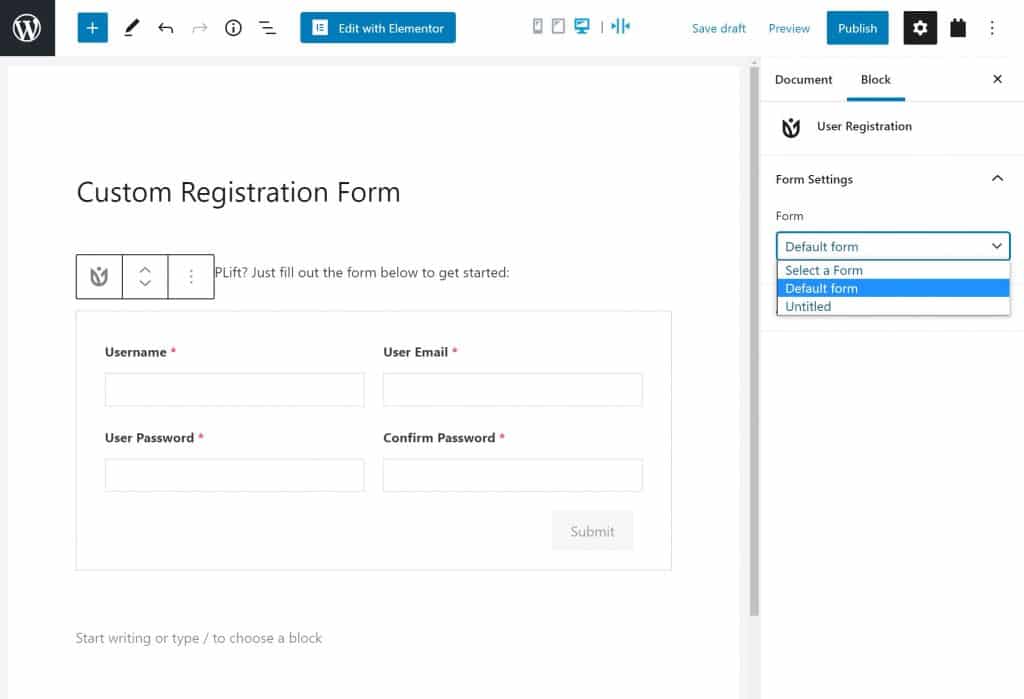
Once you’ve created your form, you can add it to any post or page using the User Registration block or a shortcode:
Elementor w/ Ultimate Addons for Elementor
If you want the most design flexibility, you can use Elementor to create a custom registration page. Elementor gives you a visual, drag-and-drop interface to design all your content – it’s what we use here at WPLift.
Unfortunately, Elementor itself doesn’t include a registration widget. However, you can add this with third-party Elementor widget plugins.
Personally, I like the widget in Ultimate Addons for Elementor, which is what I’ll use for the example below. However, this is a premium plugin – it costs $55 (and comes with 50+ widgets). If you’re on a budget, you can find some free extensions with registration widgets, though I haven’t tested them. One option is Element Pack Lite.
To get started, make sure you’ve installed at least:
- The free version of Elementor
- Ultimate Addons for Elementor (or another add-on plugin, if you want to try a free option)
Then, create a new page and edit it with Elementor.
To get started, you can create the basic layout and design using Elementor’s many options – check out our Elementor review or tutorial to learn more about these settings.
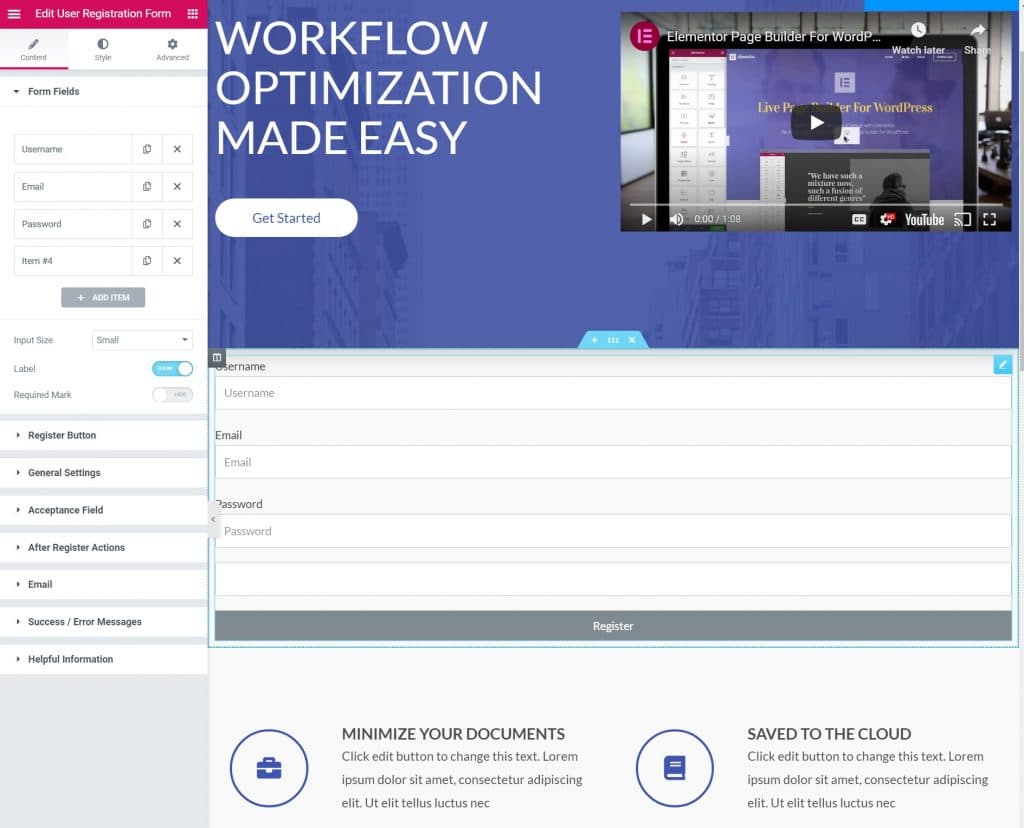
When you’re ready to add your registration form, drag over the User Registration Form widget. Then, you can use the settings in the sidebar to:
- Add more fields to your registration form. You only have a few limited options, though – you cannot add custom fields.
- Configure the style and layout of your registration form.
- Choose what happens after people register. For example, you can send them a confirmation email, redirect them to another page, and more.
Bonus: Create a Custom WordPress Multisite Registration Page
If you want to create a custom WordPress multisite registration page, the Profile Builder plugin that I detailed above will work with Multisite – learn more here.
Create Your Custom WordPress Registration Form Today
By now, you should have everything you need to customize the WordPress registration form.
If you just want to add some of your own branding, you can keep the native registration form but just switch up the styling to meet your needs.
On the other hand, if you want to customize both the design and the form fields, you should turn to alternatives such as Profile Builder, User Registration, or Elementor + Ultimate Addons for Elementor.
Do you still have any questions about how to customize the WordPress registration page? Ask away in the comments and we’ll try to help!

