
Once the payment is processed, you’re the proud owner of a live Squarespace website!
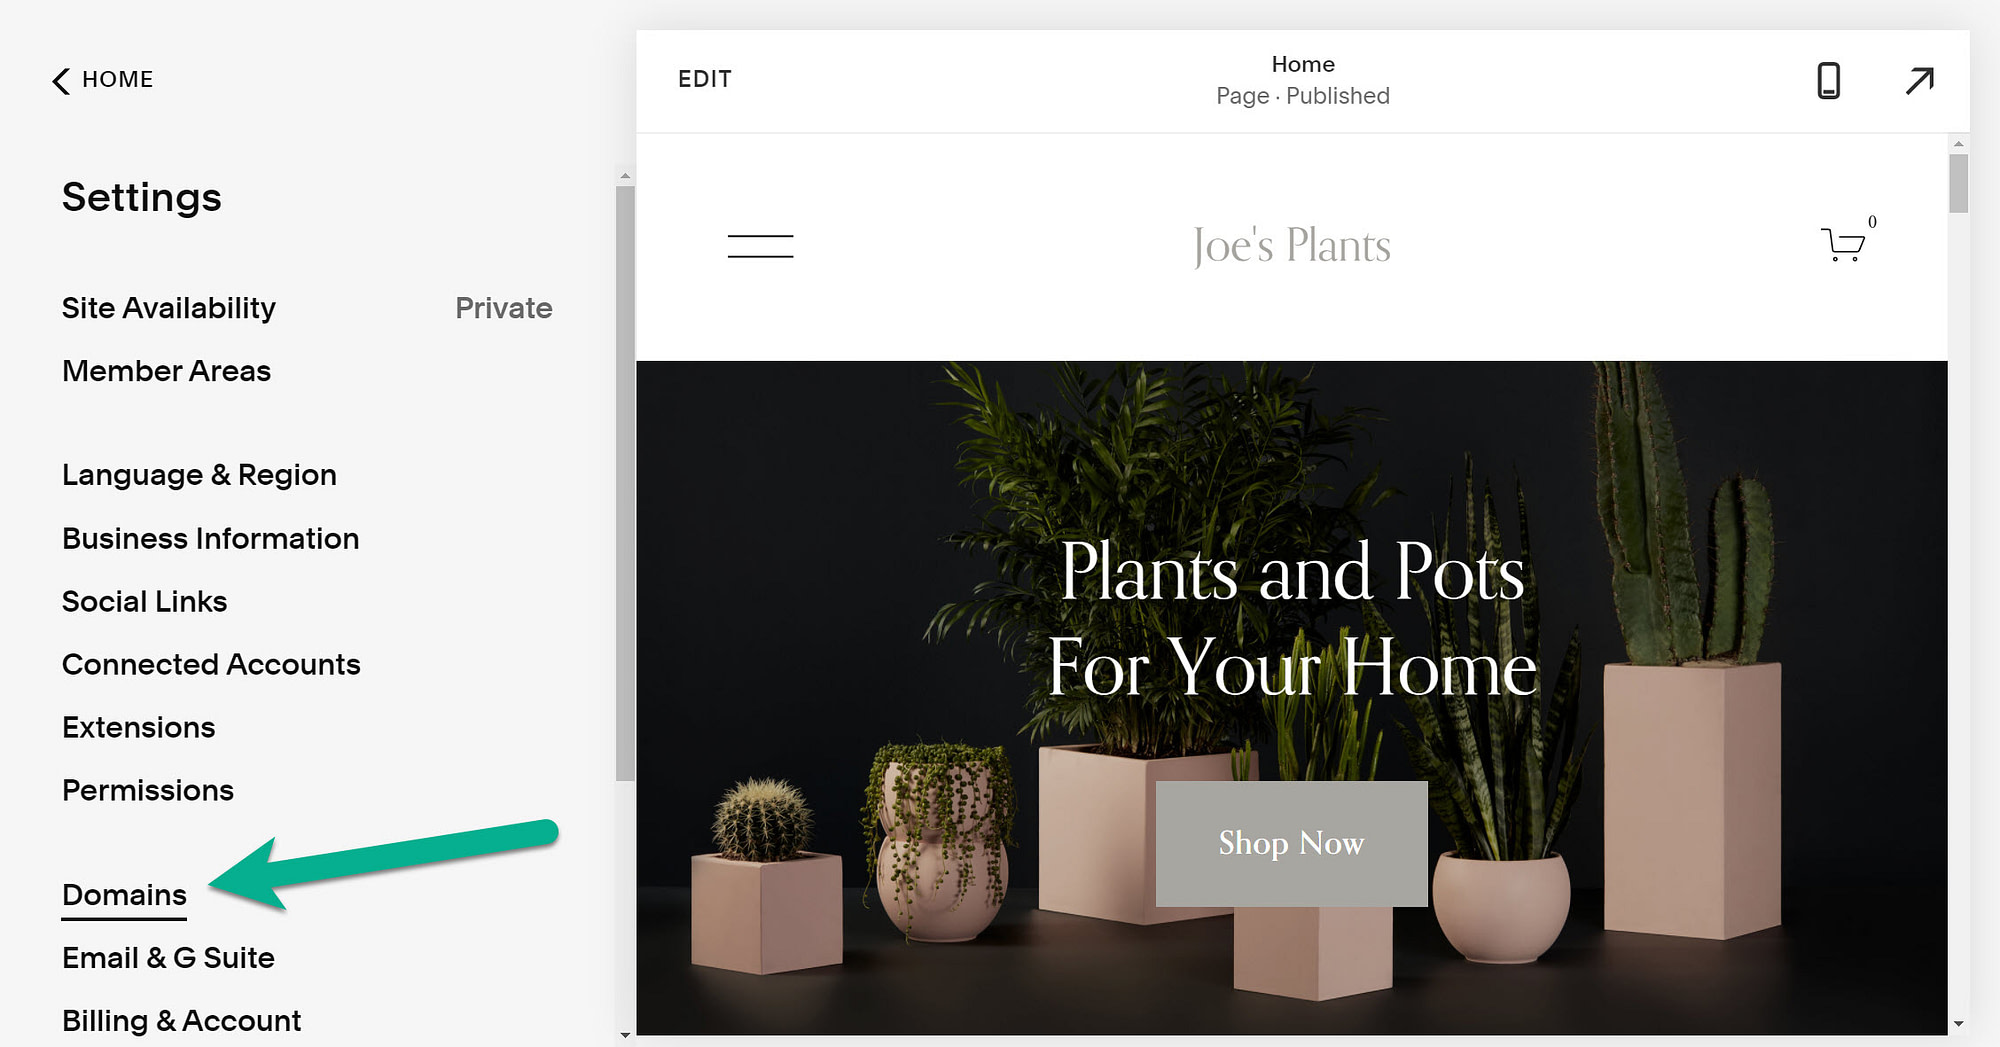
8. Activate a domain name
A professional domain name is the next step to making your website official. Luckily, Squarespace offers a domain name buying and transfer tool right in the dashboard.
Find and select the Domain button to get started.
You have a few choices when making a domain name for your website. A built-in Squarespace domain is already provided as a space for you to host your website, test out new designs, and play around with the Squarespace interface without having to pay for anything.
The other options include the Get a Domain button and the option to Use A Domain I Own.
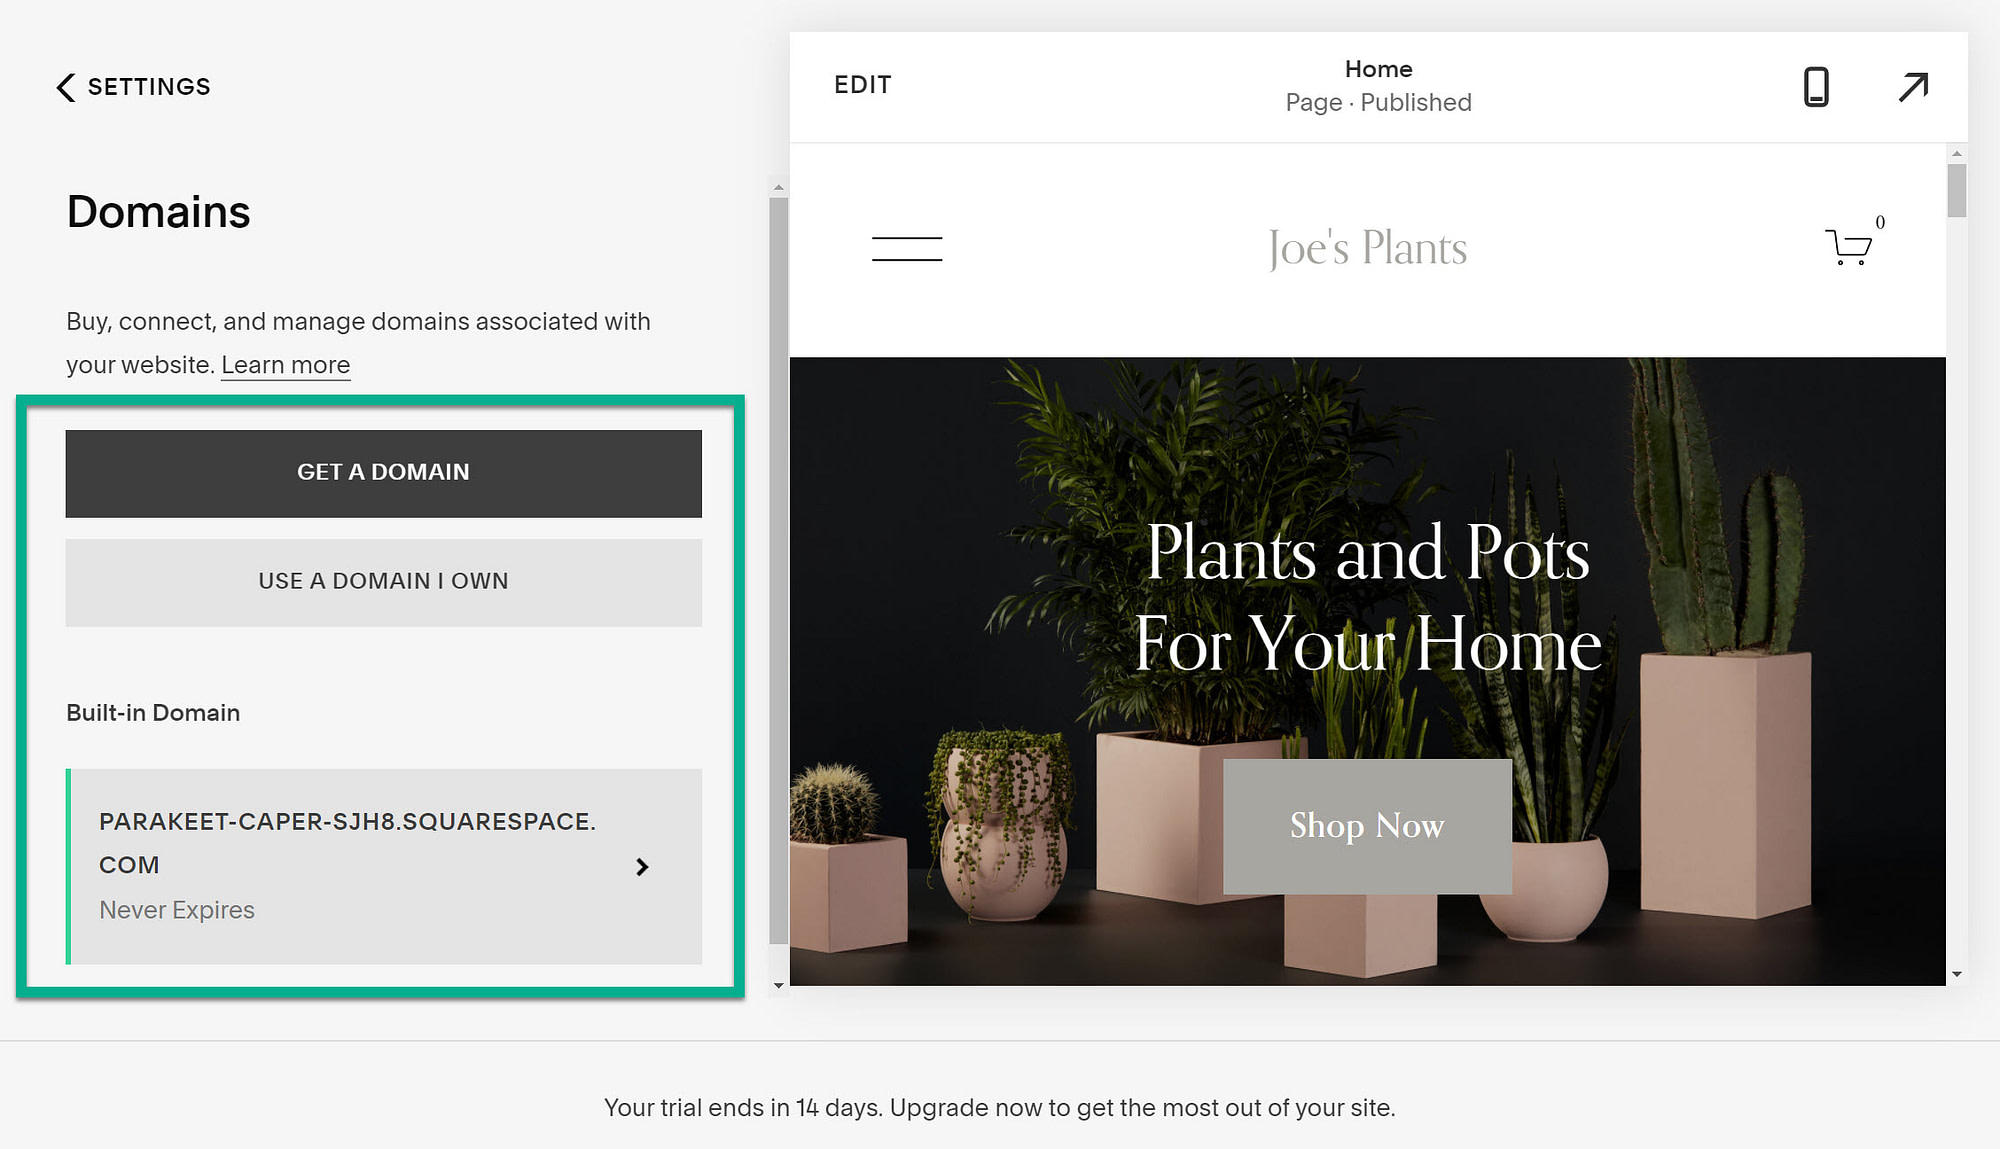
Choose Use A Domain I Own to walk through the process of transferring over a domain from another provider.
When going through the Get a Domain option, you’ll see a list of suggested domains.
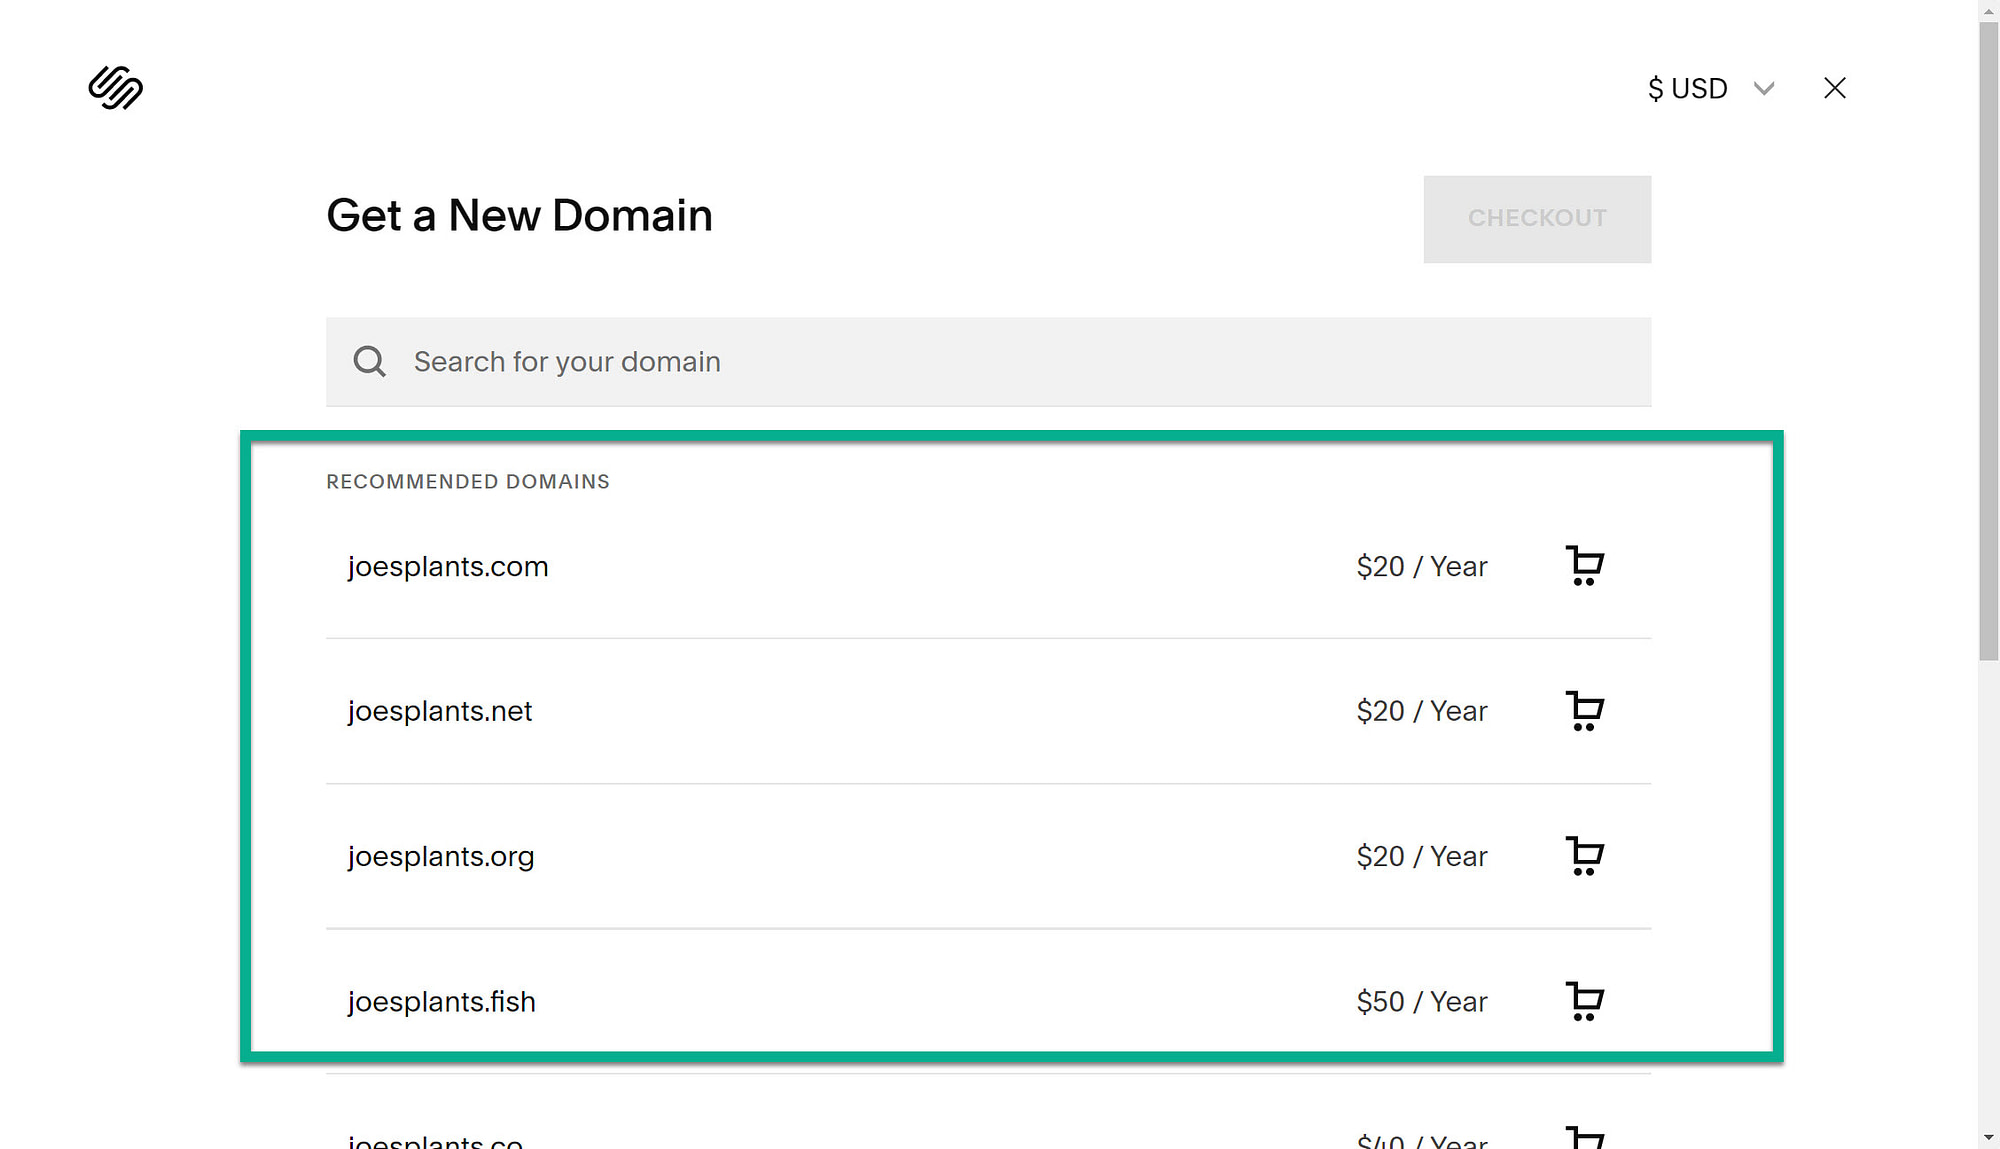
Select a domain you like and click on the Checkout button.
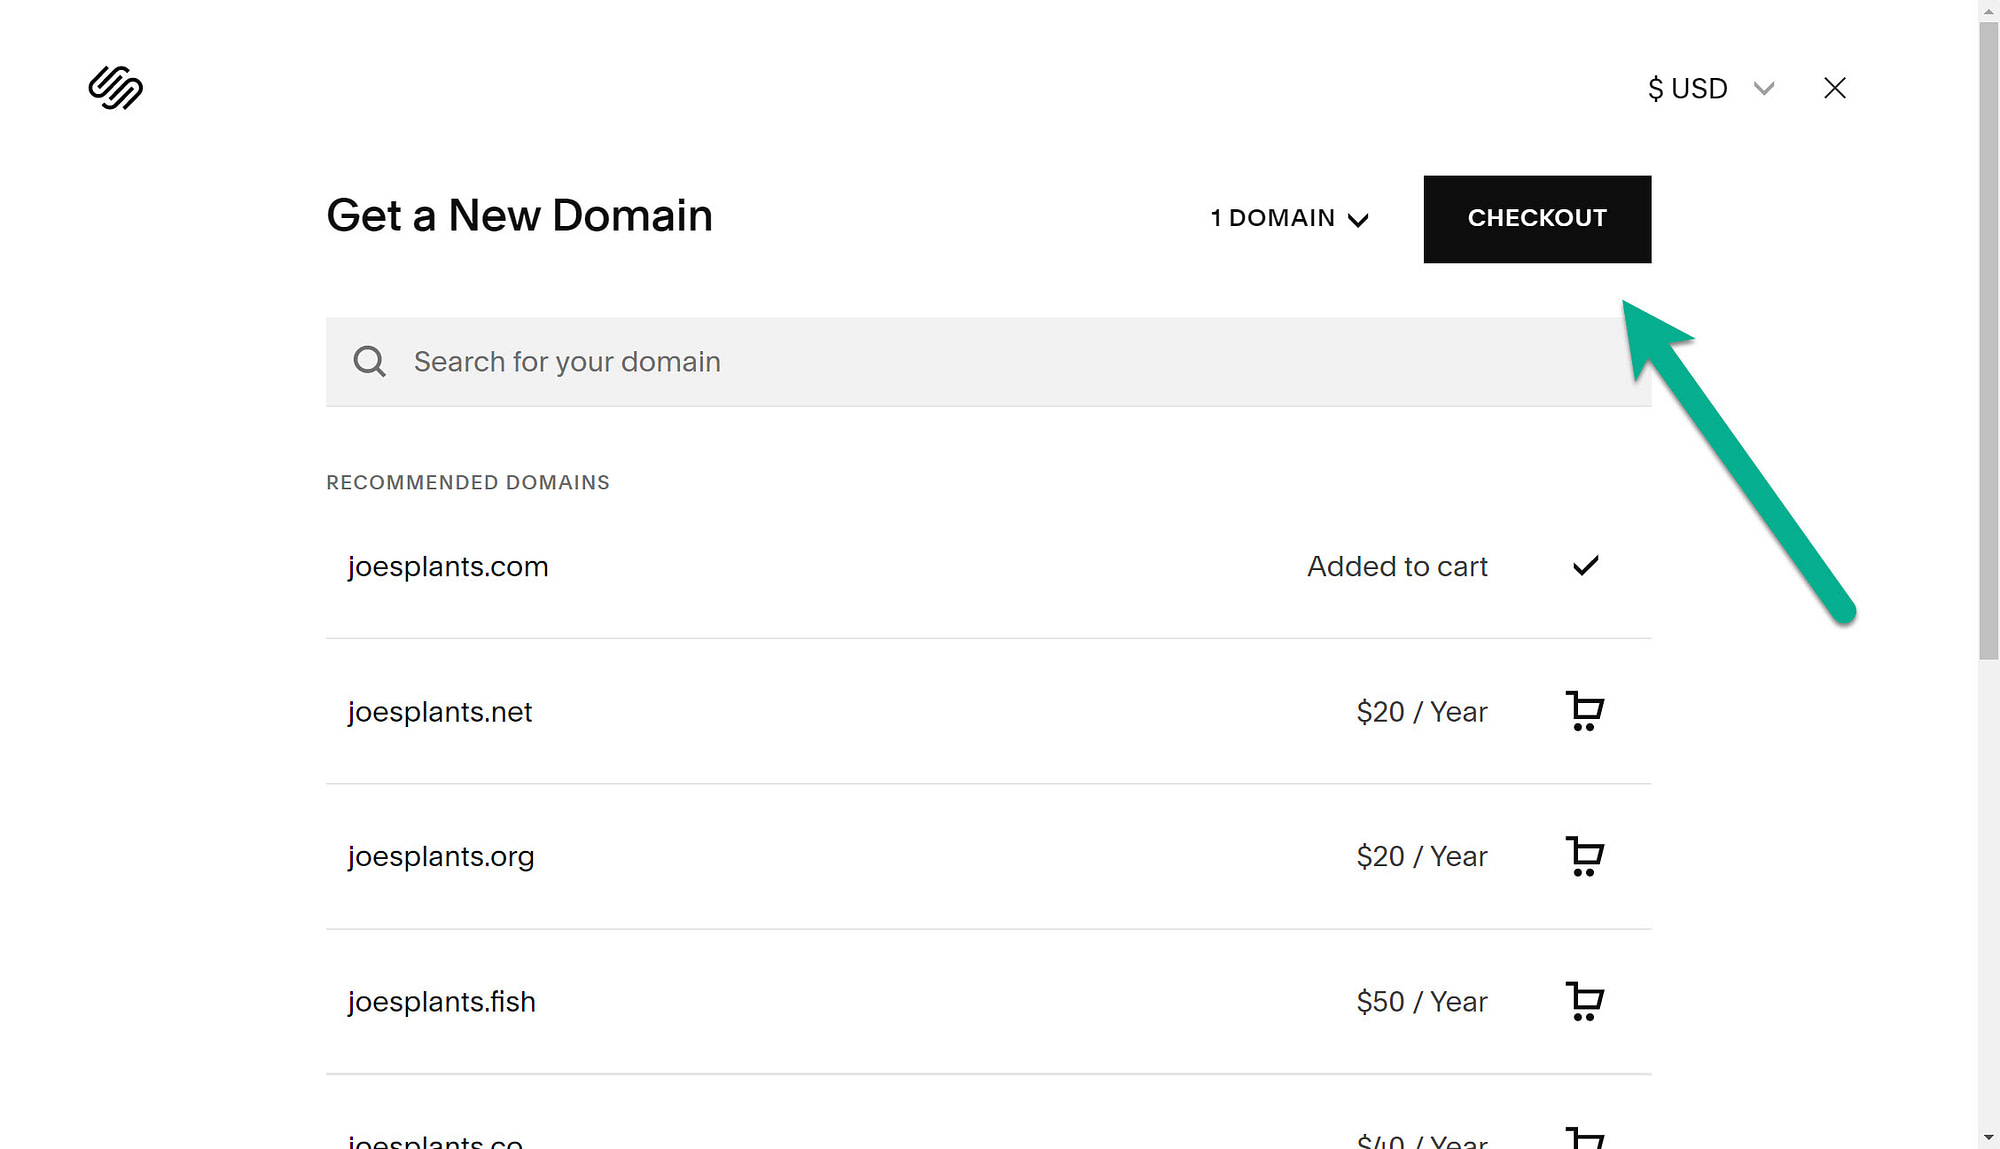
Much like upgrading your website to a paid account, Squarespace asks for payment information and automatically applies the domain name to your active website.
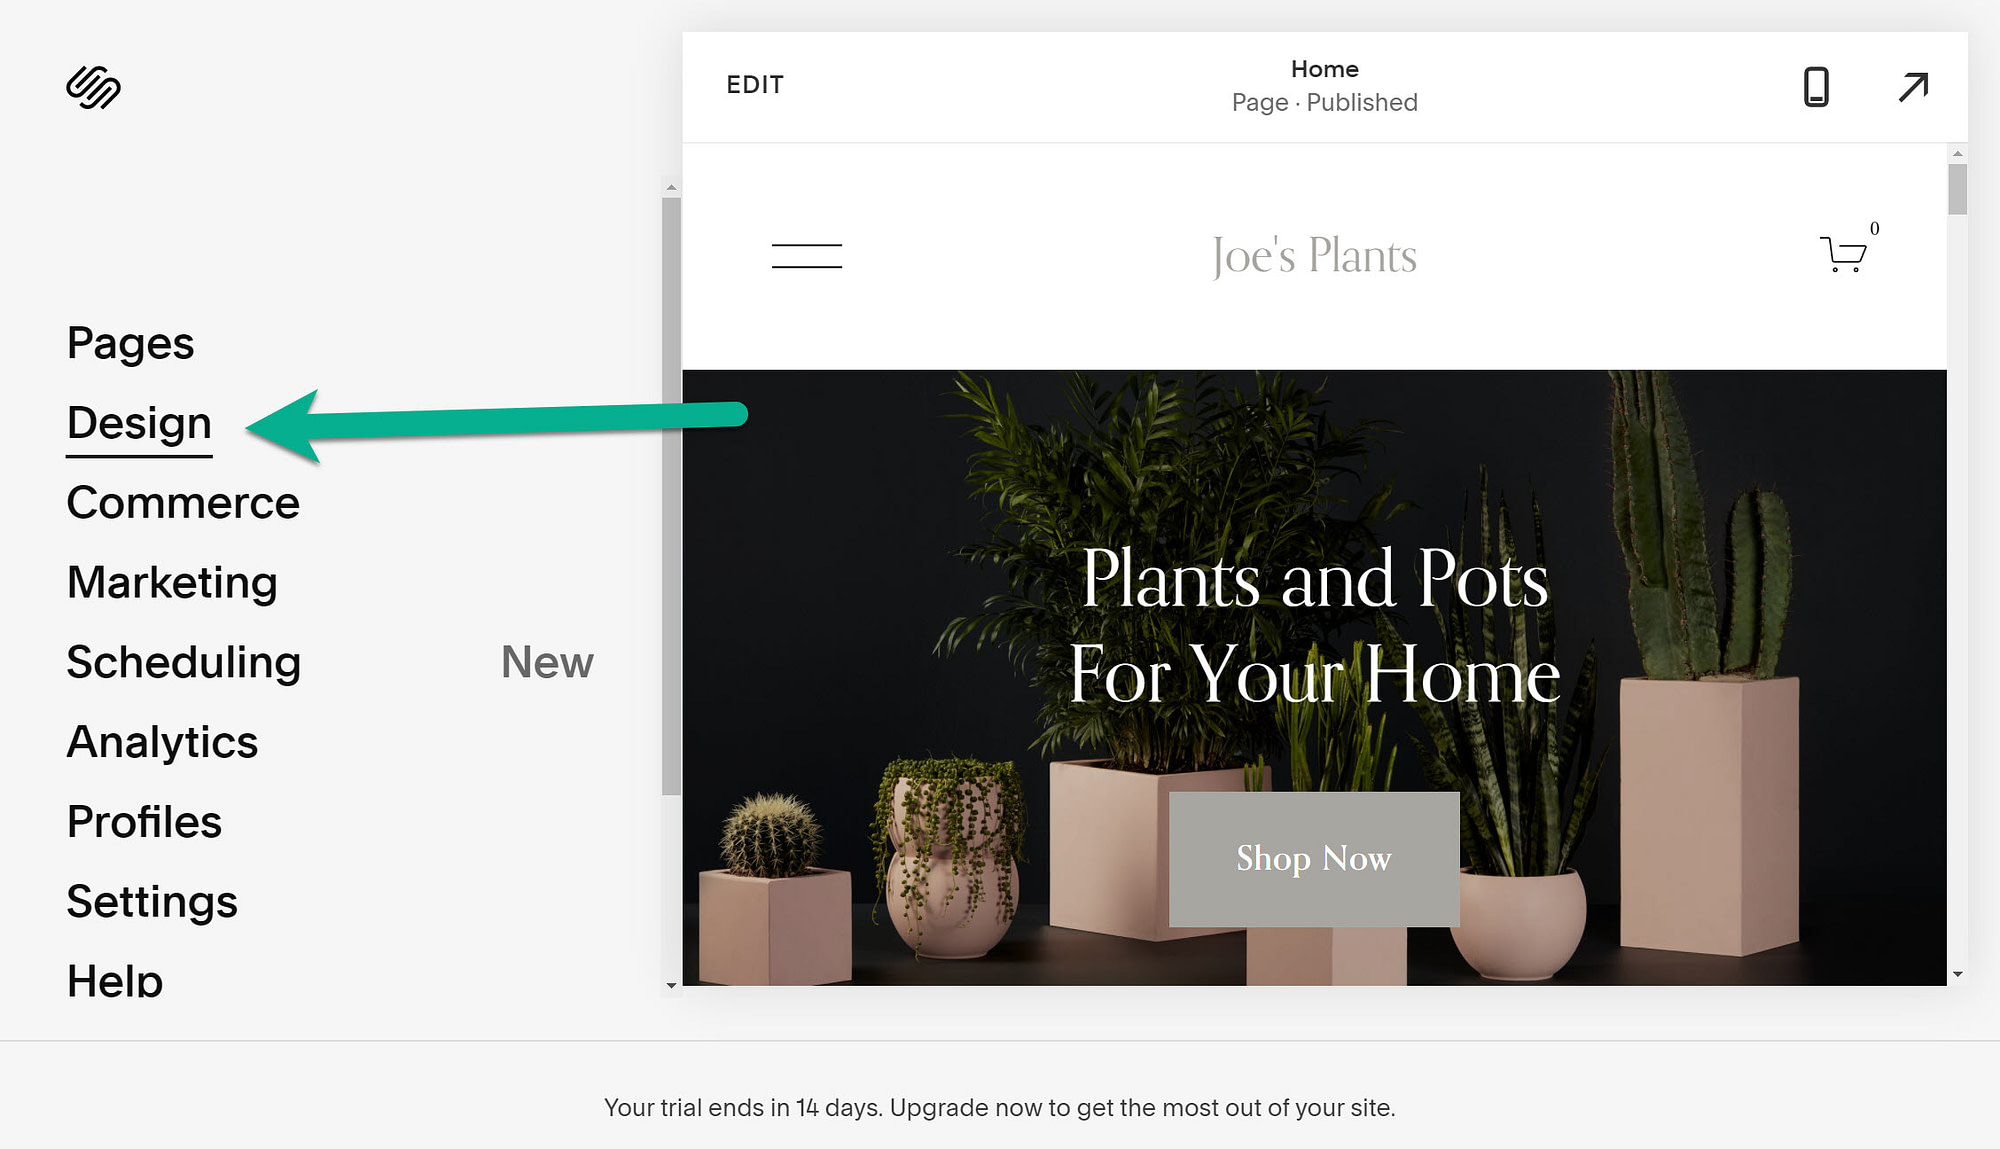
9. Manage design aspects of your Squarespace site
The Design module in Squarespace has a myriad of tools for adjusting colors, sizes, and fonts.
To explore these features, click on the Design tab.
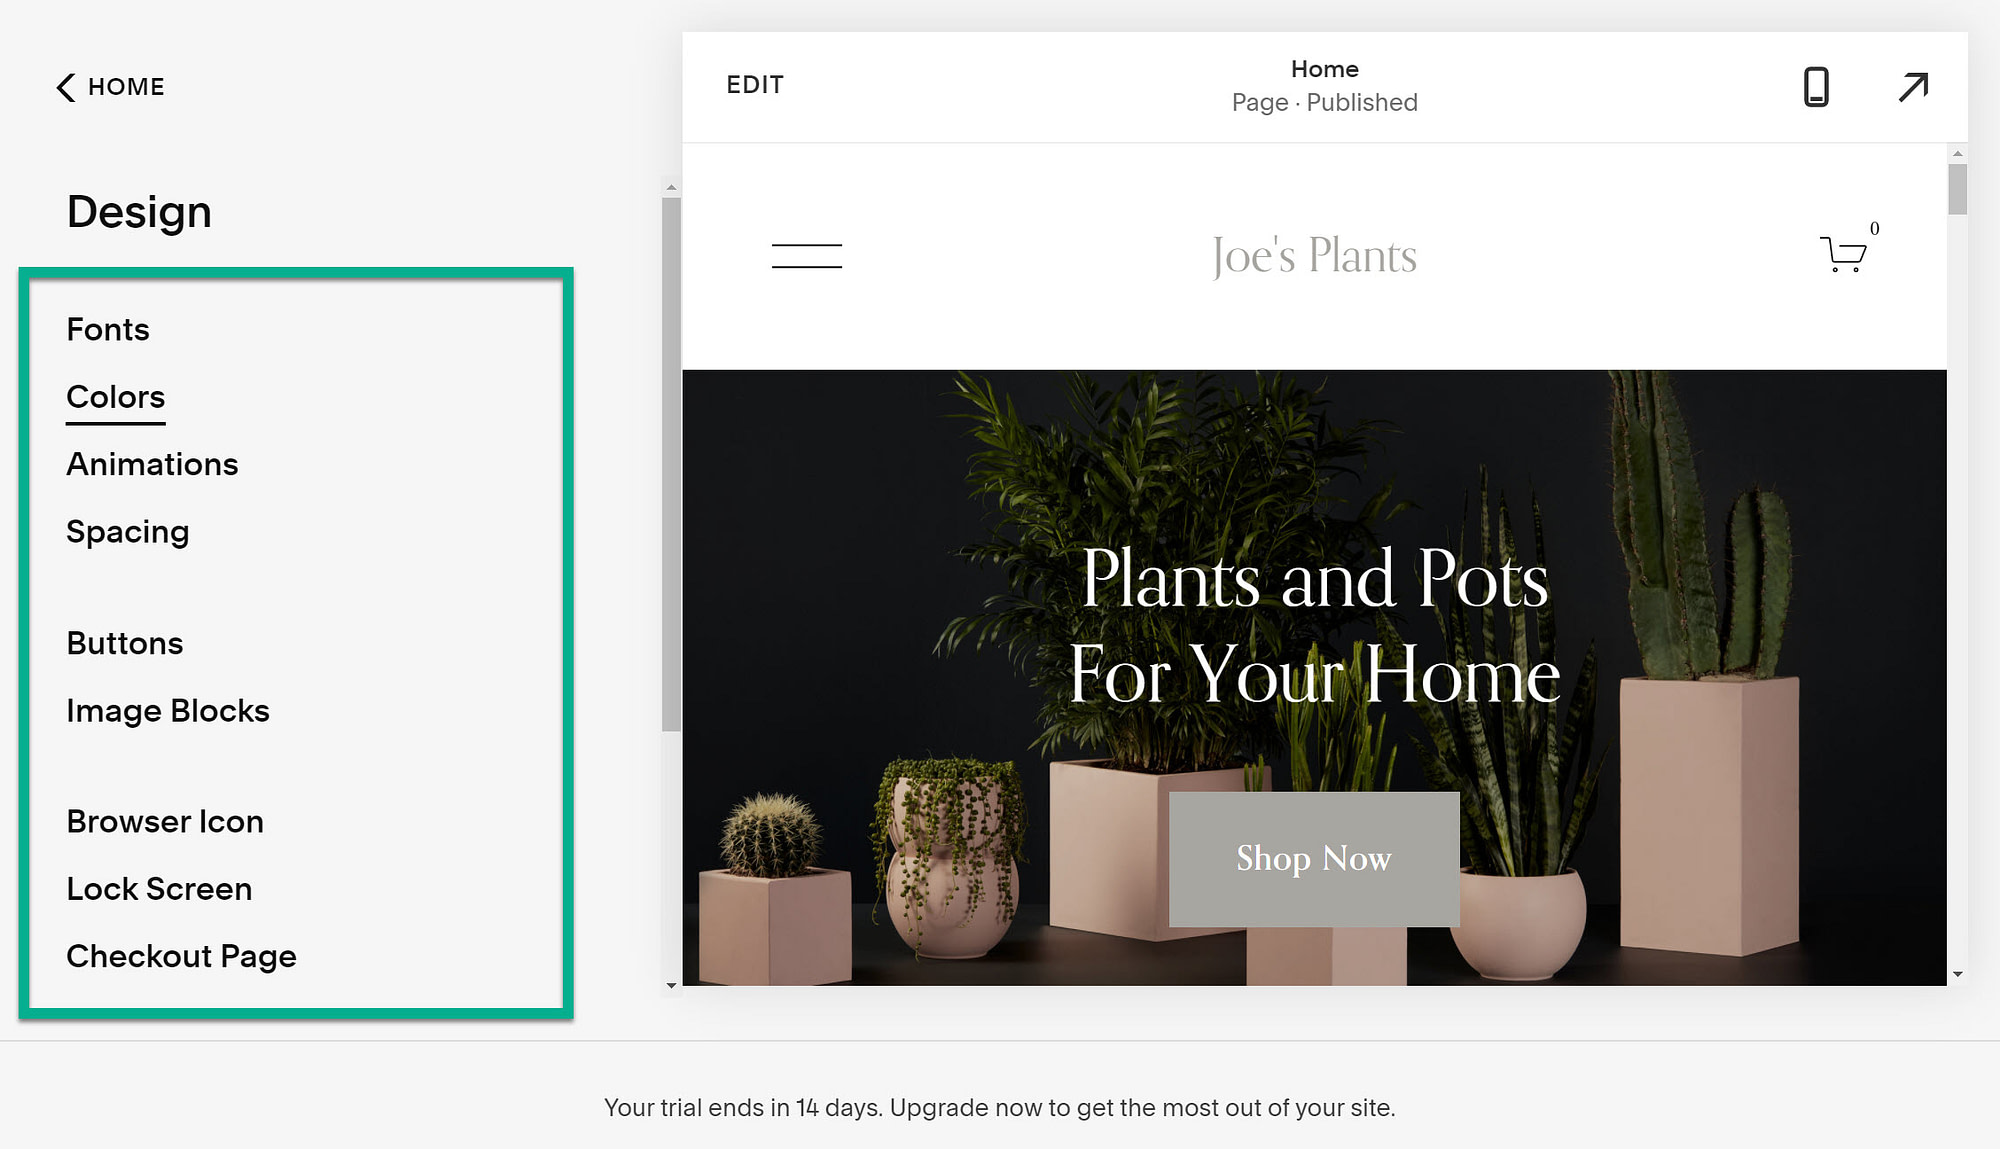
What can you expect to find in the Design module?
- Fonts
- Colors
- Animations
- Spacing
- Buttons
- Image blocks
- Browser icons
- Lock screens
- Checkout pages
We recommend clicking on each of these tabs to see what editing options are available.
For the most part, a design edit renders in the live website preview.
As an example, modifying the default font family immediately swaps out the previous fonts for the new ones.
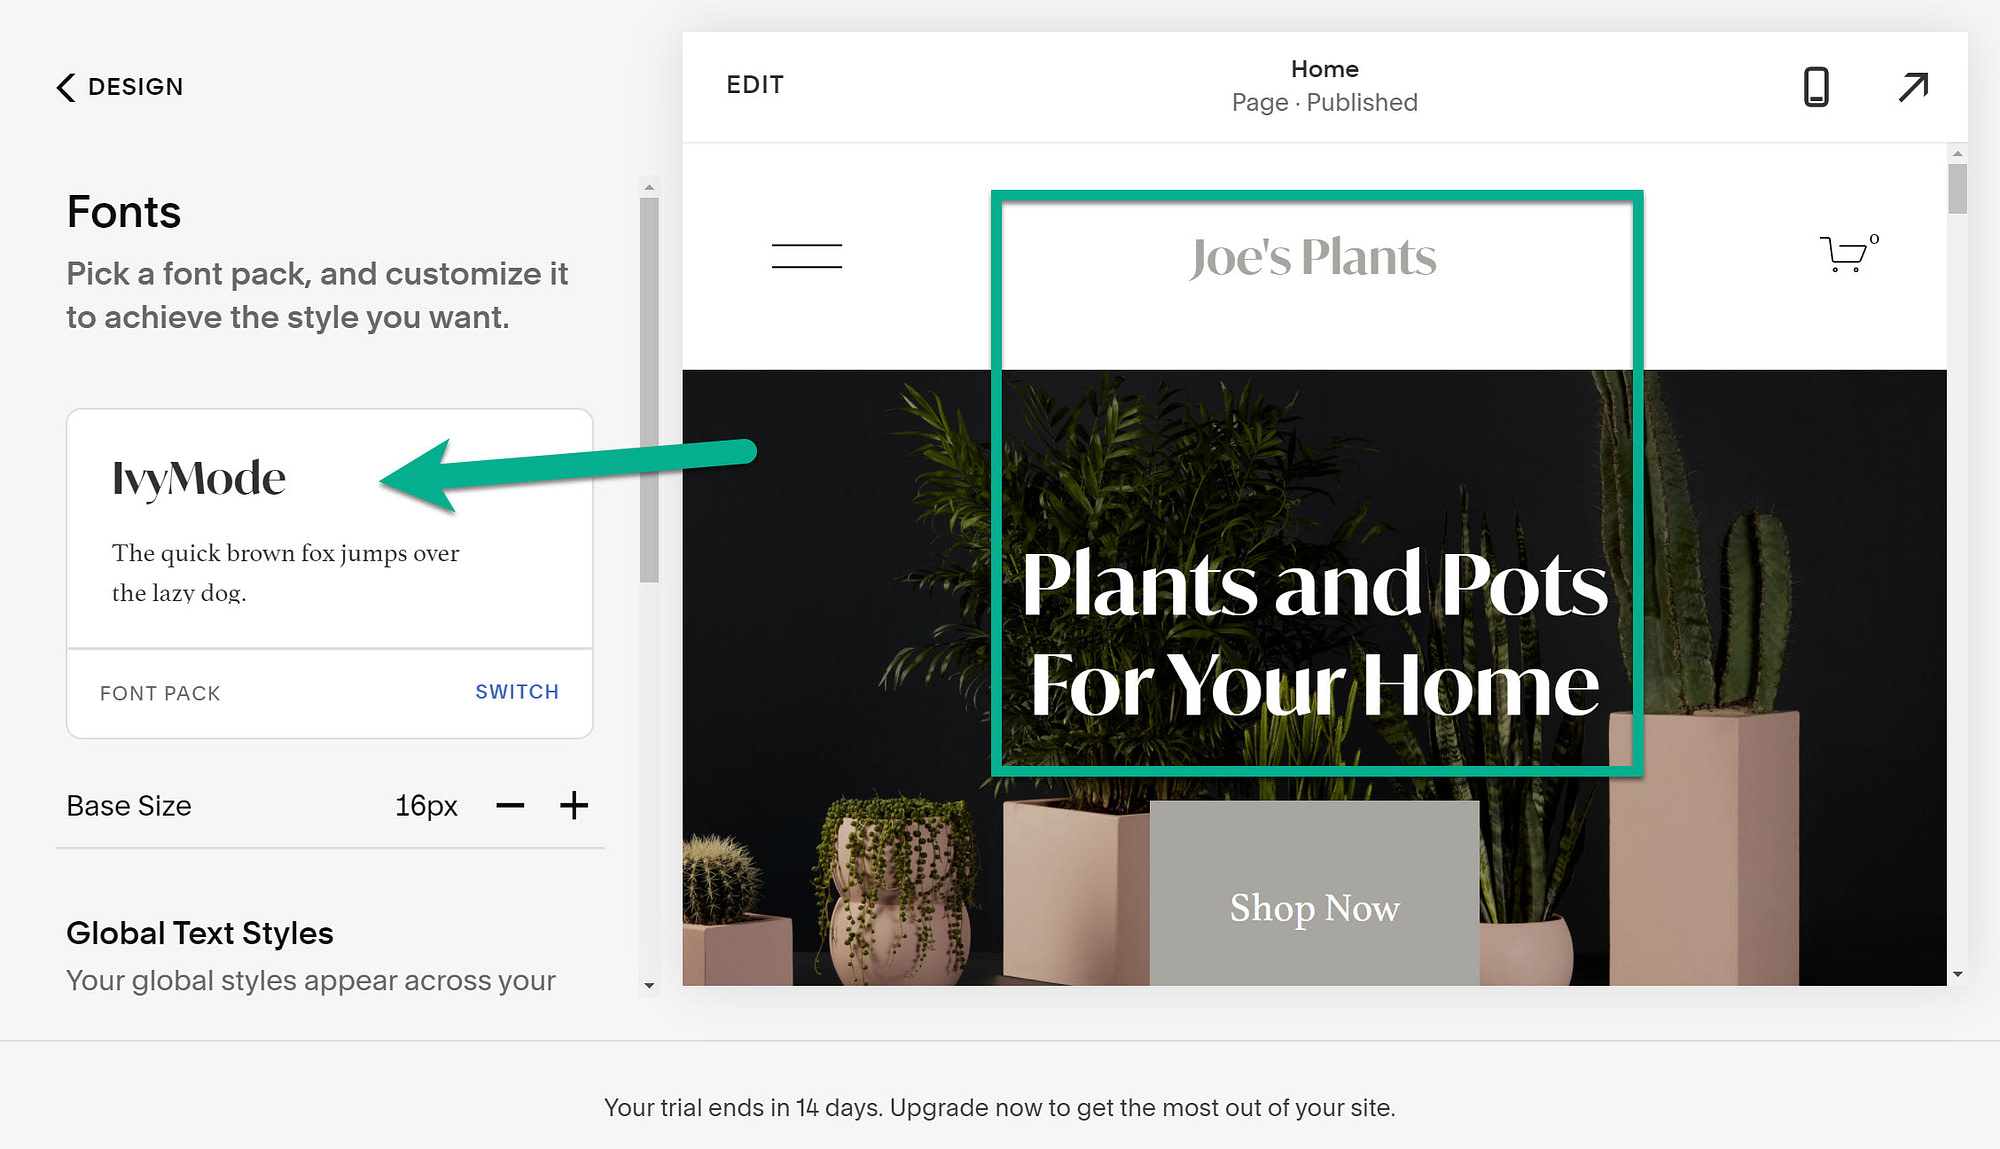
All design tools include several settings, allowing you to get to a fairly unique layout.
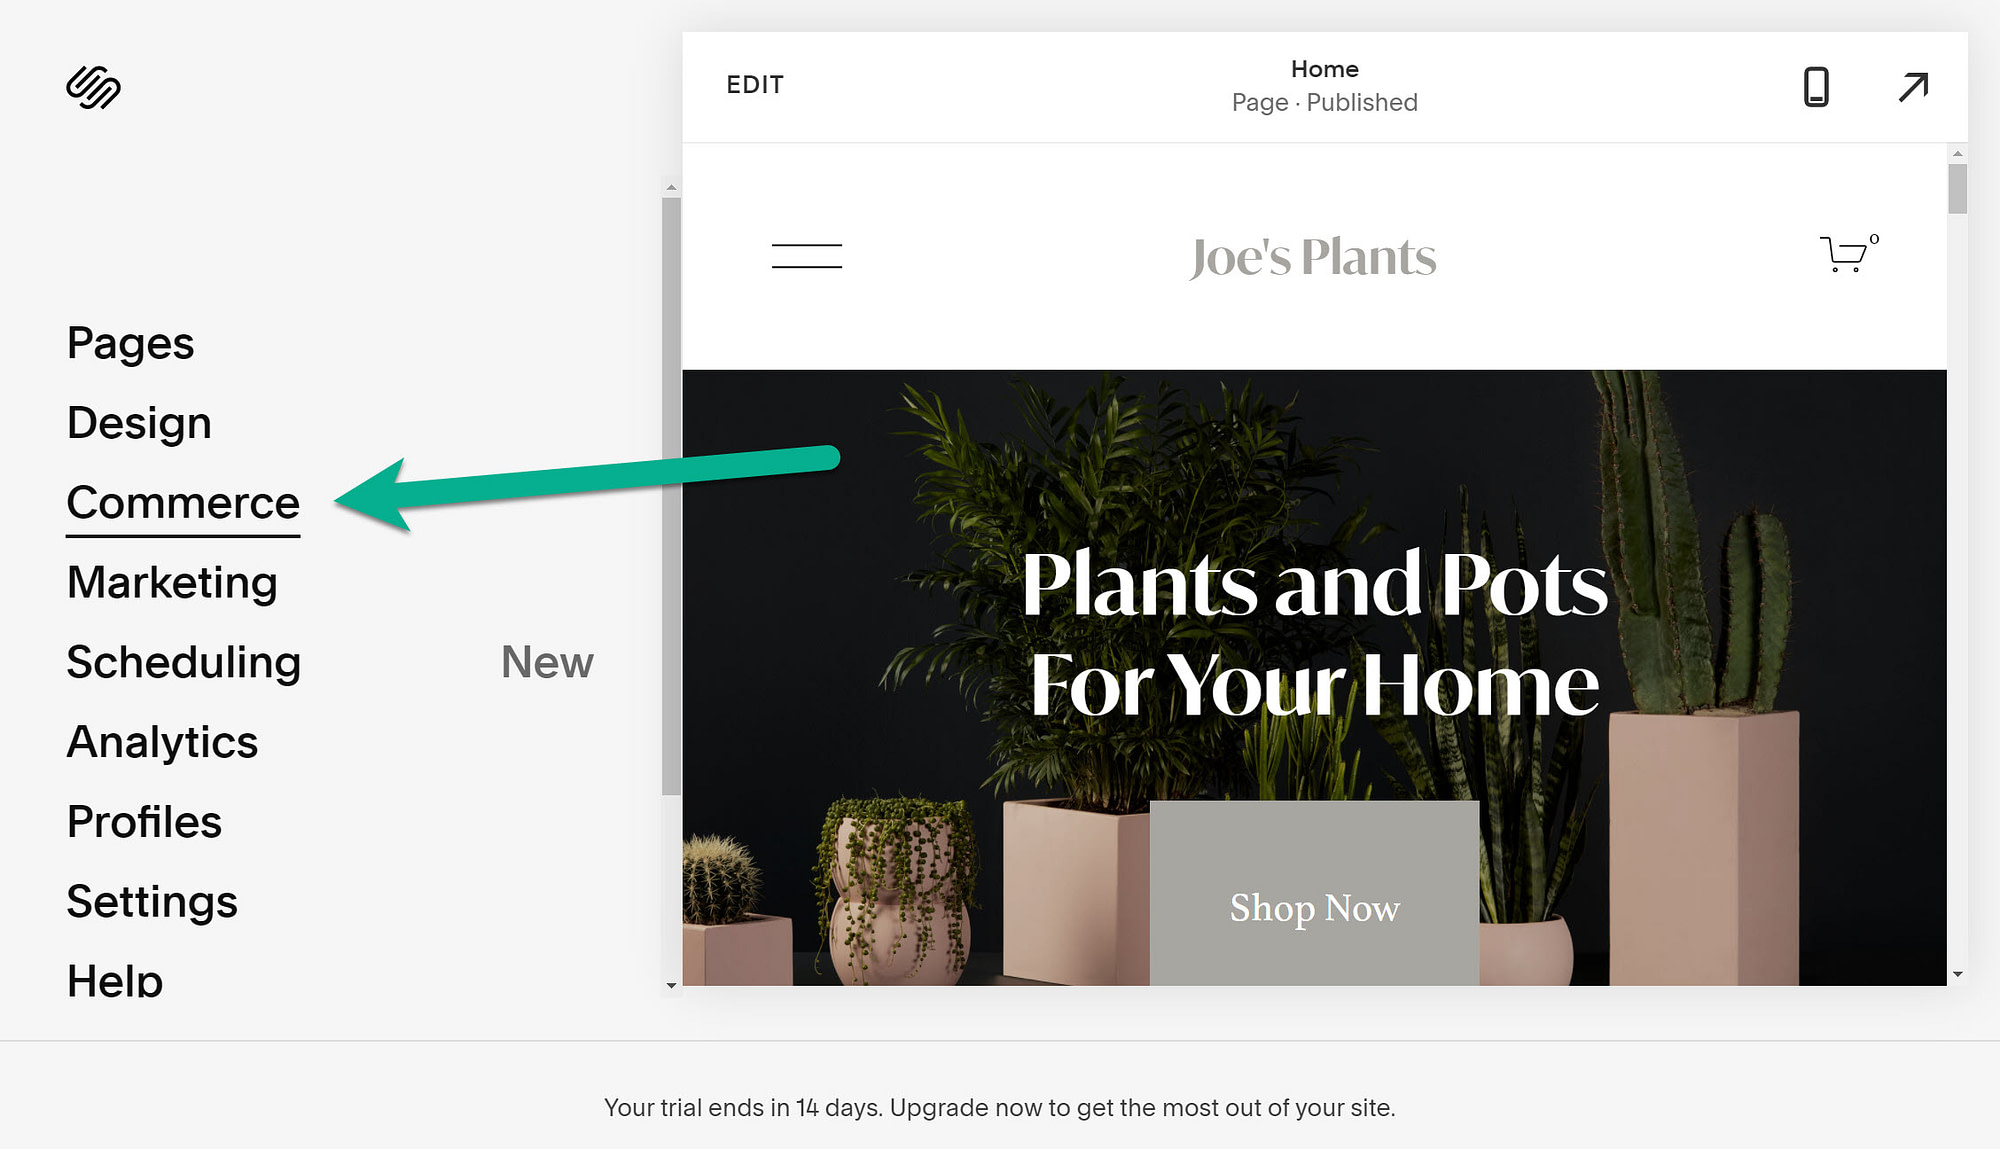
10. Add an online store to your website
Although not everyone will need an online store, Squarespace offers a store builder tool to incorporate online selling within any style of website.
Some themes are better than others, but in general, it’s possible to add a few products to even the simplest of business themes.
If you’re interested in adding a store, where customers come to your site and purchase products, click on the Commerce tab.
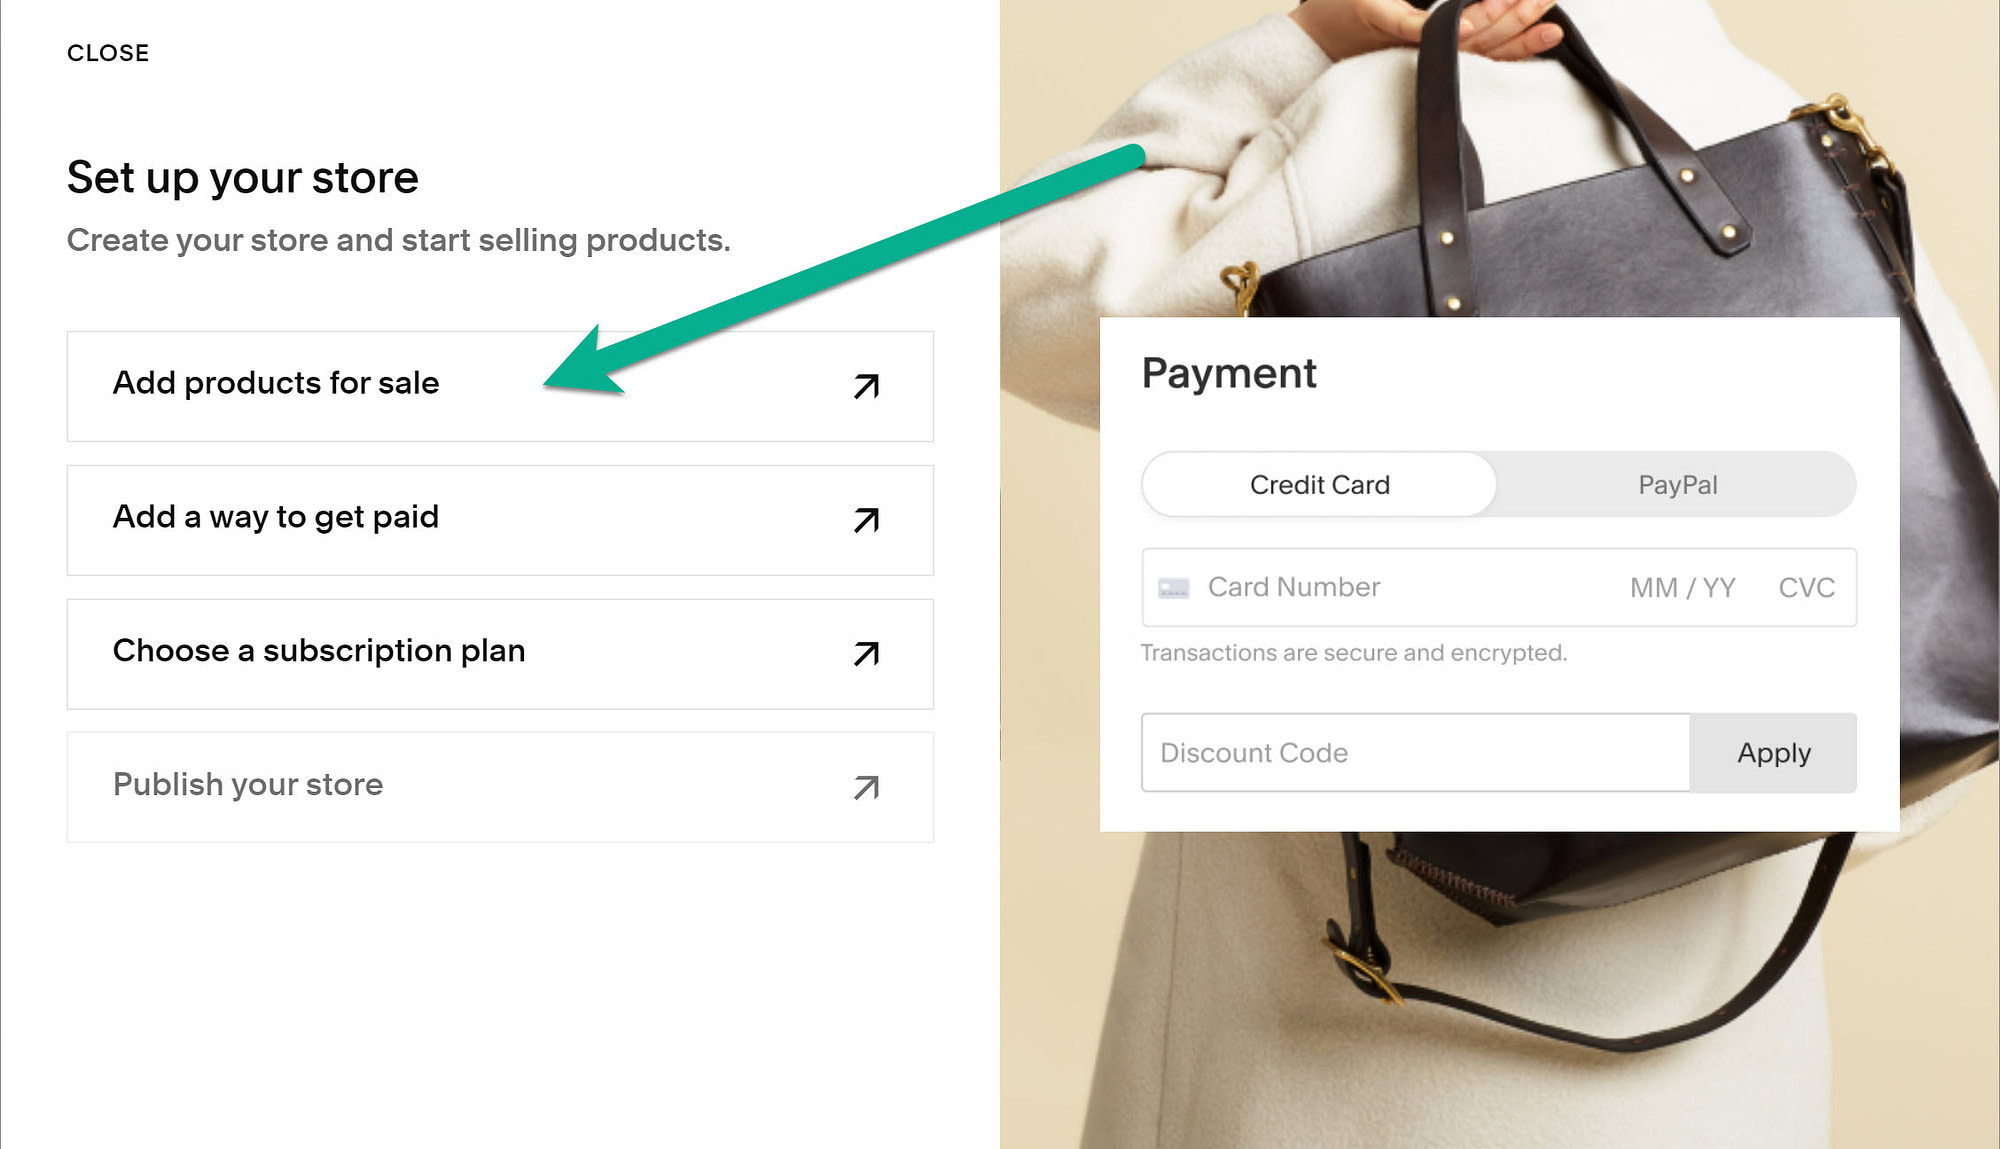
The store setup process takes four steps. Click the Start button to move forward.
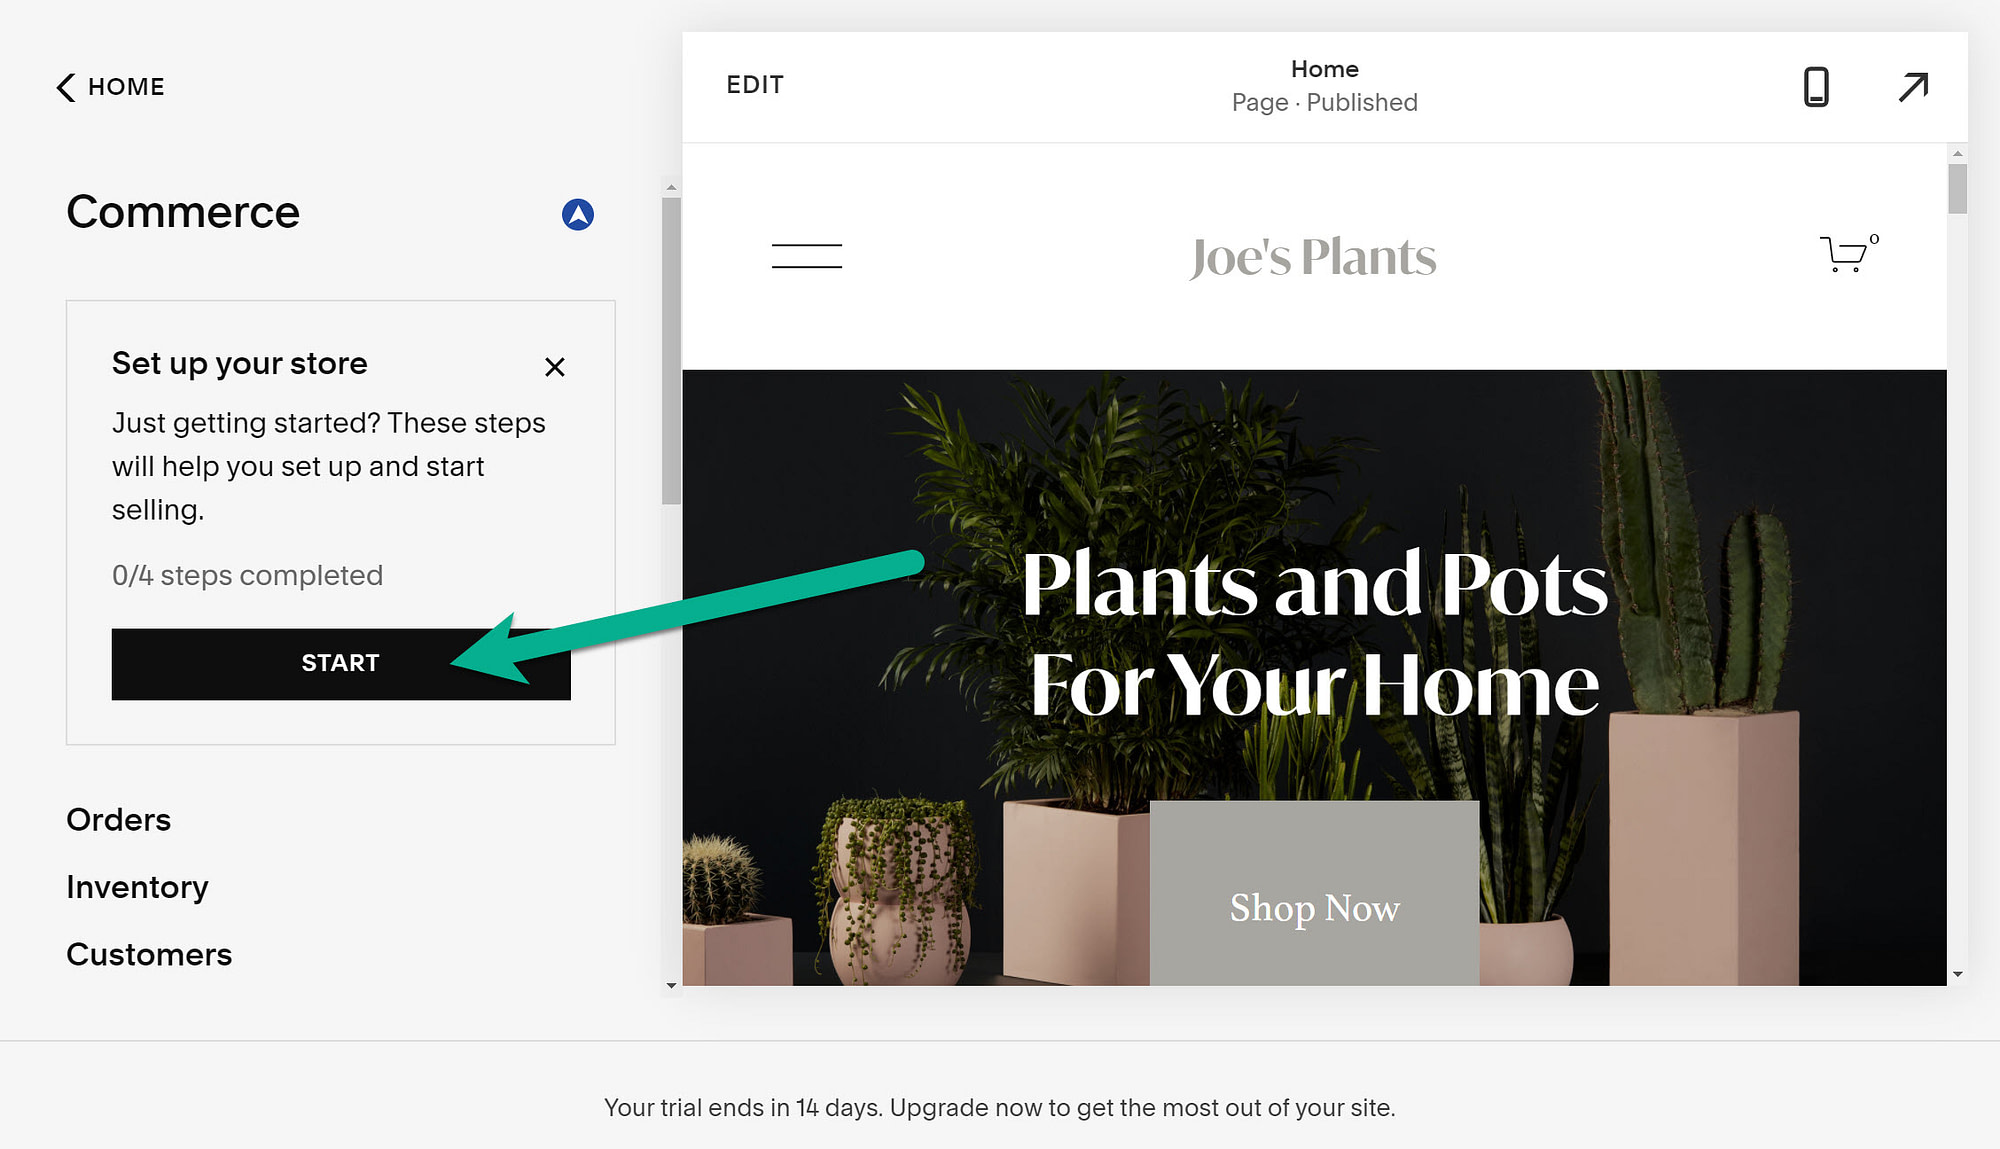
The first course of action for a store is to add products for selling.
Select the Add Products For Sale button.
At some point, Squarespace requests that you choose a store layout. Themes vary but usually offer at least two layouts.
Click on the store layout of your choice.


