
For a while now, popular marketers have been raving about how effective content upgrades are.
Some have been reporting conversion rate increases of 521%. And even more for others.
But the problem is that the technical setup for content upgrades isn’t as straight forward as most list building strategies.
Here’s the good news:
This tutorial will show you exactly how to get started using the content upgrade technique.
I’ll also give you the lowdown on exactly what they are, and how they differ from lead magnets.
What you will learn in this tutorial
- What is a content upgrade and how do they work
- The difference between a lead magnet and a content upgrade
- The basics on creating your content upgrade
- How to add content upgrades in WordPress using Thrive Leads
Tutorial information
Difficulty: Beginner / Intermediate
Time Required:Â 30 minutes – 1 hour (not including the time it takes to create your content upgrade)
Content Management System:Â WordPress (self-hosted)
Tools Required: Thrive Leads ($)
Alternatives: Leadpages ($$)
Other Requirements: Your content upgrade in PDF format (see this post if you need help creating one), email service provider account such as MailChimp or Mailerlite and an asset delivery service account (we’ll show you a few options towards the end of this tutorial)
Summary of steps:
- Step 1 – Install and activate Thrive Leads
- Step 2 –Â Add new Lead Shortcode
- Step 3 – Create a form
- Step 4 –Â Connect to a service
- Step 5 – Set up the delivery of the content upgrade
- Step 6 – Add your content upgrade
What are content upgrades anyway?
If you’ve been blogging for a while, you probably know that the best way to encourage email sign-ups is to offer something of value to your potential subscribers. This could be an e-book, a PDF report, a case-study, a checklist, a mini course or similar; and it’s usually referred to as an opt-in bribe or lead magnet.
A lead magnet is simply a freebie that you offer in exchange for visitors joining your email list.
So what is a content upgrade? And how does it differ from a lead magnet?
Well, a content upgrade is a type of lead magnet that is created to be offered only on a specific blog post.
A good example would be a blog post that features 25 tips on outsourcing business tasks. As a content upgrade, you could either offer a checklist that makes it easy for readers to work through each of the tips – or a list of recommended freelancers that readers could outsource certain business tasks to.
Or you could just offer a PDF version of the post but you’ll get more sign ups from offering a checklist or extra tips.
The reason they are so effective is because they are 100% relevant to what your visitor is reading at the time. They’re based on the idea that your reader is more inclined to subscribe to your email list to access additional information about the topic they’re already interested in.
In fact, if you really wanted to, you could have both on your blog: a lead magnet that is specific to the general topic/category of your blog and a content upgrade that offers a specific post in a PDF version or a cheat sheet/worksheet/checklist.
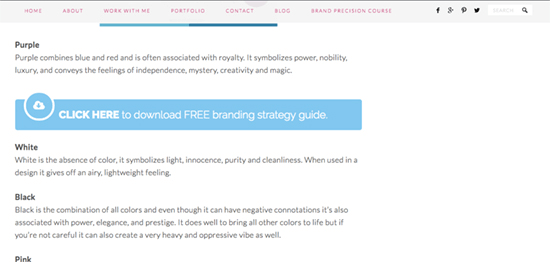
Here is an example of a content upgrade from UK Linkology:
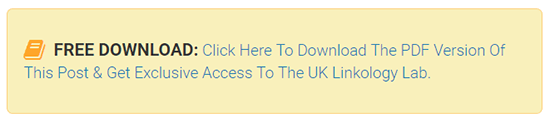
As you can see it offers a PDF of the blog the visitor is reading but also an added bonus of exclusive access to more goodies.
Now that you know what content upgrades are, let’s see how to add them in WordPress.
Creating your content upgrade
David recently covered how to create a content upgrade in this post in a lot of detail, so I’ll only touch upon it in this tutorial.
The easiest way to create your content upgrade, is to distill a blog post into it’s main points to form a checklist.
You could also create a cheat sheet, worksheet or offer a PDF version of your post.
But the idea of a content upgrade is that you offer your readers a way to ‘upgrade’ what they’re reading.
So if you do a PDF version of your post, you’ll get more subscribers if you offer bonus tips not found in the original blog post.
Okay. Let’s use an example:
Let’s say that we run a travel blog and we’ve got a blog post entitled “15 Travel Tips For Digital Nomads In 2017.”
Now, when we setup a call to action within that post for a content upgrade, we could say something like:
“Grab a PDF version of this post (includes 10 bonus tips not included in the original post).”
So what about actually creating your PDF document?
Whether your content upgrade is a worksheet, checklist or something else – PDF is the format you need to work with.
Popular tools like Microsoft Office, LibreOffice, OpenOffice and Google Docs all support it.
You’ll be able to create a document as you would normally, then save it as a PDF. For example, in Google Docs you would go to File > Download As > PDF.
You can go down the route of creating a basic PDF document using Google Docs (it’s free). Or, use a free design tool like Canva to create something more eye-catching.
The great thing about Canva is that it includes a bunch of smart templates already. Just select the ‘infographic’ design type, and you’ll see a long list of layouts you can use. These are your templates that you can customize to match your website’s branding.
There are a number of layouts specifically geared towards checklists that will be easy to edit.
Or, you could choose a different design type such as ‘Presentation’ and find a suitable layout/template there.
Okay – let’s get back to the core of this tutorial.
Using Thrive Leads to add content upgrades in WordPress
Thrive Leads makes list building easy. More importantly, it makes it easy to add content upgrades in WordPress.
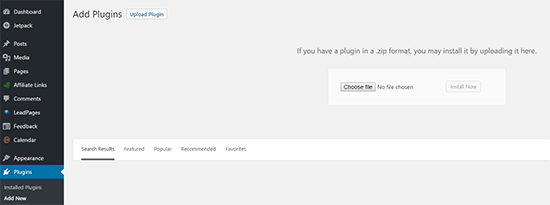
Step 1 – Install and activate Thrive Leads
To get started, you will need to have a copy of Thrive Leads installed and activated, you can do this by going to Plugins on your WordPress dashboard.
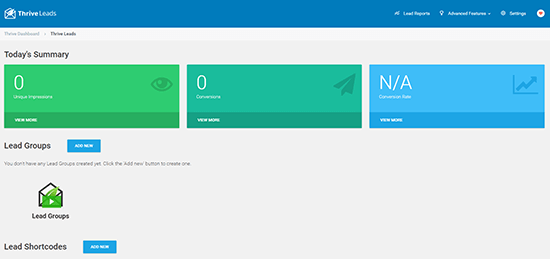
Step 2 – Add new Lead Shortcode
To setup our content upgrade, we first need to create a Lead Shortcode. A Lead Shortcode is a type of opt-in form that can be added to your posts using a shortcode. So go ahead and navigate to your WordPress dashboard and then click on Thrive Dashboard, then Thrive Leads.
Click on Add New button right next to Lead Shortcodes. Give it an appropriate name â for example, name it after a specific content upgrade so you can easily distinguish it from any future content upgrade â and click on Add Lead Shortcode.
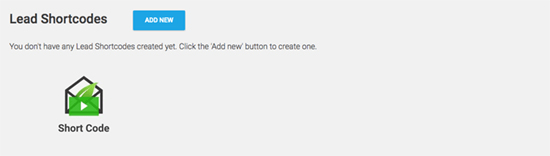
Once your lead shortcode has been created you’ll notice the shortcode now has a Thrive Leads ID code which can be placed anywhere in your post, here is an example: [thrive_leads id=’000′]. However, right now your code has no opt-in form linked to it – I’ll show you how to do this in the next step.

Before we add it to our post, let’s create a form and get it looking as attractive as we possibly can.
Step 3 – Create a form
Click on the pencil edit button on your shortcode, then click on the blue button Add New Form.
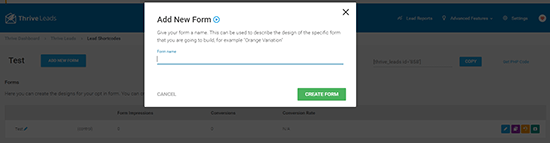
Step 3.1 – Name & select your template
Once more, name your form however you’d like and click on the green button to create it. After your form has been created, click the blue Edit design button to open up the styling interface.
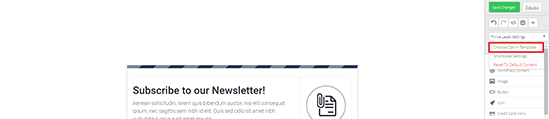
Next step is to select a template style. By clicking on Thrive Leads Settings in the right sidebar you can select Choose Opt-in Template.
You’ll be presented with a variety of templates to choose from. For this tutorial, I opted for a multi-step form which will open up a lightbox when clicked where the readers can enter their email address.
There are 6 in particular that are designed specifically for content upgrades, that I have highlighted below:
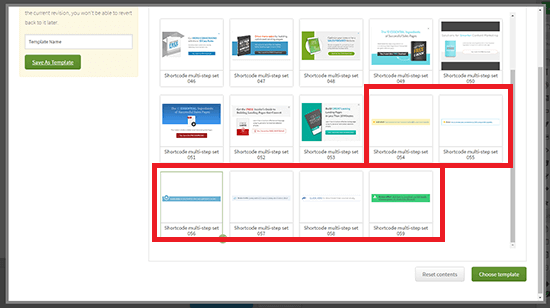
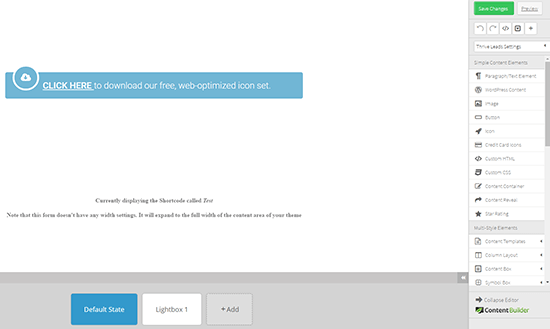
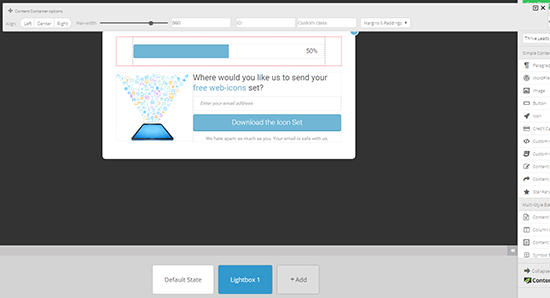
Select Choose template, and it will now appear in the editor. You will see three buttons at the bottom of the screen: Default State, Lightbox 1 and +Add. The Default State is your call to action for your content upgrade which will appear in your post or page.
Clicking on it will trigger your opt-in form, this is your Lightbox and is the second stage of the process where your visitor enters their email address to get the goodie. The +Add button allows you to create additional States and Lightboxes.
Step 3.2 – Style your form
Styling the form is very easy â everything can be customized to your liking and changed to match the forms with the rest of your website.
By clicking on the forms background you can change its colors to match your website or brand. By clicking on the text box on your form, a Text element menu will appear which will enable you to customize your text. You can edit elements such as style, size, alignment and color.

Step 3.3 – Style the Lightbox
After some styling changes to the shortcode form, you’ll need to click on lightbox 1.
Again, all editing and styling options are present here as well â from changing colors, adding images, adjusting margins and paddings to adding custom fonts.
Summary of step 3
- Name and select a template
- Style the form (call to action)
- Style the Lightbox (opt-in form)
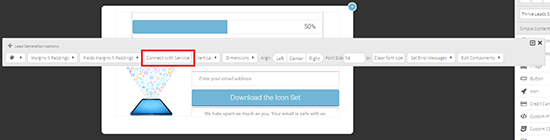
Step 4 – Connect to a service
Once you’re done styling the Lightbox, click on the actual email form field and then click on Connect with a service button. If you haven’t done this before, it will prompt you to add a new connection and choose a connection type.
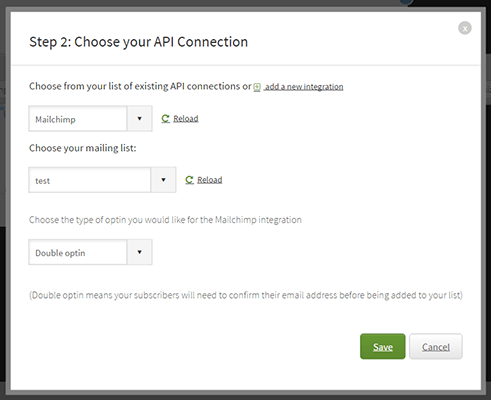
Most email services will use an API connection for which you will need an API key. The API key can usually be found in the account settings or general settings for your specific email service.
Once you have the key, copy it to Thrive Leads, select the appropriate email list and click on Save.
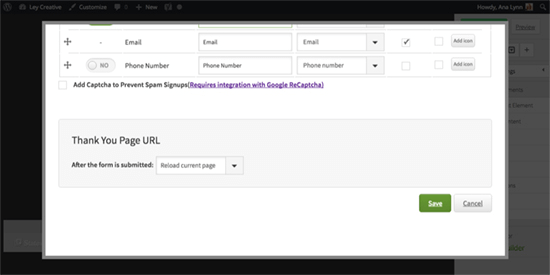
You will then be presented with the options to include or exclude additional fields to your Lightbox and to set up a special page where a user can be redirected after they sign up for your email list.
After styling the Lightbox and configuring all the options, click on Save changes to save your newly styled lead shortcode.
Step 5 – Set up the delivery of the content upgrade
There’s one more thing we need to do before adding the shortcode to the post and that is to set up the actual delivery of our content upgrade.
You can do this in two ways: using Thrive Leads Asset delivery feature or by redirecting users to a download page but for the purpose of this tutorial we are going to use the Asset Delivery feature in Thrive Leads.
We recommend this method because your subscribers will get the exact content upgrade they downloaded. They won’t have to dig through a download page to find the correct one.
Step 5.1 – Check out Thrive Leads Asset Delivery feature
Asset delivery services are similar to email service providers like AWeber etc but they offer transactional emails. Transactional emails are triggered by a user’s interaction with a website or app. Most traditional email service providers like AWeber and GetResponse cannot be used for this.
Most transactional email services charge based on the number of emails sent, rather than number of subscribers. Platforms such as Mailgun, Sendinblue and Sparkpost have a free tier which will benefit those who are just starting out and not expecting to send a large amount of emails.
Also, if you do end up paying, these two platforms are incredibly affordable, for as little as $6 you can send an additional 40,000 email a month.
Here is a quick overview:
- Mandrill: Minimum purchase of one block per month at $20 (one block is 25k emails), however, it can only be used if you have a MailChimp account.
- Postmark: Price is per 1k emails at $1.50. The cost decreases once you reach 200k emails a month. There is a free trial of first 25k emails for free.
- Mailgun: First 10k emails a month are free, next 500k are $7.50. All features available has no extra cost.
- Sendinblue: First 9k emails a month are free, however with daily sending limits. Next 40k costs £4.35 ($5.50).
- Sparkpost: First 100k emails a month are free. Next tier is 100k+ – 999,999 emails at $24.99.
Each will come with their own set of terms and conditions, as well as additional features. So it is best to have a quick look around to see which suits your needs best. On plus, each of the above are on a month-by-month basis so if you change your mind you’re not tied into a 12-month contract.
Step 5.2 – Sign up for an email delivery service account
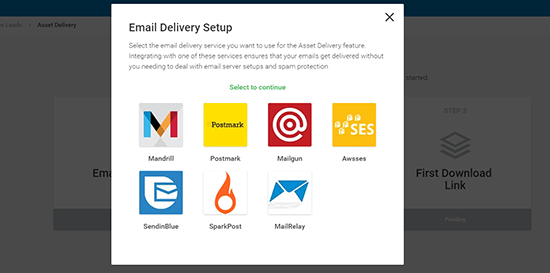
Before you can use the Thrive Leads Asset Delivery feature you’ll need to sign up for an account with one of these services. This list is always expanding, so check to see if extra services are available before you make a decision on which to choose.
To set it up, click on Advanced Features at the top menu of Thrive Leads and select Asset Delivery.
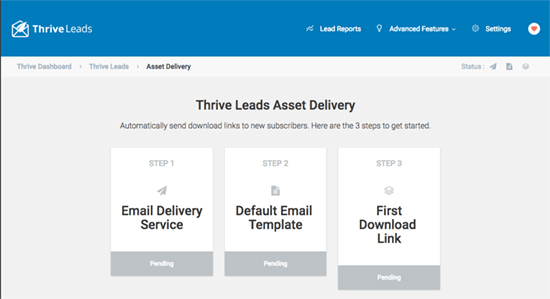
Connecting your chosen email delivery service is done via an API key which can be found in the general settings area of your account and entering the email address associated with your account.
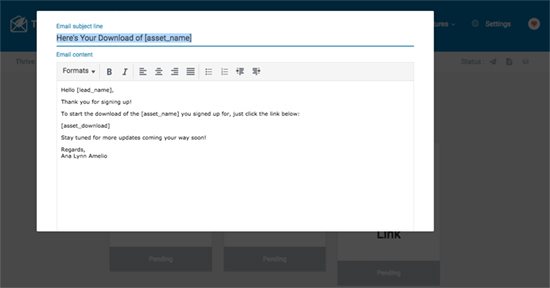
Once you connected your service, the next step is to create your email template. This is the email that will be used to send the link to your email subscribers.
Summary of step 5
- Look into the tools available on Thrive Leads Asset Delivery feature
- Sign up for an email delivery account and connect via an API
Step 6 – Add your content upgrade
The last step is to actually add your content upgrade. Click on First download link, name your asset group and then either upload your file straight to WordPress, or insert it from URL which can include links to Amazon S3 services, a link to a landing page or any other link you want to include in the asset delivery email.
When you’re done configuring all the options, click on save and close.
You can store your download using an online cloud storage such as Amazon S3 services, or optionally, depending on the generosity of your hosting plan, you could simply upload your file to your WordPress media library, grab the link and use it as the destination.
Now that you configured the actual delivery of your content upgrade, go back to Thrive Dashboard and copy the shortcode.
Then navigate to your post, and place the shortcode where you want it to appear.
Step 7 –Â Add your content upgrade opt-in forms
The last step is to add your new opt-in forms within your blog post. And that’s it!
Exactly where you add it is up to you. We usually add in-content forms at the end of the introduction, and just before the conclusion so your readers will have two opportunities to download the content upgrade.
Final thoughts
That’s it! You’re ready to use the content upgrade technique to supercharge your email list growth.
Before jumping on board and going content-upgrade crazy, here are a few tips to keep in mind:
- Keep things simple â make sure they are valuable but don’t feel pressured into creating a 50-page PDF. Often something simple as turning your blog post into a checklist of main takeaways can work wonders.
- Make the content upgrade itself shareable â consider using a tool such as Click to Tweet in the content upgrade itself and point the link back to the original post
- Include a call-to-action at the end – even if your content upgrade was just a way for you to give additional value and grow your email list, think long-term strategy here. What is the ultimate reason for growing your email list? Once you have the answer include a call to action that sends the reader in the direction that’s right for your business or a blog.
- Learn how to write eye-catching headlines â no matter how good your content upgrade might be; nobody will download it if your headline is boring. A powerful headline is key to getting the reader to download your content upgrade and should communicate the immediate value of the offer.
- Give your readers multiple opportunities to opt-in – Thrive Leads is one of the most feature-packed list building plugins for WordPress. You can use it to add opt-in forms to widget area’s, display popovers, add a ribbon style opt-in form to the header/footer of your site. And there’s plenty more too.
We hope you’ve found this guide, and the above tips helpful.


