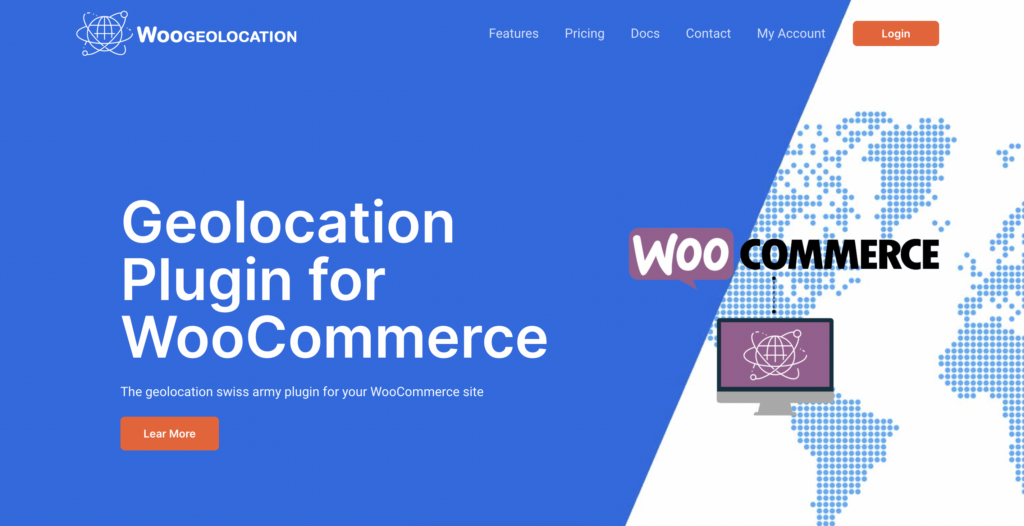
Do you sell products internationally through your WooCommerce site? Are you looking to create a memorable experience and optimize your store for a global audience? Well, then, you’ll probably be interested in utilizing the features of WooGeolocation.
WooGeolocation is a WordPress plugin for WooCommerce that lets you geotarget products and currency by location. It supports cities, states, countries, zip codes, and even custom map areas. Users can build custom regions by grouping locations and using them everywhere to save time.
But how easy is it to configure and use? And is it really the best tool for the job when it comes to mapping your store to certain regions?
In this review, we’ll scrutinize WooGeolocation to see whether it can make life easier for WordPress users looking to geotarget their WooCommerce offerings.
WooGeolocation Overview
WooGeolocation is a premium plugin that adds all sorts of location-based functionality to your website. In fact, it bills itself as “the geolocation swiss army plugin for your WooCommerce site.” Currency mapping, product geotargeting, marketplace geotargeting, and much more are all supported by the plugin.
There are many scenarios where it makes sense to use WooGeolocation. For instance, if you want to show (or hide) products based on a customer’s distance from your location, you can use product geotargeting to improve the user experience. When a prospective customer visits your eCommerce site, they’ll only see products they can buy, meaning you’ll have fewer queries to deal with.
Here are the key features of WooGeolocation:
- Multicurrency: Offer a personalized experience to international customers by converting your store into a multi-currency shop.
- Geotarget products: Target your products to certain locations only based on your target market.
- Custom regions: Group frequently targeted locations to create custom regions and use them everywhere to save time.
- Map custom regions: Carve your own regions in maps where your items are available.
- Product location: Assign a physical location to your products so customers can search by proximity in a given radius.
- Dokan marketplace geolocation: Filter your products or store based on the closest geolocation of the customer.
- Catching: Use any cache solution to geotarget unique visitors only.
Hands-On With WooGeolocation
In this section, I’ll share my experience of using WooGeolocation on a staging website.
To use the plugin:
- Purchase a WooGeolocation plan (see pricing section for more details)
- Log into your WooGeolocation account and visit the Downloads area. You can either click this link or open My Account > Downloads on the WooGeolocation site.
- Click Download WooGeolocation to get the .zip file.
- Upload the .zip file on your WordPress website.
- Go to WooCommerce > Settings > WooGeolocation
- Enter the license key in the License Key box (you can grab the license key from the Downloads section in your WooGeolocation account.
- Click Verify Key.

Geotargeting Products
Having tried a bunch of Geotargeting and Geolocation plugins in the past, I was curious to see what WooGeolocation had to offer.

Article Continues Below
First, I attempted to geotarget a product. This requires enabling Product filters on the WooGeolocation settings page, after which a new metabox appears in WooCommerce products.
Here are the general settings:
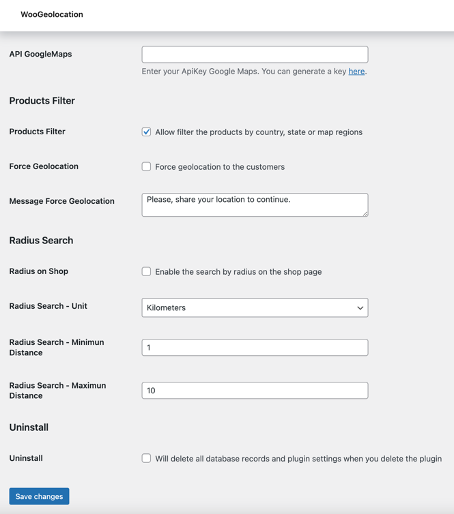
So you just need to check the box to activate product filtering.
Additionally, you can force geolocation on the customer. Selecting this option will display a message asking them to share their location before they can access your store. This can be beneficial for filtering the audience you don’t want to reach, such as customers who reside in a far-away continent.
You can also enable the search by radius on the shop page, which allows you to show products to customers located within a certain maximum distance of your business.
Coming over to WooCommerce products, here’s the metabox that allows users to set up product geotargeting:
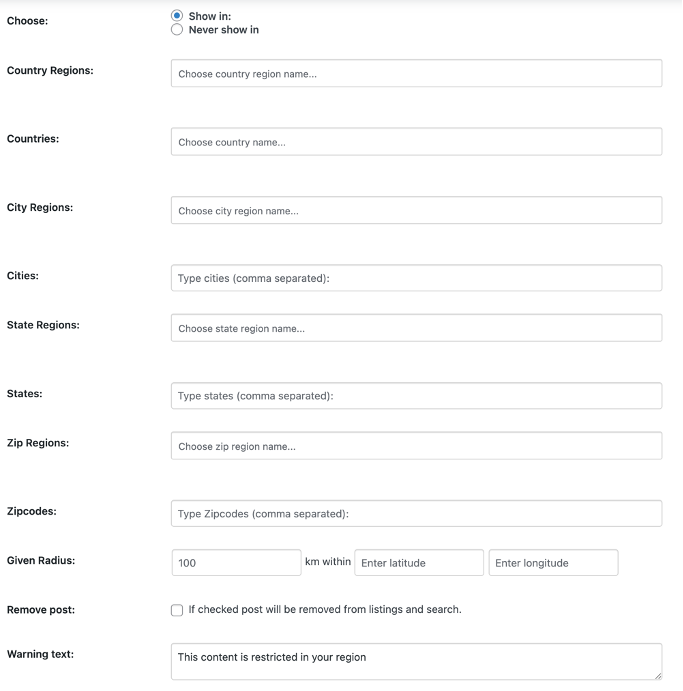
This is where the magic happens. You can show or never show a product in certain cities, states, countries, regions, and zipcodes.
For each field, the plugin lets you enter multiple names (comma separated). For instance, you can enter Geneva, Lausanne, and Neuchâtel to geotarget items to French-speaking consumers in Switzerland.
For zipcodes, you can enter a given radius in km along with the latitude and longitude. This is ideal if you run a physical store and use WooCommerce as an additional sales channel. The radius you enter will depend on how far you can ship or deliver the item without busting your business budget.
If you plan to use WooGeolocation to restrict products in certain countries, be sure to use the warning text.

Skipping this step may make people confused about why the product page isn’t opening. You don’t want to ruin the user experience, even for non-customers.
Creating custom regions
To avoid time wastage and repetition, WooGeolocation lets you create “custom regions.” These allow you to target different locations at once, such as a group of cities and countries. In other words, you can geotarget a custom region instead of typing all the locations every time.
So a custom region is just that—a bunch of locations grouped under one name that you can later use in different sections of the plugin to geotarget products.
You can create a Custom Region by going to WooCommerce > Settings > WooGeolocation > Regions.
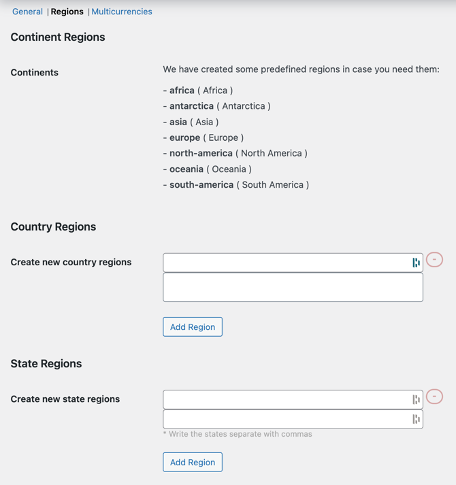
On the Regions page, you can add as many custom regions as you desire. WooGeolocation has predefined all the continents, meaning you don’t have to create them from scratch. Just target a valid continent (find a list of valid continents) and show the ISO codes included in each region for reference.
Offering multiple currencies
I also tested the multi-currency feature in WooGeolocation. And I was really pleased to see that it works smoothly.
To enable multi-currencies, you’ll need to go to WooCommerce > Settings > WooGeolocation and click the Multicurrencies tab.
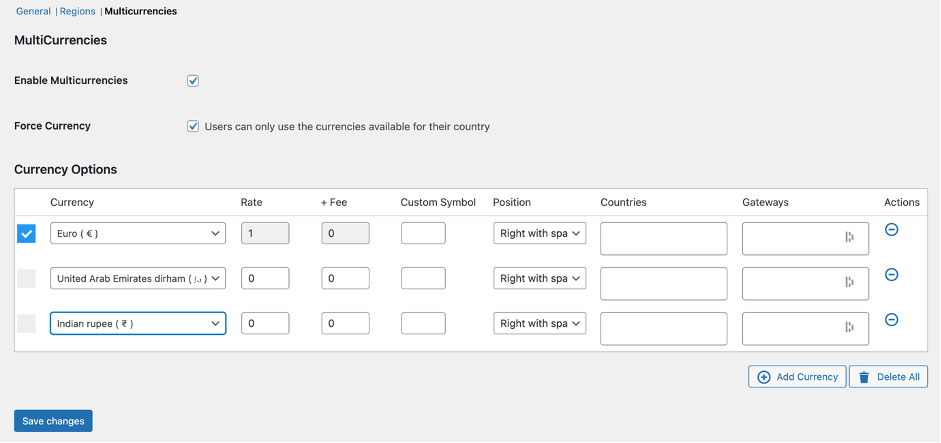
Once activated, the plugin will display your default currency—the one all rates are calculated from. Then you can add as many currencies as needed. You can also set a country for a currency, which will enable visitors from that country or countries to get that currency automatically.
If you leave the force currency option unchecked, the visitors will be able to use the currency switcher to switch to other currencies. Check the option if you want them only to use the currency assigned to their country. For countries not listed, WooGeolocation will use USD as the default currency.
There’s also the option to specify which payment gateways the currency will apply. Leave it blank if you prefer making it available to all. Overall, you can make many modifications to improve the customer experience on the currency front.
Getting Google Maps API Key
If you want to take things up a notch, get the Google Maps API key for geotargeting.
Here are the steps:
- Log into https://console.cloud.google.com/apis/dashboard?pli=1, create a new project, choose a name, and click continue.
- After you have created a project, generate the API key that you’ll use in the WooGeolocation plugin. Go to Create Credentials > API Key.
- After creating the API key, make sure to restrict it so it can only be used from your domain. While performing this step, you can also copy and paste the key into plugin settings.
Note: Clicking restrict key will open a new window where you need to fill in some details:
- Name: Something to help you identify the API key
- Restrictions: I recommend restricting by website, but you can also restrict by IP address if you desire.
- Web site: Enter your website’s name and any other domains where you plan to install WooGeolocation.
Once done, click Save, and the key will be protected.
As the last step, Google will ask you to add a credit card to verify your account. The company offers 300 USD worth of credits each month for free, which should be good enough for more projects. In case you exceed the credits, Google will charge you based on the number of requests.
And that’s it for the hands-on.
WooGeolocation Pricing
Pricing is where WooGeolocation stands out from other SaaS offerings. After all, it’s not every day you see a plugin offering all the key features in every subscription plan.
WooGeolocation has three annual subscription plans:
- Lite – $59 per year with 1 site license, all features, premium support, and plugin updates.
- Pro – $149 per year with 5 site licenses, all features, premium support, and plugin updates.
- Agency – $299 per year with unlimited licenses, all features, premium support, and plugin updates.
You can cancel your subscription at any time.
Final Verdict
Geotargeting is an excellent way to create more personalized offers for your audience and, in turn, get more conversions across your site.
With WooGeolocation, you can geotarget your products to customers nearby or in a specific market to drive revenue for your business.
Show your products where they are most likely to sell, and offer a multi-currency checkout to reduce your cart abandonment rate.
It’s time to get smart with your targeting.