A glossary is a great way to help define terms for your human visitors and boost your visibility in Google search. People are always searching for the definition for terms and a glossary helps you reach those people.

As you can probably guess, LuckyWP Glossary is a plugin that helps you create a glossary on your WordPress site.
It keeps things lightweight while still giving you plenty of helpful functionality, like the ability to automatically link mentions of your glossary terms to their definition pages.
Keep reading my LuckyWP Glossary review to see everything that this freemium plugin can offer.
LuckyWP Glossary Review: What The Plugin Does
LuckyWP is pretty simple, which I consider a positive.
Basically, it creates a new custom post type to house all of the terms that you want to explain. For each definition, you add a new “term” just like you would a regular WordPress post. There’s no new interface to learn.
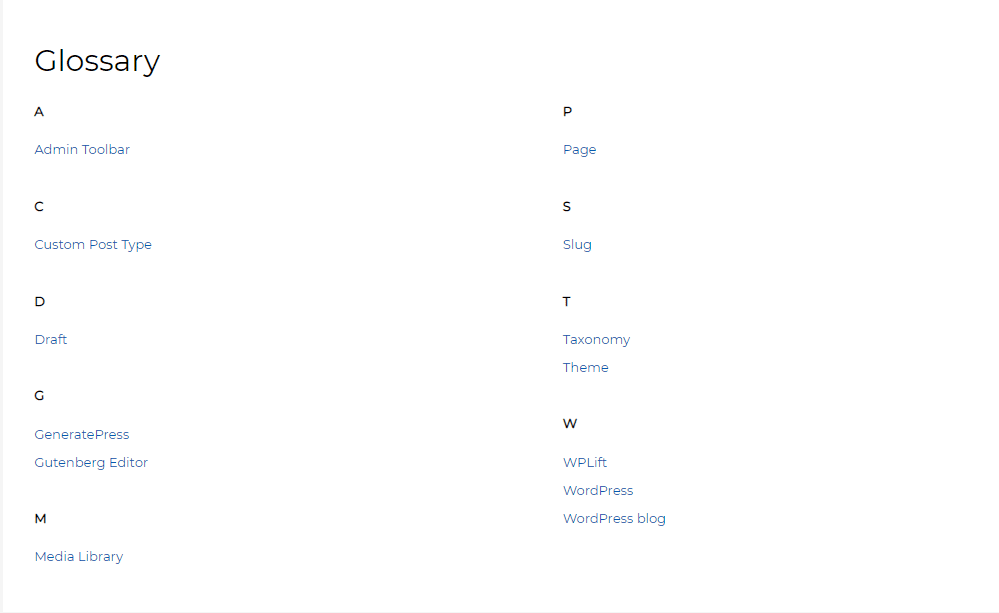
Then, LuckyWP helps you display all of your glossary terms as an alphabetical list, with each letter getting its own separate section (exactly like the glossaries you’re probably already familiar with).
Here’s what the overall glossary looks like:
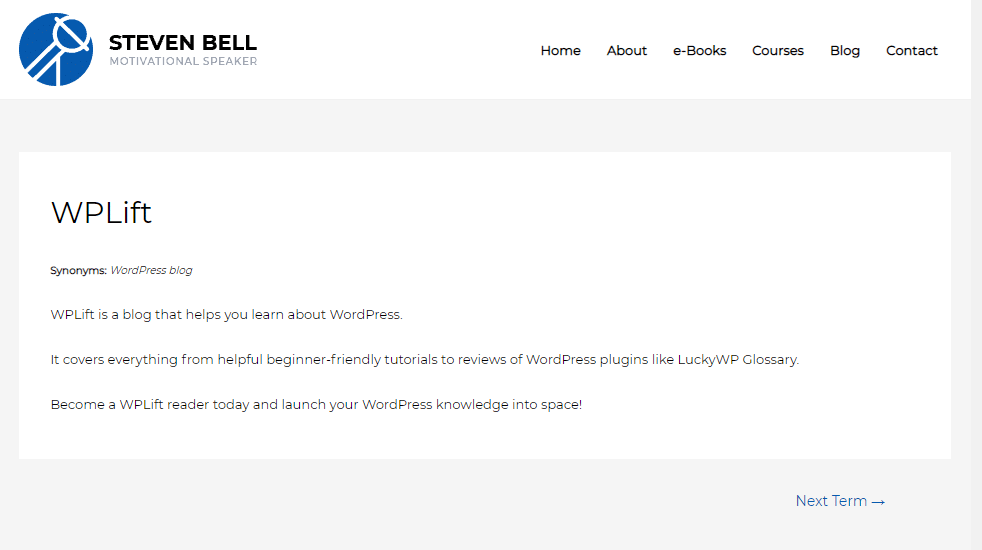
And here’s what an individual glossary term might look like:
It’s not just a custom post type, though. There are also some smart features to make your glossary better.
First, you can give each term synonyms. When you add a synonym, it also shows up in the alphabetical list of terms but it leads to the same page. This is helpful because you still get to include it in your overall list, but you don’t have to create duplicate content.
Second, there are also premium settings that let you:
- Automatically insert links to glossary terms whenever you mention them in your content
- Change the layout of your glossary archive and term pages.
- Control which user roles can create and manage glossary terms
Let’s check it out…
Hands-on With LuckyWP Glossary: Creating A Glossary On WordPress
Ok, now that you know what LuckyWP does, let’s take things hands-on and I’ll show you how all of those features actually come together.
Setting Up The Basics
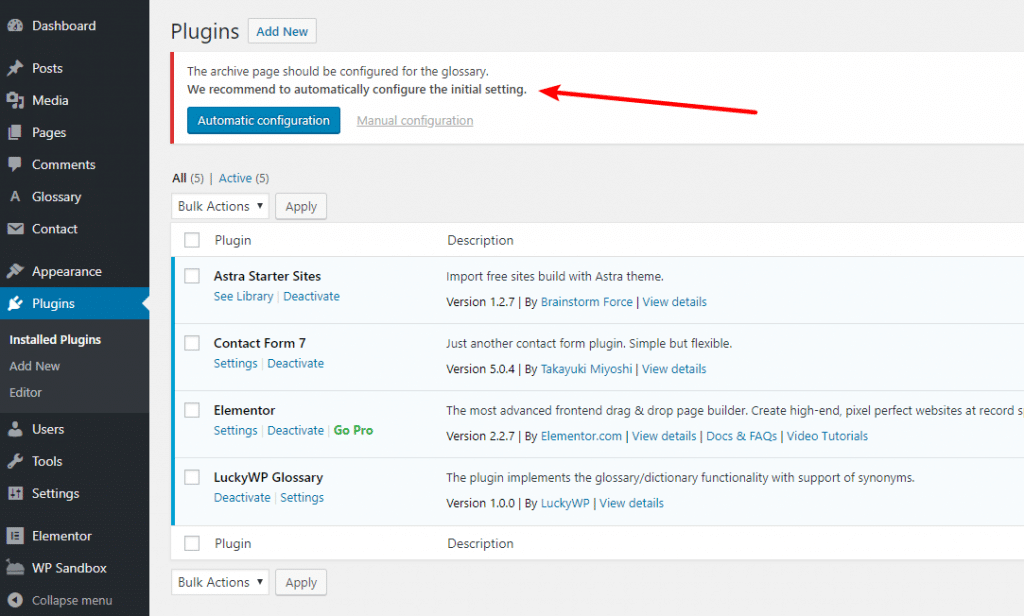
When you first activate LuckyWP Glossary, it will tell you that you need to configure the Archive page. This is the page that actually displays the full list of glossary terms.
You can either use the Automatic configuration option, which creates a new page for you. Or, you can use the Manual configuration option and choose an existing page.
It’s a small thing – but that’s a nice user-friendly way to start things off.
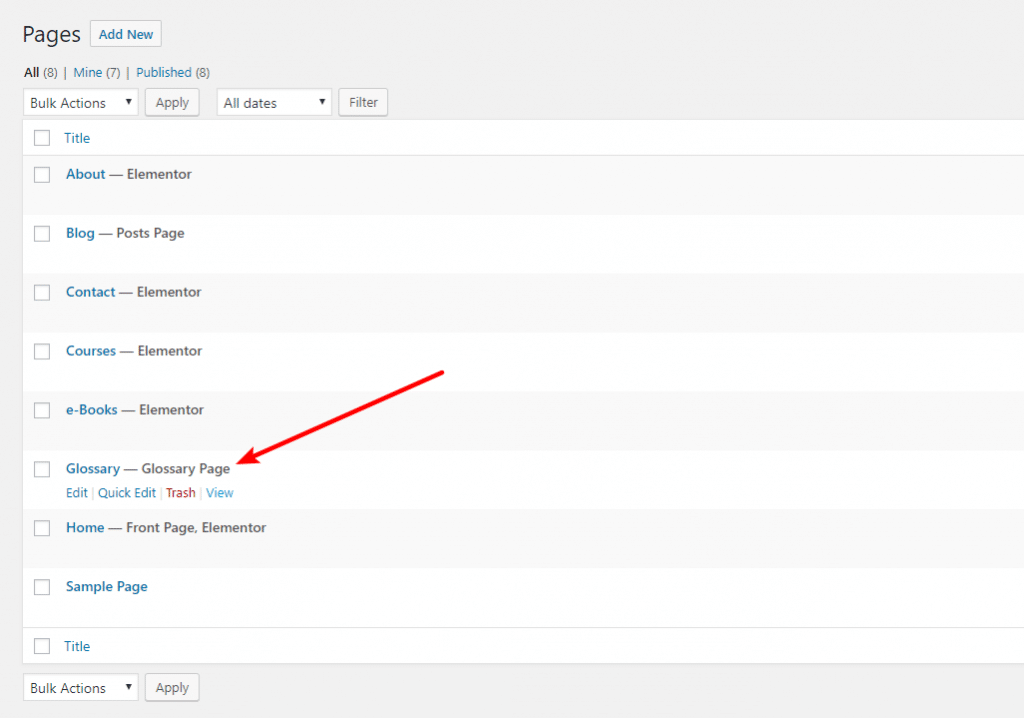
I went with the automatic option and the plugin did indeed create a page for me. This page is also clearly marked in your page list:
Again, small thing – but the little focuses on UX are always appreciated.
Creating New Glossary Terms
As I mentioned at the beginning, creating a new glossary term is super simple because it’s using the familiar WordPress editor interface.
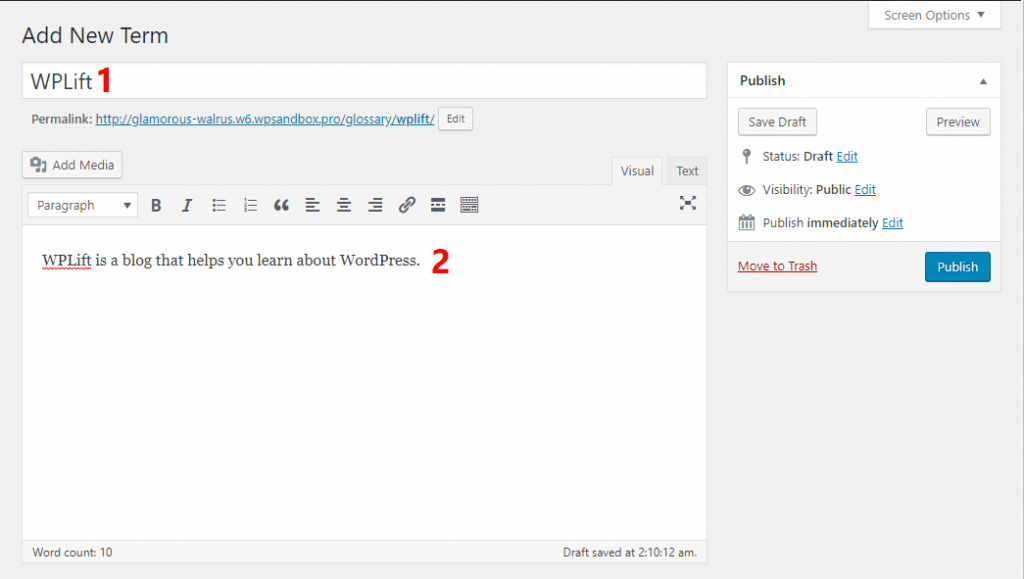
To add your first term, you go to Glossary → Add Term.
At the top, you enter a title. This should be the main term that you’re defining. Then, you can enter the definition in the regular WordPress editor interface:
The only new addition here is a meta box for Synonyms. Remember, any synonyms that you enter here will show up as items on the main glossary page. But rather than linking to their own definition page, they’ll link to the page for the main term:
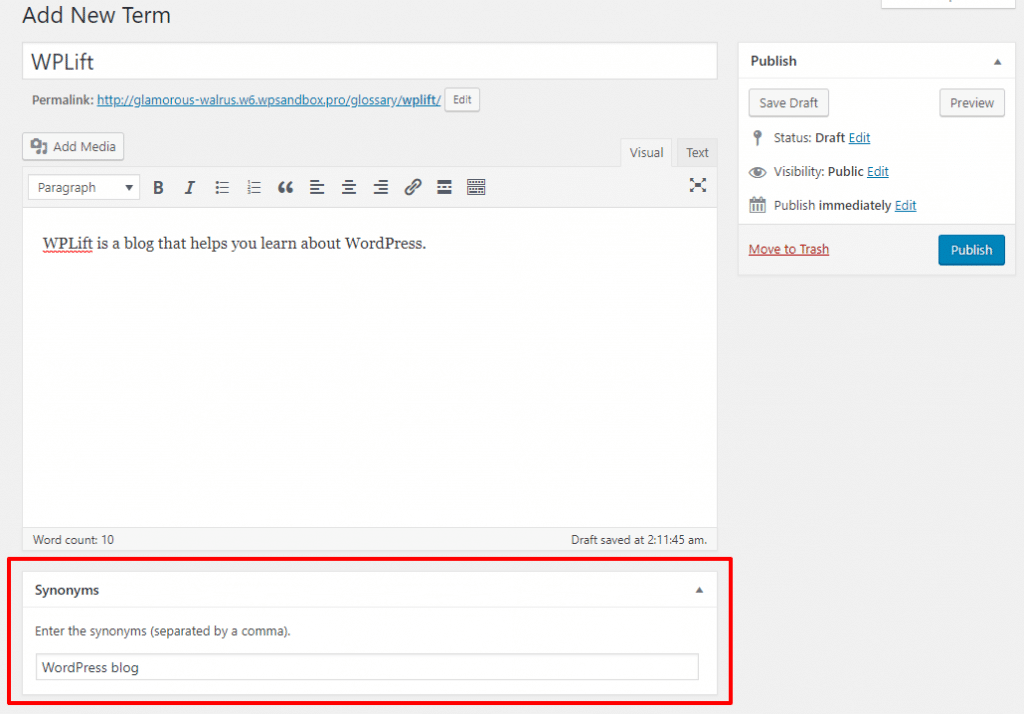
So for my example, both “WPLift” and “WordPress Blog” will show up on the glossary page and both of them will link to the term page for “WPLift”
You can add as many synonyms as you want, separated by commas.
Once you’re done, you Publish your term and repeat the process for as many terms as you want to add.
Controlling Term Permalinks For SEO
Most of the LuckyWP Glossary settings are only available in the premium version (more on those in a second). However, you are able to configure term permalink settings by going to Glossary → Settings.
This is an important consideration for SEO.
The default permalink structure is yoursite.com/archive-page/term-slug.
If you use the automatic glossary page, that will be yoursite.com/glossary/term-slug.
That’s not a bad default, to be honest. But if needed, you can switch it up. For example, maybe you just want to make it yoursite.com/term-slug:

Exploring The Premium Features
Everything that I’ve shown you so far is 100% free. There is a premium version of the plugin that does add some helpful functionality, though.
Let’s start with my favorite feature…
Automatic Link Insertion For Glossary Terms
A glossary is a great way to create tons of contextual internal links. Every time you mention a term, you can create an internal link to it which is:
- Helpful for your human visitors because it lets them define terms they don’t understand.
- Great for SEO because it helps you rank your glossary content in Google (and usually glossary terms have pretty good search volume).
However, if you have a big glossary, it can be hard to remember to create an internal link every time you mention something.
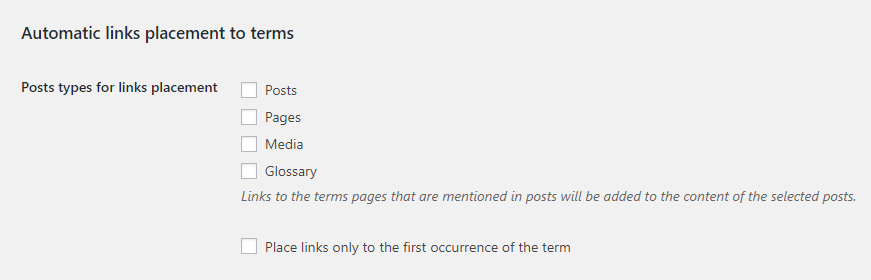
To automate the process, the premium version of LuckyWP Glossary can automatically create a link to the term page whenever you mention it.
You also get a couple options to refine how this functionality works. You can:
- Choose which post types to automatically add links to (for example, you can automatically link posts, but not pages).
- Select whether or not to only link the first mention of the term. I think this is a good setting to enable as it lets you avoid the annoying situation where you have tons of links to the same page.
Basic Glossary Layout Options
With the premium version, you get two options to control your glossary’s layout.
First off, the free version displays the alphabetical list of your glossary terms in two columns. The premium version lets you customize that to anywhere from one to five columns.
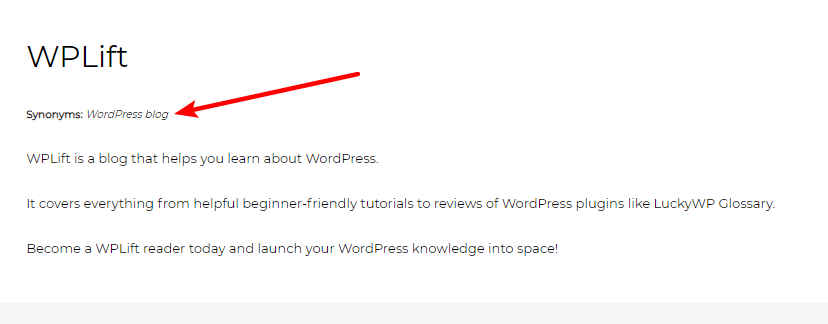
Second, you can also choose how to display synonyms on the individual term page. As you saw at the beginning, the default behavior is to show the synonym list below the term title but before the content:
The premium version lets you also:
- Display the synonym list after the definition
- Hide the synonym list
Use Role Management To Control Who Can Create Terms
In the free version of the plugin, only Administrators can create and manage glossary terms.
If you’re the only one working on your site, that’s fine. But if you have a team and want to delegate creating glossary content to them, that’s limiting because you don’t want to give random team members administrator accounts.
To fix that, the premium version lets you control exactly which user roles have access to the terms management interface:

LuckyWP Glossary Pricing: How Much Does It Cost?
The free version of the plugin is available at WordPress.org. It’s important to note that, beyond the feature differences, the free version only lets you create 30 terms maximum.
If you want to create unlimited terms and/or get access to the premium functionality, the premium version will cost you $39.
Final Thoughts On LuckyWP Glossary
If you need to create a glossary at your WordPress site, LuckyWP makes it really easy and will definitely save you time versus trying to put it together yourself.
I like that it keeps things lightweight – I tested a regular page vs a LuckyWP Glossary page and LuckyWP Glossary only adds its own small CSS file – nothing else. The free version is pretty much just:
- Creating the custom post type for you
- Adding that neat synonym functionality
- Making everything display nicely on the archive page
If you go premium, that automatic linking feature will help you create a solid internal link structure without any manual effort and the user role manager will make it easier to work with other authors. You also get some new options for controlling your glossary’s layout.
Want to get started with your own WordPress-powered glossary? Click below: