Interested in adding a floating action button to WordPress? Buttonizer is a freemium floating action button plugin that can help you create custom buttons for everything from chat, promotions, social sharing, opening popups, printing pages, and lots more.
Beyond offering versatile button actions, it also comes with tons of targeting, triggering, and analytics features to help you use Buttonizer in some really interesting ways.
It can be useful to local businesses, eCommerce stores, blogs…well, pretty much any type of WordPress site.
In our hands-on Buttonizer review, I’ll start by sharing some of the features and then I’ll give you a hands-on look at how everything works. Let’s dig in…
Buttonizer Review: The Feature List
At a high level, Buttonizer helps you create a floating action button that looks something like this:
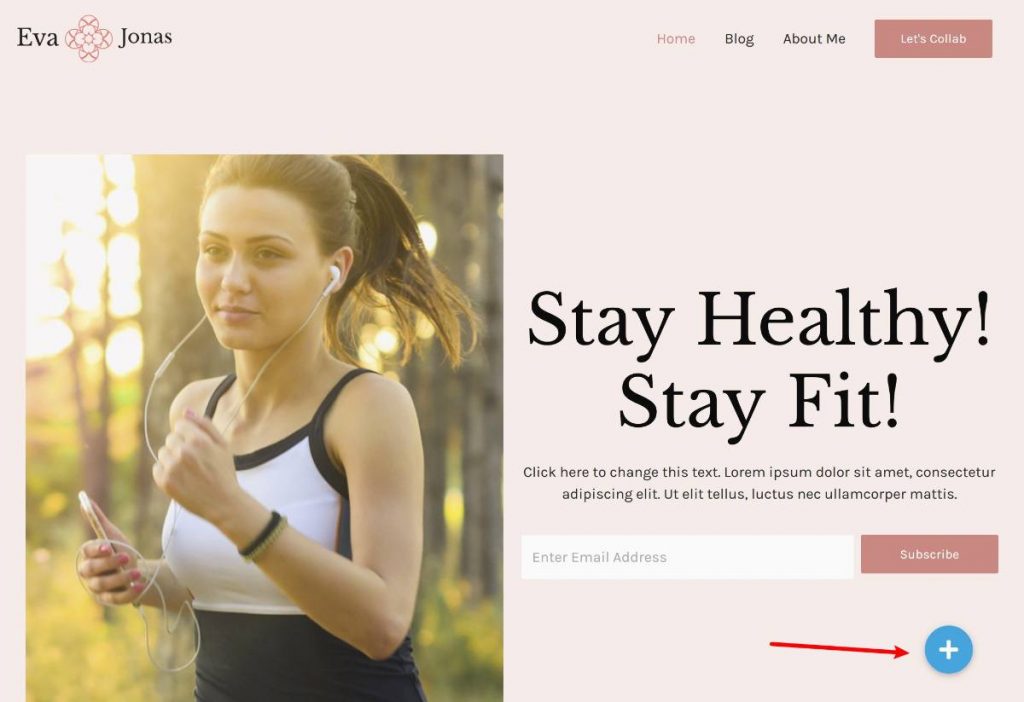
When someone clicks it, you can expand as many options as you want:
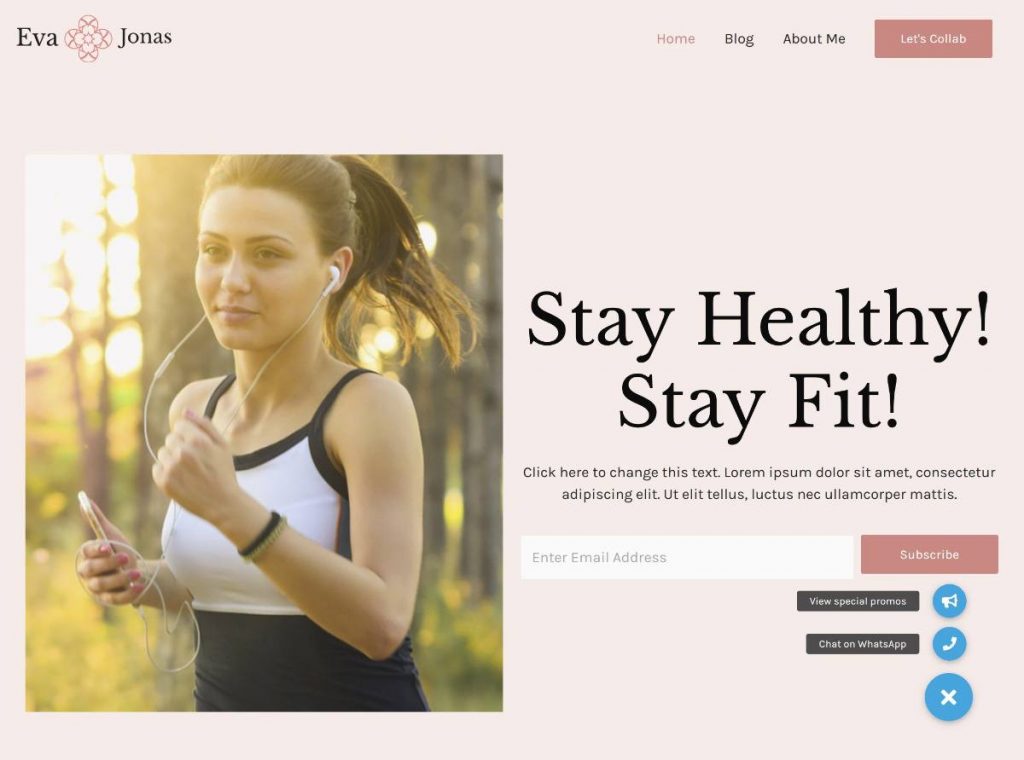
What actions can you use? You have a ton of options:
Contact Options
First off, you can create click to chat buttons for the following services:
- Facebook Messenger
- Twitter Direct Messager
- Snapchat
- Skype
- LINE
- Telegram
- Viber
You can also create other buttons for click to:
Promotion/Popup
You can add any web URL as a button, like taking people to your contact page.
You can also have the button open a popup from the following tools:
You could use these popups to include a full contact form, a sales promo, etc.
Social Sharing
You can add social share buttons for the following networks:
- VKontakte
- Poptin
- Waze
Other Buttons
- Any web URL
- Previous page
- Back to top
- Custom JavaScript code
- Print page
- Copy page URL
Style, Targeting, Triggers, Analytics, and More
Beyond giving you lots of button options to choose from, Buttonizer also comes with plenty of other features.
First off, you get detailed style/appearance rules. For example, you can:
- Choose custom icons for each button from Font Awesome or other icon libraries
- Add animations
- Choose different button layouts
- Customize all of your colors
- Add and style text labels for each button
Second, you get detailed targeting rules. You can target your buttons to:
- Mobile or desktop visitors
- Specific content
- WordPress user roles
- Certain times of day
You also get trigger rules to control when your buttons appear. You get options such as:
- Exit intent
- Inactivity
- Scroll depth
- Time on page
Finally, Buttonizer has built-in integration with Google Analytics Event tracking so that you can track individual button clicks in Google Analytics.
Let’s go hands-on and I’ll show you how it works…
Hands-On With Buttonizer
A note – many of the features that I’ll highlight below are only available in the premium version.
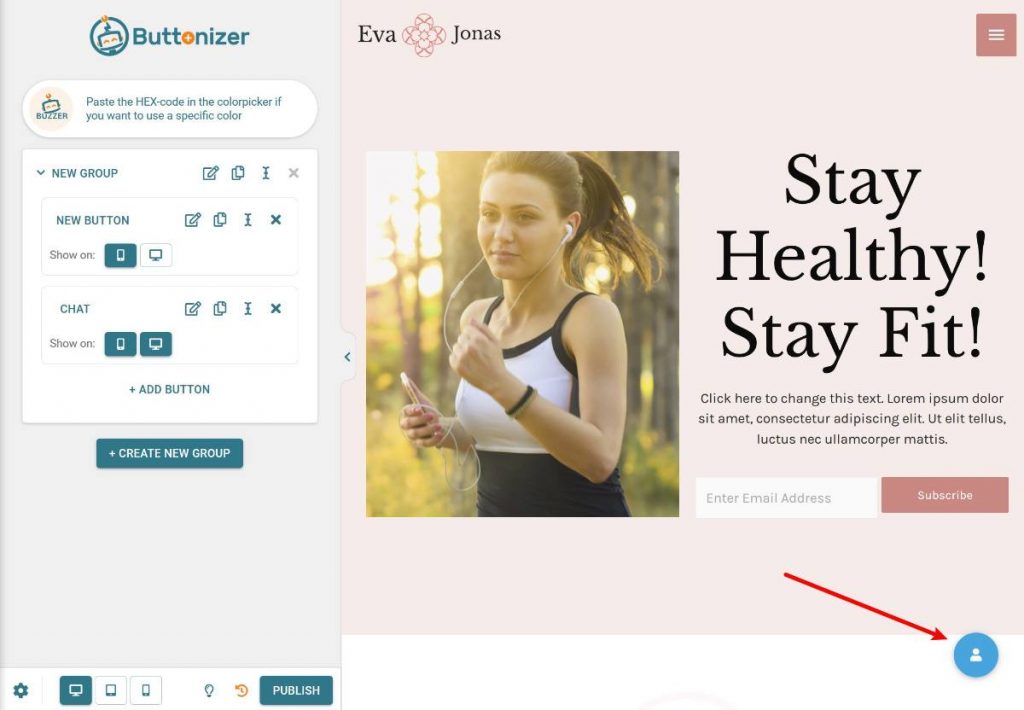
Buttonizer has a fairly unique approach to its interface which I like a lot.
Rather than using a backend settings page like a lot of other plugins, Buttonizer’s entire interface is contained in a real-time preview that shares a lot of similarities with the theme customizer.
You’ll see the settings area on the left and a live preview of your site and button(s) on the right:
Adding Buttons
There are two “levels” of buttons with Buttonizer:
- Buttons – these are the individual buttons that people interact with. For example, a WhatsApp chat button.
- Groups – these are groups of one or more buttons.
If your group only has a single button, visitors will just see that one button floating there:
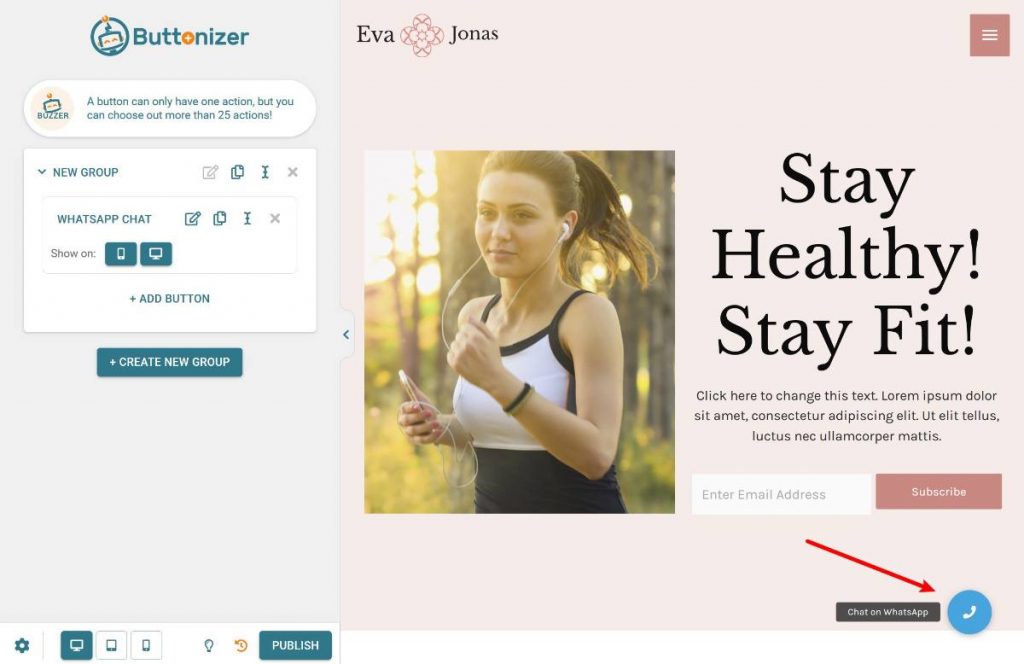
However, if your group has multiple buttons, visitors will see a single button that expands to show all of the buttons in the group when clicked:
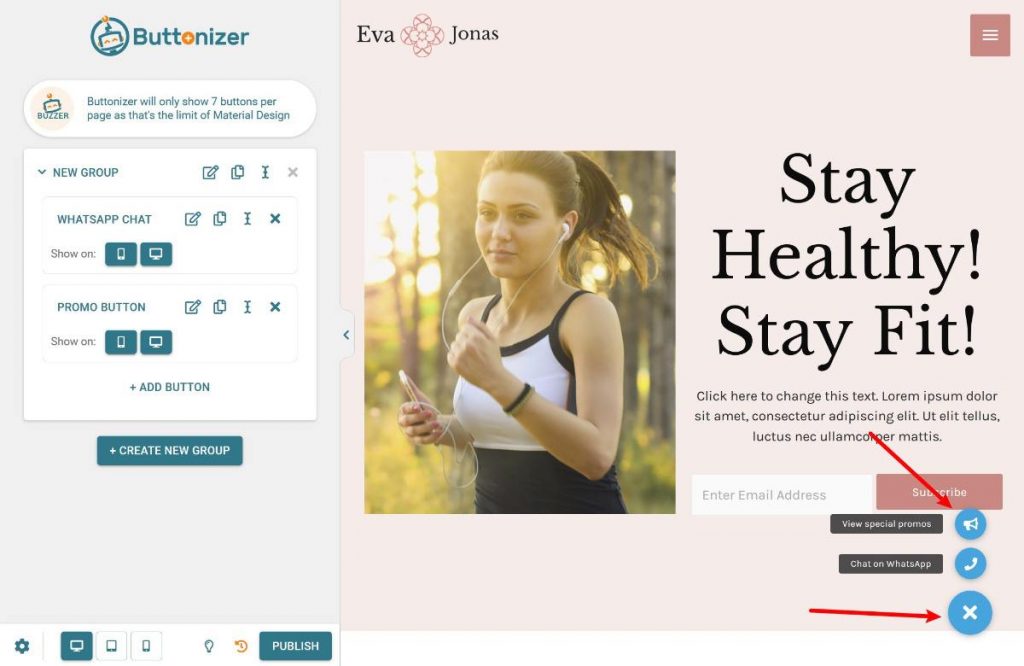
With the premium version, you can create unlimited groups and each group can contain unlimited buttons.
When you combine these with the targeting rules (which I’ll cover later on), this lets you display different sets of buttons for different content, times of day, users, etc.
When you add a button, you’ll first give it a name. Then, you can edit its settings to control what it does and how it looks.
To control what the button does, you’ll use the Button Action drop-down:
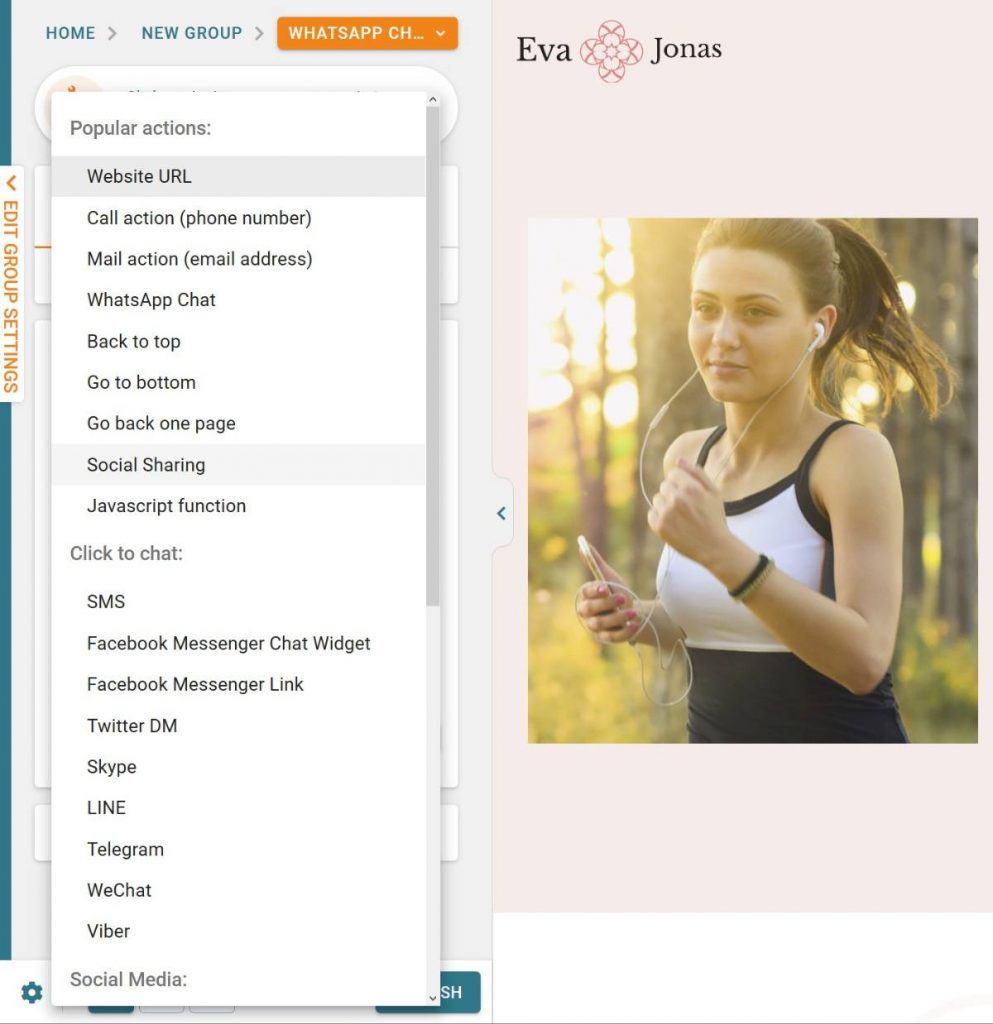
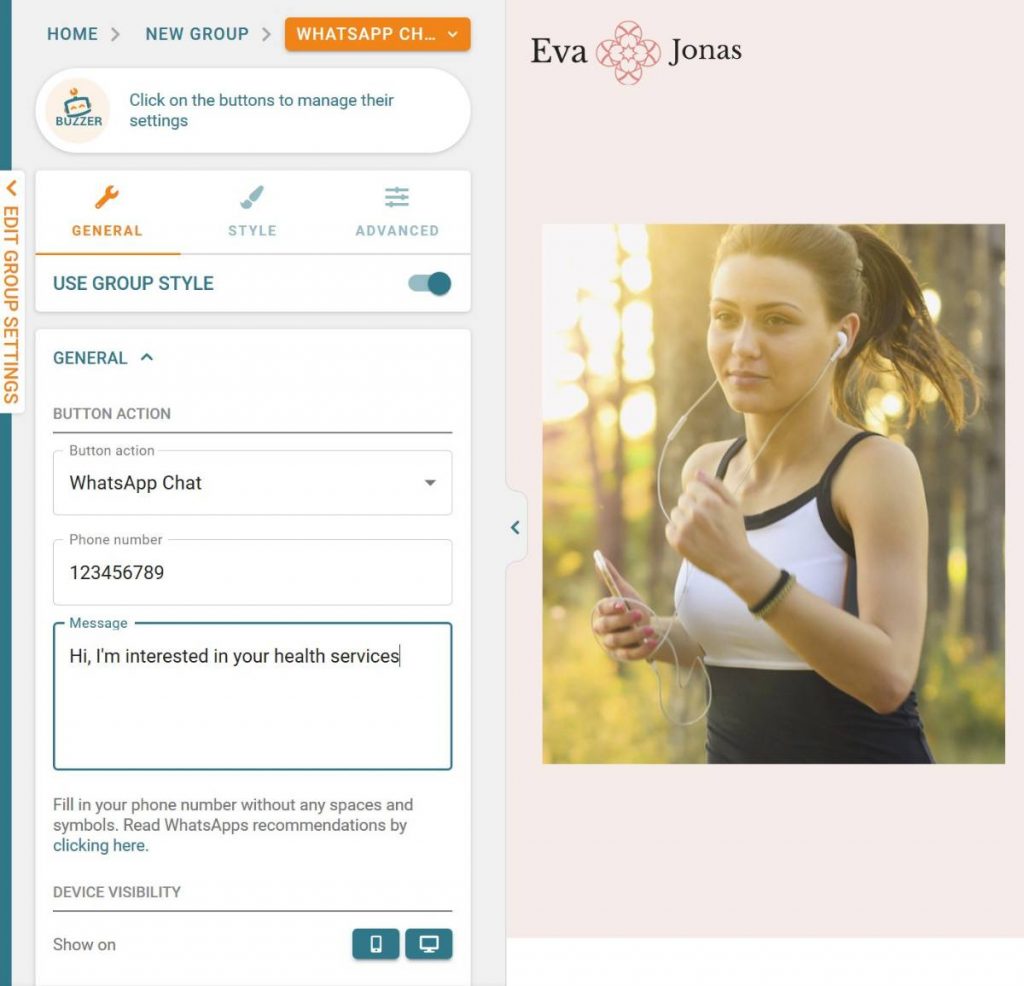
Then, you’ll see additional options depending on your choice. For example, if you add a WhatsApp chat widget, you’ll be prompted to enter:
- Your phone number (or the phone number where you want the WhatsApp messages to go)
- The pre-filled message
For a URL button, you would add the URL of the webpage you want it to link to.
Targeting/Trigger Rules for Buttons and Groups
Buttonizer gives you lots of options to target your buttons and button groups, which is a big part of what makes it so flexible.
You can set up these rules at both the group level and the individual button level, which gives you even more control.
First off, each button and group includes options to show/hide on mobile or desktop. For example, you could display a “call now” button to mobile visitors but not desktop visitors.
To access additional rules, you can go to the Advanced tab of a button or group.
For individual buttons, you can add:
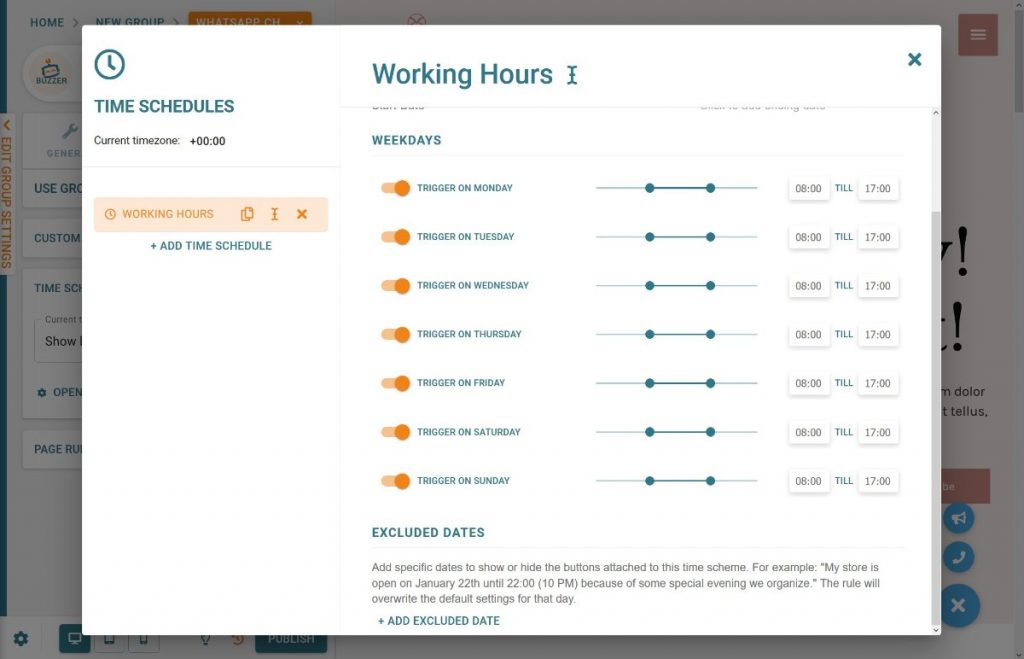
- Time schedules – these let you only show the button during certain times. For example, you could hide your “call now” button when your business is closed.
- Page rules – these let you target your buttons to specific content on your WordPress site. You can also target specific WordPress user roles.
The rules are quite detailed. For example, with time scheduling, you can create unlimited schedules, each of which can include custom rules for each day and also exclude dates:
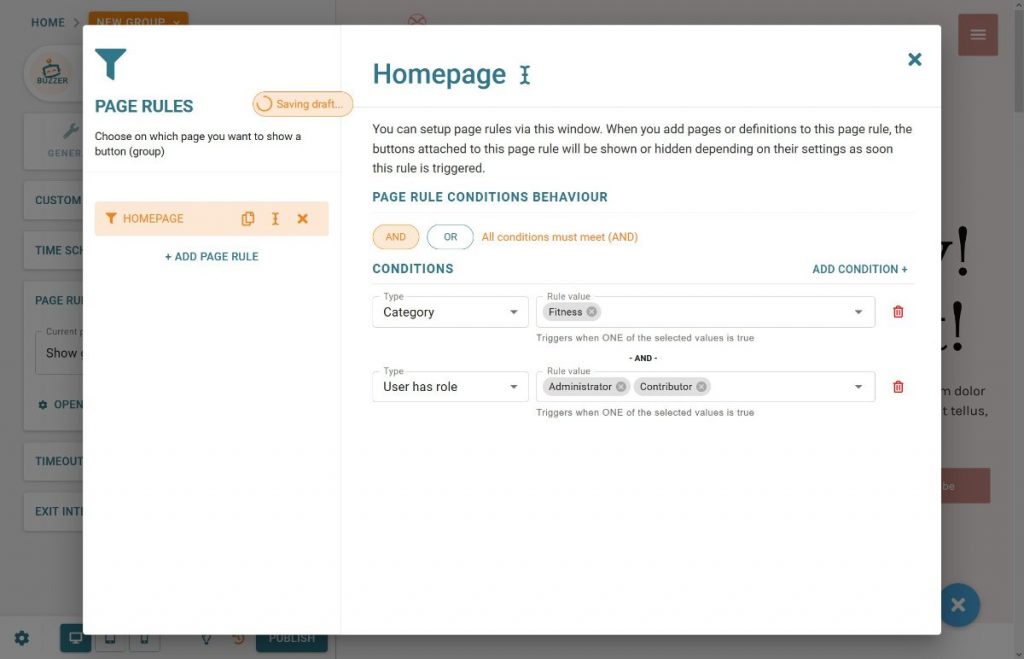
When you add page rules, you can set up as many AND/OR conditions as needed. You can target both:
- Content
- WordPress user roles
For example, if you have a membership site, you could display one set of buttons to registered members and another to anonymous guests, which opens up some neat use cases:
For button groups, you get all the same targeting rules that I showed you above. But you also get some interesting rules to control when to trigger your button group.
You can trigger it:
- After a certain number of seconds (time)
- On scroll depth – for example, when a visitor has scrolled 50% down the page.
- With exit intent – either based on inactivity or when it seems like a person is about to leave the page.
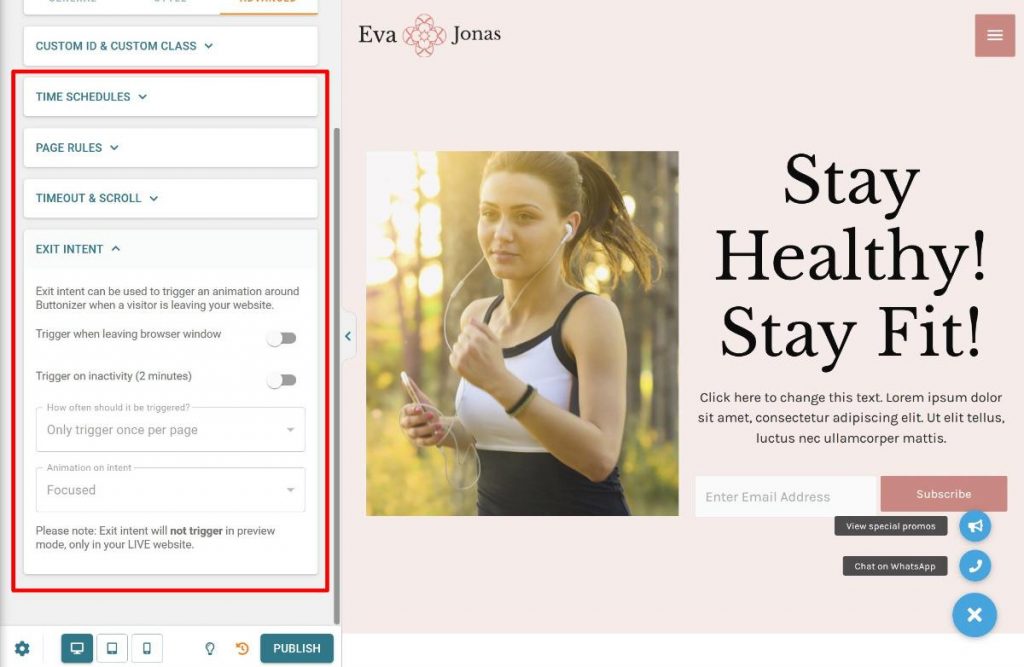
I think this opens up some neat marketing and engagement uses. For example, you could display social share buttons once a person reaches the bottom of a post. Or, you could display a contact widget if it seems like someone is about to leave your site.
Because you get so many different button actions, you can get creative here.
Styling Buttons
Buttonizer also gives you plenty of options to style your buttons.
You can either set one unified style at the group level and have all of your individual buttons inherit it. Or, you can set different styles on a per-button basis.
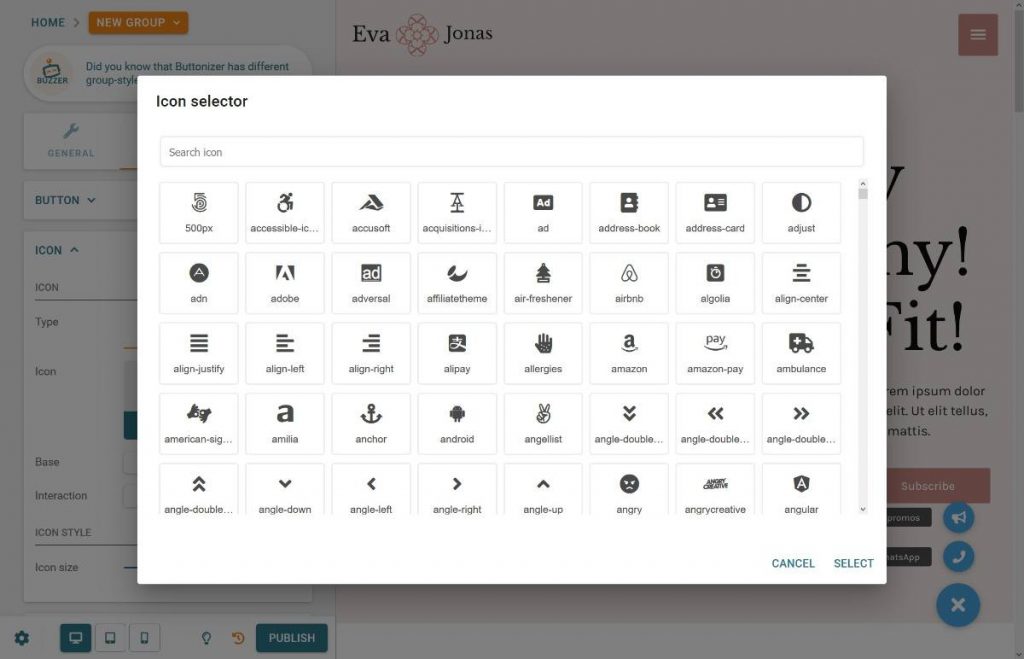
In the Style tab, you can control the colors of your buttons. You can also open an icon picker to choose any icon from a huge library (Font Awesome by default – but you can use another library):
You can also add and style labels, which are the text labels that you see next to the buttons in the screenshots above. Labels are optional, so you can also disable them.
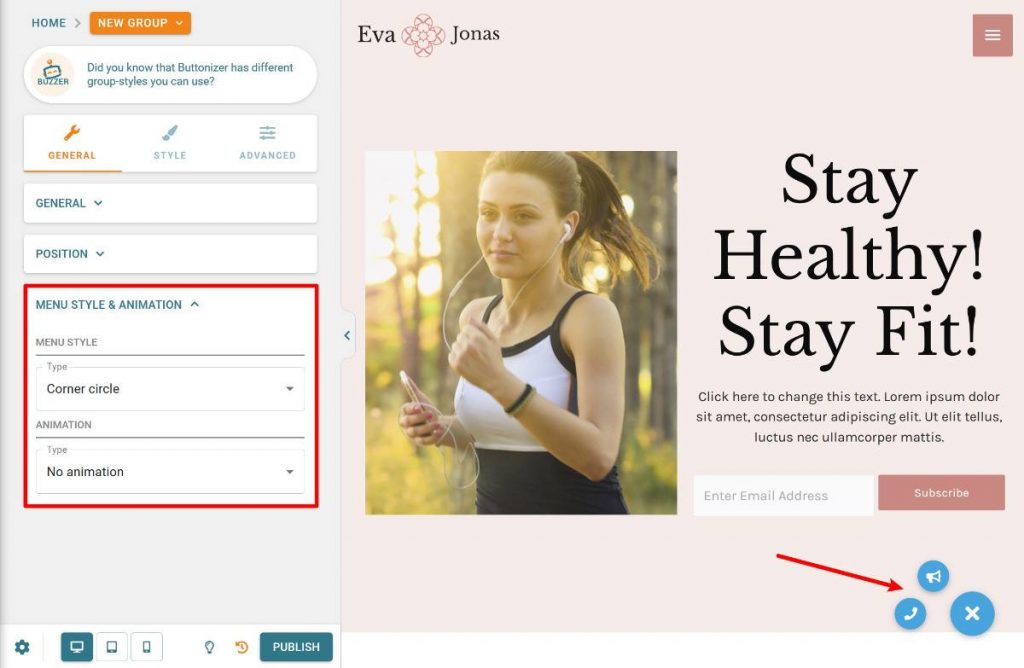
In the General tab, you also get options to control the menu style and animations. For example, if you choose the Corner circle menu style, your sub-buttons will appear as a circle instead of a vertical line:
If you choose the Text w/ icon menu style, you can also create a different style of a button where the label and the icon come together to form one unified button. For some audiences, you might find this to be a more user-friendly approach.
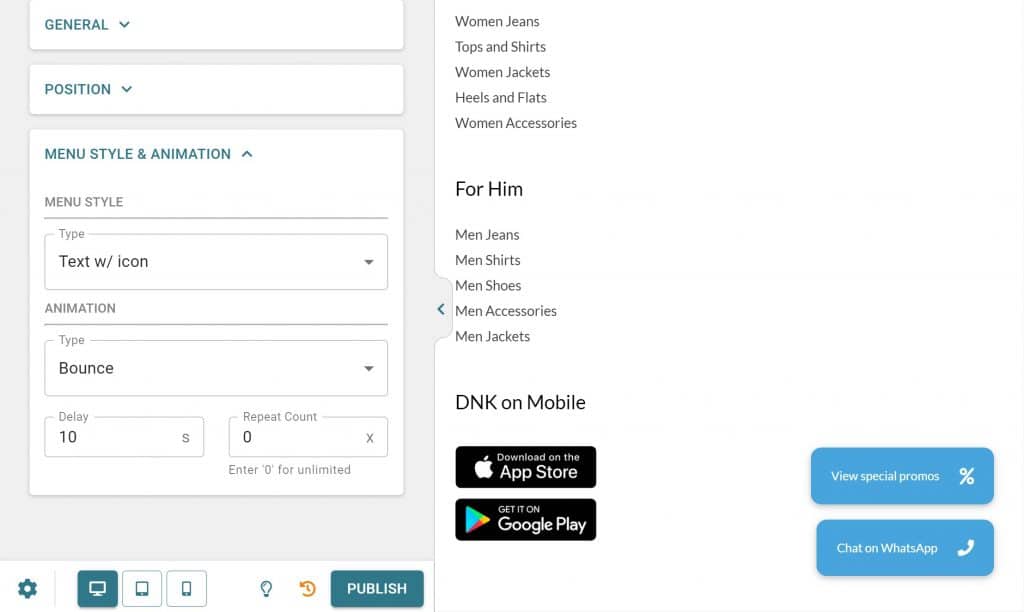
Or, you can also use the Text-only menu style, which is the same idea as the example above but without the icon.
If these styles aren’t enough, you can also apply your own custom CSS classes.
Tracking Your Buttons
To help you understand how effective your buttons are and which buttons generate the most engagement, Buttonizer comes with a built-in Google Analytics integration.
Buttonizer automatically tracks clicks with Google Analytics event tracking and passes three variables to Google Analytics:
- Event Category – the name of your button group.
- Event Action – the name of the specific button that was clicked within that group.
- Event Label – the page title on which the button was clicked.
Again, this opens up some powerful use cases.
For example, if you have a “call” widget, you could set clicking that button as a goal in Google Analytics to analyze how successfully you’re able to convert visitors into phone calls.
Buttonizer Pricing
Buttonizer comes in both a free version at WordPress.org, as well as a premium version with more features.
For the premium version, you can choose between a one-year license or a lifetime license. Here are the prices:
- One site – $19 for a one-year license or $59 for a lifetime license.
- 10 sites – $89 for a one-year license or $269 for a lifetime license.
- 1,000 sites – $149 for a one-year license. There’s no lifetime license for this plan.
You can view a detailed breakdown of the features in free vs Pro on the pricing page.
Final Thoughts on Buttonizer
Floating action buttons are a great way to add features to your site because they’re unobtrusive and don’t get in the way, while still being easy to use and noticeable enough to catch a visitor’s attention.
Because Buttonizer is so flexible in the types of buttons that you can add, you can use it for pretty much any niche.
You also get advanced features for even more control including:
- An option to wait to show the button until users start scrolling or use exit intent.
- Targeting to target both content and WordPress user roles
- Time scheduling. For example, you could display one button when your store is open and another when it’s closed.
- Google Analytics integration to see how effective your buttons are.
All in all, Buttonizer is a very versatile tool to have in your WordPress toolkit.

