There are various WordPress contact form builders in the market today, and each one of them comes with a unique value proposition. Recently Nelio Software added a contact form builder to their library of tools to help WordPress users and marketers streamline the process of creating and managing contact forms on WordPress websites. Nelio Software, recently announced as a VIP WordPress technology partner, specializes in powerful conversion optimization services and technologies for WordPress.

In this blog post, I’ll review the Nelio Forms plugin and will check out its features and functionalities on a test website. By the end of this blog post, you’ll have a more precise understanding of the plugin and will be able to set it up and use it on your website.
Nelio Forms: Overview
Nelio Forms plugin is a new builder in the form builder space and comes with full compatibility with the WordPress block editor. Since the plugin follows a simple approach to building and managing complex as well as regular contact forms, you can use it easily even if you are not familiar with building contact forms.
When I first used the plugin for this review, it took me less than 5 minutes to set up my first form with the plugin, and that too without making any trips to the plugin documentation.
If you are looking for a reliable plugin for building forms on your website, you can go with the Nelio Form’s free version or the Premium version.
Here are some of the plugin’s prominent features.
- You can easily set up and create forms on your WordPress website using the block editor.
- You don’t need any development skills to use this plugin.
- Option to create and manage multi-step forms (coming soon!)
- Avoid spam or form misuse by enabling the built-in captcha feature of the plugin.
Hands-On with Nelio Forms Premium
In this section, I’ll set up and use the Nelio Forms plugins in a testing environment. I’ll cover some of the notable features of the plugin and see how it performs compared to industry standards offered by plugins in the same space.
Nelio Forms: Installation
For this tutorial, I’ll set up and test the premium version of the plugin. You can download the premium version here. If you’d rather use the free version first, you can download it for free here.
Once you have the plugin, here’s how you can install it.
- Log in to your WP admin dashboard and go to Plugins > Add New.
- Now, hit the ‘Upload plugin’ button and upload the zip file you downloaded earlier. Click on the Install button.
- Once the installation finishes, click on the Activate button to activate Nelio Forms on your website.
Creating a New Form
Now to create a new form, follow the steps below:

Article Continues Below
In your WordPress admin dashboard, go to Nelio Forms > Add New.
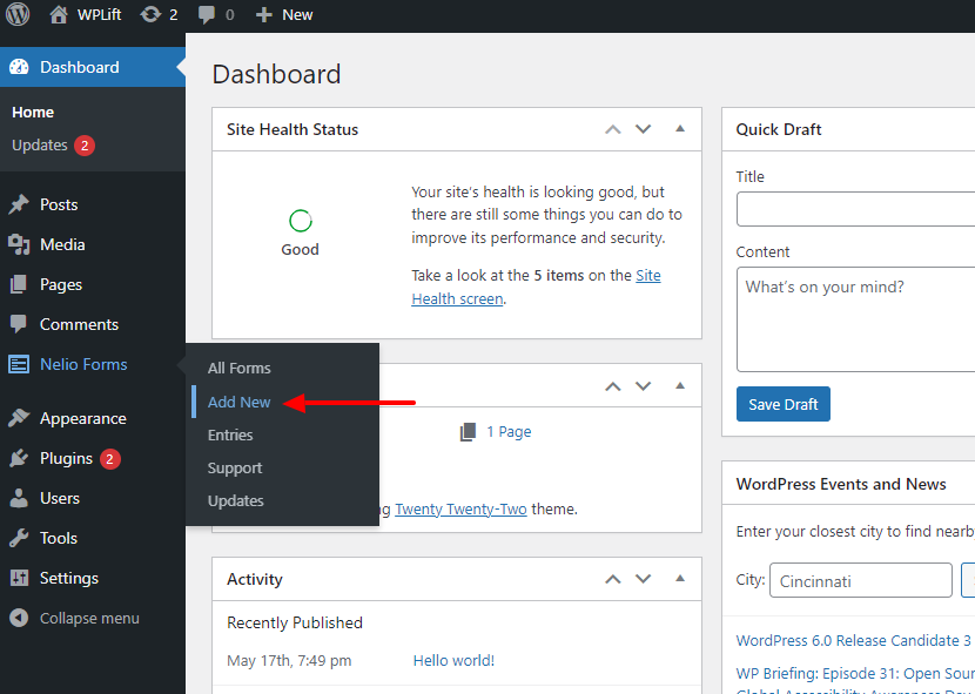
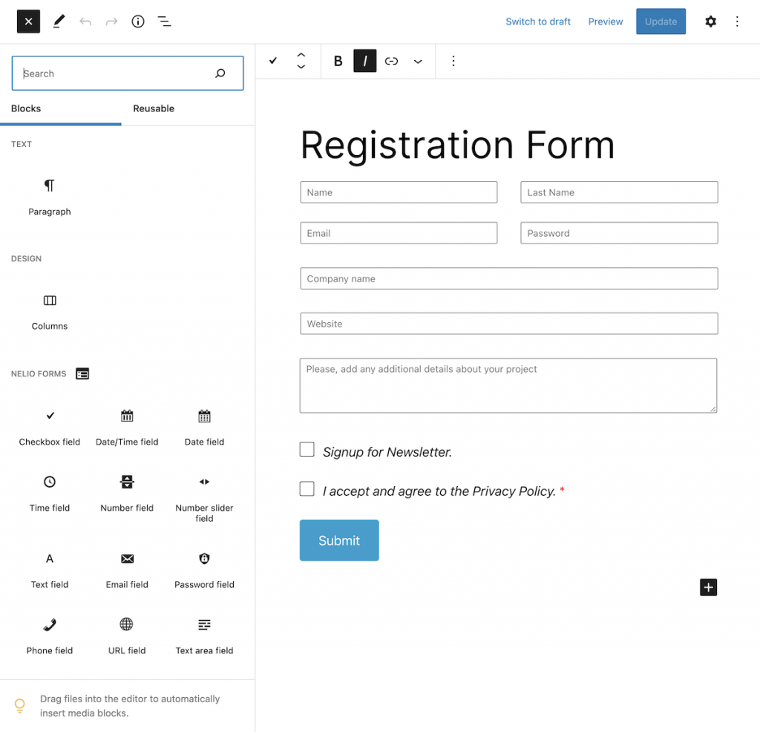
The Gutenberg editor will open, and here you can build your contact form easily, just like building a page with the block editor.
By default, you’ll see a text field and a submit button.
To begin, firstly give your contact form a proper name. Add a label to the text field and if you’d like to add a placeholder, add it by editing the text field. The remaining settings are easy to locate in the Block column on the right.
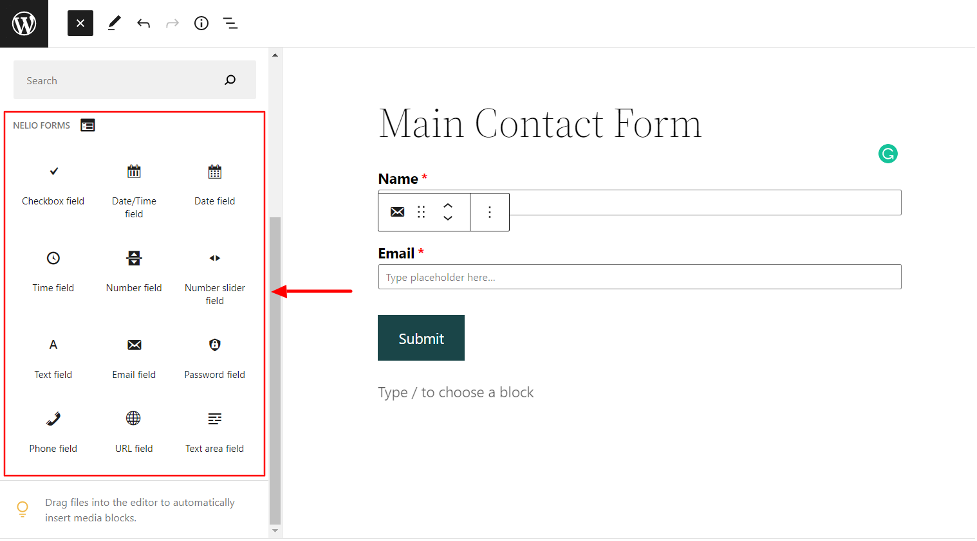
Adding a new element is no different either. You can simply click on the ‘+’ icon on the editor and scroll down and locate Nelio Forms widgets.
Now with a simple drag and drop operation, you can add new elements to the page.
Let’s create a standard contact form with the available blocks.
For this, the form will require the following elements:
- Name field
- Email field
- Subject
- Message field
- Consent checkbox
Since we already have the name field, let’s add the remaining ones.
You can repeat the steps above to add more elements to the page.
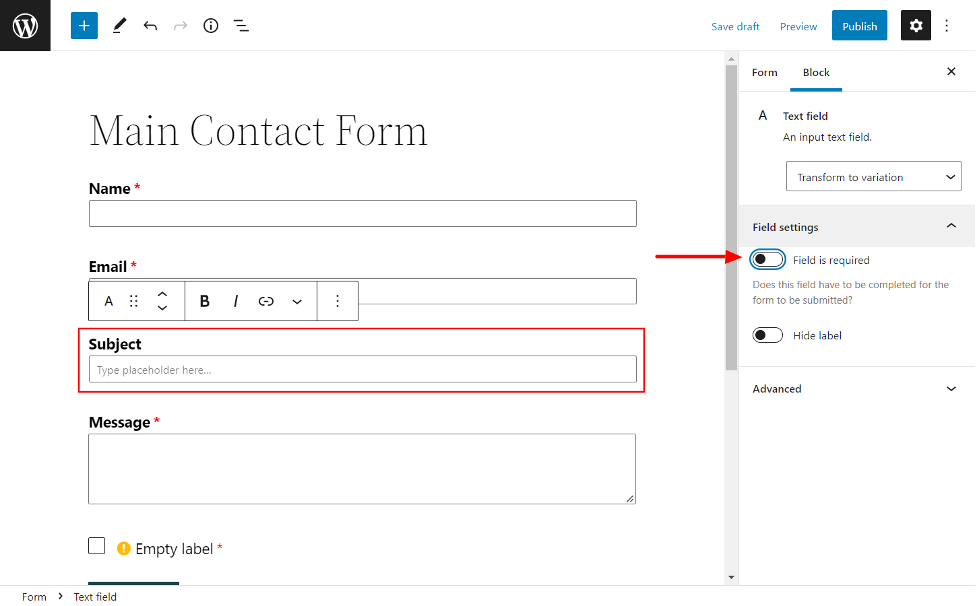
While you can simply drag and drop the elements on the page, you might want to adjust some settings from the sidebar. For example, If I do not wish to make the subject text field mandatory, I can simply toggle off the ‘Field is required’ setting, and the visitors will be able to submit the form even if they have left the Subject field empty.
Also, you get options to customize the look of the Submit button. You can change the style, color, design, size, etc., from the sidebar settings section.
If you wish to make changes to any block on the page, you always have the option to add custom CSS in the additions section of each block.
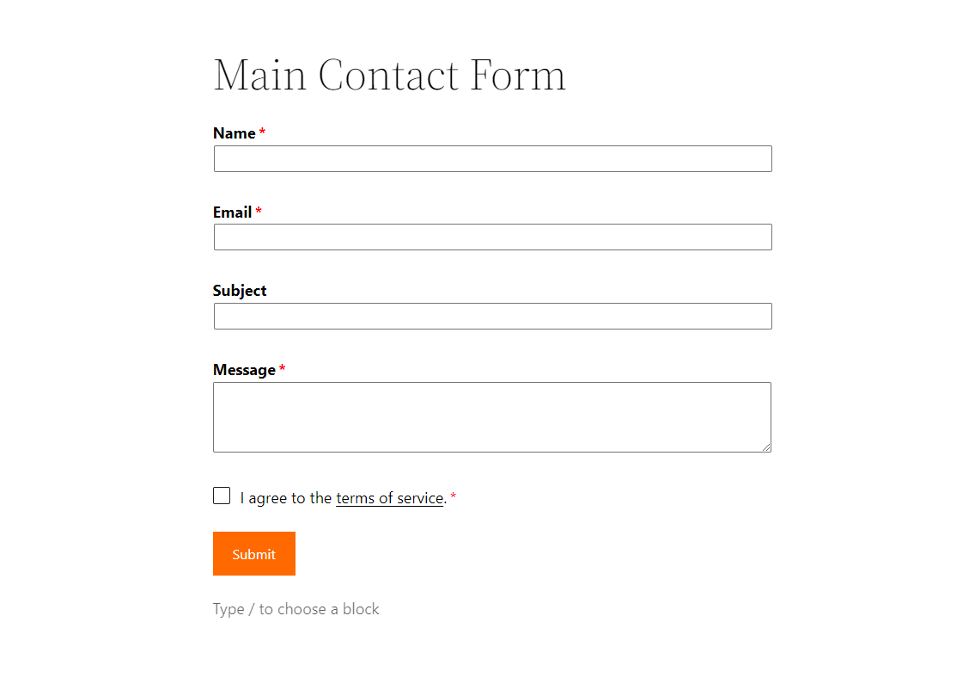
After adding all the elements to our contact form, the contact form looks like this. It took me barely minutes to add and set up the blocks.
Now that we have our contact form ready let’s set up our trigger action.
Here, you need to indicate where you want the data to be sent once it is submitted. You can do this either by editing the current ‘Submit’ action or adding a new one.
Switch over to the Form tab and look for the Submission Actions subsection. You can toggle on the Entry recording option, and with this enabled, the form will create a new entry in the backend whenever there’s a new submission.
Alternatively, you can Opt to send email notifications, content creation, or a new user generation. Simply click on the Add Action link and select the action you want to trigger. If it works with your process flow, you can even have multiple actions working simultaneously for a single form.

Further, you can even make changes to other setting options such as Spam detection, template type, etc.
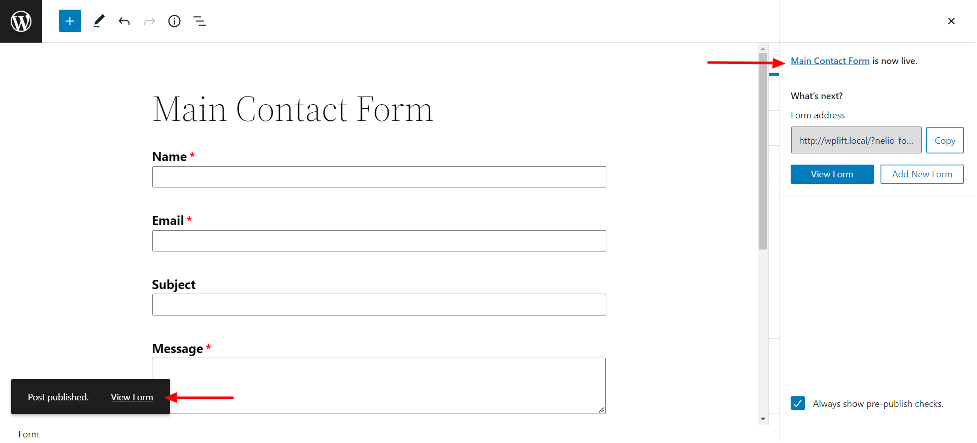
Once you’ve made the changes, you can click on the Publish button to make the changes live.
Adding Forms to Pages and Posts
The last step is to add the form to any new or existing pages on the website. For example, the form I created can be accessed by visiting the permalink, but since it is a contact form, I’d rather want it to appear on the Contact Us page. Here’s how you can do that.
Open the page or post where you want to add the contact form and open it using the block editor. Now look for the ‘Form’ block and add it to your page.
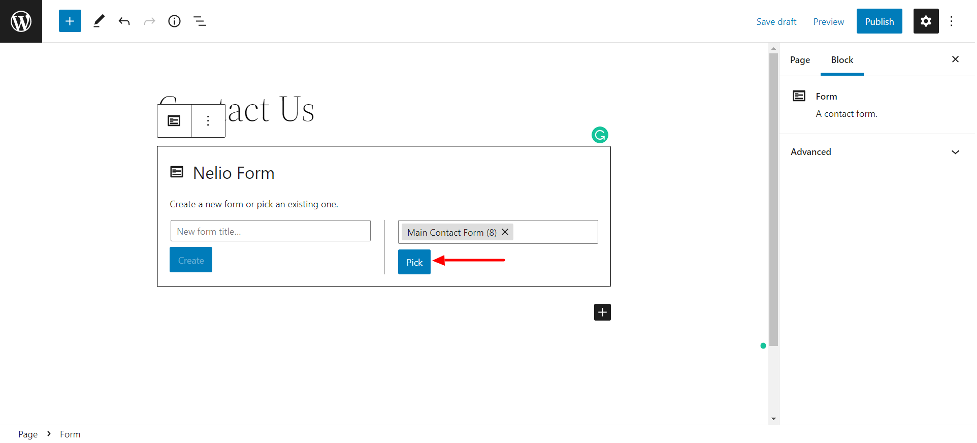
Upon clicking the “Pick” option, the form will instantly load on the page. You can update or publish the page to make the changes live.
You might have noticed that the form is editable on the page. This means you don’t have to worry about opening the form page to make any changes. You can do the same from any page that loads the form.
Checking Entries and Submissions
To view contact form submissions, you can go to Nelio Forms > Entries.
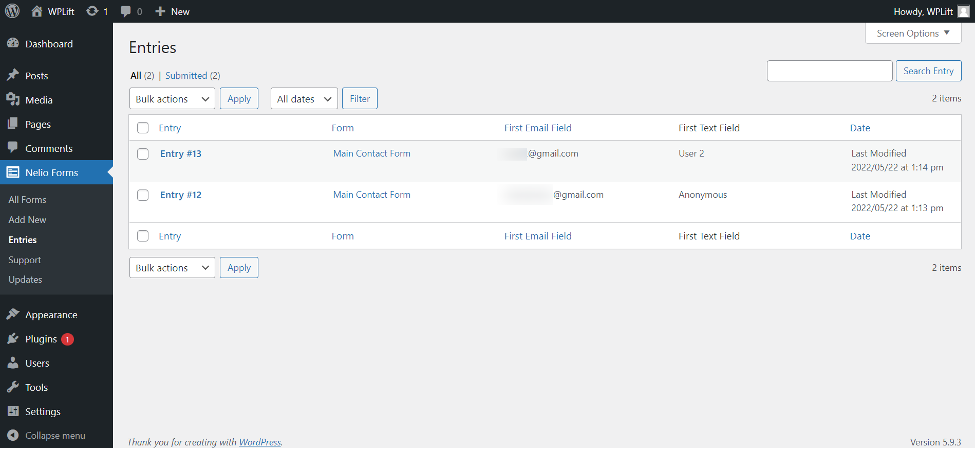
You can list the forms by dates from the filter options easily.
Nelio Forms Support
Nelio Forms offers industry standard one year of unlimited support with the premium version and updates for one year.
With the free version, you get access to the WordPress.org support forum, where you can get your queries resolved.
Nelio Forms Pricing and Plans
Nelio forms comes in a Free and a Premium version. You can directly download the free version from the WordPress.org repository.
If you wish to go with the premium version, you can get it for a standard price of $49 per year. For this price, you get unlimited support and updates for one year.
Like every other plugin offered by Nelio Software, you get a 30-day money-back guarantee with Nelio Forms too.
Nelio Forms: Verdict
If you are looking for a simple and straightforward way of creating forms on your website using the Gutenberg editor, Nelio Forms is a reliable and easy-to-use alternative to many popular contact form builders out there.
I’d recommend you check out the premium version of the plugin, as it comes with many useful features. If you’d rather give the free version a try, you can download it directly from the WordPress.org repository.
If you want to check another use case of the Nelio Forms plugin, you can check out this guide on creating a custom WordPress registration form.
While Nelio Forms is still evolving, it is worth mentioning that some features of the form builders (that are essential) are yet to be added. Some of them are Multi-step forms, conditional logic, and integration with third-party services. These features are a little technical and may only be useful to users who want to create advanced forms.
With the planned development roadmap ahead of Nelio forms, these features are supposed to be added to the form with coming updates. If you are not looking for these features particularly, Nelio forms will fit your needs just fine.
So, what are your thoughts on the plugin, and what’s your favorite feature about it? Tell us in the comments section below!