If you want to connect with your website visitors, you have plenty of options. From email opt-ins and popups to site surveys and promotions, there’s seemingly no end to the methods you can boost engagement and increase conversions.
But if you want to implement all those different tactics, you usually need to install a separate plugin for each type of widget. That can add up quickly.
Getsitecontrol changes that by combining multiple tools (known as widgets) into one incredibly helpful plugin. That means you can quickly implement:
- email opt-in forms,
- contact and feedback forms,
- high-converting CTA popups,
- online surveys, including exit surveys,
- and notification bars – all from one single dashboard.
Each widget can be easily customized to perfectly match your website and provide great experience both on desktop and on mobile.
What’s more, for each widget, you have detailed control over positioning, targeting, and display triggers and can set everything up in minutes thanks to highly customizable templates.
Having used Getsitecontrol for some time, I was already incredibly impressed with its features, as well as how easily it integrates with WordPress. However, earlier this year, the team behind this all-powerful plugin released a significant update, adding even more features and design options to make optimizing your website for visitor engagement even more accessible.
Read my Getsitecontrol review if you’d like to learn more about these new features, as well as how Getsitecontrol can help you connect with your visitors.
Getsitecontrol Review: What Does It Do?
As I mentioned in the intro, Getsitecontrol combines multiple widgets built into one SaaS-style package.
Next question …what’s a widget?
Well, each widget is a different method to help you connect with your visitors. Following the significant 2020 upgrade, the plugin contains the following widgets:
- Subscribe form for generating leads
- Contact form to allow visitors to send you a message.
- Popup notifications to help you promote offers or otherwise drive traffic to another page
- Survey tools and rating scales to help you collect feedback from your visitors
- Sticky bars To promote deals and draw attention to your CTAs.
- Fullscreen widgets that work similarly like welcome mats.
Alone, none of these widgets are especially unique. That is, you can find plenty of tools to implement every single widget on WordPress.
What is fairly unique, though, is having every single widget housed under one roof. That means that instead of needing to install multiple different plugins and work in various disparate interfaces, you can manage everything from a single interface. That likely saves you time and aggravation.
Along with these tools, you’ll also get:
- Built-in CSS editor to make your popups and forms match the rest of your web design
- Large gallery of pre-designed templates which make it easy to add new widgets
- Easy A/B testing
- Multi-page widgets
- Easy image import from Unsplash or anywhere on the web
- Form sharing option via direct links
- Incredibly detailed targeting options
- On-page behavior triggers
- Autoresponders for your email sign-ups
- Integrations with popular email marketing tools, Google Analytics, and Zapier apps.
And you can manage all of those widgets and features right from the Getsitecontrol interface.
Accessing Social Media and Live Chat Widgets
If you’re already familiar with Getsitecontrol, then you may notice that a couple of features are conspicuous by their absence in the above list.
In the previous version of the tool, you could also access:
- Follow buttons to help build your social following.
- Share buttons to help your content get more exposure on social media
- Chat widget to help you chat with your visitors in real-time via Slack or a desktop/mobile app.
With the big update, however, Getsitecontrol has taken a ‘less is more’ approach, stripping out these features and focusing more on customization and great-looking design.
If you did still want these features, then I’ve got some good news for you. I recently spent some time chatting with a representative from Getsitecontrol who let me in on a little secret:
It’s still possible to access social media buttons and live chat tools by asking them to set you up an account on the older version. The drawback to this is that you miss out on a lot of new features. You can have your live chat and social widget sure, but you’ll have to sacrifice lots of new customization options, the CSS editor, and the ability to have more than one image on a widget.
Thankfully, the company’s support team is very responsive. I contacted them via the live chat app on their website, and within minutes they had offered to set up an account on the previous version so that I could use the features I was used to.
Hands-On With Getsitecontrol: A Real Look At How It Works (2020 Update)
As I mentioned, Getsitecontrol is more of a SaaS than a standard WordPress plugin. As a result, you’ll do most of the managing from the Getsitecontrol interface.
Getsitecontrol does offer an official WordPress plugin to help you easily integrate with your WordPress site, though.
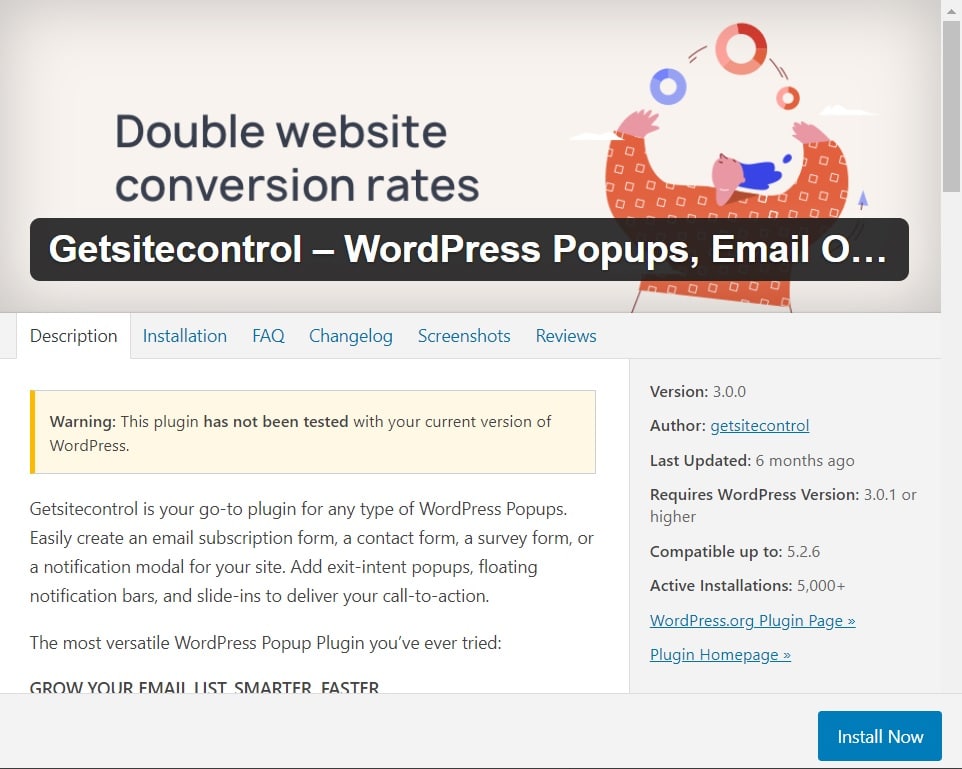
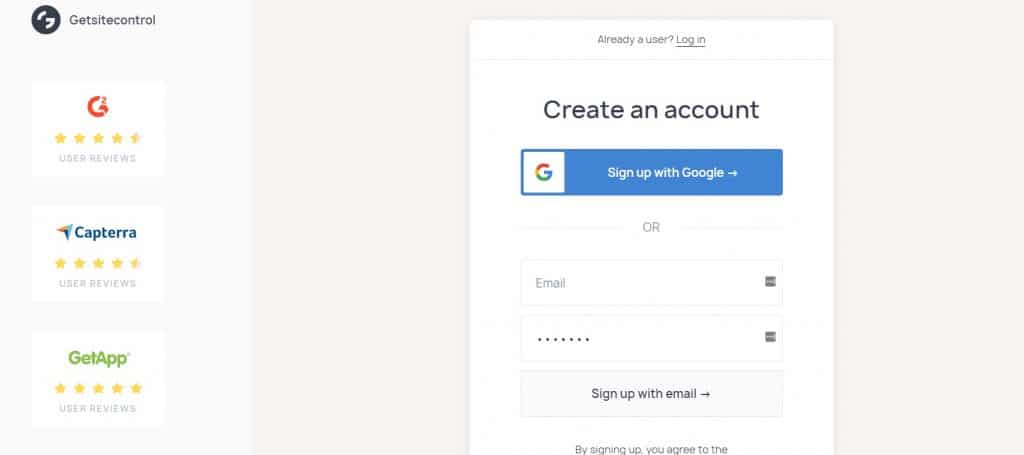
Once you install the plugin, it will prompt you to either create a new account or log in to your existing Getsitecontrol account:
Once you’re signed in, you’re finished in your WordPress dashboard! You’ll do everything else from the Getsitecontrol interface:
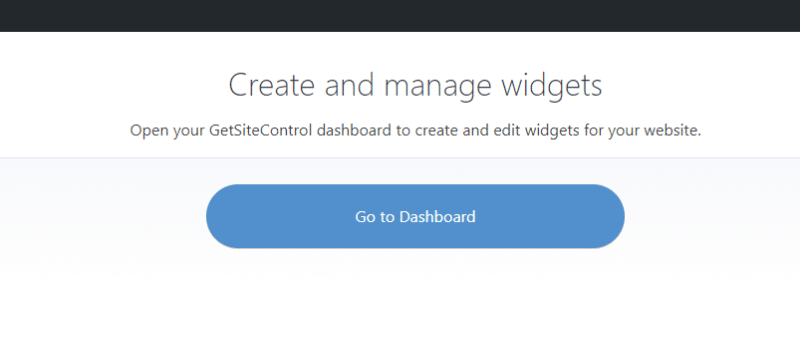
The integration process really couldn’t be more straightforward.
Creating Your First Getsitecontrol Widget
One of the main benefits of the new Getsitecontrol update is the sleek new dashboard from which you can add and manage websites, change your settings, integrate the plugin with additional tools, and more.
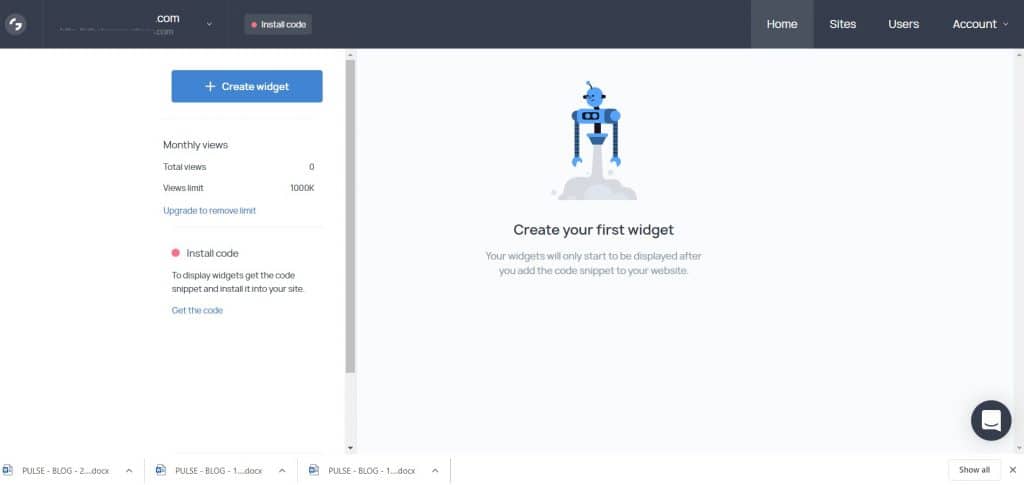
There’s nothing there because this is a brand new account. So let’s go ahead and create a new widget.
After selecting the ‘Create Widget’ button on the top left-hand side of your dashboard, Getsitecontrol will automatically open up a template for you to create an opt-in email form. However, if you’d prefer to make a contact form, popup or survey, all you have to do is choose that option from the drop-down menu, which is again found in the top left-hand corner.
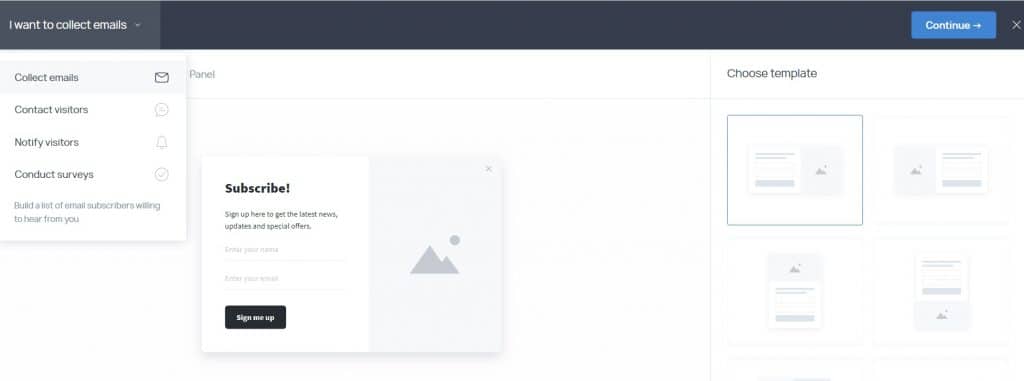
For the sake of this review, let’s stick with creating that opt-in email form.
If you don’t like the look of the template chosen for you, you can simply pick another one from the template gallery.
Using the horizontal menu across the top (Modal, Fullscreen, Slide-in, etc.) also reveals further template options so you can customize the whole thing to look precisely as you’d like.
The ability to add fullscreen forms is a new feature included in the latest update and makes a difference if you’re trying to create high-converting landing pages, so it’s a welcome addition in my view.
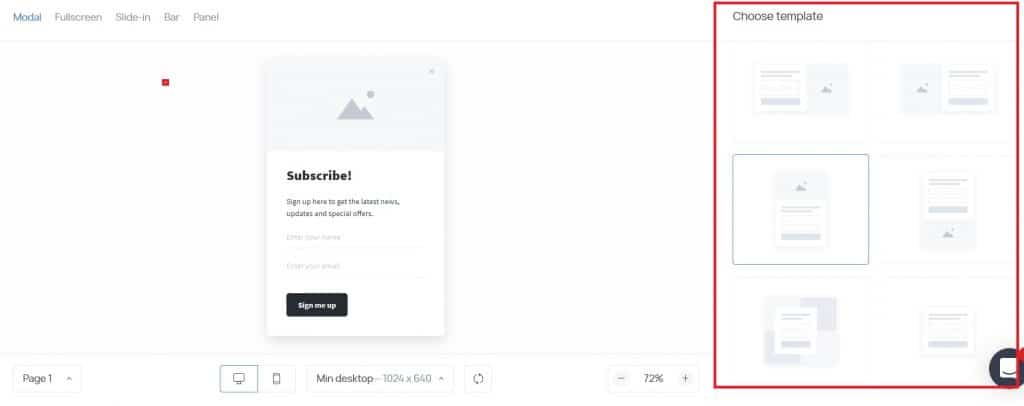
Still, let’s be honest:
That template is looking a little bland, isn’t it?
So let’s move on and change it up.
Editing Content
After choosing your template, click continue to bring up the content editing options.
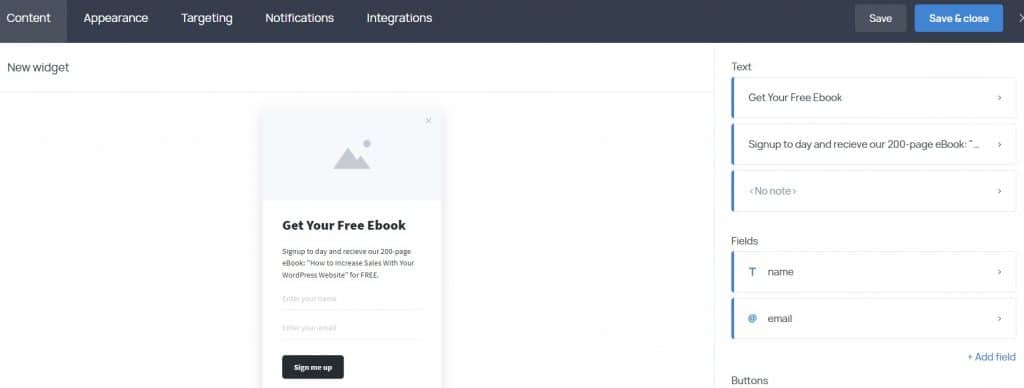
First things first, you can click on each text block in the menu to customize the text. You have three options here:
- Add a heading to your form (here I’ve gone with ‘Get Your Free EBook’)
- Add some CTA text (sign up today…)
- Add a note.
The note is left blank by default but is useful for adding Terms & Conditions or other vital information beneath the button.
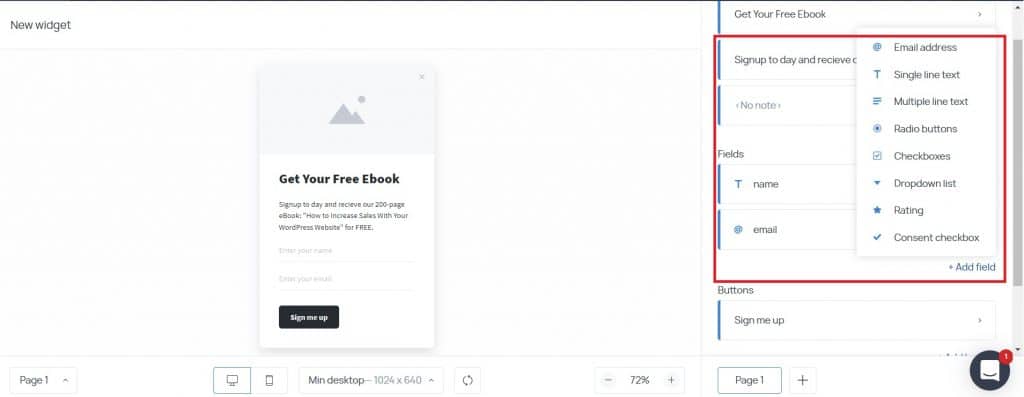
If you want to collect more than just a name and email address, this is as simple as clicking’ +Add Field’ to reveal a whole bunch of options.
Finally, you can edit your button, not only changing the text but also deciding what action should occur after a user presses it. For example, you could have it open up another widget, such as a popup or redirect your visitors to another page.
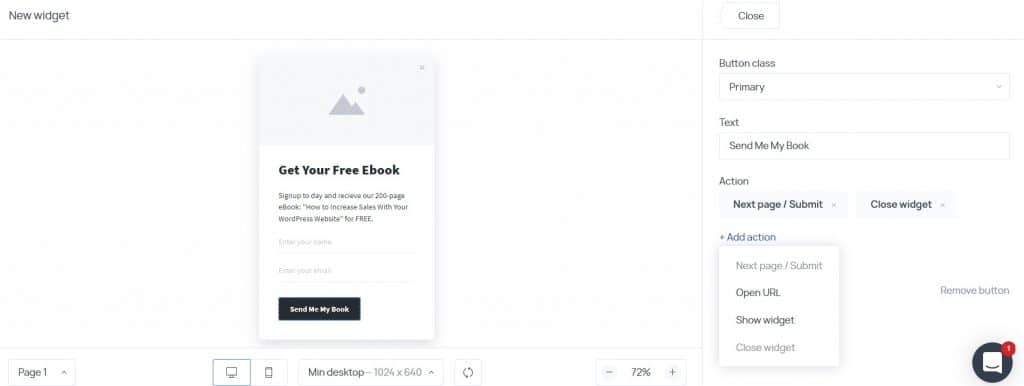
Though I’ve focussed on the email sign-up form here, the content editing options (in fact, all of the options) are the same for each type of widget.
Edit Widget Appearance
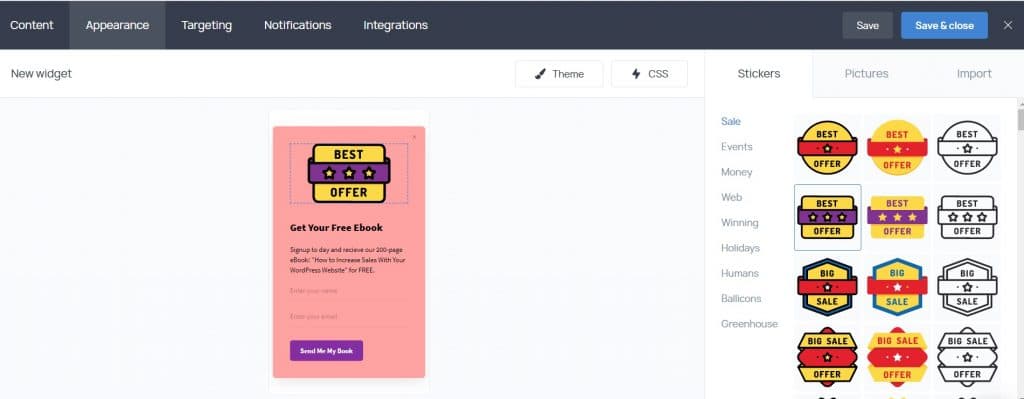
With that, all done, click ‘Appearance’ from the top horizontal menu, and let’s bring some life to your widget. From this dashboard, you can not only change your background, button, and text colors but also choose from a vast library of stickers and pictures to add to your widget. Alternatively, you can click ‘Import’ to add your images.
All of this is super easy and a lot of fun to play with, making it incredibly simple to create some impressive looking widgets.
However, as cool as all that might be, I’d be remiss if I didn’t take the opportunity here to talk about two of the best new features that Getsitecontrol released with their recent update.
- Separate editors for mobile and desktop – so that you can fine-tune your widgets to ensure they look great and function flawlessly on all devices.
- CSS Editor – As shown in the image below, the CSS editor allows you to go a step beyond the WYSIWYG editor and make your widgets unique to your website.
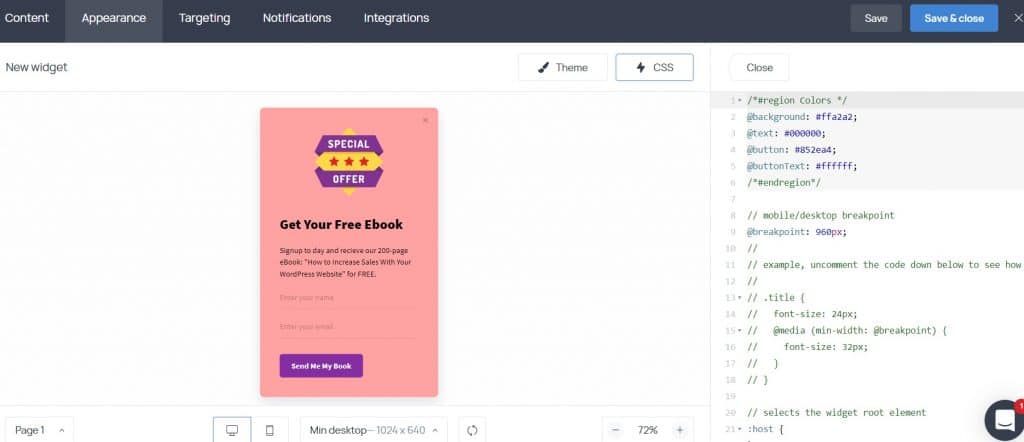
This is a fantastic option if, for example, your site uses fonts or certain design features that aren’t available in Getsitecontrol by default.
However, I should take a moment to remind you that this might be one option you pass by if you’re not already familiar with editing CSS, as a simple mistake could potentially screw up your whole widget.
Advanced Options For Triggers and Targeting
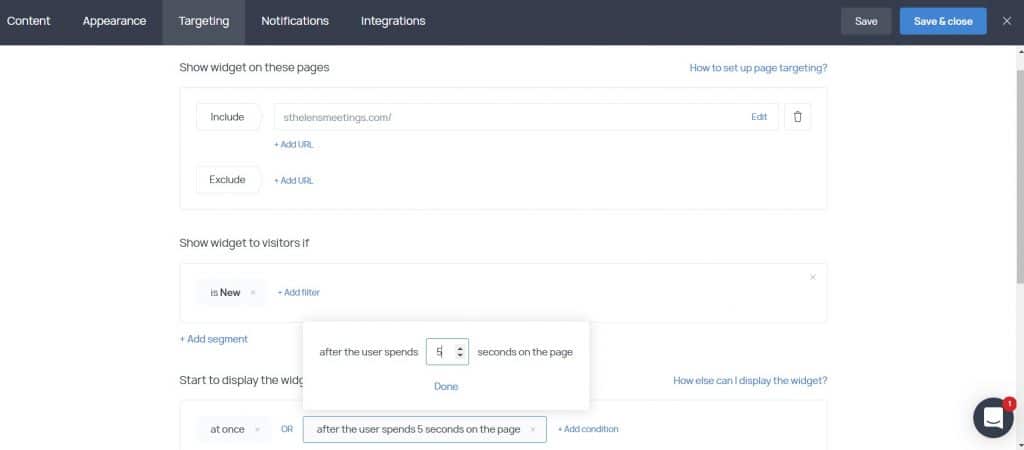
The Targeting tab is when things start getting cool. Here, you can set up:
- How to trigger the widget. You can do it right away, based on user behavior, time, or programmatically.
- How often to show the widget. Show it always or only a certain number of times per user. You can also choose to stop showing the widget after specific criteria are met.
Make no mistake about it. You have a ton of different targeting options here.
First, you can include/exclude the widget on specific pages using expressions or exact URLs.
Below that, you can also target by specific:
- Characteristics – e.g., new vs. returning.
- Browsers
- Operating systems
- Devices
- Referrers
- UTM tags
- IP addresses
- Locations.
And below those options, you can also choose specific dates and times to display the widget:
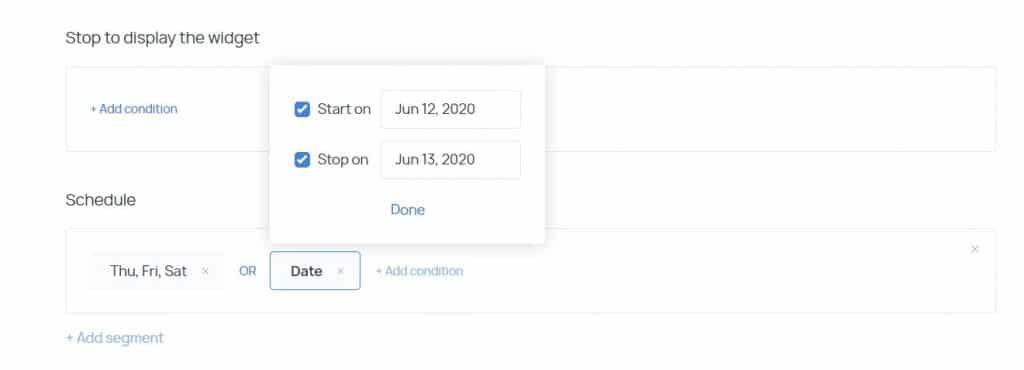
The targeting options are super cool. Seriously – it’s much deeper than most other WordPress plugins I’ve looked at. What’s more, you can easily stack conditions to create pin-point targeting.
And for all the options, you can choose to either include or exclude traffic based on that condition, which gives you even more flexibility.
Notifications and Integrations
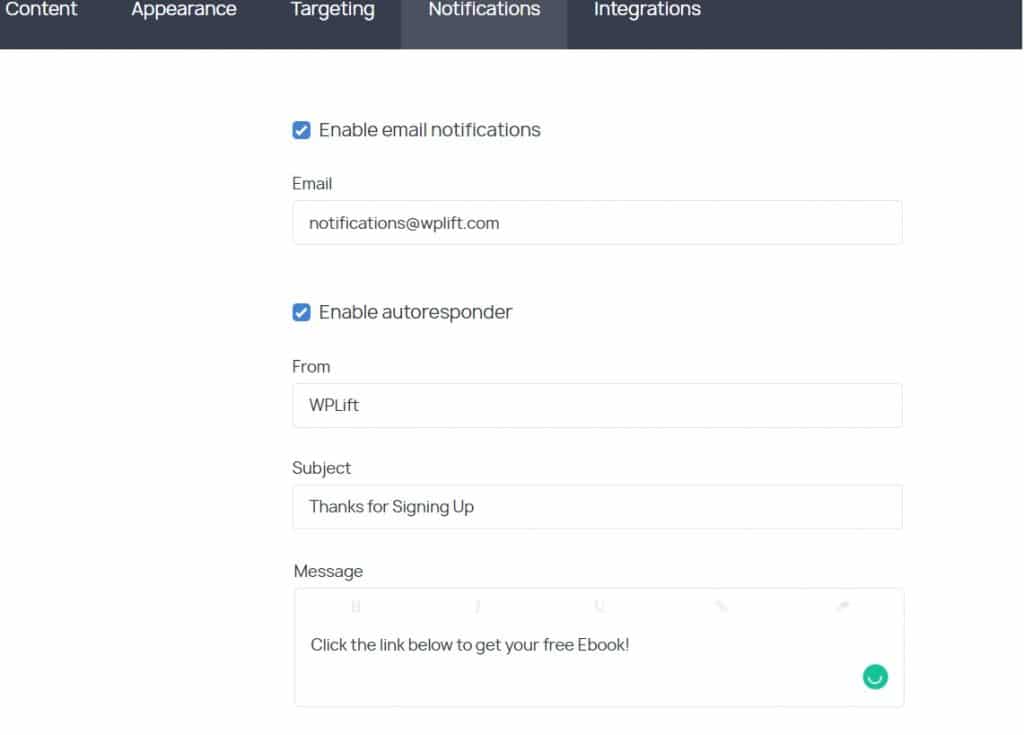
On the notifications tab, you can set-up email notifications so that you’re alerted every time somebody uses one of your widgets, as well as setting up an autoresponder for your email sign-up forms.
Finally, on the Integrations tab, you can choose where to send data from your widget.
Some nice things that you can do include:
- Integrate with third-party email marketing services
- Set up webhooks or integrate with Zapier for more flexibility
- Integrate with Google Analytics to help you get better insights into audience behavior.
And that’s it for the options! Once you click ok at the bottom, you can either activate the widget right away or leave it dormant:
Once you activate it, it shows up right away on your WordPress site – no need to do anything further:
A Quick Look At The Other Getsitecontrol Widgets
Ok, I’m not going to give you as detailed a look at the other widgets. Part of that is because the general interface for all of the widgets is pretty similar.
While some widgets might have additional tabs, all the widgets have the core options for:
- Appearance
- Content
- Behavior
- Targeting
Here’s what my site looks like with four widgets activated:
- Promo
- Survey
- Contact form
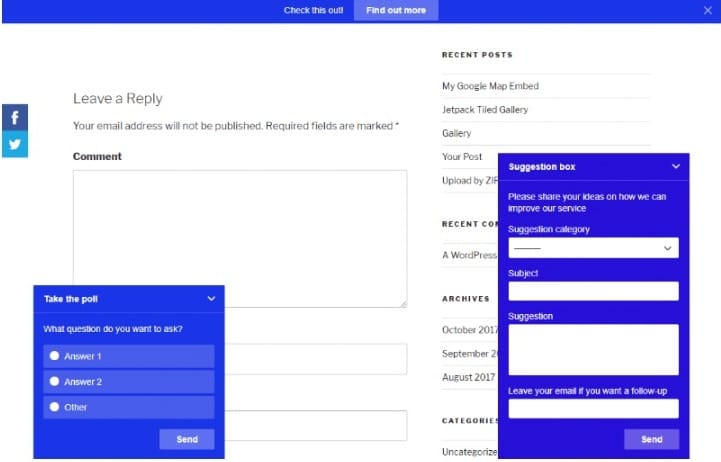
Remember – for each widget; you have full control over its positioning. You don’t have to make your widgets look like mine.
Viewing Statistics For Your Widgets
Once you start getting traffic to your various widgets, you can view statistics right from your Getsitecontrol dashboard:
And you can also click the Statistics button for a slightly more detailed look.
What’s nice here is that you can see actual CTR rates – not just raw traffic stats.
Running A/B Tests With Getsitecontrol
If you have one of the premium plans, you’ll be able to run A/B tests right from the Getsitecontrol interface.
It took me a second to understand how it works – but it’s pretty simple. All you need to do is create multiple versions of the same type of widget. Then, you can use the A/B button to add each widget to a Test:
Then, you can see how the test is doing:
Again – it’s pretty dang easy to use.
How Much Does Getsitecontrol Cost?
If you’re not sure whether Getsitecontrol is for you, you can enjoy a free trial for seven days, with unrestricted access to all of the features listed above.
After that trial ends, all of your data will still be saved, and all of your widgets will still work. However, those widgets will no longer be displayed on your website until you sign-up one of the three paid plans.
Those plans include:
Small ($19 per month, currently on offer at $9 per month)
Up to 10,000 monthly views per site.
Medium ($39 per month, currently on offer at $19 per month)
Up to 200,000 monthly views per site.
Large ($79 per month, currently on offer at $39 per month)
Up to 1,000,000 monthly views per site.
All of the above prices are for a single website only. However, you can always choose to add more sites to your plans with the same price applying for each website.
For example, if you choose the small plan which is currently $9 for one website, it will cost you $18 for two sites, $27 for three websites, and so on.
Final Thoughts On Getsitecontrol
I was thoroughly impressed with Getsitecontrol. It gives you powerful targeting and behavior rules while remaining accessible to non-techie users.
I also loved the attention to detail in the interface. Things like the color theme picker and pre-made templates make it easy to create new widgets quickly. And the beautiful dashboard makes it easy to manage those widgets, view statistics, and run A/B tests.
All in all, I recommend Getsitecontrol to anyone looking to better connect with their website visitors.


