
In this post, I’m going to compare the new Toolset Forms vs Gravity Forms. If you’re not familiar with Toolset, it’s a suite of plugins that help you create custom WordPress sites by making it easy to work with custom content types. You can use it to make directories, listing sites, membership sites, and a lot more. Learn more in our Toolset review.
One of those plugins is Toolset Forms (formerly known as CRED).
Toolset Forms helps you create forms to add/edit your custom content types and users.
For example, you could let people submit their business to your directory or submit a job to a job board. Or, you could let users edit their profiles from the front-end of your site.
With the latest release, the Toolset team has made a lot of improvements to the form editor, most noticeably adding much simpler drag-and-drop form building.
To see how those new features stack up to one of the most popular form plugins for developers, let’s dig into this Toolset Forms vs Gravity Forms comparison.
Note – this post is not about declaring a single “winner”, I really just want to show you how each tool works and how the new Toolset Forms makes things a lot simpler than previous versions.
Toolset Forms vs Gravity Forms: The Features
Toolset Forms and Gravity Forms both let you create forms, but they approach it in different ways.
Gravity Forms is focused on creating forms in general, so you can use it for anything from a simple contact form to more advanced uses like user registration, front-end post creation, and payments.
Toolset Forms, on the other hand, is a little more streamlined when it comes to the advanced applications for forms. It lets you create three different types of forms:
- Post forms – lets users create or edit any post type on your site. For example, submitting a new job to a “Jobs” custom post type.
- User forms – helps you register new users or edit existing users.
- Relationship forms – lets you connect posts in a many-to-many relationship. For example, letting a user add a song post type to a separate album post type.
You can also integrate payment functionality, if needed.
You wouldn’t really use Toolset Forms for a basic contact form, though there are workarounds to let you do it.
If you want that front-end edit functionality for Gravity Forms like you get with Toolset Forms, you’d need a third-party extension like GravityView. And if you want to be able to work with custom post types, you’d need something like Gravity Forms + Custom Post Types.
Comparing The Form Builder Interface
Now, let’s get a little more hands-on and I’ll compare how the new Toolset Forms interface stacks up to Gravity Forms. I’ll use a Post form example from Toolset Forms, but remember that you can also create user or relationship forms.
Toolset
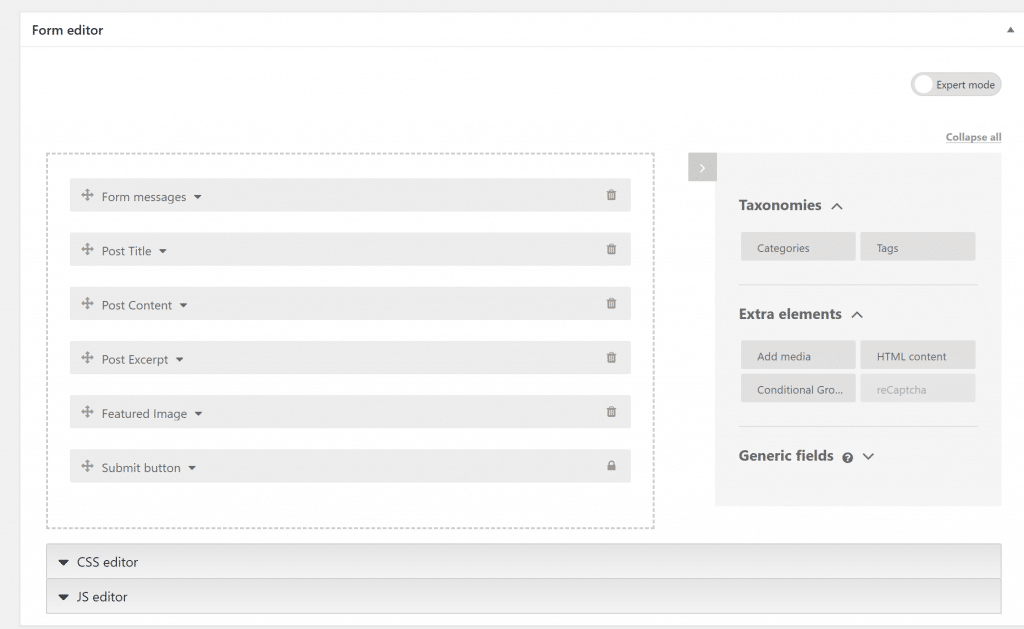
With the new Toolset Forms, you now get a drag-and-drop editor that makes it a lot easier to build and arrange your forms:
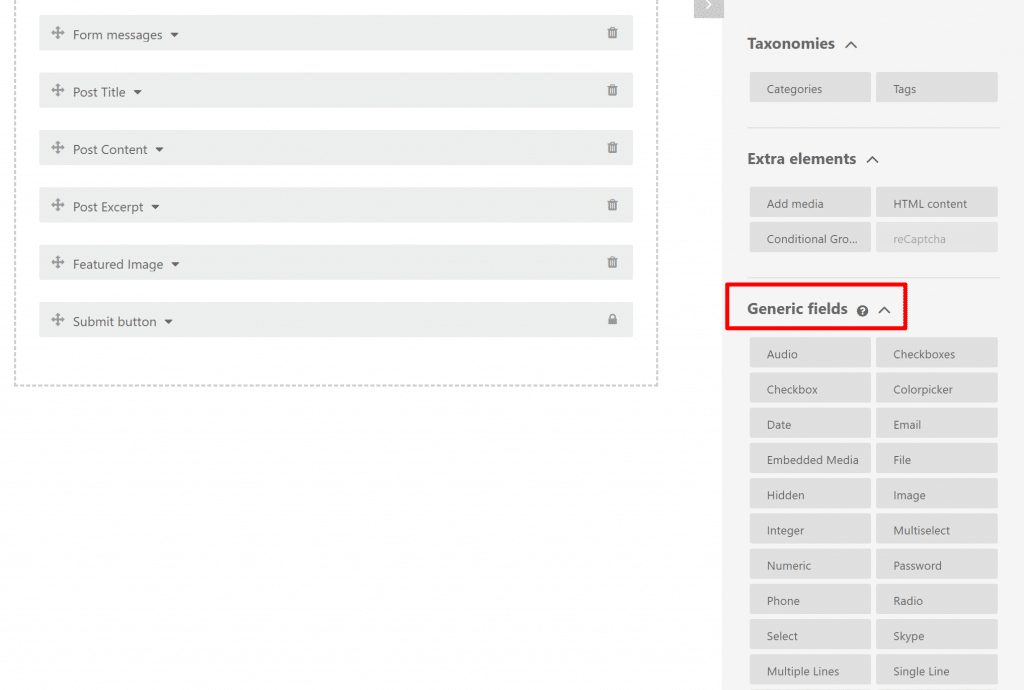
If you want to add new fields, you get the dedicated fields for post content, as well as a bunch of generic fields that you can use as needed:
I’ll show you some neat things with how Toolset detects a post type’s custom fields in the next section.
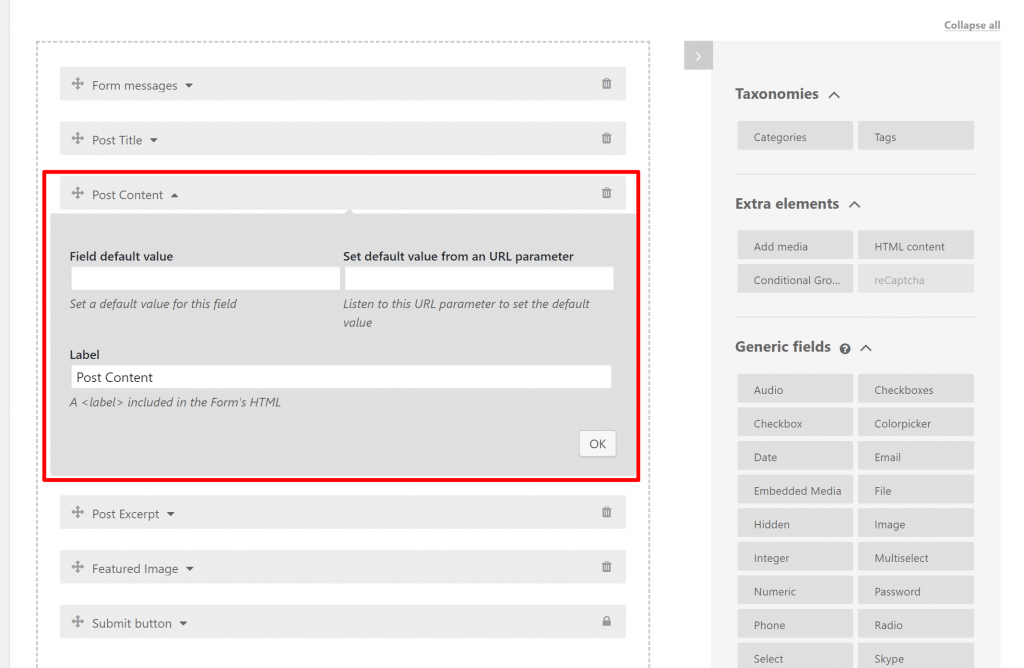
To edit individual fields, you can expand options to add a default value and label:
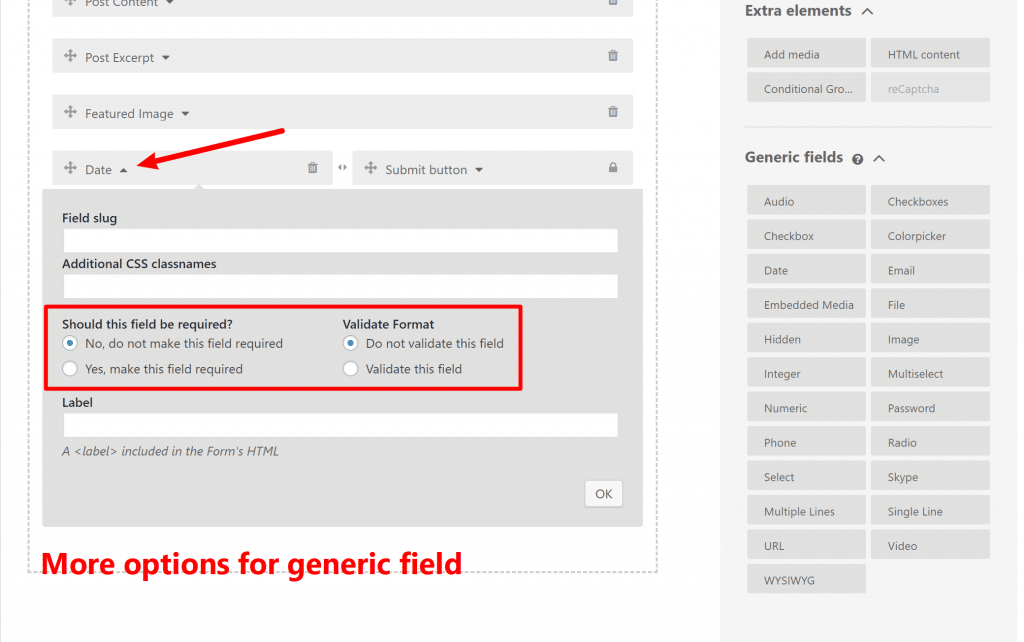
If you choose a generic form, you’ll also get more options for things like making a field required and validation – but for regular post fields, Toolset can already handle those for you:
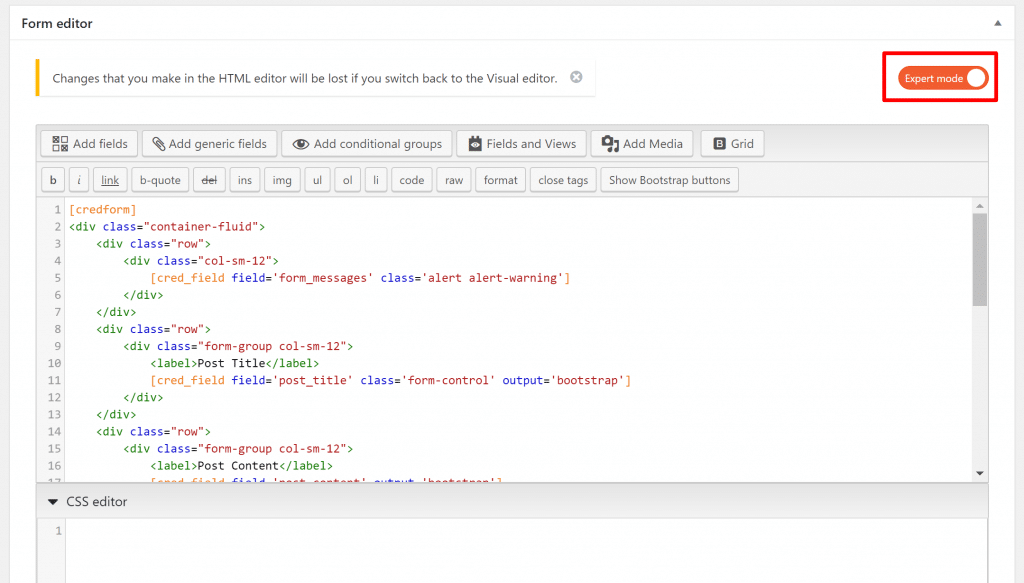
Finally, if you prefer to get your hands a little dirty, you can always enable Expert Mode, which is how Toolset Forms used to work.
In Expert mode, you’ll build your form using some basic HTML/CSS and shortcodes for the various form fields:
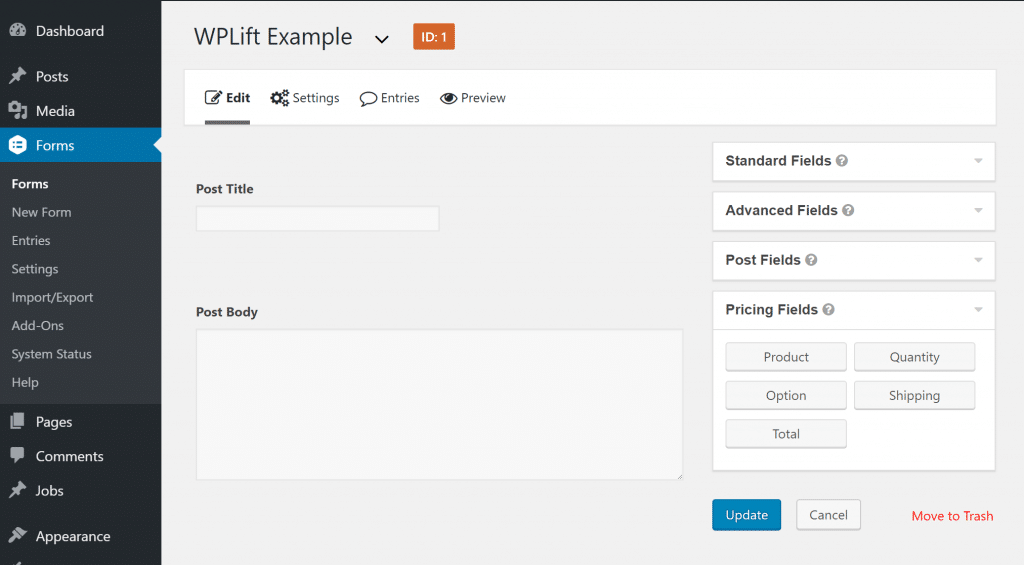
Gravity Forms
With Gravity Forms, you also get a drag-and-drop form builder to create your forms.
You’ll build your forms from scratch using fields from the four categories on the right:
- Standard Fields – basic fields.
- Advanced Fields – things like name, email, etc.
- Post Fields – fields that connect to post information. By default, these only connect to regular posts (blogs).
- Pricing Fields – fields for payment forms.
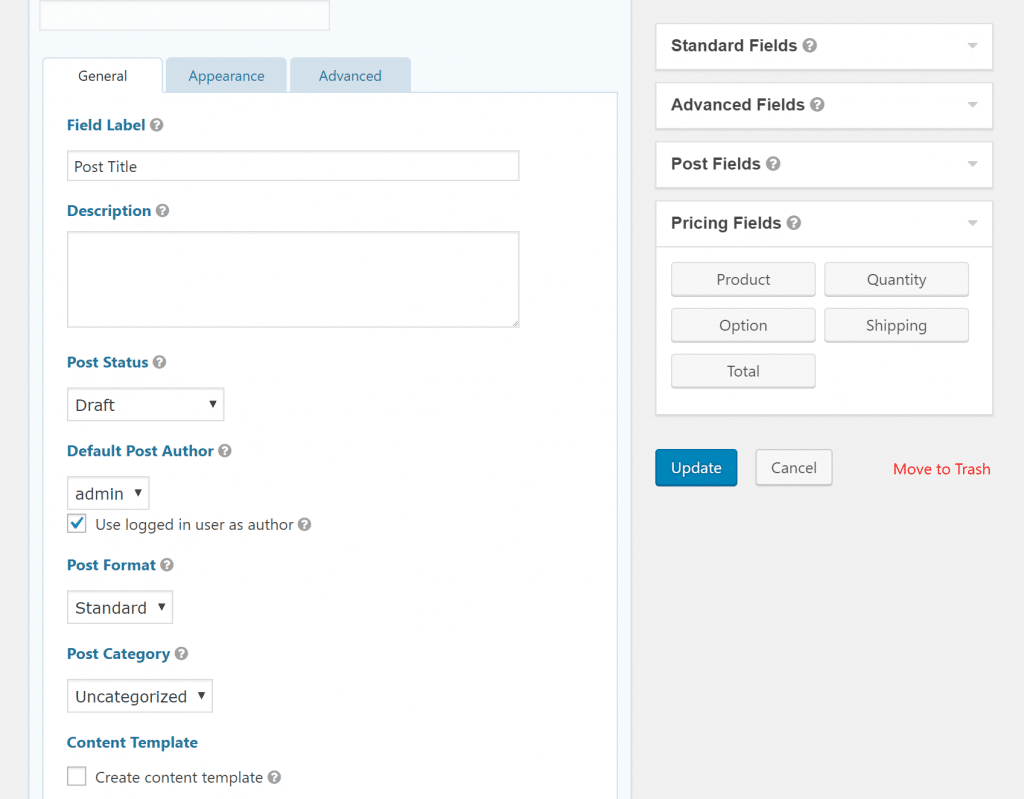
To edit individual fields, you click on them to expand more options:
In terms of the ease of building a form, I’d say both plugins are now pretty comparable in that you just drag and drop as needed to create your form layout, though Gravity Forms does give you more nitty-gritty options for individual fields.
Creating A Front-End Post Submission Form
Next, let’s take a little example of creating a front-end submission form that connects to a “Jobs” custom post type, as well as custom fields for:
- Salary
- Years of experience
- Company name
Not exactly a full-featured jobs board, but it gives us something to work with!
Basically, I’ll show you how it works with each plugin so that you can get an idea of how you’d use each tool in the real world.
Here’s where I think Toolset Forms can be more convenient than Gravity Forms.
Toolset
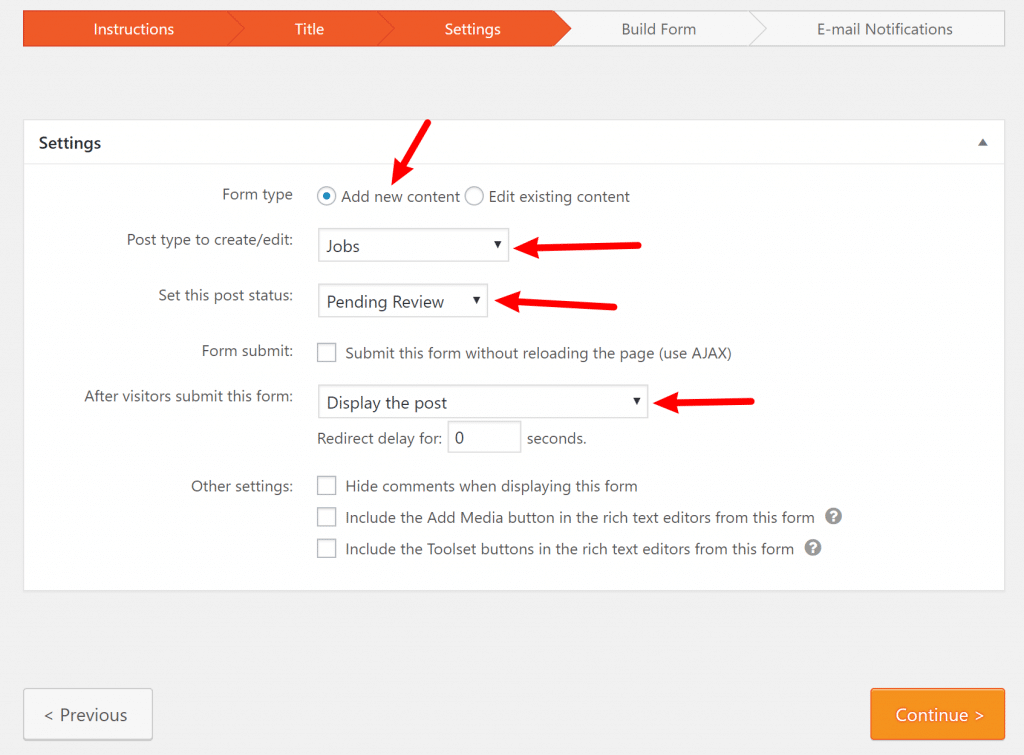
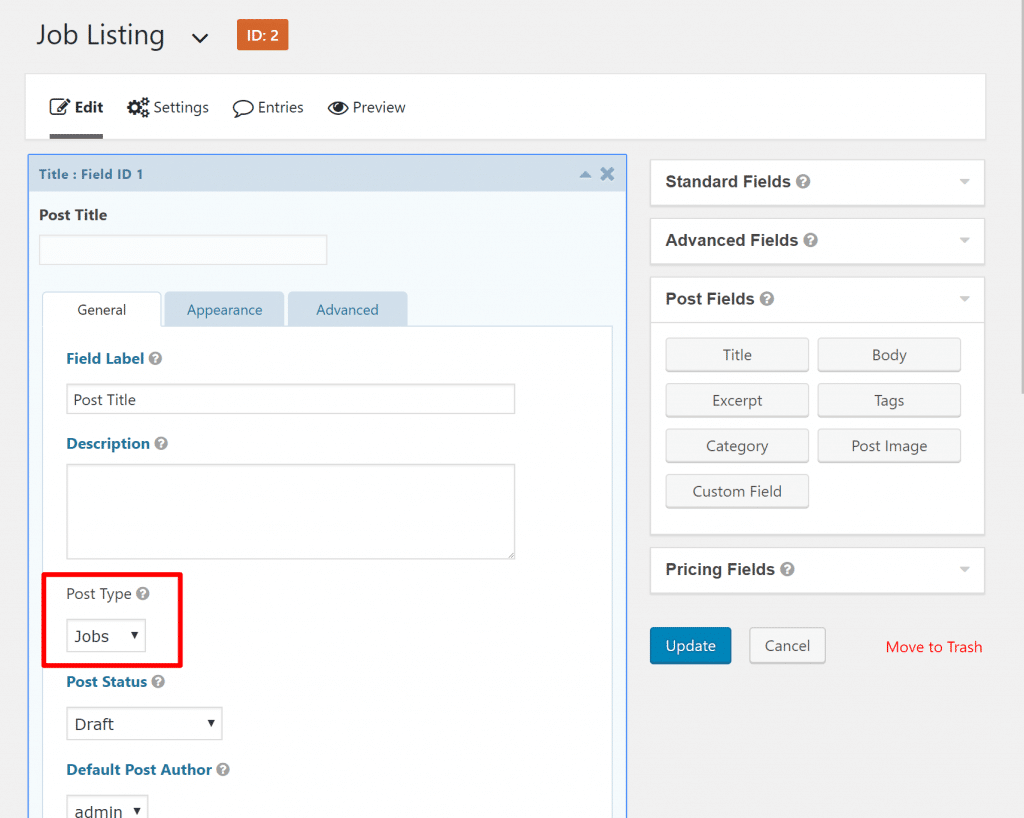
When you create a new post form with Toolset, you’ll first give it a name. Then, you’ll be able to associate your form with a specific post type and choose other important settings like:
- Default post status
- What happens after a user submits a form (e.g. you can show a message, display the post, redirect them, etc.)
Then, it drops you right into the form builder.
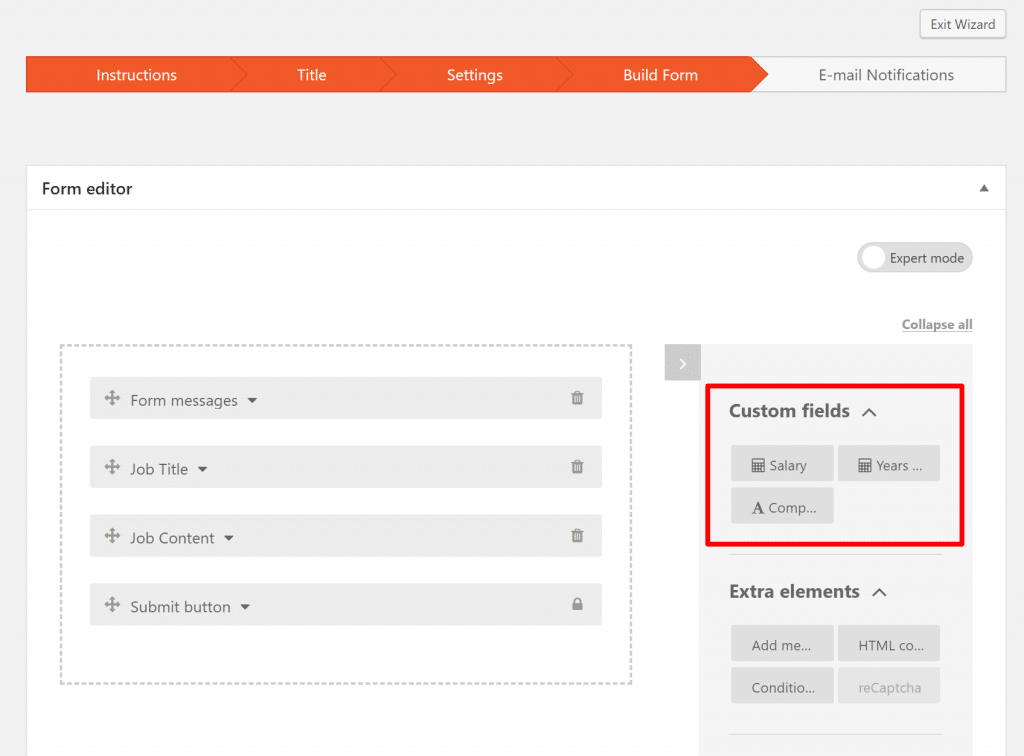
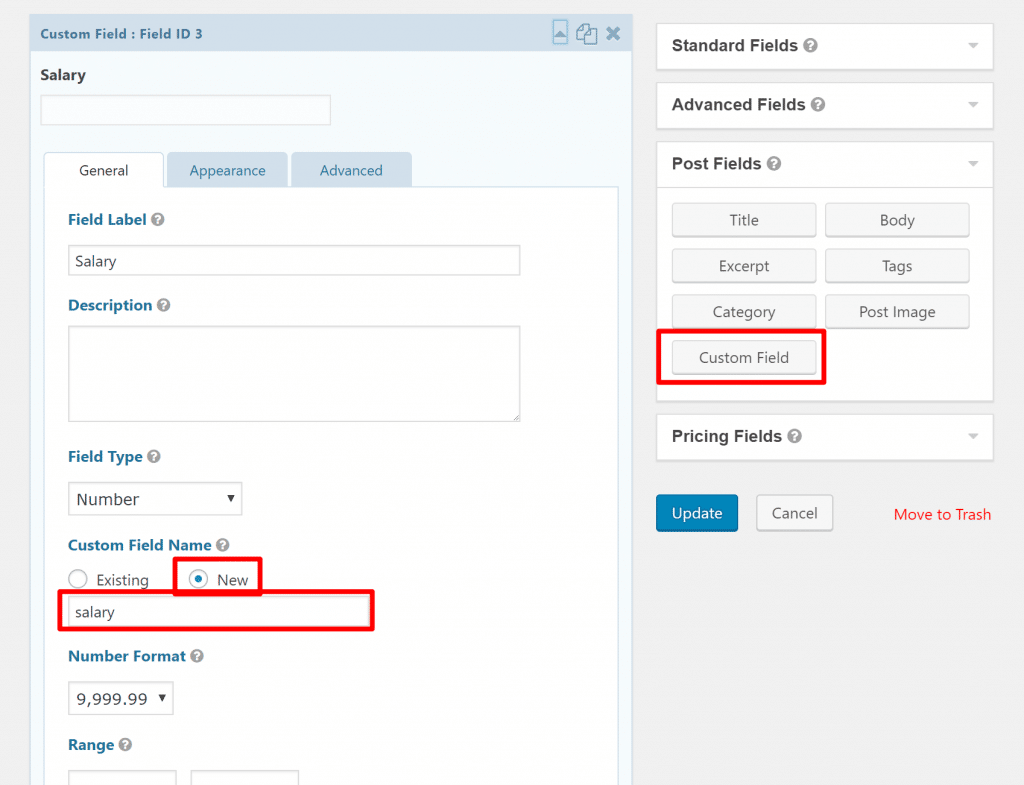
The convenient thing, though, is that Toolset Forms will automatically list all of that post type’s custom fields so that you can easily add those fields to your form as needed:
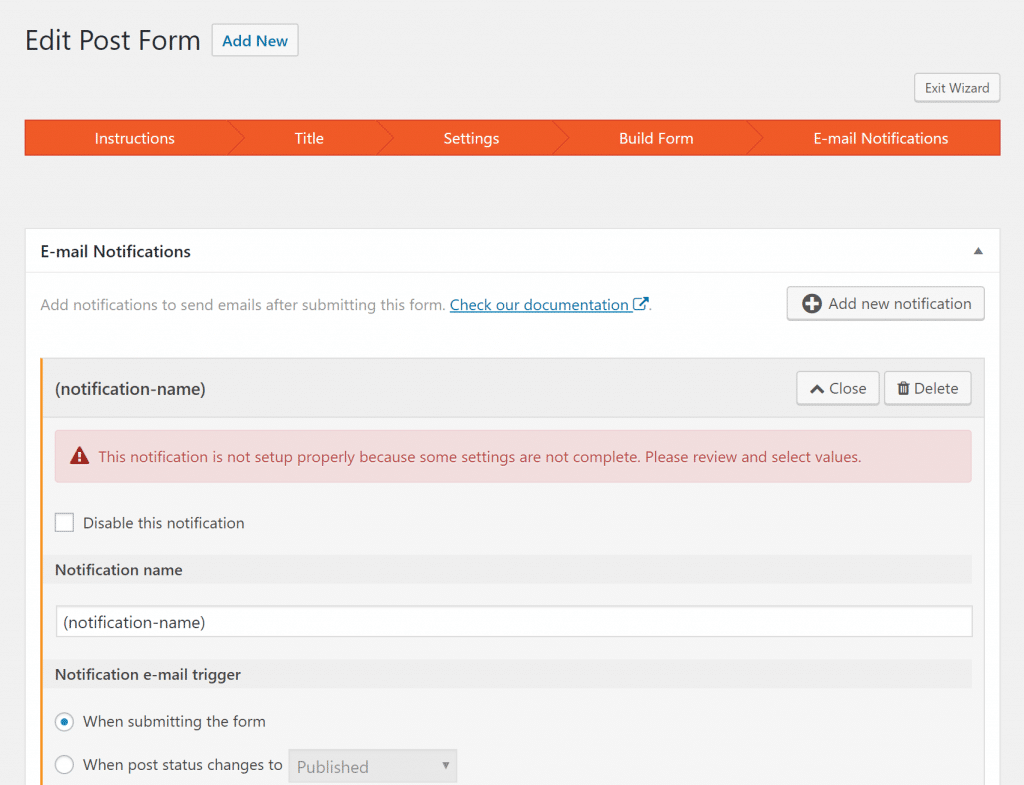
Then, you set up the email notifications and you’re done:
The whole thing is super convenient and built to make it really easy to work with custom content types.
Gravity Forms
Because Gravity Forms is a more general tool than Toolset Forms, the process isn’t quite as streamlined.
First off, to connect Gravity Forms to a custom post type in the first place, you’ll need to use the free Gravity Forms + Custom Post Types extension.
Then, you’ll need to build your form from scratch using the Post Fields. Only now, when you edit the title or body, you’ll be able to sync your form to the Jobs post type:
To add the custom fields, you’ll need to manually add the field slug using Gravity Forms’ generic Custom Field field type:
Totally doable, but not quite as convenient.
Additionally, if you wanted to let job submitters edit their listing after submitting it, you’d need another extension like GravityView, whereas Toolset Forms also makes it easy to create front-end edit forms without the need for an add-on.
Final Thoughts: Toolset Forms vs Gravity Forms
Again, the point of this post isn’t really to declare a single winner. It’s more to show that the new Toolset Forms interface is a lot more user-friendly with its easy wizard and drag-and-drop form builder.
In the past, I know that some people shied away from using Toolset’s form builder because it was a little more complicated (again – you basically had to use the Expert Mode that I showed you above). But with the new drag-and-drop approach, you can now build your forms just as easily as you can build the rest of your Toolset content types and views.
Have any questions about the new Toolset Forms vs Gravity Forms? Ask away in the comments!


